When you click on links to various merchants on this site and make a purchase, this can result in this site earning a commission. Affiliate programs and affiliations include, but are not limited to, the eBay Partner Network.
I am trying to remove my caliper so I can give it a respray. However I'm not sure which bolts I should remove to get it off.
The ones I think I need to get off are pretty well seized on, so before I spend a good amount of effort on removing them can anyone confirm they
are indeed the correct bolts
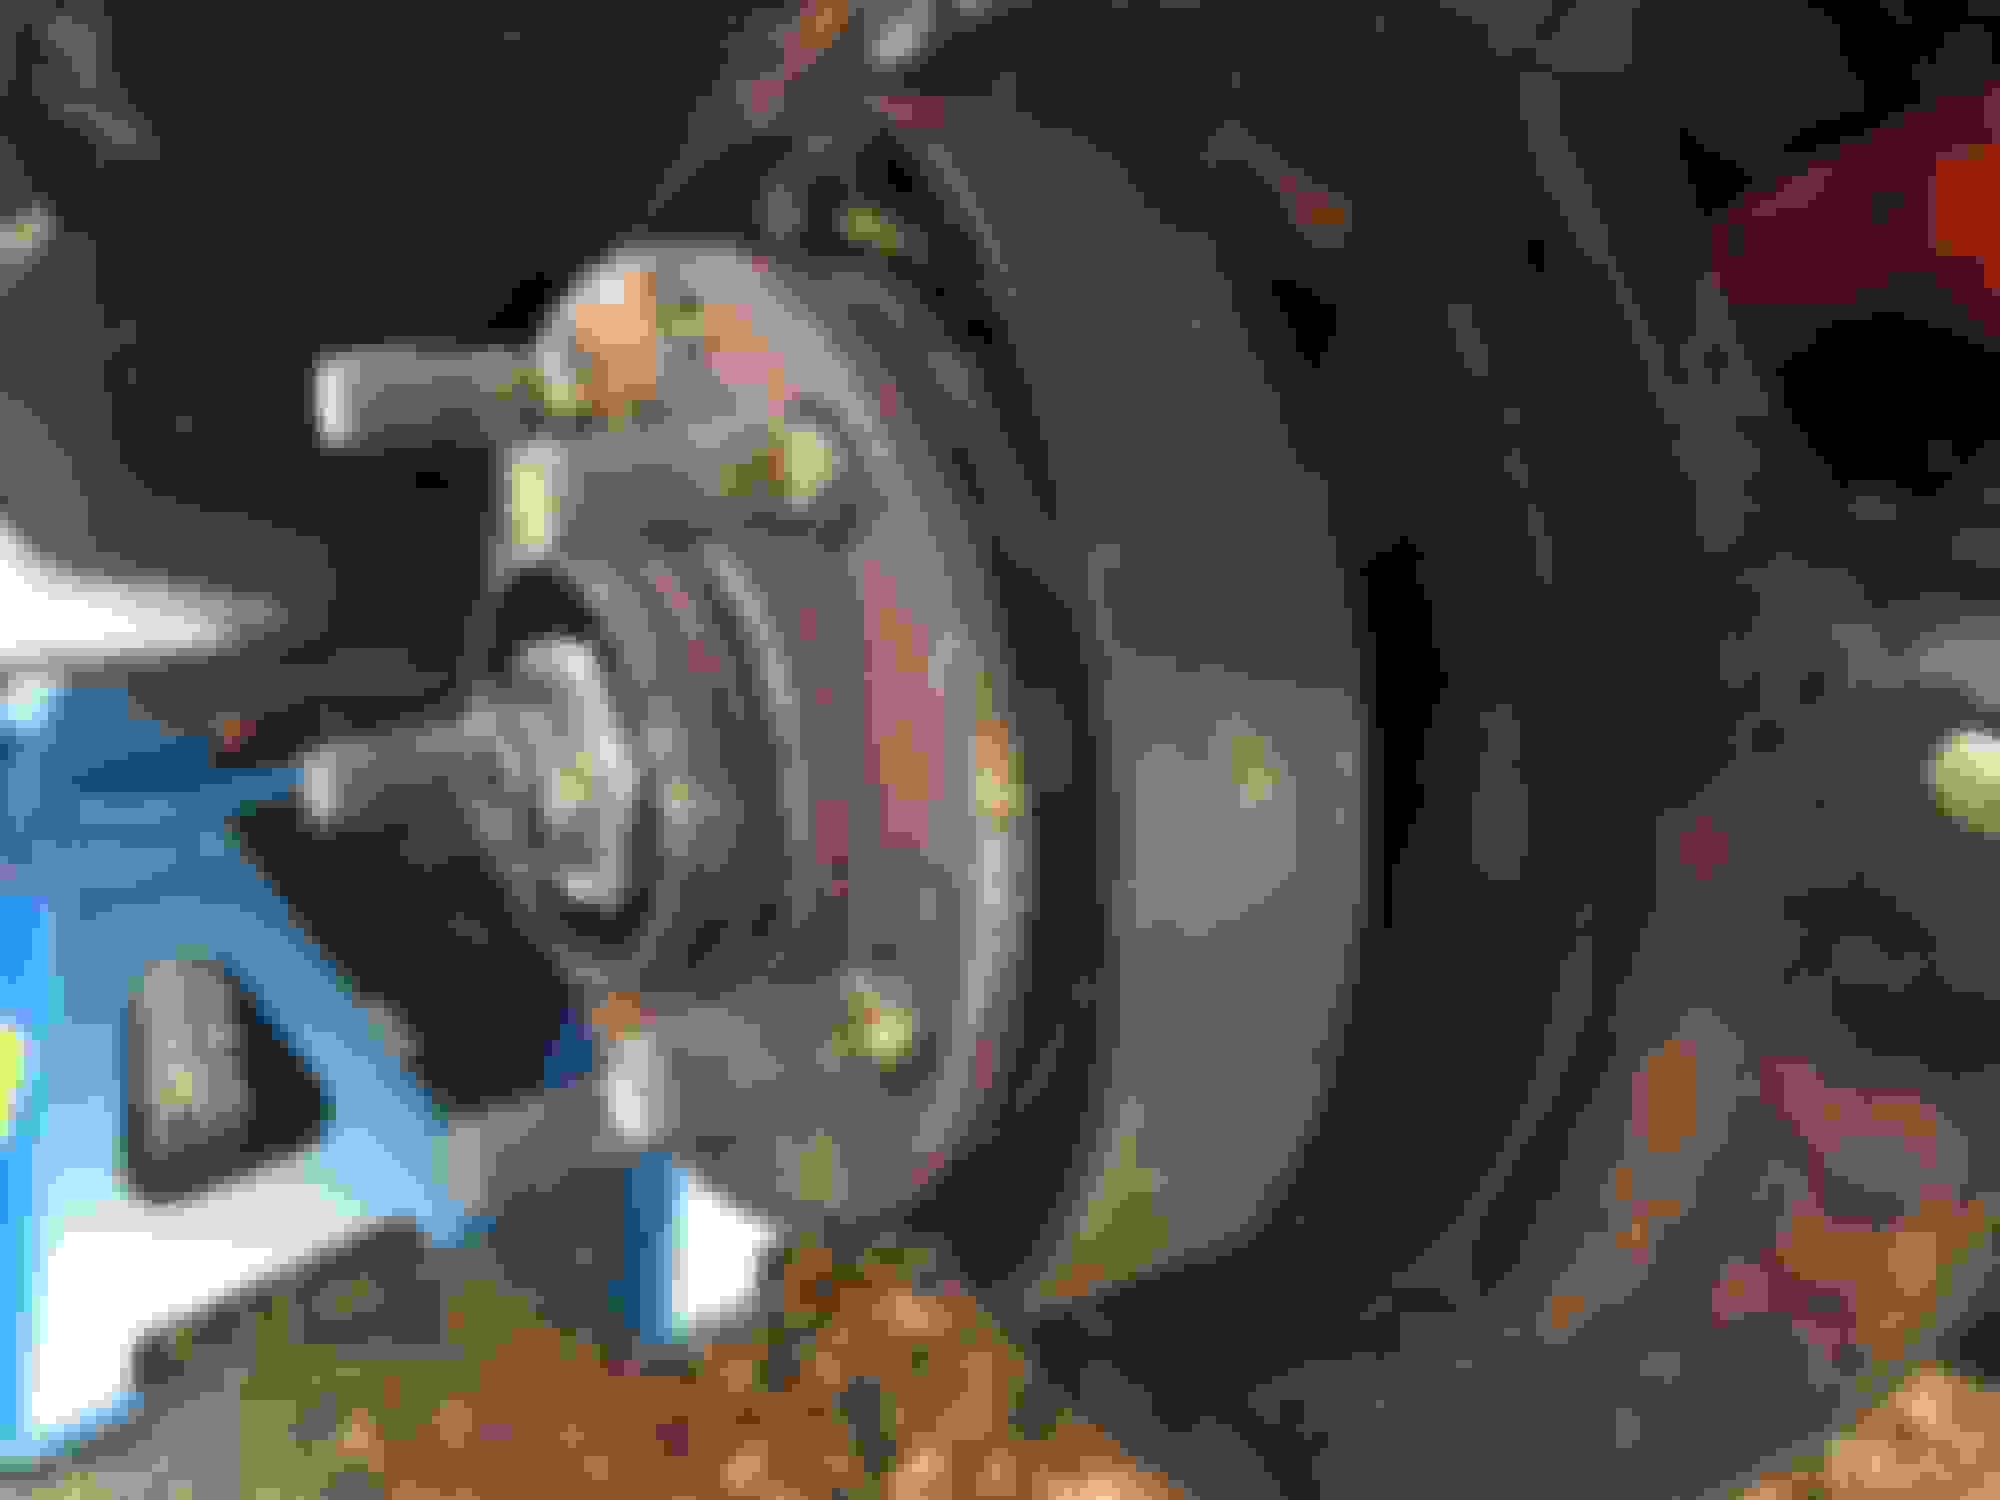
There are 4 bolts on the the caliper that do come off, but removing these do not allow the caliper to be removed from the hub, these bolts are about 2.5 inches long.
There are another 2 bolts towards the back of the caliper, which are completely seized on and difficult to get a socket or spanner on cleanly and have leverage to loosen.
I think these may be the ones I need to remove ?
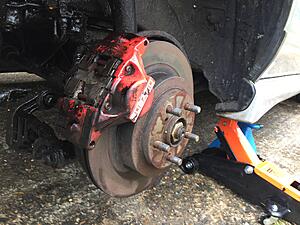
I'm not sure the type of caliper I have, the youtube videos I've seen for Subaru WRX's indicate the caliper should separate into 2 parts, the caliper with the piston part and the bracket that attaches to the hub.
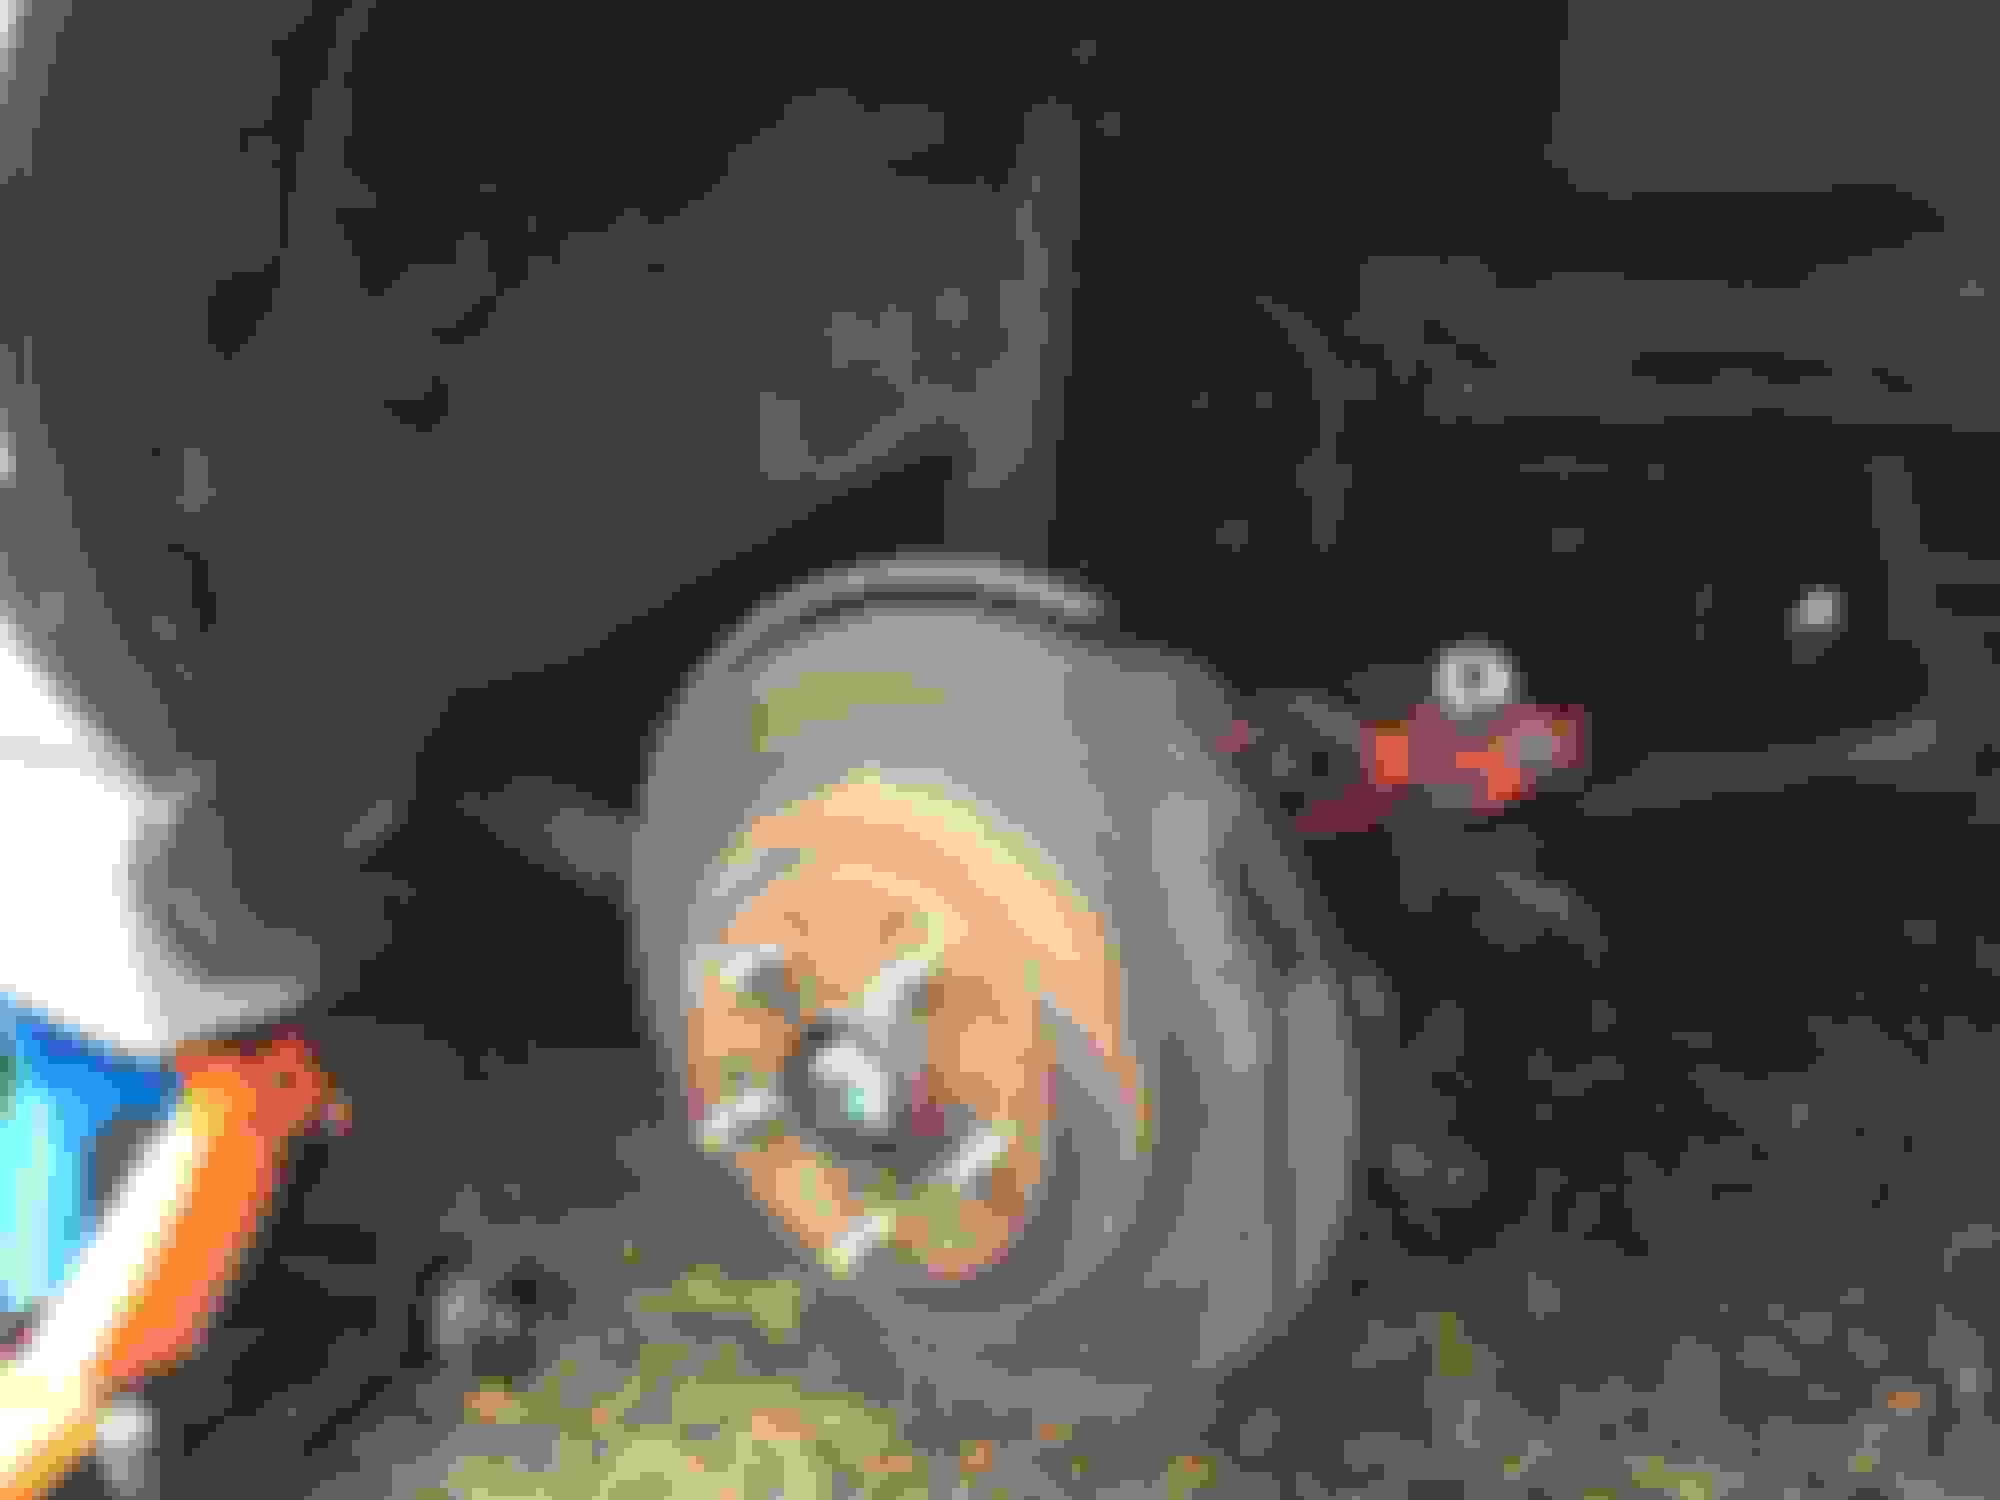
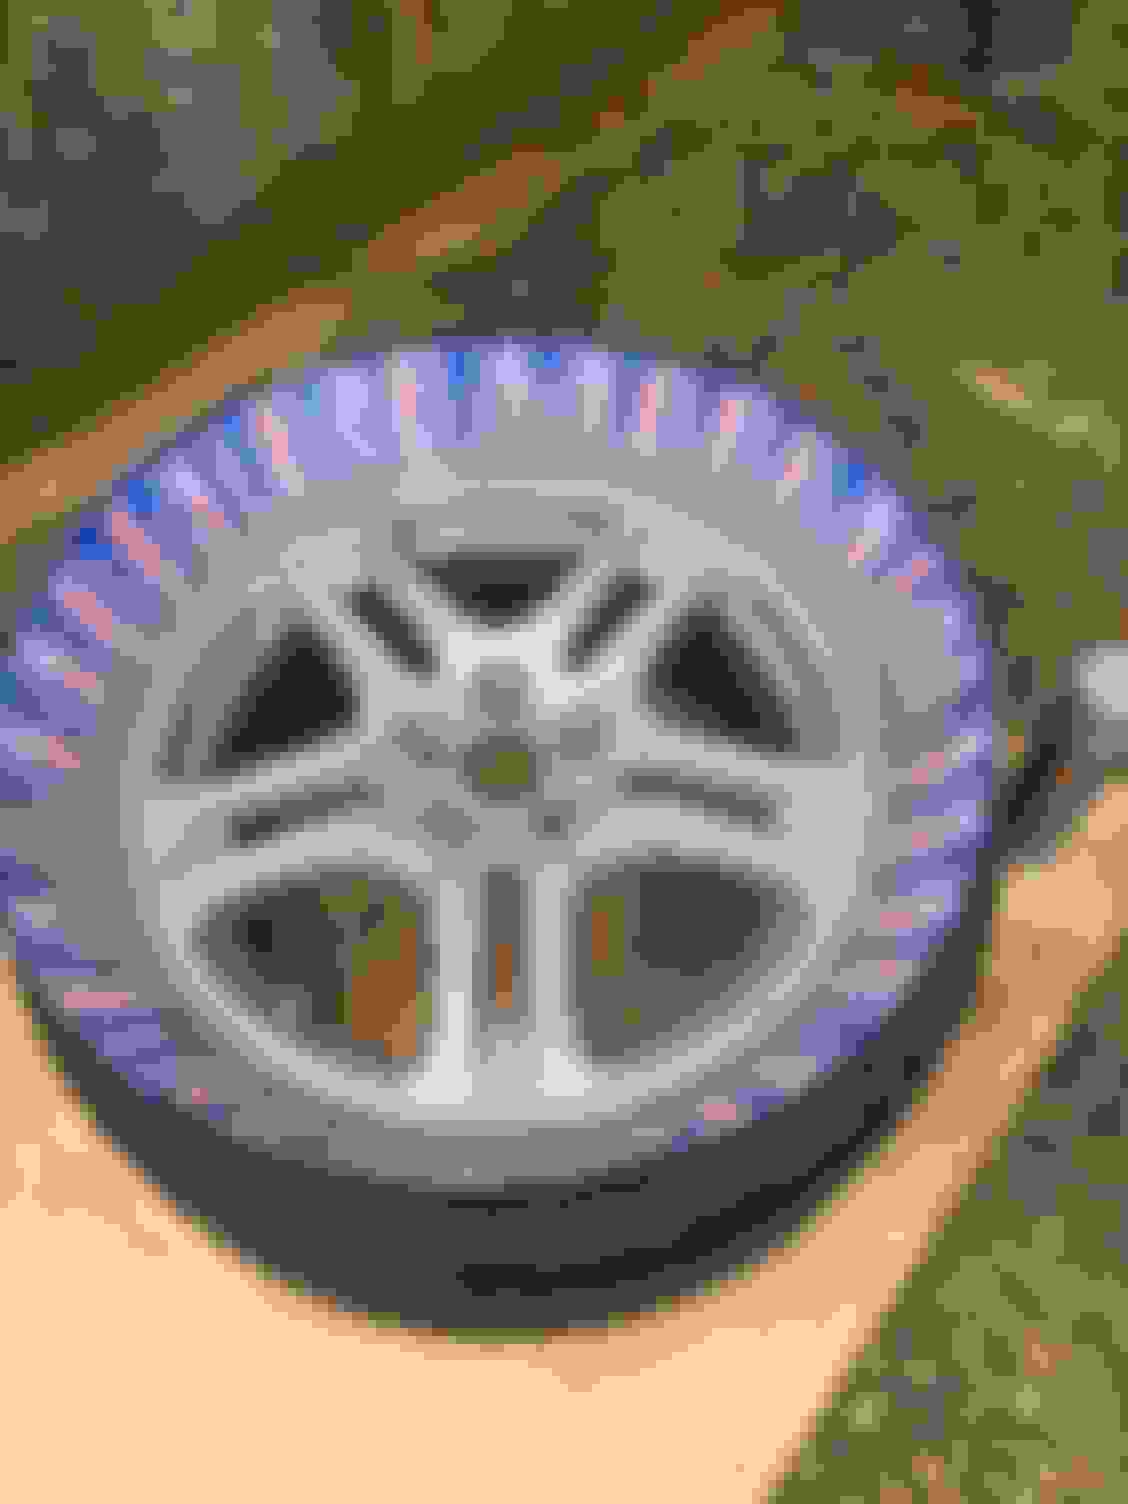
That doesn't seem to be the case with mine, some photos of the caliper below, before and after I gave it a clean.
Any tips on how this should be removed.
Also the back brake plate is corroded to hell so need to get that off as well.
Last edited by metafora; May 28, 2019 at 08:25 PM.
My advice is get a good long ring spanner that fits the bolt nice and snug,
afterwards wrap the end with a bit of cloth (to help prevent hammer bounce)
then don't be afraid to give the end a short hard tap with a large hammer.
Also get the backing plates off , waste of time keeping them really anyhow.
HI
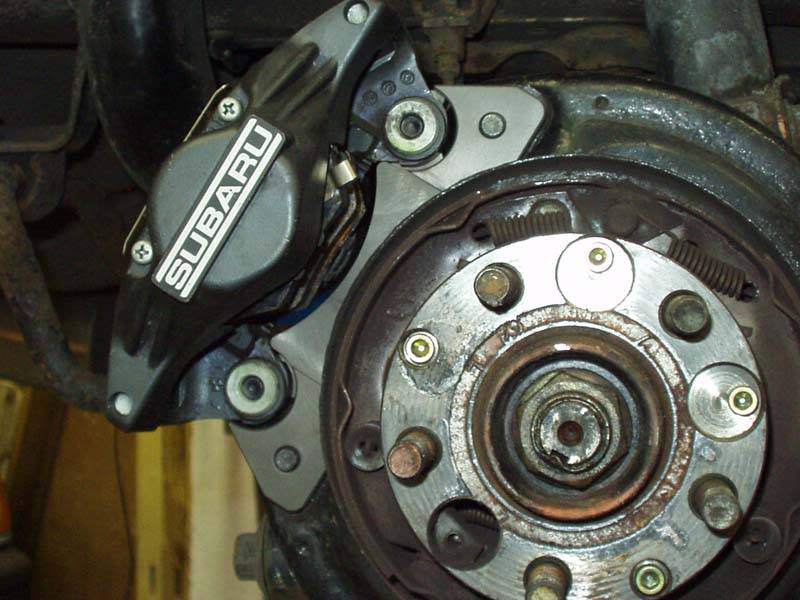
The Subaru 2 pot caliper we find are not a problem coming off like the Brembo STi ones are , The Subaru 2 pots are also alloy , but have a steel insert fitted into the with a thread for the bolts to screw into , so we never see any thread problems with them.
If you remove the 2 bolts holding the caliper onto the backplate , they will slide off the disc.
Do not undo the 4 bolts you see holding the caliper halves together , I'm only mentioning this as it sound like on your first post this is what you did , if you loosen the caliper half the O ring sealing the 2 halves can slip out of place and the calipers will leak.
If you are not totally sure what you are doing , I would recommend painting or spraying the calipers in place , clean the calipers up , mask off around them , and spray them in place , if you're just making them look nice through the wheels , you will achieve this like this
Cheers Ian
HI
The Subaru 2 pot caliper we find are not a problem coming off like the Brembo STi ones are , The Subaru 2 pots are also alloy , but have a steel insert fitted into the with a thread for the bolts to screw into , so we never see any thread problems with them.
If you remove the 2 bolts holding the caliper onto the backplate , they will slide off the disc.
Do not undo the 4 bolts you see holding the caliper halves together , I'm only mentioning this as it sound like on your first post this is what you did , if you loosen the caliper half the O ring sealing the 2 halves can slip out of place and the calipers will leak.
If you are not totally sure what you are doing , I would recommend painting or spraying the calipers in place , clean the calipers up , mask off around them , and spray them in place , if you're just making them look nice through the wheels , you will achieve this like this
Cheers Ian
Hi Ian,
Thanks for the advice, you are correct I did just that and the caliper did leak, the two halves slipped out of place, I aligned them back up and put the bolts back in. I've had to bleed the brakes and top up the fluid because of the brake fluid that leaked out, seems to be okay now not leaking, but was bit worrying, thats how you learn I guess.
I would do exactly as you suggested to leave the caliper in place and paint them in situ but I'd like to get the back plate off which is totally corroded, in fact the bottom of it just came off in my hand. I'm also trying to get to a point where I could change discs myself so at some point I'd like to be able to get items like callipers off when needed.
The problem is this car was parked up in Scotland for a while and the corrosion is terrible, every nut and bolt is seized on. Whats made matters worse is that I took the advice of a mechanic and had the entire underbody rust protected against further corrosion and all the mechanical parts including suspension, the brake hoses everything is covered in this thick gooey black product that makes everything even more difficult. A few garages I've been to won't touch it. If I'd known I wouldn't have bothered.
Keep checking your brake fluid as I've heard alot say on here once the calipers are spilt they struggle to seal again. And may require new seals. Ian would know more about this than me
Keep checking your brake fluid as I've heard alot say on here once the calipers are spilt they struggle to seal again. And may require new seals. Ian would know more about this than me
I didn't actually manage to split the caliper into 2 pieces, there still seems to be a pair of screws on the front face that I left alone and didn't take off. I guess the leak came from me taking the four bolts out and then pulling away at the other 2 bolts got them slightly misaligned which I corrected and put the 4 bolts back in.
I'll keep an eye on the brake fluid.
Raining today, so not much I can do outside. I'm actually having a go at a few things with this car over the next couple of days, including
Repairing the curb rash on all the wheels
Respraying all the wheels, I've gone for gun metal grey
Changing the steering wheel, I've got a nice refurbished one with leather & Alcantara custom made to put on
Cleaning all the callipers
Painting all the callipers (red)
Cleaning up the brake discs, maybe clean off and paint the hats which are looking rusty
Removing and replacing corroded items like the back brake dust covers
Cleaning the engine bay including replacing any visible rusted bolts
Removing staining and crap of the engine components
Touching up and repainting items such as the radiator brackets, the bonnet latch
Bringing the metallic components in the engine bay back to their former glory with some polish and elbow grease
I'll post some pictures as I go, before, during and after.
I'll probably make a few mistakes, since this is my first time trying any off this stuff but its fun.
Since I bought the car I've done the following
Changed the exhaust to a more reasonable one than the canon the previous owner had on the car
Replaced the cloth interior for a leather interior from a SL (did that myself0
Had the under body rust proofed (regretting that a bit now)
Had the engine chipped to 275Bhp (really nice increase in power without going stupid with it)
Changed the DVD unit back to the original Subaru CD/Radio player
New drilled Brembo brake discs and pads on the front
I've nearly got the car to where I want it, a solid reliable WRX with a good upgrade in power for what I need. A pretty smart comfortable interior with a discreet not in your face exterior. Plus not embarrassed with a rust fest when I open the bonnet.
Last edited by metafora; May 29, 2019 at 04:16 PM.
Don't need to take the cailper off to respray it just stretch a bin bag over that what I did with mine
The masking tap was were I clear coated over the brembo stickers so didn't need the bag
The items you thought are screws , are just the pins holding the pads in place , they have a pozidrive head on them so you can turn them with a screw driver to put the locating wire in them on the inside to hold them in place , they wont actually hold the 2 caliper halves together.
So keep an eye on the caliper leaking any fluid , if it does leak onto the wheel , when you drive it can end up spraying over the paintwork and make a mess , it'll pull the paint off
Cool thanks, wish I'd asked these questions before I started messing about with the callipers.
Don't need to take the cailper off to respray it just stretch a bin bag over that what I did with mine
The masking tap was were I clear coated over the brembo stickers so didn't need the bag
Wow .. they look awesome, if mine end up half as good I'll be pleased, did you do a coat of primer first or straight on with the paint.
So, I finally got the rear caliper off, which is in a pretty grimy state. I'm now stumped on how to get the brake disc off.
I've tried the technique of putting the bolts from the radiator brackets into the brake disc pry holes. Screwing them in lifts the disc out a little bit, however there seems to be something holding it back from coming all the way out.
I've put the handbrake down, I would have thought the disc would now just slide off once the caliper is off.
Thanks again for the replies. I've read through the links. Just to summarise the steps.
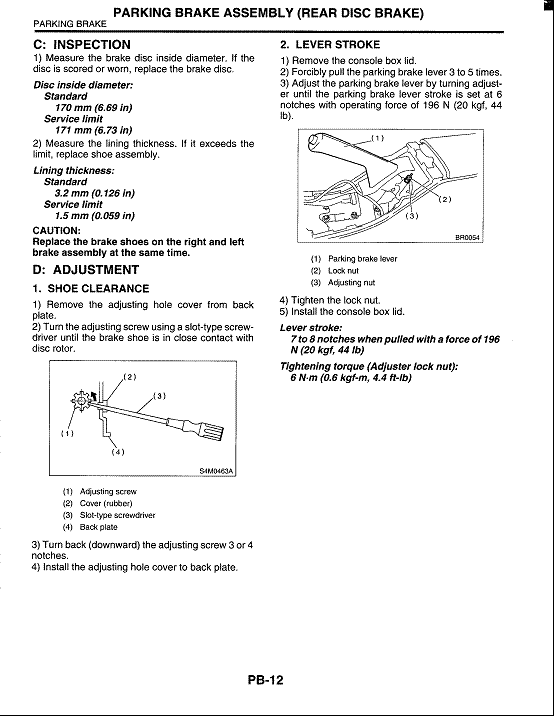
1. Behind the rear brake disc there is a back plate.
2. On the bottom part of this backplate there is a small hole, the shape of an oblong.
3. Behind this hole there is a cog.
4. Moving this cog down with a flat head screwdriver will loosen the brake shoes and allow the brake disc to come off the hub
Question: Should the handbrake be disengaged when doing this.
Last edited by metafora; May 31, 2019 at 05:53 AM.
Don, thanks for that. I decided in the end to leave the disc on and paint the caliper and the disc hat using masking take and a sainsbury's carrier bag stretched over the brake disc. I'm not ready to deal with the can off worms if anything goes wrong messing around with the brake shoes.
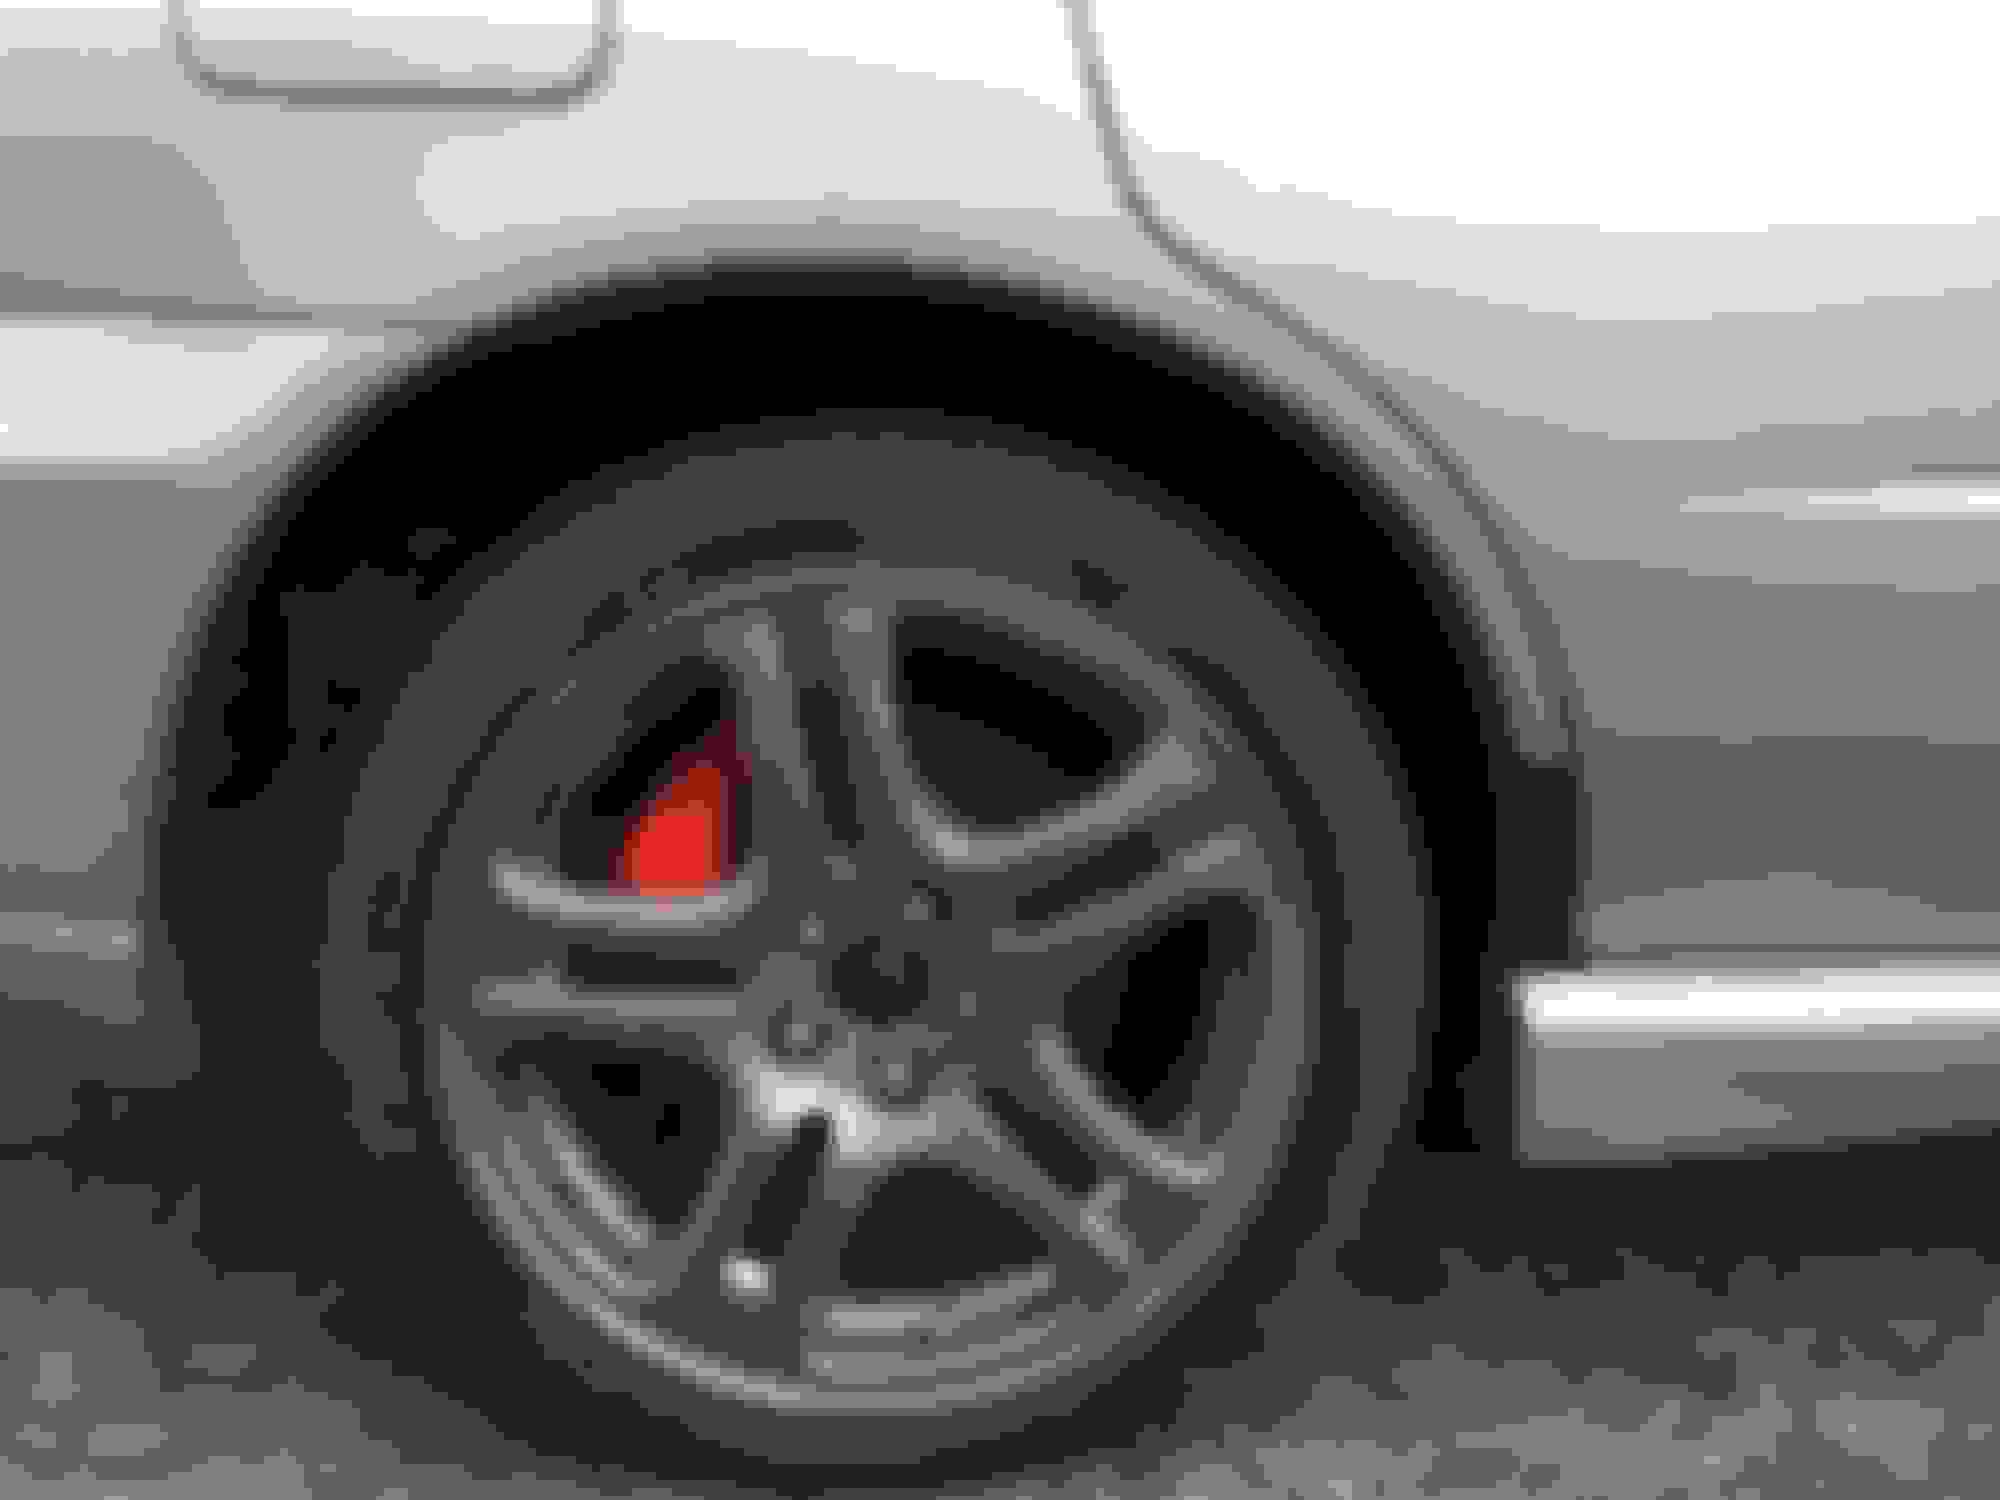
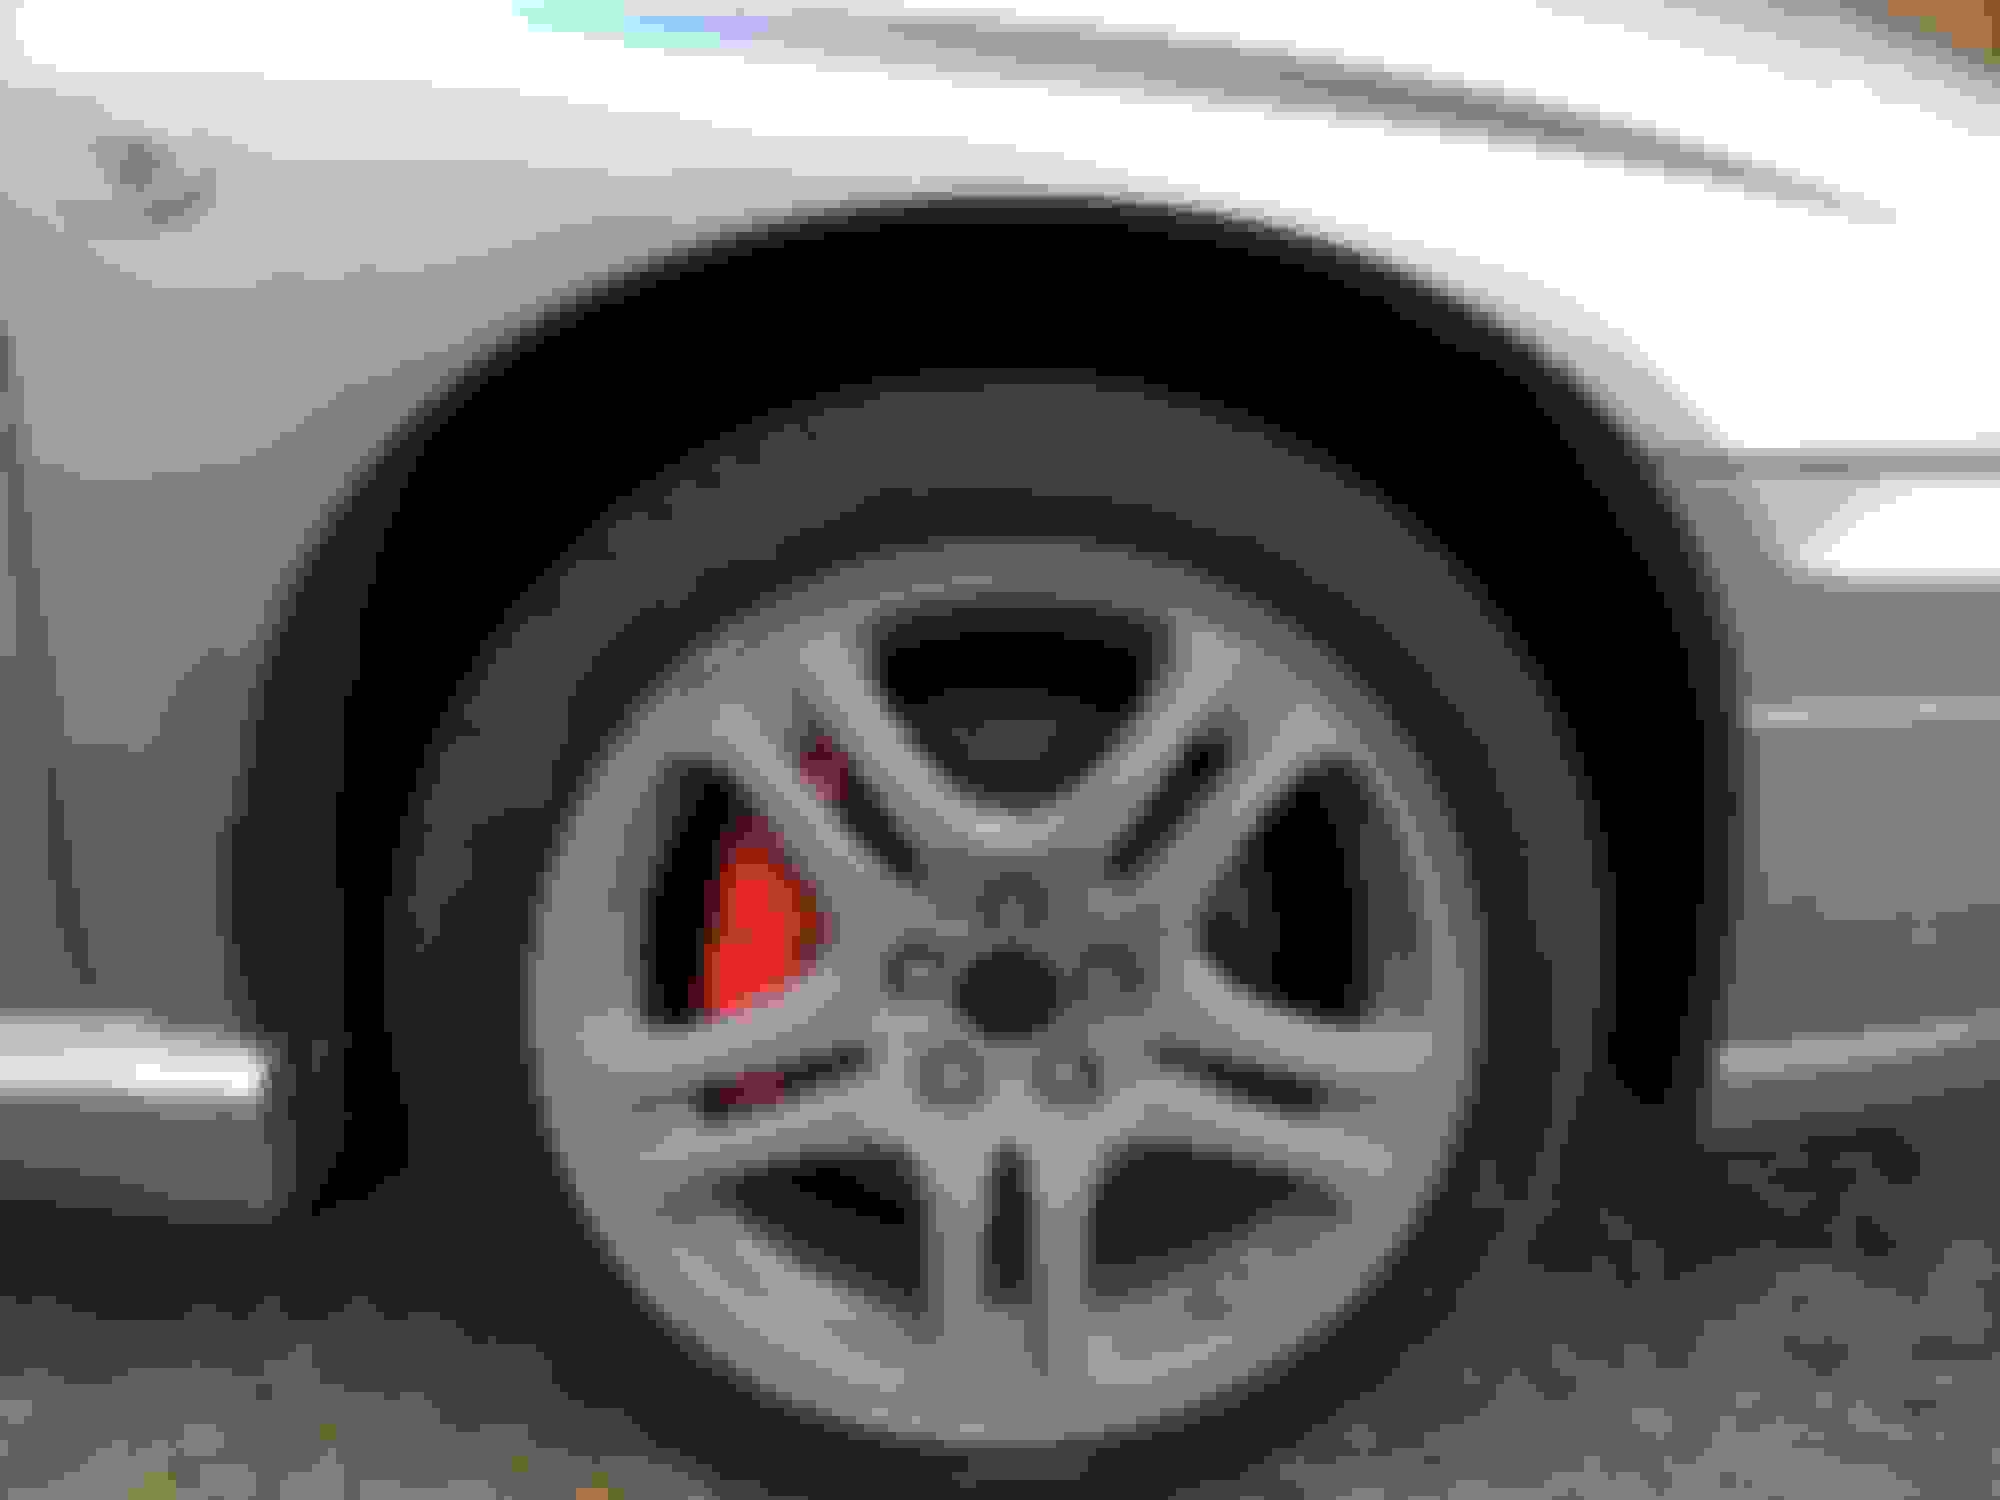
Added lacquer to two of the wheels, painted the callipers on the passenger side front and rear .. starting to look a lot better than it was.
I'm going to have a go at bleeding the brakes on the weekend. The brake pedal is sinking in, The caliper on the rear that I knocked out of alignment is not leaking brake fluid, but I think air got into the system.
Question: I have a bottle of Dot 4, can I use that or should I stick with the Dot 3 that is specified on the brake fluid lid. I've read you can add Dot 4 to Dot 3 but not the other way around.
Last edited by metafora; May 31, 2019 at 10:33 PM.
Dot 4 is an upgrade to Dot 3. Similar stuff but higher boiling point. Both absorb water, which lowers boiling point, and should be changed every few years. They will mix with no problem. One big problem is they make effective paint strippers. Good thing is they love water so wash your brakes, tools, etc after working with them. I've seen the imprint of a spanner on a front wing where a spanner covered in fluid was put down.
Dot 5 is totally different and is silicon based. I believe it had various problems. It has been replaced with Dot 5.1 similar to Dot 5. Doesn't mix with lower Dot numbers or absorb water so remains more stable. I've never used Dot 5 or 5.1 though.
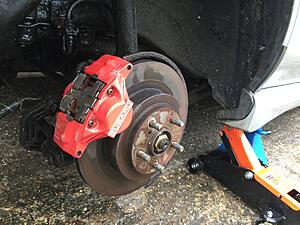
Ok, So I have painted all the callipers, 2 coats all round, just finished up the front right and rear, looking decent, well 100% better than they were.
But.. I have a problem, the passenger side (UK left) rear calliper is misbehaving since I put it back on, this is the one that I initially caused a leak by removing the wrong 4 bolts to get it off, which I realigned and put back in.
I did get the caliper off in the end and over the past 2/3 days its shown no sign of leaking after topping the brake fluid back up.
However since I've put this caliper back on, (I literally bolted it back in using the 2 bolts I removed to get it off), when I drive the car I get a horrible grinding/clunking noise from the left rear.
Could be a couple of things..
1. I haven't followed the correct procedure to put the caliper back on (aside from bolting it back on, I'm not sure what the correct procedure is)
2. When I was trying to remove the brake disc (unsuccessfully), I somehow damaged or misaligned the brake shoes when trying to pull the brake disc off without first loosening the cog behind the back plate and now the brake shoes are not releasing the brake disc properly.
3. A combination of 1 and 2
The hand brake works fine, when I engage it there is a difference how firm it holds as opposed to being disengaged and allowing the car to move more freely, all be it with the grinding/clunking noise when driving with it dis-engaged.
The brakes are still spongy but I put that down to I haven't gone through and bled them all through.
The master cylinder is showing just below max full and hasn't gone down in the past couple of days.
Note: Between getting the leak and taking the caliper off, there was no grinding. Its only since I took the calliper off and put it back on. I did spend considerable effort trying to get the brake disc off, including using bolts in the discs pry holes to separate it from the hub, without success, since as I subsequently discovered on this thread, I needed to loosen the brake shoes first, at which point I gave up and decided to leave the disc on the hub after all. I'm wondering did my efforts trying to get the disc off somehow misaligned the brake disc with relation to the brake shoes.
Any steer on how to resolve ?
Before
During
After
Another coat of paint then lacquer than done !
Front right cleaned with coat of primer, bit of a pain I ran out of spray paint so had to put back on the car unfinished for now
All the wheels were covered in this nasty rust protection overspill. Not happy how this stuff was applied!
All the callipers splattered with rust protection overspill, nasty stuff that doesn't go off, if you rub it there is a horrible brown residue that oozes out from it..yuck!
My spray paint workshop
Looking better, another coat and lacquer on the right rear and then just the front right wheel left to spray paint and lacquer
I finally got the brake disc off, what a pain, somehow got under the car using my �20 jack from Halfords and managed to just get enough on the brake shoe adjuster with a screwdriver to loosen the shoes enough to get the brake disc off.
The reverse side of the bake disc had heavy corrosion, which was probably adhering to the hub and the shoes, even though the disc itself has plenty of wear remaining. I scrubbed off a lot of the rust and cleaned up the disc.
The shoe retaining springs were pulled clean off, one was jammed between the disc and the shoe, causing the grinding, clunking noises. I've ordered some new springs, the brake shoes themselves seem to have good wear remaining on them.
Just to be certain, I put it all back together without the springs and the noise has now disappeared when driving, the handbrake engages well.
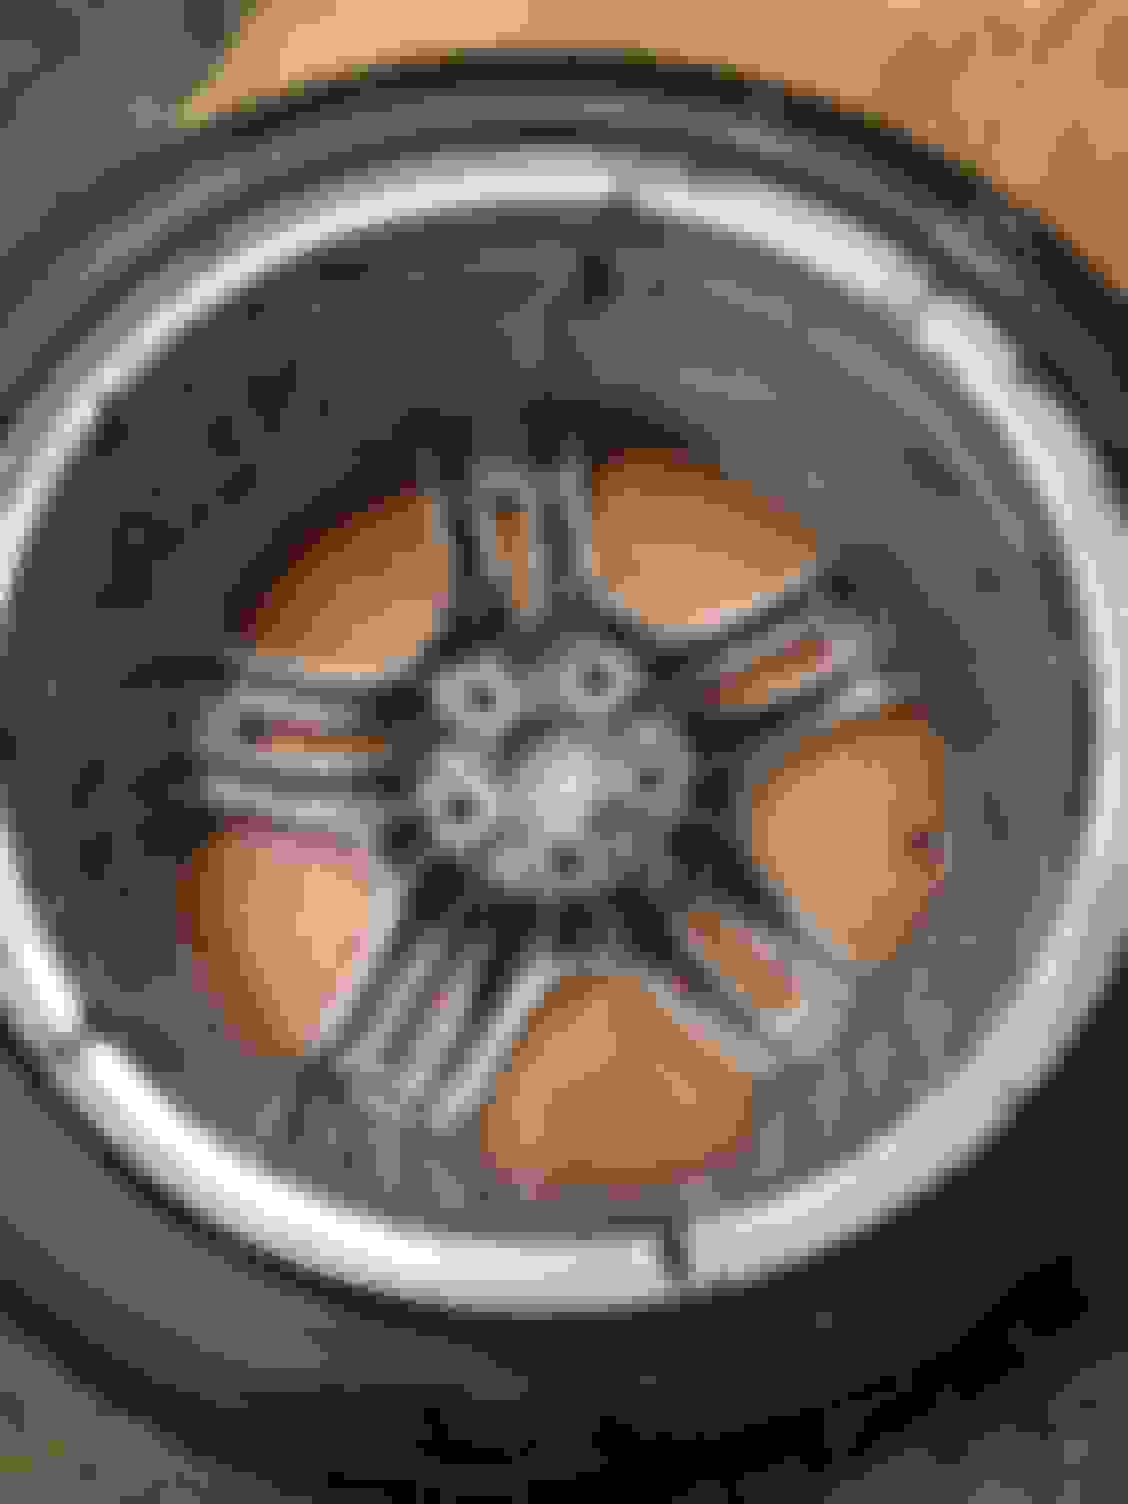
Brake disc off, spring retainers have come off and brake shoes are out of alignment
The offending spring, had come out and was jammed between the brake disc and the shoe