When you click on links to various merchants on this site and make a purchase, this can result in this site earning a commission. Affiliate programs and affiliations include, but are not limited to, the eBay Partner Network.
Pretty much everything made of rubber on the rear end of my blobeye wrx is perished, cracking and generally in poor condition. Starting this thread as a place to ask all questions I have about refurbishing everything as I'm hoping to do the whole lot in one go and it would be nice to hear any tips, tricks and experiences people have had that might save me some time or effort. Particularly any smart ways to take everything apart etc.
I've pretty much decided that I'll be removing the lateral and trailing arms, pressing old bushes out, cleaning them up and painting them, and then pressing new OE bushes in and reassembling with new bolts. I don't want to use polybushes for these, but would have considered HardRace etc. but the cost is significantly higher although the saved effort of not having to press bushes and repaint would have been nice.
I'll do the RARB bushes and probably mounts afterwards as that should be quick and accessible. I'd also prefer to decide whether or not to run a torsionally stiffer bar after refurbishing the rest so I know how it drives when it's in good shape.
I'd also like to change the subframe bushes, the bushes that the t-bar mounts to the body with and all the bushes around the differential. I'd prefer OE rubber for these, but would consider polybushes if it made installation way easier.
I'm trying to establish essentially what the best method of doing this would be. Can subframe and t-bar bushes be easily swapped on the car by lowering them a bit, drilling rubber out with a holesaw and then hacksawing the metal sleeve out and then sliding polybushes in? Or do these both need to be removed from the car, in which case I can just press old rubber out and new rubber in and give them a lick of paint.
I'm about to start refreshing mine. Everything has been removed from the car as plan to paint too. Went for the SuperPro F & R Running Gear set as need to do front too wishbones. its not cheap but seems well made. Plan is to leave the rear subframe bushes as look ok, but do the T_Bar outriggers to chassis however not decided weather to get new OEM, Poly or the supplement washers? any views? like you, I'm going to leave ARBs for as will get uprated one down line with specific bushings.
I needed to get an impact gun to remove stuff, even 3ft breaker wasn't having it, and that's after 2days worth of repeated WD soaking.
Pretty much everything made of rubber on the rear end of my blobeye wrx is perished, cracking and generally in poor condition. Starting this thread as a place to ask all questions I have about refurbishing everything as I'm hoping to do the whole lot in one go and it would be nice to hear any tips, tricks and experiences people have had that might save me some time or effort. Particularly any smart ways to take everything apart etc.
I've pretty much decided that I'll be removing the lateral and trailing arms, pressing old bushes out, cleaning them up and painting them, and then pressing new OE bushes in and reassembling with new bolts. I don't want to use polybushes for these, but would have considered HardRace etc. but the cost is significantly higher although the saved effort of not having to press bushes and repaint would have been nice.
I'll do the RARB bushes and probably mounts afterwards as that should be quick and accessible. I'd also prefer to decide whether or not to run a torsionally stiffer bar after refurbishing the rest so I know how it drives when it's in good shape.
Anything else to consider?
If you look on the Detailing World Projects page you'll see a thread in there under Red Impeza where I have a post on doing all the rear arms etc. I went down the Hardrace arms approach but if I was doing it again I'd not give them my money as Apex in this country were spectacularly misleading as well as taking about a month for them to actually get them to me. If I hadn't bought them through a friend's business I'd have done a credit card chargeback claim against them, they were inept.
Anyway, you may well end up having to cut out the inner bolts for these as they can seize inside the bushing sleeve. I only had to do this to one but it was still a pain. Get yourself a 17mm 6 point spanner as a socket won't clear the tank shield or the drive boot (even when you cut it as short as you can). You can then smack this with a lump hammer and not risk rounding the bolt as you might with a 12 point. Soak everything in plusgas for at least a week in advance, including the outer long hub bolts, although I found mine actually came out quite easily. To get the front inner bolts out you'll either need to jack the hub up to get clearance (NS) or pull the driveshaft from the diff (OS).
If I were doing it again I'd go to ICP and either get their complete SuperPro rear end overhaul kit, including bushes, bolts and everything, or go for all new bolts and use genuine Subaru Group N bushes which would be similar to Hardrace. Do yourself a favour too and get some marine grease which will help prevent things from corroding should you have to strip it down again in the future, and douse everything liberally in Bilt Hamber Dynax wax to protect bolt heads etc. Oh, and take photos of where the alignment dots are on the rear toe bolts so you can get them back together in a ballpark approximation of the right place.
Thank you for the responses so far. All informative to read. I've read through the entire Red Impreza thread on Detailing World. How are the actual HardRace products as plenty of other retailers seem to stock them, such as ASPerformance?
I'll definitely be using all new bolts. I've looked into it and the cost of buying 2nd hand arms and subframes etc. gets quite expensive.
I've got no worries about alignment- I have free access to a Hunter Rig, so I just eyeball alignment close enough to be safe, drive it up there and do it all spot-on. I do also have access to a 2-post lift evenings and weekends but the car can never get stuck there as it's in daily use. I've been debating whether to get separate arms and subframes all done with bushes, and just swap the lot on the 2-poster, or to take my time more on the drive. The disadvantage of the 2-poster is I really can't run into an issue and get stuck.
I know the SuperPro kit has been recommended a lot, but as I stated I really, really don't want polybushes on anything that controls wheel geometry. I'd prefer not to use them at all, but if it helps with installation in-situ for the subframe and t-bar bushes then I may consider them. How big of a job is it to remove the t-bar and subframe? If I did refurb 2nd-hand ones I could build it up with new arms etc. then just drop the lot on the 2-poster potentially? I'd be interested to hear anyone's tips and tricks for this, or ways they've managed to do these bushes in-situ potentially? Can you just drop the t-bar, subframe and arms off all in one?
Do yourself a favour too and get some marine grease which will help prevent things from corroding should you have to strip it down again in the future, and douse everything liberally in Bilt Hamber Dynax wax to protect bolt heads etc.
I always coat parts with Waxoyl before assembly. Been doing that for decades and not had a seizure yet.
If you've got the time, use the lift and remove one bolt at a time. Waxoyl it and replace it. That say when you come to do the job, you know there won't be a problem.
I always coat parts with Waxoyl before assembly. Been doing that for decades and not had a seizure yet.
If you've got the time, use the lift and remove one bolt at a time. Waxoyl it and replace it. That say when you come to do the job, you know there won't be a problem.
Might be a good idea to pre-loosen/remove and retighten bolts, thank you for the suggestion. Unfortunately I've got a reasonable idea of what I'm in for- I've got a 22 year old French car which the only suspension/steering parts I haven't replaced are the two front wheel bearings so I'm fairly well-used to cutting, heating and smashing out old bolts. I've tended to use copper-slip as an anti-seize in the past after wire-brushing the threads as clean as possible and it's certainly made any further removals completely painless.
The theory behind dropping the lot was minimising the need to even undo old bolts- if I can drop the whole rear assembly off the car I can refit a newly-built one. The only thing potentially holding me back is the extra cost of all the subframes and arms etc. 2nd hand but if it does make things easier I might just bite the bullet. Minimises time off the road as well then.
Basically my main choice & question at the moment: is it straightforward to drop the t-bar, rear subframe and arms off the car all in one? Or, if that's not easy, has anyone successfully removed subframe and t-bar bushes on the car with a hacksaw or similar and then pushed in polybushes?
Ask Matty@mbdevelopments he strips Subaru�s al the time and will be able to advise
I've tended to use copper-slip as an anti-seize in the past after wire-brushing the threads as clean as possible and it's certainly made any further removals completely painless.
I was going to use copper slip too - has always worked for me. Quite like the idea of waxoil on the threads / nut faces just to add extra protection. good shout.
Why are you going to go for all new bolts? is it condition based or for some other reason?
I always coat parts with Waxoyl before assembly. Been doing that for decades and not had a seizure yet.
If you've got the time, use the lift and remove one bolt at a time. Waxoyl it and replace it. That say when you come to do the job, you know there won't be a problem.
I tend to re-assemble with marine grease which is superb at not washing off. I've found BH Dynax to be better than Waxoyl but both are going to be better than not if you spray them over everything. The big ones for this to me would be the long outer control arm bolts as it should keep them like new, rather than something you'd pull off the Titanic.
Thank you for the responses so far. All informative to read. I've read through the entire Red Impreza thread on Detailing World. How are the actual HardRace products as plenty of other retailers seem to stock them, such as ASPerformance?
They do actually seem to be okay. The paint's a bit thin and brittle vs OEM so I doused them in BH Dynax to keep them relatively corrosion free. Personally I wouldn't choose to give Apex (the UK importer) any money, but if you're okay with that then getting something from AS if they've got them in stock should be okay. Make sure they are in stock though as hardrace deliveries seem ropey at best. Also make sure you know EXACTLY what you're ordering as many of the online descriptions are a bit inventive at best. I would just get some used parts and fit Grp.N bushes to everything. That way you can powdercoat it all and have it looking fresh and new (particularly the subframe etc). If you were so inclined then I reckon you could get the bushes out the old stuff, get that powdercoated and then sell it for reasonable money to someone wanting to do the same as you.
Also, from memory dropping the T-bar and rear subframe is pretty straightforward as long as it doesn't have the rear subframe lock bolts in there (you'll see an extra bolt between the main two bushed ones if there are). These *may* come out okay but they're usually screwed into some pretty jacked up threads and the nuts are only spot welded on loosely at the other side as they're just for assembly on the production line.
Right, finally some movement on this. I've got prices I'm happy with from AS and I'm in the process of ordering a full hardrace set of rear arms, including trailing arms and droplinks, plus a whiteline 22mm RARB. I can provoke a slight knock if I shake and whack the rear droplinks so hopefully that'll get rid of a slight clunk I can hear.
Looking at youtube and posts, it seems possible to undo all the lateral arms, unbolt the diff from the subframe, lower the diff and then rotate the subframe out over the diff to remove it. I'll probably just polybush the diff to subframe bushes and the front outrigger bushes on the T-bar, potentially at a later date as these look a lot less ruined and probably influence the handling a little less than control arm bushings.
So my final decision is what to do with the subframe bushes. I'm a little wary of removing the subframe as the bolts go into captive nuts (there are no extra lockbolts fitted), however I would like to replace them as they look pretty tired. There are actually quite limited options, but I could buy std. which are pricey, SWRD from scoobyworx which are also pricey, or a range of brand I've never heard of which are cheaper but may have quality issues which I'd rather avoid. Alternatively, I could buy a 2nd hand solidly mounted one, I don't know what they sell for, or finally have some aluminium bushes turned on a lathe that would replicate the solid ones fitted to some OE scoobies. Any thoughts/tips/links to bushes I haven't seen?
So my final decision is what to do with the subframe bushes. I'm a little wary of removing the subframe as the bolts go into captive nuts (there are no extra lockbolts fitted), however I would like to replace them as they look pretty tired. There are actually quite limited options, but I could buy std. which are pricey, SWRD from scoobyworx which are also pricey, or a range of brand I've never heard of which are cheaper but may have quality issues which I'd rather avoid. Alternatively, I could buy a 2nd hand solidly mounted one, I don't know what they sell for, or finally have some aluminium bushes turned on a lathe that would replicate the solid ones fitted to some OE scoobies. Any thoughts/tips/links to bushes I haven't seen?
Thanks!
If you take the rear bumper off then you should have access to the chassis rails that the captive nuts sit in - you could then douse them for a few days either with plus gas or 50/50 ATF and diesel. You'll need to re-cavity wax them after that but it may help prevent the nuts shearing off, unless the welds already weakened by rust. The rear bumper really isn't too difficult a job and probably worth it for the reduced risk of spinning, no longer captive nuts
If you take the rear bumper off then you should have access to the chassis rails that the captive nuts sit in - you could then douse them for a few days either with plus gas or 50/50 ATF and diesel. You'll need to re-cavity wax them after that but it may help prevent the nuts shearing off, unless the welds already weakened by rust. The rear bumper really isn't too difficult a job and probably worth it for the reduced risk of spinning, no longer captive nuts
Great tip, thank you. I'll definitely get penetrating spray down there before doing the job. I plan to use a fair bit of heating and re-heating before attempting to crack them off as well.
Right, finally some movement on this. I've got prices I'm happy with from AS and I'm in the process of ordering a full hardrace set of rear arms, including trailing arms and droplinks, plus a whiteline 22mm RARB. I can provoke a slight knock if I shake and whack the rear droplinks so hopefully that'll get rid of a slight clunk I can hear.
Looking at youtube and posts, it seems possible to undo all the lateral arms, unbolt the diff from the subframe, lower the diff and then rotate the subframe out over the diff to remove it. I'll probably just polybush the diff to subframe bushes and the front outrigger bushes on the T-bar, potentially at a later date as these look a lot less ruined and probably influence the handling a little less than control arm bushings.
So my final decision is what to do with the subframe bushes. I'm a little wary of removing the subframe as the bolts go into captive nuts (there are no extra lockbolts fitted), however I would like to replace them as they look pretty tired. There are actually quite limited options, but I could buy std. which are pricey, SWRD from scoobyworx which are also pricey, or a range of brand I've never heard of which are cheaper but may have quality issues which I'd rather avoid. Alternatively, I could buy a 2nd hand solidly mounted one, I don't know what they sell for, or finally have some aluminium bushes turned on a lathe that would replicate the solid ones fitted to some OE scoobies. Any thoughts/tips/links to bushes I haven't seen?
Thanks!
I've just had the rear subframe on my WRX replaced with a solid bushed one from an STI (lovely thing, powder-coated and practically new from MB Developments - just over �100 with delivery). A word of warning - the old subframe was a complete pig to get off. It was so corroded (2001 Bugeye) that the Subaru specialist I normally use couldn't shift the bolts that attach it to the body and said he felt like they were about to snap. I ended up taking the car to a Landrover specialist who got 2 of the 4 bolts out, and had to cut the remaining 2 out and do some welding to repair the body before fitting the new subframe. It needed a couple of bushes and things too, but the bill was �500 in the end. I hope the years have been kinder to yours!
That's what I've just done actually, I've bought a VGC sti rear subframe with solid inserts. It's come with good condition diff bushes as well so I'll re-use those. I'm pretty worried about the captive nuts that hold the subframe in snapping. My subframe doesn't look too corroded but that doesn't really mean anything when it comes to whether or not the bolts require more force to turn than the spot welds can sustain. If it happens I guess I'm cutting a hole but I'd really rather avoid this! It does seem that online a lot of people have successfully cracked the bolts off to remove the subframe or to realign it to fit lockbolts so I'm hoping I'll be OK. I will be removing the rear bumper and getting loads of penetrant spray down there, and I plan on using heat to try to unseize them as well. Might even have a go at the main subframe bolts at work on the lift beforehand, or even all of them if I've got time. I'll be doing this at home in a couple of weeks.
Also, link to marine grease that you use?
The parts I've now purchased:
STI Subframe Solid Inserts & Diff Bushes
Hardrace Lateral Arms, Trailing Arms & Droplinks
Whiteline 22mm RARB
Perrin Stout Mounts
Powerflex Yellow Outrigger Bushes
Bolt kit for all rear arms
I'm in the process of removing bushes now.
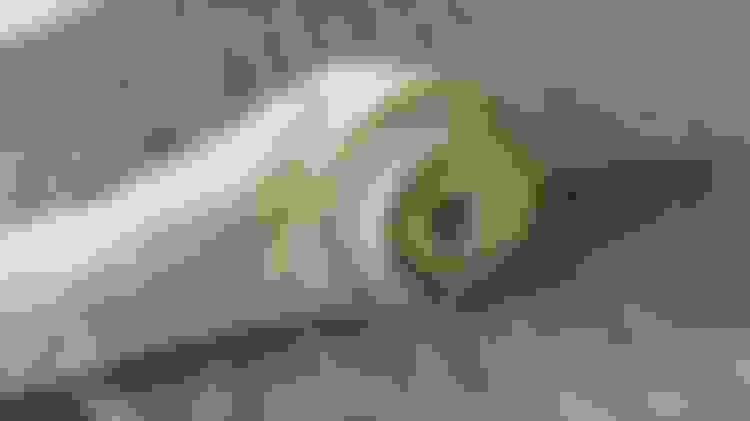
With the outrigger bushes, I am going to replace with the Powerflex Yellow variants. can anybody advise if you just cut and clean the rubber portion, or are you supposed to remove the original metal casing out too? I'm presuming you take original the casing out, but thought I would check as there is no way you can press it easily - mine need to be cut and chiselled out.. cheers
Great inputs guys, looking at this process soon myself.
RetroPug and Chaps - if you could give updates on any feedback on complications etc. You thoughts and observations on differences in general feel and steering it would be greatly appreciated.
I will update this- don't worry. I'm planning to fit it all in the next few weeks.
I've done two soaks with penetrating oil. Attempted to crack a few bolts off at work yesterday but didn't really fully go for it as if one snaps at work I've got a big problem, so all I cracked off were the big bolts that go through the outrigger bushes on each side. These went back in with copper anti-seize. I'll obviously be really leaning on them at home, and I've got a new bolt kit on the way. As I've said before my main worry is the four subframe bolts.
I'll also add, you don't need to take the bumper off to spray penetrating oil down the inside of the chassis, but the subframe is miles away so I doubt you'd get the nuts anyway.
I started this today, after dousing everything in penetrating oil about 5 or 6 times. There's a few tips towards the end of this post which I'll probably write up in more detail once everything is done. Hopefully they're helpful.
So far I've removed the subframe, all lateral arms, and the RHS trailing arm. Still to remove is the LHS trailing arm, and the whole RARB assembly. I'll also probably remove the lower hub bush and put in a new one, and probably also change the outrigger bushes. However, I'm STILL waiting for the outrigger bushes ans even more annoyingly the bolt kit for the rear end. These were ordered on the 3rd August and it's now the 19th. I was promised dispatch today and my order history with this particular supplier suggests the order is still unprocessed to me. I'll be quite irritated if that holds me up as I ordered it in plenty of time. I suppose it gives me time to treat all the crusty areas and give the RARB a coat of lacquer etc. though.
The old bushes definitely needed removing, so this should make a very good difference. There's a bit of rocking coming off the throttle which hopefully all the diff bushes will sort as well. Obviously the RARB on stout mounts will change the handling balance as well so I'll definitely be feeling a change!
Here's some tips for anyone attempting this:
One of the long lateral bolts came out intact, one had the head cut off then hammered through. They're not too bad, the main thing I read online which I definitely agree with is they seize hard on the inner sleeves of the bushes. If you get the inner arm fasteners undone, you can then use the arms as levers to try to free the bushes off. If you can do that, and remove the forward lateral arm, the bolt isn't too bad to drift through the hub.
The inner bolts at the front ended up just being impossible to undo and they rounded off. Undid all the diff mountings, jacked the diff up high, used this to get access to cut the heads off. This would also help you get a tool on them. I then dropped the subframe, this allowed me to push the cut bolts out below the fuel tank. The subframe is easy to lift out over the diff when everything is undone.
Ok. Absolutely everything is dismantled. Bolts should arrive tomorrow. May start reassembling subframe etc later this evening but I've been spending the whole afternoon treating the rust that I've now got much easier access to. I'm waiting for everything to dry then I'll apply some stonechip to the most exposed areas. I've decided to leave the hub to trailing arm bushes for now as they look absolutely fine. I do have replacements that I'll eventually fit. I've also not done the outrigger bushes yet as the other end of the diff is unsupported so can't access them. I've given my whiteline ARB two coats of clear lacquer to hopefully protect it.
For reference if anyone else is attempting the same, I've found the section of the workshop manual that provides torques. It's listed for a bugeye but I see no reason why they shouldn't be the same/similar. It's pictured below but I'll do a proper write-up of the whole process eventually. If anyone has any questions about the process feel free to ask- happy to help and it will make the eventual write-up more complete.
My standard arms and subframe etc. are for sale for a fair bit cheaper than from breakers if anyone wants to use them to put new bushes in and carry out a similar refurb.
Last edited by RetroPug; Aug 20, 2019 at 04:31 PM.
Looking for a bit of advice, I'm going to be doing something similar to my own car, plan is to drop everything out of the car and replace the bushes. Thinking of goin for powerflex as I know 2 people who recently replaced all their bushes using them with no problems one being an evo an the other an m3.
That being said is going for polybushes for everything a good idea for a road car ? The car will never be tracked etc purely fair weather driving and b road blasting.
The brother done his evo but the fellas on the evo form recommended going for polybushes for some parts and oem rubber ones for other areas.
Reason why I want to go with polybushes is they dont dry up and perish when the cars parked up for a long time over winter etc.
Polyurethane on compression Rubber on rotation.Rubber for lateral links,trailing arms and arb bushings.Poly on mounts such as diff,outrigger and steering rack bushings.A lot of people go for poly because is easier to install from rubber but require maintenance and have a tendency to bind after some time.
Last edited by Staurossim; Nov 17, 2019 at 03:29 PM.