
Today I been mostly...
 02 August 2012, 10:39 PM
#1
Scooby Regular
Thread Starter
iTrader: (22)
Join Date: May 2006
Location: Doncaster, S. Yorks.
Posts: 21,415
Received 0 Likes
on
0 Posts
...sorting out the rotten rear bumper bar for the Subaru's MOT 
I did a thread before about my rotten front bumper bar and the rear one wasn't much better. So the kick up the **** required was when the Subaru failed it's MOT on a couple of things...
and was fibre-glassed and under-sealed afterwards. Top job and VAT probably paid. 
But today I was on my own. I needed to get the bumper and bumper bar off as well as make/fabricate up some new brackets for the number plate lights.
Getting the bumper off wasn't too bad, apart from the annoying bolts/clips that attach the corners near the wheel arches. I have a rust issue on the o/s rear arch so when the bolt and clip came off, it brought some bodywork with it.
O/s arch after removal (galvanising spray applied to slow down the rot)
N/s arch in much better condition
I actually removed the bumper still attached to the bar as I found it easiest. There were the 6 M12x 1.2 fine threaded bolts which were pre-soaked with Penol over the previous 3 days, one 10mm clip in the bottom corners of the bumper sides and an 8mm clip in the centre bottom all attaching to the main bodywork.
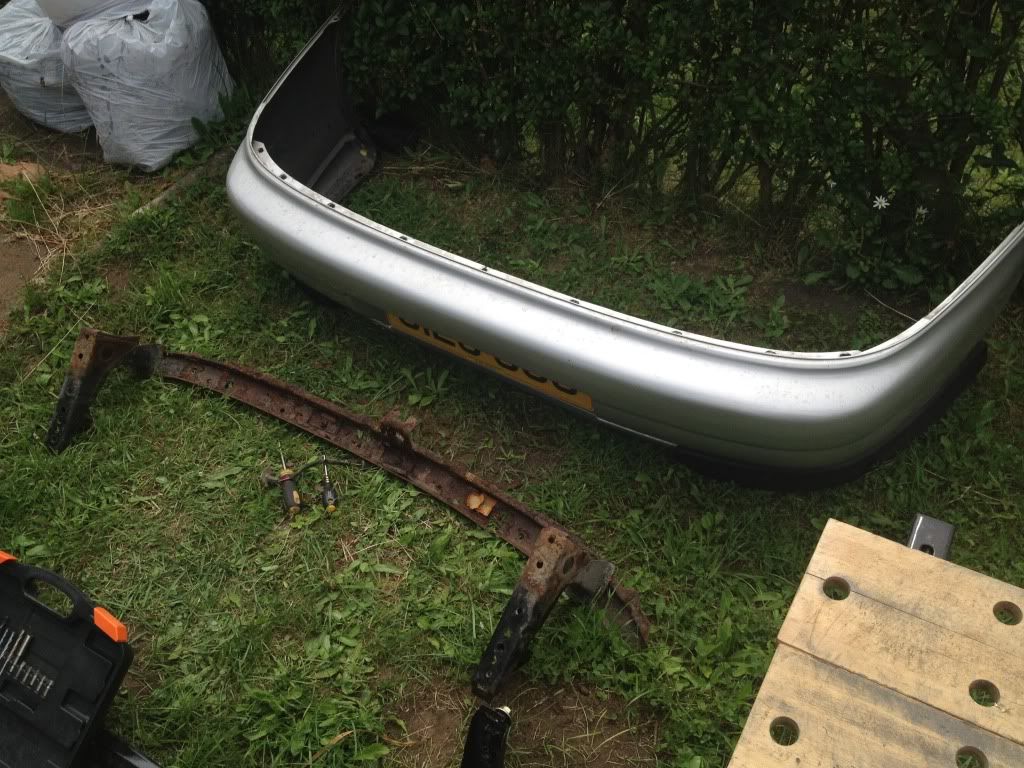
Bumper/bumper bar then came off...
This is what I was faced with and what was left of the bumper bar

The clips came out easily enough with a screw driver and then the old bumper bar was off. I think there's nine 10mm clips across the top and one more either side near the bottom attaching the two together.
Now as I'm tight, I refused to pay �20+ each for a pair of number plate light brackets, so I decided to make my own from some 1mm mild plate. I made one up using rough measurements from the remains of the one left on the rotten bumper bar and then copied that to the second one.
Now I was using minimal tools such as a small fold away wood bench without a vice, a drill, 4 1/2 grinder, files etc. so it was a little crude but used some of the hand fitting techniques I've learnt at work on my apprenticeship.
This was one plate mocked up before the drilled holes were cut between to make a square hole for the wires/grommet to fit through
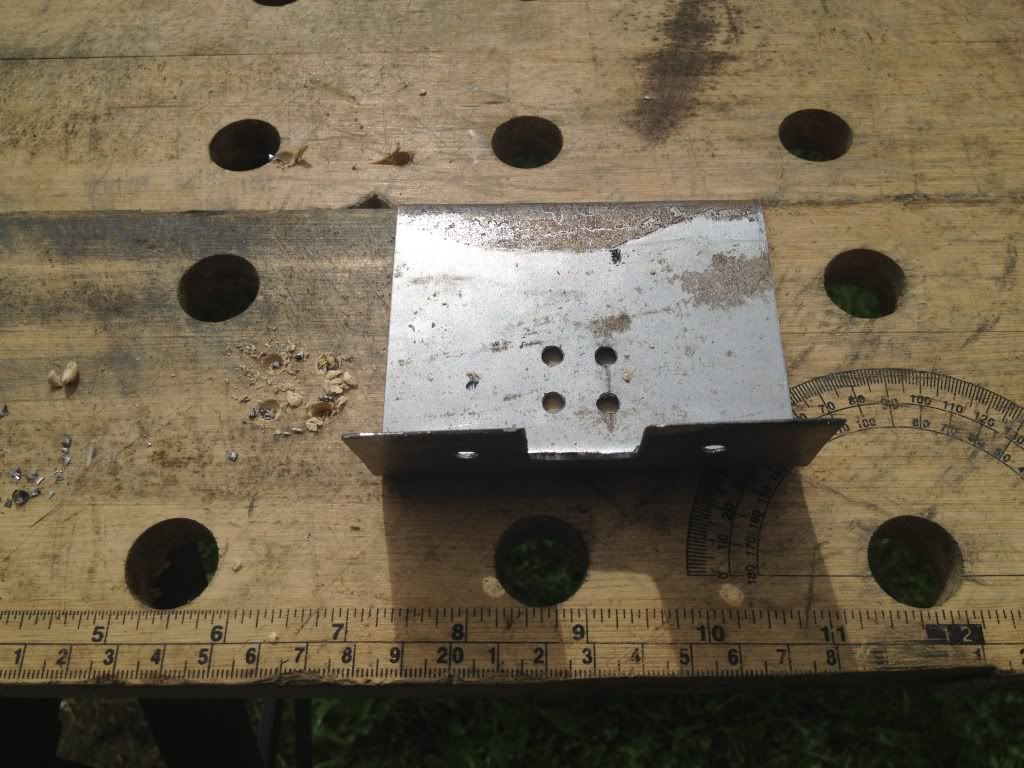
Below you can see my simple design imitating the original Subaru part
I sprayed the brackets after they were drilled but before attaching to the new bumper bar
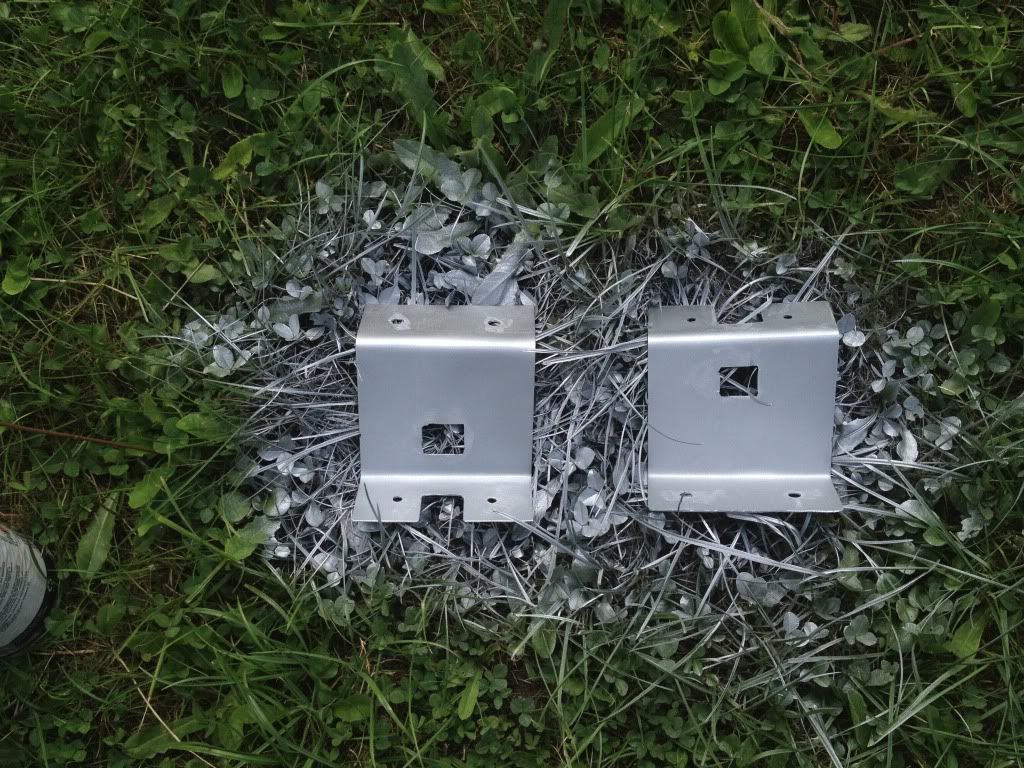
Luckily the night before when I had removed the lights themselves, I'd managed to clean the connections up and they worked with new 15w bulbs in. So I fixed the lights onto the brackets with stainless M4 bolts/nuts/washers (something Alcazar has said finally rubbed off re. using stainless where possible and safe). These were then attached to the bumper bar after I'd drilled 6.5mm holes for the M6 bolts/nuts/washers (again stainless).
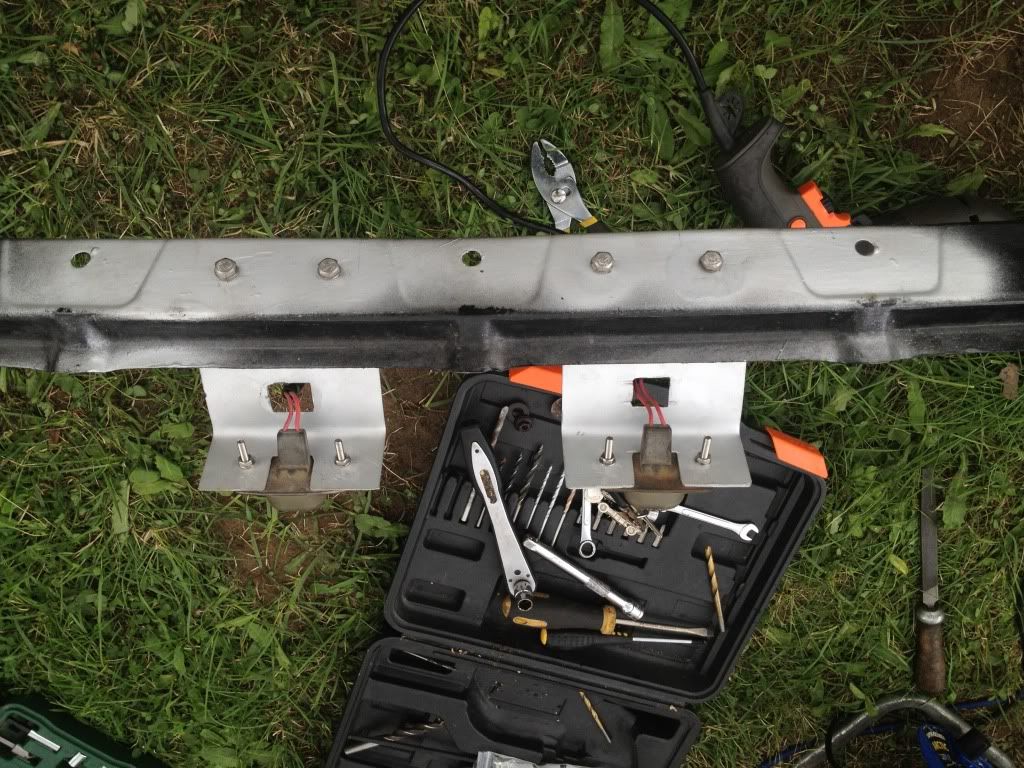
Now I believe there are two different rear bumper bars for classics, my car is a MY99 and I think the bumper bar was the earlier one. This is because on the earlier models, the number plate lights fixed directly to the bumper and not the bumper bar. With the above picture you'll see I drilled custom holes which weren't there but were on the rotten bar. No big issue but worth noting for anyone else I think.
So as there were no recesses, the bolt heads sat proud and interferred when trying to fit back onto the bumper.
So more drilling was required - quite neatly done giving my "stencil"
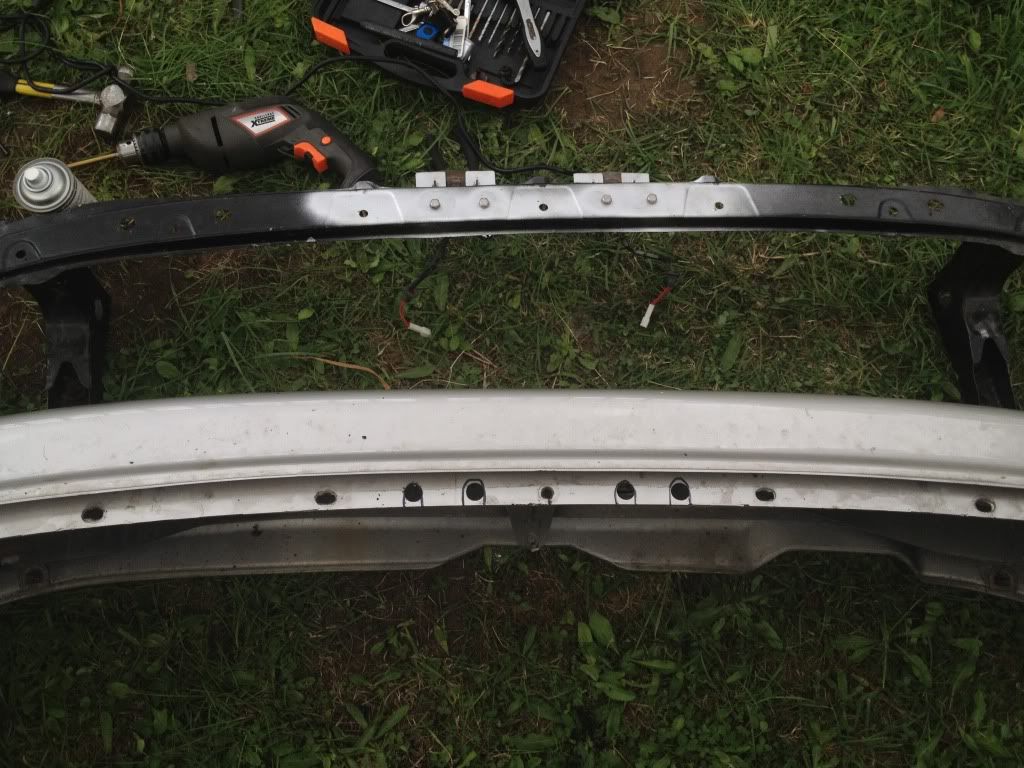
So all lined up, I re-fitted the bumper bar in being careful with the light fittings and bending the brackets by hand until they were angled right. As said before, 9 new 10mm clips on the top and 2 (1 in each bottom leg) saw the bumper and bumper bar matched in perfect harmony.
This is the bumper and bar ready to go back onto the Subaru, note the two grommets off centre underneath the boot latch? That's where the light fixings thread through. You need to pop these in whilst balancing the legs in their 'holsters' as you can't do it when properly fitted.

Unfortunately that was the last picture I did but by no means the end of the job. Before fitting the 6 M12 bolts which clamp the bar to the bodywork, I wanted to line up the sides with the arches. The n/s was easy enough with an M6 bolt/nut/2x penny washers (stainless again). This was lined up fine. The o/s where the two holes meet up (remembering one hole was rust and had disintegrated) was more of a challenge. In the end I decided to drill a hole near to where the previous one was and a hole in line on the inner bumper flap. Then rather than trying to faff with bolts and penny washers, I simply used a cleverly concealed tie-wrap and pulled it into place before tightening/snipping the excess. Without looking (or me grassing myself up on a 'bodge') you wouldn't and can't tell the difference.
I then got the 6 M12 bolts threaded and tightened after checking it lined up as well as possible. Then the two 10mm clips on both corners and the 8mm central clip were popped in.
Hazaar! All done. Well apart from fitting the trim inside the boot back and checking the number plate lights worked that is.
So a few hours (due to lack of workshop and/or experience doing this job), some cut knuckles but minimal swearing later... job done.
Hopefully this thread can help others as I found it daunting to think about to start with. But I did my Bapps Bolts shopping list before starting and bought plenty of what I'd need before touching the car.
If you're still awake, thanks for reading and fingers crossed on the MOT retest in 12 hours, she now passes with flying colours
I did a thread before about my rotten front bumper bar and the rear one wasn't much better. So the kick up the **** required was when the Subaru failed it's MOT on a couple of things...
- Rotten rear bumper bar (not supporting bumper skin adequately)
- Rotten number plate light fittings (supposed to be attached to above)
- Number plate lights not actually working
- Rot on n/s front chassis leg behind wishbone mount (30cm rule applies)
and was fibre-glassed and under-sealed afterwards. Top job and VAT probably paid. But today I was on my own. I needed to get the bumper and bumper bar off as well as make/fabricate up some new brackets for the number plate lights.
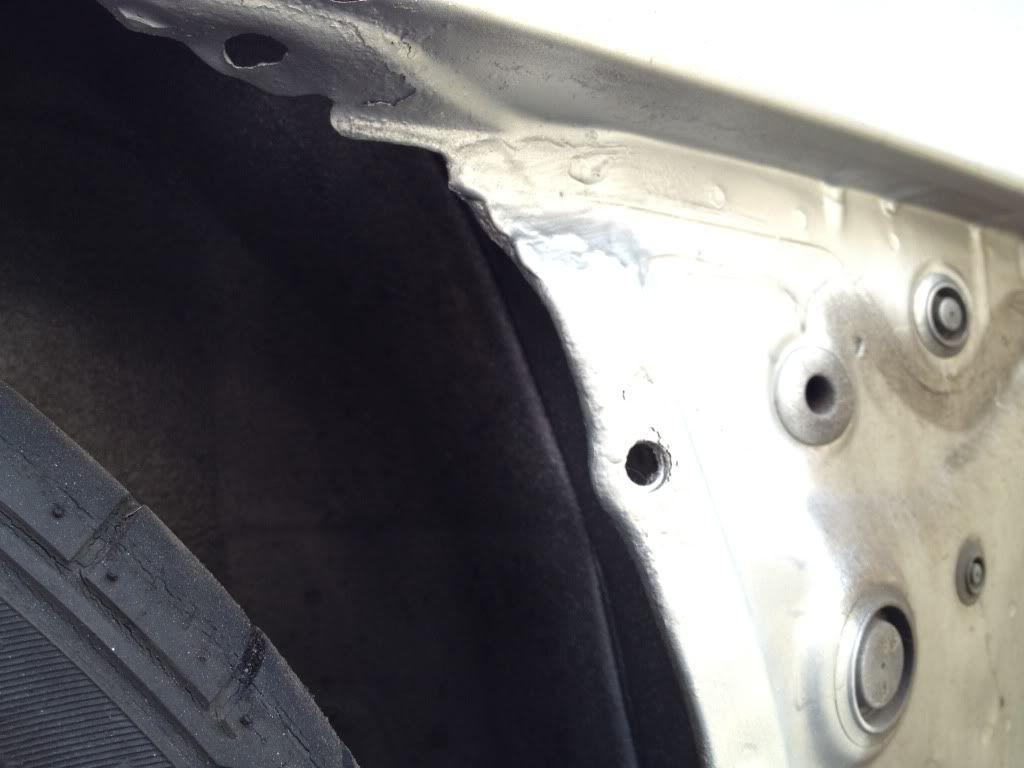
Getting the bumper off wasn't too bad, apart from the annoying bolts/clips that attach the corners near the wheel arches. I have a rust issue on the o/s rear arch so when the bolt and clip came off, it brought some bodywork with it.
O/s arch after removal (galvanising spray applied to slow down the rot)
N/s arch in much better condition
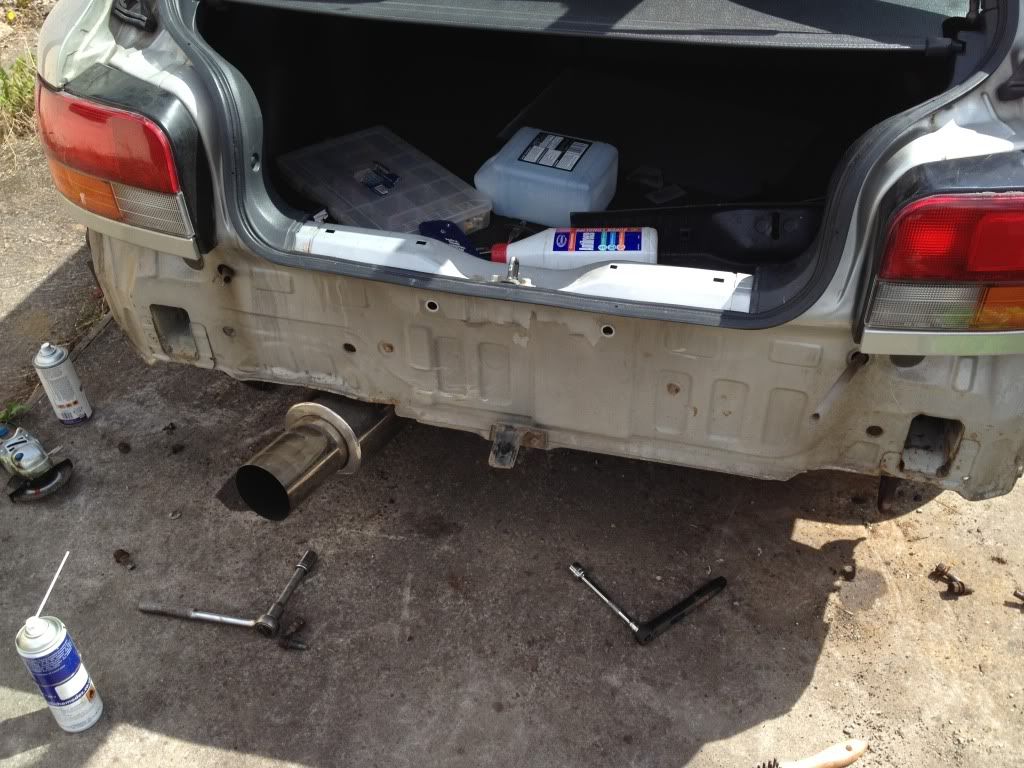
I actually removed the bumper still attached to the bar as I found it easiest. There were the 6 M12x 1.2 fine threaded bolts which were pre-soaked with Penol over the previous 3 days, one 10mm clip in the bottom corners of the bumper sides and an 8mm clip in the centre bottom all attaching to the main bodywork.
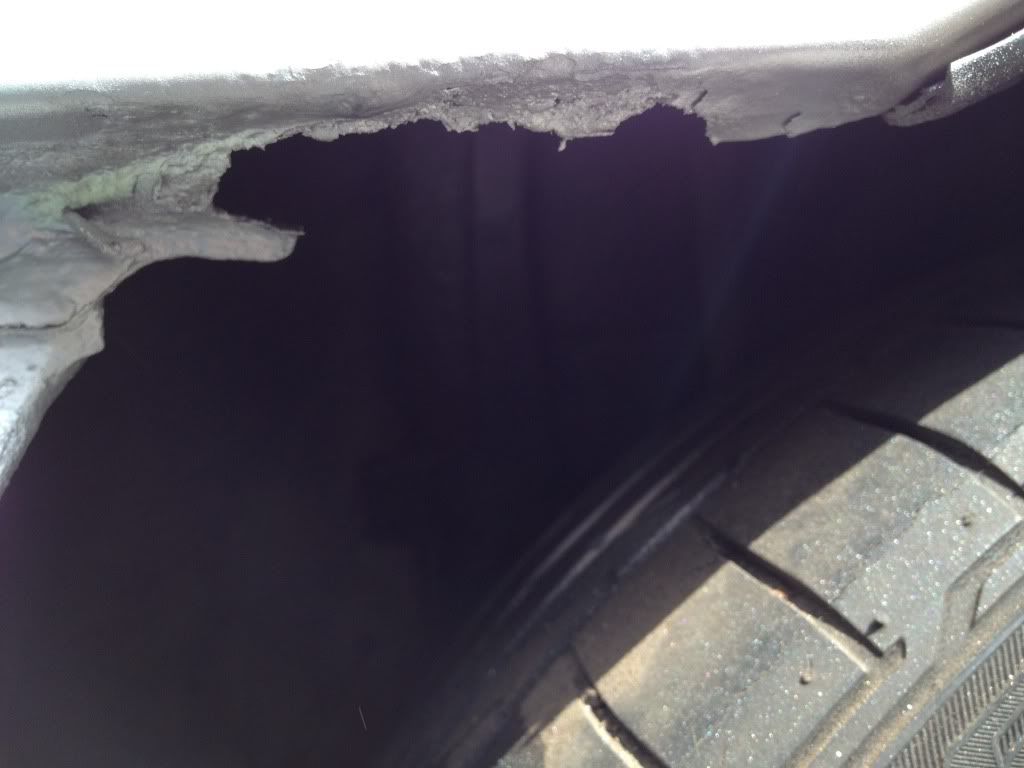
Bumper/bumper bar then came off...
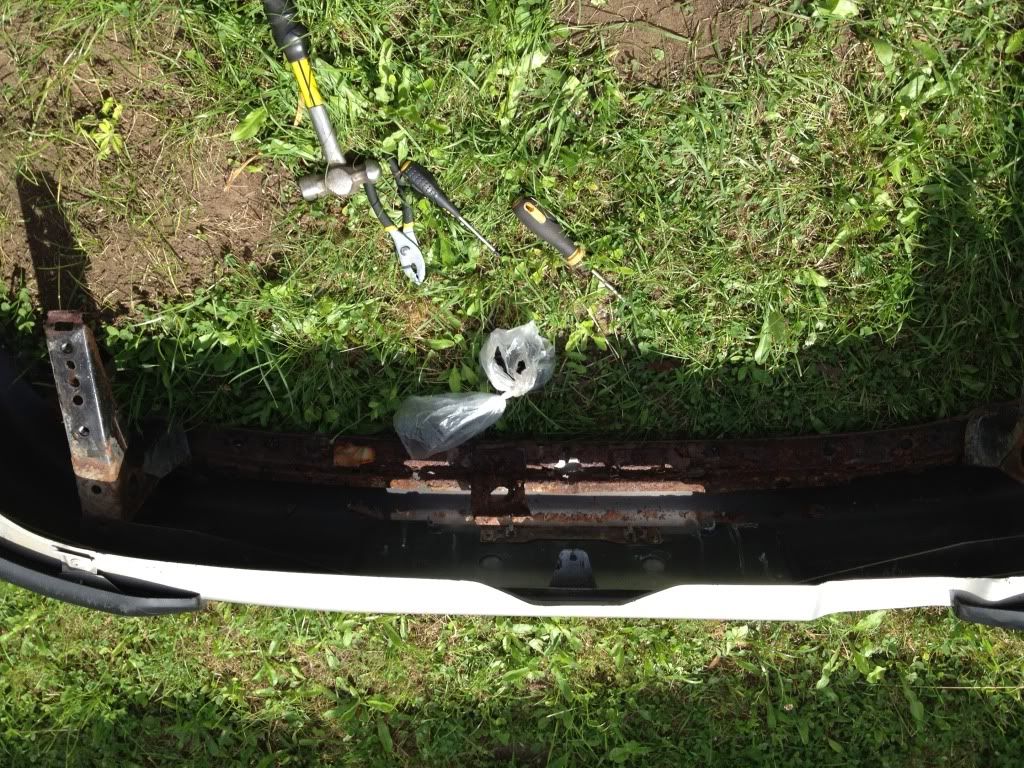
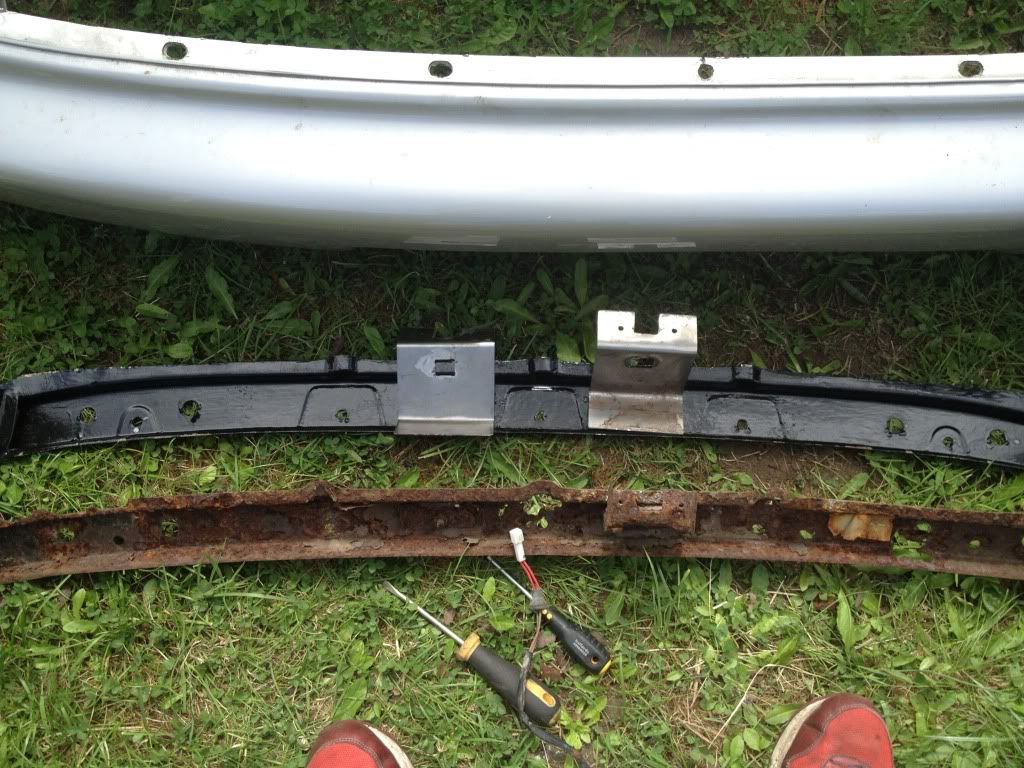
This is what I was faced with and what was left of the bumper bar
The clips came out easily enough with a screw driver and then the old bumper bar was off. I think there's nine 10mm clips across the top and one more either side near the bottom attaching the two together.
Now as I'm tight, I refused to pay �20+ each for a pair of number plate light brackets, so I decided to make my own from some 1mm mild plate. I made one up using rough measurements from the remains of the one left on the rotten bumper bar and then copied that to the second one.
Now I was using minimal tools such as a small fold away wood bench without a vice, a drill, 4 1/2 grinder, files etc. so it was a little crude but used some of the hand fitting techniques I've learnt at work on my apprenticeship.
This was one plate mocked up before the drilled holes were cut between to make a square hole for the wires/grommet to fit through
Below you can see my simple design imitating the original Subaru part
I sprayed the brackets after they were drilled but before attaching to the new bumper bar
Luckily the night before when I had removed the lights themselves, I'd managed to clean the connections up and they worked with new 15w bulbs in. So I fixed the lights onto the brackets with stainless M4 bolts/nuts/washers (something Alcazar has said finally rubbed off re. using stainless where possible and safe). These were then attached to the bumper bar after I'd drilled 6.5mm holes for the M6 bolts/nuts/washers (again stainless).
Now I believe there are two different rear bumper bars for classics, my car is a MY99 and I think the bumper bar was the earlier one. This is because on the earlier models, the number plate lights fixed directly to the bumper and not the bumper bar. With the above picture you'll see I drilled custom holes which weren't there but were on the rotten bar. No big issue but worth noting for anyone else I think.
So as there were no recesses, the bolt heads sat proud and interferred when trying to fit back onto the bumper.
So more drilling was required - quite neatly done giving my "stencil"
So all lined up, I re-fitted the bumper bar in being careful with the light fittings and bending the brackets by hand until they were angled right. As said before, 9 new 10mm clips on the top and 2 (1 in each bottom leg) saw the bumper and bumper bar matched in perfect harmony.
This is the bumper and bar ready to go back onto the Subaru, note the two grommets off centre underneath the boot latch? That's where the light fixings thread through. You need to pop these in whilst balancing the legs in their 'holsters' as you can't do it when properly fitted.
Unfortunately that was the last picture I did but by no means the end of the job. Before fitting the 6 M12 bolts which clamp the bar to the bodywork, I wanted to line up the sides with the arches. The n/s was easy enough with an M6 bolt/nut/2x penny washers (stainless again). This was lined up fine. The o/s where the two holes meet up (remembering one hole was rust and had disintegrated) was more of a challenge. In the end I decided to drill a hole near to where the previous one was and a hole in line on the inner bumper flap. Then rather than trying to faff with bolts and penny washers, I simply used a cleverly concealed tie-wrap and pulled it into place before tightening/snipping the excess. Without looking (or me grassing myself up on a 'bodge'
) you wouldn't and can't tell the difference.I then got the 6 M12 bolts threaded and tightened after checking it lined up as well as possible. Then the two 10mm clips on both corners and the 8mm central clip were popped in.
Hazaar! All done. Well apart from fitting the trim inside the boot back and checking the number plate lights worked that is.
So a few hours (due to lack of workshop and/or experience doing this job), some cut knuckles but minimal swearing later... job done.
Hopefully this thread can help others as I found it daunting to think about to start with. But I did my Bapps Bolts shopping list before starting and bought plenty of what I'd need before touching the car.
If you're still awake, thanks for reading and fingers crossed on the MOT retest in 12 hours, she now passes with flying colours
 03 August 2012, 09:43 AM
#3

Nice job, but I do have to say, I can't see how you should have had a fail on the top two points...should be advisories. Unless the bumper fell off during the test, and number plate light wasn't illuminating the plate.
FWIW...some cars don't even have bumper bars and all that hold them on is plastic clips.
Chassis leg and duff NP light however = fail.
Now sort out that chassis leg (edit sorry, sorted). And use plenty of waxoyl....those salted roads are taking its toll (thats why I wash the underside of my car every few weeks during winter).
Last edited by ALi-B; 03 August 2012 at 09:48 AM.
03 August 2012, 10:44 AM
#4
Scooby Regular
Thread Starter
iTrader: (22)
Join Date: May 2006
Location: Doncaster, S. Yorks.
Posts: 21,415
Received 0 Likes
on
0 Posts
Nice job, but I do have to say, I can't see how you should have had a fail on the top two points...should be advisories. Unless the bumper fell off during the test, and number plate light wasn't illuminating the plate.
FWIW...some cars don't even have bumper bars and all that hold them on is plastic clips.
Chassis leg and duff NP light however = fail.
Now sort out that chassis leg (edit sorry, sorted). And use plenty of waxoyl....those salted roads are taking its toll (thats why I wash the underside of my car every few weeks during winter).
FWIW...some cars don't even have bumper bars and all that hold them on is plastic clips.
Chassis leg and duff NP light however = fail.
Now sort out that chassis leg (edit sorry, sorted). And use plenty of waxoyl....those salted roads are taking its toll (thats why I wash the underside of my car every few weeks during winter).
Bumper nearly came off on MOT and as the brackets had rotted away, the bulbs were broke and dangling on the wires!

Trending Topics
 06 August 2012, 04:24 PM
#16
Scooby Regular
iTrader: (1)
Join Date: Jan 2008
Location: surrey/west sussex
Posts: 3,189
Likes: 0
Received 0 Likes
on
0 Posts
Nice job there 
Had to replace the bumper on mine last week last week. Bars were in perfect condition. Car has only been in uk just over a year though. Just shows ya...
Had to replace the bumper on mine last week last week. Bars were in perfect condition. Car has only been in uk just over a year though. Just shows ya...

Thread
Thread Starter
Forum
Replies
Last Post