
How To - UK to JDM indicator/wiper combi switch. MY99 Classic


Thread Starter
Scooby Regular
Joined: Aug 2012
Posts: 423
Likes: 0
From: South Essex
Hey all.
This might be useful for anyone that has a UK car, but likes the JDM feel - or people who have other British oriented cars, and want to change their JDM switches to make their lives easier.
This job was done on a UK MY99 Classic wagon/ MY99 JDM STi donor car. Wagons have a rear wiper as do JDMs.
Either way, I got mine done in just under an hour on a very cold, but beautiful bright morning.
Boring stuff:
You perform these mods at your own risk - if in doubt it's good to do these OEM+ tasks with a mate about just to exchange ideas or support. Better still, any competent mechanic will treat this mod as simply replacing one switch and loom with another.
Please beware you are dealing with an explosive device (airbag).
What you need.
1. JDM / UK combination switch assembly for the year/era of your car. Please make sure you also get the full pigtail/loom that connects about 1 foot further down the steering column.
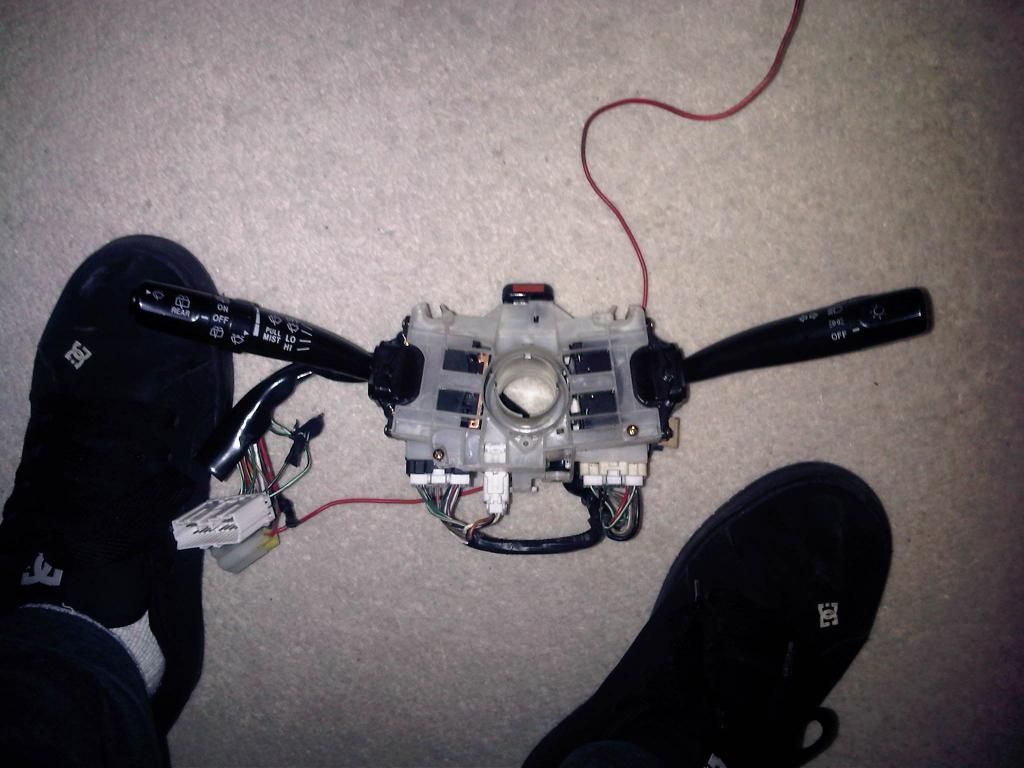
Looking at the wiring diagrams for most of the classics, the loom (2 x multiplugs) near the foot pedals are all the same, but differ slightly for the 3 multiplugs at the steering wheel. (wiper, lights and parking lights). The original multiplugs will fit in, but the pins are located differently so you will have to modify - UNLESS you do what I did and get the new switches with their corresponding loom - see pic).
2. T30 Torx bit
3. 10mm spanner / socket for battery
4. 17mm socket, extention and decent ratchet or better still a breaker bar. I used a ratchet and old fashioned park plug wrench as a lever.
5. Decent screw driver set.
6. cable ties
7. Assortment of tools/consumables for carrying out electrical work such as electrical tape etc.
8. You MIGHT* need a soldering iron (If your original loom has been tapped for the alarm/immobiliser at the UK dealership).
Prelude:
Keep the steering wheel dead straight, disconnect negative battery terminal, then Positive terminal. Press the foot brake for a few secs or turn the ignition key for a few secs to discharge any capacitors. People say turn on the headlights, but this is pointless on our car as they are dead without ignition. :P
Let's get started.
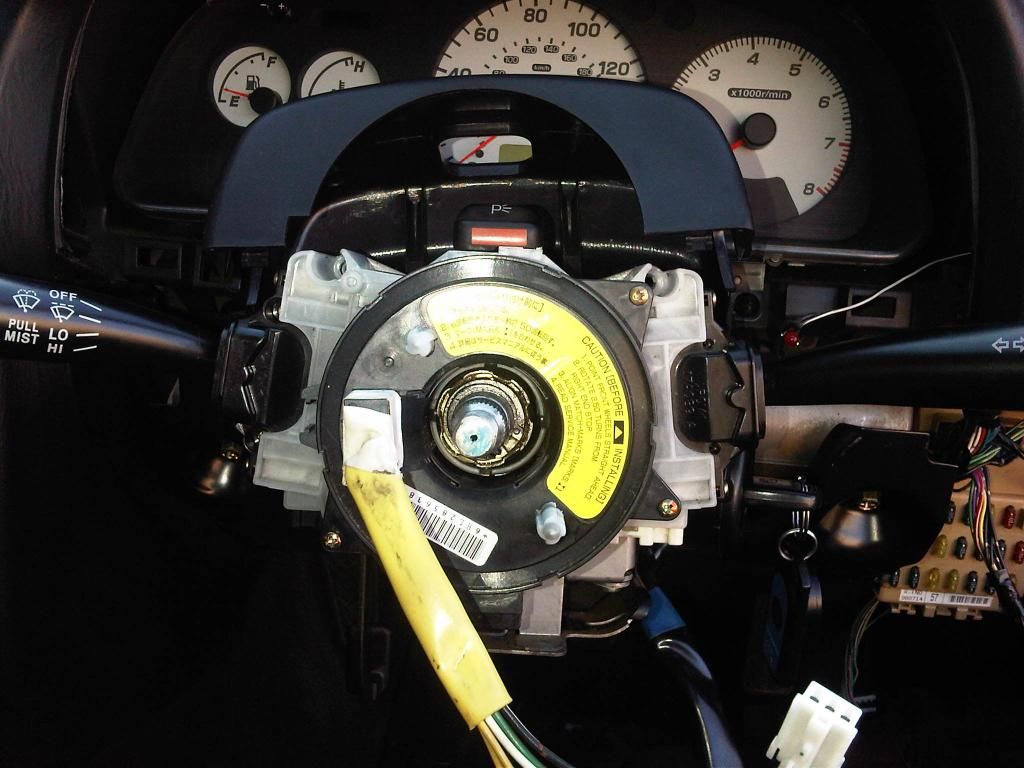
1. See how to remove the steering wheel for your car. On mine, the precautions were taken, then I undid the two T30 Torx screws either side of the steering wheel holding the airbag assembly in place. The screws will not come out completely as they are held captive inside.
2. Disconnect the yellow plug, and white plug and safely put the airbag away.
3. On the actual steering wheel where it fits onto the spline, use a marker or small screwdriver to etch mark lines of where they meet (similar to doing a cambelt). You will see what I mean when you get there....sorry I didnt take a pic.
4. Undo the 17mm nut, and unscrew but do NOT remove it completely. Wriggle the steering wheel at opposite ends until it works loose. It will be prevented from hitting you in the face by the nut you hopefully left in place. You can go ahead and remove the nut and steering wheel now. Place the nut in a tin, and steering wheel with the air bag.
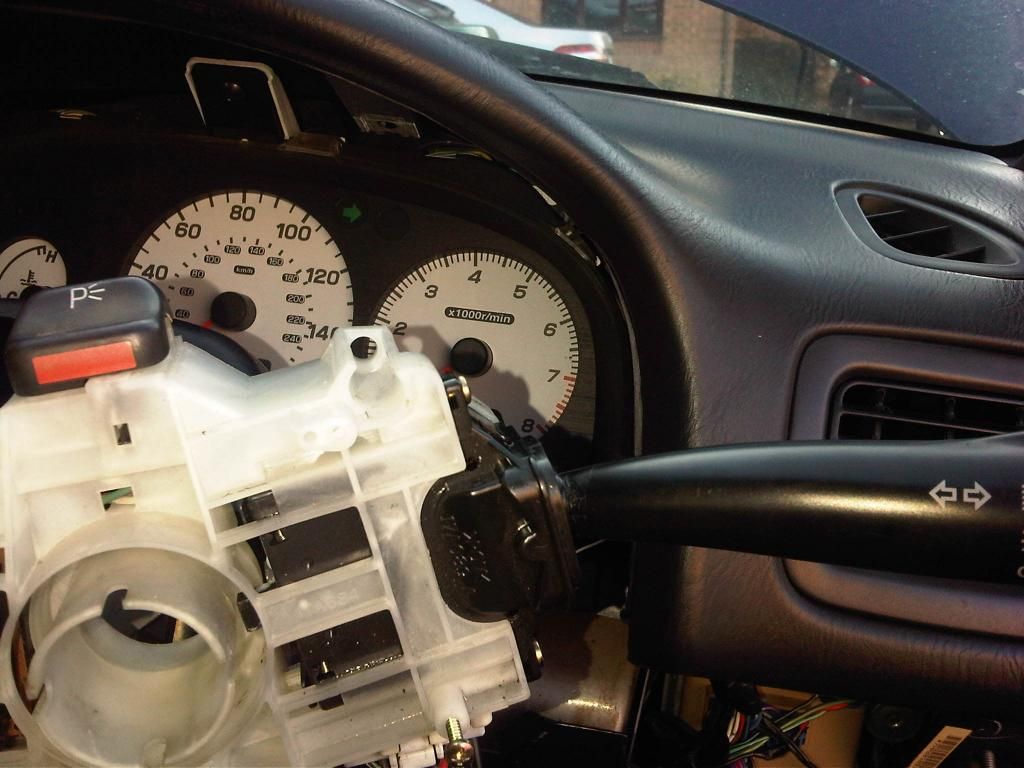
5. Undo 3 screws holding the steering column cowling, 2 screws holding the speedo surround and another 2 screws and one trim piece holding the plastic trim covering the fuse box area. Remove all trim from around there, put the screws in the tin as well, and trim pieces with the steering wheel.
6. Undo the 3 multiplugs from your existing combination switch assembly. There are 3 screws holding the assembly in place - 2 right in front of you and one at the bottom. Put these in the tin.

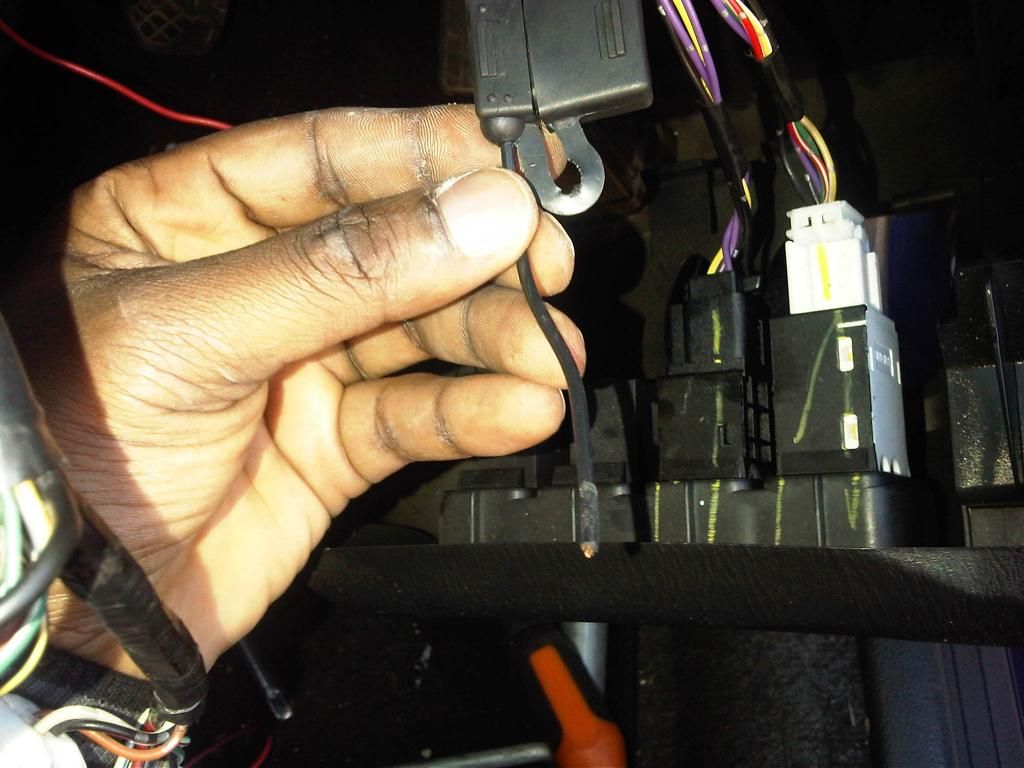
7. At this moment, I place the looms side by side. All colours are the same, plugs are the same, but as I mentioned earlier, the actual pins are located differently. If at this point you look and yours are similar, no need to unplug further down.
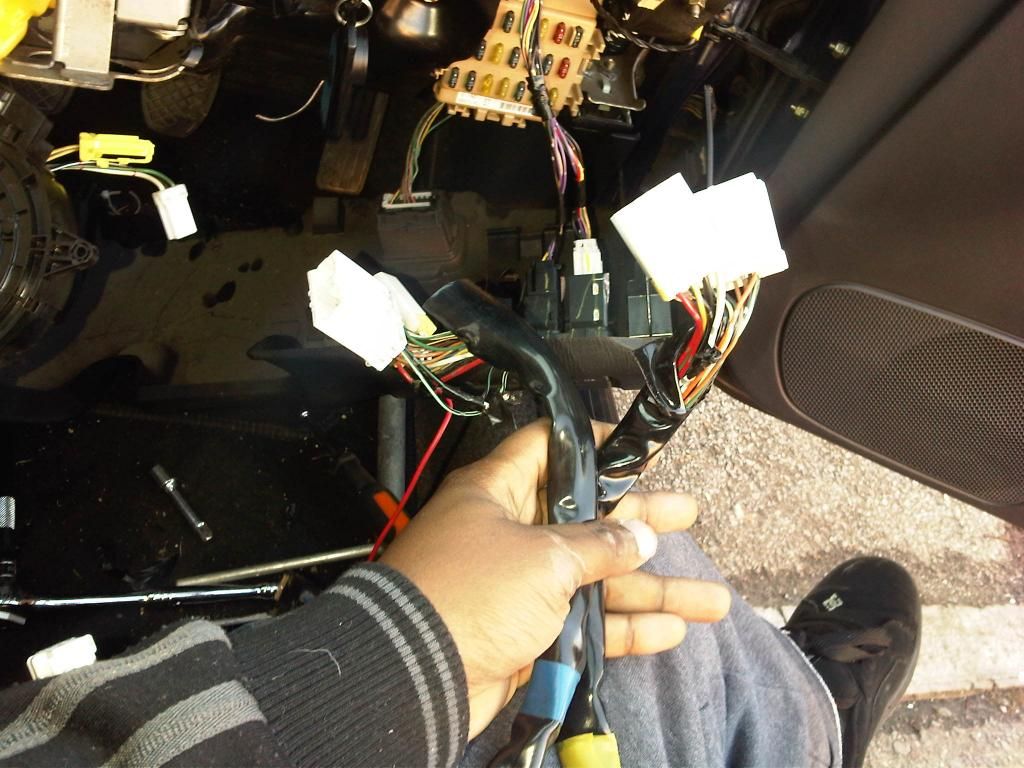
8. As you can see from the pic there are 2 sets of looms (JDM left side and UKDM right side). They are perfectly similar at that end where they plug into the car's main loom.
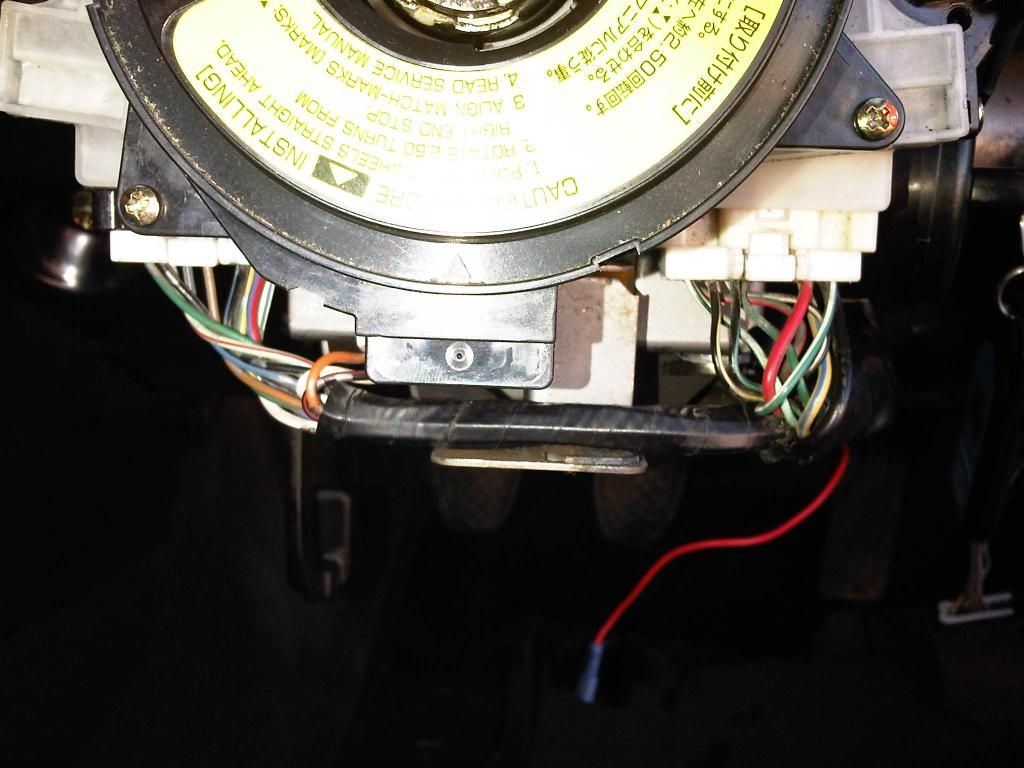
9. At this point, when removing to inspect, please be careful as your alarm installer will more than likely have tapped into the indicator circuits from there. If so, take note of the wires as you will need to replicate the work on the new loom.
It was like that on the JDM loom as it must have had a non factory alarm fitted, but my UK loom was untouched for indicators, but there was a power source for something else, so I soldered that back.
10. If you are happy that the multiplugs (2 that meet the car) are similar, then plug them in, connect the airbag (supported just as you will a brake caliper when changing brakes) so it is not dangling on the wire.
11. Connect the battery, positive first, negative second. Don't tighten the terminals, we are just checking if the switches work. By turning the ignition key (No need to start the engine), play with the switches to see if the work - lights, indicators, wiper etc.
12. Once you are satisfied they do, disconnect negative terminal, then positive, then airbag and put that back at the safe place.
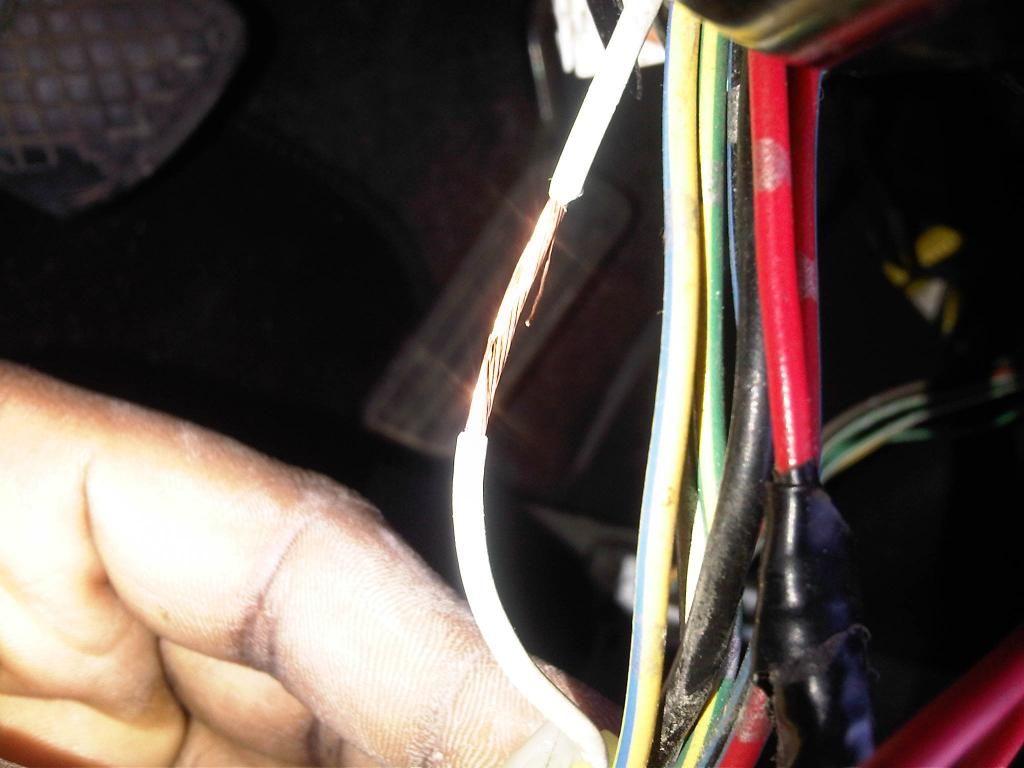
13. As you can see here, something was tapped into the old loom so I had to do the same to the new one.
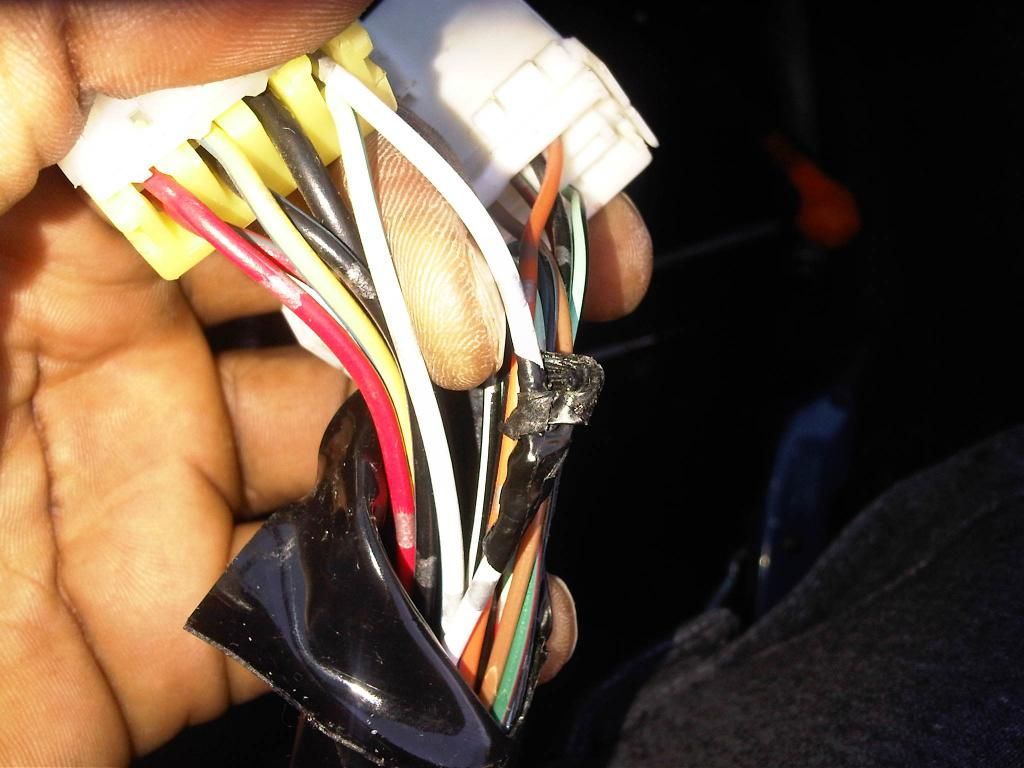
14. So I revealed some bare wire on the correct wire, and made an eye.
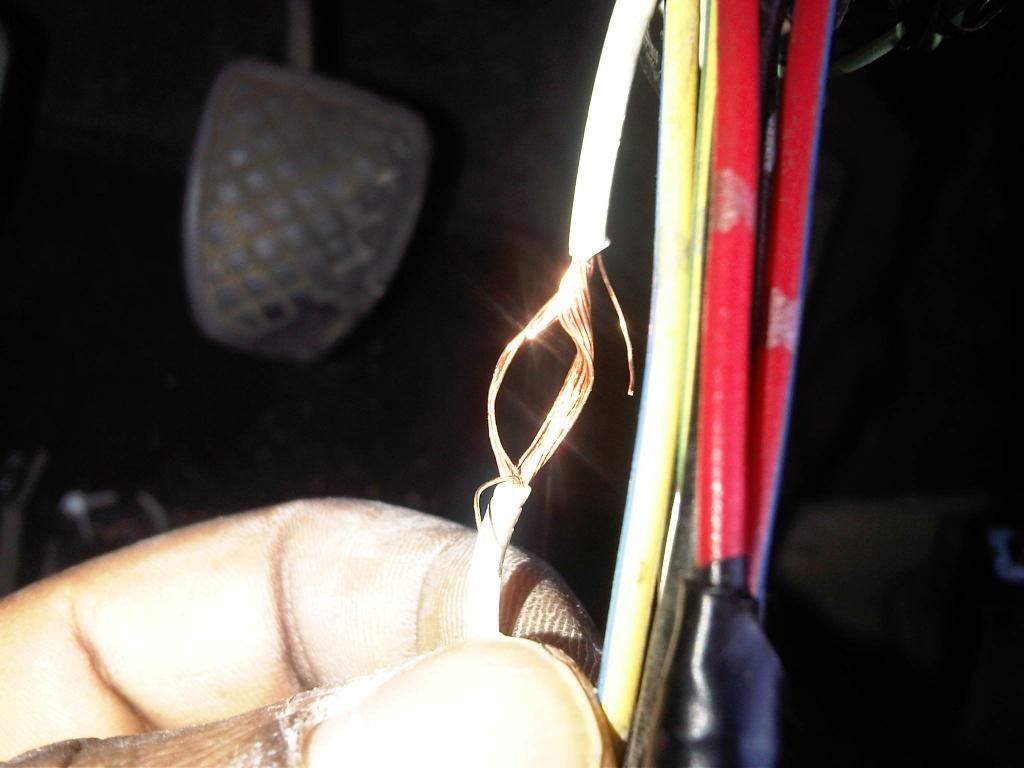
IF you are wondering what the eye is for, it is something I learnt on a wiring video. Its to put the new wire (the black one), twist for a more secure connection and solder away.
Please ignore the red wire dangling with the crimp connector at the end. It was on the donor loom so I can imagine that was a power source for its alarm. I cut that off.
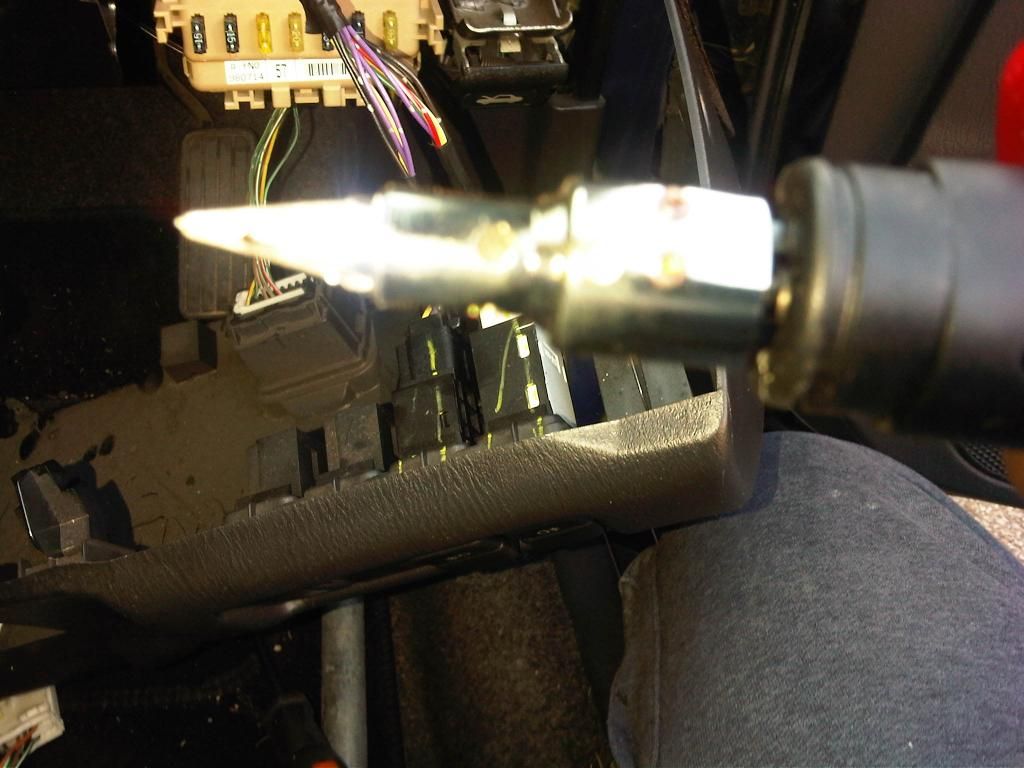
15. Hot hot hot
16. Put everything back together. Make sure the marks on the steering wheel/spline match.
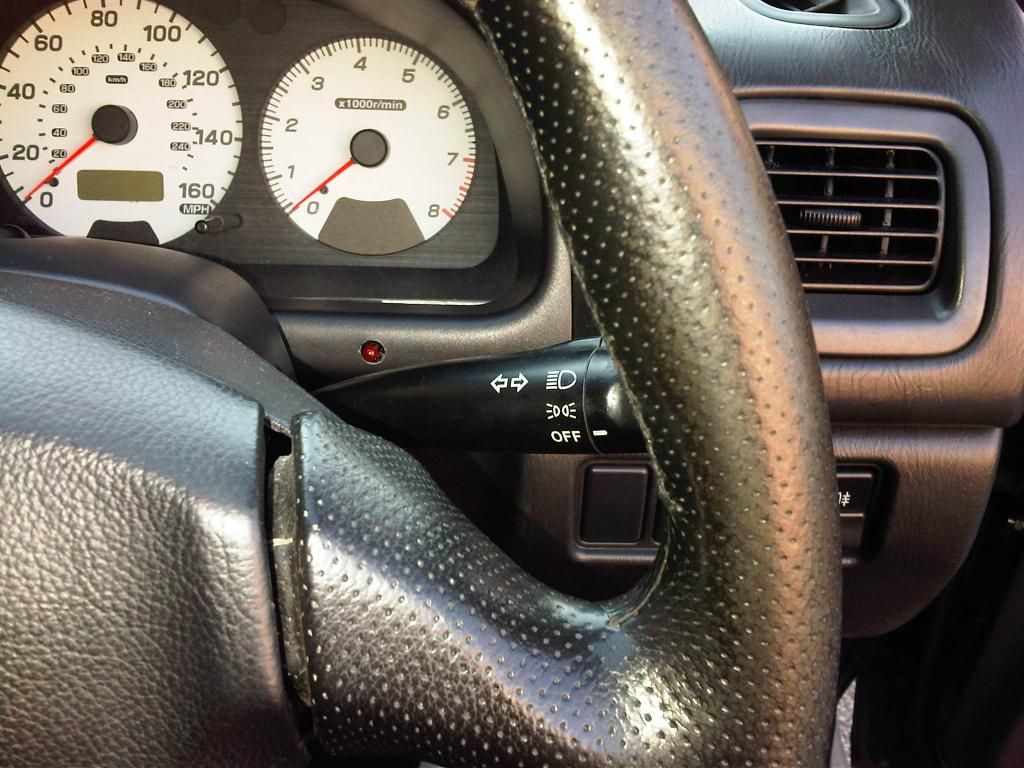
17. Re connect the 3 multi plugs.
18. Hey presto. All done. Put battery back together, tools away and go for a drive - just remember the switches have changed.
Now my Civic and Impreza are both similar. Hooray.
PS I'm sorry I missed some pictures or that the instructions are not very clear. It is a guide, but very simple once you have all the trim out of the way.
J
This might be useful for anyone that has a UK car, but likes the JDM feel - or people who have other British oriented cars, and want to change their JDM switches to make their lives easier.
This job was done on a UK MY99 Classic wagon/ MY99 JDM STi donor car. Wagons have a rear wiper as do JDMs.
Either way, I got mine done in just under an hour on a very cold, but beautiful bright morning.
Boring stuff:
You perform these mods at your own risk - if in doubt it's good to do these OEM+ tasks with a mate about just to exchange ideas or support. Better still, any competent mechanic will treat this mod as simply replacing one switch and loom with another.
Please beware you are dealing with an explosive device (airbag).
What you need.
1. JDM / UK combination switch assembly for the year/era of your car. Please make sure you also get the full pigtail/loom that connects about 1 foot further down the steering column.
Looking at the wiring diagrams for most of the classics, the loom (2 x multiplugs) near the foot pedals are all the same, but differ slightly for the 3 multiplugs at the steering wheel. (wiper, lights and parking lights). The original multiplugs will fit in, but the pins are located differently so you will have to modify - UNLESS you do what I did and get the new switches with their corresponding loom - see pic).
2. T30 Torx bit
3. 10mm spanner / socket for battery
4. 17mm socket, extention and decent ratchet or better still a breaker bar. I used a ratchet and old fashioned park plug wrench as a lever.
5. Decent screw driver set.
6. cable ties
7. Assortment of tools/consumables for carrying out electrical work such as electrical tape etc.
8. You MIGHT* need a soldering iron (If your original loom has been tapped for the alarm/immobiliser at the UK dealership).
Prelude:
Keep the steering wheel dead straight, disconnect negative battery terminal, then Positive terminal. Press the foot brake for a few secs or turn the ignition key for a few secs to discharge any capacitors. People say turn on the headlights, but this is pointless on our car as they are dead without ignition. :P
Let's get started.
1. See how to remove the steering wheel for your car. On mine, the precautions were taken, then I undid the two T30 Torx screws either side of the steering wheel holding the airbag assembly in place. The screws will not come out completely as they are held captive inside.
2. Disconnect the yellow plug, and white plug and safely put the airbag away.
3. On the actual steering wheel where it fits onto the spline, use a marker or small screwdriver to etch mark lines of where they meet (similar to doing a cambelt). You will see what I mean when you get there....sorry I didnt take a pic.
4. Undo the 17mm nut, and unscrew but do NOT remove it completely. Wriggle the steering wheel at opposite ends until it works loose. It will be prevented from hitting you in the face by the nut you hopefully left in place. You can go ahead and remove the nut and steering wheel now. Place the nut in a tin, and steering wheel with the air bag.
5. Undo 3 screws holding the steering column cowling, 2 screws holding the speedo surround and another 2 screws and one trim piece holding the plastic trim covering the fuse box area. Remove all trim from around there, put the screws in the tin as well, and trim pieces with the steering wheel.
6. Undo the 3 multiplugs from your existing combination switch assembly. There are 3 screws holding the assembly in place - 2 right in front of you and one at the bottom. Put these in the tin.
7. At this moment, I place the looms side by side. All colours are the same, plugs are the same, but as I mentioned earlier, the actual pins are located differently. If at this point you look and yours are similar, no need to unplug further down.
8. As you can see from the pic there are 2 sets of looms (JDM left side and UKDM right side). They are perfectly similar at that end where they plug into the car's main loom.
9. At this point, when removing to inspect, please be careful as your alarm installer will more than likely have tapped into the indicator circuits from there. If so, take note of the wires as you will need to replicate the work on the new loom.
It was like that on the JDM loom as it must have had a non factory alarm fitted, but my UK loom was untouched for indicators, but there was a power source for something else, so I soldered that back.
10. If you are happy that the multiplugs (2 that meet the car) are similar, then plug them in, connect the airbag (supported just as you will a brake caliper when changing brakes) so it is not dangling on the wire.
11. Connect the battery, positive first, negative second. Don't tighten the terminals, we are just checking if the switches work. By turning the ignition key (No need to start the engine), play with the switches to see if the work - lights, indicators, wiper etc.
12. Once you are satisfied they do, disconnect negative terminal, then positive, then airbag and put that back at the safe place.
13. As you can see here, something was tapped into the old loom so I had to do the same to the new one.
14. So I revealed some bare wire on the correct wire, and made an eye.
IF you are wondering what the eye is for, it is something I learnt on a wiring video. Its to put the new wire (the black one), twist for a more secure connection and solder away.
Please ignore the red wire dangling with the crimp connector at the end. It was on the donor loom so I can imagine that was a power source for its alarm. I cut that off.
15. Hot hot hot
16. Put everything back together. Make sure the marks on the steering wheel/spline match.
17. Re connect the 3 multi plugs.
18. Hey presto. All done. Put battery back together, tools away and go for a drive - just remember the switches have changed.
Now my Civic and Impreza are both similar. Hooray.
PS I'm sorry I missed some pictures or that the instructions are not very clear. It is a guide, but very simple once you have all the trim out of the way.
J


Thread
Thread Starter
Forum
Replies
Last Post
IanG1983
Interior
2
Feb 22, 2016 09:16 PM
Carl Davey
Interior
10
Apr 5, 2007 03:30 PM