

porting headers ?


Scooby Regular
Joined: May 2007
Posts: 364
Likes: 0
From: Hayes,Middlesex
Hi mate
just done mine i believe it gives you better spool-up for the turbo thus extra power i would presume about 10%.
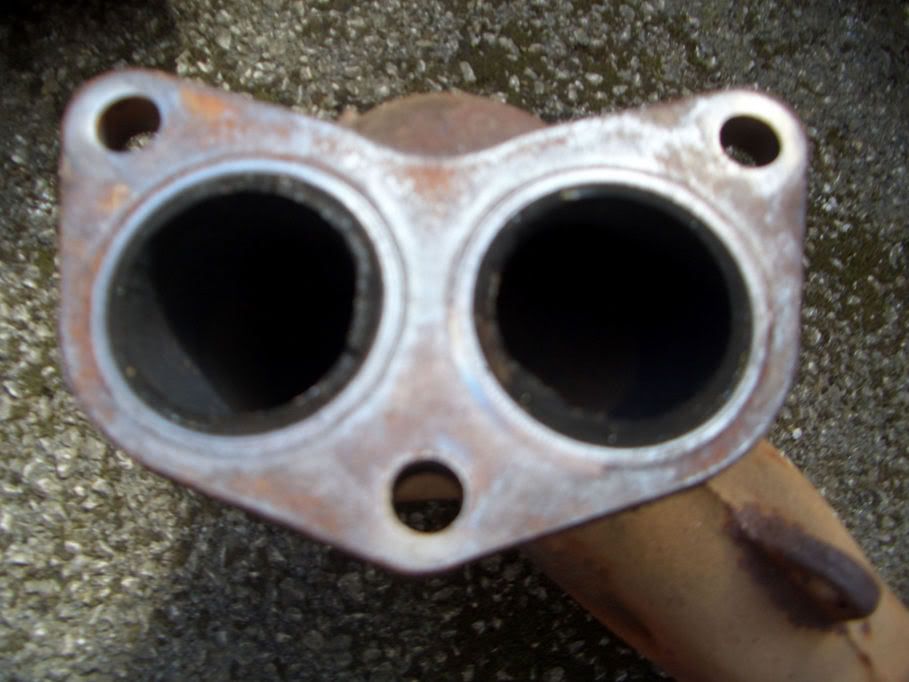
I was explained that when taking off the headers get two new gaskets and on the flange of the headers you will see a soot ring from where the gasket finishes and the header in intruding into the port this is what needs to be ground out getting rid of the soot ring i used a hand drill with 2 packs of grinding bits from halfrauds do this and and job done takes about 4 hours roughly
good luck
john
just done mine i believe it gives you better spool-up for the turbo thus extra power i would presume about 10%.
I was explained that when taking off the headers get two new gaskets and on the flange of the headers you will see a soot ring from where the gasket finishes and the header in intruding into the port this is what needs to be ground out getting rid of the soot ring i used a hand drill with 2 packs of grinding bits from halfrauds do this and and job done takes about 4 hours roughly
good luck
john


Scooby Regular
Joined: Mar 2008
Posts: 691
Likes: 0
From: chelmsford essex
Hi mate
just done mine i believe it gives you better spool-up for the turbo thus extra power i would presume about 10%.
I was explained that when taking off the headers get two new gaskets and on the flange of the headers you will see a soot ring from where the gasket finishes and the header in intruding into the port this is what needs to be ground out getting rid of the soot ring i used a hand drill with 2 packs of grinding bits from halfrauds do this and and job done takes about 4 hours roughly
good luck
john


Trending Topics

Scooby Regular
Joined: Oct 2007
Posts: 209
Likes: 0
From: Waltham Cross
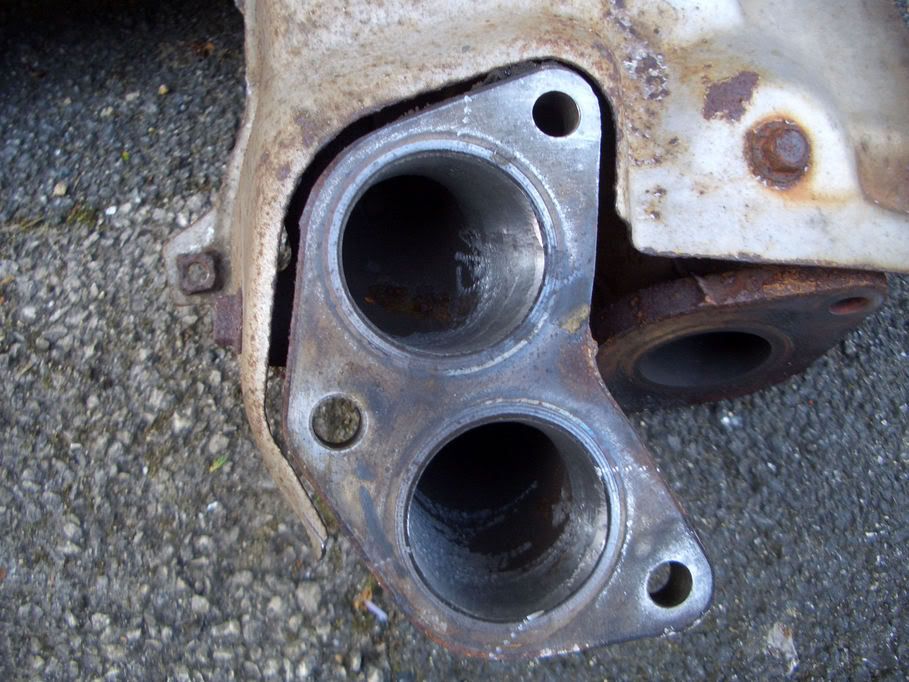
Just ported a spare set for mine two weeks back and was quiet easy, just time consuming. Took me six hours and broke the mainifold into three sections and matched them to the gaskets. I used a dremmel and carbides for main bulk of metal removal and then on to sanding stones to smooth. Once id done this, used a power drill and flap wheels for a smooth finish

When I port OE headers this is what I do.
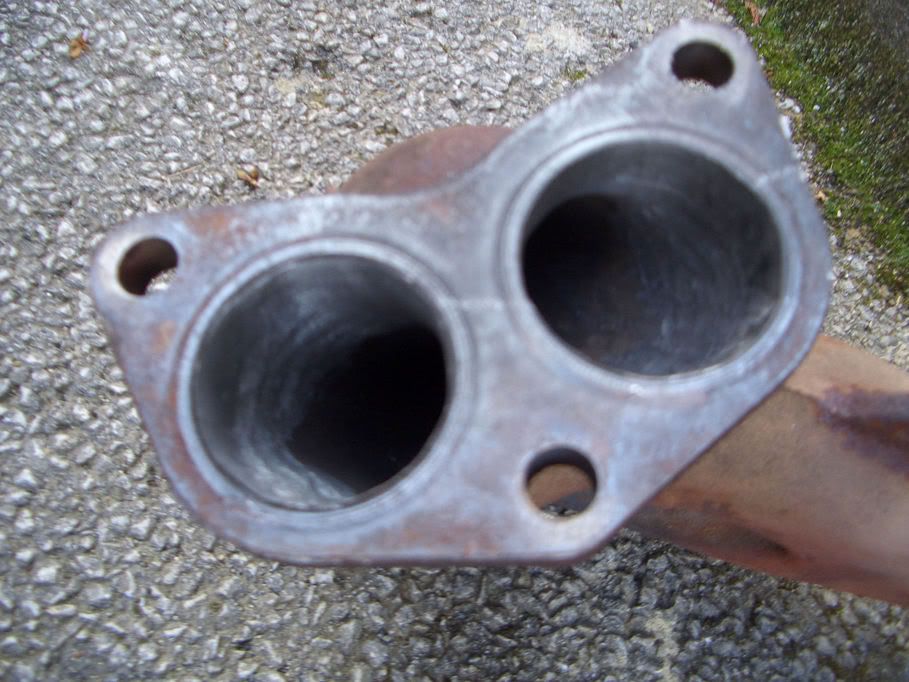
Port the inlets to within 1-2mm of where the gasket sits. This combined with the work mentioned next improves flow and creates an anti reversion lip that reduces the exhaust pulses from the other cylinders from sending gases back up in to exhaust port of the head.
I never port the exit of any piece of the headers, only remove casting marks and the casting buttons.
I port the cross pipe to give a nice smooth entry and then remove any welds that are causing obstructions from its exit
The best way of doing this is by using a die grinder with various tungsten carbide bits powered by a decent size compressor.
Takes me 4 hours to do a set, including removing the heat shield lugs prior to wrapping.
Some pics here
Index of /Scooby Pics/Headers/NewPorted
Wayne.
Edited: Trying to find out if the above is true. Harvey has pointed out that this may not be the case. Due to his expertise on this area I am inclined to agree with his opinion.
Let me know if you want just that piece.
Wayne.
Last edited by Welloilbeefhooked; Apr 21, 2008 at 03:50 PM.


Wayne : I think the earlier "bulbous" headers flow better than the later design but have not had a set flow bench tested to confirm this. I think the design was changed to simplyfy production methods and not for performance gains. I plan to bench test a set soon.
Just chamferring the flanges is unlikely to have any signifigant effect. Do NOT open out the headers to the soot marks as that will detract from the potential performance gain. You need to get deep down into the header and the objective is to accelerate gas all the way from the exhaust valve to the exhaust turbine wheel.
Just chamferring the flanges is unlikely to have any signifigant effect. Do NOT open out the headers to the soot marks as that will detract from the potential performance gain. You need to get deep down into the header and the objective is to accelerate gas all the way from the exhaust valve to the exhaust turbine wheel.
Harvey,
Interesting stuff regarding the older header design. I have a few sets of both at the moment and will be looking to see which are better too. I have no flow bench to test them on but would welcome any info from your testing.
I can't for the life of me remember which thread had the info about the porting and flow of the older versions, but it did state not to go for the older type due to restrictions. I think it was a post by Pat on 22b.com. I will edit this when I get told off for quoting crap!!
I stopped porting out to the gasket line on the sets I have been doing. I take it to close to the gasket line but leave about 1-2mm gap. I now have a set of templates which match my heads. I use these to mark the headers and then grind a little past that line before doing the rest of the work. I'm getting quite good at the tapering and finishing off of the internal surfaces.
Would I be right in thinking that the overall bore size of the headers does not need increasing?
Wayne.

Thread
Thread Starter
Forum
Replies
Last Post
Mattybr5@MB Developments
Full Cars Breaking For Spares
28
Dec 28, 2015 11:07 PM
Mattybr5@MB Developments
Full Cars Breaking For Spares
12
Nov 18, 2015 07:03 AM