more engine removal - 2 nuts on bellhousing

 04 August 2011, 08:16 PM
#34
Scooby Regular
Thread Starter

Join Date: Mar 2011
Posts: 546
Likes: 0
Received 0 Likes
on
0 Posts
more fun and games folks....
Firstly, thanks very very much to all who have given advice so far!
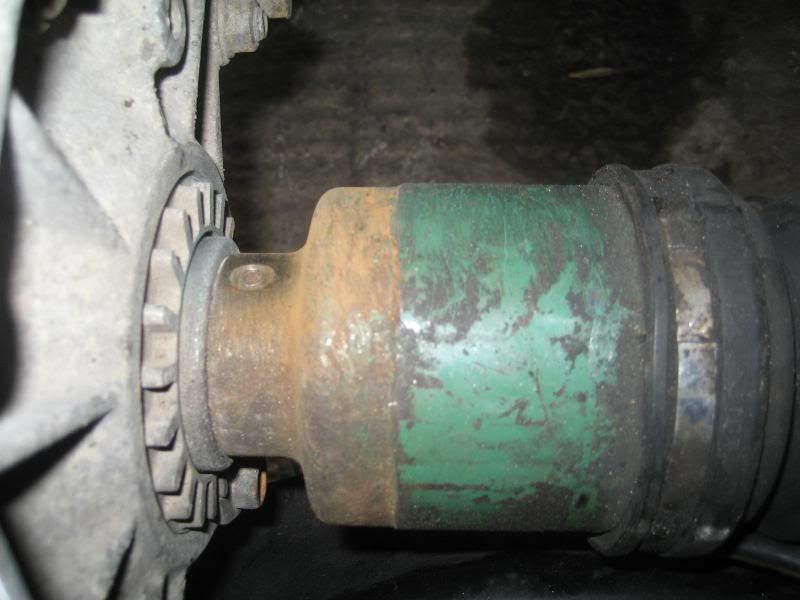
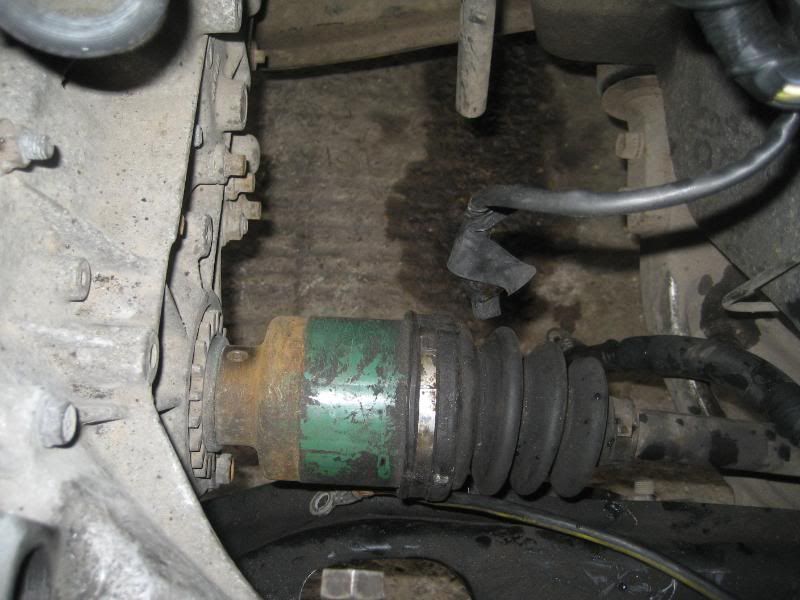
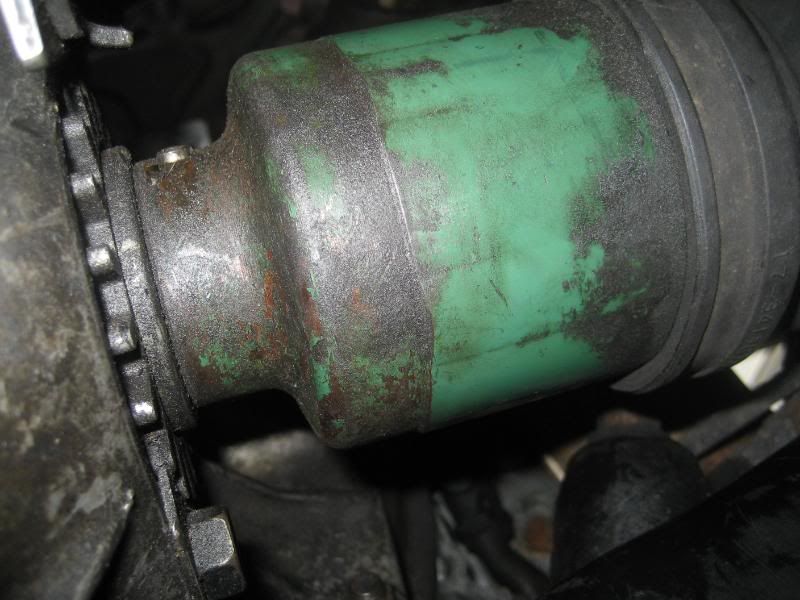
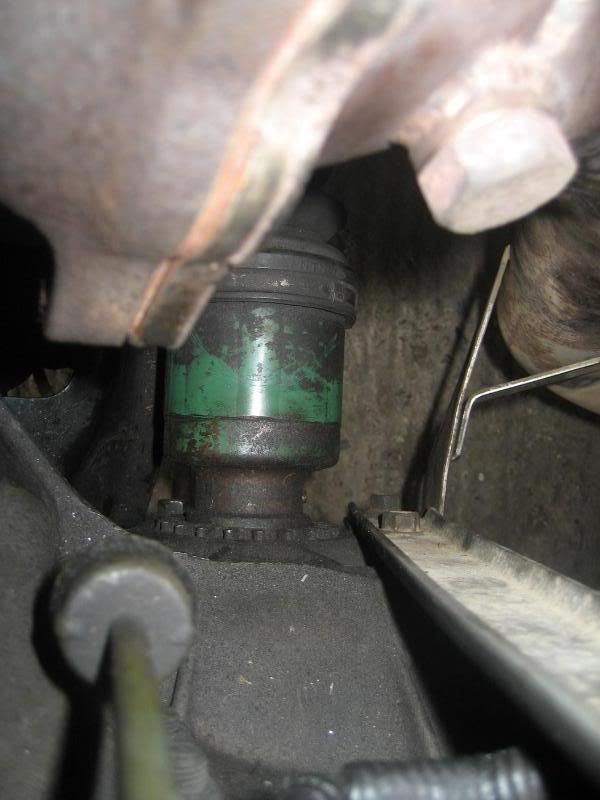
UNortunately, having had a bit of a look under and over the driveshafts I'm still left confused.. I can see what looks like a pin in each shaft but am not sure if these are the ones to come out as they're not under the gaiter. I've given the passenegr side one a couple of experimental taps with the assistance of a hammer and nail and it doesn't seem keen to move!
I reckon these are the right pins to get rid of, as if there's anything under the gaiters (which I can't get the clips off of - any ideas?) then the big green bit of shaft (UJ?) would still be in the way...
anyway, here are some pics.. as ever, all advice gratefully received!
I'll get there in the end!

cheers,
Mark.
Firstly, thanks very very much to all who have given advice so far!
UNortunately, having had a bit of a look under and over the driveshafts I'm still left confused.. I can see what looks like a pin in each shaft but am not sure if these are the ones to come out as they're not under the gaiter. I've given the passenegr side one a couple of experimental taps with the assistance of a hammer and nail and it doesn't seem keen to move!
I reckon these are the right pins to get rid of, as if there's anything under the gaiters (which I can't get the clips off of - any ideas?) then the big green bit of shaft (UJ?) would still be in the way...
anyway, here are some pics.. as ever, all advice gratefully received!
I'll get there in the end!
cheers,
Mark.
04 August 2011, 08:30 PM
#35
Scooby Regular
That is the right pin that needs to be removed but can be a pain to get out. but patience is a virtue lol. as for "the big green bit " that will come away with it all once the pin in removed so should no longer be in way and you should be able to gain better access to the bell housing. Hope this helps mate
05 August 2011, 10:17 AM
#37
Scooby Regular
Thread Starter
Join Date: Mar 2011
Posts: 546
Likes: 0
Received 0 Likes
on
0 Posts
Nice one. thanks folks.
Already have an extensive punch collection as my old man used to be a hand engraver...
Looks like the mission is a go for Sunday morning then!
Already have an extensive punch collection as my old man used to be a hand engraver...
Looks like the mission is a go for Sunday morning then!
06 August 2011, 09:41 PM
#38
Scooby Regular
iTrader: (6)

Join Date: Feb 2011
Location: oxford
Posts: 422
Likes: 0
Received 0 Likes
on
0 Posts
When u remove the pin make sure u are tapping the correct side because they only go in on way i made that mistake when i was tapping my pin back in pretty sure u need a 5mm punch should tap it right through
07 August 2011, 04:05 PM
#39
Scooby Regular
Thread Starter
Join Date: Mar 2011
Posts: 546
Likes: 0
Received 0 Likes
on
0 Posts
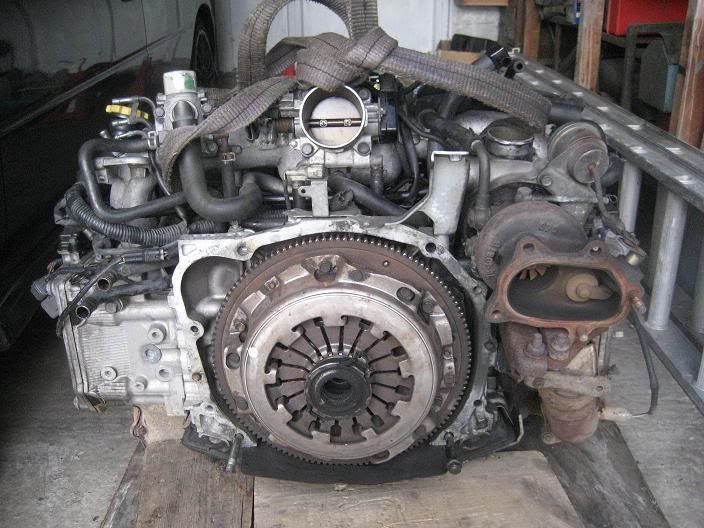
SUCCESS!!!!!!!
Thanks for all the advice/help folks... finally got the engine out today.
Mullered the green bits on the driveshafts trying to pop them out but got there in the end! I reckon i'll be able to sort them out again with a bit of gentle persuasion...
the problematic nut was a different story though. Managed to get one off with an impact socket, once i had freed up the access by removing the driveshaft, but the other one persisted in being a nightmare. Thankfully my mate Dave (also my new hero!) was around with his van and offered to help. we tried everything.. breaker bar, chisel, hammering on a smaller socket, and eventually gave up and he got his air chisel out. tried using it to turn the nut to no avail so we decided to chisel the end of the stud off with the nut and then replace the stud later. fortunately, while he was going at it, the nut started to turn and we got it off. As you can see from the pics, it's a bit manky to say the least.
Also finally got some decent pics of my turbo, but still am none the wiser as to which one it is... and have discovered what appears to be a leaking cam cover gasket, which will get sorted while the lump's out.
Now... on to the main event... just got to get the remains of the bolt out of the block (fifth pic).... currently thinking an easy out or similar is the best bet, unless anyone else has any ideas?
ruined nut:


Broken bolt:

turbo:


leak:

WINNING!!!!

One further discovery was made today, which i'm concerned abotu to say the least - the big black box in the air intake pipe has a dirty great hole in it which it looks like someone's tried to bodge up with electrical tape. assuming that the MAF is the first black box with FLOW-> written on it, then I can only see this as being extremely bad indeed as it must have been letting unmetered air into the engine.
Thanks for all the advice/help folks... finally got the engine out today.
Mullered the green bits on the driveshafts trying to pop them out but got there in the end! I reckon i'll be able to sort them out again with a bit of gentle persuasion...
the problematic nut was a different story though. Managed to get one off with an impact socket, once i had freed up the access by removing the driveshaft, but the other one persisted in being a nightmare. Thankfully my mate Dave (also my new hero!) was around with his van and offered to help. we tried everything.. breaker bar, chisel, hammering on a smaller socket, and eventually gave up and he got his air chisel out. tried using it to turn the nut to no avail so we decided to chisel the end of the stud off with the nut and then replace the stud later. fortunately, while he was going at it, the nut started to turn and we got it off. As you can see from the pics, it's a bit manky to say the least.
Also finally got some decent pics of my turbo, but still am none the wiser as to which one it is... and have discovered what appears to be a leaking cam cover gasket, which will get sorted while the lump's out.
Now... on to the main event... just got to get the remains of the bolt out of the block (fifth pic).... currently thinking an easy out or similar is the best bet, unless anyone else has any ideas?
ruined nut:
Broken bolt:
turbo:
leak:
WINNING!!!!
One further discovery was made today, which i'm concerned abotu to say the least - the big black box in the air intake pipe has a dirty great hole in it which it looks like someone's tried to bodge up with electrical tape. assuming that the MAF is the first black box with FLOW-> written on it, then I can only see this as being extremely bad indeed as it must have been letting unmetered air into the engine.
Last edited by markb_s1; 07 August 2011 at 04:10 PM.
08 August 2011, 05:36 PM
#41
Scooby Regular

Join Date: Feb 2011
Location: Tamworth
Posts: 68
Likes: 0
Received 0 Likes
on
0 Posts
where abouts are you mate, if your not to far away from me perhaps i could come give you a hand when chucking it back in, i've done a few of these fellas now, offers there jays
10 August 2011, 08:06 PM
#43
Scooby Split Ltd
iTrader: (49)

Join Date: Feb 2010
Location: Cheshire
Posts: 623
Likes: 0
Received 0 Likes
on
0 Posts
Mark
You can get a rocker gasket from a motor factors, although last time I got one they only listed one side think it was about �7. You need to check the bolt seals and the centre gaskets around the spark plug holes as well, and the half moons at the back of the head. Leaks can spring from them all.
Easy out would seem the obvious thing for the bolt stub.
The black box I think you mean is the resonator.
Nuts will be on their way tomorrow. Good luck.
Ken
You can get a rocker gasket from a motor factors, although last time I got one they only listed one side
think it was about �7. You need to check the bolt seals and the centre gaskets around the spark plug holes as well, and the half moons at the back of the head. Leaks can spring from them all.Easy out would seem the obvious thing for the bolt stub.
The black box I think you mean is the resonator.
Nuts will be on their way tomorrow. Good luck.
Ken
10 August 2011, 08:11 PM
#44
Scooby Split Ltd
iTrader: (49)
Join Date: Feb 2010
Location: Cheshire
Posts: 623
Likes: 0
Received 0 Likes
on
0 Posts
In your 2nd picture of the turbo, the one of the compressor side, you will see some writing in the centre on the turbo. That will tell you what turbo it is, TD05H or TD04.
Having looked at your picture of the leak I would check the lower half moon seal, could be that. They tend to perish, go brittle, crack and leak.
Having looked at your picture of the leak I would check the lower half moon seal, could be that. They tend to perish, go brittle, crack and leak.
11 August 2011, 08:53 AM
#45
Scooby Regular
Thread Starter
Join Date: Mar 2011
Posts: 546
Likes: 0
Received 0 Likes
on
0 Posts
Thanks a lot Ken. You've been a great help throughout this!
Will get myself an appropriately sized easy out and give that a go.
I'll have a word at my local motor factors re the gasket(s). I'm thinking if i'm going to take it to pieces i might as well do the lot!
I'm pretty suse the black box is the resonator. Presumably this definitely shouldn't have a hole in, and any air entering via there won't be metered and will lean out the mixture?
11 August 2011, 10:18 AM
#46
Scooby Split Ltd
iTrader: (49)
Join Date: Feb 2010
Location: Cheshire
Posts: 623
Likes: 0
Received 0 Likes
on
0 Posts
Resonator box should have just the holes on each side where it fits to the intake pipework plus a nipple for the pipe from the bottom of the boost solenoid to connect to, and the breather connector. Any air it sucks in that is not going through the maf is not going to be accounted for by the ecu so will cause the mixture to be incorrect, most probably lean like you say.
11 August 2011, 10:19 AM
#47
Scooby Regular
Thread Starter
Join Date: Mar 2011
Posts: 546
Likes: 0
Received 0 Likes
on
0 Posts
Thought so.
sounds like the best bet is to get shot of it if it won't cause any ill effects.
I suspect the hole is where the nipple used to be. boost solenoid seemed to be connected correctly from what I know - one port ot compressor side of turbo, one port to atmosphere and one port to actuator.
sounds like the best bet is to get shot of it if it won't cause any ill effects.
I suspect the hole is where the nipple used to be. boost solenoid seemed to be connected correctly from what I know - one port ot compressor side of turbo, one port to atmosphere and one port to actuator.

Thread
Thread Starter
Forum
Replies
Last Post
shorty87
Full Cars Breaking For Spares
19
22 December 2015 11:59 AM