
Project 500


Done 1k miles now so running in is all but done. Justneed a few jobs finishing - moving the coil pack away from the fpr, finish the coil air feed for the induction and sort the geo out.
I have sorted a few bits in the mean time......I have been chasing my tail a bit with the brake issue I have. I think I have finally tracked the fault as a worn bearing thanks to advice from Paul@zen.
I have swapped the drivers side front hub but as is always the case this one was fine and its the passenger side that is the issue. Just waiting on
one being delivered.
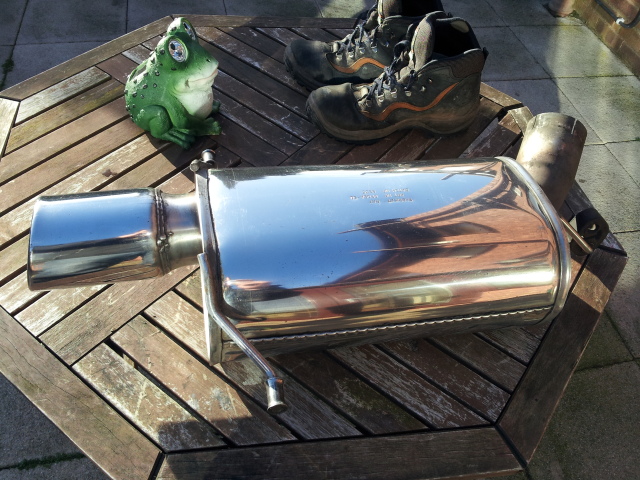
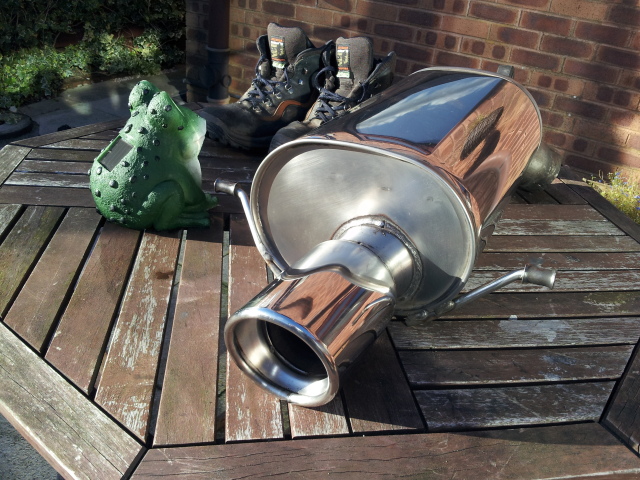
To keep the neighbours happy and ensure I don't have a problem with noise regs at track days I have swapped the h&a cat back system for a revolution one. I'm not keen on the sound of the revolution one so far -to raspy for my liking but it is much quieter.
This was when I got it

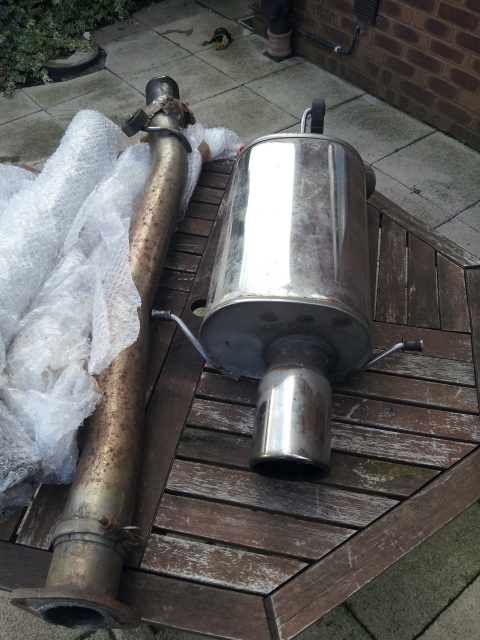
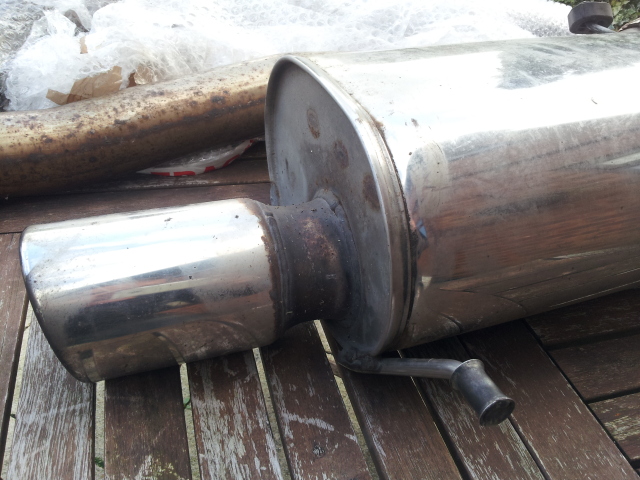
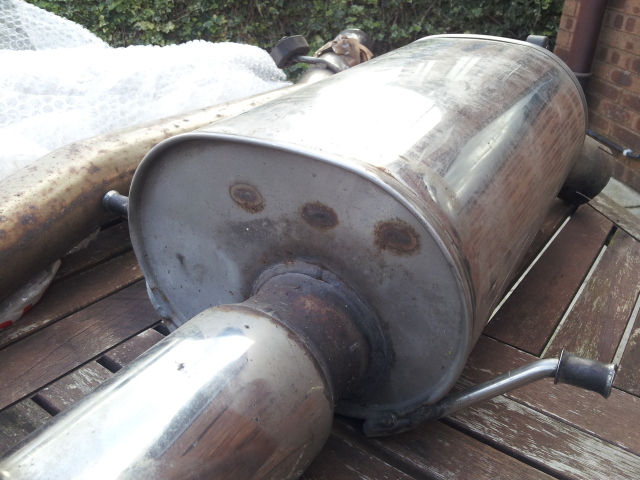
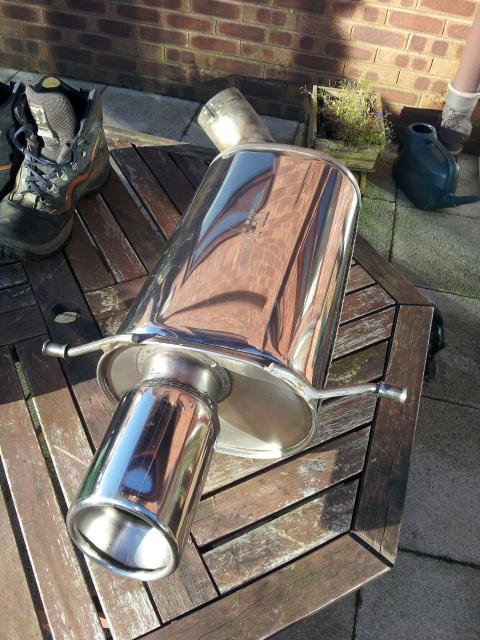
And after a bit of a tickle with some brasso
As the geo hadn't been touched since putting the car together it is obviously a little off. This is evident from the uneven wear on the front tyres. they are bald on the outside but loads of tread left elsewhere. Due to this I have bought a set of 18's with nearly new tyres and I silk keep the 17's for track days.the wheels are genuine prodrive pff7's. They are not really what I wanted but will do for now.
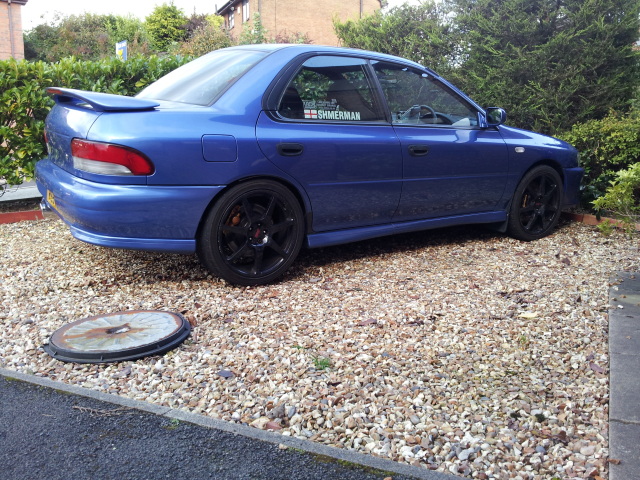
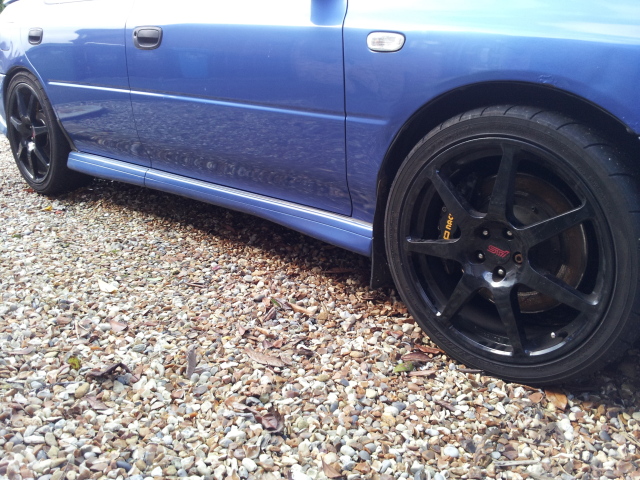
I'm going to find somewhere to set the geo up on the car as a priority as I can't afford to ruin another set of tyres.
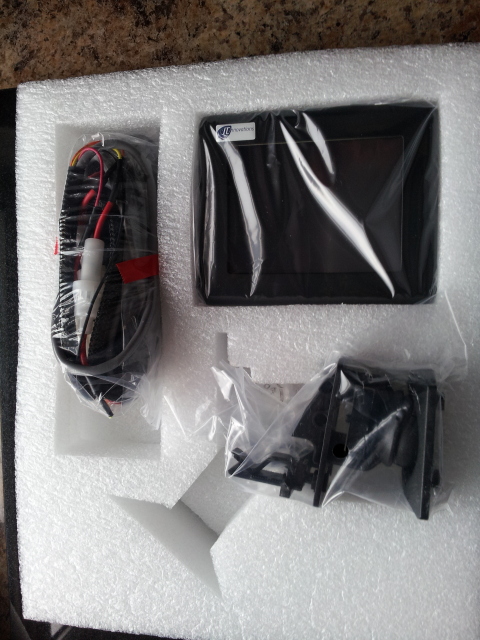
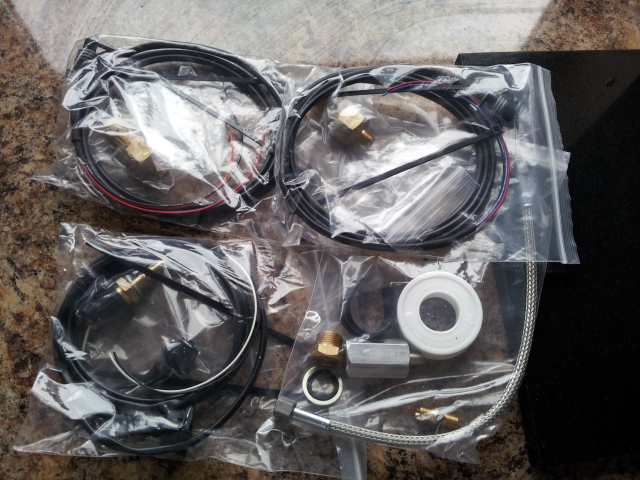
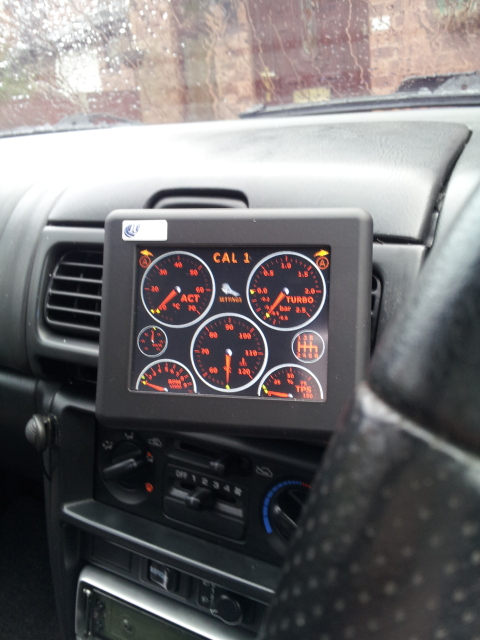
received my toucan and sensors from Tim @ jt innovations. I will soon be removing the defi gauges and replacing them with this.
I have sorted a few bits in the mean time......I have been chasing my tail a bit with the brake issue I have. I think I have finally tracked the fault as a worn bearing thanks to advice from Paul@zen.
I have swapped the drivers side front hub but as is always the case this one was fine and its the passenger side that is the issue. Just waiting on
one being delivered.
To keep the neighbours happy and ensure I don't have a problem with noise regs at track days I have swapped the h&a cat back system for a revolution one. I'm not keen on the sound of the revolution one so far -to raspy for my liking but it is much quieter.
This was when I got it
And after a bit of a tickle with some brasso
As the geo hadn't been touched since putting the car together it is obviously a little off. This is evident from the uneven wear on the front tyres. they are bald on the outside but loads of tread left elsewhere. Due to this I have bought a set of 18's with nearly new tyres and I silk keep the 17's for track days.the wheels are genuine prodrive pff7's. They are not really what I wanted but will do for now.
I'm going to find somewhere to set the geo up on the car as a priority as I can't afford to ruin another set of tyres.
received my toucan and sensors from Tim @ jt innovations. I will soon be removing the defi gauges and replacing them with this.
Last edited by Shmerman; Oct 6, 2012 at 01:55 PM.
I have been chasing a fault on my car. Basically whenever I brake I get a shaking of the steering wheel, accosted vibration thought the cabin and a pulsing brake pedal increasing inline with speed.
after having the front brake discs skimmed the problem persisted. However I was now left with brake discs that were well below their wear limit.
I after some advice I sourced second hand osf hub. This made no difference. I then bought a secondhand nsf hub (that came with another osf hub and 2 front drive shafts) but this was in slot worse condition than the one that was on the car.I could feel and hear the bearing was not in great condition just from turning the hub in my hand.
against my better judgement I decided to fit it to see what difference it made. It was a pig to fit as the bottom ball joint was seized in the knuckle so I had a fight to remove it. Then all the bolt holding the heat/dust shied had seized so just rounded off and had to be cut off. The bearing was still noisy and hadn't made difference otherwise.
I decided take the car of the road until I could get to the bottom of the problem.
I had the old hub assemblies checked over and it seems they may be to blame.
I refitted my original nsf hub as I know for sure that the bearing is goosed in that one.
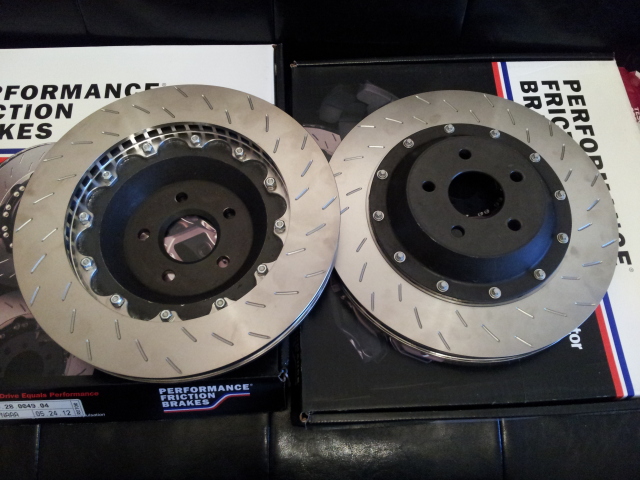
As a last ditch attempt to rule the brakes out and to get them back into operating spec, I got a new set of rotors and genuine AP bolt kit.

I had a quote for 2 new hubs and 2 new bearings.......ouch.
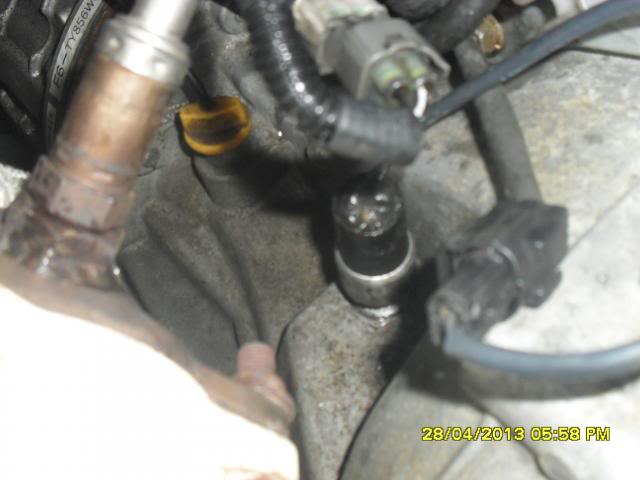
Asia have now removed the defi gauges but have still yet to upgrade the simtek my only reference for oil pressure is the OEM pressure switch which I have fitted ( second hand). Unfortunately its not working. I bought a genuine oem one but still no joy. The bulb works as I have tested it. Something else to sort out while the ecu is away being upgraded.
after having the front brake discs skimmed the problem persisted. However I was now left with brake discs that were well below their wear limit.
I after some advice I sourced second hand osf hub. This made no difference. I then bought a secondhand nsf hub (that came with another osf hub and 2 front drive shafts) but this was in slot worse condition than the one that was on the car.I could feel and hear the bearing was not in great condition just from turning the hub in my hand.
against my better judgement I decided to fit it to see what difference it made. It was a pig to fit as the bottom ball joint was seized in the knuckle so I had a fight to remove it. Then all the bolt holding the heat/dust shied had seized so just rounded off and had to be cut off. The bearing was still noisy and hadn't made difference otherwise.
I decided take the car of the road until I could get to the bottom of the problem.
I had the old hub assemblies checked over and it seems they may be to blame.
I refitted my original nsf hub as I know for sure that the bearing is goosed in that one.
As a last ditch attempt to rule the brakes out and to get them back into operating spec, I got a new set of rotors and genuine AP bolt kit.
I had a quote for 2 new hubs and 2 new bearings.......ouch.
Asia have now removed the defi gauges but have still yet to upgrade the simtek my only reference for oil pressure is the OEM pressure switch which I have fitted ( second hand). Unfortunately its not working. I bought a genuine oem one but still no joy. The bulb works as I have tested it. Something else to sort out while the ecu is away being upgraded.


Time for an update.
I but the new exhaust on and it has made a huge difference. The in cabin noise is now much lower. The exhaust note now has a rasp to it when the throttle is applied. Its not really to my liking but keeps the neighbours happy and I won't have any problems passing any noise regs.
I did a short video to compare the H&S with the revolution system.
Its here if you are interested. I miss the H&S
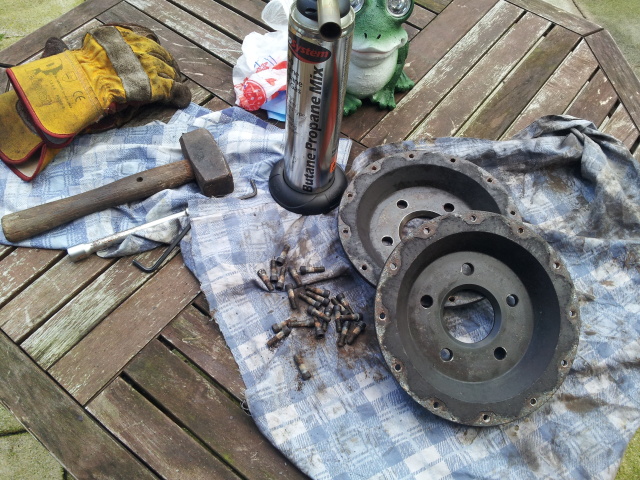
I stripped the old brake rotors, this was a bit of a challange as the old bolts were a pig to remove. Lots of renetrating oil and heat was the key.
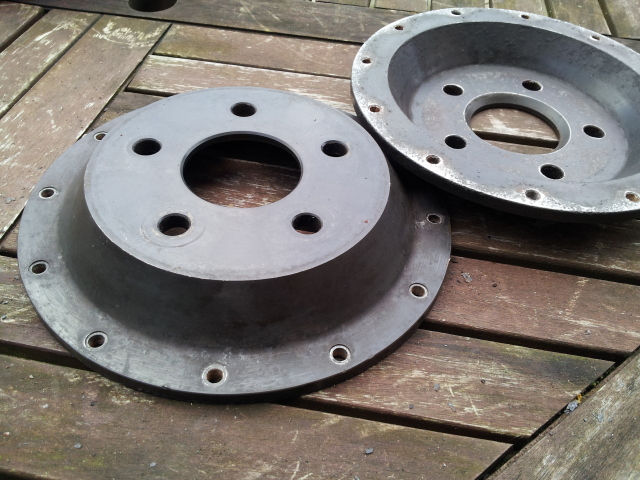
After cleaning the bells up I fitted the new rotors.
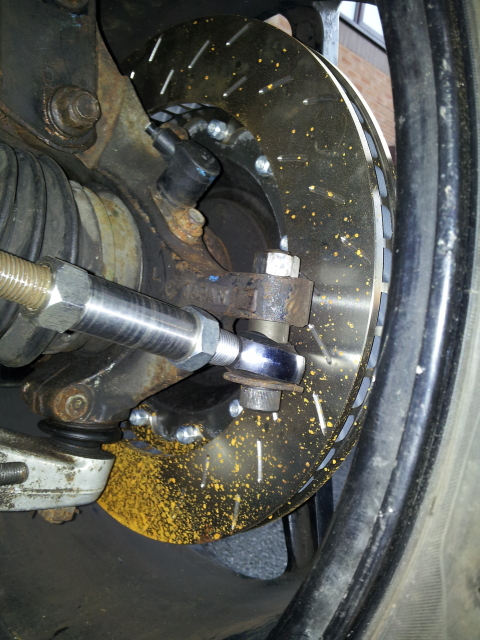
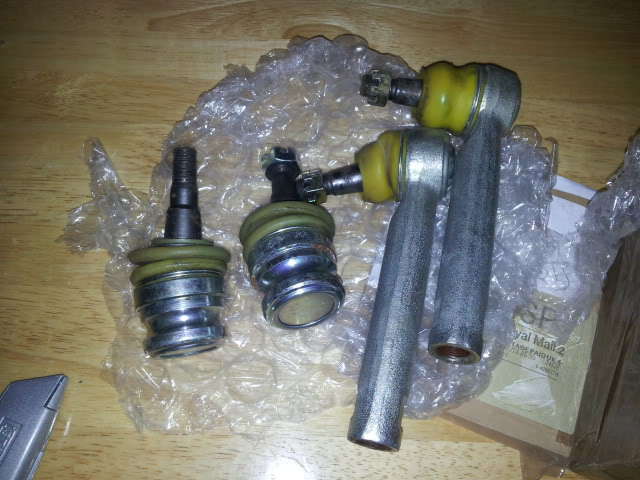
I when replacing the hubs i managed to mangle one of the track rod ends. Brian (speedflash) had some aftermarket ones in. I fitted these and adjusted them as best I could. It still looked the the front was toeing in but I hoped to get away with it. I had planned to get the tracking and geo set up anyway as soon as I had the engine running again.
Not knowing if the new discs solved the vibration problems I was having (as the ECU was away for the upgrade) I decided to brave it and arrange for the mapping to be done. It was going to be a full day due to the number of things that needed sorting. First thing monday morning Andrew arrived. The weather wasn't on our side (never is) and we had to endure rain and hail while Andrew installed the new ECU and got all the sensors installed for mapping.
The car fired first time. After around 5 minutes the engine stalled and wouldn't restart........Out of fuel. I had let it run low the last time so that I could start with some fresh v-power. With a jerry can of fresh fuel we were back in business. I locked the house up and prepaerd to set off up to CAMS so that we had a workshop we could use to get the rest of the jobs sorted. One problem......I could select a gear. Trying to force the stick into gear and the car stalled. I put the car in gear and went to start the car with the clutch in and the car lurches forward. I adjusted the pedal but the damn clutch was stuck (on the flywheel I presume). It was decided that I would just start the car with it in gear and hope the clutch would free itself. Thanksfully the car got the the end of the drive and the clutch was released.
We set off and it was instantly obvious that the vibrations problem was solved. Most likely the disks as the OEM track rod ends were not worn and located very positively. A quick stop to stick some v-power in. Not to much as the tyres have a tendancy to rub on the rear arches as I am running wider wheels/tyres, so I wanted to keep the weight down.
Some mapping would take place on the journey to CAMS (around 40 minutes drive). Once on the motorway there was an unexplained missfire. I noticed that the rev counter stopped working and that the CEL was flashing at random. I pulled off the motorway thinking that maybe I had disturbed some wiring when messing with the clutch pedal.
All was as it should be. We didcided to carry on with the journey up to the unit to investigate further.
The rest of the journey was trouble free apart from the ride quality. The car felt like the back end was moving around on every bump and pot hole. It was seriously un-nerving.
Once at the unit Andrew got on with wiring in the sensors into the ECU for the Toucan. I dropped the running in oil and filter and filled with some new Millers 10 60.
After that I had a look at the back end to see if I could find anything loose. I found that the rear adjustable lateral links were loose at the adjusters. I tightened them and assumed I had cracked it.
Time was limited as I had to be in work for 17:30. I had to get back home and get a wash and change of clothes first.
As with everything on this car, every job was taking longer than anticipated. This ment that Andrew's laptop battery was almost flat and we were really pushed for time.
For some reason the toucan wasn't working when plugged into the ECU. It had power as it would turning on and display the startup logo but then switch off. This was another problem I had to add to the list.
Andrew now had the oil pressure, fuel pressure and oil temperature sensors wired in. We tried to solve my speedo problem (it doesnt work) by fitting Andrews dash clock wiring harness to my clocks. We then set off back to my house. Andrew decided that a "spare" laptop charger would be a good idea. We headed to Maplins. I parked in the furthers point of the carpark so that I would have some room around the car so that I could have another quick look at the rear end of the car as it was still feeling loose, and also try Andrew's clocks as the speedo still wasnt working.
Predictabley, some punk pulled up next to me. I swapped the clocks over, checked the rear strut to hub bolts and they were nice and tight, wheels nuts were solid. Laptop now with charge we could continue back home.
The car was running faultlessly, the engine felt responsive and stronge (although we hadnt put any boost through it yet. Coming onto the motorway slipway I gave it a little bit more load, the turbo spooled up nice and fast and I felt gently pushed back in my seat. It was still only very low boost (around half a bar) but still felt satisfying.
The next sliproad (to the A627M off the M62) is a slight uphill and bit of a left hand sweeping corner. As I loaded the throttle up the car felt like it was oversteering so I eased off the throttle. The back end felt like it settled back to going in the same direction as the front. Again I eased the throttle on and once again the car felt like I was lighting the tyres up. I knew I wasnt as there was very little power going through them. It was very unsettling and I knew I would have very little chance of correcting things if they got really out of shape. On the straight, I gave it some boost again with the same result. I was in no way confident to try anymore boost until I got what ever handling issue sorting.
Time was up and I had to go to work.
The next day I took a look at the wiring for the toucan. I had wired the switched ignition to the lights circuit. A quick fix and it worked perfectly
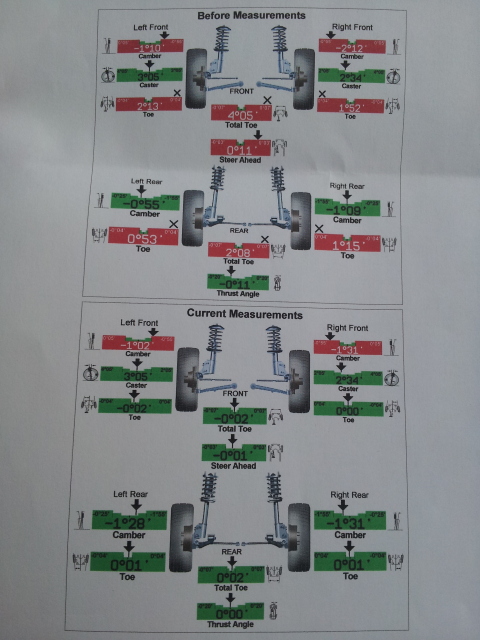
Next was to book the car in for its tracking/geometry. I chose a local place, Drury Lane Diagnostic & Service Centre.
They fitted a set of camber bolts I had for the rears and set the car up for fast road/track. They have a great setup with some sophisticated equipment.
They also provided me with a before and after printout of the setup.
I wouldn't hesitate to reccomend them to anyone that is thinking of having their geo setup.
The car now drove so much better. It didn't feel so unsettled going over potholes or bumps. It didnt want to switch ends when accelerating. I think because all four wheels were toeing in the car just wanted to drive in circles.
The only troubling issue was that steering was very light and had a huge amount of play in it. On the way home from work later that night the car would follow any alterations in the road (camber or 'tramlines') and it would take a lot of input in the steering to correct this.
As it was nearly 11pm I parked up with the intention of checking it the next morning.
The first thing I chected was the new track rod ends. These had loosened and I could undo the nut with my fingers. I had sourced the nuts myself but had got normal nuts and not locking nuts. I need to rectify this as this will keep happening.
I also dont like the way they are just bolted through the hub as the bolt is a smaller diameter than the orginal fitting and obviously isn't tapered. Paul at Drury lane has said I need to either get an insert or top hat, or see if there is a kit designed for these particular after market rose jointed track rod ends. I think they are compbrake so I have sent them an email.
Jobs to do now is
Try a new speed sensor
find the issue with the oem oil pressure swich
wire the newage coil packs in
roll the rear arches
fit longer rear studs in the hubs
fit return to sump to the catch can
full mapping
I but the new exhaust on and it has made a huge difference. The in cabin noise is now much lower. The exhaust note now has a rasp to it when the throttle is applied. Its not really to my liking but keeps the neighbours happy and I won't have any problems passing any noise regs.
I did a short video to compare the H&S with the revolution system.
Its here if you are interested. I miss the H&S
I stripped the old brake rotors, this was a bit of a challange as the old bolts were a pig to remove. Lots of renetrating oil and heat was the key.
After cleaning the bells up I fitted the new rotors.
I when replacing the hubs i managed to mangle one of the track rod ends. Brian (speedflash) had some aftermarket ones in. I fitted these and adjusted them as best I could. It still looked the the front was toeing in but I hoped to get away with it. I had planned to get the tracking and geo set up anyway as soon as I had the engine running again.
Not knowing if the new discs solved the vibration problems I was having (as the ECU was away for the upgrade) I decided to brave it and arrange for the mapping to be done. It was going to be a full day due to the number of things that needed sorting. First thing monday morning Andrew arrived. The weather wasn't on our side (never is) and we had to endure rain and hail while Andrew installed the new ECU and got all the sensors installed for mapping.
The car fired first time. After around 5 minutes the engine stalled and wouldn't restart........Out of fuel. I had let it run low the last time so that I could start with some fresh v-power. With a jerry can of fresh fuel we were back in business. I locked the house up and prepaerd to set off up to CAMS so that we had a workshop we could use to get the rest of the jobs sorted. One problem......I could select a gear. Trying to force the stick into gear and the car stalled. I put the car in gear and went to start the car with the clutch in and the car lurches forward. I adjusted the pedal but the damn clutch was stuck (on the flywheel I presume). It was decided that I would just start the car with it in gear and hope the clutch would free itself. Thanksfully the car got the the end of the drive and the clutch was released.
We set off and it was instantly obvious that the vibrations problem was solved. Most likely the disks as the OEM track rod ends were not worn and located very positively. A quick stop to stick some v-power in. Not to much as the tyres have a tendancy to rub on the rear arches as I am running wider wheels/tyres, so I wanted to keep the weight down.
Some mapping would take place on the journey to CAMS (around 40 minutes drive). Once on the motorway there was an unexplained missfire. I noticed that the rev counter stopped working and that the CEL was flashing at random. I pulled off the motorway thinking that maybe I had disturbed some wiring when messing with the clutch pedal.
All was as it should be. We didcided to carry on with the journey up to the unit to investigate further.
The rest of the journey was trouble free apart from the ride quality. The car felt like the back end was moving around on every bump and pot hole. It was seriously un-nerving.
Once at the unit Andrew got on with wiring in the sensors into the ECU for the Toucan. I dropped the running in oil and filter and filled with some new Millers 10 60.
After that I had a look at the back end to see if I could find anything loose. I found that the rear adjustable lateral links were loose at the adjusters. I tightened them and assumed I had cracked it.
Time was limited as I had to be in work for 17:30. I had to get back home and get a wash and change of clothes first.
As with everything on this car, every job was taking longer than anticipated. This ment that Andrew's laptop battery was almost flat and we were really pushed for time.
For some reason the toucan wasn't working when plugged into the ECU. It had power as it would turning on and display the startup logo but then switch off. This was another problem I had to add to the list.
Andrew now had the oil pressure, fuel pressure and oil temperature sensors wired in. We tried to solve my speedo problem (it doesnt work) by fitting Andrews dash clock wiring harness to my clocks. We then set off back to my house. Andrew decided that a "spare" laptop charger would be a good idea. We headed to Maplins. I parked in the furthers point of the carpark so that I would have some room around the car so that I could have another quick look at the rear end of the car as it was still feeling loose, and also try Andrew's clocks as the speedo still wasnt working.
Predictabley, some punk pulled up next to me. I swapped the clocks over, checked the rear strut to hub bolts and they were nice and tight, wheels nuts were solid. Laptop now with charge we could continue back home.
The car was running faultlessly, the engine felt responsive and stronge (although we hadnt put any boost through it yet. Coming onto the motorway slipway I gave it a little bit more load, the turbo spooled up nice and fast and I felt gently pushed back in my seat. It was still only very low boost (around half a bar) but still felt satisfying.
The next sliproad (to the A627M off the M62) is a slight uphill and bit of a left hand sweeping corner. As I loaded the throttle up the car felt like it was oversteering so I eased off the throttle. The back end felt like it settled back to going in the same direction as the front. Again I eased the throttle on and once again the car felt like I was lighting the tyres up. I knew I wasnt as there was very little power going through them. It was very unsettling and I knew I would have very little chance of correcting things if they got really out of shape. On the straight, I gave it some boost again with the same result. I was in no way confident to try anymore boost until I got what ever handling issue sorting.
Time was up and I had to go to work.
The next day I took a look at the wiring for the toucan. I had wired the switched ignition to the lights circuit. A quick fix and it worked perfectly
Next was to book the car in for its tracking/geometry. I chose a local place, Drury Lane Diagnostic & Service Centre.
They fitted a set of camber bolts I had for the rears and set the car up for fast road/track. They have a great setup with some sophisticated equipment.
They also provided me with a before and after printout of the setup.
I wouldn't hesitate to reccomend them to anyone that is thinking of having their geo setup.
The car now drove so much better. It didn't feel so unsettled going over potholes or bumps. It didnt want to switch ends when accelerating. I think because all four wheels were toeing in the car just wanted to drive in circles.
The only troubling issue was that steering was very light and had a huge amount of play in it. On the way home from work later that night the car would follow any alterations in the road (camber or 'tramlines') and it would take a lot of input in the steering to correct this.
As it was nearly 11pm I parked up with the intention of checking it the next morning.
The first thing I chected was the new track rod ends. These had loosened and I could undo the nut with my fingers. I had sourced the nuts myself but had got normal nuts and not locking nuts. I need to rectify this as this will keep happening.
I also dont like the way they are just bolted through the hub as the bolt is a smaller diameter than the orginal fitting and obviously isn't tapered. Paul at Drury lane has said I need to either get an insert or top hat, or see if there is a kit designed for these particular after market rose jointed track rod ends. I think they are compbrake so I have sent them an email.
Jobs to do now is
Try a new speed sensor
find the issue with the oem oil pressure swich
wire the newage coil packs in
roll the rear arches
fit longer rear studs in the hubs
fit return to sump to the catch can
full mapping
Not really any new developments.......Andrew is working on stripping a spare engine of all the redundant sensors and splicing in newage coil pack plugs so that they are plug and play. This should shrink the loom a fair bit and tidy things a little.
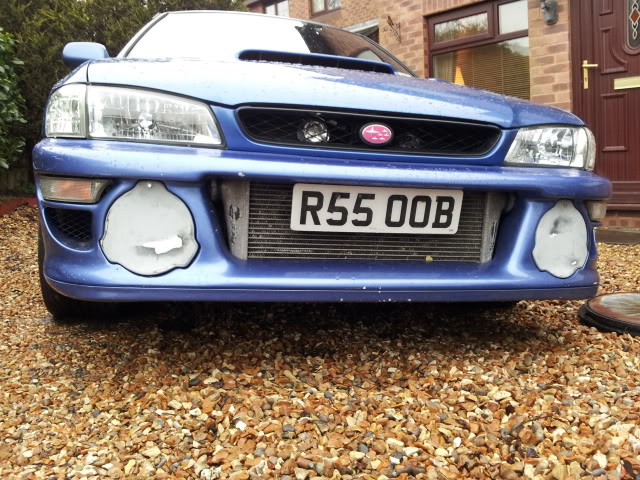
I have made a couple of brackets for the fog covers on the bumper as the old brackets foul the FMIC pipework.
I started marking where I the bracket needed to go.
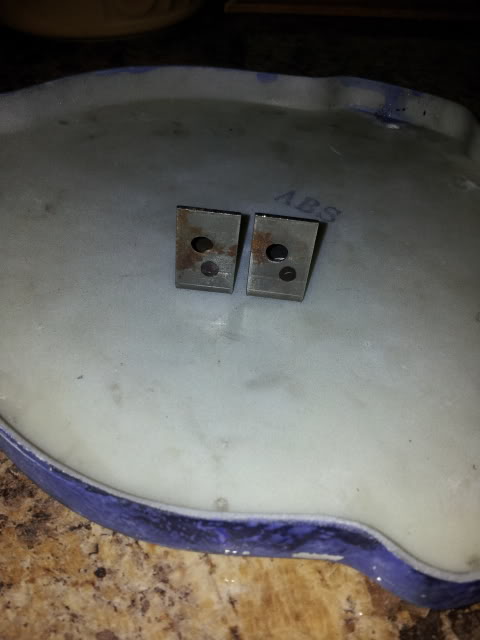
Then drilled and tapped
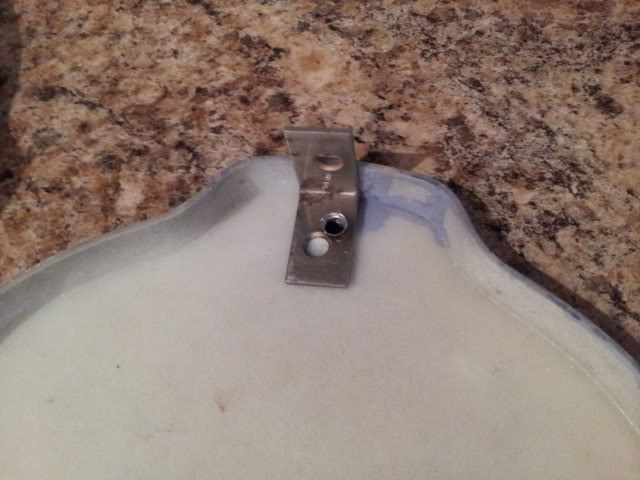
Offering the cover up to the bumper gave me a rough idea of there the bracket needed to sit. I mounted it on some washers to space it out enough so that the fog cover can sit flush against the bracket.
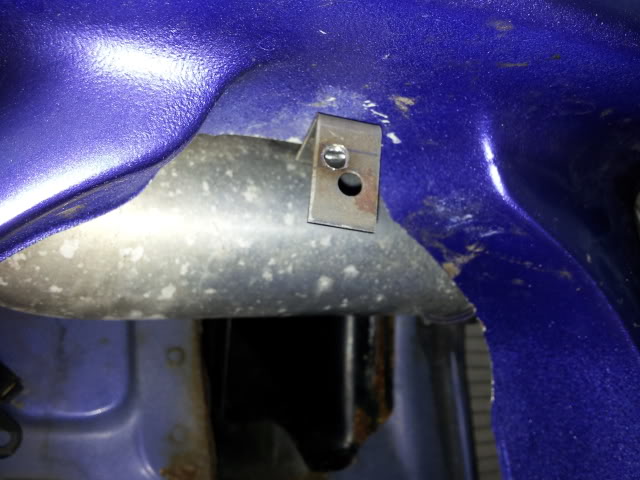
I have ordered some allen head bolts so in the hope that the covers don't go missing once they are all painted and looking more reasonable than they do now.
I have made a couple of brackets for the fog covers on the bumper as the old brackets foul the FMIC pipework.
I started marking where I the bracket needed to go.
Then drilled and tapped
Offering the cover up to the bumper gave me a rough idea of there the bracket needed to sit. I mounted it on some washers to space it out enough so that the fog cover can sit flush against the bracket.
I have ordered some allen head bolts so in the hope that the covers don't go missing once they are all painted and looking more reasonable than they do now.
Can't wait to see what its like once its mapped to its full potential. I just need to get some money together which is difficult at the minute with a wedding to pay for.
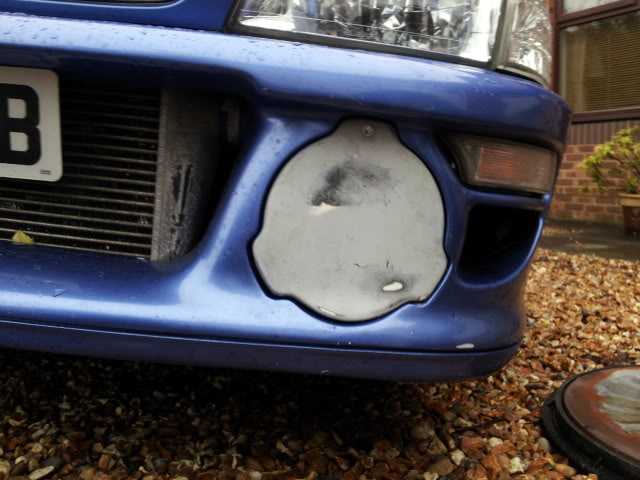
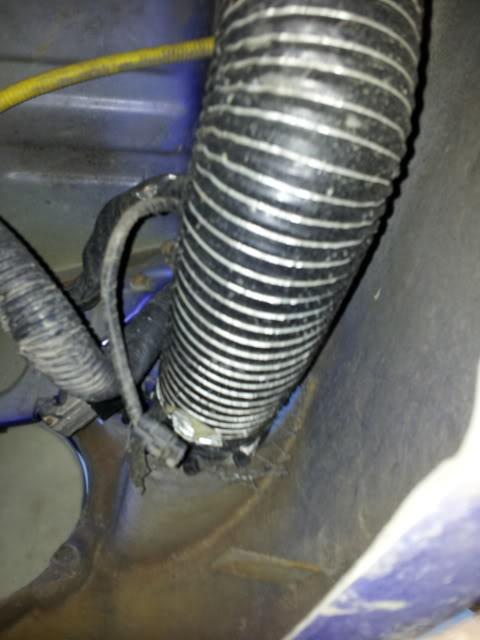
I got a couple more little things sorted out. I got a half meter of flexible hose to get a cold air feed to the air filter.
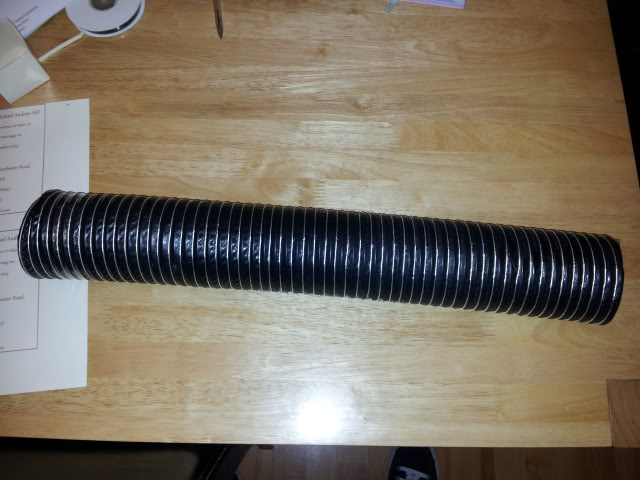
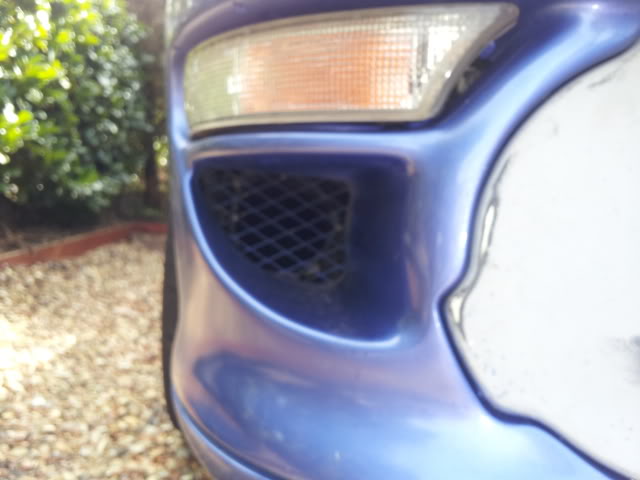
I have temporarily fixed it to the front bumper. I plan on making a more permanent structure from the vent on the bumper to catch all the air fed in rather than how it is at the minute.
I have also addressed the issue of the track rod ends. I was never confident with the compbrake items. I got hold of the whiteline roll centre correction kit so got this fitted and had the tracking sorted again..........Bit of a waste of money as I have now spent the best part of �300 of geometry and tracking.
I got a couple more little things sorted out. I got a half meter of flexible hose to get a cold air feed to the air filter.
I have temporarily fixed it to the front bumper. I plan on making a more permanent structure from the vent on the bumper to catch all the air fed in rather than how it is at the minute.
I have also addressed the issue of the track rod ends. I was never confident with the compbrake items. I got hold of the whiteline roll centre correction kit so got this fitted and had the tracking sorted again..........Bit of a waste of money as I have now spent the best part of �300 of geometry and tracking.

yes Ian, much better quality then the compbrake stuff.
although my car isn't exactly low i'm sure it had made some difference over stock track rod ends.
how you getting on with yours mate?
although my car isn't exactly low i'm sure it had made some difference over stock track rod ends.
how you getting on with yours mate?
Joined: Nov 2003
Posts: 13,356
Likes: 58
From: in the woods...........555 Wagon Sqn

Small update......been busy with a few things. I did manage to get the HID lights working a while ago but they never worked on full beam (the standard light bulbs worked fine). I bought a new bi xenon HID kit but that was still the same.
I traced the fault to a dodgy headlight wiring harness on the passenger side. I extended the wiring loom for the HID kit so that I could plug it in to the drivers side headlight loom. This solved the problem.
The Speedo has never worked since the car being back on the road. One of the 2 wired was damaged. I have used an app on my phone to show me the speed as measured by GPS. This also kept track of the mileage for me to.
I got a new Speedo sensor from Brian @CAMS and thats now sorted. However as I now have STi clocks in the car (which is a UK car) the speedo is reading in KPH so I need a converter.
Last thursday on my way to work the clutch failed on the car. Initially the clutch pedal was staying on the floor when pressed. I had to manually return it with my toe. After doing this for about a mile of bumper to bumper traffic the clutch totally gave up and there was no resistence in the pedal at all. I had to get the car recovered and missed a day of work. Trying to diagnose the problem when your on your own is very difficult as I couldnt be in the car pressing the pedal and watching what was happening under the bonnet at the same time.
After a quick conversation with steve @cotton competition it was decided that the most likely problem was that the seal in the slave cylinder had failed.
As i really needed the car back on the road as I need it to get to work I decided that I would make my way over to CAMS to pick up a decent slave cylinder to replace my suspected one.
When getting back home it became obvious that things were not going to be so easy as swap the slaves over. They were not the same. The one removed from my car had been cut at the mounting bracket and another mounting bracket had been welded on creating a taller slave cylinder which when mounted is in a slightly different position. This is presumably due to a clearance issue with the reverse movement kit for the os giken clutch.
Here is a comparison of the 2 slave cylinders mine on the left and the new one on the right
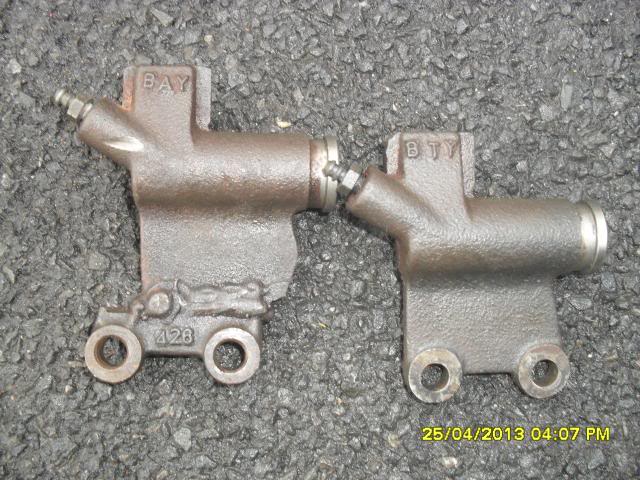
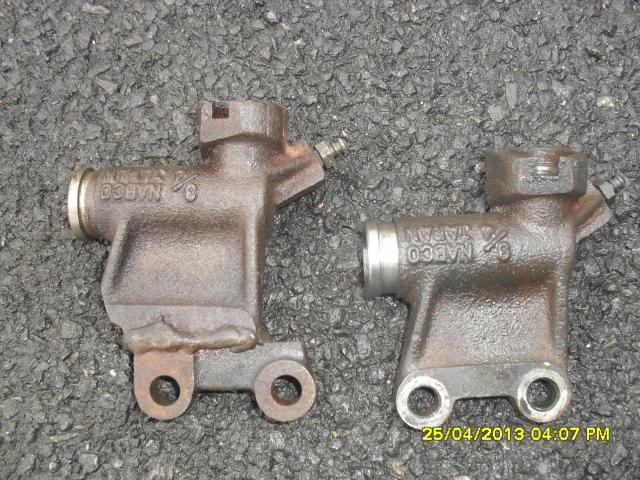
The internals of the slave cylinder on my car are part of the push/pull movement kit that is attached to a bracket to operate the clutch. The normal piston and rod in the oem slave cylinder are removed and this one piece piston/rod is used instead. This can be seen below.
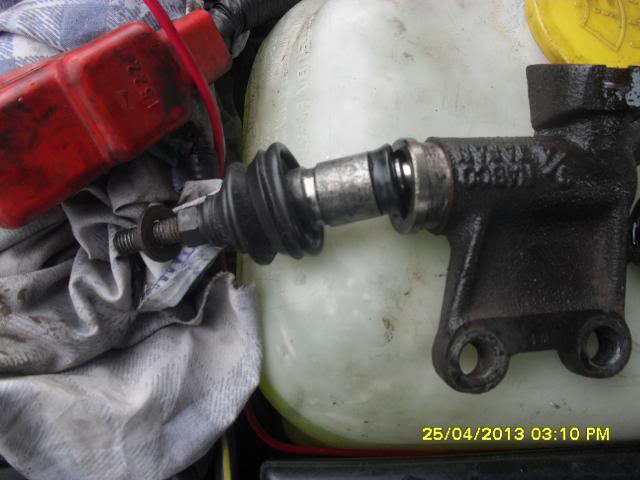
As I now had no choice but to use the slave cylinder that was originally on the car I swapped the 2 seals over from the new slave cylinder (thanks Brian). I ensured that it was all clean inside the cylinder and the piston and put it all back together.
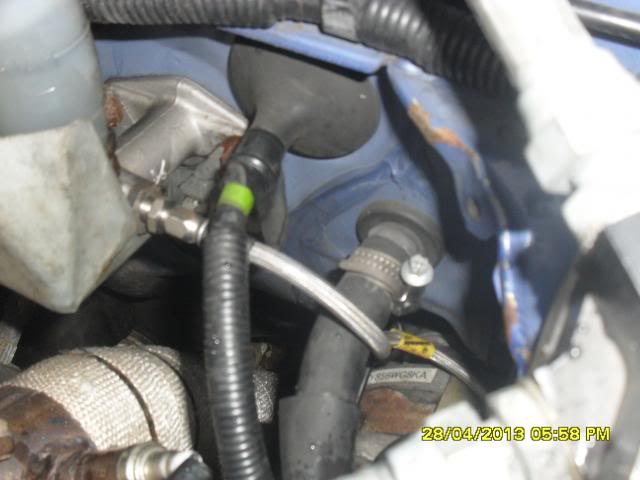
I was unsure on the integrity of the clutch line and as a precautionary measure I ordered a new braided hose to replace all the clutch line that worm there way all over then engine bay (thanks for the heads up Justin).
I placed an order with Alyn @ASP on Friday and the kind post lady delivered it on Saturday just after 10am
This is the now much tidier clutch line
and now done away with all of this lot
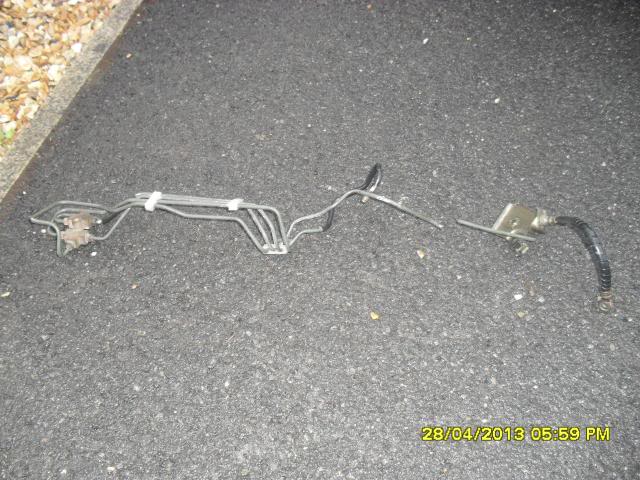
The clutch is now working as it should.
I traced the fault to a dodgy headlight wiring harness on the passenger side. I extended the wiring loom for the HID kit so that I could plug it in to the drivers side headlight loom. This solved the problem.
The Speedo has never worked since the car being back on the road. One of the 2 wired was damaged. I have used an app on my phone to show me the speed as measured by GPS. This also kept track of the mileage for me to.
I got a new Speedo sensor from Brian @CAMS and thats now sorted. However as I now have STi clocks in the car (which is a UK car) the speedo is reading in KPH so I need a converter.

Last thursday on my way to work the clutch failed on the car. Initially the clutch pedal was staying on the floor when pressed. I had to manually return it with my toe. After doing this for about a mile of bumper to bumper traffic the clutch totally gave up and there was no resistence in the pedal at all. I had to get the car recovered and missed a day of work. Trying to diagnose the problem when your on your own is very difficult as I couldnt be in the car pressing the pedal and watching what was happening under the bonnet at the same time.
After a quick conversation with steve @cotton competition it was decided that the most likely problem was that the seal in the slave cylinder had failed.
As i really needed the car back on the road as I need it to get to work I decided that I would make my way over to CAMS to pick up a decent slave cylinder to replace my suspected one.
When getting back home it became obvious that things were not going to be so easy as swap the slaves over. They were not the same. The one removed from my car had been cut at the mounting bracket and another mounting bracket had been welded on creating a taller slave cylinder which when mounted is in a slightly different position. This is presumably due to a clearance issue with the reverse movement kit for the os giken clutch.
Here is a comparison of the 2 slave cylinders mine on the left and the new one on the right


The internals of the slave cylinder on my car are part of the push/pull movement kit that is attached to a bracket to operate the clutch. The normal piston and rod in the oem slave cylinder are removed and this one piece piston/rod is used instead. This can be seen below.

As I now had no choice but to use the slave cylinder that was originally on the car I swapped the 2 seals over from the new slave cylinder (thanks Brian). I ensured that it was all clean inside the cylinder and the piston and put it all back together.
I was unsure on the integrity of the clutch line and as a precautionary measure I ordered a new braided hose to replace all the clutch line that worm there way all over then engine bay (thanks for the heads up Justin).
I placed an order with Alyn @ASP on Friday and the kind post lady delivered it on Saturday just after 10am
This is the now much tidier clutch line

and now done away with all of this lot

The clutch is now working as it should.
Update.
After getting a new speedo convertor and fitting it, the speedo has stopped working. I will double check I have installed it correctly. If I have then I think I will just go back to using kph.
I arranged mapping with Andrew for 10/10/13. I was a little jet lagged as I had only got back from my honeymoon the day before. I met Andrew at 10:30 at Teg sport. He was just finishing off mapping a bugeye with full STi engine transplant. We got my car on the rollers. First it was out with the oem central coil pack (which was now located under the fpr and in close proximity to the turbo on a bracket using the holes originally for the TMIC). The engine loom was also stripped out as Andrew had prepared a stripped loom for me with the newage coil pack connectors already in place. The new loom is so much smaller/neater as all the connectors for sensors that are now redundant on my car are no longer there.
Newage coil packs in and the ignitior wiring modified slightly as its no longer needed and this is necessary on the phase 1.5 cars. The fires first time and runs as it should - result! A quick brew and then we can get on with the mapping.
The car is all setup on the dyno. This is the first time I have had my car mapped on the dyno. Previously it has all been done on the road. It was a very different experience and highly informative for me. For example, you can directly compare the run with the map retrospectively with a high degree of accuracy. I had not seen this before as when mapping the car Andrew is doing all the adjustments on the fly as I concentrate on driving.
The first run is done at actuator pressure - 1bar of boost. I had already warned Andrew that I was nervous/aprehensive about the power runs and mapping. When I first bought the car in standard form I had every confidence that it could take whatever I could throw at it, Slowly the power was increased but was still kept at a relatively safe level (~300bhp and similar torque). Today was a whole new field, not just because tuning a car to this level is completely new to me and it comes with its risks but I have been looking forward to this day for over 4 years now.
With the dramatics over and Andrew reassuring me the first power run gets underway. This was the first time the motor had been over 6000rpm and 0.5 bar of boost. The car made 368bhp but was running a little rich. With a few tweaks across the fueling map the car then made 380ish at the same 1bar. Fueling was spot on so the wastegate duty was increased slightly. The boost didn't really alter much as the duty is really above the 1bar actuator threshold so as a result the power was almost identical. As there was no noise on the det cans a bit of timing was added and the wategate duty increased a bit more. Andrew turns just before the next run and says "over 400 this time". I just smile and nod.
The next run begins, up throught the gears 2nd, 3rd and into 4th, upto around 4k rpm and the revs slowly drop to around 2k rpm and the dyno is set to record. The throttle is buried, the revs climbing slowly at first and you hear the turbo starting to spool, the revs start to increase a little more and the turbo sounds like its gonna suck the paint off the walls. At around 6k rpm I think I hear a 'snap' sound (like when you hold a belt double it over and pull hard and it makes a loud snapping noise). Andrew doesn't flinch so I just assume its nothing to worry about or I am hearing things......the run continues. As the screen refreshes and the plot is revealed and exclaimes "holy ****". I look at the screen and see the car made 485.9bhp. My first thought is to ask if Andrew heard the noise I did. He didn’t hear it. Andrew brings up the boost graph on the dyno monitor. Just over 2bar…..whoops. Andrew suspects a boost pipe has split or blown off.
A quick inspection and all the pipes are intact and still in place. Back in the car and the wastegate duty is reduced. This time, boost pressure (as well as lambda) is displayed in realtime at the top of the dyno monitor. The next run was done with some caution. 4th gear and the revs climbing again, the car starts to come on boost but it makes boost so quickly it flies past 1bar and all of a sudden 1.8bar flashes on the screen and Andrew lifts. There is no boost control.
My thoughts turn to the noise I heard. It could be that Andrew couldn’t hear through his det can headphones it could be just something that hit the rollers or it could be I imagined it.
Andrew inspects the turbo actuator. It won’t budge, it explains the lack of boost control. The circlip is removed and the wategate it free. Connecting at mityvac confirmed the actuator was moving at 1bar. When looking at the position the actuator arm wanted to be in, it was not really where it should be in relation to the wastegate bracket. The actuator arm had to be forced over to the left when connecting it to the wastegate. A combination of the extra heat and the fact the actuator had to open for the first time had jammed it against its housing. Manipulating the actuator arm was considered the best solution as the bracket was stainless steel and would not have been very easy to correct the position of the actuator.
With it all back together another power run showed that there was still a problem controlling boost. This time it was just fluctuating way too much and couldn’t be stabilised. This ended play for the mapping session. I am going to get a new bracket made up and probably a new actuator then give it another crack. The car was set back to actuator pressure and I will just be cautious when on boost that the wastegate doesn’t jam shut again. The car is still plenty quick enough with around 400bhp for now.
With the car making decent power with just air flow I am hopeful that I will make decent power at a more reasonable boost pressure (1.7-1.8 bar) as there is still a bit more fuel to come out and timing to be added.
I got home just as my brake warning light came on (handbrake light). I had topped up the fluid that morning so I put the car on the drive for the night. I got the Wife to pump the brake pedal while I checked all the lines. I found the leak at the inlet side of the bias valve. I have ordered a brake spanner to get it nipped up.
I got the brake fitting tightened up. It only took a slight movement but it has now stopped the leak. Earlier today I took the car over to Brian at CAMS as he had a spare actuator and could make a new actuator arm rather than fabricating a new bracket. The arm was then in a much straighter line when the actuator arm was opening and closing. I then set off up to meet Andrew at the dyno at Teg sport.
The first run was at wastegate pressure and all was well. The next few runs were done with increasing wastegate duty to find the desired boost level. This was found and it was peaking at 1.8bar and quickly dropping off so was losing a lot of power and torque at the top end. A little more work on the map and the boost was holding a little better resulting in a much nicer power curve. The wideband sensor for the dyno was playing up and only working intermittently. It was found to have a frayed wire so it was swapped for a new one. It was now ready for adding some ignition timing and pull some fuel out of the map. I thought it might be a good idea to take a video of the run at this point. It wasn’t until I was right up close to the monitor with my phone that I realised it had just made 490bhp!!
It was running quite rich so a few more tweeks was in order. Some work on the wastegate duty at the top end and it broke the magic 500. 501bhp and I was ecstatic. The boost profile was now much better but the fueling still on the rich side.
Leaning it out a tad resulted in a loss of power so it seems the sweet spot was found and this engine prefers a fueling a little on the rich side. With the fueling back in and the timing tweeked a final time it was time for a final pull.
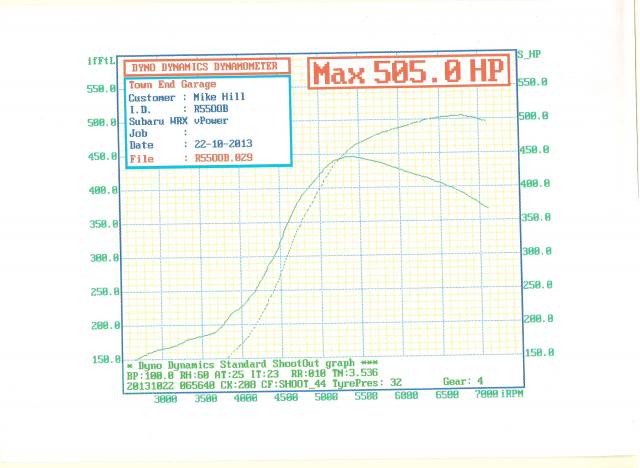
To say im thrilled with the result is an understatement. This is on just v-power. The inlet temps actually never got any lower than 32 so its possible this result is on the conservative side.
It is brutal on the road and I haven’t had the guts to floor it in 2nd yet. The roads were damp and it was lighting the tyres in 3rd gear.
The first run was at wastegate pressure and all was well. The next few runs were done with increasing wastegate duty to find the desired boost level. This was found and it was peaking at 1.8bar and quickly dropping off so was losing a lot of power and torque at the top end. A little more work on the map and the boost was holding a little better resulting in a much nicer power curve. The wideband sensor for the dyno was playing up and only working intermittently. It was found to have a frayed wire so it was swapped for a new one. It was now ready for adding some ignition timing and pull some fuel out of the map. I thought it might be a good idea to take a video of the run at this point. It wasn’t until I was right up close to the monitor with my phone that I realised it had just made 490bhp!!
Leaning it out a tad resulted in a loss of power so it seems the sweet spot was found and this engine prefers a fueling a little on the rich side. With the fueling back in and the timing tweeked a final time it was time for a final pull.

To say im thrilled with the result is an understatement. This is on just v-power. The inlet temps actually never got any lower than 32 so its possible this result is on the conservative side.
It is brutal on the road and I haven’t had the guts to floor it in 2nd yet. The roads were damp and it was lighting the tyres in 3rd gear.
Joined: Nov 2003
Posts: 13,356
Likes: 58
From: in the woods...........555 Wagon Sqn
Fabulous write up Mike, you had my sphincter flapping reading that so gawd knows what yours was doing after the 2bar run...quite a year then; marriage and a running car
Track day booked yet?!
Track day booked yet?!
Thanks Roy, yes the toucan is a great bit of kit and getting better with every firmware update.
No trackday booked yet Ian. My suspension is now very old and worn so Im not sure how well it will do with corners. I was hoping to get a couple of 1/4 miles in but the season has finished now. I might get on at oulton park soon just to have a benchmark for the handling and a bit of seat time as i'm a complete novice at trackday.
No trackday booked yet Ian. My suspension is now very old and worn so Im not sure how well it will do with corners. I was hoping to get a couple of 1/4 miles in but the season has finished now. I might get on at oulton park soon just to have a benchmark for the handling and a bit of seat time as i'm a complete novice at trackday.
Excellent thread that mate, enjoyed reading it, so much hard work, im currently going through a similar build, seems lyk its taking forever but the last few pges of this thread have got me excited again
And you Gaz. Could finally put a face to the name. It was a great weekend and was thoroughly enjoyed.
In the right conditions I think I could have seen a 10 up the strip. A little cooler, no head wind and a prepped track or decent tyres. Still happy with my time and how the car performed.
It was bitter sweet for me. I finally got to use the car for what it was built for but now I realised its time to sell up and re coup some of the money I have plowed into this project.
Yep i agree there the heat and headwind wouldnt have helped with times, At least you got to use it like you say, Might keep an eye out for some bits in the future for a build me and dave are thinking All the best mate 

Joined: Apr 2005
Posts: 11,778
Likes: 4
From: Newcastle. 330bhp-289lb/ft @ 1bar boost - 12.4s @ 105mph

just read through this, such a shame to hear your breaking it after a near on 5 year project!! Can't help thinking you deserve more enjoyment out of it after what you've put in, but understand sometimes these things have to happen!
