
Project 500


No huge update. All the little farty bits that take forever to do need sorting.
I have collected a few more items as I can't resist a bargain
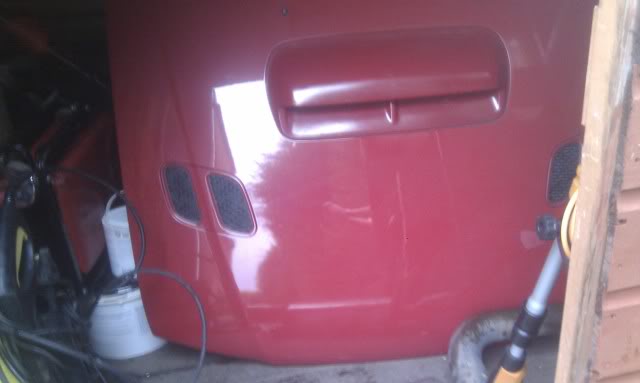
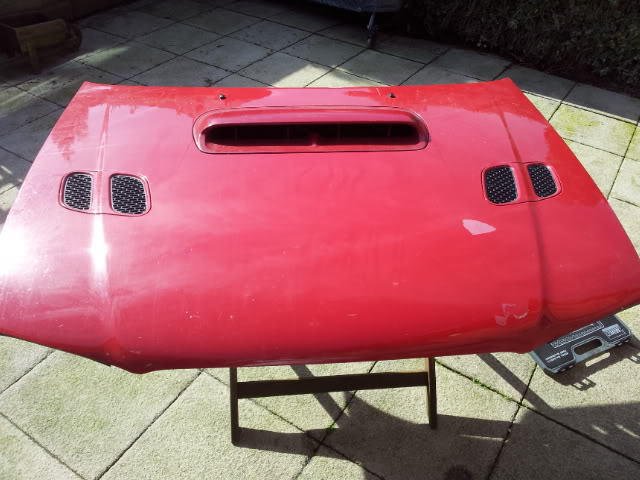
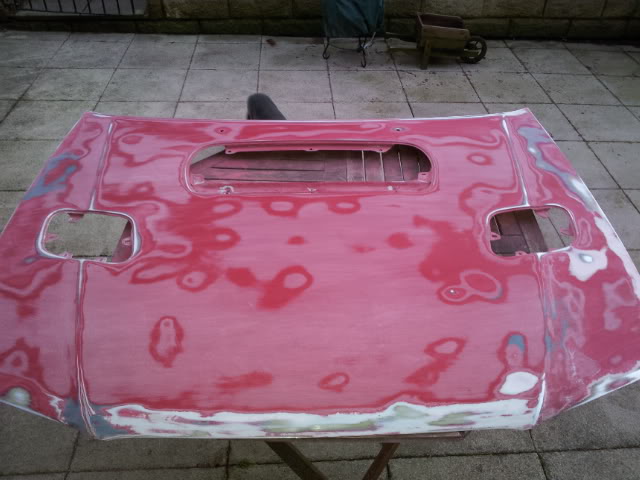
Lightweight alloy bonnet
Will need painting but I have plenty of work to do on the body yet.
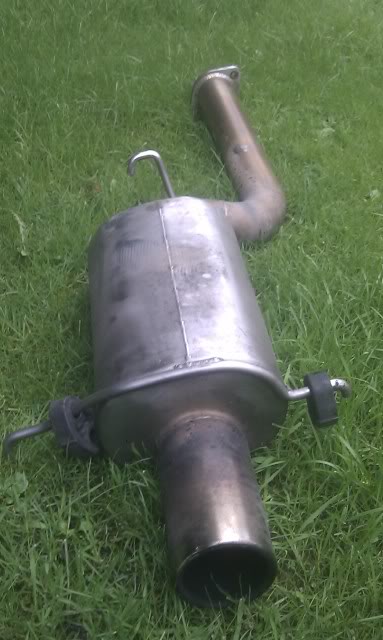
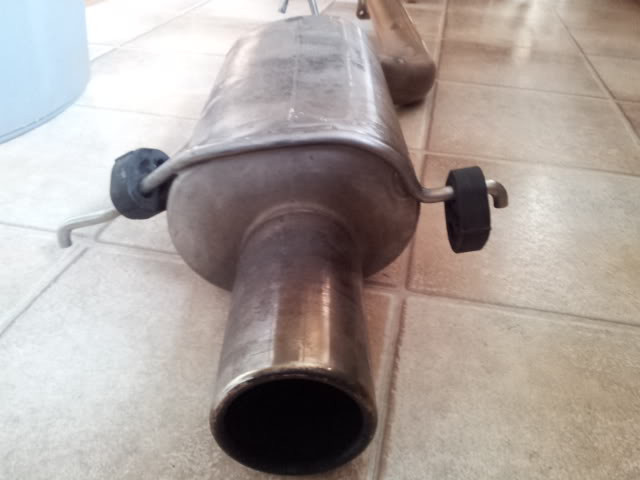
I have a feeling that the KHS silencer that I have on the car at the moment might not pass the noise regs on track days/ elvington/ neighbours so I have picked up this 3" H&S 3.5" tail pipe silencer. Should do the trick witha bit of a clean up.
Took delevary of this today
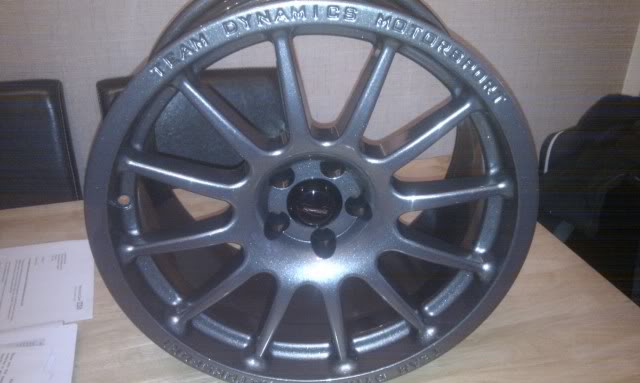
9x17" pro race 1.2 et 23 to match the 3 I already have. Just need to get the ones I have refurbished.
The plan of putting a 22b wide arch on the car will not materialise. This is for several reasons, some of which I will not get into, but cost is one factor and that these came up at the right time and price.
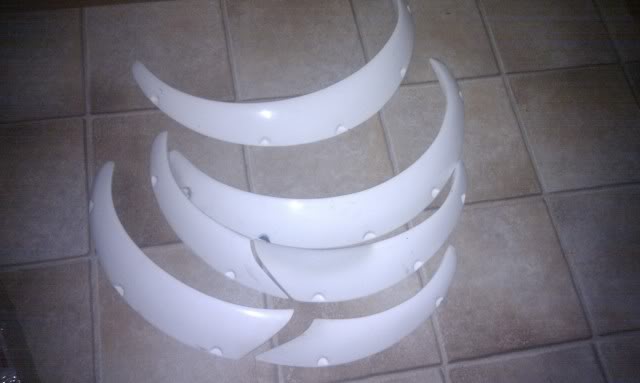
ABW 4 door arch extentions.
And to keep the car safe, a very solid drive post
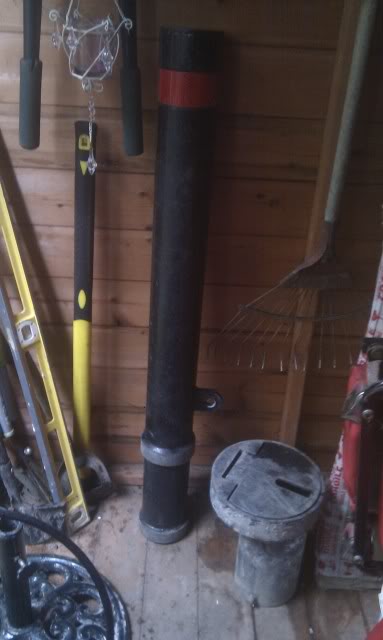
Plus anyone try and rob me, I will cut your teeth out!
I have collected a few more items as I can't resist a bargain
Lightweight alloy bonnet
Will need painting but I have plenty of work to do on the body yet.
I have a feeling that the KHS silencer that I have on the car at the moment might not pass the noise regs on track days/ elvington/ neighbours so I have picked up this 3" H&S 3.5" tail pipe silencer. Should do the trick witha bit of a clean up.
Took delevary of this today
9x17" pro race 1.2 et 23 to match the 3 I already have. Just need to get the ones I have refurbished.
The plan of putting a 22b wide arch on the car will not materialise. This is for several reasons, some of which I will not get into, but cost is one factor and that these came up at the right time and price.
ABW 4 door arch extentions.
And to keep the car safe, a very solid drive post
Plus anyone try and rob me, I will cut your teeth out!

I bought 3 used pro race 1.2's some time ago, hence only one new alloy in the picture above. The 3 I had really needed some slight repair and a refurbish. I tried a place localish to me but they were unable to get a match on the anthracite paint as it has a large amount of sparkle in it.
I got in touch with rimstock that make team dynamics and also offer a refurbishment service. They are going to be dropped off with them and turned around in ~10 days. Cost just under �65 per wheel. I will post some pictures up when I get them back.
As I have removed the ABS from the car I was a little worried about my ability to control the car is an emergency stop situation. I got myself on a skid training day. It was very worth while. Not only did you learn how to safely control a ABS and a non ABS car you also had a fair amount of time in a BMW drifting around the track.
As a result I am more confident that I will be able to stop the car in a safer manner now. The 255/35/17 tyres that will be going on should help too.
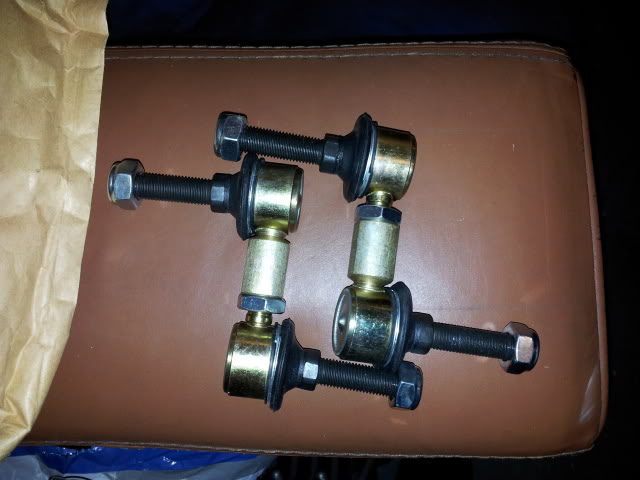
I have been up to the car today and done a couple of small bits. Dropped the gear and diff oil and put fresh in. fitted the new drop links.
Adz has been working on a few brackets and new pipework for the intercooler and all the little jobs that take up so much time.
Looking at getting it running in a couple if weeks.
Adz has been working on a few brackets and new pipework for the intercooler and all the little jobs that take up so much time.
Looking at getting it running in a couple if weeks.


Ian they are whiteline. They are indeed much more substantial than the wire type drop links. They are adjusatable also.
Adz was telling me today that they had to address the fact that the wire type ones start to squeek after about 12 months. These should address that.
They are for the alloy bottom arms
Adz was telling me today that they had to address the fact that the wire type ones start to squeek after about 12 months. These should address that.
They are for the alloy bottom arms
Joined: Nov 2003
Posts: 13,356
Likes: 58
From: in the woods...........555 Wagon Sqn
Ian they are whiteline. They are indeed much more substantial than the wire type drop links. They are adjusatable also.
Adz was telling me today that they had to address the fact that the wire type ones start to squeek after about 12 months. These should address that.
They are for the alloy bottom arms
Adz was telling me today that they had to address the fact that the wire type ones start to squeek after about 12 months. These should address that.
They are for the alloy bottom arms

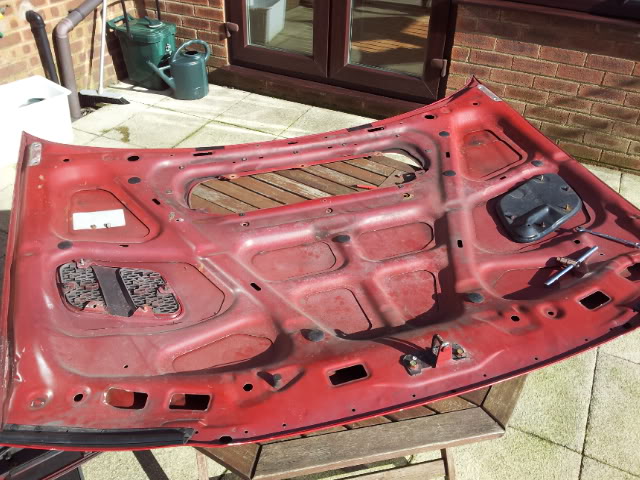
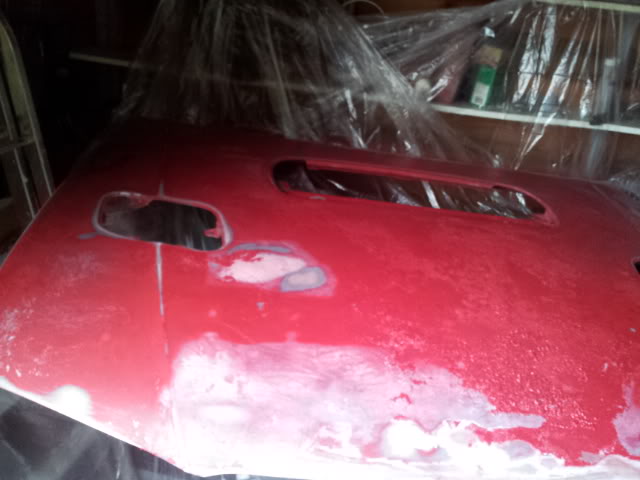
I have been trying to get a couple of bits sorted with what I have at home.
progress is very slow. Trying to prepare the light weight bonnet I have for painting takes an age.
2 days work and I have only gone from this
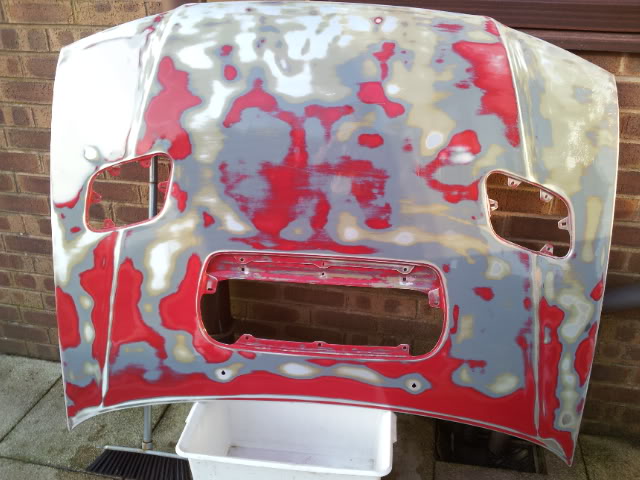
To this
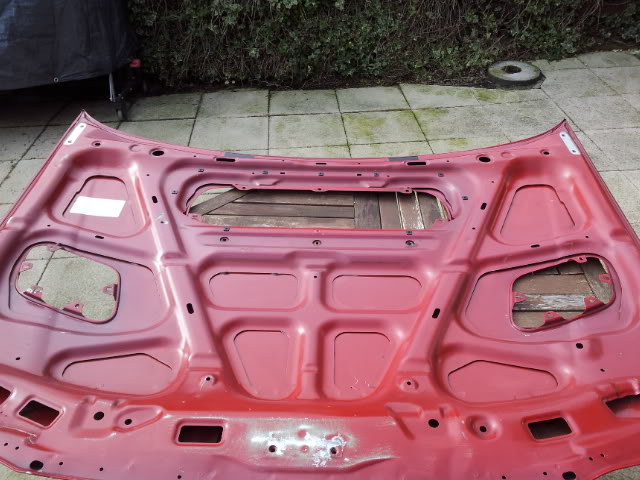
I cannot believe how much work is in involved in just getting it to this stage. There is still loads of work I need to do on this to get it ready for paint.
Thank you to Neil @ EMB for his advice.
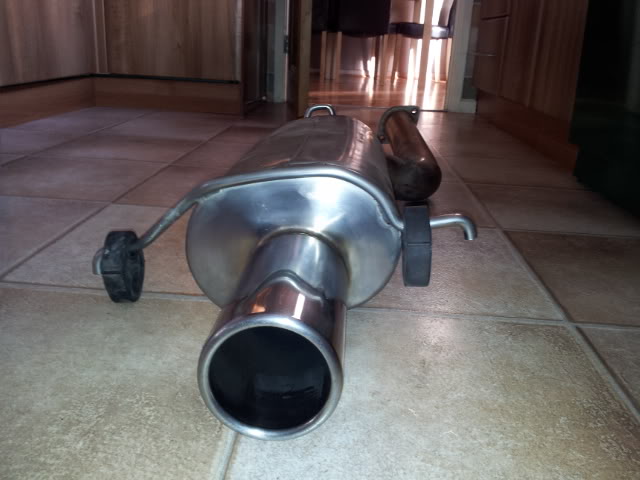
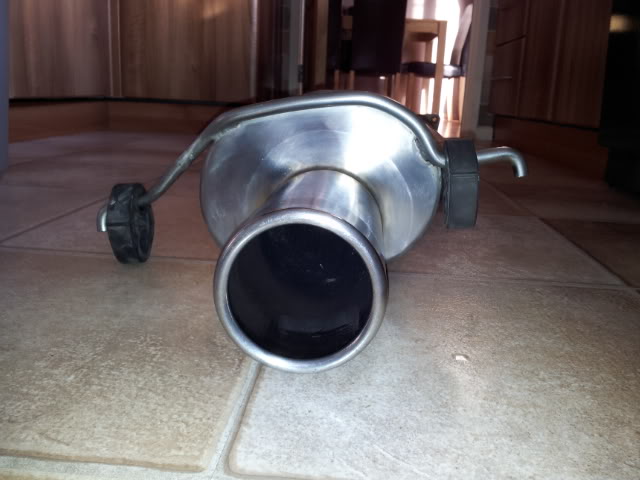
Also done a bit on the exhaust to clean it up a bit.
I will hopefully be going up to the car this weekend for what might be the finishing touches.
progress is very slow. Trying to prepare the light weight bonnet I have for painting takes an age.
2 days work and I have only gone from this
To this
I cannot believe how much work is in involved in just getting it to this stage. There is still loads of work I need to do on this to get it ready for paint.
Thank you to Neil @ EMB for his advice.
Also done a bit on the exhaust to clean it up a bit.
I will hopefully be going up to the car this weekend for what might be the finishing touches.
Made some more progress on the bonnet. I got some proper stripper from frost and made a start.
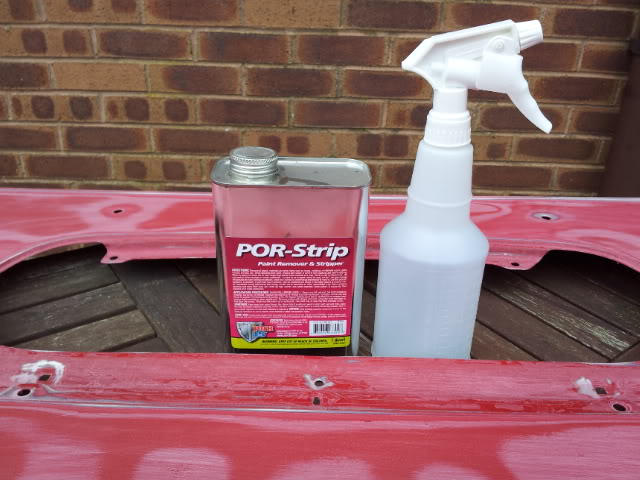
As there were so many layers of paint and primers it was taking numerous applications.
Then was back to rubbing down.
I got to this stage
Primer then went on. I underestimated how much I would need an ran out prematurely.

As there were so many layers of paint and primers it was taking numerous applications.
Then was back to rubbing down.
I got to this stage
Primer then went on. I underestimated how much I would need an ran out prematurely.
The bonnet didn't come out quite as well as I hoped. 4 days of prep obviously isn't enough.
I'm not sure why the pain hadn't taken in some areas. Possibly contamination or the fact I I didn't get back to bare metal in some areas.
Thanks mik. I have a plan about the side lights. I will probably drop in you're place on the way up to neil's as he is going to have a look at the bodywork on the car and what needs to be done.
Neil also told me wheats going on south the paint - as I didn't remove everything back to bare metal it looks like the remaining paint and or body filler had absorbed the paint stripper and now it's redacting with the primer.
Looks like it's all going to come off again and back to bare metal.
Neil also told me wheats going on south the paint - as I didn't remove everything back to bare metal it looks like the remaining paint and or body filler had absorbed the paint stripper and now it's redacting with the primer.
Looks like it's all going to come off again and back to bare metal.
Got some more time on the car yesterday. I went to fit the brakes but 2 of the pistons were seized on both calipers :@ I am hoping leaving them with some penetrating oil will free them as I don't fancy having to strip them down.
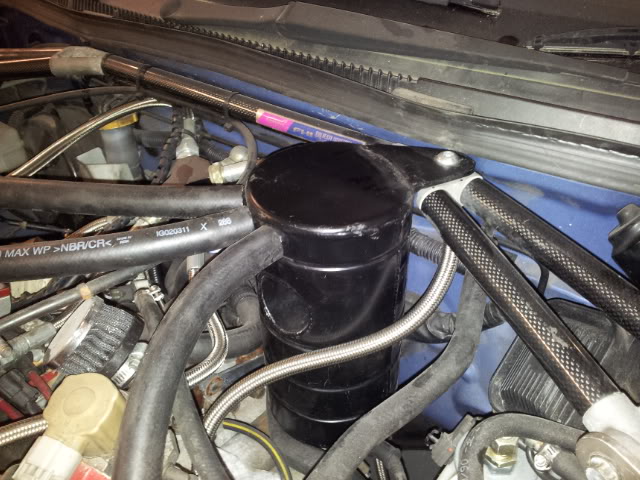
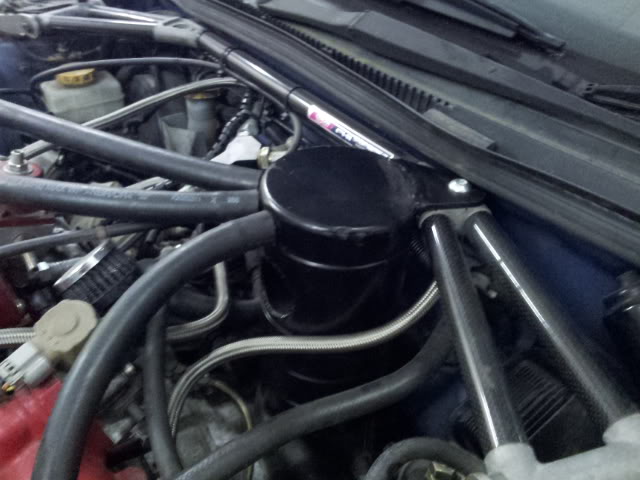
Adz has made up a bracket for the catch can and machined some take off plates for the breathers rather than the nasty plastic oem ones. I just need to sort out a vent for it and run that to the back of the car. As the catch can has moved from its intedned positon the return to sump pipework isnt long enough. I also dont have a boss welded on the sump. I am going to get a longer piece and return via the sump plug for now.
In the future when I get the sump baffled I will have a return boss welded on.

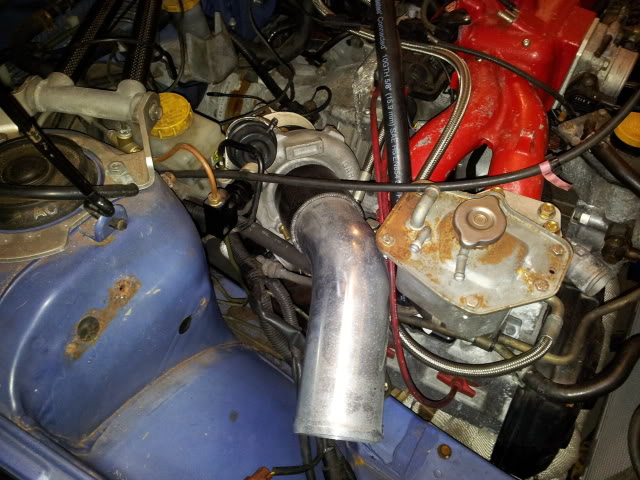
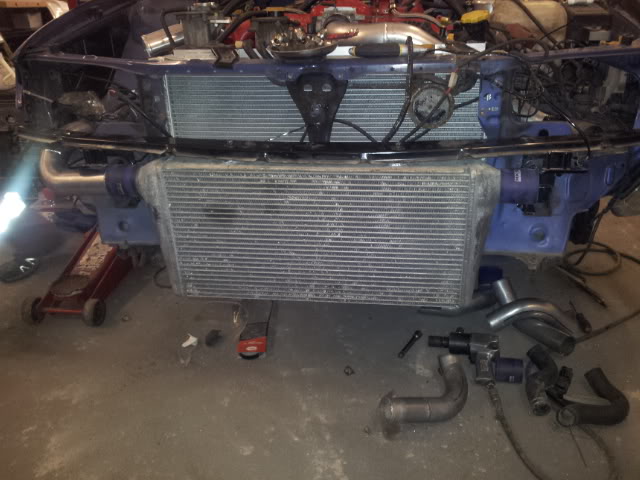
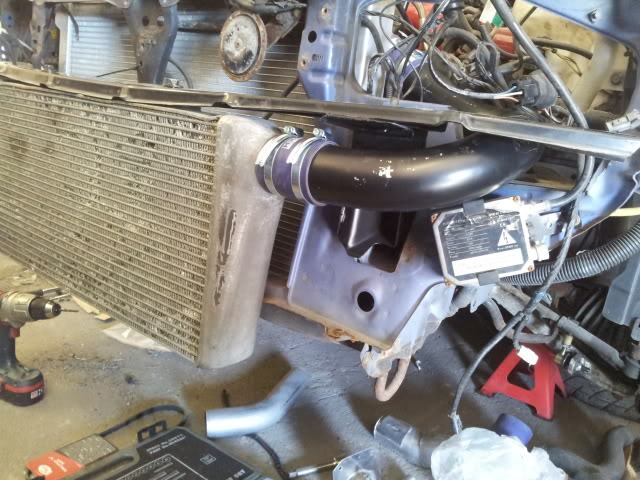
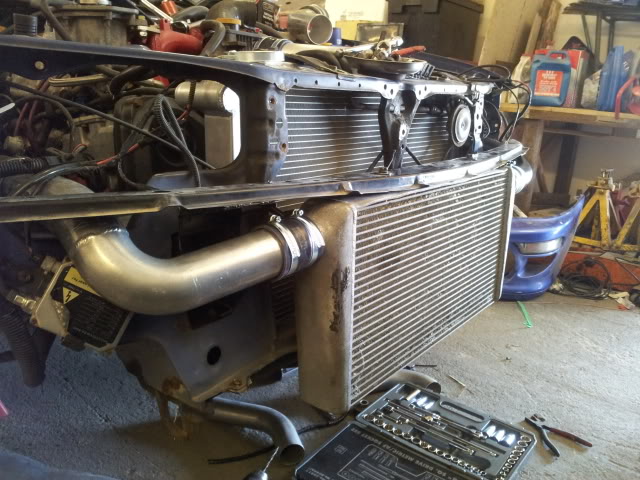
The intercooler has now been flipped. Its still a working progress as the bumper bar brackets may need to be clipped back a bit and the cooler raising another 5mm.
The pipework is nearly there and is nice and short
Adz has made up a bracket for the catch can and machined some take off plates for the breathers rather than the nasty plastic oem ones. I just need to sort out a vent for it and run that to the back of the car. As the catch can has moved from its intedned positon the return to sump pipework isnt long enough. I also dont have a boss welded on the sump. I am going to get a longer piece and return via the sump plug for now.
In the future when I get the sump baffled I will have a return boss welded on.
The intercooler has now been flipped. Its still a working progress as the bumper bar brackets may need to be clipped back a bit and the cooler raising another 5mm.
The pipework is nearly there and is nice and short
Got some more time on the car yesterday.
A couple of bolts that hold the front bumper in the middle had seized in the bracket so adz was tacking them with some blunt drill bits when I arrived. Im sure everyone knows the feeling of tackling a 5 minute job that turns into a 45 minute swear-fest.
I got to work on the easy stuff - I had to remove the nsf drive shaft as when I first installed it I couldn't get the locating pin all the way in. Removed drop link, steering arm, bottom locating bolt on the wish bone to free up the strut. With a bit more room under the car and some more light I could see that the shaft just needed removing turning 180 degrees (just like adz had told me :P).
Then it was a case of painting a bit of primer on the cut out areas below the headlights. Simple jobs but still non the less neccessary.
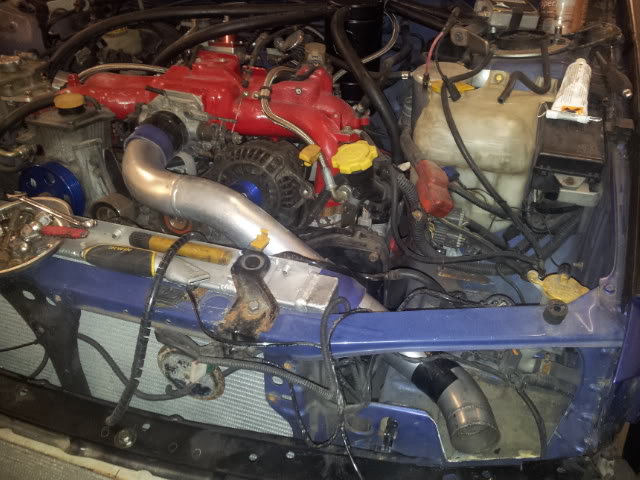
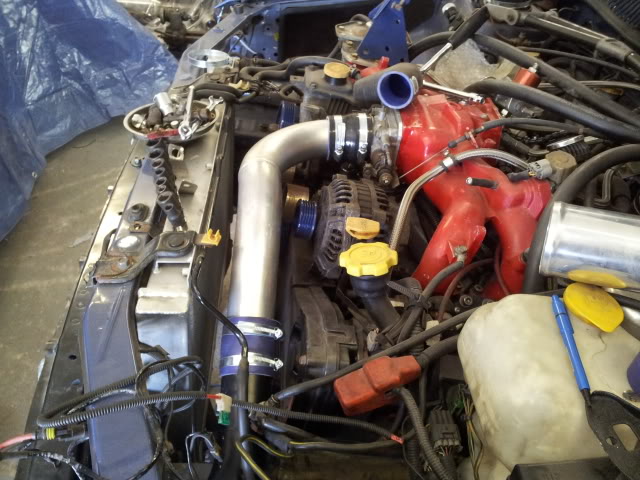
Adz has made up some new intercooler pipework and this was then all plumbed up and sealed (when the primer dried) with some new clamps and silicone hoses. I have reused a couple of old silicone joiners from the old pipework for now. At some point I will have some new lightweight pipework made up.
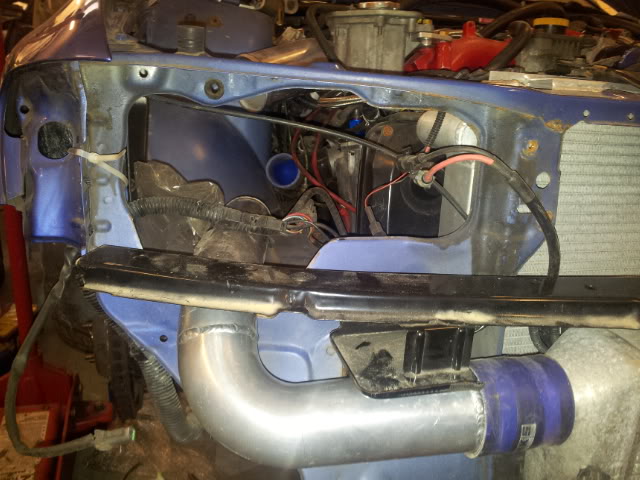
The bumper was cut to shape earlier in the week so I was just a case of fitting it so we thought. We found a new place for the HID ballasts that didn't get in the way but the fog lamp bracket fowled the intercooler pipework. These are to be cut and repositioned.
The brake lines needed repositioning so that the bias valve coule have a better fixing point along with fixing the t pipe. These are now in a much better position with the bias valve where the BCS map sensor etc should be.
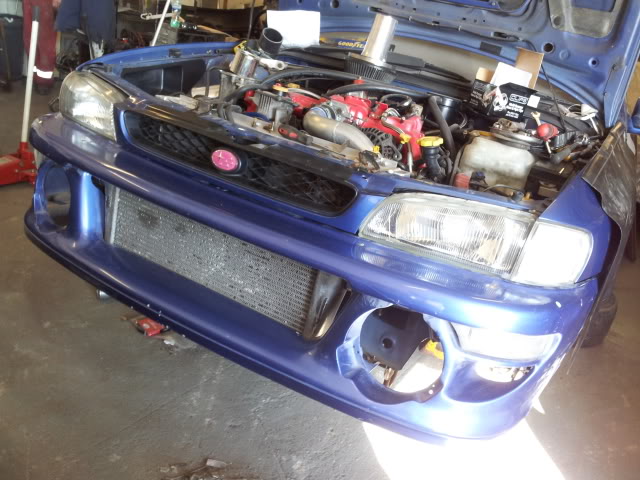
The bumper is now fixed on and all the lights back in and finally looking like a car again.
The only trouble is that the front mount core is fairly large so it actually sticks out the bottom of the bumper. It is fixed at the top right up against the bumper bar so not really a mounting issue. I will just have to have a splitter made up earlier than intended.

The last thing to do was to remove the ABS sensors off the front, plugged the holes in the towers with the oem gromet. I cut the wires and cut most of the sensor off leaving just enough material so that the holes on the hubs were perfectly sealed.
A couple of bolts that hold the front bumper in the middle had seized in the bracket so adz was tacking them with some blunt drill bits when I arrived. Im sure everyone knows the feeling of tackling a 5 minute job that turns into a 45 minute swear-fest.
I got to work on the easy stuff - I had to remove the nsf drive shaft as when I first installed it I couldn't get the locating pin all the way in. Removed drop link, steering arm, bottom locating bolt on the wish bone to free up the strut. With a bit more room under the car and some more light I could see that the shaft just needed removing turning 180 degrees (just like adz had told me :P).
Then it was a case of painting a bit of primer on the cut out areas below the headlights. Simple jobs but still non the less neccessary.
Adz has made up some new intercooler pipework and this was then all plumbed up and sealed (when the primer dried) with some new clamps and silicone hoses. I have reused a couple of old silicone joiners from the old pipework for now. At some point I will have some new lightweight pipework made up.
The bumper was cut to shape earlier in the week so I was just a case of fitting it so we thought. We found a new place for the HID ballasts that didn't get in the way but the fog lamp bracket fowled the intercooler pipework. These are to be cut and repositioned.
The brake lines needed repositioning so that the bias valve coule have a better fixing point along with fixing the t pipe. These are now in a much better position with the bias valve where the BCS map sensor etc should be.
The bumper is now fixed on and all the lights back in and finally looking like a car again.
The only trouble is that the front mount core is fairly large so it actually sticks out the bottom of the bumper. It is fixed at the top right up against the bumper bar so not really a mounting issue. I will just have to have a splitter made up earlier than intended.
The last thing to do was to remove the ABS sensors off the front, plugged the holes in the towers with the oem gromet. I cut the wires and cut most of the sensor off leaving just enough material so that the holes on the hubs were perfectly sealed.

Unfortunately the pistons in the ap's had seized and didn't show any sign of moving. Sent them off to Alyn at ASP. The pistons were pressed out and polished up. all but 2 pistons were still serviceable
but 2 were to badly scored to reuse. after a set of new seals they are rebuilt and on their way back to me.
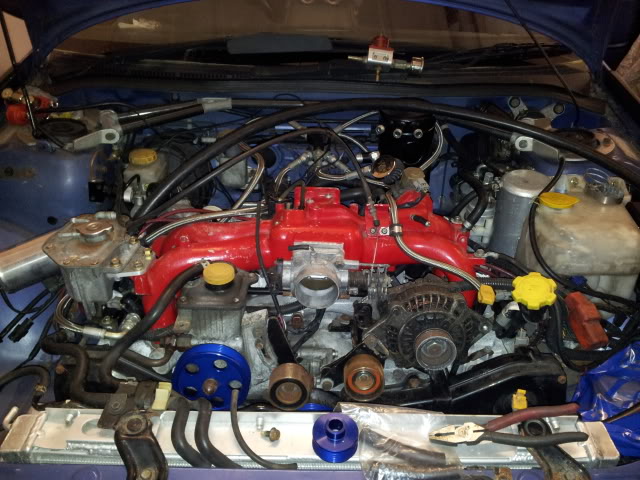
Had a set of silicone radiator hoses made up from viper performance to replace the tired oem rubber items.
Just a couple of little bits to sort and it's a case of re plumbing the boost control and sort all sensors then it's ready for firing.
but 2 were to badly scored to reuse. after a set of new seals they are rebuilt and on their way back to me.
Had a set of silicone radiator hoses made up from viper performance to replace the tired oem rubber items.
Just a couple of little bits to sort and it's a case of re plumbing the boost control and sort all sensors then it's ready for firing.

Fantastic. Must have been some effort to make it in time for the courier so I appreciate that.
Thanks Alyn ;-)
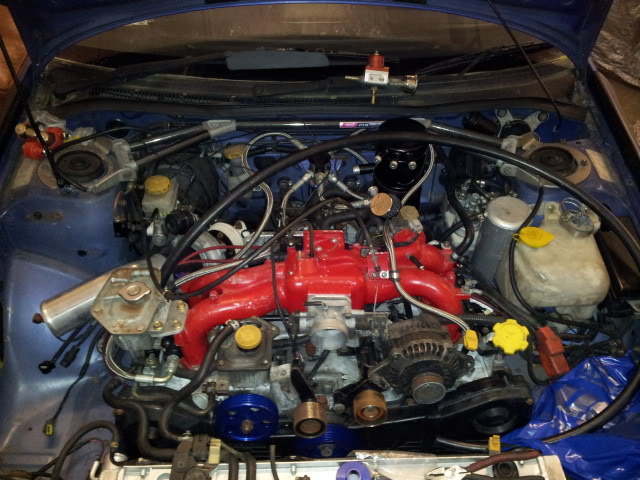
Ian, no problem I cheated and bought an already rotated manifold and ancillaries (alternator bracket, coil pack relocation) so was very easy for me and it's a good proven setup so your welcome to take any tips from it you can.
Thanks Alyn ;-)
Ian, no problem I cheated and bought an already rotated manifold and ancillaries (alternator bracket, coil pack relocation) so was very easy for me and it's a good proven setup so your welcome to take any tips from it you can.
Joined: Nov 2003
Posts: 13,356
Likes: 58
From: in the woods...........555 Wagon Sqn
the intercooler flip is more of a concern for me, I'll need to get all the pipework made up...the alternator kit will e one of Carl Daveys'; expensive lovely
I had to send the viper performance hoses back as they were for a newage. On their website it specifies them as 2000 onwards. I just read it as 2000 and assumed it was for a classic.
I was looking elsewhere for Silicone hose kit, samco was very expensive but probably the best place to go as I wanted black for the oem look. After a calk to Richard at cotcomp (thank you) I was ready too place an order. The only thing stopping me was that it would have taken 4-6 Weeks and cost a lot of money for the kit. I was initially just ordering the top and bottom rad hoses forgetting that I probably needed almost a full set of water pipes.
This would probably hold the car up so I decided that I would just go for the popular blue house kit. After many hours searching the Web I ordered the Autobahn 88 kit.
Place the order on the weekend, it left Hong Kong on Monday and arrived today (Wednesday) ! fantastic service from them.
There are quite a few imitation websites around so beware. On of these sites is owned by flat four online - I don't think I need to mention anymore.
Ordered some vacuum pipes at the same time.
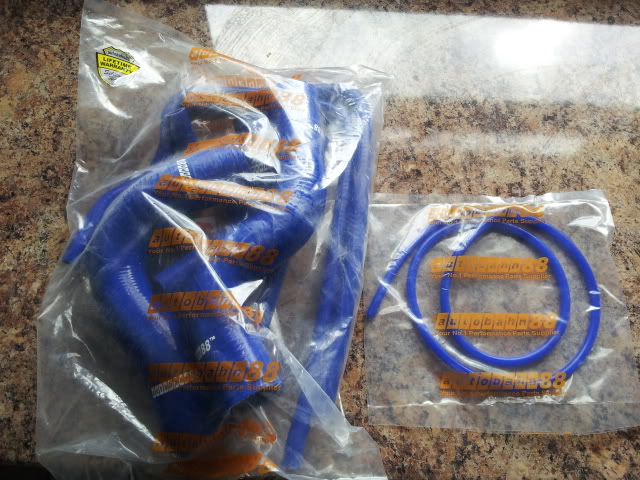
I will hopeful get some time this weekend to go up to the car and get this plumed in with a few more bits and pieces.
I was looking elsewhere for Silicone hose kit, samco was very expensive but probably the best place to go as I wanted black for the oem look. After a calk to Richard at cotcomp (thank you) I was ready too place an order. The only thing stopping me was that it would have taken 4-6 Weeks and cost a lot of money for the kit. I was initially just ordering the top and bottom rad hoses forgetting that I probably needed almost a full set of water pipes.
This would probably hold the car up so I decided that I would just go for the popular blue house kit. After many hours searching the Web I ordered the Autobahn 88 kit.
Place the order on the weekend, it left Hong Kong on Monday and arrived today (Wednesday) ! fantastic service from them.
There are quite a few imitation websites around so beware. On of these sites is owned by flat four online - I don't think I need to mention anymore.
Ordered some vacuum pipes at the same time.
I will hopeful get some time this weekend to go up to the car and get this plumed in with a few more bits and pieces.

Scooby Regular
Joined: Oct 2008
Posts: 119
Likes: 0
From: lancs
getting there.slowly,slowly catchy monkey and all that......my FSTI is at scooby clinic getting a forged engine(bloody oil burner) not due to pick it up till 22nd will be 5 weeks i've been without a turbo scooby fix(got a auto n/a legacy estate as a loaner) so god knows how you've coped!!!!now get back in that garage and work......ATB,
mik
mik
Lol thanks Mik.
I will be down the clinic myself soon after the car is up and running. I need to get the cold air feed sorted and I need their help.
Most people just have an induction trumpet in the offside fog cover. I don't like the look of them and would rather a more subtle solution.

I have been in touch with Kev and they are hopefully going to replicate the induction cover on their 22b.
I will be down the clinic myself soon after the car is up and running. I need to get the cold air feed sorted and I need their help.
Most people just have an induction trumpet in the offside fog cover. I don't like the look of them and would rather a more subtle solution.
I have been in touch with Kev and they are hopefully going to replicate the induction cover on their 22b.