
wagon fettle

Thread Starter


Joined: Nov 2003
Posts: 13,356
Likes: 58
From: in the woods...........555 Wagon Sqn
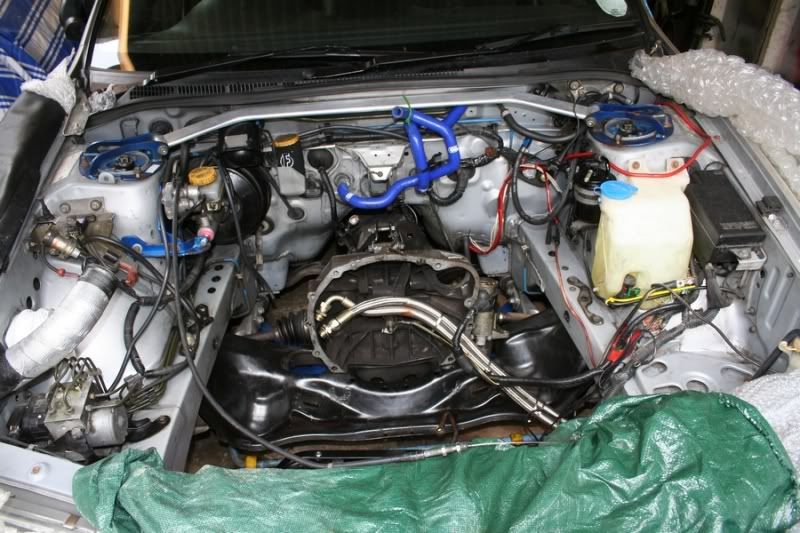
I have spent quite a bit of time cleaning the engine bay and ancillaries, most was covered in oil from when then engine went pop, I removed the old oil catch can, moved the alarm speaker out of the way and fitted the Cusco master cylinder support (I cut up the old throttle cable bracket too).
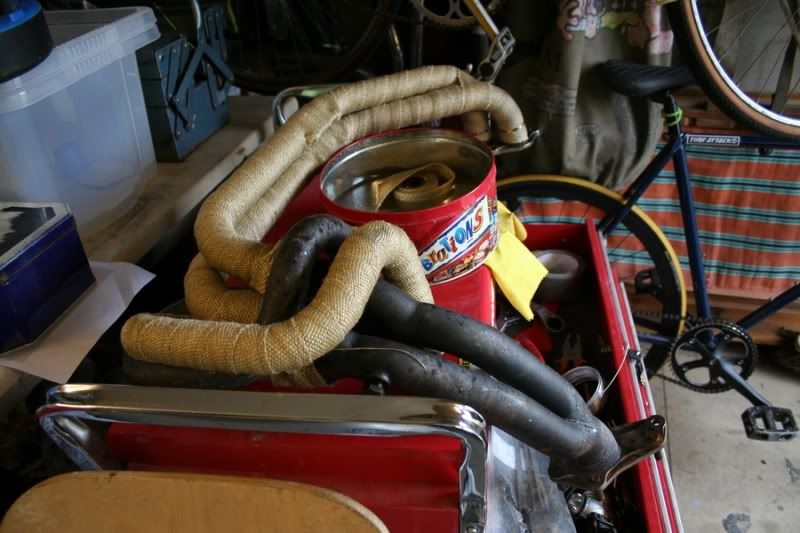
This afternoon I started wrapping my headers, I started off with these at 3:30...
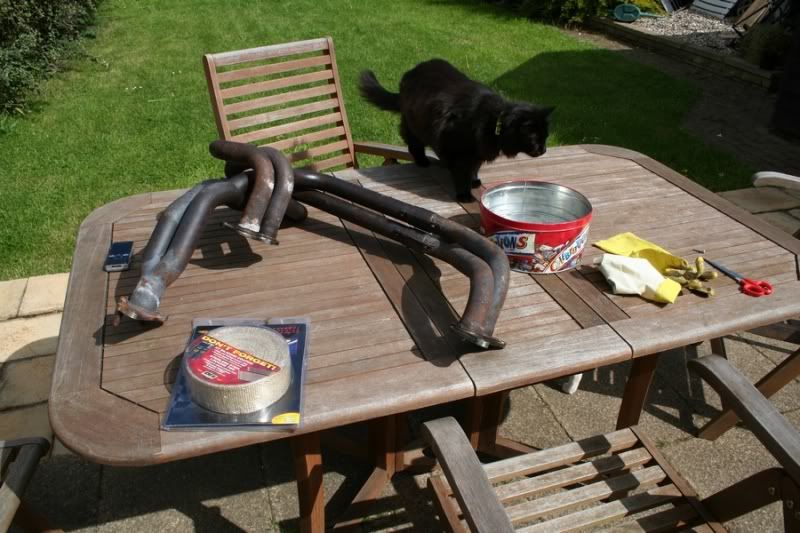
and stopped when it started raining at 6...never gain, the next lot are getting ceramic coated regardless of the cost. Lifes too short
This afternoon I started wrapping my headers, I started off with these at 3:30...
and stopped when it started raining at 6...never gain, the next lot are getting ceramic coated regardless of the cost. Lifes too short
 you know me too well...fookin' right it won't

the bay looks good and clean. get some jetseal 109 couple of coats should do it. followed up by a good wax, on there to help it stay that way for longer.
exhaust wrapping is good fun isn't it took me 2 solid days to wrap the headers on my ra.
exhaust wrapping is good fun isn't it
took me 2 solid days to wrap the headers on my ra.
Thread Starter
Joined: Nov 2003
Posts: 13,356
Likes: 58
From: in the woods...........555 Wagon Sqn
not sure i can be bothered to clean the bay anymore...so lazy when it comes to cleaning 
i wrapped Zaks 4-1 headers and they were OK, took a few hours but fairly straight forward but these are 4-2-1 with slip joints and there is bugger all room
anyway i left the headers and made up a battery tray for the small battery i'll be running ready for welding...the first one was terrible
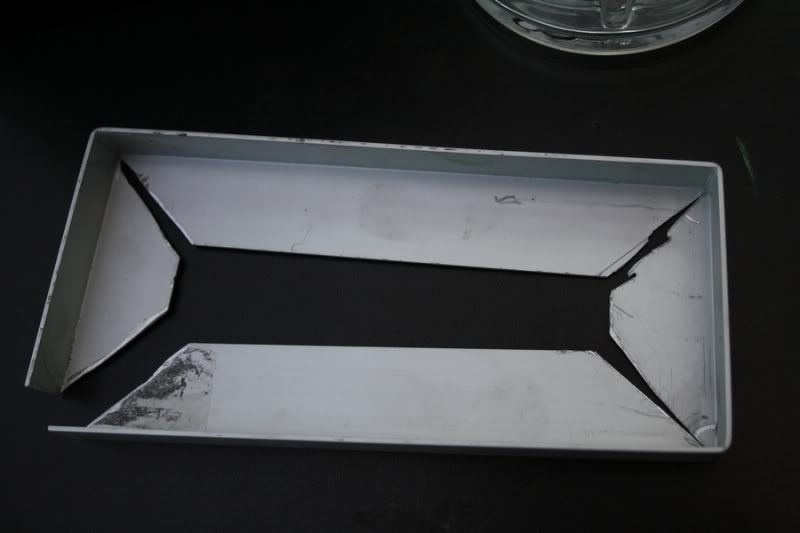
so I spent a bit more time on the measuring and this time it came out much better...well good enough for some artistic welding to hide the gaps anyway
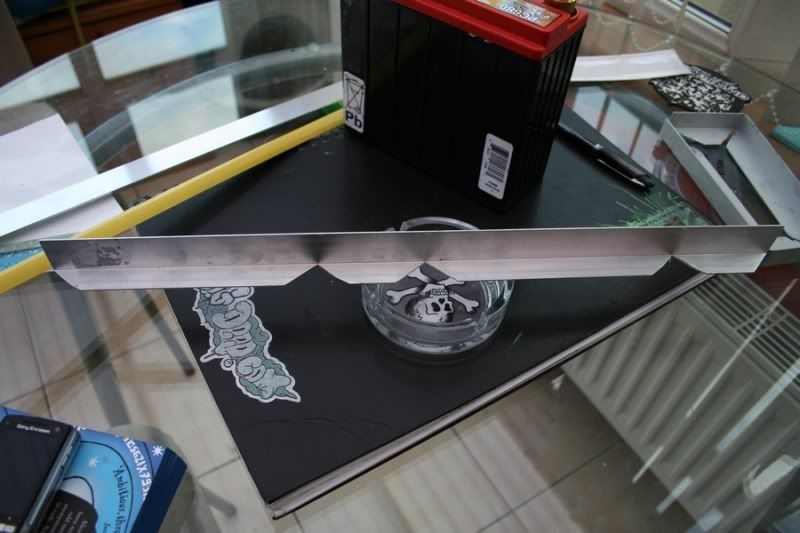

i've cut a couple of strips to be welded up the sides too to enable me to clamp the battery in place. i'm looking forward to see how it comes out
i wrapped Zaks 4-1 headers and they were OK, took a few hours but fairly straight forward but these are 4-2-1 with slip joints and there is bugger all room
anyway i left the headers and made up a battery tray for the small battery i'll be running ready for welding...the first one was terrible
so I spent a bit more time on the measuring and this time it came out much better...well good enough for some artistic welding to hide the gaps anyway
i've cut a couple of strips to be welded up the sides too to enable me to clamp the battery in place. i'm looking forward to see how it comes out
Scooby Regular
Joined: May 2008
Posts: 1,260
Likes: 3
From: Derbyshire
Sorry to hijack the thread but I figured that as this has to be one of the most informative wagon modding thread's I've come across, it must also be one of the best places to get my query answered:
I have a rear waist spoiler that I want to fit to my wagon. Does anyone have a guide on how to fit these things, along with the necesary tools and bits n bobs required; or would I be better getting it done at a bodyshop?
Thanks in advance.
I have a rear waist spoiler that I want to fit to my wagon. Does anyone have a guide on how to fit these things, along with the necesary tools and bits n bobs required; or would I be better getting it done at a bodyshop?
Thanks in advance.
Last edited by Jonnys3; May 28, 2009 at 12:54 PM.
Thread Starter
Joined: Nov 2003
Posts: 13,356
Likes: 58
From: in the woods...........555 Wagon Sqn
no worries Jonny, the waist spoiler should fit straight into the holes the OEM spoiler. it's a fiddly job but nothing too challenging
Scooby Regular
Joined: May 2008
Posts: 1,260
Likes: 3
From: Derbyshire
My wagon is a bugeye and didn't come with a waist spoiler. What's the best way to drill through the tailgate without inflicting too much damage, and what bolts are required to fic it in place? 
Thread Starter
Joined: Nov 2003
Posts: 13,356
Likes: 58
From: in the woods...........555 Wagon Sqn
Thread Starter
Joined: Nov 2003
Posts: 13,356
Likes: 58
From: in the woods...........555 Wagon Sqn
Good luck Jonny
sourced one of the final bits I've been looking for, a more accurately reflect the new engines potential thanks Zak 
I think all I'll need is a mechanical speedo converter (kph to mph), and then its just plug & play...
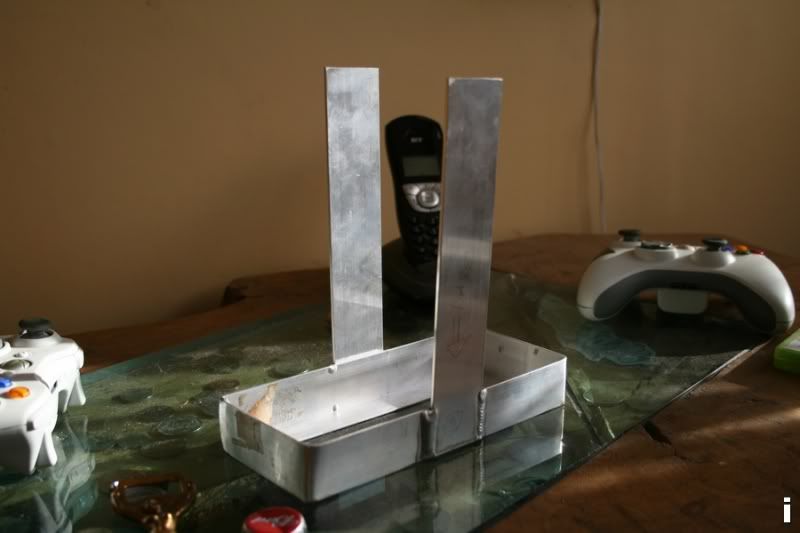
Got the battery tray back from welding, looks good...all I need is to sort the latch out...got a few ideas but need to visit a breakers yard first
sourced one of the final bits I've been looking for, a more accurately reflect the new engines potential
thanks Zak I think all I'll need is a mechanical speedo converter (kph to mph), and then its just plug & play...
Got the battery tray back from welding, looks good...all I need is to sort the latch out...got a few ideas but need to visit a breakers yard first
Thread Starter
Joined: Nov 2003
Posts: 13,356
Likes: 58
From: in the woods...........555 Wagon Sqn
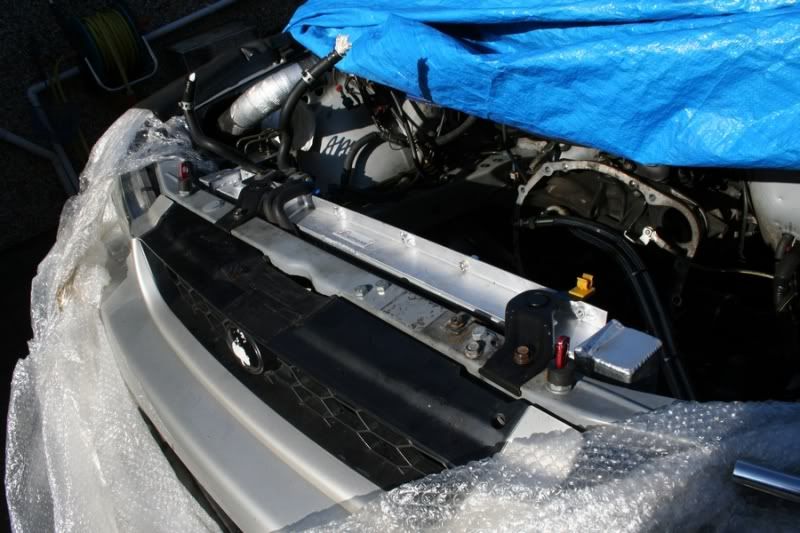
a few more bits and bobs sorted whilst i wait for my engine...finished the header tank and am pleased with the results.

IM reassembled...

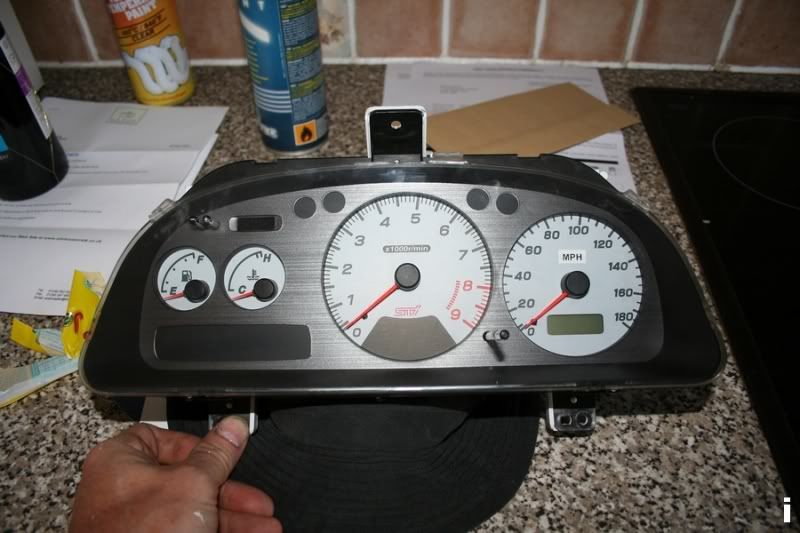
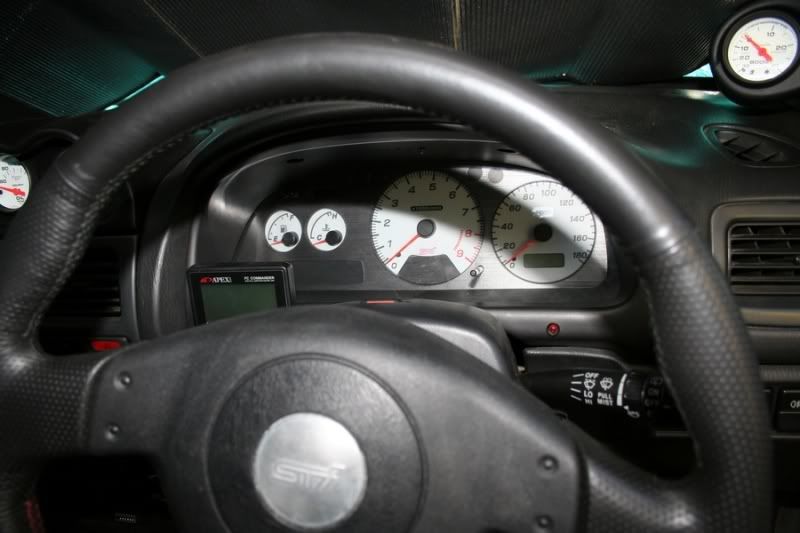
sti clocks fitted but not tested...no power
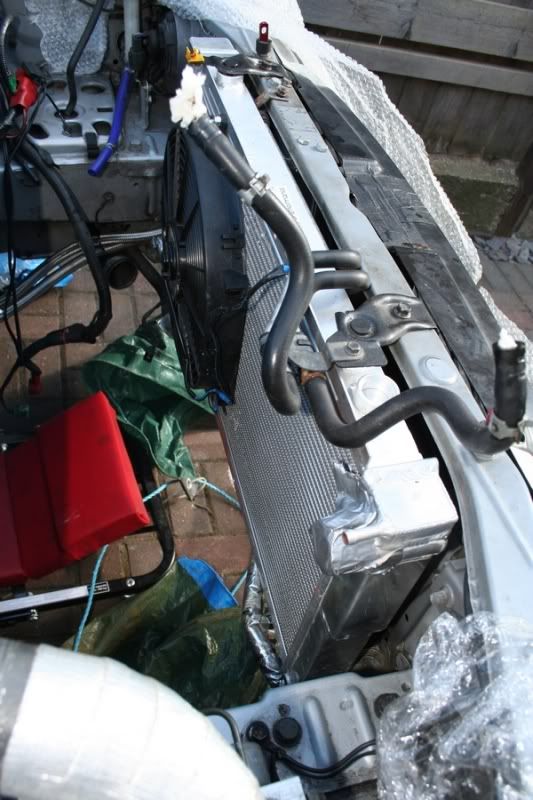
reattached the fan using its fittings no more cable ties through the core and tested fitted it. It fits
still not sorted my steering rack, but all I need now is to source now are some longer fittings; on one side of the newage there are two thick alloy fitting holes instead of a thin steel bracket. the good news is it doesn't look like the oil lines need to be moved so just the linkage to sort. I've got the newage linkage now (thanks Zak), I've measured them but don't want to make the cut until I've fitted the rack to be on the safe side. I've decided to get the weld ultrasound checked once it's welded for some peace of mind, so if anyone can recommend a firm that can I'd be grateful.
IM reassembled...
sti clocks fitted but not tested...no power
reattached the fan using its fittings no more cable ties through the core
and tested fitted it. It fits still not sorted my steering rack, but all I need now is to source now are some longer fittings; on one side of the newage there are two thick alloy fitting holes instead of a thin steel bracket. the good news is it doesn't look like the oil lines need to be moved so just the linkage to sort. I've got the newage linkage now (thanks Zak), I've measured them but don't want to make the cut until I've fitted the rack to be on the safe side. I've decided to get the weld ultrasound checked once it's welded for some peace of mind, so if anyone can recommend a firm that can I'd be grateful.


Thread Starter
Joined: Nov 2003
Posts: 13,356
Likes: 58
From: in the woods...........555 Wagon Sqn
Cheers Darms
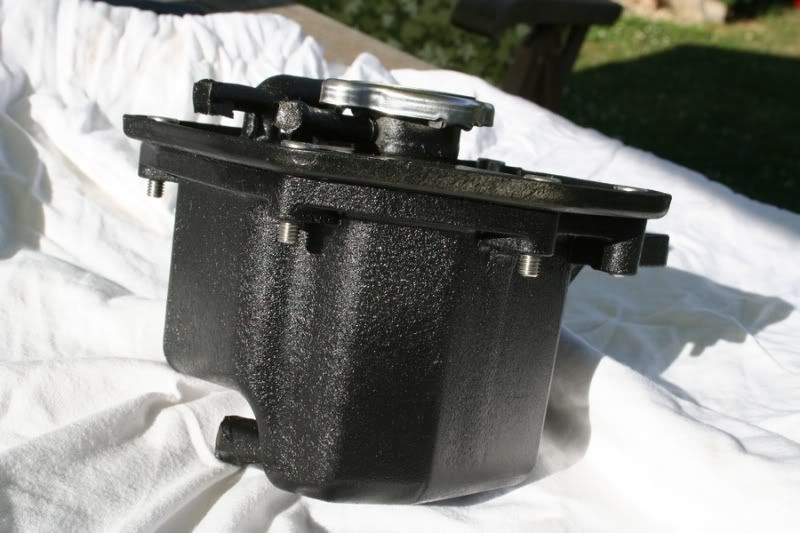
Jon, Steven beat me to it...black crinkle paint from Frost Auto restoration (google is your friend)
Steven, I'm intending on stealing the convertor fro the car that donated the clocks
Jon, Steven beat me to it...black crinkle paint from Frost Auto restoration (google is your friend)
Steven, I'm intending on stealing the convertor fro the car that donated the clocks


Thread Starter
Joined: Nov 2003
Posts: 13,356
Likes: 58
From: in the woods...........555 Wagon Sqn
Bit of a brief update; short engine now stripped and ready to be shipped to SMG next Friday to be decked, honed, and new rings. The block is an SMG linered EJ20 CDB with custom Carillo rods to give a displacement of 2.35, Mahle Power Pak pistons, ACL race bearings, 14mm outer head studs.
I need to buy a 12mm oil pump because I'm using AVCS heads which have an additional load to the pump...peace of mind over the 10mm regular version. Just need to be patient now and hope nothing unplanned for crops up...fingers crossed
I need to buy a 12mm oil pump because I'm using AVCS heads which have an additional load to the pump...peace of mind over the 10mm regular version. Just need to be patient now and hope nothing unplanned for crops up...fingers crossed
Last edited by trails; Aug 20, 2009 at 01:54 PM. Reason: I was wrong!
Thread Starter
Joined: Nov 2003
Posts: 13,356
Likes: 58
From: in the woods...........555 Wagon Sqn
I'm going on holiday for a couple of weeks so hope to have a long engine ready to install on my return. Block work due for completion tomorrow\Monday morning when it's going to be shipped back to Mocom to have these refitted
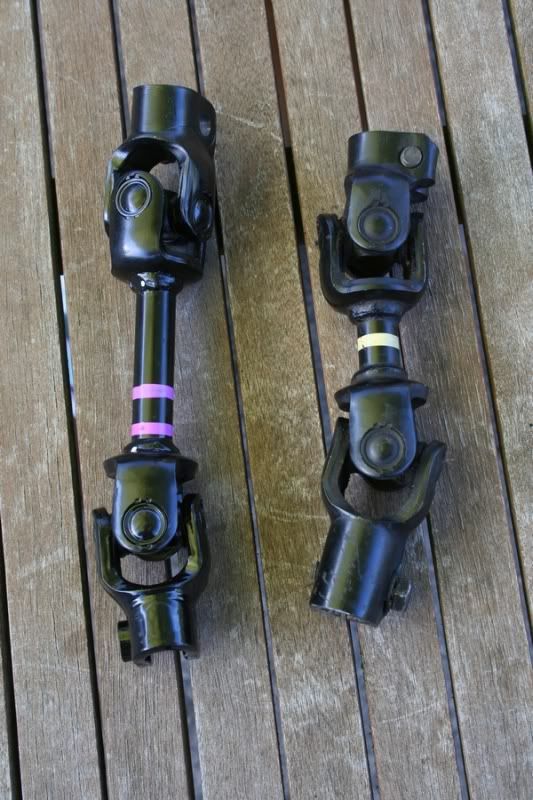
A bit of a change of plan around the steering linkage; after being reacquainted with Hookes Law by a retired automotive engineer (thanks Dad ), cutting and welding the steering linkage seemed like a very bad idea. New plan is to disassemble the UJ's from both linkages and reassemble them as they were originally assembled. That will ensure they retain thier strength and turns smoothly. Universal joint - Wikipedia, the free encyclopedia Both linkages are now with a local engineering shop and be ready on my return.
If all goes according to plan it should be running late third week\beginning of fourth week of August. Quite excited as its going to be almost seven months since I've driven it
A bit of a change of plan around the steering linkage; after being reacquainted with Hookes Law by a retired automotive engineer (thanks Dad
), cutting and welding the steering linkage seemed like a very bad idea. New plan is to disassemble the UJ's from both linkages and reassemble them as they were originally assembled. That will ensure they retain thier strength and turns smoothly. Universal joint - Wikipedia, the free encyclopedia Both linkages are now with a local engineering shop and be ready on my return.If all goes according to plan it should be running late third week\beginning of fourth week of August. Quite excited as its going to be almost seven months since I've driven it
Last edited by trails; Aug 20, 2009 at 01:58 PM.

