
wagon fettle


Scooby Regular
Joined: Apr 2004
Posts: 98
Likes: 0
From: From No-bars Krud to Subarman in one leap
What a splendid "Squadron attitude" from one of the 555 Wagon Squadron's most formidable pilots!!
I think your splendid piston should be brought to a Squadron event and displayed as utter class!!!
F Off Simpleton signing out..................
I think your splendid piston should be brought to a Squadron event and displayed as utter class!!!
F Off Simpleton signing out..................
Thread Starter


Joined: Nov 2003
Posts: 13,356
Likes: 58
From: in the woods...........555 Wagon Sqn


Thread Starter
Joined: Nov 2003
Posts: 13,356
Likes: 58
From: in the woods...........555 Wagon Sqn
No pics at present but a bit of an update;
I�ve been buying a few bits for the rebuild, some I need...some are just too cheap to turn down I�ve sourced one of John Stevenson�s baffled sumps; my original one was ahem a little dented after a jacking incident and then full up with small bits of engine post bang. I intended to replace it with a standard sump but this one was too good a price to miss.
I now have an alloy race rad and slimline fan, this has been on my list for a while since, mainly since I saw the amount of corrosion on it when I stripped out the aircon last year...finally I�ve sourced a Spec C quickrack (2.25 turns from lock to lock), I just need to change the uj and it will fit straight in. Allegedly! Another mod I�ve been wanting to do for a while and now the engine is out its the perfect excuse
I've also got myself a shift light and a Cusco break stopper (I already have a CDF one but this is just a little nicer") ).
).
As well as spending I've been cleaning up my IM and header tank by removing now redundant brackets\hangers...totally aesthetic poncyness but I'm enjoying the process
I�ve been buying a few bits for the rebuild, some I need...some are just too cheap to turn down
I�ve sourced one of John Stevenson�s baffled sumps; my original one was ahem a little dented after a jacking incident and then full up with small bits of engine post bang. I intended to replace it with a standard sump but this one was too good a price to miss.I now have an alloy race rad and slimline fan, this has been on my list for a while since, mainly since I saw the amount of corrosion on it when I stripped out the aircon last year...finally I�ve sourced a Spec C quickrack (2.25 turns from lock to lock), I just need to change the uj and it will fit straight in. Allegedly! Another mod I�ve been wanting to do for a while and now the engine is out its the perfect excuse
I've also got myself a shift light and a Cusco break stopper (I already have a CDF one but this is just a little nicer
).As well as spending I've been cleaning up my IM and header tank by removing now redundant brackets\hangers...totally aesthetic poncyness but I'm enjoying the process
Thread Starter
Joined: Nov 2003
Posts: 13,356
Likes: 58
From: in the woods...........555 Wagon Sqn
Thread Starter
Joined: Nov 2003
Posts: 13,356
Likes: 58
From: in the woods...........555 Wagon Sqn
I've got some *ahem* bits but I don't want to say too much until its ready to go

Thread Starter
Joined: Nov 2003
Posts: 13,356
Likes: 58
From: in the woods...........555 Wagon Sqn
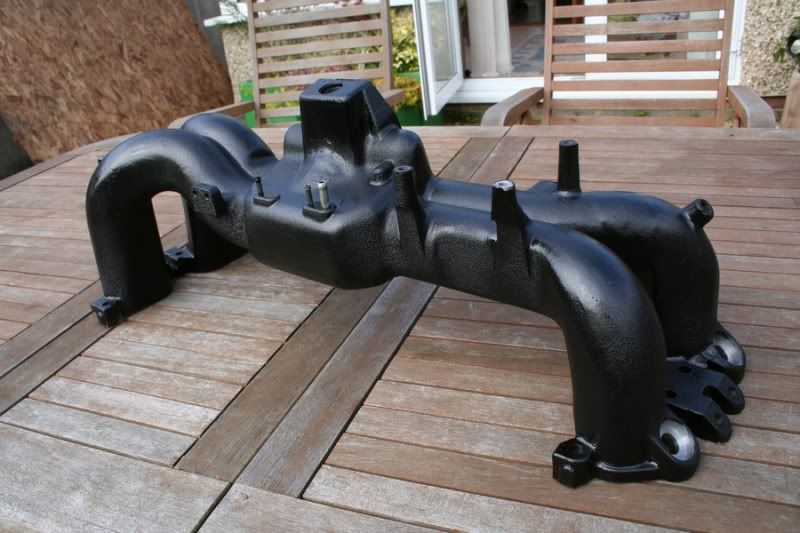
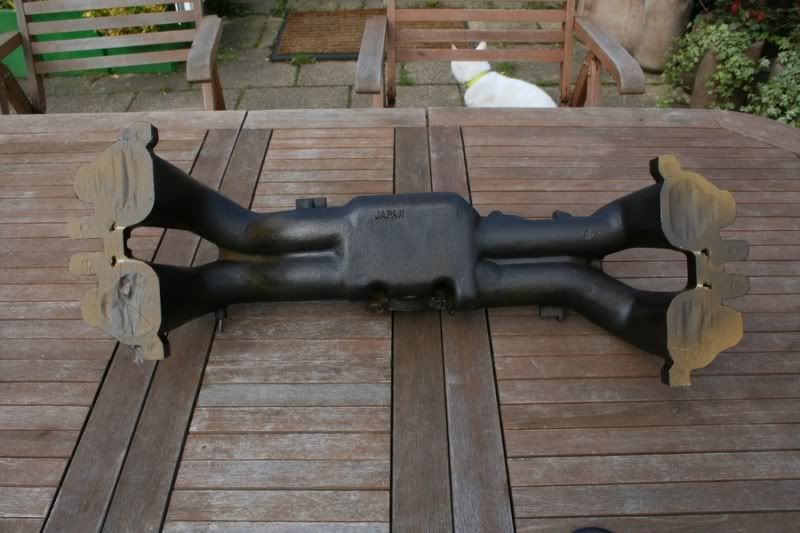
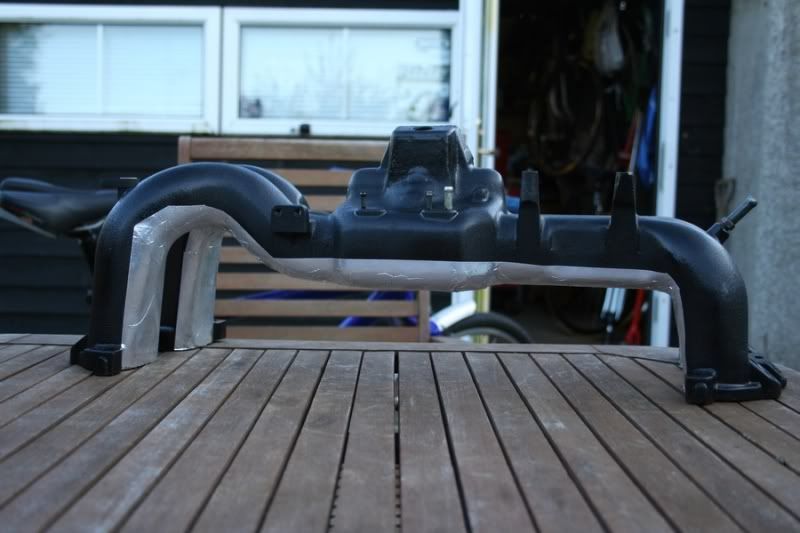
Last time the IM was off I chopped a few of the OE fuel rail fixing points but always wanted to make a proper job of it...so this time I brought myself a couple of good files and a die grinder and after a fair few hours have removed all the casting marks and all the fixing points except those for the coil-pack, idle control valve and header tank, I'm pretty happy with the results
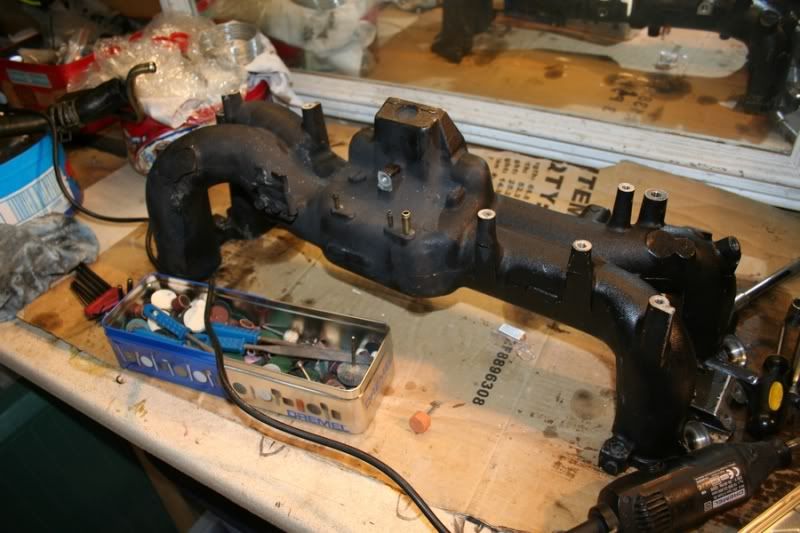

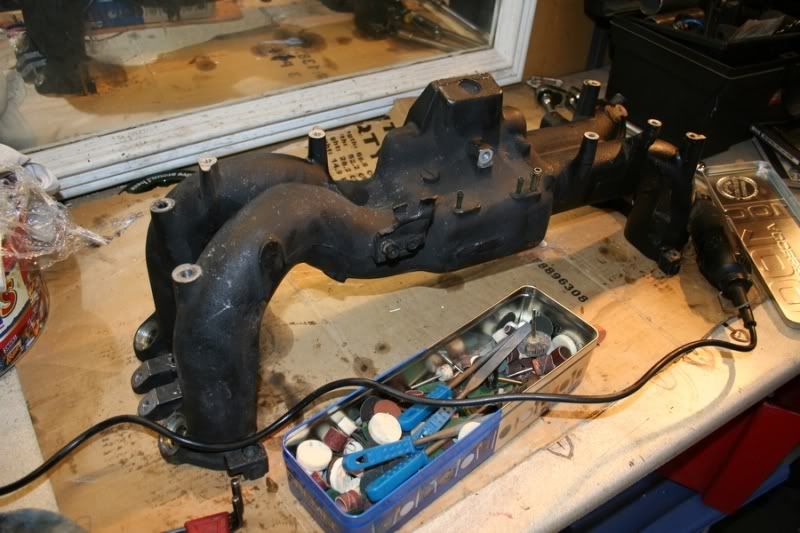
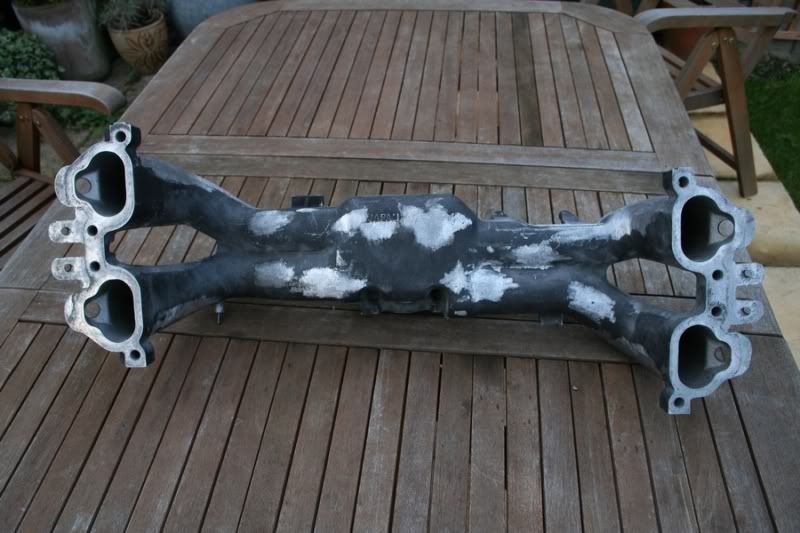
As I'm using some of Carl Davey's header tank spacers I don't use the lower support...so I cut it off
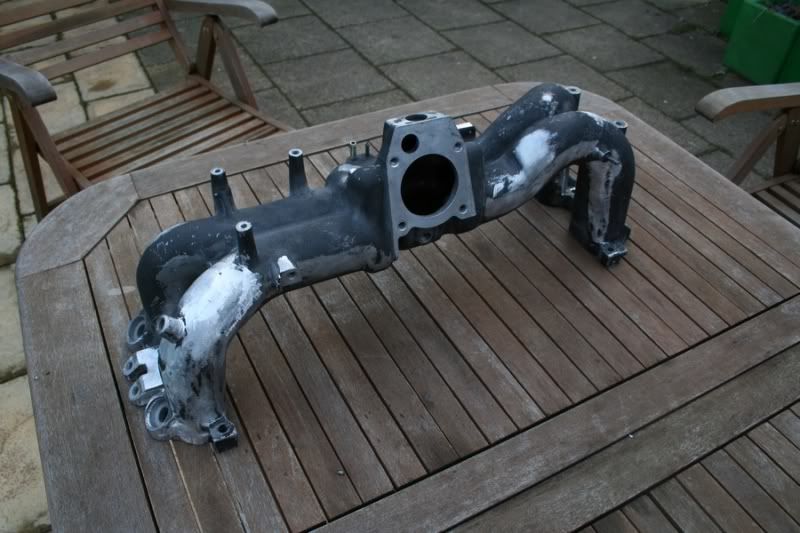
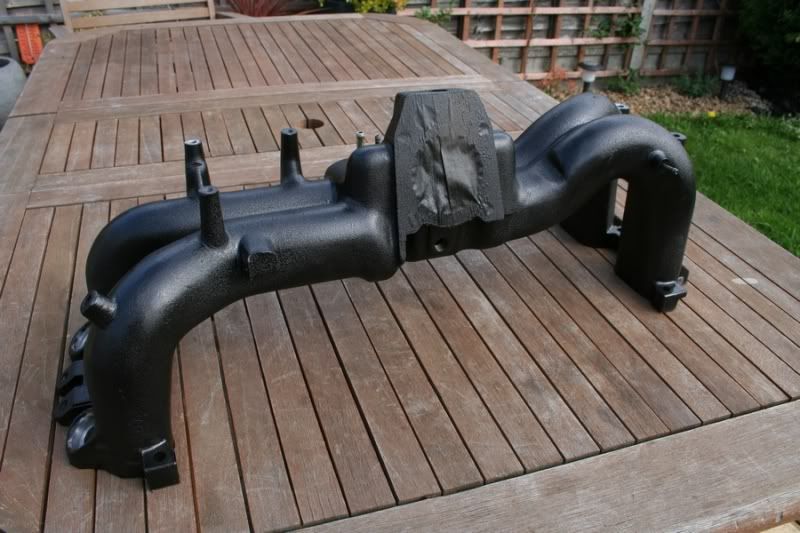
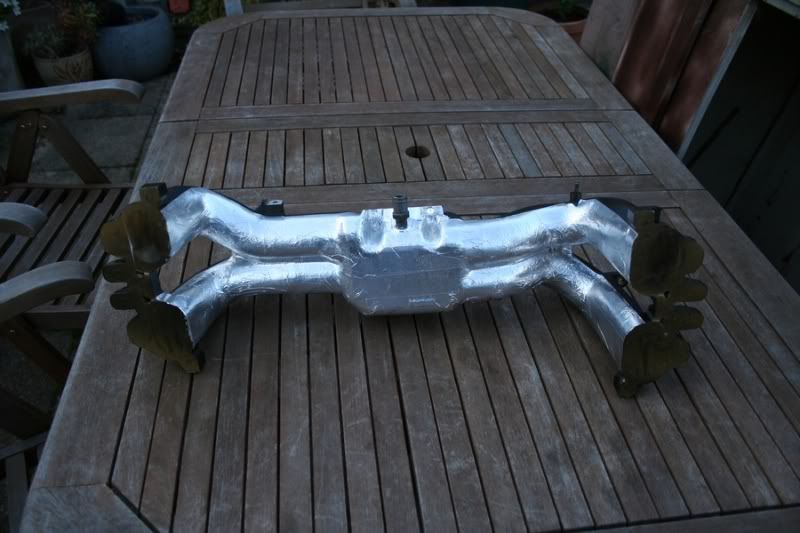
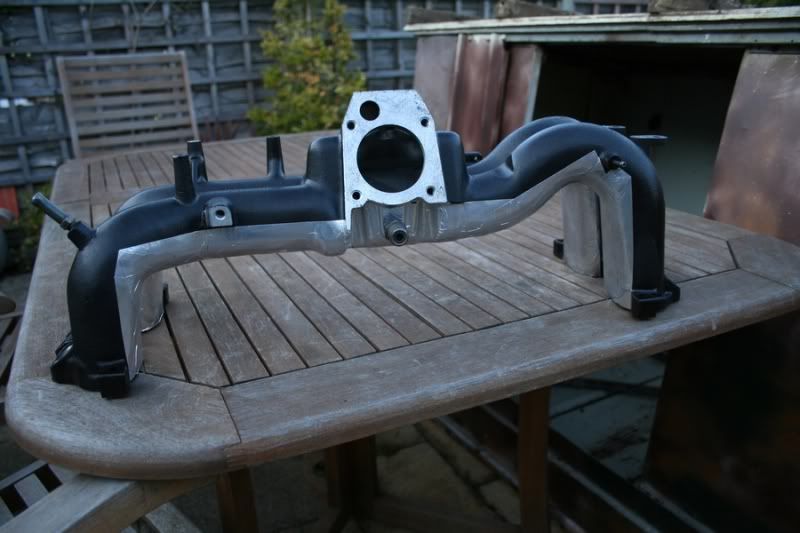
I've ordered some black crackle finish paint (thanks Frayz ), and am looking forward to seeing what it looks like when its painted. I can then reassemble it with TB, fuel rails etc.
As I'm using some of Carl Davey's header tank spacers I don't use the lower support...so I cut it off
I've ordered some black crackle finish paint (thanks Frayz
), and am looking forward to seeing what it looks like when its painted. I can then reassemble it with TB, fuel rails etc.
Last edited by trails; Mar 28, 2009 at 07:36 PM.
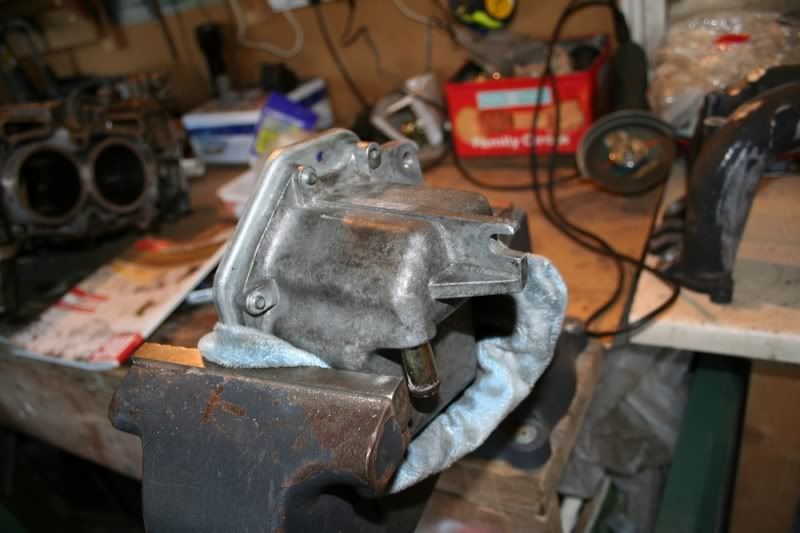
What are you going to do in respect of the cables/pipes that were fitted to clips screwed into those anchor points on top Ian and what is fitted to all the points underneath ? is it mostly the carbon canister pipework anchor points ?
Thread Starter
Joined: Nov 2003
Posts: 13,356
Likes: 58
From: in the woods...........555 Wagon Sqn
the fixings underneath are for the hard pipes for the carbon cannister and recirc BOV, I've binned the carbon canister and because I'm using a SSQV converted to recirc its easier to use soft hoses. The fixings on the top were mostly for the HT leads but as I'm running IM spacers the leads are quite tight and don't flap around so a couple of well placed cable ties should be all I need...well that's my theory anyways
Scooby Regular
iTrader: (5)
Joined: Mar 2003
Posts: 788
Likes: 0
From: Aberdeen, White Classic Wagon, 6-Speed, Track Car
Trails,
How did you get on with the steering rack? Very keen to see how you get on as i'm looking to attempt this one!
Cracking wagon by the way!
Cheers
James
How did you get on with the steering rack? Very keen to see how you get on as i'm looking to attempt this one!
Cracking wagon by the way!
Cheers
James
Interesting Ian.... I have some spacers to go on here at some point to and have dumped my cannister so I'm curious to see what parts are either no longer needed or simply can't be used.
Scooby Regular
iTrader: (5)
Joined: Mar 2003
Posts: 788
Likes: 0
From: Aberdeen, White Classic Wagon, 6-Speed, Track Car
Thread Starter
Joined: Nov 2003
Posts: 13,356
Likes: 58
From: in the woods...........555 Wagon Sqn
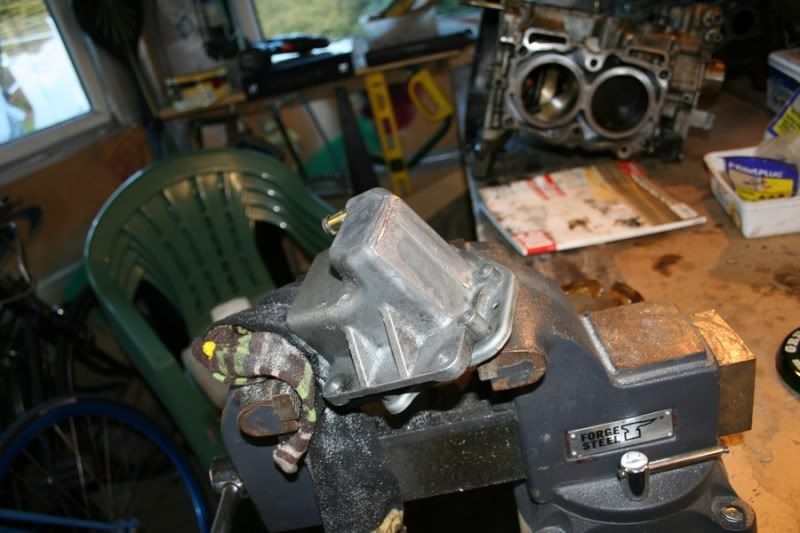
junking the carbon cannister means you can loose one of the hardpipes that go under the IM but the other one is used for the OE BOV and inlet pipe so unless you change to soft pipes I'd say leave it in place. Removing the OE fuel rails and going parallel allows you to remove the largest number of fixing points...you can see from the pics where the IM is still black there are lots of stumps!
Last edited by trails; Mar 30, 2009 at 09:25 AM.
Thread Starter
Joined: Nov 2003
Posts: 13,356
Likes: 58
From: in the woods...........555 Wagon Sqn


Thread Starter
Joined: Nov 2003
Posts: 13,356
Likes: 58
From: in the woods...........555 Wagon Sqn
Hey Ross, well i've got almost everything i need now...Zak is going to strip the short engine down and then it's going back to SMG to get skimmed and rehoned. then back to Zak for re-assembly with the heads, i will then take it home and fit the long engine. i did originally plan to do the strip down and rebuild myself but there are too many easy mistakes to make and i'm not prepared to risk the money invested in this engine. or to put it another way; i'm scared 
Last edited by trails; Apr 13, 2009 at 12:18 PM.
Hey Ross, well i've got almost everything i need now...Zak is going to strip the short engine down and then it's going back to SMG to get skimmed and rehoned. then back to Zak for re-assembly. I did originally plan to do the strip down and rebuild myself but there are too many easy mistakes to make and i'm not prepared to risk the money invested in this engine. or to put it another way; i'm scared
Totally agree with you, unless 100% confident in doing it yourself, pay someone else... that's my philosophy anyway
.
Scooby Regular
iTrader: (12)
Joined: Jun 2007
Posts: 3,734
Likes: 0
From: 700+ WR1 aka The Vuvu Zela...10.6 @ 136 weighing 1370kg....say no more....
Looking good Ian
Now go get that Solaris!
Check out the full spec on pdf -
-
Lateral Performance Ltd| Home | Solaris Ecu's
Now go get that Solaris!
Check out the full spec on pdf
-Lateral Performance Ltd| Home | Solaris Ecu's
Scooby Regular
iTrader: (12)
Joined: Jun 2007
Posts: 3,734
Likes: 0
From: 700+ WR1 aka The Vuvu Zela...10.6 @ 136 weighing 1370kg....say no more....
Another recruit....get Pat to fit the Anti-Lag and Launch control switches where the ashtray is. The current version is better than ever - Pat will be upgrading mine (very soon) when he maps it once the service is complete.
And don't forget to get the calibration switch!
The current version is better than ever - Pat will be upgrading mine (very soon) when he maps it once the service is complete. And don't forget to get the calibration switch!
Thread Starter
Joined: Nov 2003
Posts: 13,356
Likes: 58
From: in the woods...........555 Wagon Sqn
I'll be getting Zak to map mine but I'll be fitting it...switches will be going where the heated seat switches go in the centre console; as OEM looking as possible

Thread Starter
Joined: Nov 2003
Posts: 13,356
Likes: 58
From: in the woods...........555 Wagon Sqn
jujst for you matt some more silver and black
blatantly stolen from Silent Running's thread and another reason for cleaning up the the underside of the IM. its a shame i didn't have the opportunity to log the temps around the underside of the IM beforehand...but it wasn't exactly a planned rebuild
Engine has gone to be stripped, just need to contact the seller as I'm a pulley and head bolt nuts short at present...
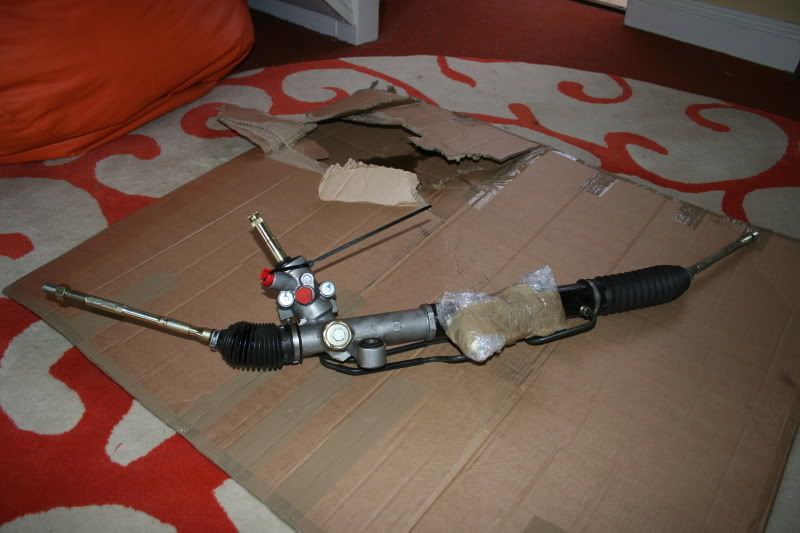
I've removed the standard steering rack and am going to cut and shut a classic and blob linkages to allow me to run the newage quickrack. Well, I'm not I'm going to get it welded and ultra sound checked, not that I'm paranoid but I really don't want that particular weld to fail pics to follow
blatantly stolen from Silent Running's thread and another reason for cleaning up the the underside of the IM. its a shame i didn't have the opportunity to log the temps around the underside of the IM beforehand...but it wasn't exactly a planned rebuild
Engine has gone to be stripped, just need to contact the seller as I'm a pulley and head bolt nuts short at present...
I've removed the standard steering rack and am going to cut and shut a classic and blob linkages to allow me to run the newage quickrack. Well, I'm not I'm going to get it welded and ultra sound checked, not that I'm paranoid but I really don't want that particular weld to fail
pics to follow
Thread Starter
Joined: Nov 2003
Posts: 13,356
Likes: 58
From: in the woods...........555 Wagon Sqn
suffering from a trapped nerve in my back so no BMX fun this weekend...am going to try and get a few bits done and get some more pics up of my progress. in the meantime here are a few pics of stuff I did earlier in the year ad was too slack to post about
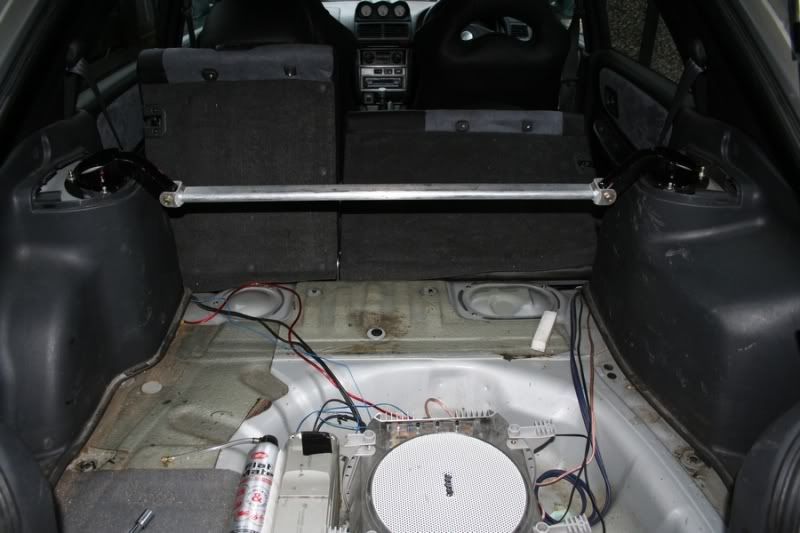
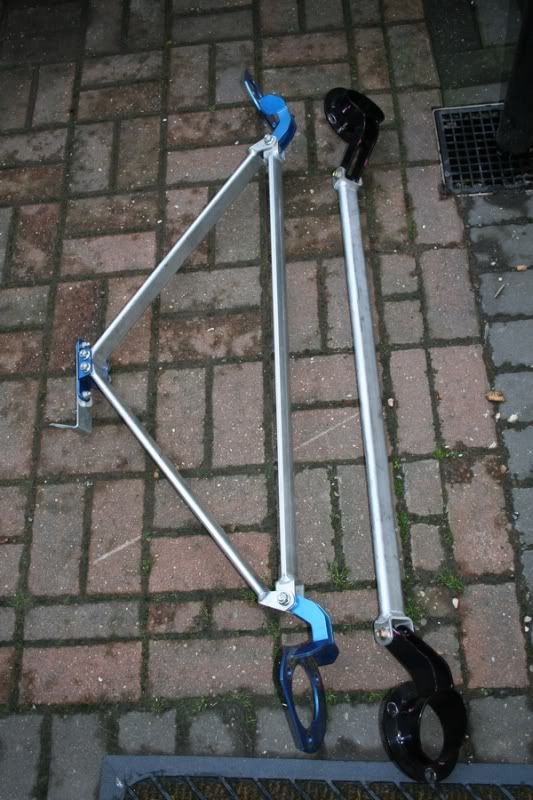
Replaced my rear strut brace with a Cusco three point version, now welded in place...the load cover even fits over it! No pics of it fitted and welded though as the boot is full up of bits of engine
before
side by side
after
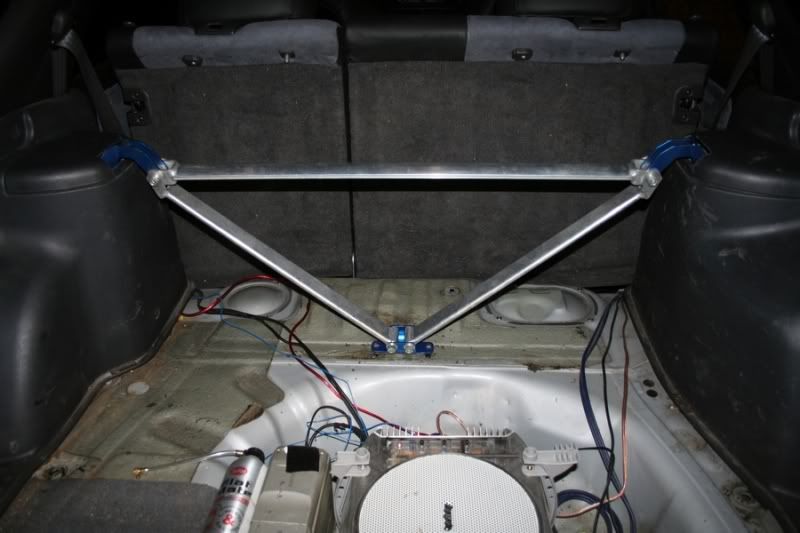
Replaced my rear strut brace with a Cusco three point version, now welded in place...the load cover even fits over it! No pics of it fitted and welded though as the boot is full up of bits of engine
before
side by side
after
Thread Starter
Joined: Nov 2003
Posts: 13,356
Likes: 58
From: in the woods...........555 Wagon Sqn
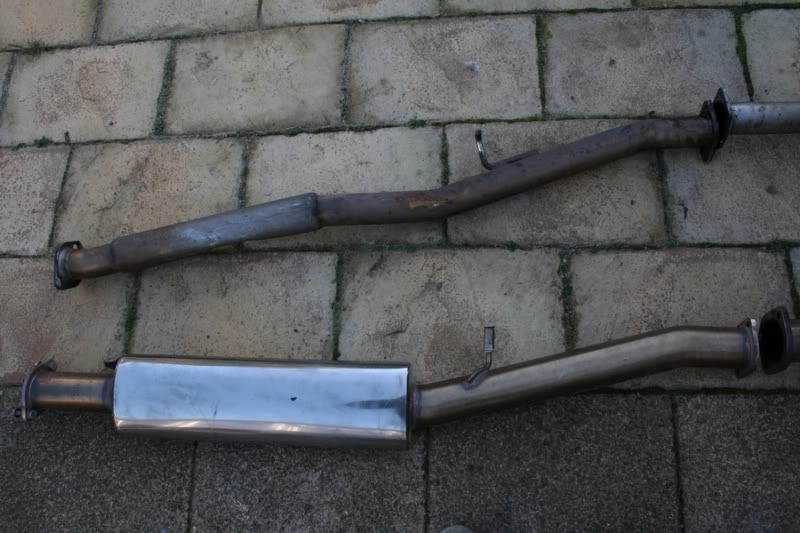
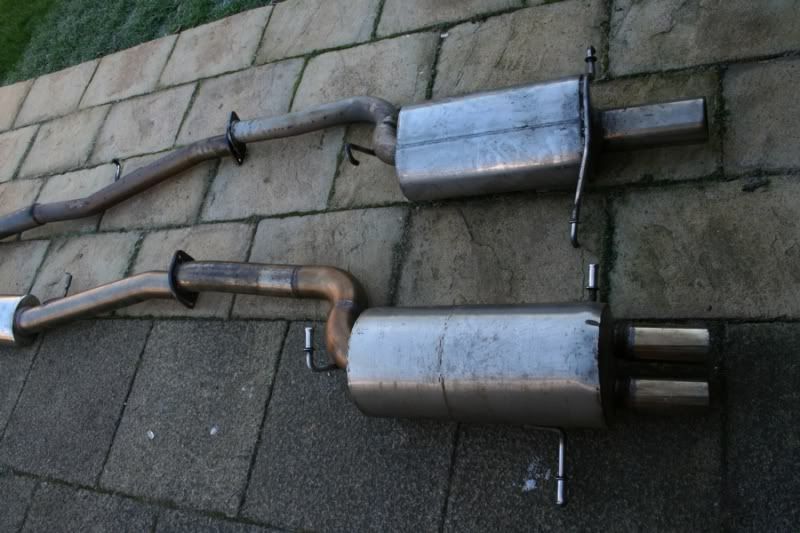
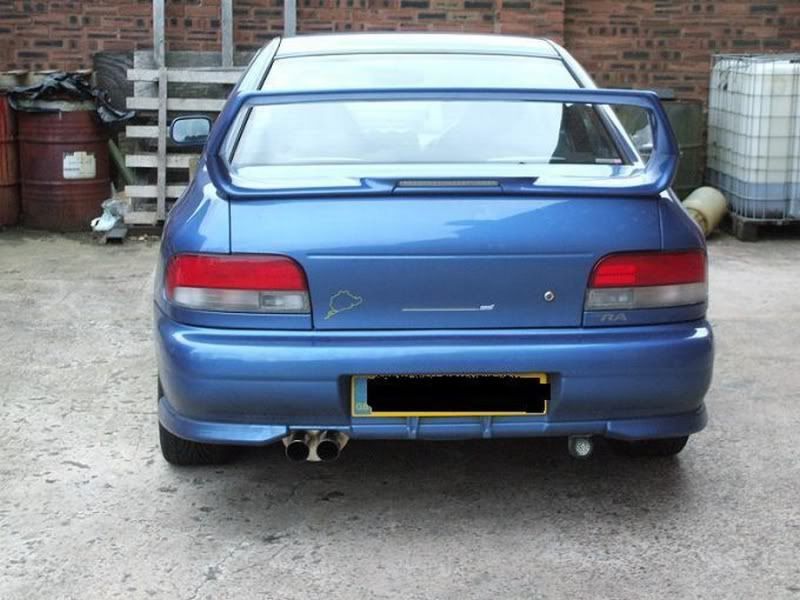
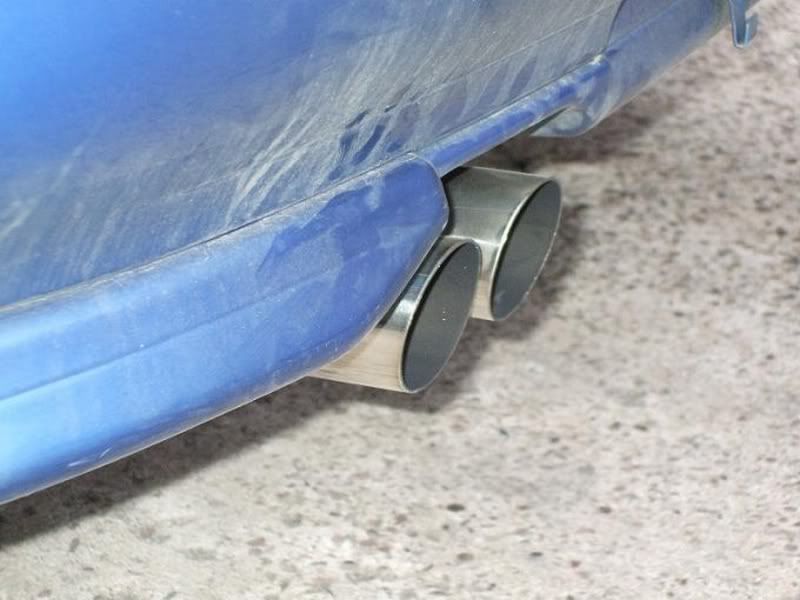
In my quest for a quieter more subtle but still quick car I replaced my 2.5" H&S system for a 3" system made up of a H&S 3" bell mouth downpipe, 3" RCM resonated centre section and a custom twin outlet back box from John Felstead. To say I was pleased with the results is a massive understatement, car was much quieter and the fit of the twin outlet looks very OEM. A few pics to compare the two systems, but again non of it fitted 
centre sections, the RCM resonator is way bigger than the H&S version.
a couple if pics of it fitted to John's old RA.
centre sections, the RCM resonator is way bigger than the H&S version.
a couple if pics of it fitted to John's old RA.