
Floyd’s ‘economy’ Stage III


Scooby Regular
Joined: May 2004
Posts: 11,341
Likes: 1
To Floyd and Flat4
This is quality work. In the scale of things is this all worth the effort? Do you have any indicator that you will gain x bhp/torque whatever.
I ask this as I do not recall anyone doing it over the 3 years I've been on Snet.
If you feel it is, then it is a job for Xmas this year.
Similarly, the air flow from the turbo to the base 'Y' piece of the TMIC:
There is a huge step in the junction of the 'samco-to-cast Y piece' casting. Have either of you feathered/flowed that step? The lip of the casting must be about 3 or 4 mm or have you both used a samco Y piece?
Graham.


Graham, I thought I'd shown a picture of the flowed Y piece earlier (post 40 page 2)? Yes it is a big lip and yes I did smooth it out much more than in the picture, I'll dig out a picture later.
As for the TB, well my philosophy is to maximise flow and reduce 'pumping' losses on anything in the air path so this includes the TB. It may not make much difference in isolation but hopefully all the little mods will accumulate into a better flowing engine and therefore more power. I don't like peaky engines but I want an easy and genuine broad power band. This means a good foundation from all the parts.
Many slap on a big turbo, zorst and filter and get good increases but how much more would they have got with less boost if they had matched, ported and flowed everything? That's what I'm trying to find out. And I'm only after a very flat 300x300...
F
Last edited by Floyd; Apr 14, 2005 at 08:03 AM.

Scooby Regular
Joined: Dec 2003
Posts: 358
Likes: 0
From: Lancashire
I would imagine that gains from such porting would be minimal on a turbo charged engine where the incoming air is under pressure as opposed to a normally aspirated one where the incoming air is sucked in and and steps in the airflow path disrupt the flow and reduce volumetric efficiency. That said, every little bit counts, all these mods combined might make for an eaiser flowing intake and hence more power for a lower amount of boost. You've gone to the trouble of making a certain amount of pressure in the turbo so why not make the most of it?
Martin
Martin
Martin
More power for less boost is the goal and it has the added benefit of quicker spool. The downside is effort involved and time taken, but as Andy F says "many a mickle makes a muckle"
F
More power for less boost is the goal and it has the added benefit of quicker spool. The downside is effort involved and time taken, but as Andy F says "many a mickle makes a muckle"
F

\m/ ^_^ \m/
Joined: Dec 2001
Posts: 36,816
Likes: 0
From: 2010 Time Attack Club Pro Champion - Powered by ScoobyClinic

 might treat myself to a new die grinder this weekend, headers are next on my list of things to do, almost forgot about the scoop side of things, i had something similar in mind but nothing that complete! Hmmmmm

Former Sponsor
iTrader: (234)
Joined: Jan 2003
Posts: 14,406
Likes: 0
From: Over 500ft/lbs of torque @ just 1.1bar
Cheers Martin. How did you know it was leaking? Did it leak oil like mine?
F: Sorry for the hi-jack. Keep up the good work. Do you have a date you expect to be finished? Will be good to see the results.
Bob
F: Sorry for the hi-jack. Keep up the good work. Do you have a date you expect to be finished? Will be good to see the results.
Bob
Scooby Regular
Joined: Dec 2003
Posts: 358
Likes: 0
From: Lancashire
BoB, yes it sprayed a fine mist of oil on the windscreen wiper motor, I was baffled at first, just couldn't see where it was coming from, everytime I wiped it clean it came back within a few miles!
911, I asume that the one you bought was the one that Adge was selling on e-bay? Adge now has my Sti8 scoop and the fabricated alloy sealed scoop! It's a small world for scooby parts eh?
Martin
911, I asume that the one you bought was the one that Adge was selling on e-bay? Adge now has my Sti8 scoop and the fabricated alloy sealed scoop! It's a small world for scooby parts eh?
Martin
Former Sponsor
iTrader: (234)
Joined: Jan 2003
Posts: 14,406
Likes: 0
From: Over 500ft/lbs of torque @ just 1.1bar
Cheers Martin. Sounds identical to mine. No loss of boost or anything...just oil sprayed on area under the back of the i/c on passenger side. Will get onto it on the weekend. 
Bob
Bob
The offside bracket is almost there but I decided to make an adapter instead of using a hammer. The near side is way out and hence the adapter again. Both times I need to adjust to get right when I though it was there in the first place ")
You could use the std nearside bracket and bend it as it is about 1-2cm out to start with on mine.
F
You could use the std nearside bracket and bend it as it is about 1-2cm out to start with on mine.
F
Former Sponsor
iTrader: (234)
Joined: Jan 2003
Posts: 14,406
Likes: 0
From: Over 500ft/lbs of torque @ just 1.1bar
Will be interested to see you adaptors and finished brackets. Still have no brackets on mine.
When do you think the project will be finished?
Bob
When do you think the project will be finished?
Bob
Now that the throttle body is complete the next job is the inlet manifold. No actual modding or porting is taking place on the manifold though. I don't believe at this level of tune there are any gains to be had as the manifold seems quite good to start with. The main reason to lift the manifold is to fit these:
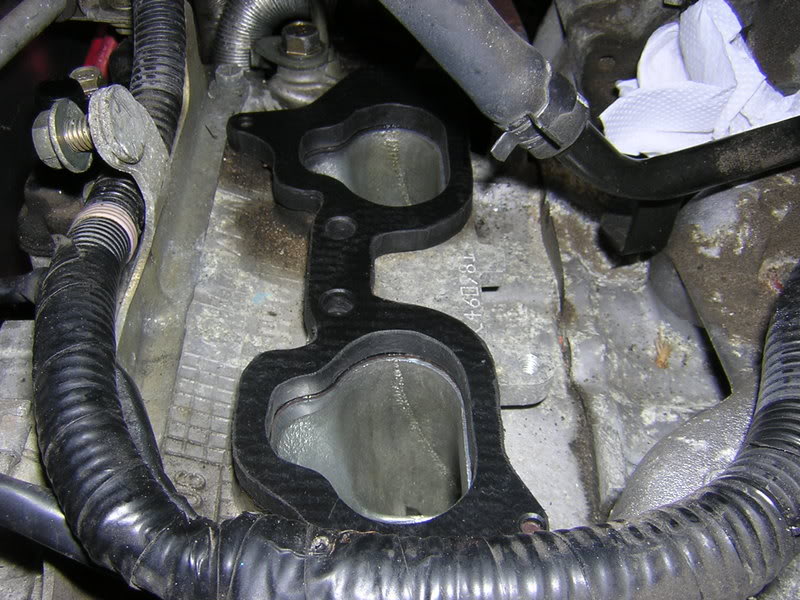
The reason I wanted these is reduce heat transmision and soak, therefore improving temperature control. It also gives the added benefit of a little more room, which I may need for the parallel fuel rail mod (it would be rude not to do this while it's off):
You can see on the right hand side the gasket is still in place and this shows how the fit is quite good already. The head itself can be improved but I'm just not that brave (and I don't have the time) to do it in situ as I know some others have done:
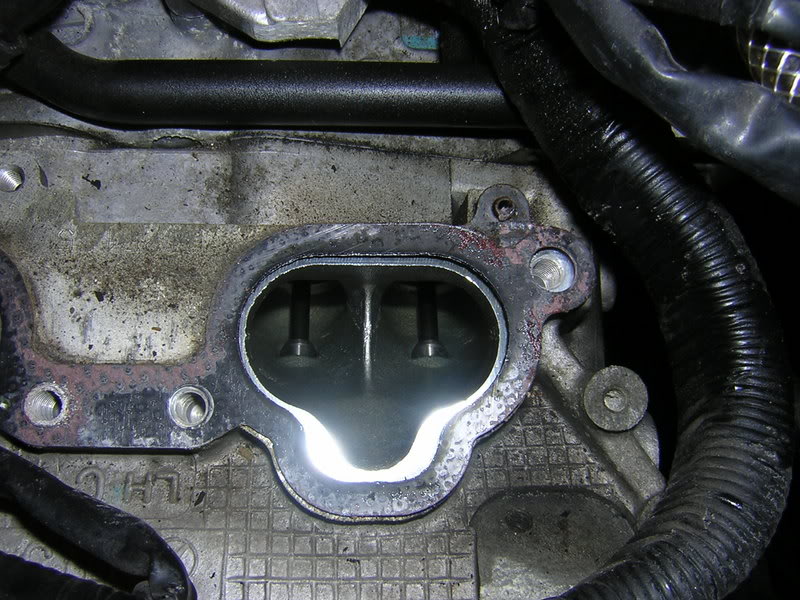
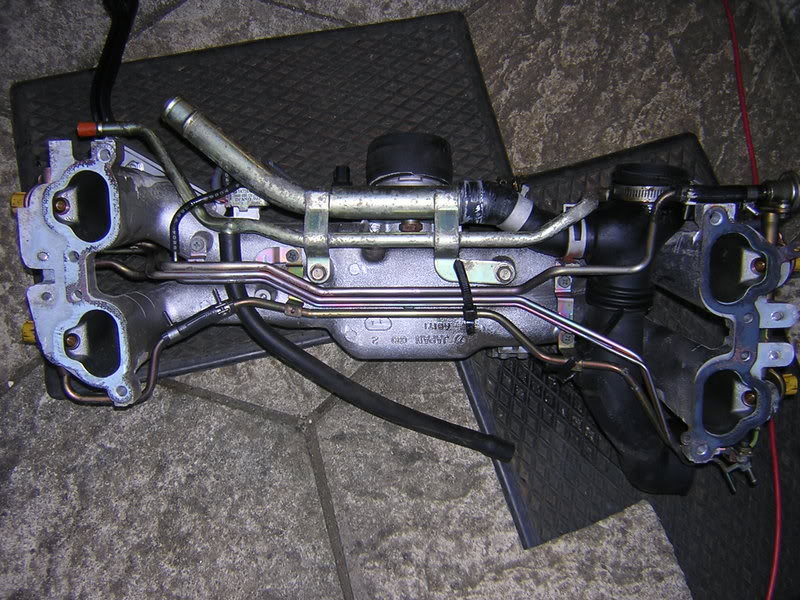
It's a little daunting just how much gubbins has to be removed to do this but it does make changing the inlet pipe much easier, in fact I'd say that this is the way to change the inlet pipe!
I bought 4 new gaskets, 2 for each side of the spacers. While I was doing the fuel rail mod (next) I used the space to fit an oil temp sender and and oil pressure sender. The adapters were bought from LMA and all I needed to say was Scoobynet group buy and they new exactly what I wanted (even though I wasn't part of that group buy but my fittings were 1/8 NPT!):
F
The reason I wanted these is reduce heat transmision and soak, therefore improving temperature control. It also gives the added benefit of a little more room, which I may need for the parallel fuel rail mod (it would be rude not to do this while it's off):
You can see on the right hand side the gasket is still in place and this shows how the fit is quite good already. The head itself can be improved but I'm just not that brave (and I don't have the time) to do it in situ
as I know some others have done:It's a little daunting just how much gubbins has to be removed to do this but it does make changing the inlet pipe much easier, in fact I'd say that this is the way to change the inlet pipe!
I bought 4 new gaskets, 2 for each side of the spacers. While I was doing the fuel rail mod (next) I used the space to fit an oil temp sender and and oil pressure sender. The adapters were bought from LMA and all I needed to say was Scoobynet group buy and they new exactly what I wanted (even though I wasn't part of that group buy but my fittings were 1/8 NPT!):
F
If you have NPT 1/8 fittings then this is the kit from LMA:
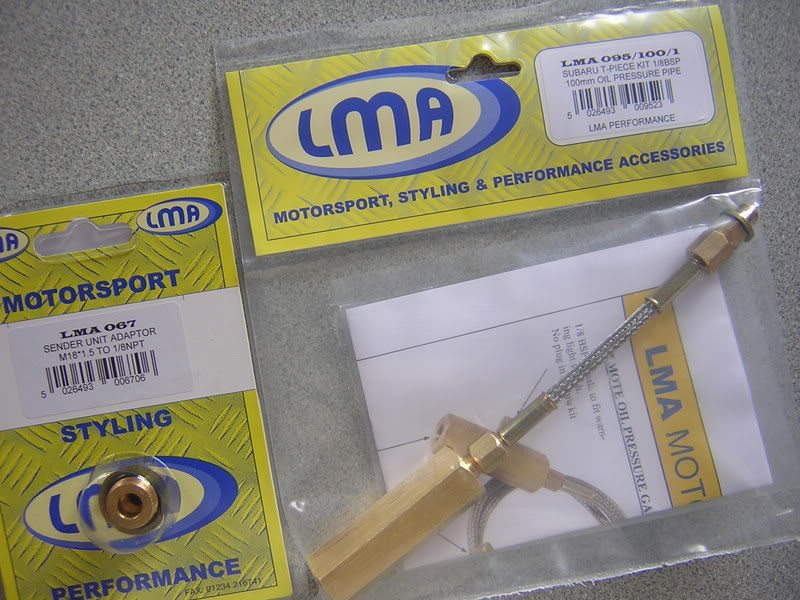
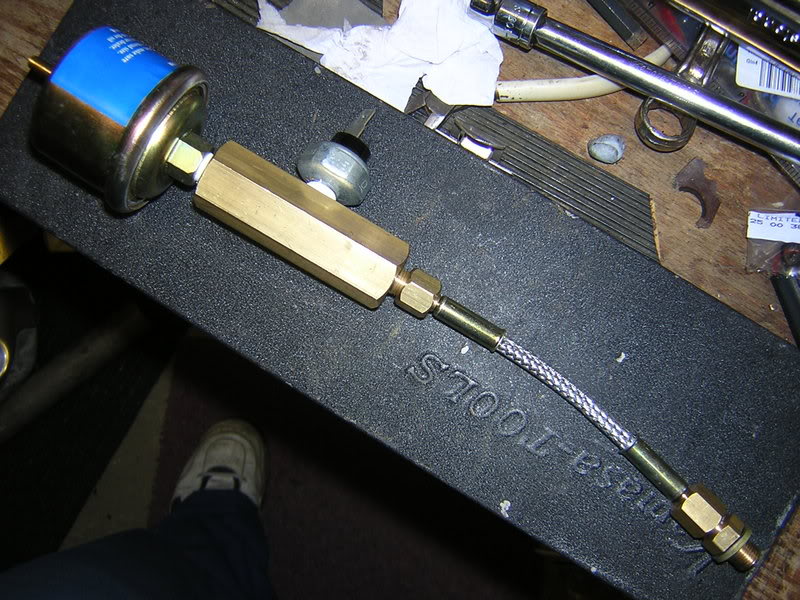
The oil pressure kit retains the OEM switch, which you don't have to retain:
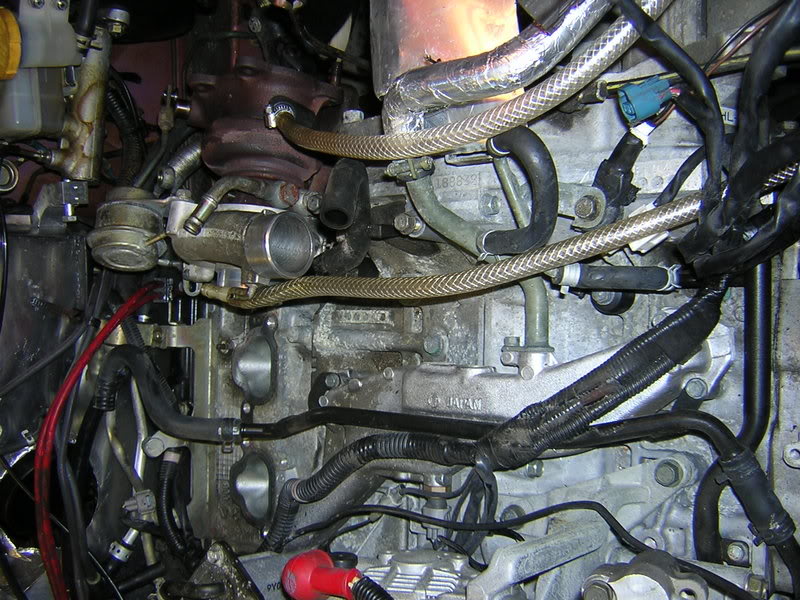
This is how they are fitted in the block:
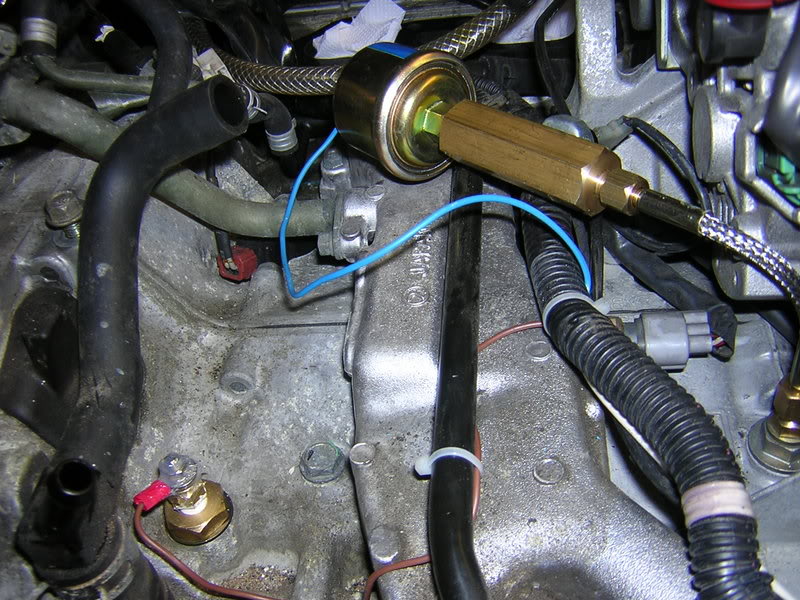
The 100mm braided hose lifts the large sender clear of the manifold and it'll now sit up top somehwere!
F
The oil pressure kit retains the OEM switch, which you don't have to retain:
This is how they are fitted in the block:
The 100mm braided hose lifts the large sender clear of the manifold and it'll now sit up top somehwere!
F
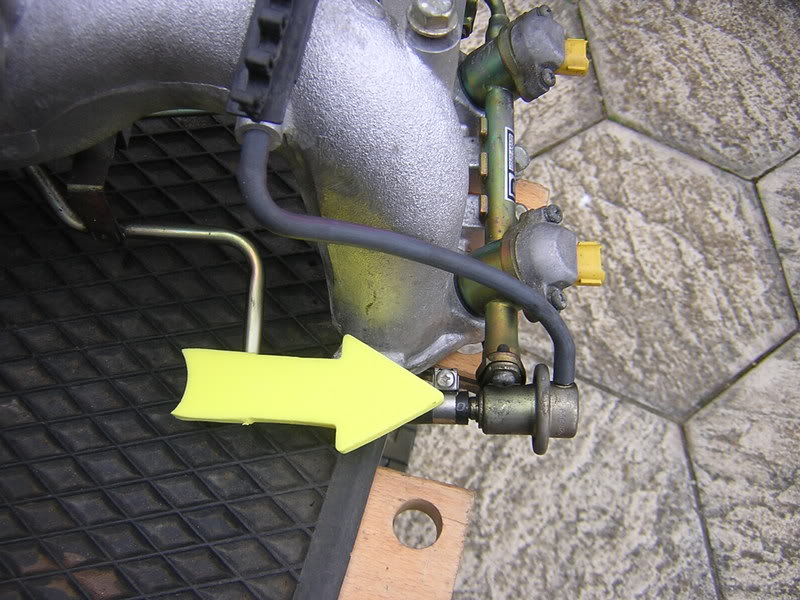
NB new high-tech arrows now in use 
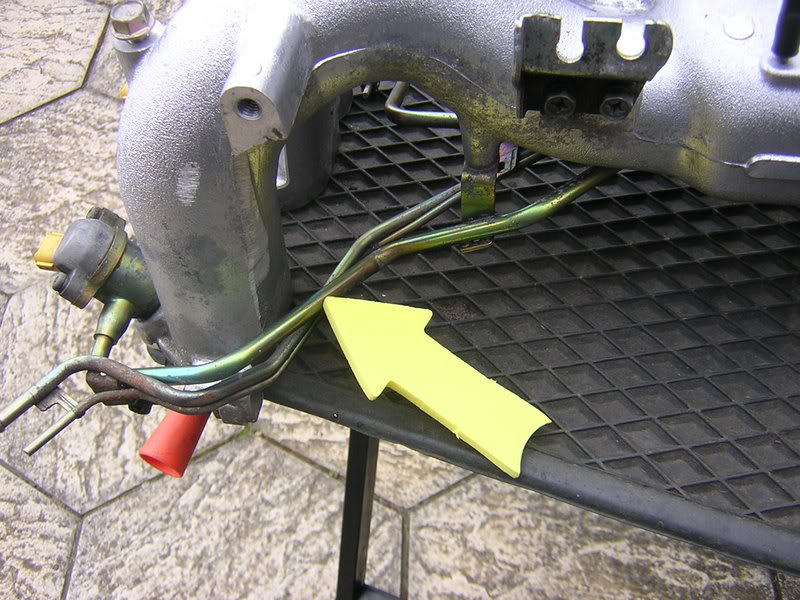
I wanted to retain the stock fuel pressure regulator as it is supposed to be OK for the pressure that I need. It'll be fed by a Walbro 255 but this will be mapped to compensate for higher delivery:
The standard reg was removed and fitted to bespoke adapters (thanks mef):
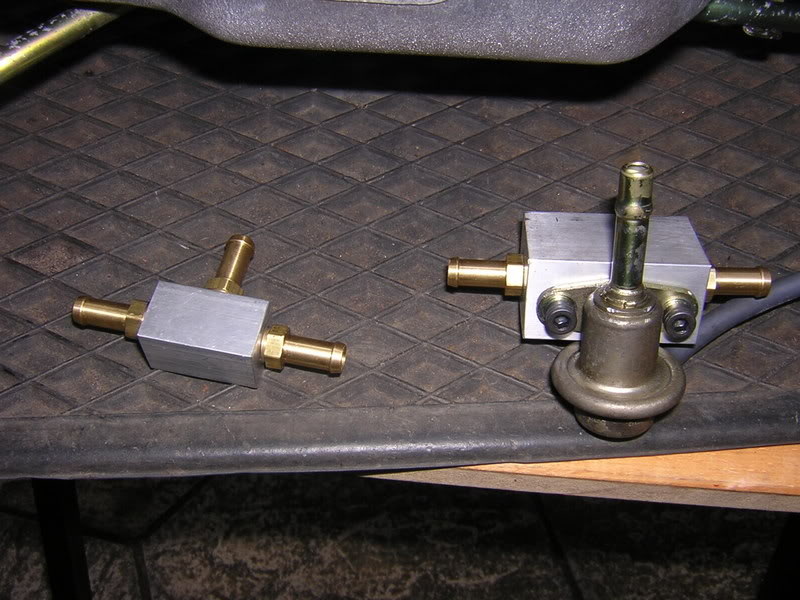
An adapter went in place of the reg on the end of the fuel rail:
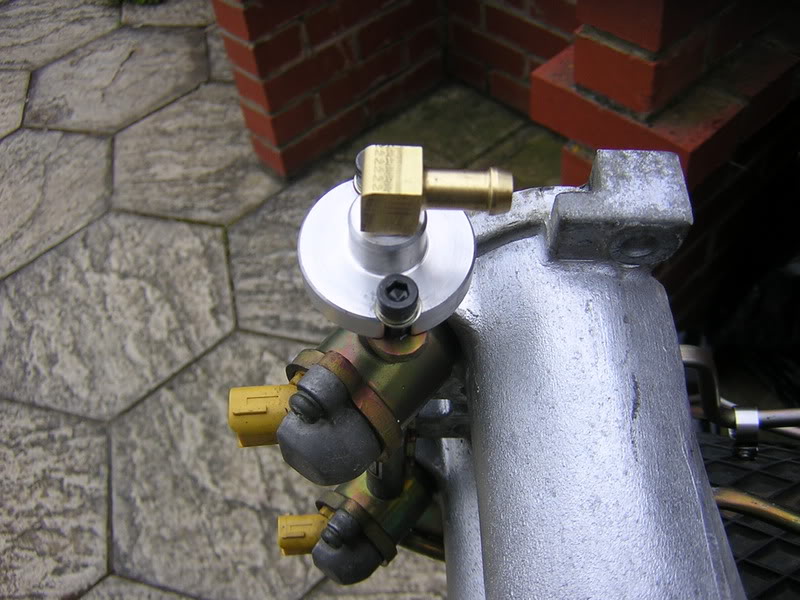
These are a little large to fit under the manifold so I decided to mount them higher on the manifold itself:
I needed to cut the pipes to feed the fuel fittings and was going to cut here:
And here:
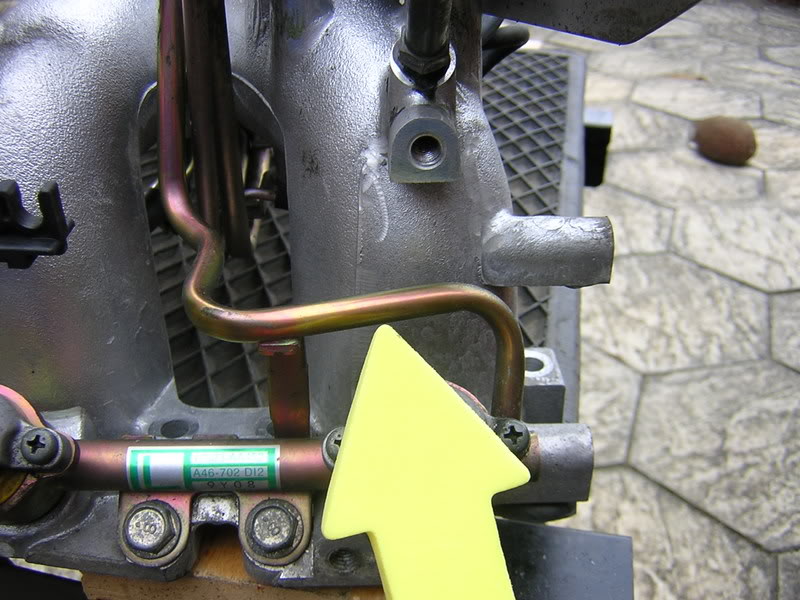
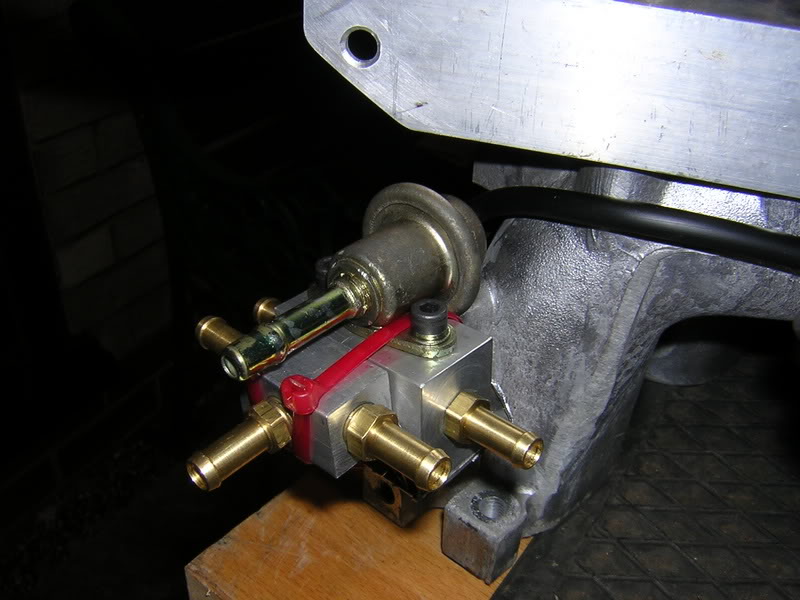
But I had a better idea that wouldn't need any cutting. This isn't as clean as some have done but it is a reversible method. I will feed 3 and 4 first and return from 1 and 2.
F
I wanted to retain the stock fuel pressure regulator as it is supposed to be OK for the pressure that I need. It'll be fed by a Walbro 255 but this will be mapped to compensate for higher delivery:
The standard reg was removed and fitted to bespoke adapters (thanks mef):
An adapter went in place of the reg on the end of the fuel rail:
These are a little large to fit under the manifold so I decided to mount them higher on the manifold itself:
I needed to cut the pipes to feed the fuel fittings and was going to cut here:
And here:
But I had a better idea that wouldn't need any cutting. This isn't as clean as some have done but it is a reversible method. I will feed 3 and 4 first and return from 1 and 2.
F
I'm feeling pretty low today. I spent what seem to be all w/e on the bloody car 
There's so much to do, just when I think I've got something finished and ready to fit another problem is found - aaarrgh!
F
There's so much to do, just when I think I've got something finished and ready to fit another problem is found - aaarrgh!
F
Scooby Regular
Joined: May 2004
Posts: 11,341
Likes: 1
I know exactly how you feel.
When I had the manifold off, doing exactly what you are now I had the very same 'outlook' on the bloody thing.
All the pipes, more pipes and then more. My hands were stressed and I was p!ssed off to say the least.
However... just now all is well.
Goes well, no leaks, achieved my target numbers and then some.
just looking forwards to the Summer's racing.
Keep at it. You will come through the dark side!!
Graham.

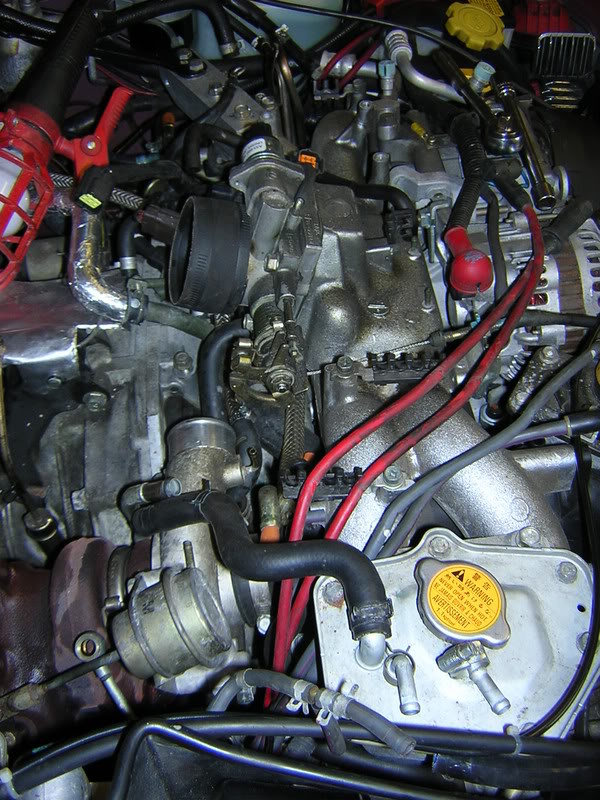
I expected to be able to start the car today but I've not got the turbo, DP or TMIC fitted yet. I think I have the Manifold licked now, just a couple of fuel pipes and it's done. I'm dreading finding a leak somewhere so I'm making sure I double check everything, PTFE tape on threads and locktight where appropriate. I've never seen so many tools out at once and I can't move in the garage for bits. I'm really glad I have so many tools that can sort most jobs.
If anyone is contemplating this amount of mods then be prepared to put about 50 hours of effort in I'm sure it can be done quicker especially for the second time but to do a thorough job needs a lot of thought, blood, sweat and tears.
F
If anyone is contemplating this amount of mods then be prepared to put about 50 hours of effort in
I'm sure it can be done quicker especially for the second time but to do a thorough job needs a lot of thought, blood, sweat and tears.F