
Floyd’s ‘economy’ Stage III


I've recently completed a refurb of a cheap and pretty tatty set I had for my track wheels.
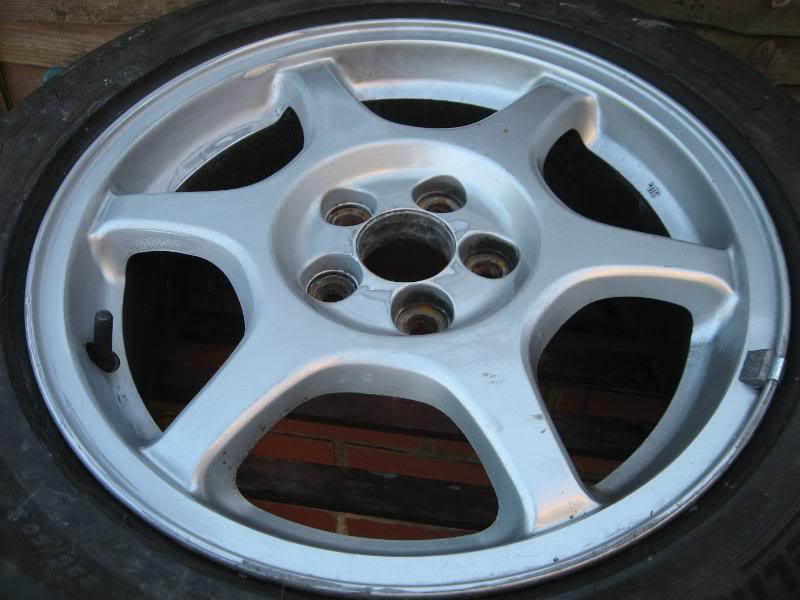
Before:
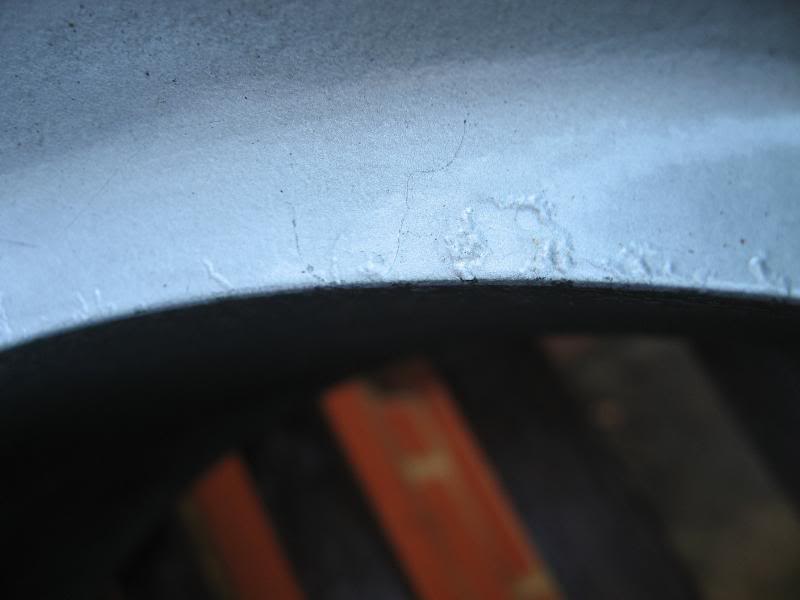
I cleaned them, then rubbed them down with course wet 'n dry before smoothing with fine w/d. Then another rinse and a good dry. They were then primed with grey, followed by a coat of Pug metallic steel grey:
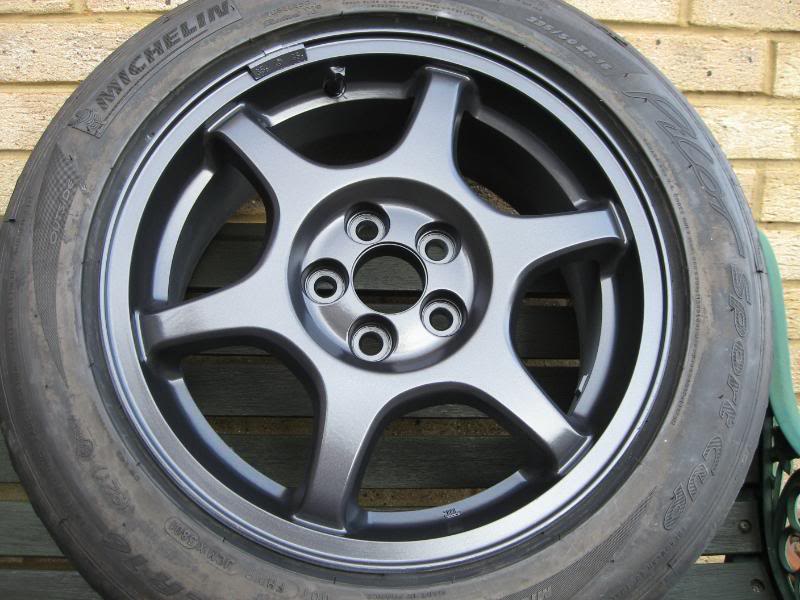
Then finally a coat of clear:
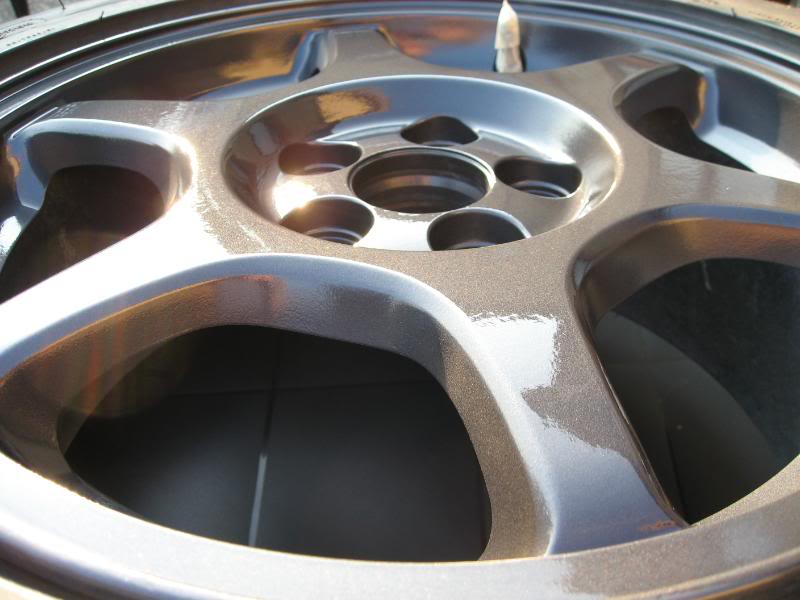
On the car:
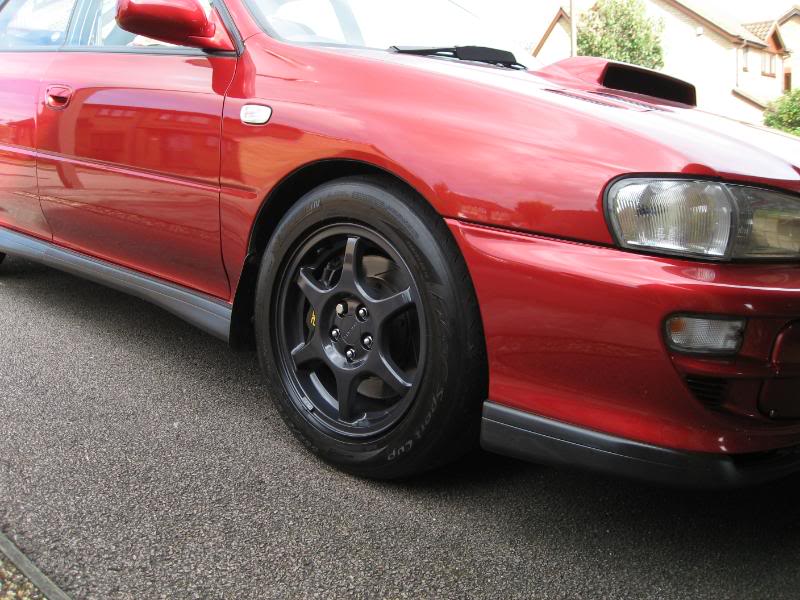
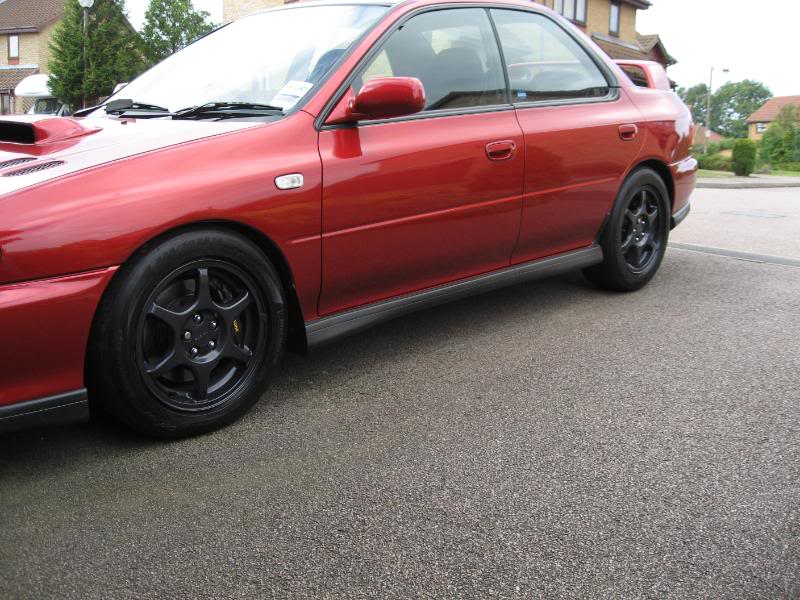
The whole process took a few dry and warm days. I have another set to do but it's getting too cold now.
F
Before:
I cleaned them, then rubbed them down with course wet 'n dry before smoothing with fine w/d. Then another rinse and a good dry. They were then primed with grey, followed by a coat of Pug metallic steel grey:
Then finally a coat of clear:
On the car:
The whole process took a few dry and warm days. I have another set to do but it's getting too cold now.
F

I had a good comparison with a 2.5 TD05 car today. It runs 310bhp/360lbft. My car is slower off the mark but has the edge mid to high I feel.
It's so hard to test these things especially when doing a 30mph rolling start as you can't be sure that both cars apply the throttle at the same moment. So often the other car or I would go a fraction before and it's pretty much game over.
I think the twinscroll is very smooth at applying the power but I do miss the VF35 for it's amazing punch. The twinscroll isn't being pushed as far as it can of course due to the fuelling limitation (440's), non optimal 2.5 exhaust with diy cat removal and the std bottom end. There's also attention to surge. I think that with a more agressive map and amendments to fuel/exhaust could restore that 'up for it' feeling.
I have to wonder what a 2.5 would be like with the twinscroll, matched with a 3 inch exhaust, and bigger injectors...
When will it end?
F


Bob, thanks for that. It was something I think we spoke about and IIRC we decided to 'map' with surge in mind. I am toying with the idea of changing the inlet to the STi8 OE version to address the surge issue. If I remap then I may as well go bigger on the injectors too.
They way you brought the VF35 'in' made for a really punchy, exciting car and I miss that.
F
They way you brought the VF35 'in' made for a really punchy, exciting car and I miss that.
F

It was the first bolt in one made for the Impreza. IIRC it was made in Cambridge but that may be wrong. It uses existing fixing points in the car. The only bits you leave in the car are the rear strut bars. 5 minute job for the rest.
F
F
Floyd, Graham has a 6 point bolt in Safety Devices FIA cage with front hoop and door bars, which has welded in mounting points on the sills/floor where they meet the front wheelarches and the rear seat base, plus plates on the rear wheelarches where it meets the strut towers
The bolt in trackday cage is just that but with good mounting locations. It's not a motorsport cage and I didn't want one because of the welding hassle and possible irreversible dash mods.
This cage will provide some extra rigidity at the rear and save me buying a rear strut brace. It will also provide much better roll over/crash protection than stock, obviously. I think it's a great compromise against the cost/effort of fixing in a full cage. It also has decent fixings for the harness, which is a bonus for me.
F

Scooby Regular
Joined: Aug 2000
Posts: 4,262
Likes: 1
I have the same removable Safety Devices cage, albeit I have one with captive nuts in various places as it's designed for the P1/two door shell and you can't get at various nuts with no back doors.
Biggest pain is mounting the vertical bars that attach to the rear strut top mounts - you need a ring spanner as no space for a socket set. However, once these are in you can leave them in permanently as the back seat will go back in with them in place. No passengers have ever noticed or commented. Come a track day, then back seat out - 2 minutes, cage in - 20-30 mins or so on my own. You might need to use the old trick of winding a loop of rope around the upper diagonal cross brace and under the lower cross brace and then sticking a stick/wrench through to wind it up - I alway find that 3 bolts go in ok, but the 4th is always a git until you persuade the bar into place with the rope trick.
Talking of the lower brace - it goes between the feet of the hoop just over transmission tunnel height - I can't see it in your photos, but I assume that you have it? I have twin extinguishers mounted on this lower bar as well
Yes, I have the long bar somewhere as well as the little bars. I can be done with one man but is better with help. As you say the rear strut mounts are a PITA to fit but once in they are 'invisible'. Do you find the rear seat bolsters bulge a little though?
F
F

Scooby Regular
Joined: Aug 2000
Posts: 4,262
Likes: 1
Do the rear seats bolsteers bulge a bit? Not noticeably. There is initially about an inch gap,but the foam moulds itself around the bars over time. No passengers have ever noticed or commented.
Only other pain is that I attach the lap belts of the harness to the rear bolts on the front seat runners ( once you pull the plastic cap off) and the fittings prevent me from then sliding the seat all the way back by about an inch or two, which is a bit annoying as I'm about 6 2 ish and normally drive with the seat all the way back. if you don't need the full travel you'll be alright, but even if you do need it it's Ok for track days
Only other pain is that I attach the lap belts of the harness to the rear bolts on the front seat runners ( once you pull the plastic cap off) and the fittings prevent me from then sliding the seat all the way back by about an inch or two, which is a bit annoying as I'm about 6 2 ish and normally drive with the seat all the way back. if you don't need the full travel you'll be alright, but even if you do need it it's Ok for track days
Last edited by Fat Boy; Nov 22, 2007 at 10:45 AM.
Happy New Year project people!
Last w/e I eventually got around to fitting some of the cage. Having removed it from the donor car I had a good idea of the best way to fit it obviously.
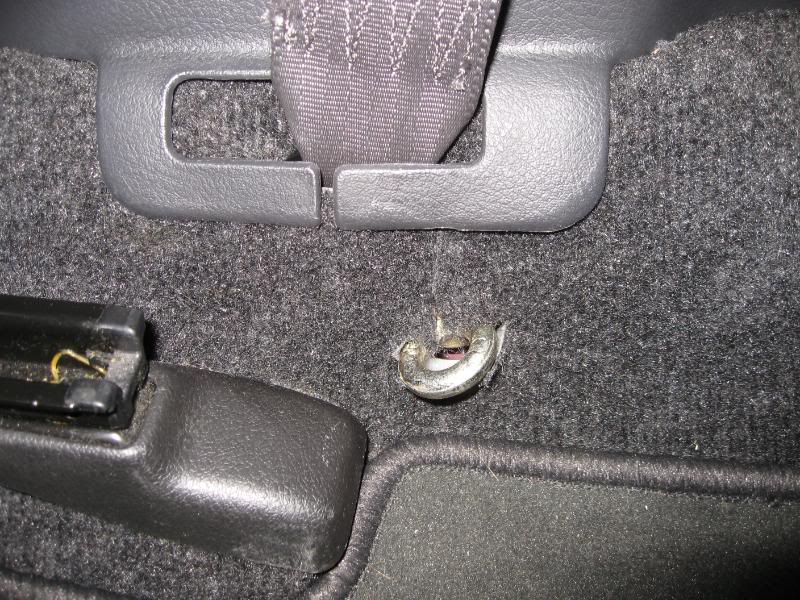
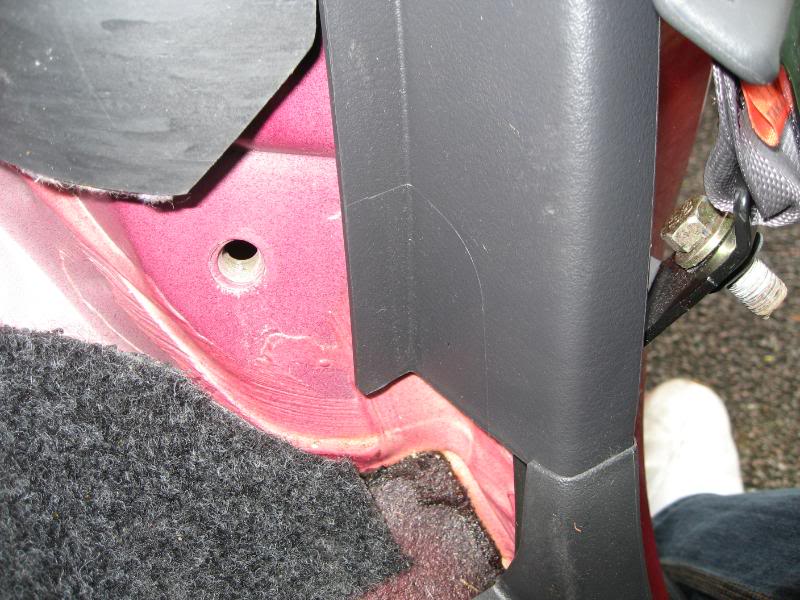
First thing to do was remove the lower B pillar trim to enable access to the front seat belt retractor anchor point. The bolt is replaced by an eye bolt that I will attach my harness lap belt to. The sill trim is removed and then the upright plastic bit is lifted to provide access to the carpet, which needs cutting. I could have cut a neat hole but decide to slit it as this would be better if I removed the bolt later on:
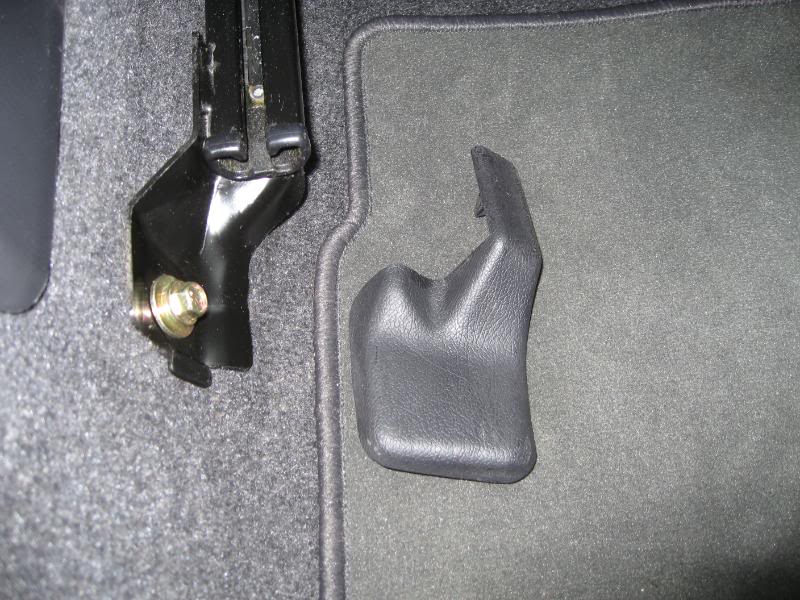
The other eye bolt has a small bracket that attaches under the plastic cover:
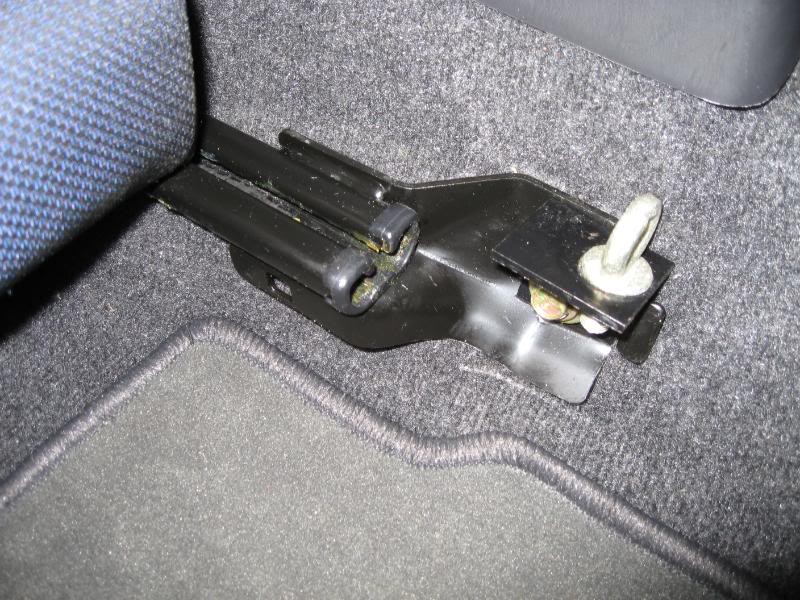
I did this for both sides.
The next bit is to remove the rear seat completely:
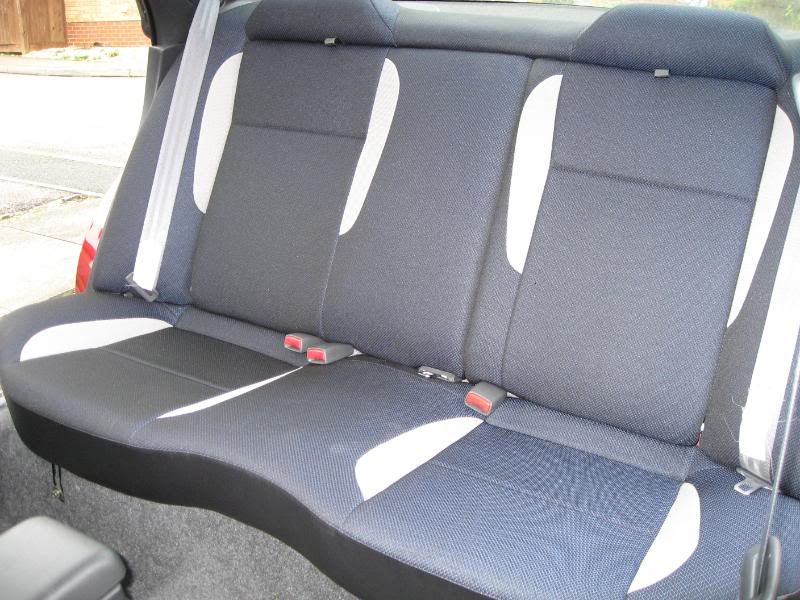
This is easy as you need to undo 2 bolts fo the lower seat part and unclip from the upright centre hook:
Last w/e I eventually got around to fitting some of the cage. Having removed it from the donor car I had a good idea of the best way to fit it obviously.
First thing to do was remove the lower B pillar trim to enable access to the front seat belt retractor anchor point. The bolt is replaced by an eye bolt that I will attach my harness lap belt to. The sill trim is removed and then the upright plastic bit is lifted to provide access to the carpet, which needs cutting. I could have cut a neat hole but decide to slit it as this would be better if I removed the bolt later on:
The other eye bolt has a small bracket that attaches under the plastic cover:
I did this for both sides.
The next bit is to remove the rear seat completely:
This is easy as you need to undo 2 bolts fo the lower seat part and unclip from the upright centre hook:
The upright seat part is the heavy bit, which needs 3 bolts removing (one each side and the centre bolt under the hook:

Then the seat is lifted off 2 more hooks at the top.
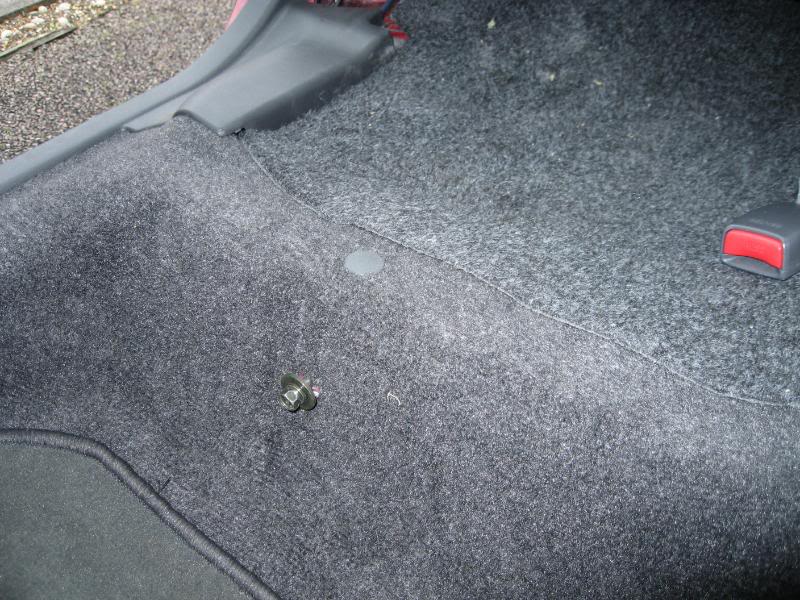
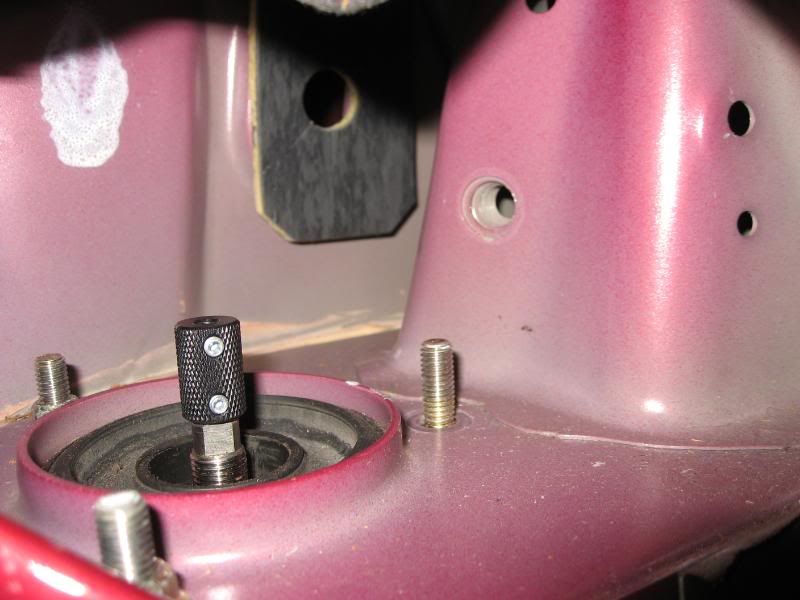
The nuts are removed from the strut top but only after removing the seat belt retractor bolt:
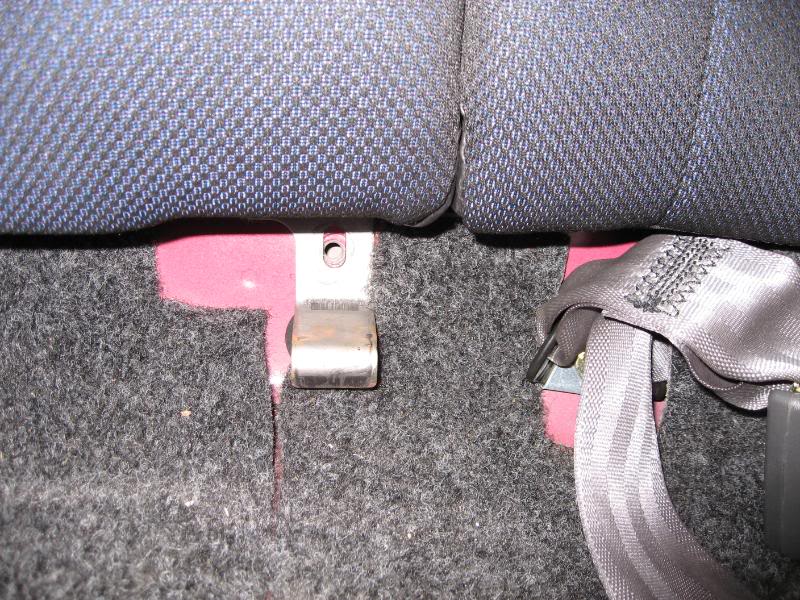
The rear seat belt fixing is removed:
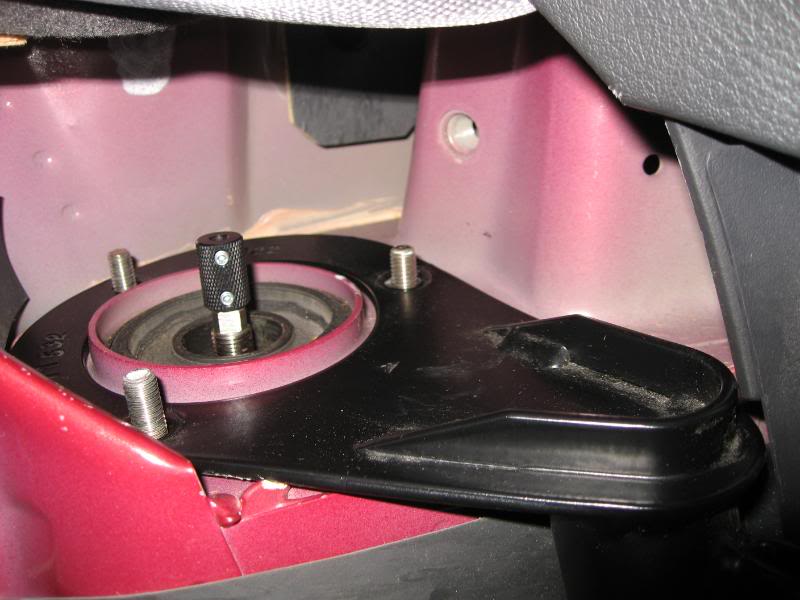
The cage fixing is then put in place and bolted up:
Then the seat is lifted off 2 more hooks at the top.
The nuts are removed from the strut top but only after removing the seat belt retractor bolt:
The rear seat belt fixing is removed:
The cage fixing is then put in place and bolted up:
The seat belt retractor is replaced and the rear seat parts.
While everything was exposed I took the time to tidy a little job that had been bothering me. The AST rear adjusters were always a bit loose and I found out why:
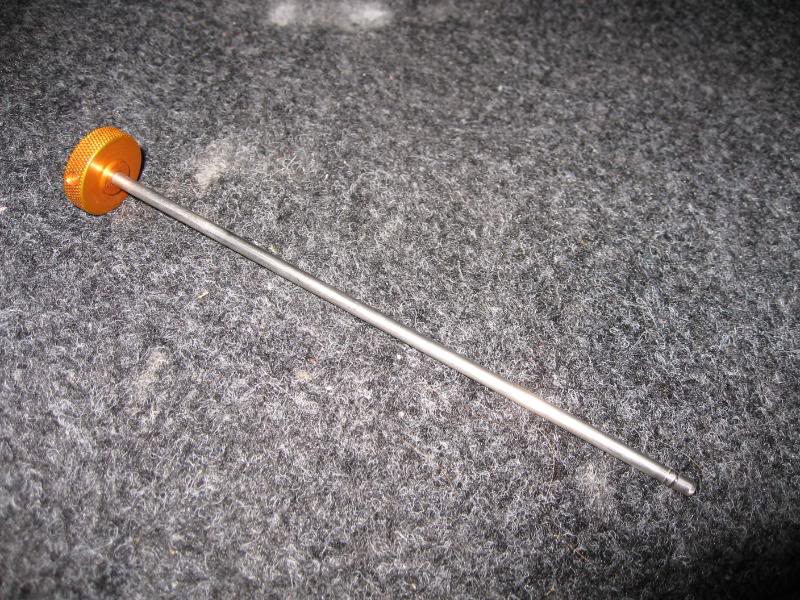
The rods are fixed and locked with an allen grub screw but the rod is round and the grub screw can't get enough pressure on it to stop it slipping")
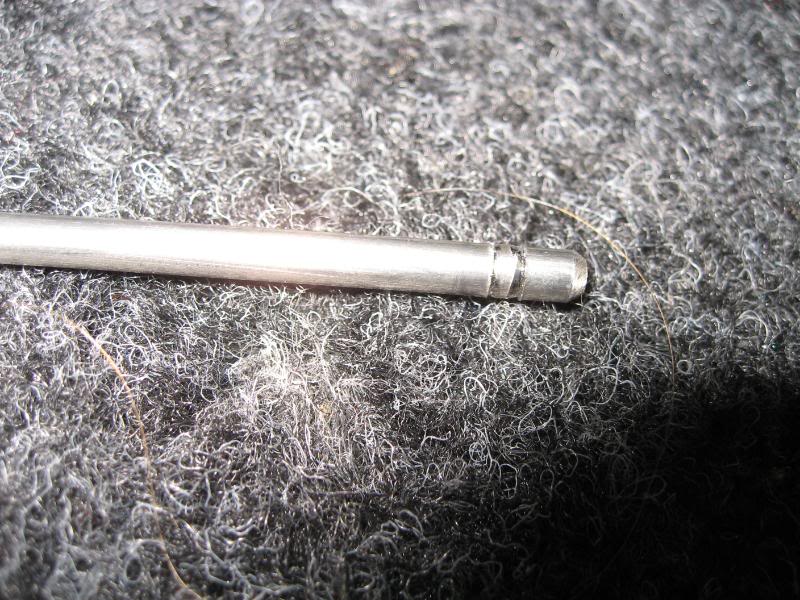
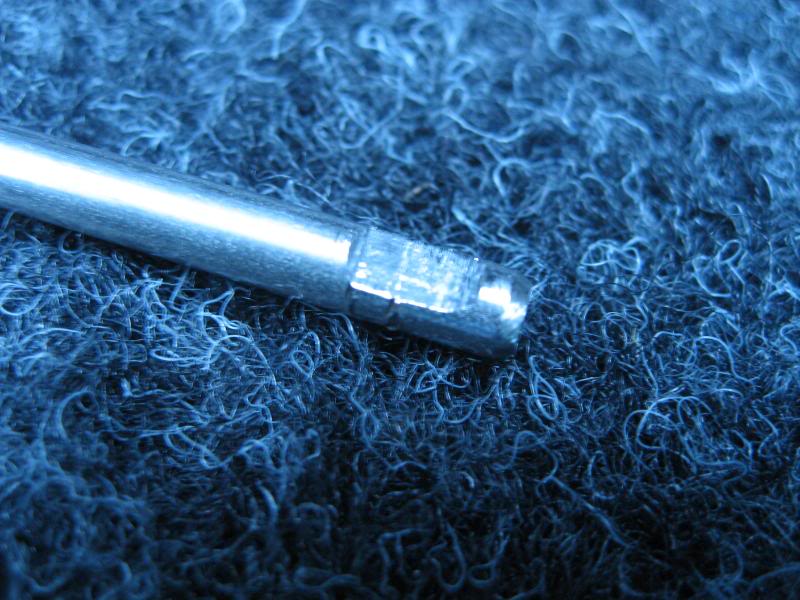
I filed a flat on it (both sides) to stop this from happening:
Why they don't do this with the kit is beyond me
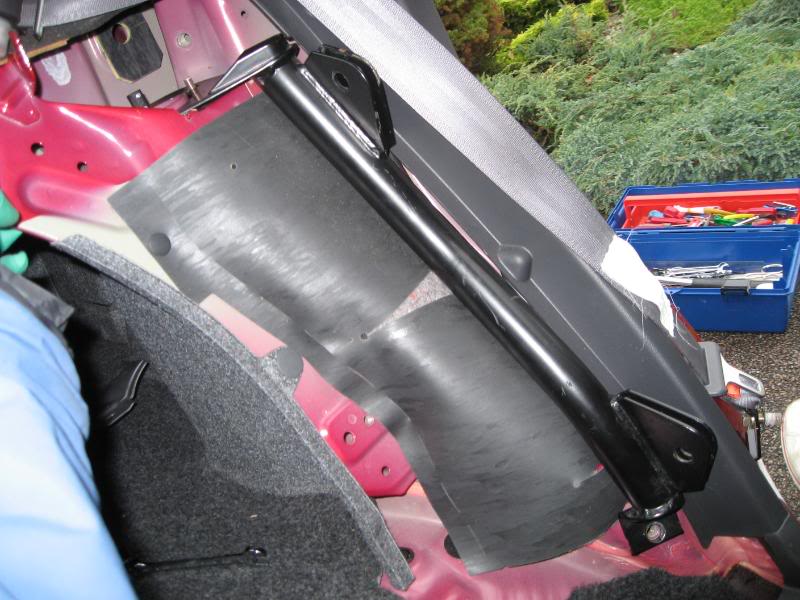
First run out with the cage will be Bedford in Feb Hopefully it'll stffen the rear a little and the extra weight will be offset by the removal of the rear seat and spare wheel. The harness will provide better driver location and control too.
While everything was exposed I took the time to tidy a little job that had been bothering me. The AST rear adjusters were always a bit loose and I found out why:
The rods are fixed and locked with an allen grub screw but the rod is round and the grub screw can't get enough pressure on it to stop it slipping
I filed a flat on it (both sides) to stop this from happening:
Why they don't do this with the kit is beyond me
First run out with the cage will be Bedford in Feb
Hopefully it'll stffen the rear a little and the extra weight will be offset by the removal of the rear seat and spare wheel. The harness will provide better driver location and control too.

Scooby Regular
Joined: Aug 2000
Posts: 4,262
Likes: 1
Both sides of each my lap belts attach to the seat runners in the same way - so I haven't needed to mess about with eye bolts/ cutting carpet/removing b pillar trim. Maybe the guy who sold it to you still has the other attachments?
Also I didn't need to take out the rear selt retractors to fit the rear cage struts (hence my earlier ring spanner comment) but maybe you're saving weight and leaving them out?
Also I didn't need to take out the rear selt retractors to fit the rear cage struts (hence my earlier ring spanner comment) but maybe you're saving weight and leaving them out?
Perhaps a picture Fat Boy of your seat runner attachment so I can understand your method. The eyebolts were with the kit and as this was the first kit made they may have improved it since? There's no way the strut bars would have fitted without removing the rear seat belt retractors in my installation.
Not teasing Dunc, just the detailed the tricky bit! The rest is a quick job apparently!!!
PS I didn't buy it, it was donated
Not teasing Dunc, just the detailed the tricky bit! The rest is a quick job apparently!!!
PS I didn't buy it, it was donated
Scooby Regular
Joined: Aug 2000
Posts: 4,262
Likes: 1
Sorry, Floyd, it'll have to wait as I managed to break my back falling out of the attic over Xmas when the loft ladder snapped! All going to be alright but flat on my back for a few more weeks now. I'm currently in a hip to neck cast and all the bits are in the roof as I only install it when I'm doing a track day - as you might imagine I won't be hopping up into the attic any day soon.... Basically it's a similar arrangement at the end of each seat runner to the one you showed in your pictures.
edited as i didn't explain very well - at the end of the seat runners behind the front seat I take both plastic covers off - whereas you've only taken one off - and use the bolts in the runner to go through the bracket thing that the eye bolt is attached to one your one that I can see
Re the seat belt retractors I took one off so I could get a socket set in and then took forever to get it back in, and then realised that I could get the nuts off on the other one with one of those ring spanners. Anyway, doesn't matter now as you've done it
Last edited by Fat Boy; Jan 16, 2008 at 06:23 PM.
Eek, broken back  Not nice.
I think I get the picture now anyway but thanks for explaining.
I managed to pick up a new induction pipe at the end of last year in the quest to reduce surge further and therefore provide the option of earlier boost. I'm just deciding whether to fit bigger injectors at the same time and possibly a 3 inch exhaust. The problem with the exhaust is that the 'Ring is becoming very picky about noise limits as well as some trackday venues and mine is super quiet already.
The injector options are 550's, my 440's modded to 740's by Mark or 380's modded to something less than 740, which is probably too big for my needs.
Not nice.I think I get the picture now anyway but thanks for explaining.
I managed to pick up a new induction pipe at the end of last year in the quest to reduce surge further and therefore provide the option of earlier boost. I'm just deciding whether to fit bigger injectors at the same time and possibly a 3 inch exhaust. The problem with the exhaust is that the 'Ring is becoming very picky about noise limits as well as some trackday venues and mine is super quiet already.
The injector options are 550's, my 440's modded to 740's by Mark or 380's modded to something less than 740, which is probably too big for my needs.