
Floyd’s ‘economy’ Stage III


Former Sponsor
iTrader: (4)
Joined: Jan 2001
Posts: 16,548
Likes: 2
From: ECU Mapping - www.JollyGreenMonster.co.uk

There are no issues with the tank being located there. The pump scavenges from the tank, so it's not gravity fed. Ran mine there for last 3 years no issues whatsoever.


Update!
After a few UK trackdays this year it became apparent that the a/r bars were sticking. I removed them to clean and then regreased them before refit. There was no lube left on them!!!
I bought and fitted this:
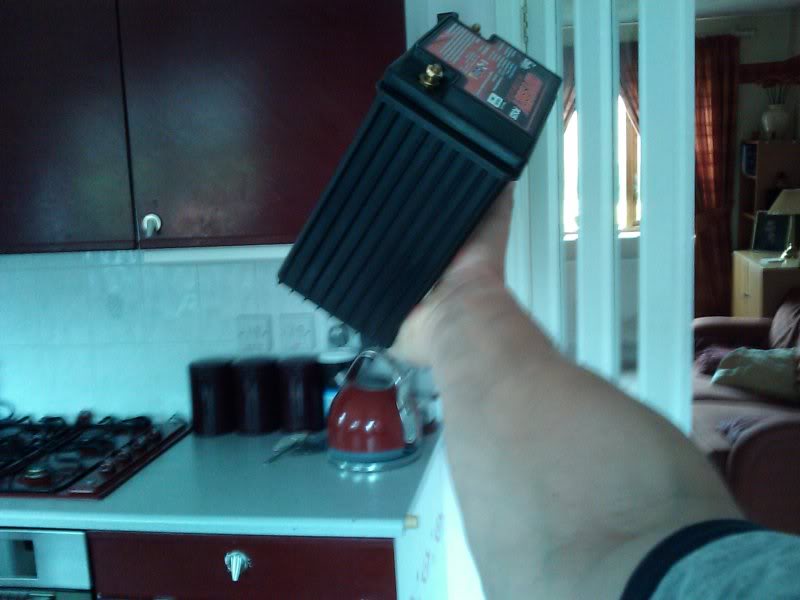
Try holding your normal car battey with your arm outstretched! I'm using an optimate trickle charger when the car is not in use. It's in the original location but it'll be moved to the interior at some point. I then want to use the space for the oil catch can or perhaps the swirl pot and fuel pump. When I get the bonnet painted then that will be on next.
The gearbox cover detatched itself again but this time the front undertray was still in place??? Speed was about 130mph at Bedford so I'm not sure why this happened. I still have it as the marshalls kindly found it for me. It looks a little sad
I smelt fuel recently before the last couple of track days but couldn't see a leak. I eventually traced it to some of the prallel work I'd done. One of the joints was weeping under pressure quite badly - eek! All fixed now.
After a few UK trackdays this year it became apparent that the a/r bars were sticking. I removed them to clean and then regreased them before refit. There was no lube left on them!!!
I bought and fitted this:
Try holding your normal car battey with your arm outstretched! I'm using an optimate trickle charger when the car is not in use. It's in the original location but it'll be moved to the interior at some point. I then want to use the space for the oil catch can or perhaps the swirl pot and fuel pump. When I get the bonnet painted then that will be on next.
The gearbox cover detatched itself again but this time the front undertray was still in place??? Speed was about 130mph at Bedford so I'm not sure why this happened. I still have it as the marshalls kindly found it for me. It looks a little sad
I smelt fuel recently before the last couple of track days but couldn't see a leak. I eventually traced it to some of the prallel work I'd done. One of the joints was weeping under pressure quite badly - eek! All fixed now.
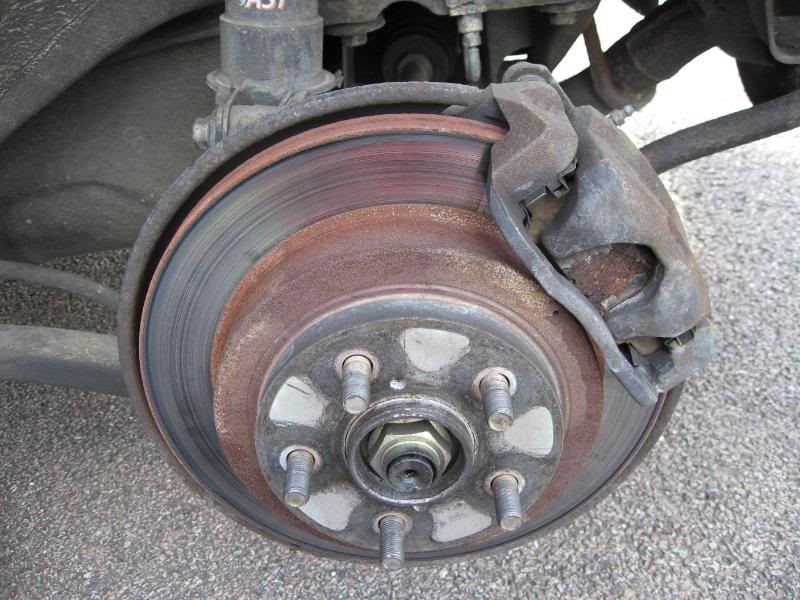
Something I've been wanting to do for some time now. The front AP's are great of course but as I push the car more I felt the need to help them work a little less hard and go twin pot rear. I sourced some tiwn pot calipers, larger vent discs and Mintex pads, which was fairly straight forward. The brackets on Ebay didn't look right to me; firstly their design used spacers and secondly they looked to tall. I made a template up and tested the fitment.
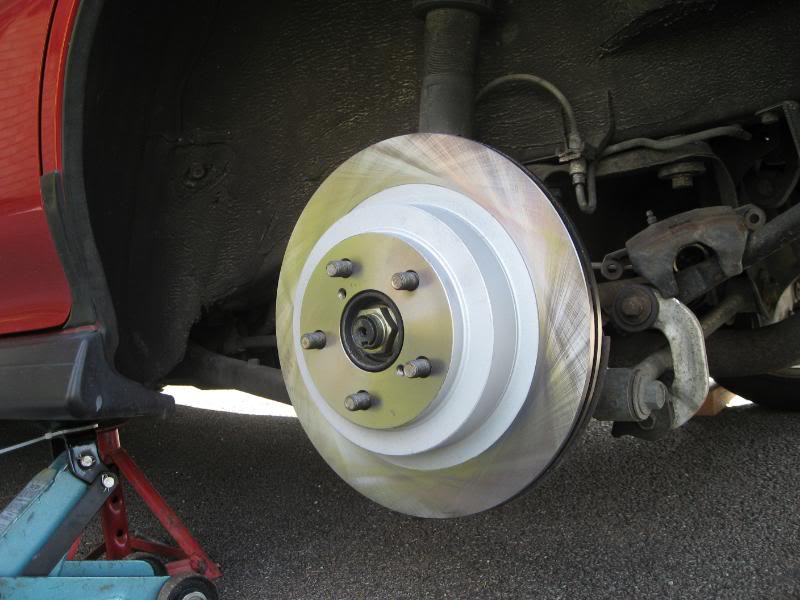
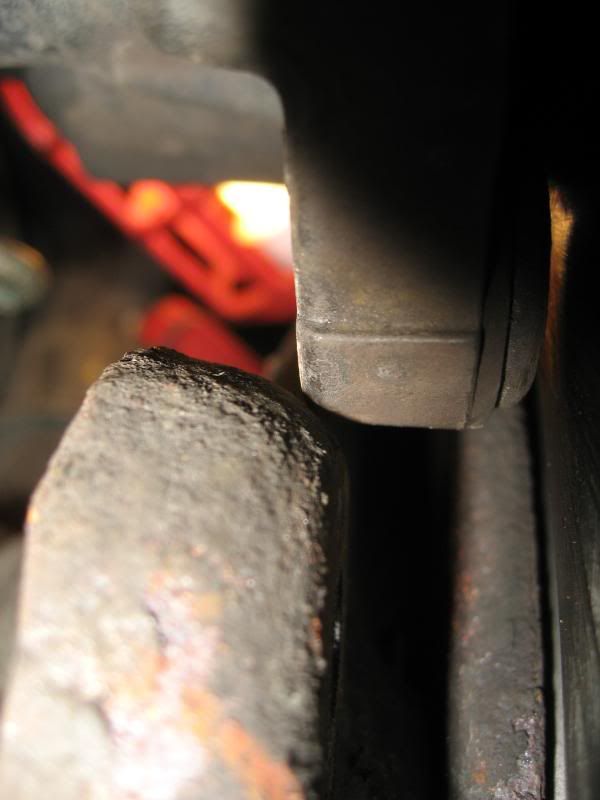
The original set up:
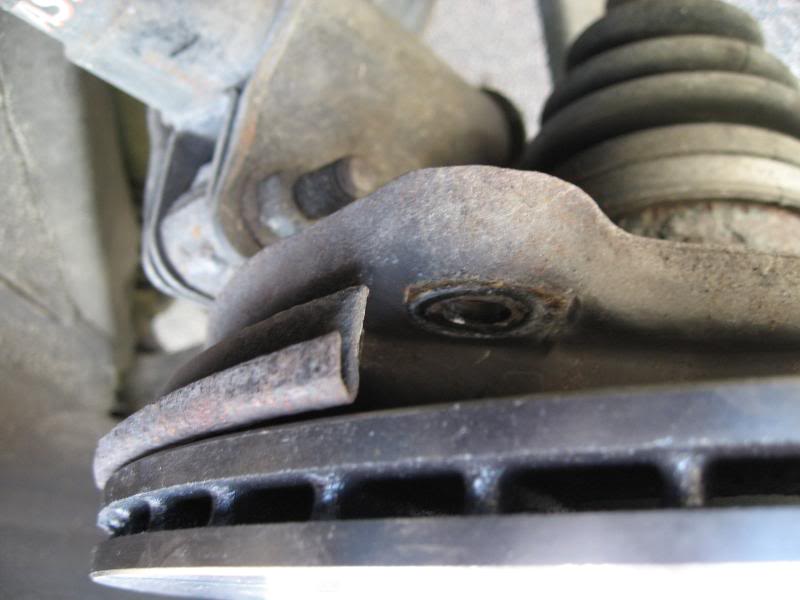
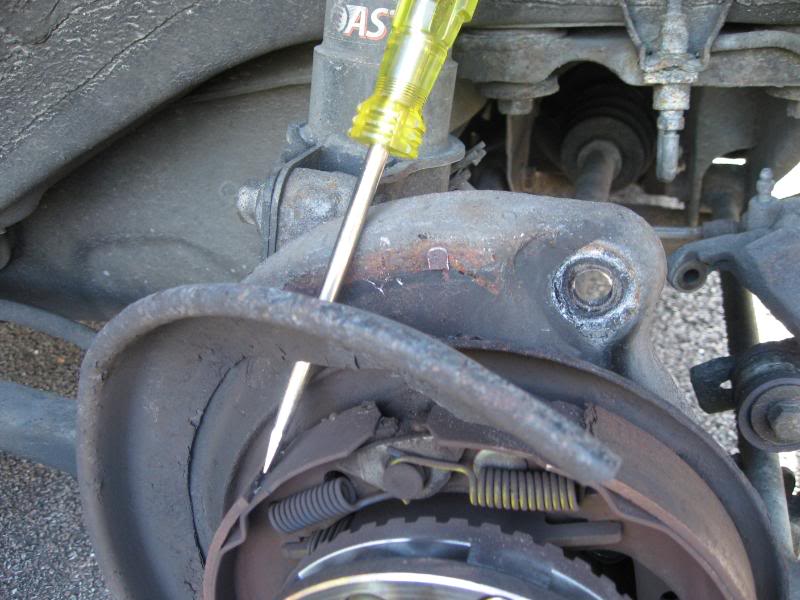
The new disc requires this shield to be removed:
Rear view:
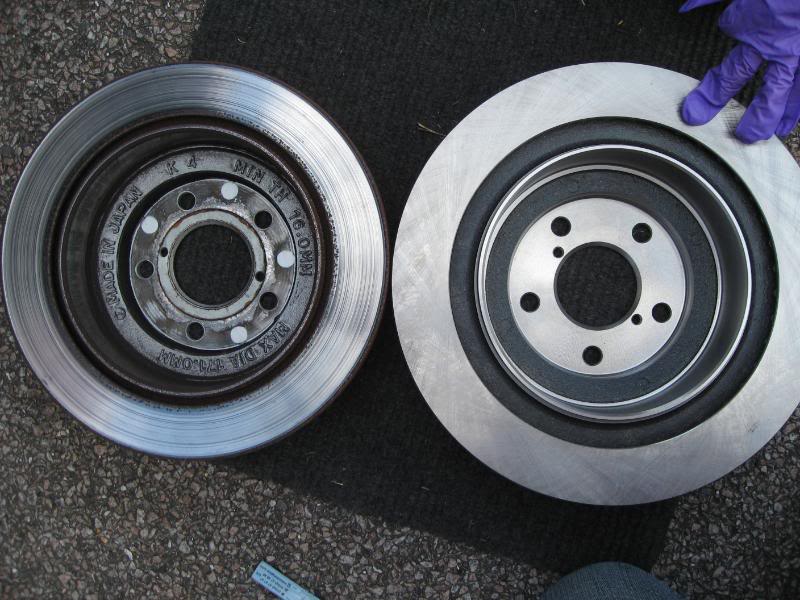
New disc next to old:
New disc before shield removal:
The original set up:
The new disc requires this shield to be removed:
Rear view:
New disc next to old:
New disc before shield removal:
New disc in place:
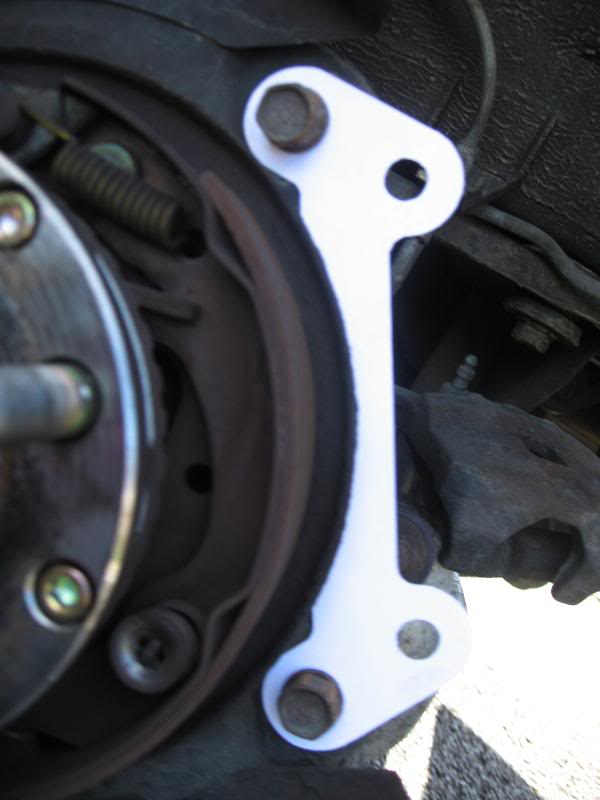
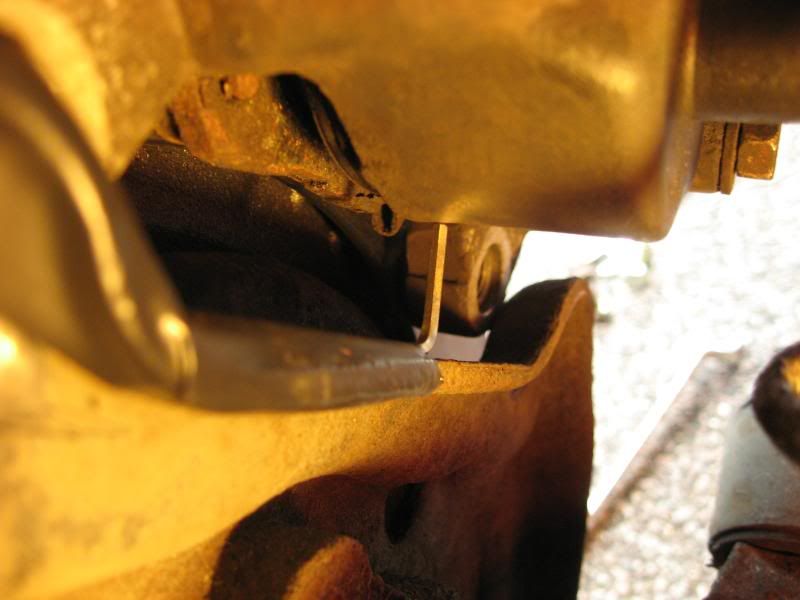
Paper template test fitting (in front of back plate - wrong side):
Shield removal is easy even with a srewdriver and moderate force:
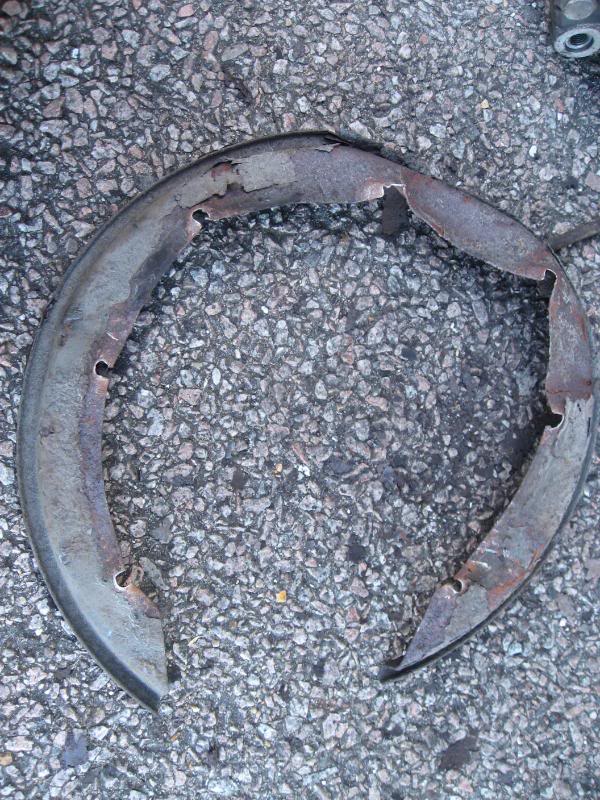
Tada! only 200g's bah!
New caliper in place and lined up:
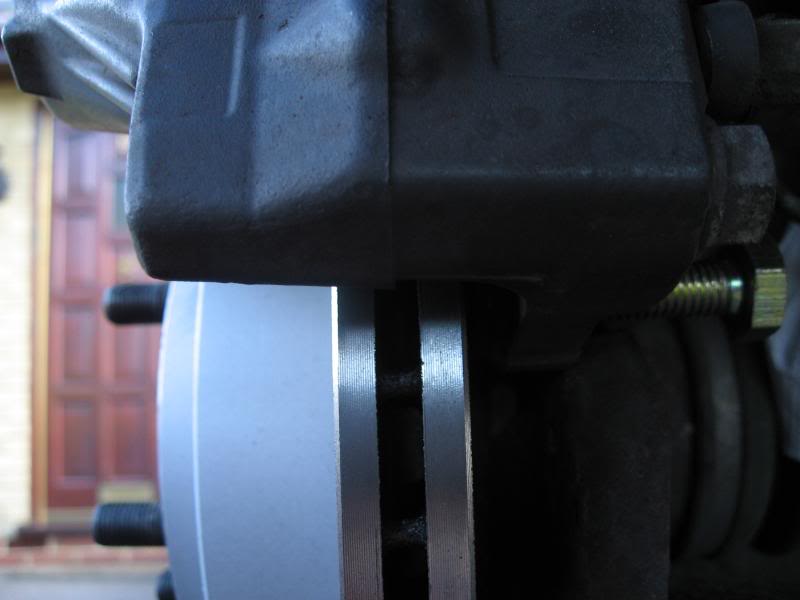
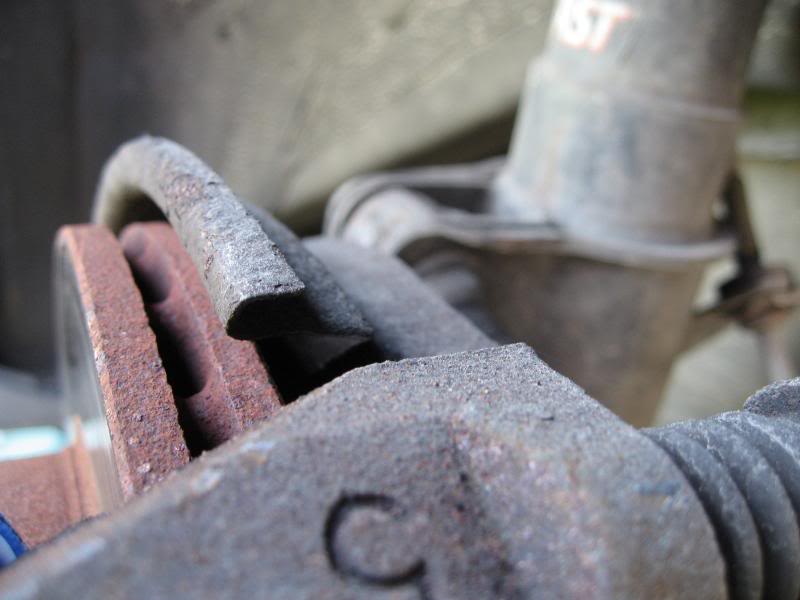
Not quite right though:
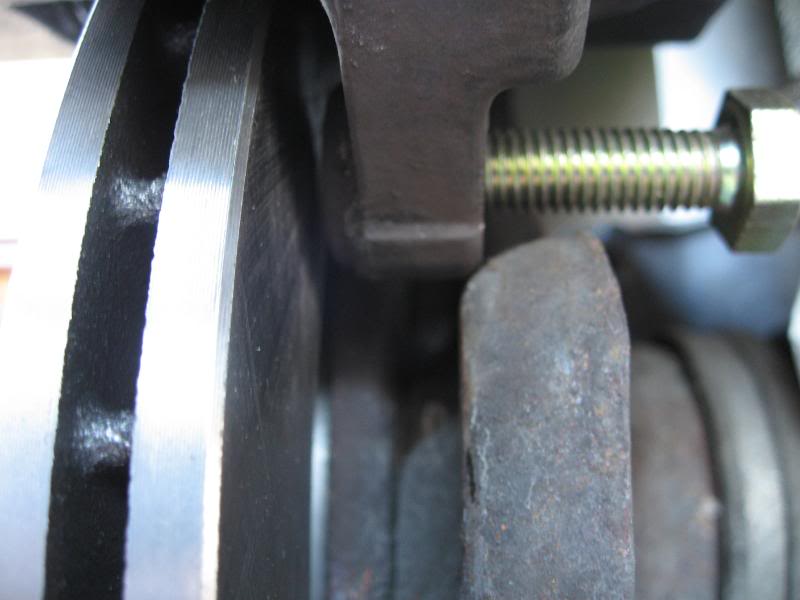
For starters it leaves the pad overhanging the top of the disc by 5mm...

Paper template test fitting (in front of back plate - wrong side):
Shield removal is easy even with a srewdriver and moderate force:
Tada! only 200g's bah!
New caliper in place and lined up:
Not quite right though:
For starters it leaves the pad overhanging the top of the disc by 5mm...

Floyd, I bought a set of new age WRX rear hubs to fit the vented 2 pots, themselves from a new age WRX, to my car. Bolt straight on but they do add about a degree of positive camber each side though, got round this with adjustable top mounts and the use of a die grinder on the struts 
Yes, that's an option but this thread is about economy and I can't find WRX rear hubs cheaply I have access to reasonably priced bracket manufacture so I thought I'd design and build myself. I will have to cut the existing backplate though but all that costs is time! Thanks for the input though, I'll need some more later...
and I can't find WRX rear hubs cheaply I have access to reasonably priced bracket manufacture so I thought I'd design and build myself. I will have to cut the existing backplate though but all that costs is time! Thanks for the input though, I'll need some more later...
The old brake line is a banjo to the braided lines
The new caliper has a direct smaller fitting?
I'll need something to go from the female braided line end to the new caliper??? Any ideas?


Hurrah, my brackets have been made. Well, the prototype anyway.
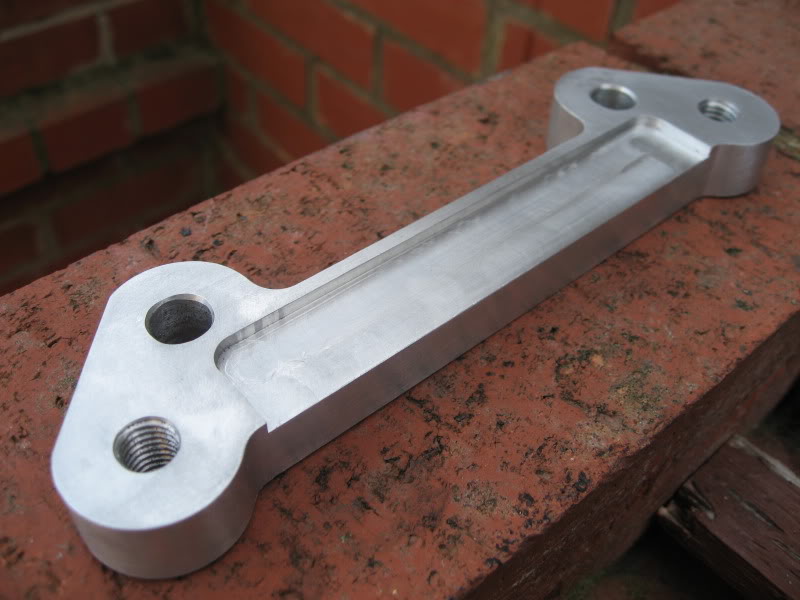
They are made from 6000 grade alloy or something! Very light and hopefully very strong. The Ebay jobbies are steel IIRC and don't fit properly (I may have mentioned that before). The new age WRX hubs would have been a neat solution but that would have cost me Ł100+ and involved removing the old and replacing, which I wasn't keen on not having done it before. Also, if it ain't broke and all that...
So, probably on the w/e I may have a go at fitting it.
After much faffing about and getting the banjo to seal properly, it's all complete.
Bracket mounted after backplate-ectomy:
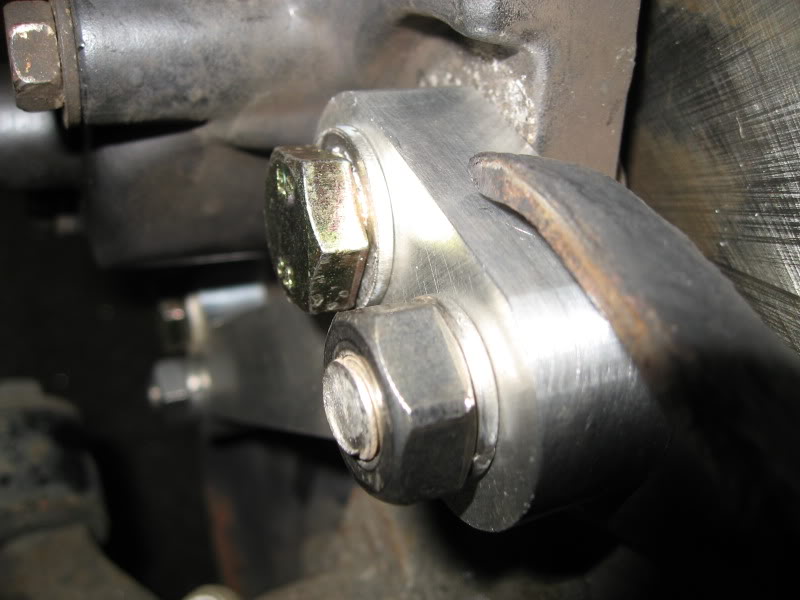
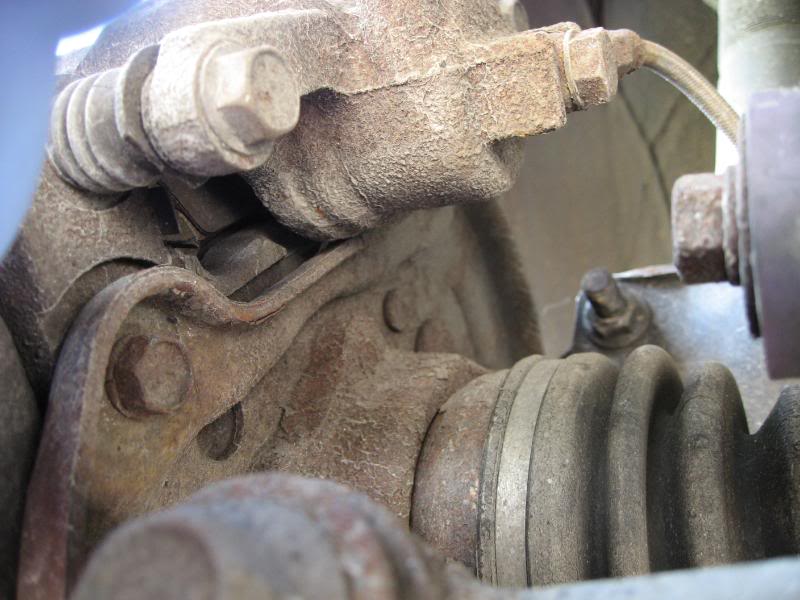
Front detail:
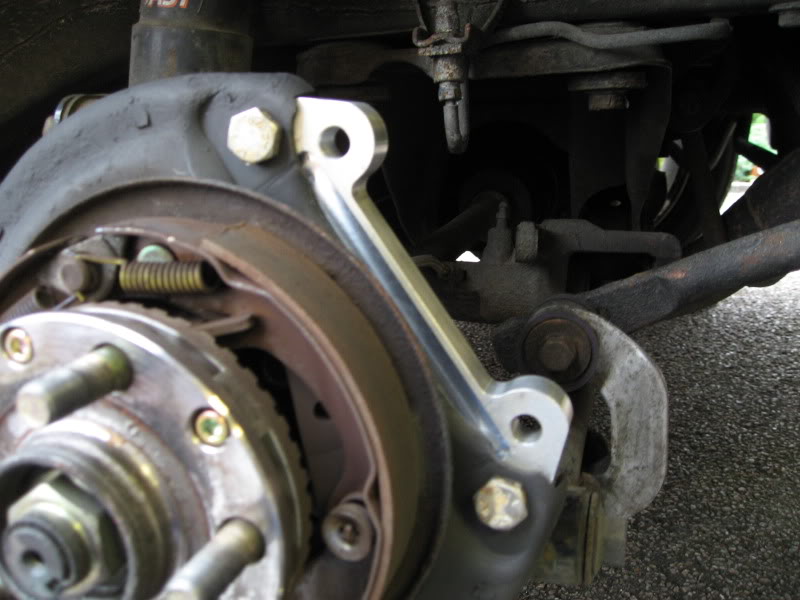
Caliper on:
Close up:
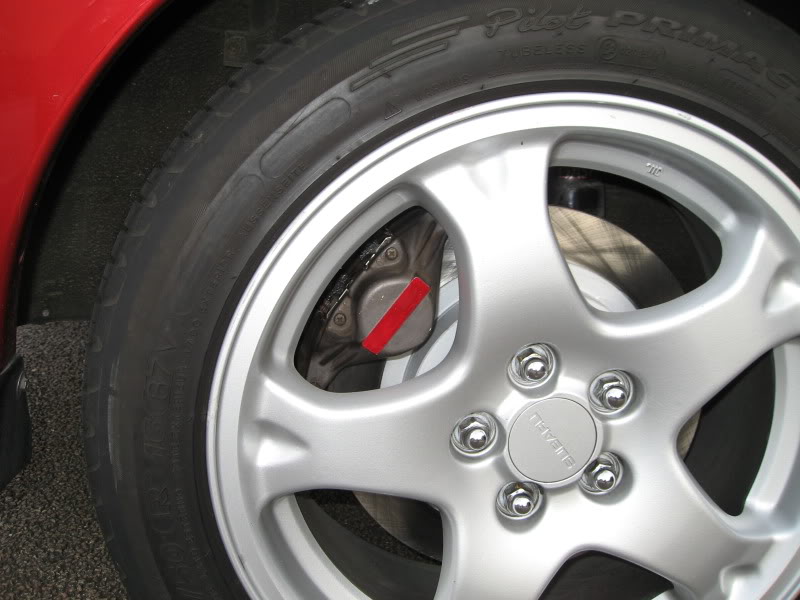
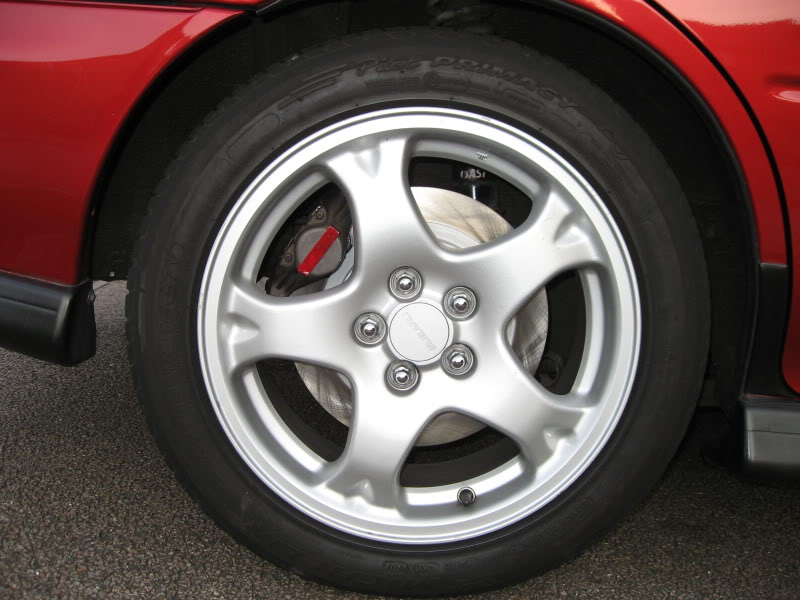
Does it work? Well, the car is sorn at the moment so when I get some front replacement discs the car will be taxed and back on the road for a trial! They look the business though and much better than the sliding calipers. There is a significant weight saving as the 2 pots are alloy. I'll measure them later (I have a set of spare 2 pot calipers!).
For ease of conversion I'd go with Tim's method of New Age hubs, but I wouldn't recommend the kits from Ebay as the pad doesn't sit on the disc correctly. So, my method was the next best thing if you're on a tight budget.
Bracket mounted after backplate-ectomy:
Front detail:
Caliper on:
Close up:
Does it work? Well, the car is sorn at the moment so when I get some front replacement discs the car will be taxed and back on the road for a trial! They look the business though and much better than the sliding calipers. There is a significant weight saving as the 2 pots are alloy. I'll measure them later (I have a set of spare 2 pot calipers!).
For ease of conversion I'd go with Tim's method of New Age hubs, but I wouldn't recommend the kits from Ebay as the pad doesn't sit on the disc correctly. So, my method was the next best thing if you're on a tight budget.
Last edited by Floyd; Oct 18, 2009 at 10:05 PM.

Well, the car is taxed and back on the road at last. The hold up was sourcing new front discs to replace the AP rotors, which I eventually got from Compbrake.
Unfortunately they didn't fit the AP bells even though they should have Compbrake then modified my bells and returned them although they lost my fastners in the process and it took a lot of chasing to get all the work completed
I then sourced some suitable fastners locally (metal locking nuts etc) and tried to put the bell/rotor together, which you would think is simple. There was play between the fasteners and the bolt holes (even though the fasteners were the right size) so the bell didn't locate accurately to the centre of the disc. Bugger. No time to fix it as I had a rockingham track day booked... I decided to line it up by eye - yes, that's right, only using my judgement. What could go wrong")
I fitted new Yellow stuff pads up front and used the new mintex road pads that came with the rear discs on the rear 2 pots. I put new 'halfords own' brake fluid in the system (no time to get any good stuff) and fully bled all calipers. I gingerley took the car out for a spin. Amazingly there were no vibrations or odd things happening. I bedded the pads in (read thrashed) and put the car away.
The next time I used the car was on the drive to Rockingham race track. The brakes felt really good. Lots of feel and little play in the brake pedal.
Out on track it was a different story. The first few stops were fine - good stoppage, no vibrations, excellent feel but then a soft pedal and the pedal went to the floor. Oh bugger.
Back in the pits I scratch my head and wonder how I'm going to fix this. I already have new pads, discs, fluid. There are no leaks and the system has been bled. Double bugger.
My mate Ian comes over to help and says that it's just the new pads and I should leave it for a bit. Bugger me he was right. The brakes fixed themselves and the rest of the day was brilliant. Amazing stoppage and zero fade. The upgraded rears work really well with the AP 4 pots up front and I can brake right up to the apex with no lock up or sillyness.
At the end of the day the rears were completely shot and the fronts were 2/3 gone! At least the pads were cheap!
So, does it work = YES.
Unfortunately they didn't fit the AP bells even though they should have
Compbrake then modified my bells and returned them although they lost my fastners in the process and it took a lot of chasing to get all the work completed I then sourced some suitable fastners locally (metal locking nuts etc) and tried to put the bell/rotor together, which you would think is simple. There was play between the fasteners and the bolt holes (even though the fasteners were the right size) so the bell didn't locate accurately to the centre of the disc. Bugger. No time to fix it as I had a rockingham track day booked... I decided to line it up by eye - yes, that's right, only using my judgement. What could go wrong
I fitted new Yellow stuff pads up front and used the new mintex road pads that came with the rear discs on the rear 2 pots. I put new 'halfords own' brake fluid in the system (no time to get any good stuff) and fully bled all calipers. I gingerley took the car out for a spin. Amazingly there were no vibrations or odd things happening. I bedded the pads in (read thrashed) and put the car away.
The next time I used the car was on the drive to Rockingham race track. The brakes felt really good. Lots of feel and little play in the brake pedal.
Out on track it was a different story. The first few stops were fine - good stoppage, no vibrations, excellent feel but then a soft pedal and the pedal went to the floor. Oh bugger.
Back in the pits I scratch my head and wonder how I'm going to fix this. I already have new pads, discs, fluid. There are no leaks and the system has been bled. Double bugger.
My mate Ian comes over to help and says that it's just the new pads and I should leave it for a bit. Bugger me he was right. The brakes fixed themselves and the rest of the day was brilliant. Amazing stoppage and zero fade. The upgraded rears work really well with the AP 4 pots up front and I can brake right up to the apex with no lock up or sillyness.
At the end of the day the rears were completely shot and the fronts were 2/3 gone!
At least the pads were cheap!So, does it work = YES.
Oh right, er, well I've made a battery clamp. Just a temporary thing before I can relocate the battery to the boot. I've also made a bulkhead panel to cover the rear seat void made from Dibond, which is aluminium composite - light yet stiff.
So, what next. I have bought a swirl pot and need to find a pump to suit. I'm still undecided on where to put it. If it's in the boot it'll be noisy and if it's under the bonnet I need to run a lead from the old pump supply. Either location is fairly easy for pipe runs though.
I have a heat gun and I'll start stripping the sound proofing. The carpet will go back in afterwards and I'll cover the bare areas with felt. I have aquired a Cobra seat and OMP steering wheel and boss so these will go in at some point. The airbags will be coming out too.
The next big stage? I was asked this question recently and this is what I told him:
I went for the STi8 inlet to improve surge over the Samco - it didn't. I like the OE look though.
When I look back on the VF35 I realise what a great package that was - really punchy. I could have mapped it for more BHP but that would have given me more surge possibly. I've tried a TD05 16G and it was just awful for lag/late spool but that maybe just the second hand one that I had. That made me avoid trying the 18G or 20G. It didn't have any surge though.
The Twinscroll has some surge too but it's been mapped to avoid it and although you can hear it it doen't seem to affect performance or reliability. Bob reckons it has around 350/350. It's very smooth but doesn't have the punch or excitment of the VF35 as a result of the mapping. On circuits like Cadwell it really suffers lag/late spool at Hall and Barn. At Bovington tank course, the hair pins meant I had to use 1st gear as 2nd bogged down. I felt a bit low after those tracks. I then switched to the STi8 inlet (from the Samco) and without any mapping, I've done Silverstone South, Rockingham and the full Ring including the F1 circuit. Now I'm much happier as these open tracks really suit the delivery very well.
I've thought a lot about where to go now with it. The downpipe is a JDM OE unit with the Cat removed. It leaks a bit in the cat section for some reason and the shape is not ideal. I've managed to pick up a full Miltek twinscroll 3 inch cheaply to replace the whole 2 1/2 inch system, which I'm looking forward to fitting. I think this will improve pickup but may increase surge. I've been told a few times that the twinscrolls really work well because they are usually fitted to AVCS heads and this is where the lack of low lag comes from. I'm not in a position to do that right now.
A mate has given me his old standard EJ25 long engine. He used it with a TD05 and we compared them on the road together. He had less BHP (20 or 30) but similar or more torque and it came in really early. There was nothing between the cars and when I drove his, the way it picked up was superb and almost turbo diesel like.
I'm going to replace my 2.0 with this 2.5 and run it with the twinscroll. I'll keep it at 350 bhp but with more torque (maybe up to 380) and see how I get on. I want it to come in really early and strong but still have the oomph in the mid and top range. I've checked my data logs and this is where I can find extra seconds. Something that is really punchy yet smooth would make a devastating track car. To help this package will be a lightened flywheel (8kg) and lightweight pulleys. I'll be sticking to the 440's for now and add the fuel swirl pot and Bosch external.
The thinking here is the unopened 2.5 should normally be track reliable up to 380-400bhp if I want it. People seem to have HG issues once they play around with pistons and internals. I can always swap to 550's later for extra headroom and a bit more power but for now my current engine is good enough for 8:20's BTG in my hands at the Ring and 'off the clock' on the main DH straight, so just widening the torque curve will make it quicker everywhere without compromising reliability.
I've not updated this thread for a while but I've steadily been working on upgrades. The brakes are documented and work extremely well. I'm stripping the car but it'll remain streetable. I'm going for the R26.R look - stripped but factory. I've fitted defi's now and relocated my AFR.
The twinscroll turbo and headers are really well made for OE items. They flow superbly too and are heat shielded perfectly. These will be sought after IMO.
I have an engine stand and I'll document the build. For starters I'm replacing the cam belt and the pulleys.
Watch this space!


Quite a bit going on then!
Do you think your rear firewall cover will make a difference when you have the cage in? I guess it would without the cage though.
I'm glad you've said the VF35 is a good unit, one has just turned up on my doorstep Have you got any tips for porting the wastegate to remove boost creep? I've had a read through your posts, but they don't really show how much was removed.
Will you be keeping your old engine?
Are you not worried that the 440's might max out or have you been mapped appropriately?
Can't wait for the rest
Do you think your rear firewall cover will make a difference when you have the cage in? I guess it would without the cage though.
I'm glad you've said the VF35 is a good unit, one has just turned up on my doorstep
Have you got any tips for porting the wastegate to remove boost creep? I've had a read through your posts, but they don't really show how much was removed.Will you be keeping your old engine?
Are you not worried that the 440's might max out or have you been mapped appropriately?
Can't wait for the rest
DO NOT attack the sound proofing with a heat gun Floyd. Ice, chisel and hammer is far far better.
Swirl pot on passenger strut nearest bulkhead as possible, aftermarket filter and an uprated walbro in the oemfilter position will be spot on.
Swirl pot on passenger strut nearest bulkhead as possible, aftermarket filter and an uprated walbro in the oemfilter position will be spot on.