
Floyd’s ‘economy’ Stage III


Not a brilliant picture - camera phone!
It's a 1bar jobbie so we'll see how this works out. I did have a choice and it could have been the 1.2bar but in the back of my mind I'm thinking gearbox

F
I needed to get a new sump to fit the headers. The sump will also require a new oil pick up and possibly a new dipstick. I called Drew at Cotswold Subaru to source the parts as he's always very helpful even if he's quite a distance from me. I did try other places but I didn't get any joy (the usual scooby breakers and suppliers etc). Drew found the parts instantly and ordered them. I got a call last night from Drew about 6:00p.m. to say they had arrived and could he drop them off to me. 7:30p.m. he arrived with the parts  Beat that!!!
I hope these are the right parts as I thought the latest 2.5 cars had the same sumps as the Twinscrolls?
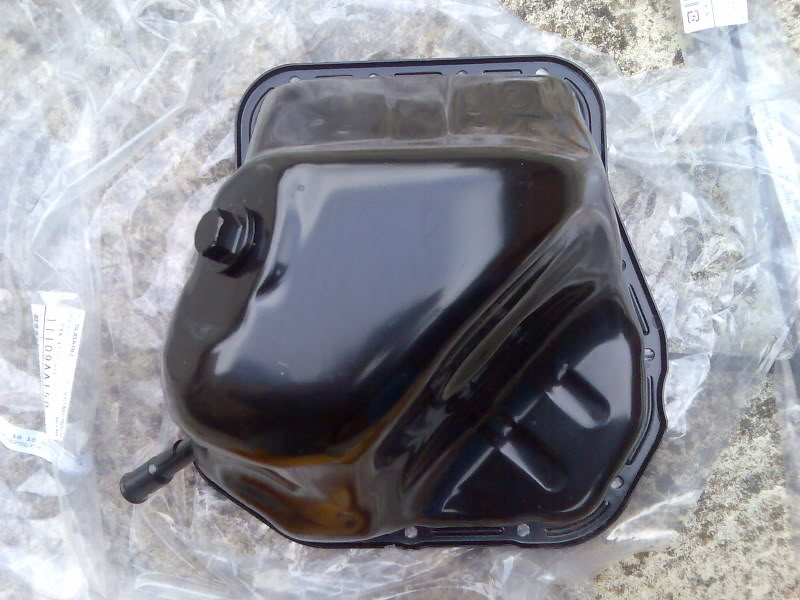
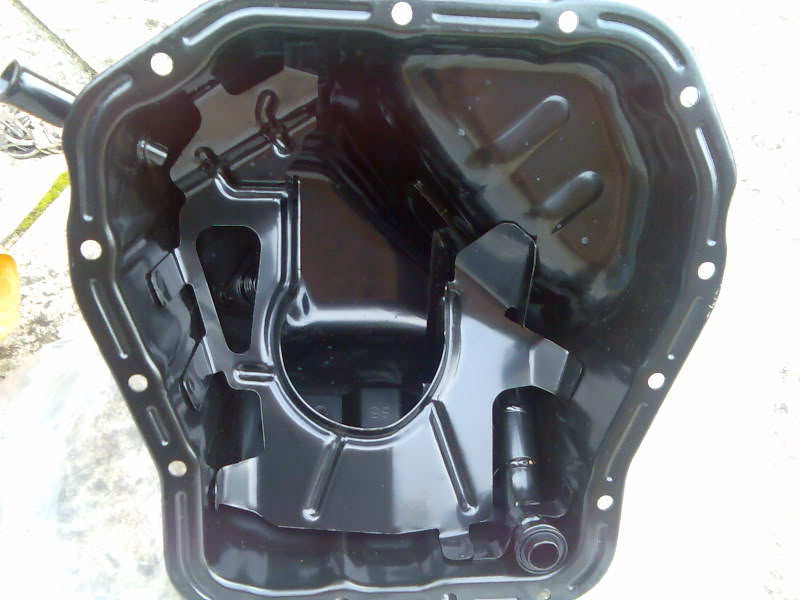
The oil pan looks quite 'pointy' so maybe it'll be more resistant to surge?
Beat that!!!I hope these are the right parts as I thought the latest 2.5 cars had the same sumps as the Twinscrolls?
The oil pan looks quite 'pointy' so maybe it'll be more resistant to surge?
Last edited by Floyd; Oct 4, 2006 at 08:07 PM.
 I bloody hope the engine doesn't have to come out! I'll try to undo the engine mounts and lift it a bit...
The sump looks smaller but I will be fitting an oil cooler so I'll get extra oil capacity there.
F


Tips
Drain oil
Remove the pitch bar from bulkhead to box
Ensure no cables or pipes will get crushed as your lift the engine as high as possible.
Remove headers (your doing that anyway)
Using 3/8's ratchet, extension bar and universal joint with 10mm socket, remove most of bolts
Remove remaining (ones nearest gearbox) with 1/4 drive version of above
NOTEMake sure you are calm and patient before attempting any of this, as it is time consuming, and you will gradually get dead arms!
Using a pry bar, knock between sump and block, carefully
Remove old sump
Clean the engine block face thoroughly, note oil will continue to weep onto the surface.
Use VERY good silicon sealer (3 Bond or the Loctite equivelant) smearing onto the block surface (not too thick)
Check that no more oil has dripped onto the sealer
Put new sump on, and bolt up as quick as possible, at that point all the best with putting the rear bolts in
Something along those lines anyhow
Thanks Steven, exactly what I wanted. I can feel my sphincter twitching already at the thought of it all going wrong now Add this to my misses popping in after an hour or two saying "are you done yet, we need to go out" or something when I have oil up to my arm pits...
F
Add this to my misses popping in after an hour or two saying "are you done yet, we need to go out" or something when I have oil up to my arm pits... F

Scooby Regular
Joined: Nov 2004
Posts: 1,959
Likes: 0
From: In a 405 BHP/360 ft/lb P1 with SN superstar Sonic dog at my side!
I looked at doing this Floyd (sump removal in situ) and decided it would be quicker and less hassle to take the engine out.
Steven's post has confirmed this!
Steven's post has confirmed this!
I don't really want to lift the engine out as I don't have the space in my garage and the weather is crap outside. It is possible so I'll give it a go.
I picked up the penultimate part today from a raid in Swindon! It's a new Down pipe and I have three options now:
Use as is (it has a cat).
Use but remove the cat.
Cut the most excellent cast bell mouth off it and nail to H&S DP.
I'm tempted to remove the cat and use as is. My reasoning is that although there may be some turbulence with the removed cat cavity, Mike Wood once indicated that there were advantages with an 'expansion' chamber after the turbo? If there isn't then the advantages would be the damn good heat shielding it will have as well as a cast bell mouth that looks really good and is the best for retaining heat and therefore gas speed. It will probably be quieter too. It may not produce as much power as a normal DP but as I'm keeping the 440 injectors I'll be limited on power anyway.
Stage III.III will be a 3 inch turbo back system, 550's and a strengthened box of some sort.
For now the objective is to regain the response and a bit more BHP/torque everywhere!
Just need to sort oil and water pipes now for the turbo and I'm ready to build...
F
lol, Floyd what are you getting yourself into..?
You should have stayed with the VF35..!
Seriously, you're a star for trying this and hopefully cutting new ground, keep it up..!
You should have stayed with the VF35..!
Seriously, you're a star for trying this and hopefully cutting new ground, keep it up..!
The VF35 was really good but I've always wanted a taste of twinscroll.
I really need to get a move on before it gets too cold in the garage so I've takn the DP to work to do stuff in my lunch hour! I can always enlist some help from my minions
It looks like I have an oil pipe but I've no idea if I need a restricted banjo bolt thingy? I look at the water pipe later!
F
I really need to get a move on before it gets too cold in the garage so I've takn the DP to work to do stuff in my lunch hour! I can always enlist some help from my minions
It looks like I have an oil pipe but I've no idea if I need a restricted banjo bolt thingy? I look at the water pipe later!
F
There's me removing the DP and I take a peek into the centre pipe. WTF that looks like a catalyst -huh!? Anyway, looks like I somehow managed to leave it on while the TD05 was on there. It could explain a few things. Never mind it's off now.
F
F


Scooby Regular
Joined: Aug 2004
Posts: 948
Likes: 0
From: Berkshire
Floyd, I've just caught up on your thread and it seems you've come a long way from glueing foam to the top of the intercooler!
We gave up on the modifying thing (not enough time, what with the Locost and Polo!) and my dad has just bought a 2006 STi. We will be visiting the ring again this summer
Adam
We gave up on the modifying thing (not enough time, what with the Locost and Polo!) and my dad has just bought a 2006 STi. We will be visiting the ring again this summer
Adam
I managed to remove all the sump bolts without removing the engine or lifting it off the engine mounts!
Last part arrived today so rebuild will be this w/e. Pictures to come.
I also need to fit some new front pads, my front rose jointed a/r and scrub in the new Pilot cups...
F
Last part arrived today so rebuild will be this w/e. Pictures to come.
I also need to fit some new front pads, my front rose jointed a/r and scrub in the new Pilot cups...
F


Former Sponsor
Joined: Jul 2005
Posts: 2,859
Likes: 0
From: Wellingborough, Northamptonshire
Floyd,
If you haven't already got one, we have the ARB locking kits that stop the roll bar from moving sideways in the mounts when using the rose jointed links. Not sure you got those first time round.
If you haven't already got one, we have the ARB locking kits that stop the roll bar from moving sideways in the mounts when using the rose jointed links. Not sure you got those first time round.
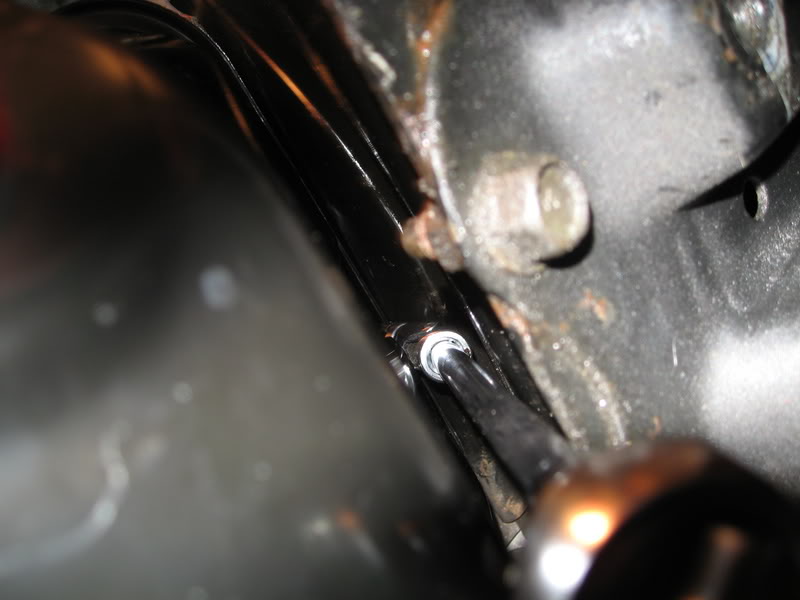
The dip stick tube is the first thing to remove:
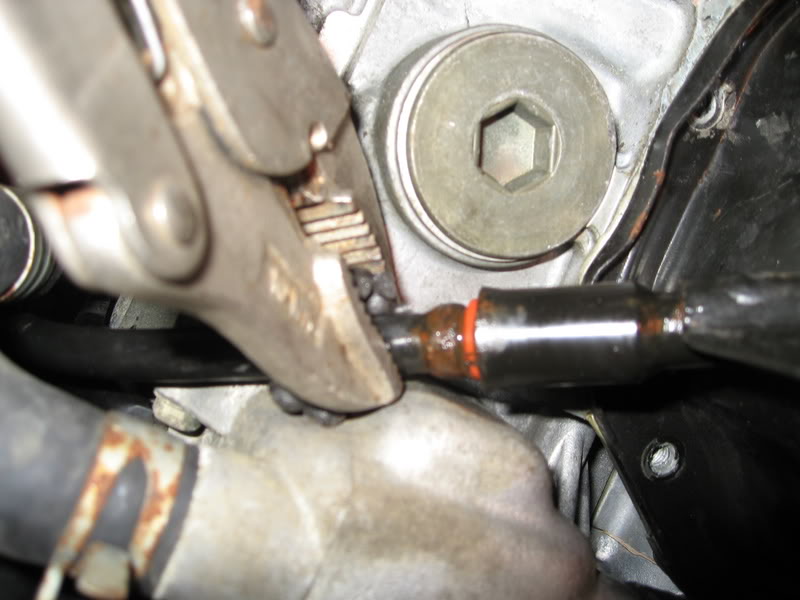
The way I did it was to clamp it with mole grips and knock it gently with a hammer. The jaws were lined with rubber to limit damage. Prying the sump isn't an easy thing in situ:
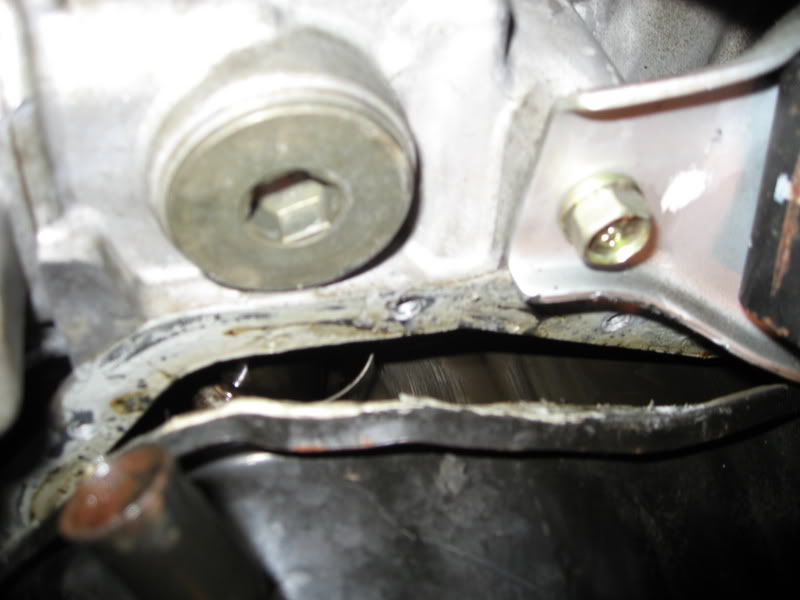
But with brute force and good advice, it does come away. Then when the sump is free it does not fall away without removing the pickup:
Remember that the car hasn't been raised off its mountings so some careful manipulation is required.
The way I did it was to clamp it with mole grips and knock it gently with a hammer. The jaws were lined with rubber to limit damage. Prying the sump isn't an easy thing in situ:
But with brute force and good advice, it does come away. Then when the sump is free it does not fall away without removing the pickup:
Remember that the car hasn't been raised off its mountings so some careful manipulation is required.
The sumps side by side:
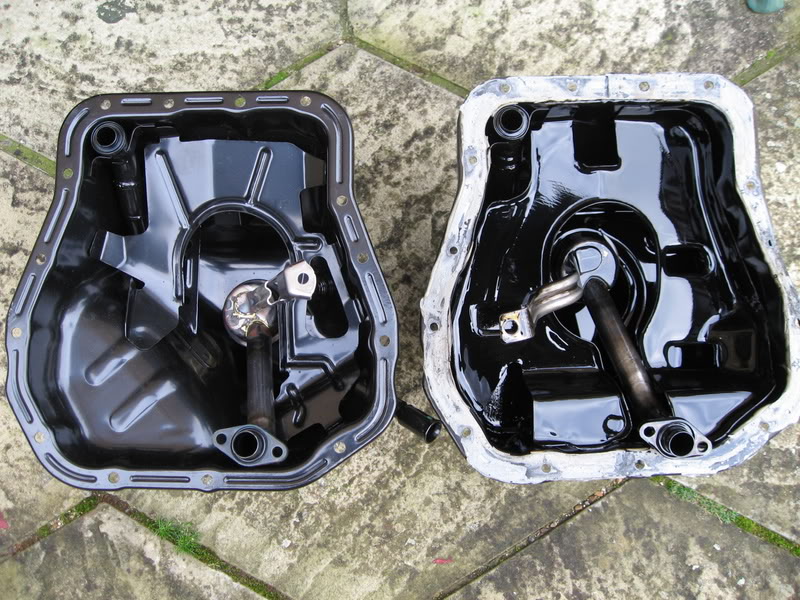
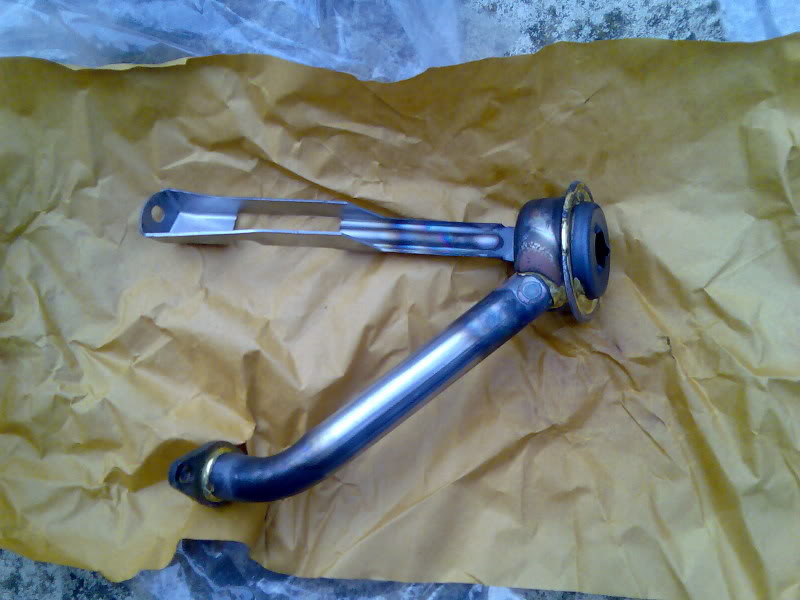
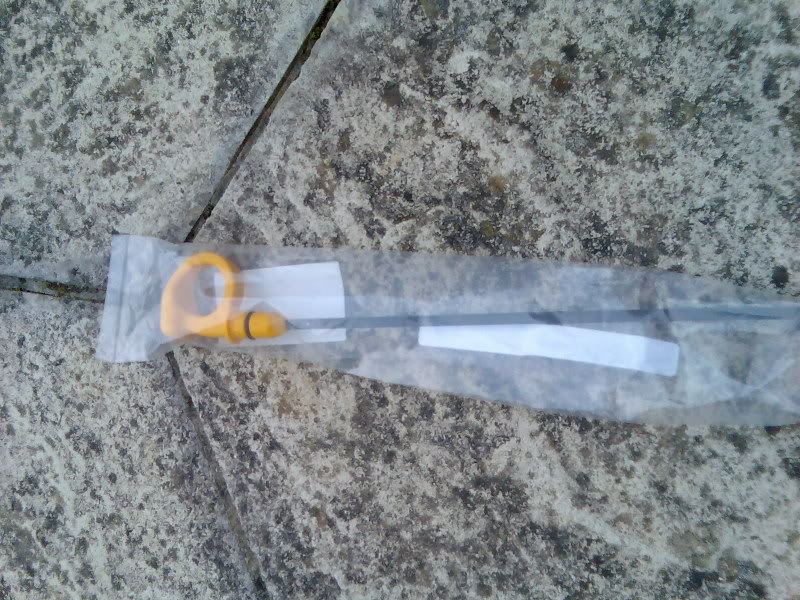
This is when I discovered that the pickup has a different support bracket location. Thankfully it uses an existing mounting point! I then checked out the dipstick:

The one at the top is the new one and is much shorter. I'm using the same tube at the moment and I've no idea if it should be different? My thinking would say it should be the same. Anyone know what the MY05 2.5's oil capacity is? Looking at the sump and the length of the dipstick it would seem that the oil level is higher, which means that the oil pick up is much more submersed. This seems better from a surge point of view IMO.
The last bolts going back in (the tricky ones!):
This is when I discovered that the pickup has a different support bracket location. Thankfully it uses an existing mounting point! I then checked out the dipstick:
The one at the top is the new one and is much shorter. I'm using the same tube at the moment and I've no idea if it should be different? My thinking would say it should be the same. Anyone know what the MY05 2.5's oil capacity is? Looking at the sump and the length of the dipstick it would seem that the oil level is higher, which means that the oil pick up is much more submersed. This seems better from a surge point of view IMO.
The last bolts going back in (the tricky ones!):
All bolted up:
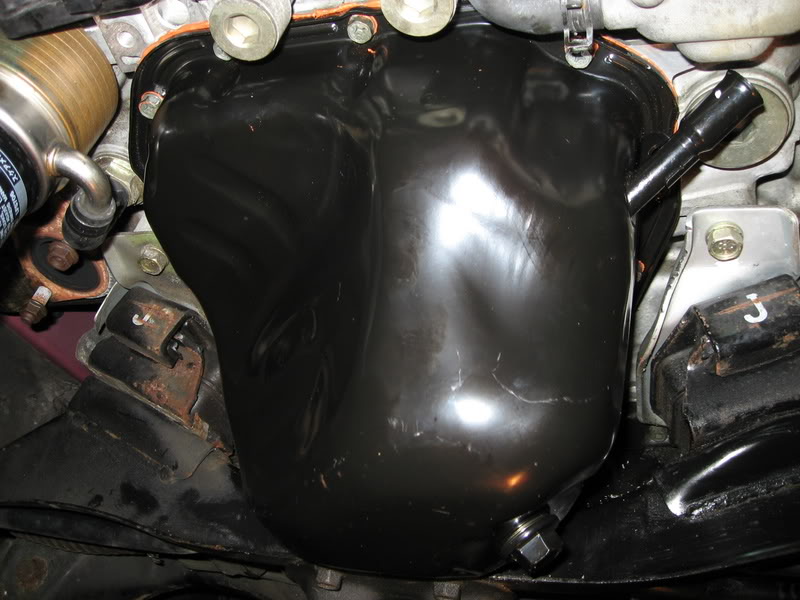
The DP has 2 sensor holes so this one was plugged with the blanking screw I had from the oil temp sender hole - and that was nice!
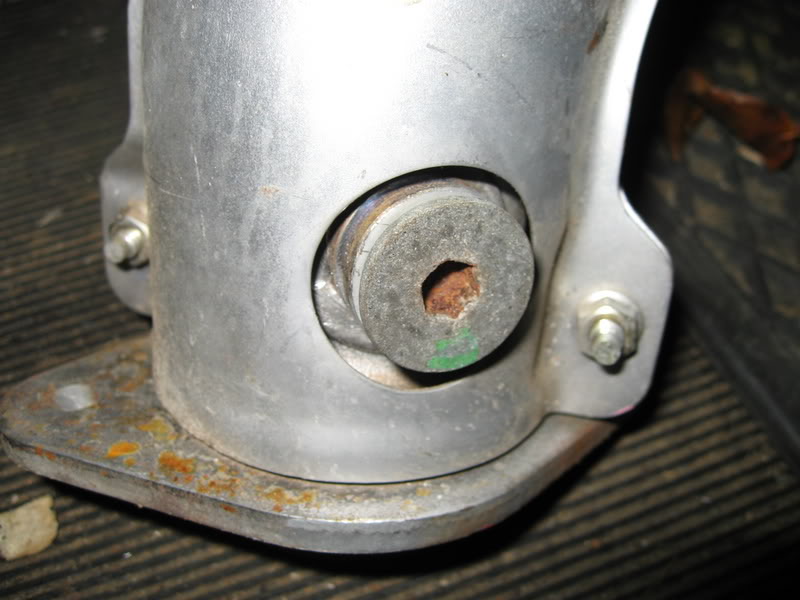
Oh, the irony. I managed to do the sump without having to lift the engine only to find that I couldn't get the twin scroll up pipe in place I jacked the engine up and managed to slide it in place. I needed to remove the 2 turbo support brackets as well. I can only refit one bracket as the smaller one won't fit with the new turbo. More pictures later as my arms are aching and I'm tired.
F
The DP has 2 sensor holes so this one was plugged with the blanking screw I had from the oil temp sender hole - and that was nice!
Oh, the irony. I managed to do the sump without having to lift the engine only to find that I couldn't get the twin scroll up pipe in place
I jacked the engine up and managed to slide it in place. I needed to remove the 2 turbo support brackets as well. I can only refit one bracket as the smaller one won't fit with the new turbo. More pictures later as my arms are aching and I'm tired.F