
05 HVAC LED change anyone do it?
 05 December 2013, 08:40 PM
#1
Scooby Regular
Thread Starter
iTrader: (4)

Join Date: Jan 2010
Posts: 893
Likes: 0
Received 0 Likes
on
0 Posts
have an 05 HVAC and wanting to have red led's added to it.
Does anyone on here do it??
Don't really fancy giving it ago myself and soldering iron isn't in best of condition either.
Thanks
Oli
Does anyone on here do it??
Don't really fancy giving it ago myself and soldering iron isn't in best of condition either.
Thanks
Oli
 23 December 2013, 05:45 PM
#2
Scooby Regular
Thread Starter
iTrader: (4)
Join Date: Jan 2010
Posts: 893
Likes: 0
Received 0 Likes
on
0 Posts
anyone?  will happily pay for someone to do it for me aswell, have all the LED's and resistors to do the job with aswell
will happily pay for someone to do it for me aswell, have all the LED's and resistors to do the job with aswell
Last edited by oli_p; 23 December 2013 at 07:36 PM.

 31 December 2013, 12:30 AM
#6
Scooby Regular
Thread Starter
iTrader: (4)
Join Date: Jan 2010
Posts: 893
Likes: 0
Received 0 Likes
on
0 Posts
anyone?? On verge of giving up attempting to do it myself. Few things Im unsure off, how people are holding the LED's in place aswell as getting the wiring right so they can be pulled through the holes easy enough etc
Trending Topics
31 December 2013, 05:27 PM
#9
Scooby Regular
Thread Starter
iTrader: (4)
Join Date: Jan 2010
Posts: 893
Likes: 0
Received 0 Likes
on
0 Posts
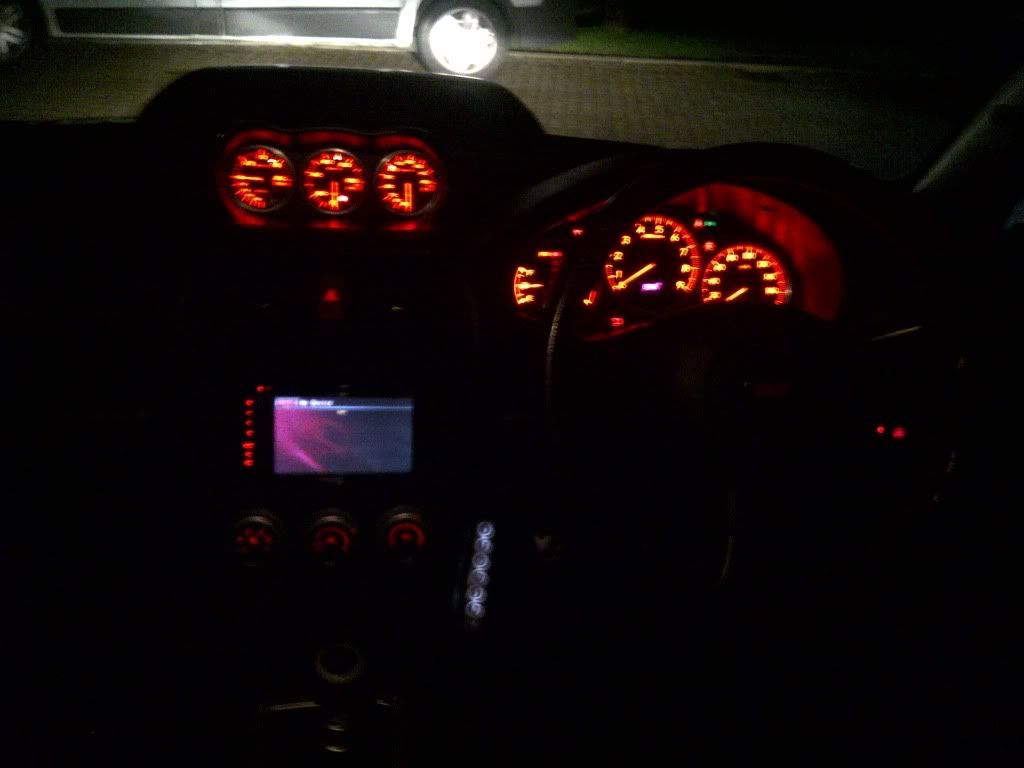
slight update. managed to finish putting the LED's into back of the dials, just to add the resistors and connect both power and ground wires to the main board now. LEDS look a little dim as being powered off a watch battery that's all ive got lying about. But light coverage seems fairly even except bit iffy on part of the fan speed dial, LED probably came away from the light diffuser abit.
All in all glad its finally coming together deffo a mod I don't want to attempt again in a hurry, just hope the rest of the heater controls etc all work fine once I plug the unit into the car

All in all glad its finally coming together deffo a mod I don't want to attempt again in a hurry, just hope the rest of the heater controls etc all work fine once I plug the unit into the car
 31 December 2013, 06:27 PM
#10
Scooby Regular
Thread Starter
iTrader: (4)
Join Date: Jan 2010
Posts: 893
Likes: 0
Received 0 Likes
on
0 Posts
Right stupid question time. This is the first time ive ever dealt with or used resistors. The 3 resistors group and solder to the same connector on the main circuit board.
Im having trouble keeping them together whilst attempting to solder them, If I use a thicker wire than what ive used, would I be able to just solder the resistors to the thicker wire then just solder the wire to the board?? Will only be a short piece of wire, just think it may make it easier, cant keep my hand steady enough as it is worried about cocking it up lol
Im having trouble keeping them together whilst attempting to solder them, If I use a thicker wire than what ive used, would I be able to just solder the resistors to the thicker wire then just solder the wire to the board?? Will only be a short piece of wire, just think it may make it easier, cant keep my hand steady enough as it is worried about cocking it up lol
 01 January 2014, 11:38 AM
#12
01 January 2014, 11:46 AM
#14
Scooby Regular
Thread Starter
iTrader: (4)
Join Date: Jan 2010
Posts: 893
Likes: 0
Received 0 Likes
on
0 Posts
used the guide/tutorial from the youtube video above, and then just improved on it slightly.
The above video shows that the guy puts the leds between the light diffuser and the centre pin of the dial, where as I managed to put the LEDs against the diffuser properly, made it abit harder though as less space to work with.
Also used a small dab of glue on top of each LED to hold it in place against the light diffuser.
I would of done my own tutorial, but too be honest didn't go as planned, and isn't as neat as id of liked it, just glad it works
Also when it comes to soldering the positive and negative wire to the main board, I used a thicker piece of wire, soldered them to correct pins first then the other wires/resistors to each wire, thought it made it abit easier
01 January 2014, 11:50 AM
#15
Scooby Regular
Thread Starter
iTrader: (4)
Join Date: Jan 2010
Posts: 893
Likes: 0
Received 0 Likes
on
0 Posts
i used these LEDs http://www.ebay.co.uk/itm/290829720491
The resistor used, would depend on how many LEDs used for each dial
can work out which resistors you need by using this http://led.linear1.org/led.wiz
The resistor used, would depend on how many LEDs used for each dial
can work out which resistors you need by using this http://led.linear1.org/led.wiz
01 January 2014, 11:56 AM
#16
Scooby Regular
iTrader: (2)

Join Date: May 2012
Location: Playa del Bourne
Posts: 313
Likes: 0
Received 0 Likes
on
0 Posts
cheers oli... i watched the video a little while back and got some led's and resistors but cant bloody find them so gonna order some more up and give it a bash
01 January 2014, 12:05 PM
#17
Scooby Regular
Thread Starter
iTrader: (4)
Join Date: Jan 2010
Posts: 893
Likes: 0
Received 0 Likes
on
0 Posts
no probs good luck, think most worrying part was the drilling, incase caught the board itself, had a very close shave with one, but lucky didn't do any damage, had to elongate one or two of the holes aswell as didn't quite line up with the gaps on the dials, other than that wasn't too bad
good luck, think most worrying part was the drilling, incase caught the board itself, had a very close shave with one, but lucky didn't do any damage, had to elongate one or two of the holes aswell as didn't quite line up with the gaps on the dials, other than that wasn't too bad
02 January 2014, 10:07 AM
#24
Scooby Regular
Thread Starter
iTrader: (4)
Join Date: Jan 2010
Posts: 893
Likes: 0
Received 0 Likes
on
0 Posts
already have the hawkeye sti clocks fitted main reason for me wanting to add LED's to the HVAC to match them and my gauges.
Ill be adding an LED to the 12v socket and ignition aswell, although the LED's that I ordered are too big so need to have a look on the bay again for a diff set.
Will also be looking into replacing bulb for rear fog button aswell, and was also going to look into adding them to my window switches although can't seem to find a set of window switch where all the buttons allow light to pass through
main reason for me wanting to add LED's to the HVAC to match them and my gauges.Ill be adding an LED to the 12v socket and ignition aswell, although the LED's that I ordered are too big so need to have a look on the bay again for a diff set.
Will also be looking into replacing bulb for rear fog button aswell, and was also going to look into adding them to my window switches although can't seem to find a set of window switch where all the buttons allow light to pass through
02 January 2014, 10:56 AM
#25
Scooby Regular
iTrader: (10)
Join Date: Apr 2010
Location: preston
Posts: 2,081
Likes: 0
Received 0 Likes
on
0 Posts
this is the guide the bloke that did mine followed
http://www.iwsti.com/forums/gd-inter...s-05-06-a.html
he also did the door card switches ignition ring ic switch and ashtray lights
http://www.iwsti.com/forums/gd-inter...s-05-06-a.html
he also did the door card switches ignition ring ic switch and ashtray lights

Last edited by Dave-W-; 02 January 2014 at 11:00 AM.
