
Today, I have mostly been......

Out in the pi**ing rain and cold! 
Have been wanting to de-tango my lights for a while now, and finally found the time to do it. I wont bore you with all the details, as there are some great step by step guides already on here
Hope this inspires others. I will gladly go into more specific detail if people are unsure
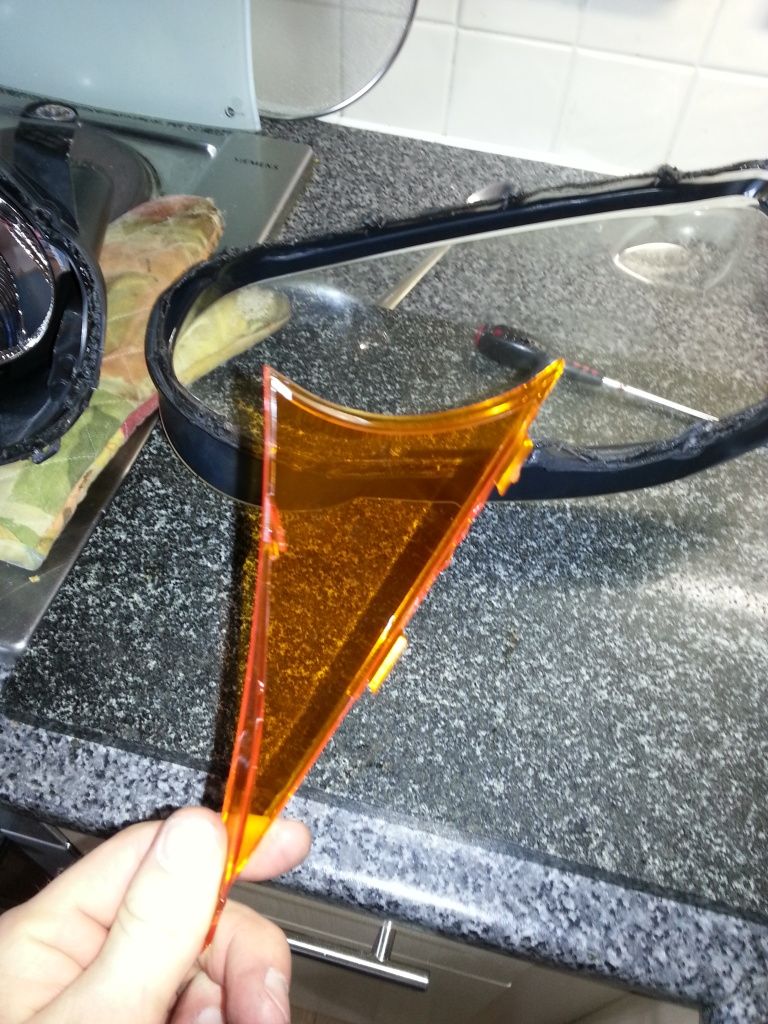
First things first, get them apart!

Take out the offending piece
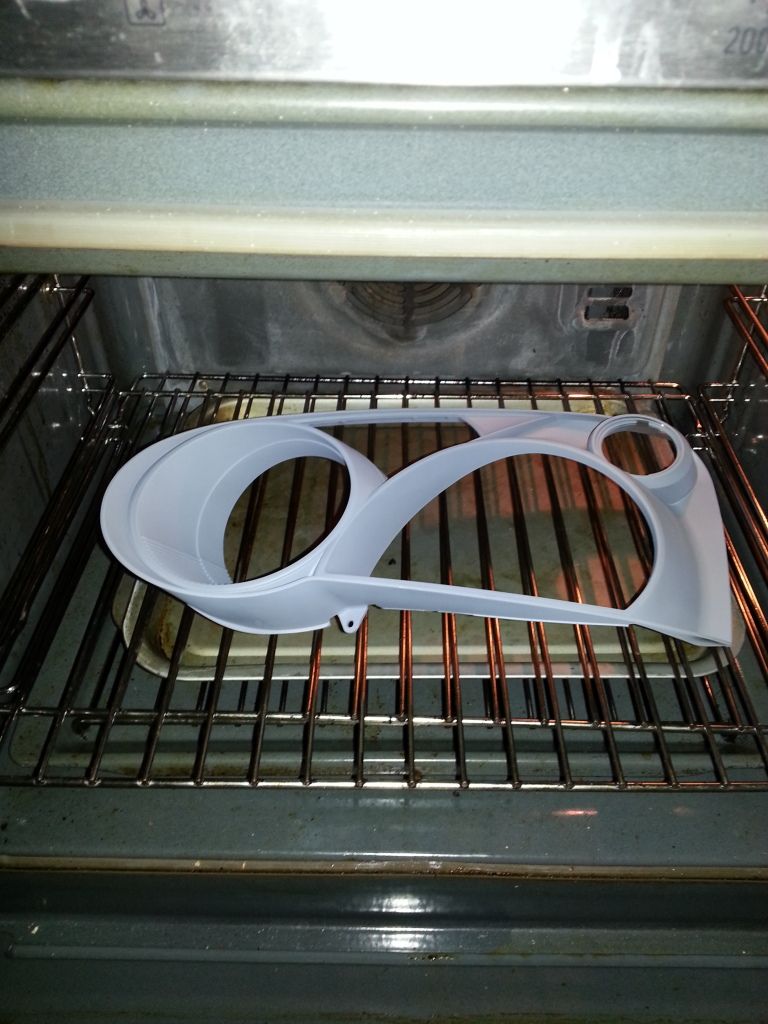
Prime the little monkeys...
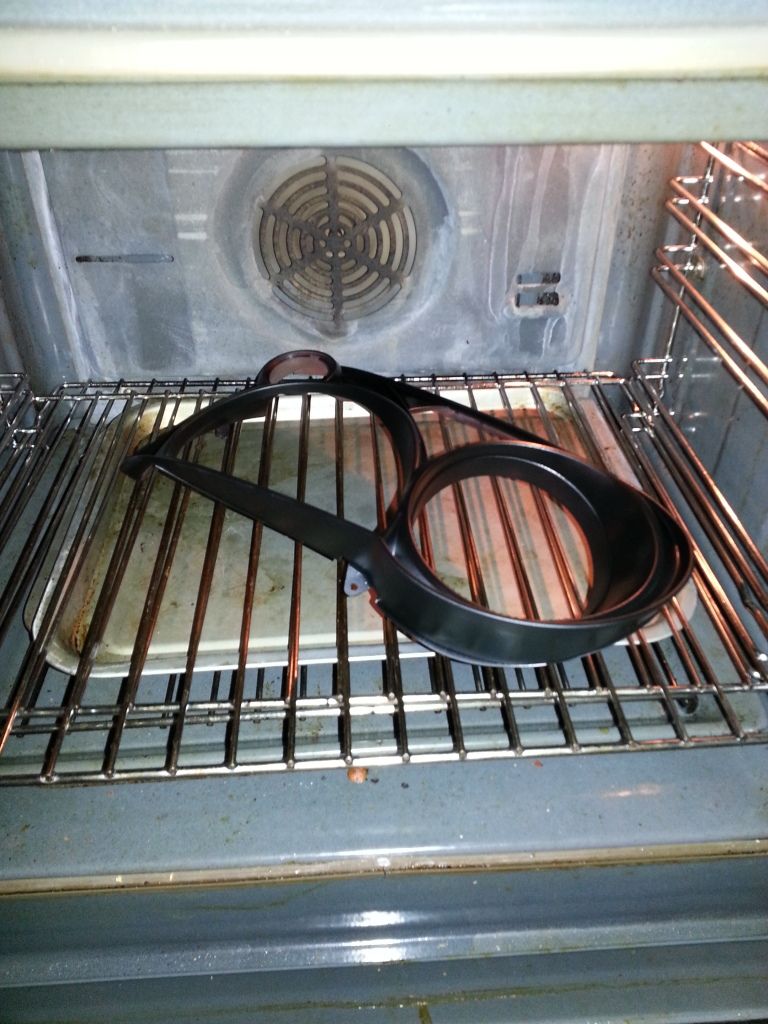
Paint the little buggers
And stick it all back together
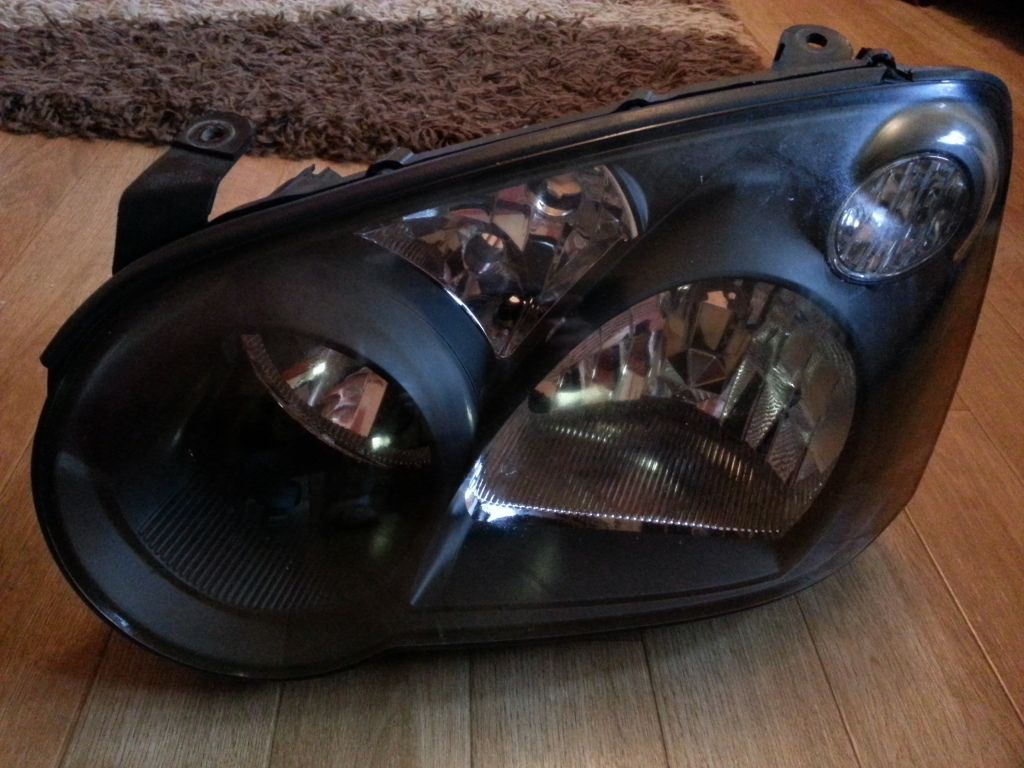
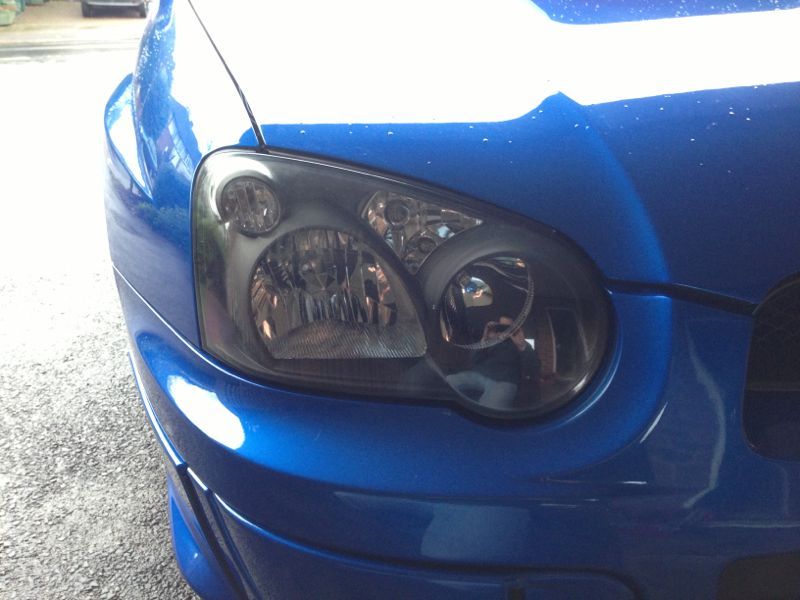
A great mod that can be done quite easily, and looks heaps better than the original ones! Even managed to get the power steering belt changed, a good day!
Have been wanting to de-tango my lights for a while now, and finally found the time to do it. I wont bore you with all the details, as there are some great step by step guides already on here
Hope this inspires others. I will gladly go into more specific detail if people are unsure
First things first, get them apart!
Take out the offending piece
Prime the little monkeys...
Paint the little buggers
And stick it all back together
A great mod that can be done quite easily, and looks heaps better than the original ones! Even managed to get the power steering belt changed, a good day!


Trending Topics

I think I'm going to paint the inside of mine too, they are detangoed already. What temp did you 1.set the oven too initially to separate them? 2.to bake the paint, and how long in the oven for each process?
Thanks
Thanks
When baking I set it down to 50 for 5 minutes each.
Putting them back together, I put the two halves in for 5 minutes at 80 and put them back together. After pressing hard to seal, I put them back in again for 3 minutes and pressed again to confirm the seal. Left to harden and job done. Hope that helps.

How have you checked that it's definitely sealed, is it just a question of putting it back on the car and hoped that it doesn't mist up?
I was just about to ask about this actually. Does it dry quick enough to have to put the lights back in the oven as two halves before binding it back together again, I guess this answers my question.
How have you checked that it's definitely sealed, is it just a question of putting it back on the car and hoped that it doesn't mist up?
How have you checked that it's definitely sealed, is it just a question of putting it back on the car and hoped that it doesn't mist up?


Scooby Regular
Joined: Apr 2011
Posts: 1,019
Likes: 0
From: chasing numbers.....
Interesting read.
Mine were detangoed a couple of years ago and have unfortunately misted up this year so ill be splitting mine soon.
Anyone have an idea of what sealant to use? (Just incase)
Mine were detangoed a couple of years ago and have unfortunately misted up this year so ill be splitting mine soon.
Anyone have an idea of what sealant to use? (Just incase)

any factors should have it on the shelf
used it on my last blob with no misting issues
https://www.scoobynet.com/scoobynet-...-splitter.html


 Luckily classic headlights are 10 a penny or else I'd have really been annoyed I've still got the melted units if anyone wants pictures!!!
Not really mate. I used a standard black matt paint. Can use satin/gloss too. Your choice really. I primed it twice (baked twice) and painted it twice (again, baked twice between coats)


Thread
Thread Starter
Forum
Replies
Last Post