Will & Petes Alloy Respray Guide!
 07 September 2009, 12:02 AM
#1
Scooby Regular
Thread Starter
iTrader: (1)
Join Date: Apr 2009
Location: Chesterfield, UK
Posts: 225
Likes: 0
Received 0 Likes
on
0 Posts
Hi Guys,
I've been umming and aring about refurbing and respraying my alloys for some time now! Anyway, this weekend was quiet nice and my neighbour Pete (importpete) and I decided it was time to do them! Pete is a bit of an expert when it comes to spray jobs and I was a complete virgin... Firstly we needed some bits and bobs, so off I popped to halfords to get the following items:
2 x 500ml Grey Primer
3 x 500ml Satin Black
1 x 300ml Laquer
800 grade sandpaper
1500 grade sandpaper
Masking tape
Cakes and Tea (provided by the wife...)
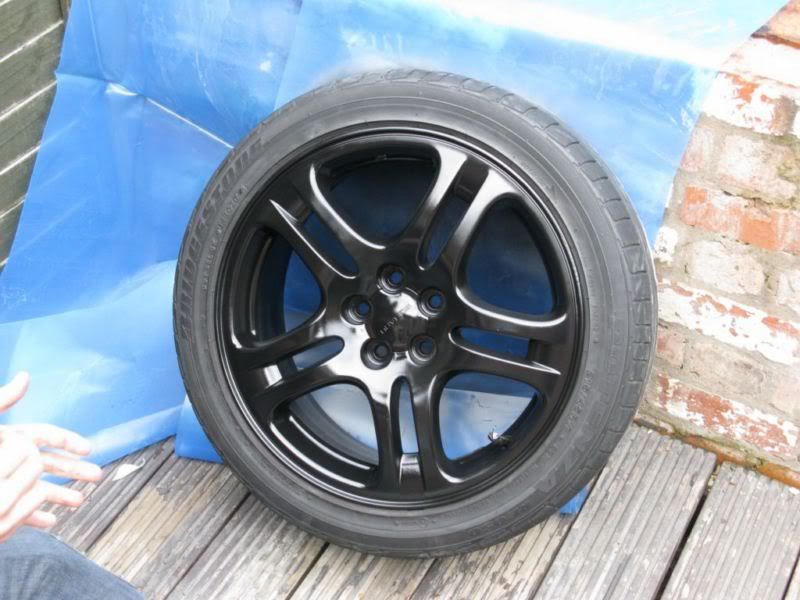
Step 1 is to obviously get the wheel off the car and give it a good clean! I sprayed the wheel with alloy wheel cleaner and left it a cpl minutes to break down the dirt. i then got a cleaning pad from the kitchen draw and gave the wheels a good scrub with hot soapy water (washing up liquid did the job...) aim was to get rid of all the muck and brake dust ect...
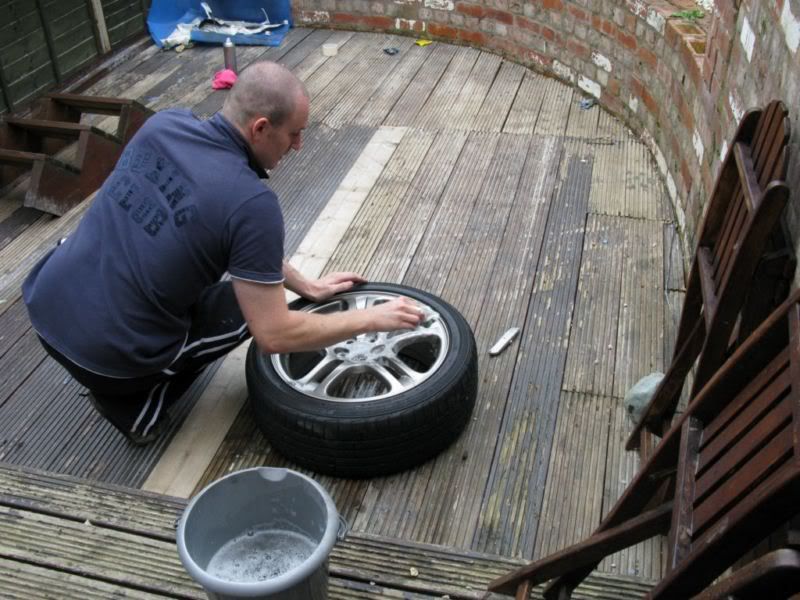
step 2. now that the wheel was clean we had to make sure it was fully dry. i used a drying towel and gave it a good dry down. Once dry get the 800 sand paper and give all the wheel a good going-over... there is no going back now! you need to make sure all the cracks and corners have a good sanding so the primer has something to key too... basically rough up the entire wheel front and back... give it a quick rinse and dry again.
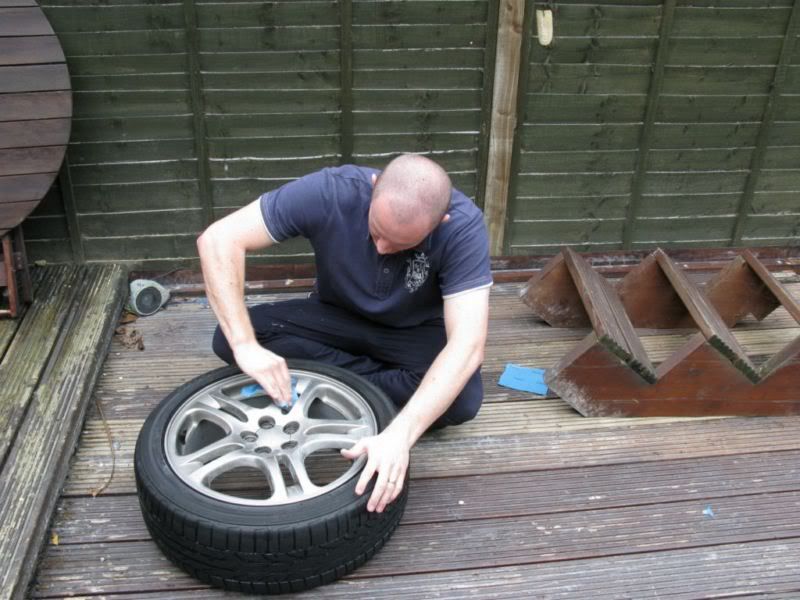
step 3. mask up the wheel with your maskign tape. make sure the masking tape goes down behind the alloy lip so the spray can get all around the lip. also dont forgot to mask off the valve! once masked up its time to primer. the trick is lots of thin layers with some drying time inbetween each layer. dont spray on thick or it will run. start with going round the lip and work inwards, from the back to front (do the back first as any overspray will be covered when you do the front...)
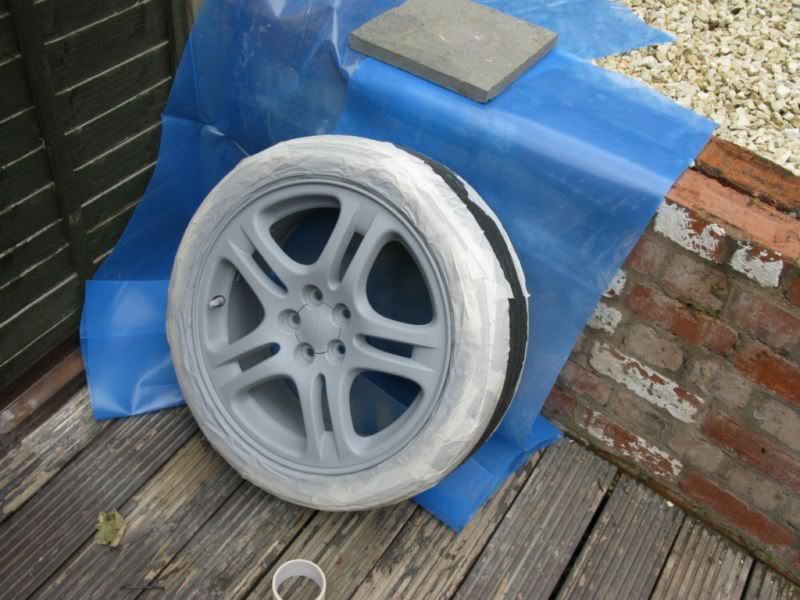
Some ppl recommend leaving overnight to dry... this is fine if you can be arsed, otherwise, get the wife to make you a brew or woteva... after about 10 ~ 15mins it should be pretty dry, esp. if its a nice day!. Time to build up the paint now. Pete recommended not trying to do gloss with spray cans, its harded to get a good finish... so we went for satin black... as it turned out its pretty hard to get it wrong! using the same technique with the primer, back first, start with the lip and work inwards. lots of thin layers and watch for runs!
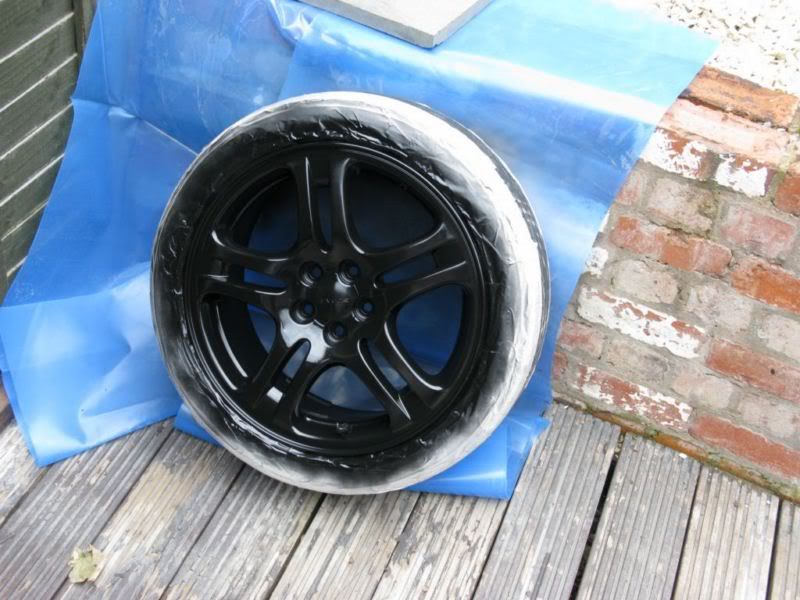
I did actually manage to get a run getting trigger happy on the last wheel... DONT PANIC! let it dry, have another brew... once its FULLY dry (this might take about 30 mins or so....) get some water and the 1500 paper and gently flat the area back down.... take your time and lots of water and it will get rid of the run.... it will ruin the paint finish so a quick blast back over the area once your done will be required.... obviously dont let it run again lol. Check all around the spokes, move the wheel around, look from different angles and make sure everything is covered well. Let the paint dry a good 30 mins then go at it with the laquer... again same technique... you dont need too much, and make sure it goes on even.... once its all dry, take off the masking tape....
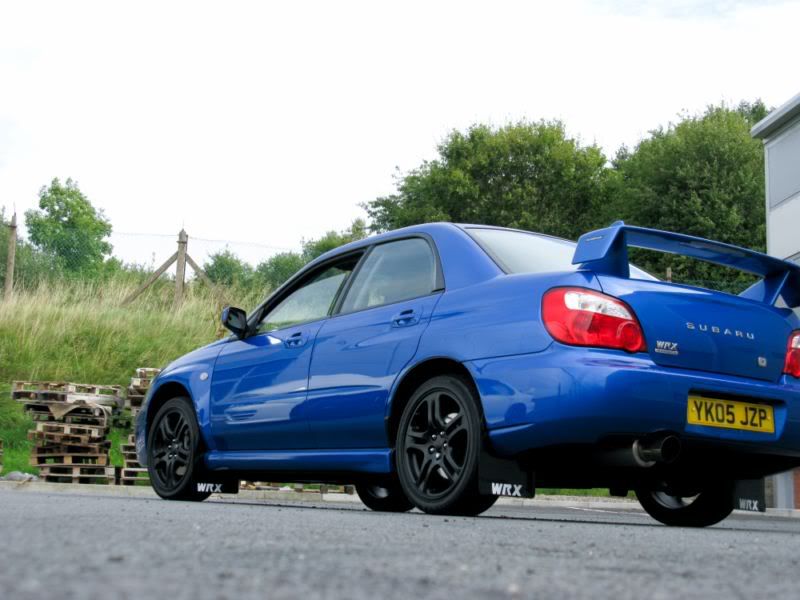
Thats one done! If you have axle stands you can actually work on 2 wheels at the same time (or 4 if your all fancy!).... The last stage is a good detail of the whole car, apply the tyre-gel and admire your work!! (and how much money you have saved compared to a bodyshop / wheel repair specialist....) it honestly is a fantastic job.... thanks for your help pete :-)
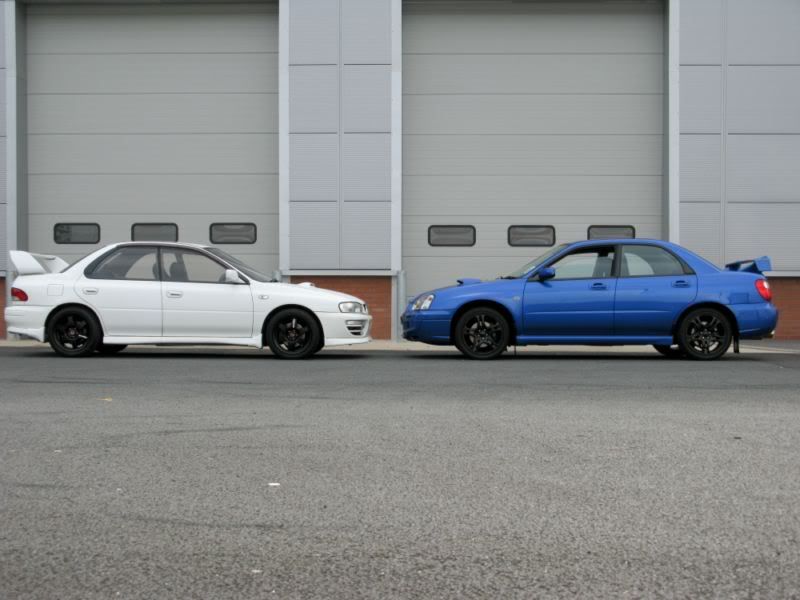
BEFORE:

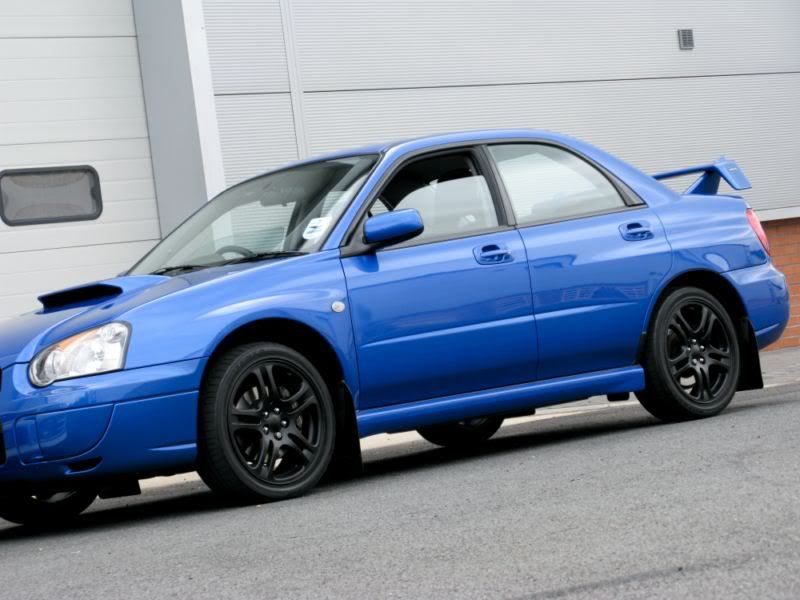
AFTER:
Thanks for looking guys and big thanks to importpete for helping me out this weekend - comments and questions welcomed! i think its made a big difference to the car.....next mod..... new springs
Cheers guys!
I've been umming and aring about refurbing and respraying my alloys for some time now! Anyway, this weekend was quiet nice and my neighbour Pete (importpete) and I decided it was time to do them! Pete is a bit of an expert when it comes to spray jobs and I was a complete virgin... Firstly we needed some bits and bobs, so off I popped to halfords to get the following items:
2 x 500ml Grey Primer
3 x 500ml Satin Black
1 x 300ml Laquer
800 grade sandpaper
1500 grade sandpaper
Masking tape
Cakes and Tea (provided by the wife...)
Step 1 is to obviously get the wheel off the car and give it a good clean! I sprayed the wheel with alloy wheel cleaner and left it a cpl minutes to break down the dirt. i then got a cleaning pad from the kitchen draw and gave the wheels a good scrub with hot soapy water (washing up liquid did the job...) aim was to get rid of all the muck and brake dust ect...
step 2. now that the wheel was clean we had to make sure it was fully dry. i used a drying towel and gave it a good dry down. Once dry get the 800 sand paper and give all the wheel a good going-over... there is no going back now! you need to make sure all the cracks and corners have a good sanding so the primer has something to key too... basically rough up the entire wheel front and back... give it a quick rinse and dry again.
step 3. mask up the wheel with your maskign tape. make sure the masking tape goes down behind the alloy lip so the spray can get all around the lip. also dont forgot to mask off the valve! once masked up its time to primer. the trick is lots of thin layers with some drying time inbetween each layer. dont spray on thick or it will run. start with going round the lip and work inwards, from the back to front (do the back first as any overspray will be covered when you do the front...)
Some ppl recommend leaving overnight to dry... this is fine if you can be arsed, otherwise, get the wife to make you a brew or woteva... after about 10 ~ 15mins it should be pretty dry, esp. if its a nice day!. Time to build up the paint now. Pete recommended not trying to do gloss with spray cans, its harded to get a good finish... so we went for satin black... as it turned out its pretty hard to get it wrong! using the same technique with the primer, back first, start with the lip and work inwards. lots of thin layers and watch for runs!
I did actually manage to get a run getting trigger happy on the last wheel... DONT PANIC! let it dry, have another brew... once its FULLY dry (this might take about 30 mins or so....) get some water and the 1500 paper and gently flat the area back down.... take your time and lots of water and it will get rid of the run.... it will ruin the paint finish so a quick blast back over the area once your done will be required.... obviously dont let it run again lol. Check all around the spokes, move the wheel around, look from different angles and make sure everything is covered well. Let the paint dry a good 30 mins then go at it with the laquer... again same technique... you dont need too much, and make sure it goes on even.... once its all dry, take off the masking tape....
Thats one done! If you have axle stands you can actually work on 2 wheels at the same time (or 4 if your all fancy!).... The last stage is a good detail of the whole car, apply the tyre-gel and admire your work!! (and how much money you have saved compared to a bodyshop / wheel repair specialist....) it honestly is a fantastic job.... thanks for your help pete :-)
BEFORE:
AFTER:
Thanks for looking guys and big thanks to importpete for helping me out this weekend - comments and questions welcomed! i think its made a big difference to the car.....next mod..... new springs
Cheers guys!

 07 September 2009, 12:22 AM
#3
Scooby Regular
Thread Starter
iTrader: (1)
Join Date: Apr 2009
Location: Chesterfield, UK
Posts: 225
Likes: 0
Received 0 Likes
on
0 Posts
what ive got left is 3/4 can of black and 1/4 can of primer... enough to do any touch-ups / repairs :-) imo excellent value for money!
07 September 2009, 01:47 AM
#5
Scooby Regular
iTrader: (7)
Join Date: Apr 2009
Location: DIESEL POWERED BORAT! SLAMMED, R32 WHEELS, MAPPED, DE-CAT, TINTS. LOVE IT!
Posts: 2,032
Likes: 0
Received 0 Likes
on
0 Posts
good timing.. i was thinking of gettin mine off 2morro and rubbing em down all nice and ready for spraying. any ideas about how you fix curb marks? 1 of my wheels i clouted a little while ago. maybe 1.5mm to 2mm deep gash in it.
and nice write up!
and nice write up!
Trending Topics
07 September 2009, 08:49 AM
#8
Nice job, good write up, tempted to have a go myself...
I see looking at the before & after pics you changed the rear spoiler too - looks much better with the black alloys
I see looking at the before & after pics you changed the rear spoiler too - looks much better with the black alloys
07 September 2009, 08:50 AM
#9
Scooby Regular
Thread Starter
iTrader: (1)
Join Date: Apr 2009
Location: Chesterfield, UK
Posts: 225
Likes: 0
Received 0 Likes
on
0 Posts
best thing to do mate for curb marks is metal filler from halfords... it only cost about �5 a tube. prep the area propperly (clean, sand and clean) and put just enough on to cover the damage. let it fully cure then work it down with went&dry. might need to start abbrasive @ 400 ~ 600 and work up to 1500. shouldnt take you more than and hour or 2 to sort it out mate. i had some light scuffs on mine but 800 managed to smooth them down enough so you couldnt tell once it was painted... hope that helps!
07 September 2009, 10:25 AM
#10
Scooby Regular

Join Date: Sep 2004
Posts: 290
Likes: 0
Received 0 Likes
on
0 Posts
Nice review, bit off but I painted a set of alloys on my old TR7 ( Yes I know TR7 HA HA.. and so on.. ! ) a few Years ago, knocked up a spinning table out of a length of pipe, the feet off an old swivel chair and a round piece of metal with a spigot welded in its centre.... Fitted the pipe to the feet, knocked a bearing into the top end of the pipe and then placed the round metal piece with the spigot in the bearing, and hay presto a spining table, seat the Alloys on the table (although table is the wrong name for it, as it was only ablot 4 inch Dia or so to sit inside the machined area of the Alloys ) and spun the wheel by hand and sprayed, no runs and a professional job too.Found the prep the hardest part as rubbing down is sooooo boring.....
07 September 2009, 02:37 PM
#12
Scooby Regular
Join Date: Aug 2006
Location: peterelliottwallandfloortiling.co.uk
Posts: 406
Likes: 0
Received 0 Likes
on
0 Posts
nice one mate looking good you obviously had some sort of genius helping  No prob i quite enjoyed doin it might have to think of a new colour for my wheels just to have another go lol.
No prob i quite enjoyed doin it might have to think of a new colour for my wheels just to have another go lol.
07 September 2009, 02:39 PM
#13
Scooby Regular
iTrader: (2)

Join Date: Jan 2005
Location: Wirral,Pensby
Posts: 2,010
Likes: 0
Received 0 Likes
on
0 Posts
Guys you have really inspired me to do this myself!! Although i think i'm going to take the tyres off and do them that way as the insides are really grotty  Might go for Anthracite also.
Might go for Anthracite also.


 08 September 2009, 01:23 PM
#20
Scooby Regular
Thread Starter
iTrader: (1)
Join Date: Apr 2009
Location: Chesterfield, UK
Posts: 225
Likes: 0
Received 0 Likes
on
0 Posts
kimera999 - I think they do a normal alloy colour spray off the shelf... worst case, most big halfords stores offer a "mixing service" so they would be able to make you some up....
chris - Importpetes wheels back been black for around a year i think, and hes had the tyres off twice lol - i think thats a pretty good benchmark for the paint!
chris - Importpetes wheels back been black for around a year i think, and hes had the tyres off twice lol - i think thats a pretty good benchmark for the paint!
08 September 2009, 08:28 PM
#22
Scooby Regular

Join Date: Oct 2008
Location: near northwich
Posts: 106
Likes: 0
Received 0 Likes
on
0 Posts
If you live on the northwest I can recommend National Alloys in Widnes. I had 2 badly curbed wheels repaired and painted for about 20 quid each. I think they charged 140 quid for repairing/respaying a full set. nationalalloys.co.uk. Also, Just a point for DIYers. You need etch primer for alloy. Ordinary primer will peel/flake off in a few months
08 September 2009, 09:26 PM
#23
Scooby Regular
Join Date: Aug 2006
Location: peterelliottwallandfloortiling.co.uk
Posts: 406
Likes: 0
Received 0 Likes
on
0 Posts
If you live on the northwest I can recommend National Alloys in Widnes. I had 2 badly curbed wheels repaired and painted for about 20 quid each. I think they charged 140 quid for repairing/respaying a full set. nationalalloys.co.uk. Also, Just a point for DIYers. You need etch primer for alloy. Ordinary primer will peel/flake off in a few months
08 September 2009, 09:38 PM
#24
Nice job but i dont think longevity will be at the top of this job.
i have just done some motorbike wheels,flurescent orange and bloody hell its hard to get a smooth colour transfer.
bike wheels are o.k for rattle cans but dont think car wheels will last too long,but look good tho !! (hope im wrong tho)
i have just done some motorbike wheels,flurescent orange and bloody hell its hard to get a smooth colour transfer.
bike wheels are o.k for rattle cans but dont think car wheels will last too long,but look good tho !! (hope im wrong tho)
 08 September 2009, 10:46 PM
#27
Scooby Regular
Join Date: Oct 2008
Location: near northwich
Posts: 106
Likes: 0
Received 0 Likes
on
0 Posts
Aye Pete. I dont disagree, but if yer going to all that trouble, the etch primer is no dearer and sticks better to the alloy. You use it on galvanised metal as well. Im sure Halfords, B & Q etc sell it.
08 September 2009, 11:21 PM
#28
Scooby Regular
Thread Starter
iTrader: (1)
Join Date: Apr 2009
Location: Chesterfield, UK
Posts: 225
Likes: 0
Received 0 Likes
on
0 Posts
tbf - petes wheels are in great condition, and we spent quiet a while prepping my wheels... there is no reason the primer shouldnt stick to the wheel, granted it hasnt got the corrosive properties of an etch primer, but a well prepared surface gives it the best chance in life! Not saying your wrong dude not at all! etch primer is by far the best way to do it but having seen petes wheels survive over 12 months with the tyres taken on and off a cpl of times, it cant be THAT bad

Rant over. thats all group hug now!
