Amateur Budget 2.1 Stroker Project
 09 January 2012, 09:56 AM
#1
Hello,
The project - The thought process started when i realised I've had my 1994 WRX for 6 years now and that i should look at replacing her. I looked about and nothing really caught my attention. I'm worried about her going pop as she's now 17 years old so the thoughts started to head towards buying a replacement engine in case things went wrong. So i've spent the last few months on here reading, and coming to the conclusion the closed deck block is becoming a rare commodity and that silly amounts of horse-power can be made from these blocks. My youngest boy loves my car and I'd love to sit down with him and teach him the little i know about the internal combustion engine, as nobody did that with me as a kid.
The intention - Well i think a step-by-step guide would be really helpful to others in the future, as well as being a point of reference for me. As a noob i'd also welcome criticism when i go wrong, as i inevitably will. But also my budget is going to be my restriction and i estimate at least a year before this engine is near completion.
Now i'm not sure whether to put the completed engine in this as a sleeper, or whether to keep an eye out for a 2dr P1 or TypeR shell.
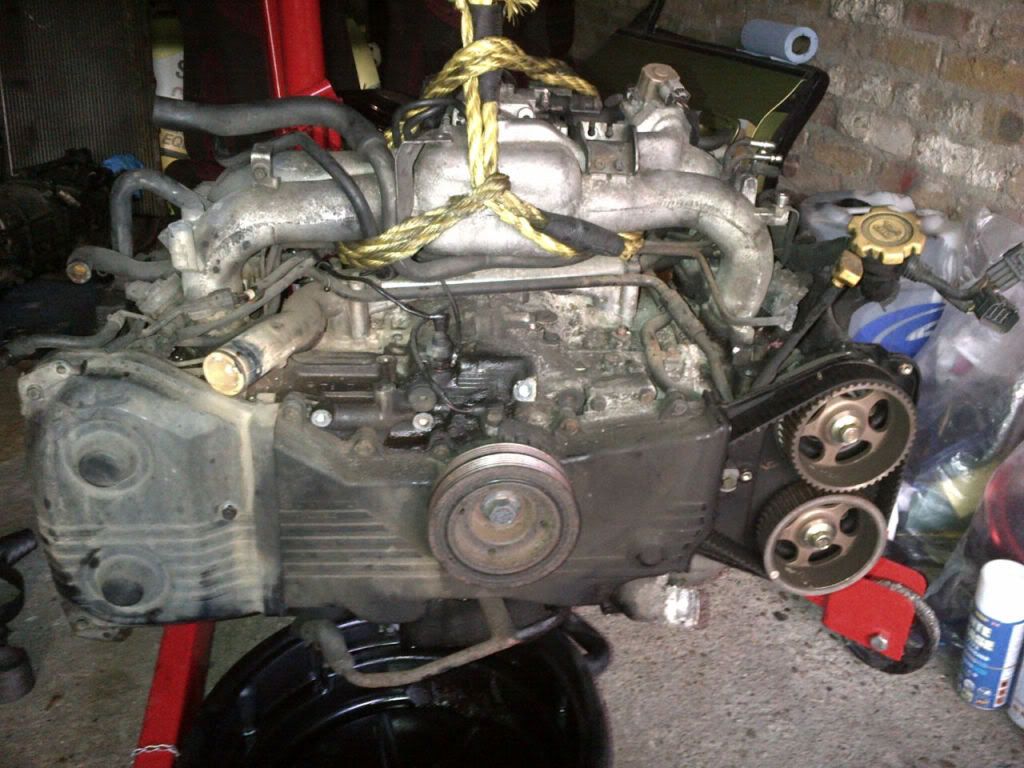
But here's the engine sourced from DannyboyGTI yesterday. I haven't even had time to take my own pics of it yet *Thanks to DannyBoyGTI
OK so my thinking is Billet 257 crank, 11mm headstuds, ACL bearings, I-beam rods and Cosworth 92.5mm pistons, Cosworth head-gaskets making it a 2.1 stroker.
Then depending on finances i'll look at injectors, Heads, possibly valves and cams if i win the lottery, then front mount/exhaust (Which i have a plan for) and possibly new turbo.
My aim is 350-400BHP/lb torque, which is modest for the strength of the bottom end.
I also intend to price everything up as I go and give links or thanks to those involved/purchased from. I have a few idea's i think are original but i'll keep them for when the time is right.
So 2.1 CDB stroker project begins - cost so far (CDB) �200.....
Man hours - 0
The project - The thought process started when i realised I've had my 1994 WRX for 6 years now and that i should look at replacing her. I looked about and nothing really caught my attention. I'm worried about her going pop as she's now 17 years old so the thoughts started to head towards buying a replacement engine in case things went wrong. So i've spent the last few months on here reading, and coming to the conclusion the closed deck block is becoming a rare commodity and that silly amounts of horse-power can be made from these blocks. My youngest boy loves my car and I'd love to sit down with him and teach him the little i know about the internal combustion engine, as nobody did that with me as a kid.
The intention - Well i think a step-by-step guide would be really helpful to others in the future, as well as being a point of reference for me. As a noob i'd also welcome criticism when i go wrong, as i inevitably will. But also my budget is going to be my restriction and i estimate at least a year before this engine is near completion.
Now i'm not sure whether to put the completed engine in this as a sleeper, or whether to keep an eye out for a 2dr P1 or TypeR shell.
But here's the engine sourced from DannyboyGTI yesterday. I haven't even had time to take my own pics of it yet *Thanks to DannyBoyGTI
OK so my thinking is Billet 257 crank, 11mm headstuds, ACL bearings, I-beam rods and Cosworth 92.5mm pistons, Cosworth head-gaskets making it a 2.1 stroker.
Then depending on finances i'll look at injectors, Heads, possibly valves and cams if i win the lottery, then front mount/exhaust (Which i have a plan for) and possibly new turbo.
My aim is 350-400BHP/lb torque, which is modest for the strength of the bottom end.
I also intend to price everything up as I go and give links or thanks to those involved/purchased from. I have a few idea's i think are original but i'll keep them for when the time is right.
So 2.1 CDB stroker project begins - cost so far (CDB) �200.....
Man hours - 0
Last edited by Kwik; 11 July 2012 at 09:36 AM.
 09 January 2012, 10:07 AM
#3
Scooby Senior
iTrader: (51)
Join Date: Nov 2005
Location: Wherever I park my car, that's my home
Posts: 20,491
Likes: 0
Received 2 Likes
on
2 Posts
If not a 6-speed at least an uprated 5-speed (PPG or similar) at that power if you stick with the standard box you'll become a master at gearbox changes
I am tempted to do something like this myself and hopefully a move into a new department in spring will give me some more time (although I'm still doing my MSc until September/October) so I'll be following this for some ideas
Good luck with the build, and a sleeper would be my choice
I am tempted to do something like this myself and hopefully a move into a new department in spring will give me some more time (although I'm still doing my MSc until September/October) so I'll be following this for some ideas
Good luck with the build, and a sleeper would be my choice
09 January 2012, 10:17 AM
#4
6sp is definately something i'll be on the look out for and obvioulsy an uprated clutch. My list could ultimately be endless, limiting the idea to 350-400BHP should curb some of the spending but the intention to have a rock solid bottom end is the main thing, and means i can go in any direction i please.
Its getting to that point though lol....
Shopping list has been pondered over the last few months, and a few helpful people have pointed me in a good direction. I've worked out an "Engine Budget" and hopefully thats do-able within a year/18 months.
Its getting to that point though lol....
Shopping list has been pondered over the last few months, and a few helpful people have pointed me in a good direction. I've worked out an "Engine Budget" and hopefully thats do-able within a year/18 months.
Last edited by Kwik; 09 January 2012 at 10:27 AM.
09 January 2012, 11:42 AM
#5
If im perfectly honest here, why 2.1 if your thinking 350-400bhp? Surely a newage 2.0 standard block is more than capable of delivering the goods at a fraction of the cost?
If your thinking future proof, or you intend on going beyond 400-450bhp then 2.1 is probably the right direction, but not for 350bhp imho.
6 Speed classic conversion - �1800 plus fitting
6 Speed decent basic clutch kit for 350bhp - �300 plus fitting
Twin / Triple plate - a grand plus.
Not sure where your going with this, but you definatly need to weigh it all up first, Turbo �1000, Injectors �200, Inlet �120, Mapping �300-�550 blah blah.
Im sure you already know the score, but by your introduction you dont come accross as flush, or even in a good financial position to be doing this
Rob
Rob
09 January 2012, 12:06 PM
#6
As much of a shed the WRX is my youngest boy would probably cry his eyes out if i sold it. I can't find much to inspire me so theres no point me looking at newer scoobs, except a type R. I understand what you are saying about a newage 2.0, but thats fairly boring.
350-400BHP is conservative, but like building a house i want to start with a solid foundation. Who knows how money will be by the time i first turn the key, maybe i could go further, but i wouldn't be able to with a standard 2l newage block.
Oh and there's no better way to learn than jumping in the deep end?
Last edited by Kwik; 09 January 2012 at 12:08 PM.
Trending Topics
10 January 2012, 12:56 PM
#11
http://www.rogerclarkmotorsport.co.u...productID=1461
Obviously if i can get it done for a lot cheaper then i will as long as its done by someone who knows what they are doing (unlike me).
Well was told yesterday to take the rest of the week off as i need to use 4 weeks before April so I've been out in the cold this morning for an hour or so, before cutting my finger and nearly passing out on the mrs lol.
 10 January 2012, 03:00 PM
#15
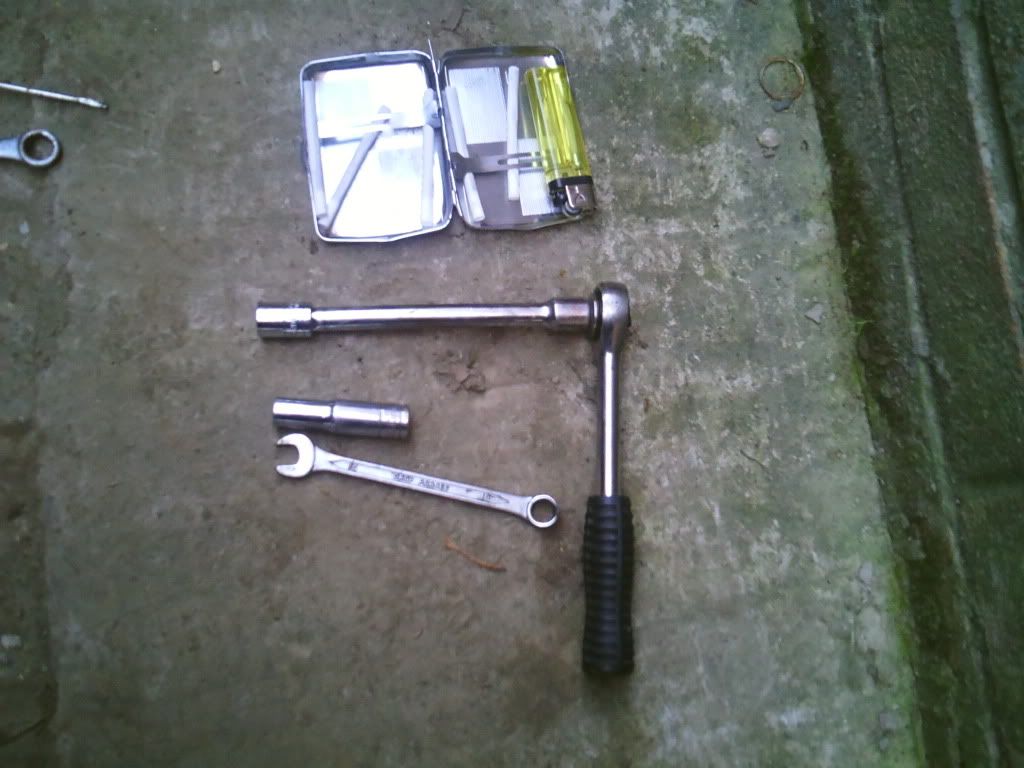
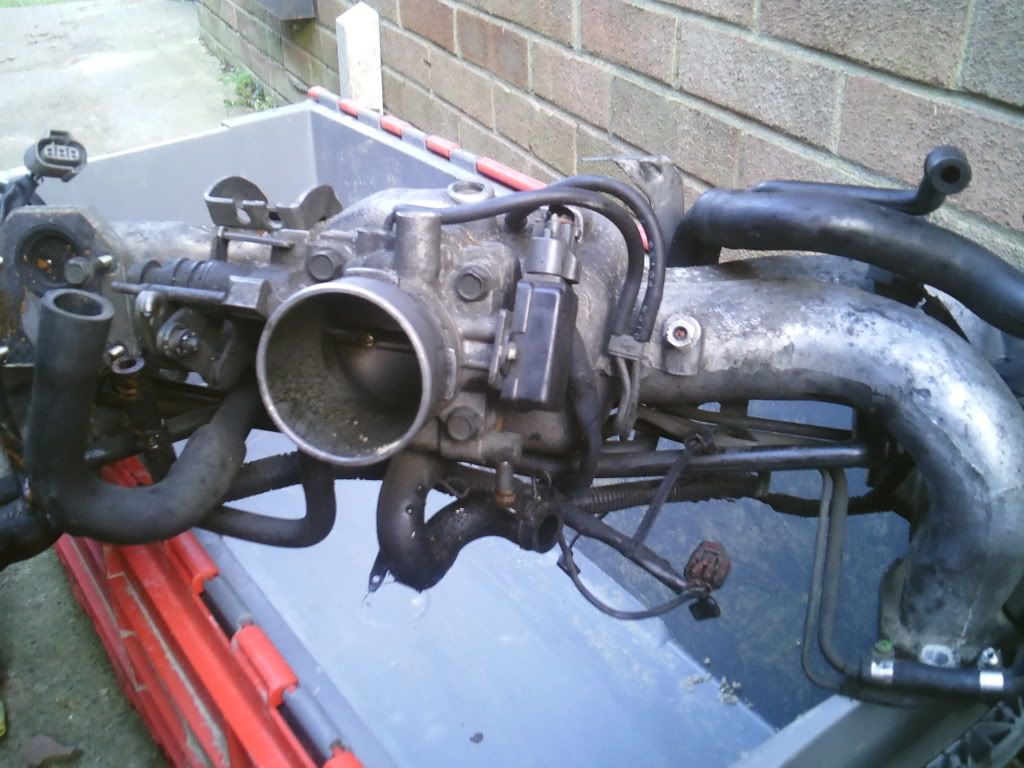
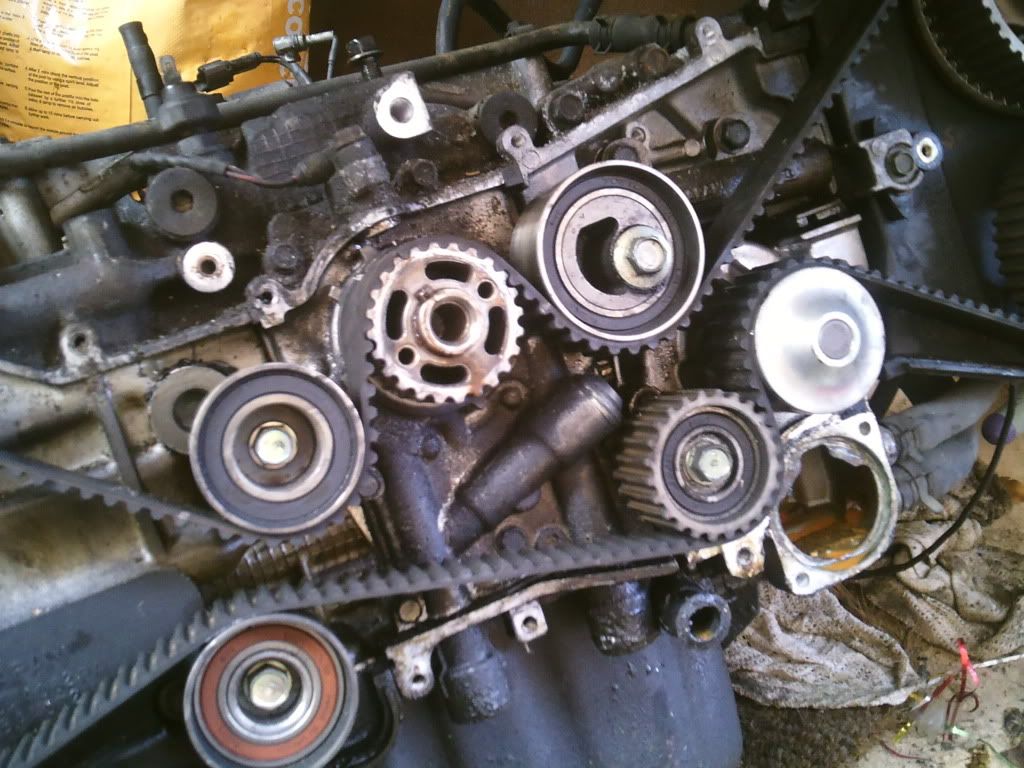
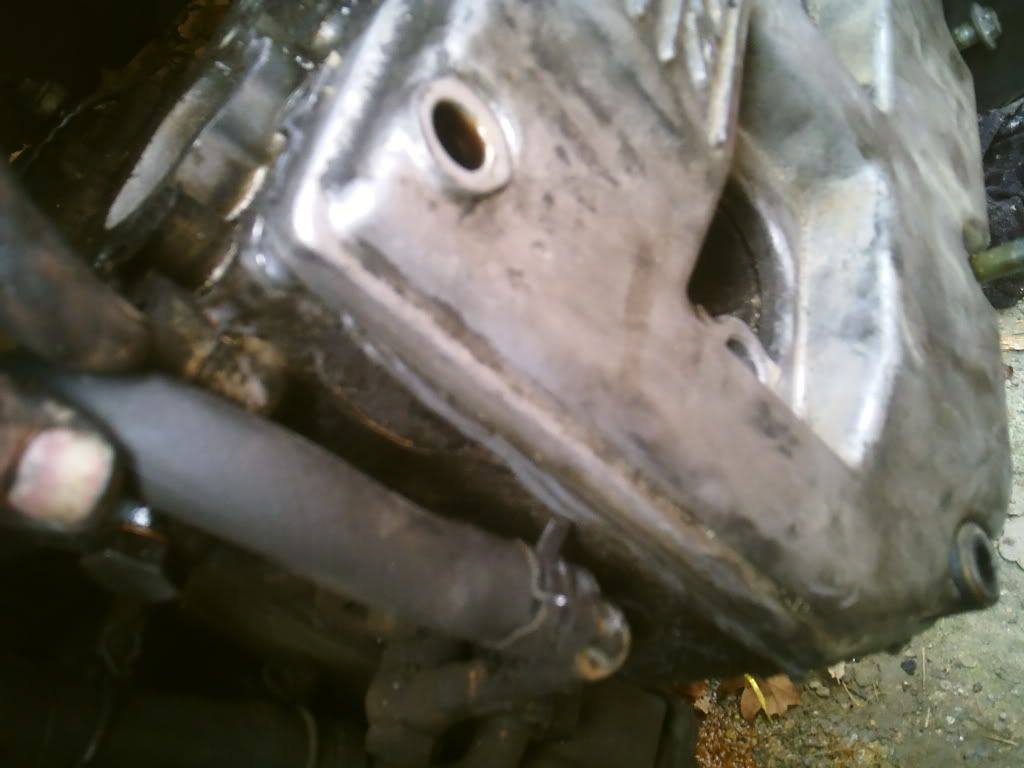
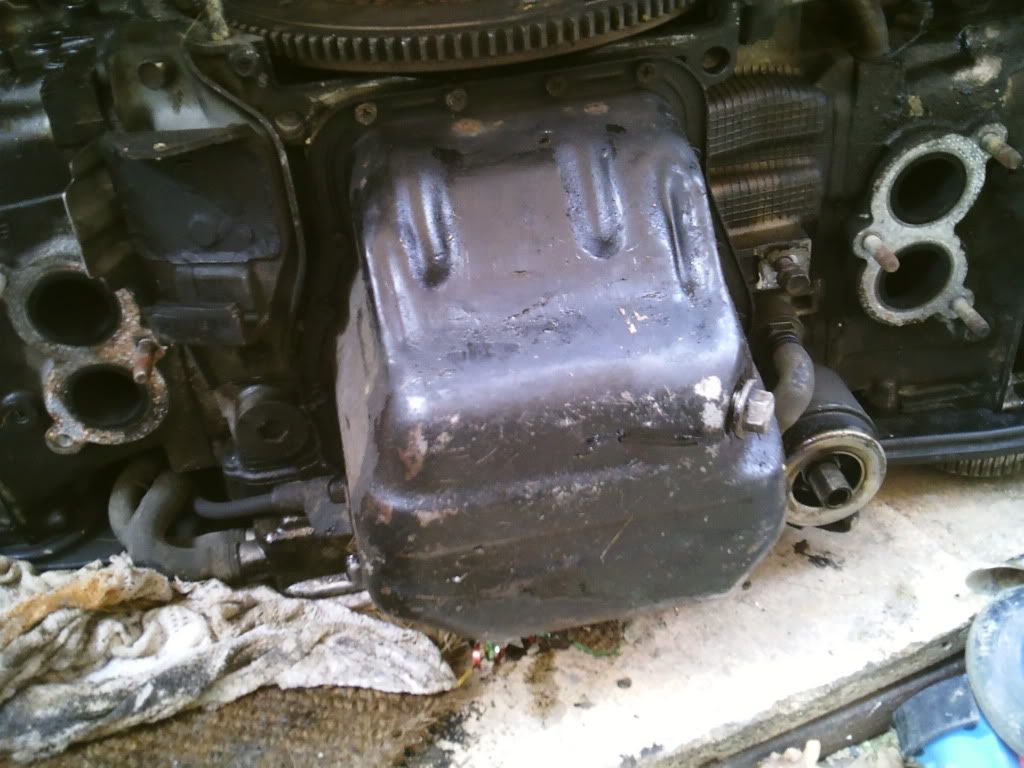
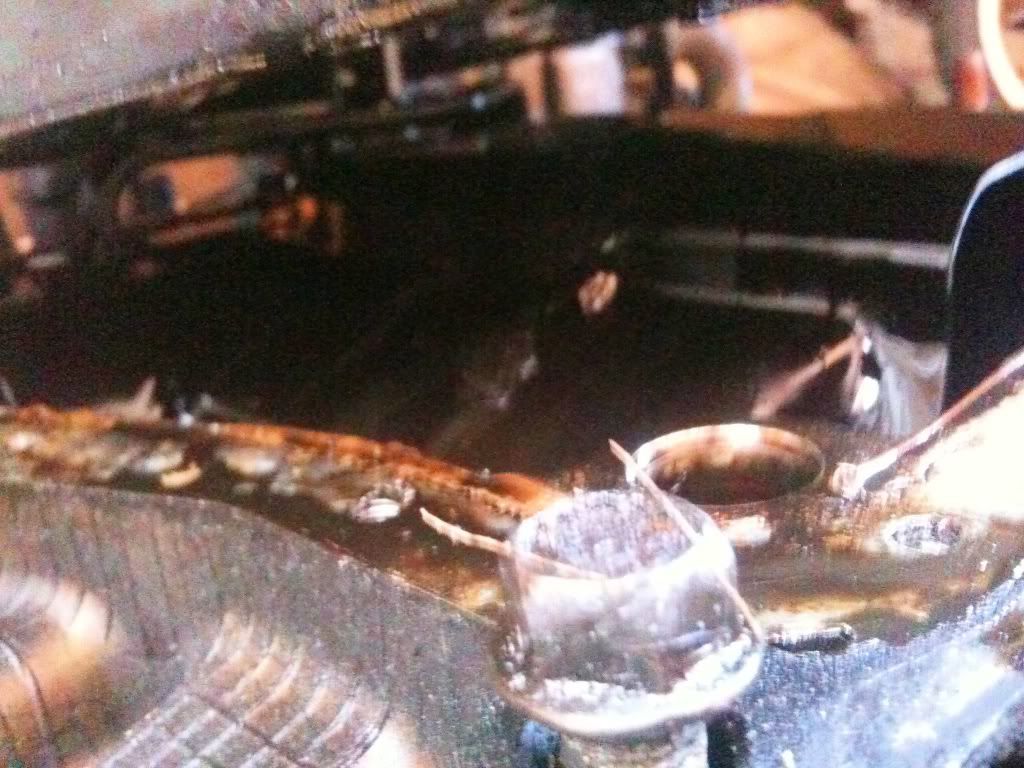
Ok so looking at the block i first thought the Inlet Manifold should come off to clear some room.... tools needed....
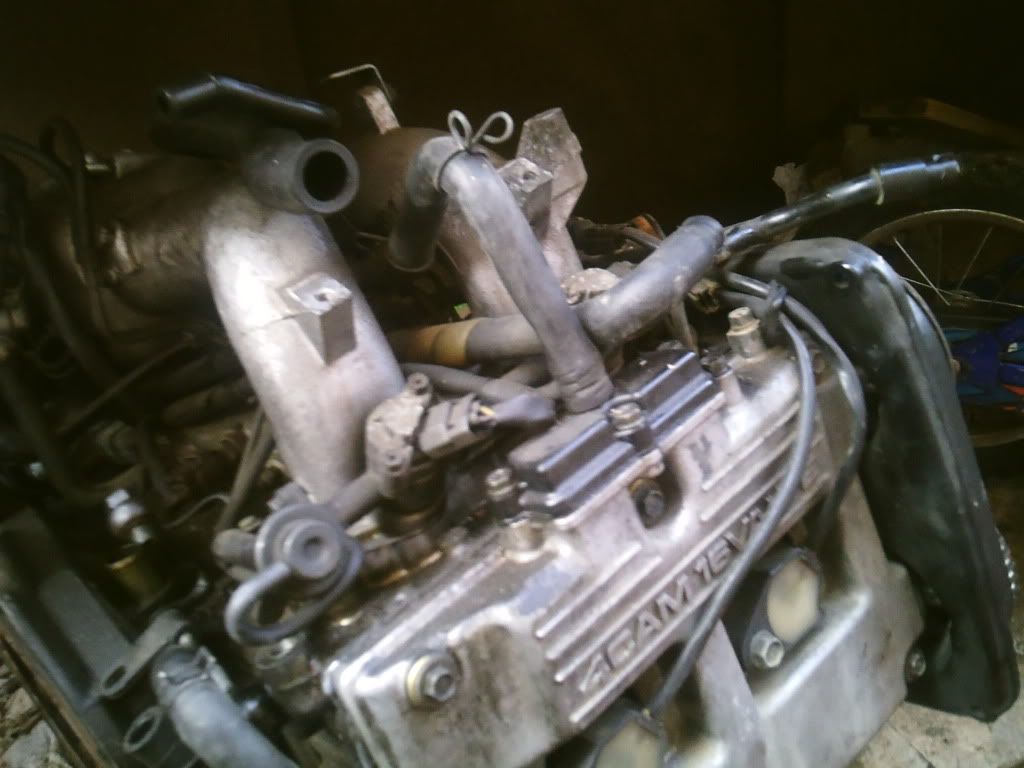
Getting the 12mm socket into the manifolds bolts was fairly straight forward.

This bracket got in my way so needed to be whipped off...
And then....
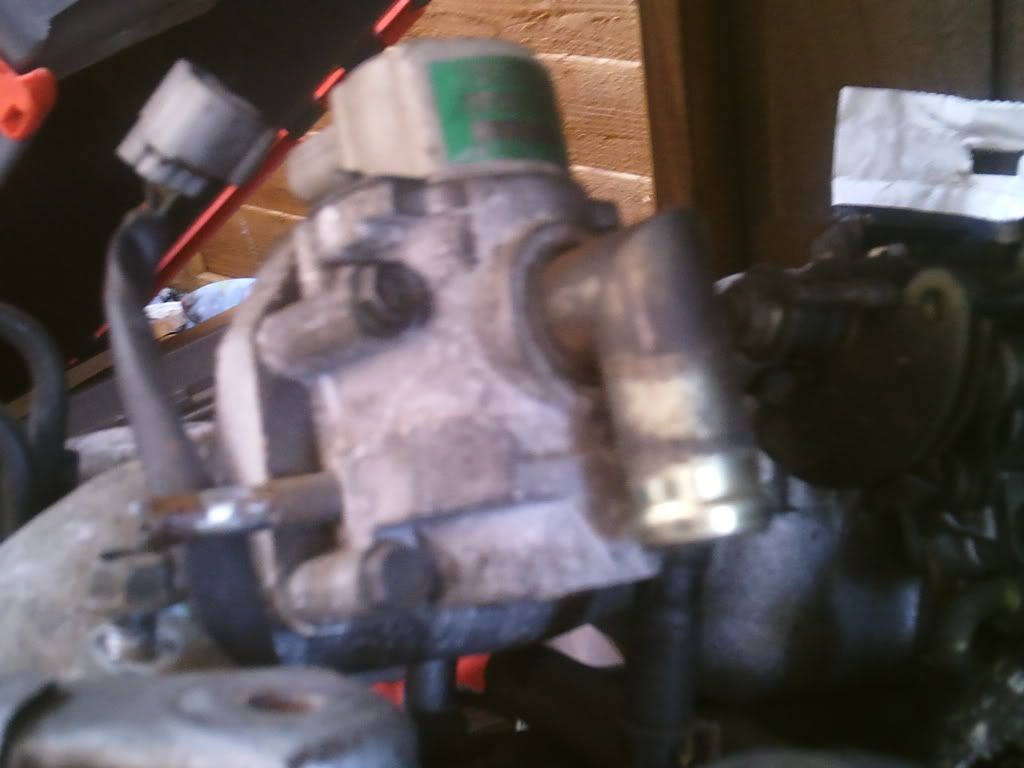

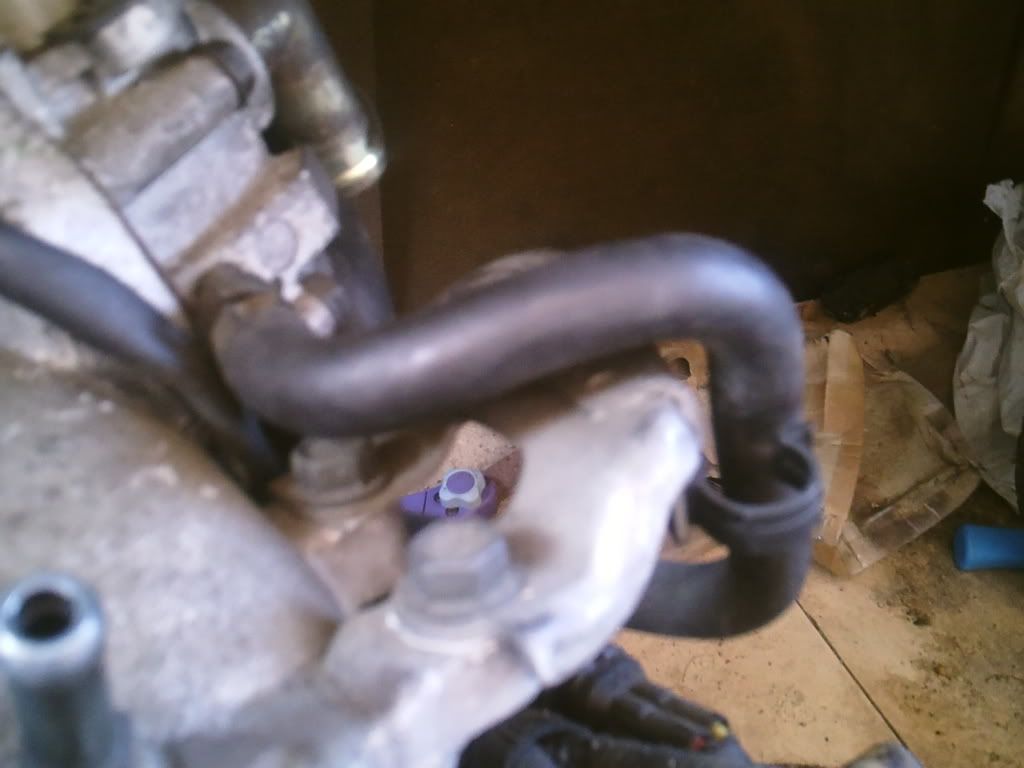
Earth lead (i think)
I had to take off the small 10mm bolt holding the bracket which holds these fuel lines to get purchase on the manifold bolts...
Oil filler can now come off, just 2 bolts....
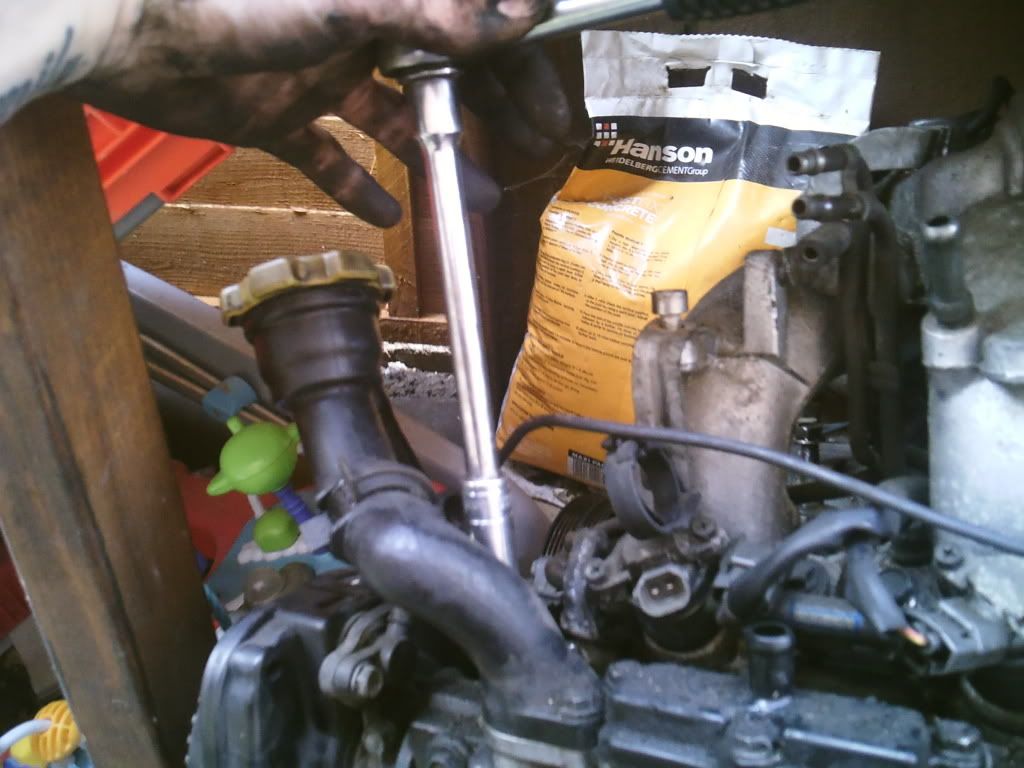
Unplug injectors...
Line up manifold bolts so i know how they go back on (right to left front to back).

Unplug leads...
Manifold off
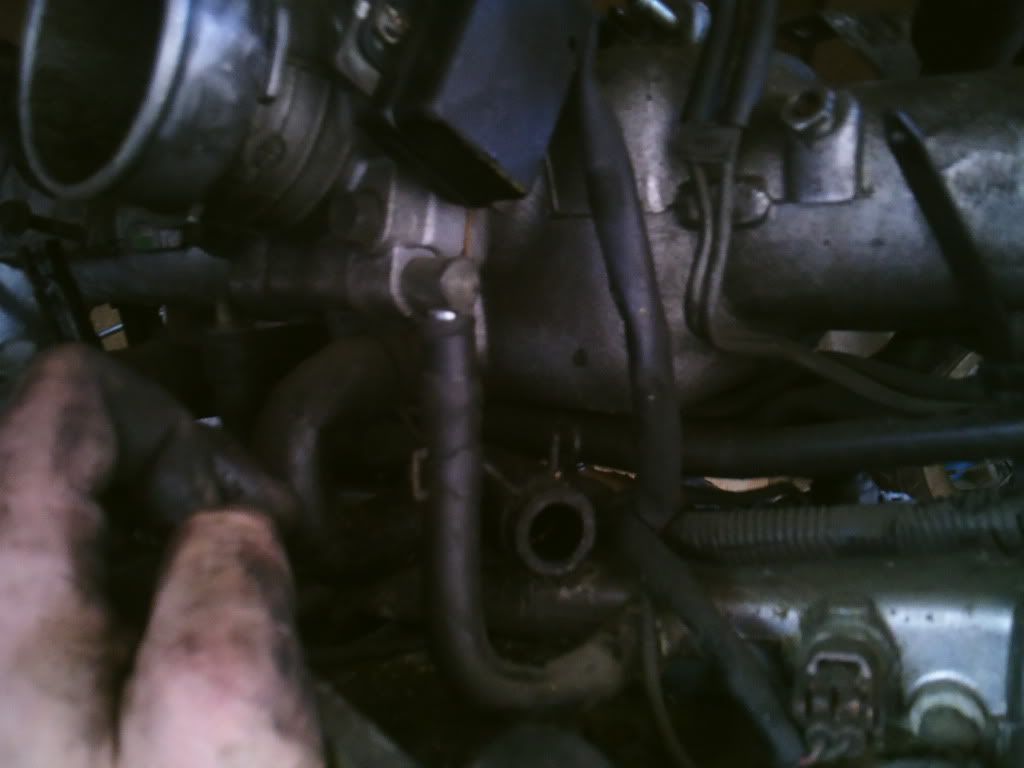
So next i thought about removing the cambelt/pullys etc. Although i hit one major snag, the centre pulley obviously had nothing holding it back, it just kept turning the engine over. After a bit of persistance i got it!

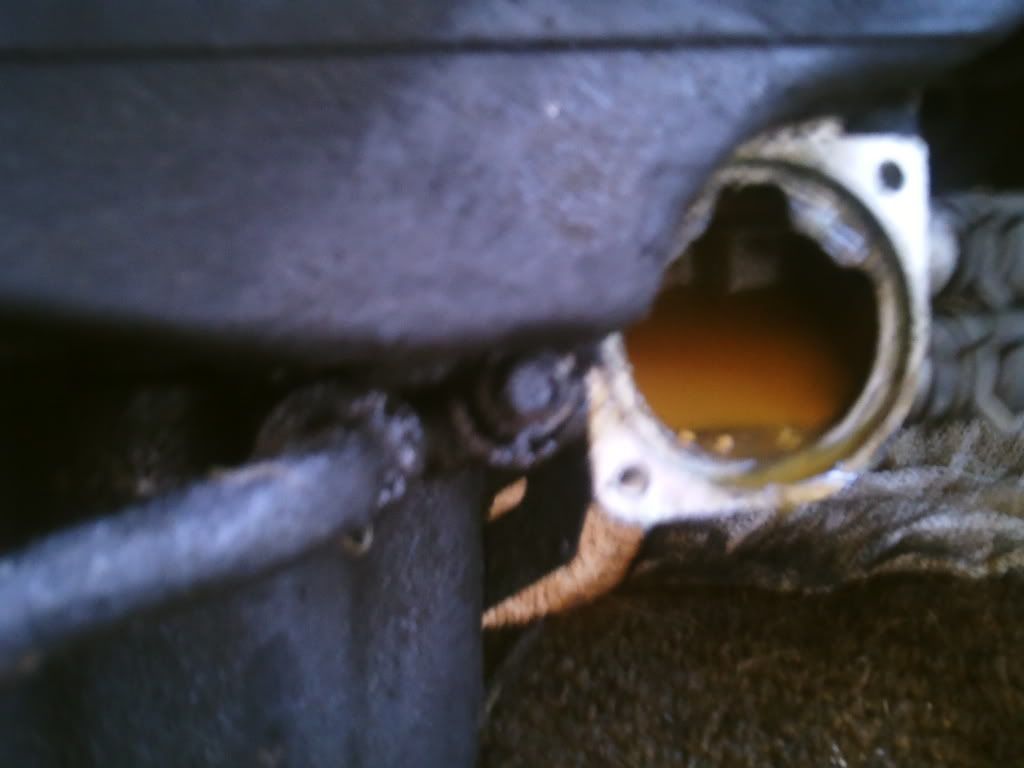
If iirc i got bored at one point trying to take the centre pulley off and took the thermostat out instead!
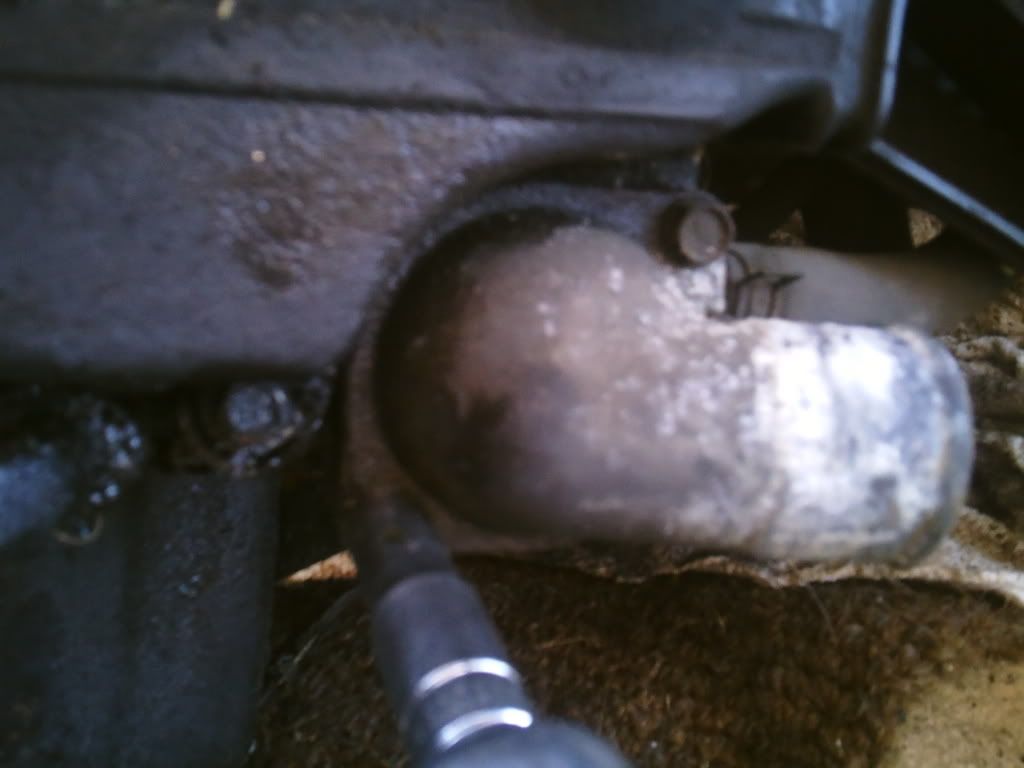
Oh dear? Looks like water's been used more often than coolant...
Here's me holding the pulley.....er....yeah!
Now, this is where i go wrong. Some may have already spotted the mistake(s) I've made....
I watched a "fitting a cambelt" guide, then thought well i'll whip the tensioner off, that will make life easier...
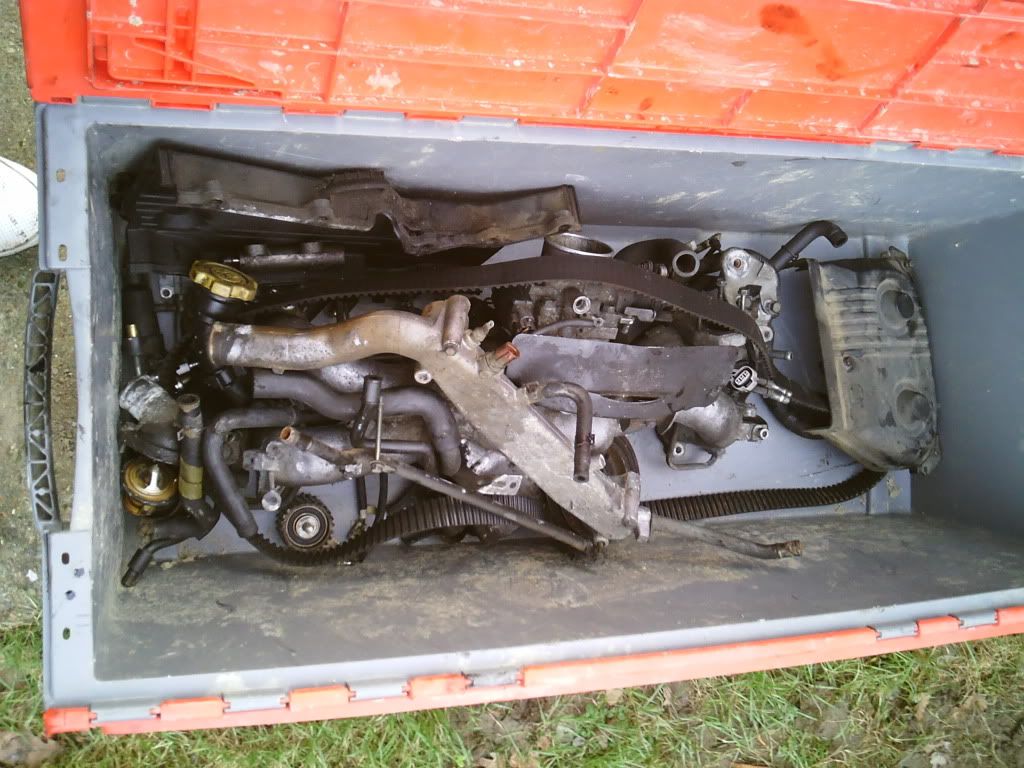
Belt off, yes I'm doing this in my garden. I've been told i can bring the block in once its small enough to go in the store room . i've got all bits and block going into 2 large totes though, and under-cover.
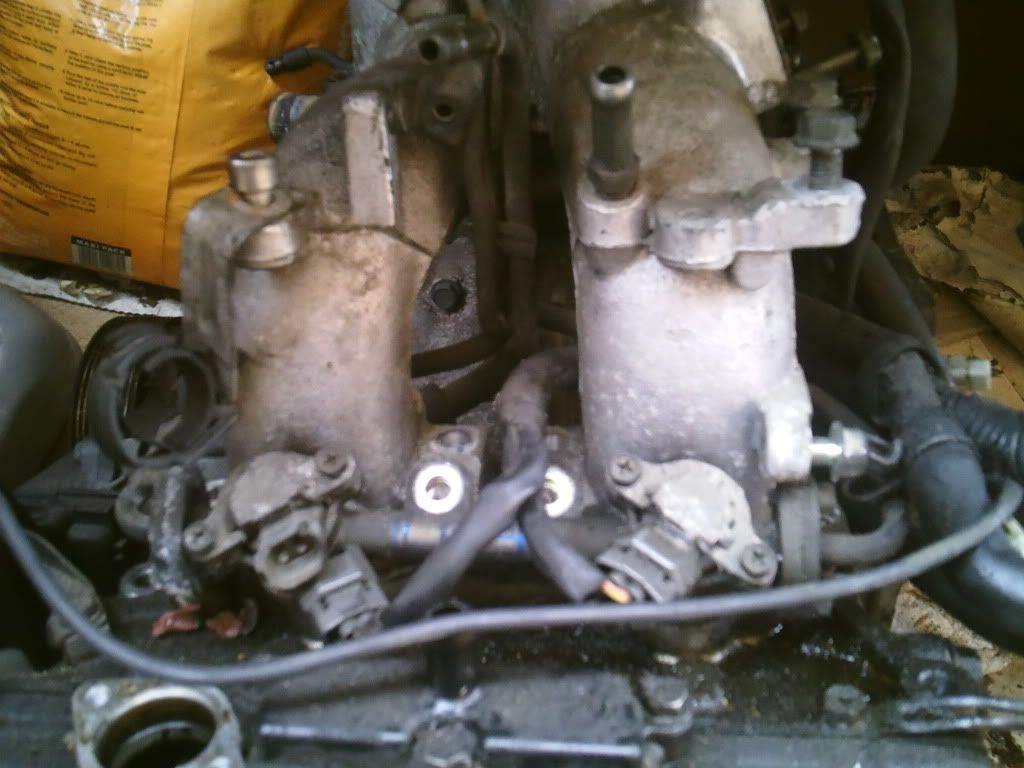
Erm...coolant thingy....couple of 10mm bolts, nice and simple.

Coilpacks off, although they were a bitch to disconnect the wires, one even stripped away from the block connector, the one's on my WRX weren't as much of a ******* as these.... still 3 decent coilpacks now spare.
Oh and spark plugs out...Rocker cover 10mm bolts removed nice and easily.

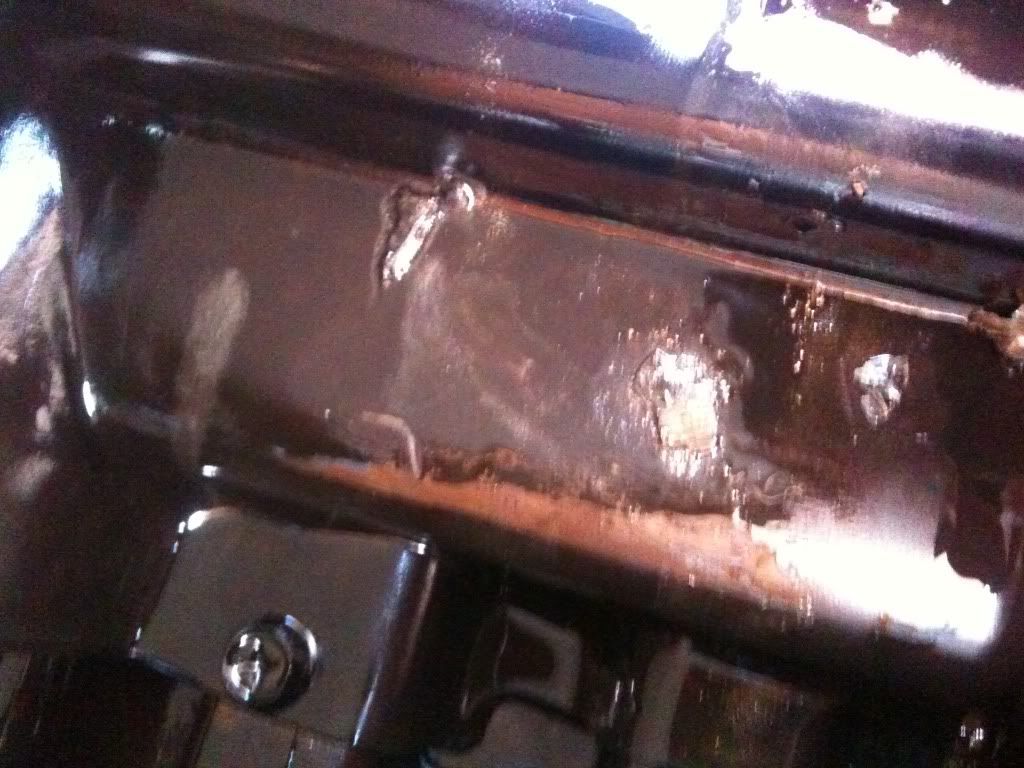
Looks as though some silicone around the rocker cover gasket....
Now I've got steam coming out of my ears. Because i haven't taken the pulleys connected to the cam off i can't get the cams out. Because there's a plastic cover around the pulleys i can't take the furthest clamp holding the cam's in. Because the pulleys are still on i can't get the plastic cover out of the way enough to remove the bolts for the clamp!!!!!
And so i thought I'd slip a ring spanner under the plastic cover to under to clamp bolts, spanner snapped AND.....
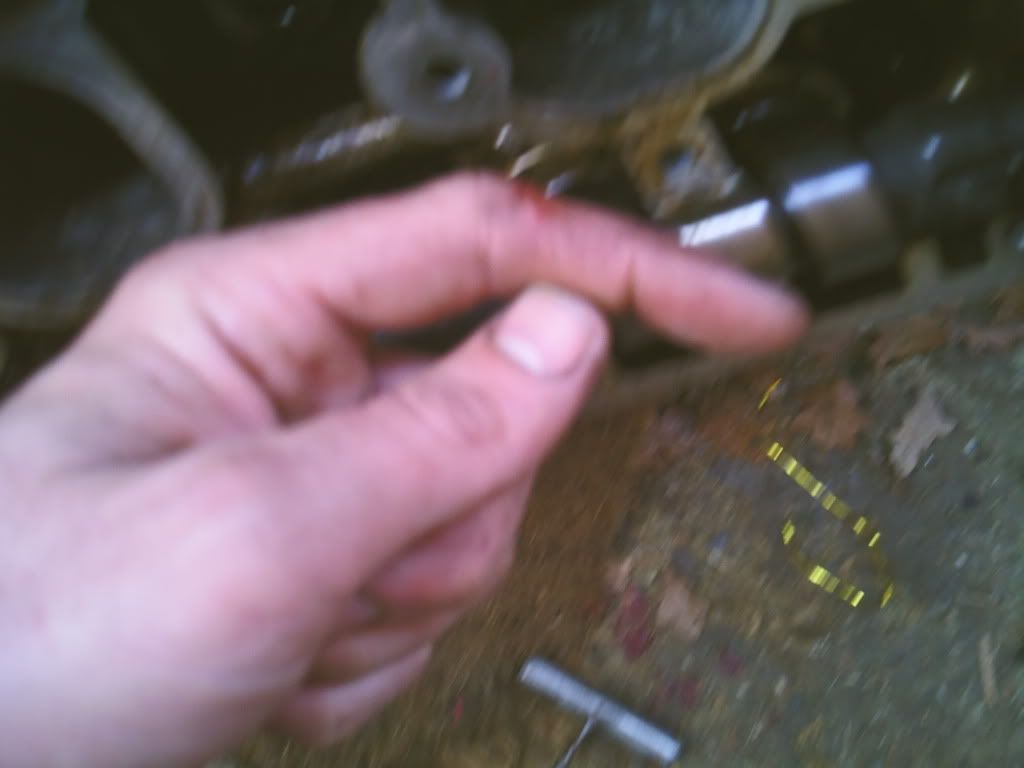
Now let me explain that i hadn't eaten anything. Instantly i looked down and i'd whacked my finger against the side of the head! I walked inside followed by a trail of blood and said to the mrs i'd hurt myself. Now you know when your hurt and you start to sweat, and you see a lot of blood, well i thought i was going to pass out. I also had this horrible thought that i was going to be sitting in a waiting room for ages for a couple of stitches....

A good advert for decent tools, never go to Halfords....
hmmm, now i see torque's instead of hex, looks like will have to go and pick up a special tool tomorrow.
So i changed tack, and thought about taking the sump off. But even after being unbolted and having a couple of taps from a rubber mallet it didn't move.
Enough for one day i thought, pride all bruised, finger pulsating, head hurting from thinking how can i hold the cam pulley's without turning the cams....
All that i had removed put into the other Tote box, bolts bagged up per piece it was taken off of.
Not bad i thought for 2 hours work, I'm no mechanic and i need time to think....
Oh can you tell I'm a picture *****?
Getting the 12mm socket into the manifolds bolts was fairly straight forward.
This bracket got in my way so needed to be whipped off...
And then....
Earth lead (i think)
I had to take off the small 10mm bolt holding the bracket which holds these fuel lines to get purchase on the manifold bolts...
Oil filler can now come off, just 2 bolts....
Unplug injectors...
Line up manifold bolts so i know how they go back on (right to left front to back).
Unplug leads...
Manifold off
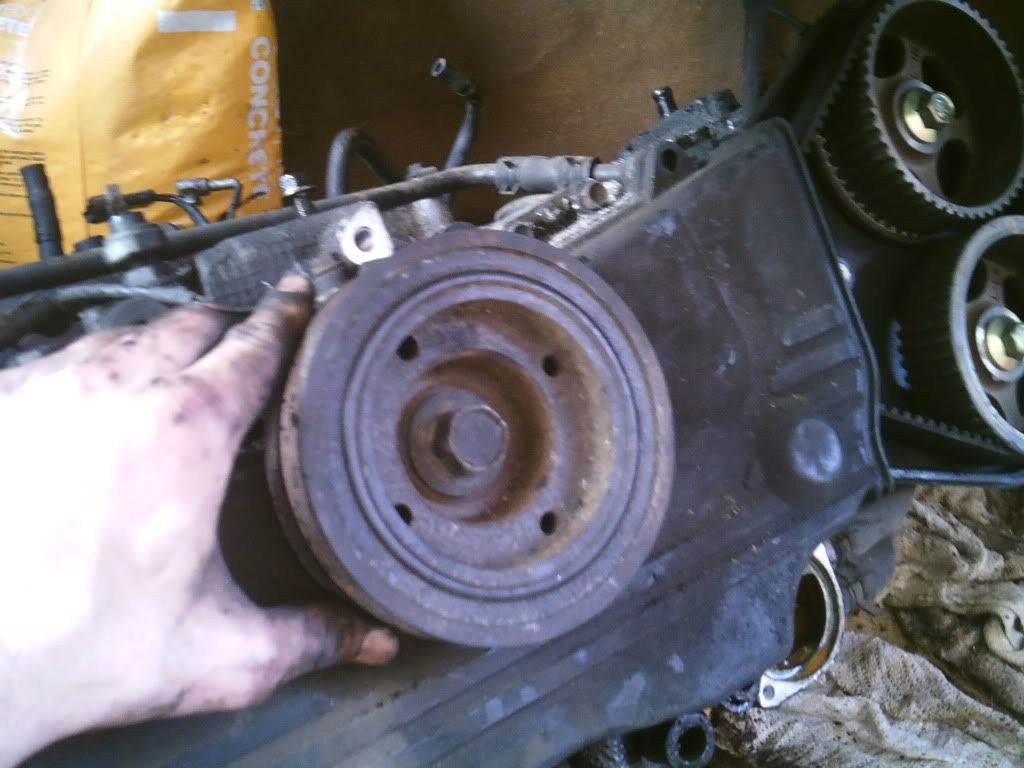
So next i thought about removing the cambelt/pullys etc. Although i hit one major snag, the centre pulley obviously had nothing holding it back, it just kept turning the engine over. After a bit of persistance i got it!
If iirc i got bored at one point trying to take the centre pulley off and took the thermostat out instead!
Oh dear? Looks like water's been used more often than coolant...
Here's me holding the pulley.....er....yeah!
Now, this is where i go wrong. Some may have already spotted the mistake(s) I've made....
I watched a "fitting a cambelt" guide, then thought well i'll whip the tensioner off, that will make life easier...
Belt off, yes I'm doing this in my garden. I've been told i can bring the block in once its small enough to go in the store room
. i've got all bits and block going into 2 large totes though, and under-cover. Erm...coolant thingy....couple of 10mm bolts, nice and simple.
Coilpacks off, although they were a bitch to disconnect the wires, one even stripped away from the block connector, the one's on my WRX weren't as much of a ******* as these.... still 3 decent coilpacks now spare
.Oh and spark plugs out...Rocker cover 10mm bolts removed nice and easily.
Looks as though some silicone around the rocker cover gasket....
Now I've got steam coming out of my ears. Because i haven't taken the pulleys connected to the cam off i can't get the cams out. Because there's a plastic cover around the pulleys i can't take the furthest clamp holding the cam's in. Because the pulleys are still on i can't get the plastic cover out of the way enough to remove the bolts for the clamp!!!!!
And so i thought I'd slip a ring spanner under the plastic cover to under to clamp bolts, spanner snapped AND.....
Now let me explain that i hadn't eaten anything. Instantly i looked down and i'd whacked my finger against the side of the head! I walked inside followed by a trail of blood and said to the mrs i'd hurt myself. Now you know when your hurt and you start to sweat, and you see a lot of blood, well i thought i was going to pass out. I also had this horrible thought that i was going to be sitting in a waiting room for ages for a couple of stitches....
A good advert for decent tools, never go to Halfords....
hmmm, now i see torque's instead of hex, looks like will have to go and pick up a special tool tomorrow.
So i changed tack, and thought about taking the sump off. But even after being unbolted and having a couple of taps from a rubber mallet it didn't move.
Enough for one day i thought, pride all bruised, finger pulsating, head hurting from thinking how can i hold the cam pulley's without turning the cams....
All that i had removed put into the other Tote box, bolts bagged up per piece it was taken off of.
Not bad i thought for 2 hours work, I'm no mechanic and i need time to think....
Oh can you tell I'm a picture *****?
Last edited by Kwik; 10 January 2012 at 03:04 PM.
10 January 2012, 04:20 PM
#16
Scooby Regular
iTrader: (24)

Join Date: Oct 2009
Location: Aberdeen
Posts: 2,604
Likes: 0
Received 0 Likes
on
0 Posts
Mate would you not be cheaper (future cost effective too) to just put in a Newage STI engine
Even shortblock have it mapped and you have a fully capable 400bhp engine
My03 STI is running close to 450 and it's totally fine
Steve
Even shortblock have it mapped and you have a fully capable 400bhp engine
My03 STI is running close to 450 and it's totally fine
Steve
10 January 2012, 07:40 PM
#18
 10 January 2012, 11:45 PM
#20
Its moments like this, and the camshat pulleys AND the problem i've got removing the flywhel that made me wish i had an air line and impact gun.
12 January 2012, 07:55 PM
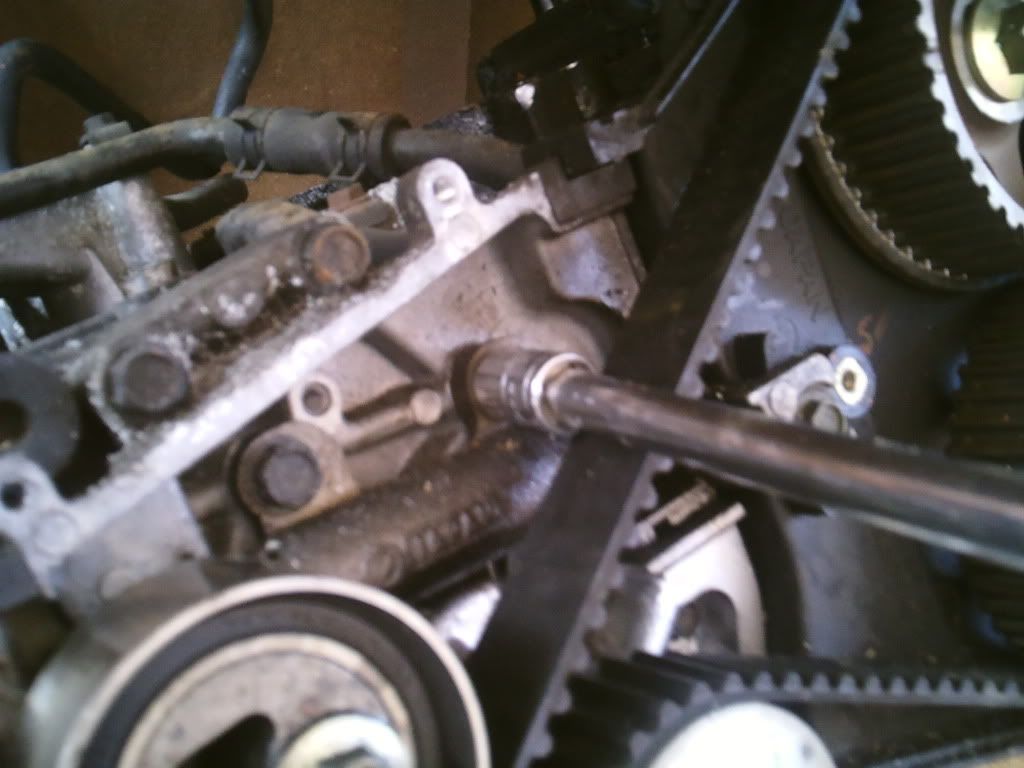
#21
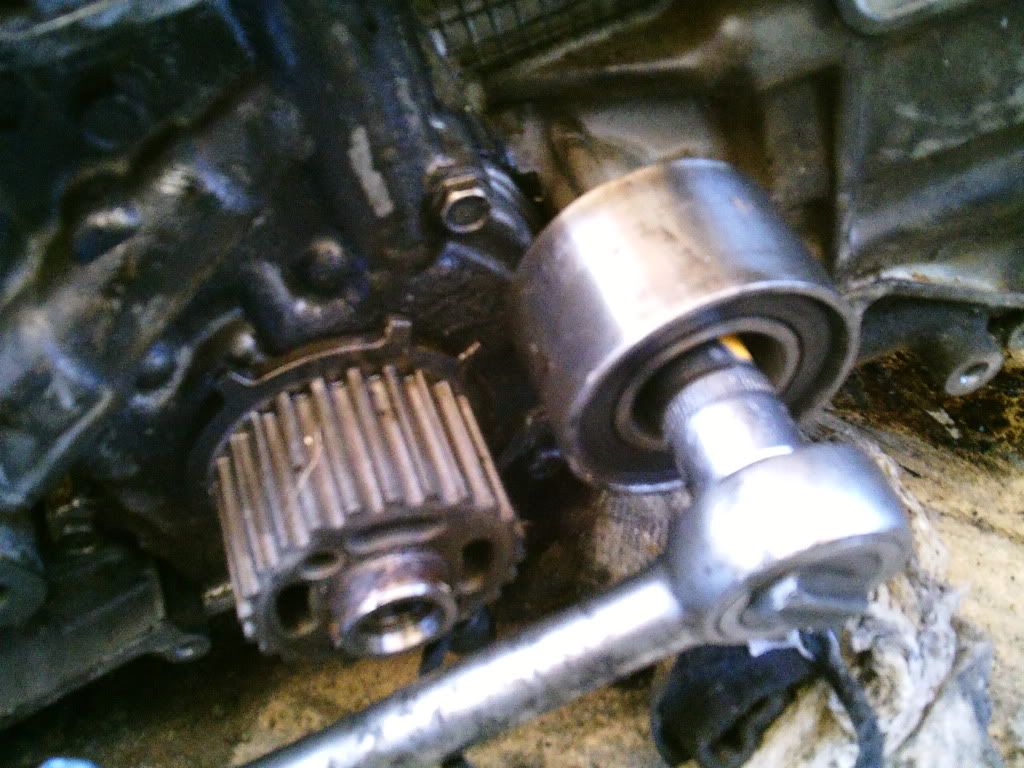
I haven't had much time but shot to pick up a 1" spanner yesterday to hold the cams in place while undoing the pulleys (�10).
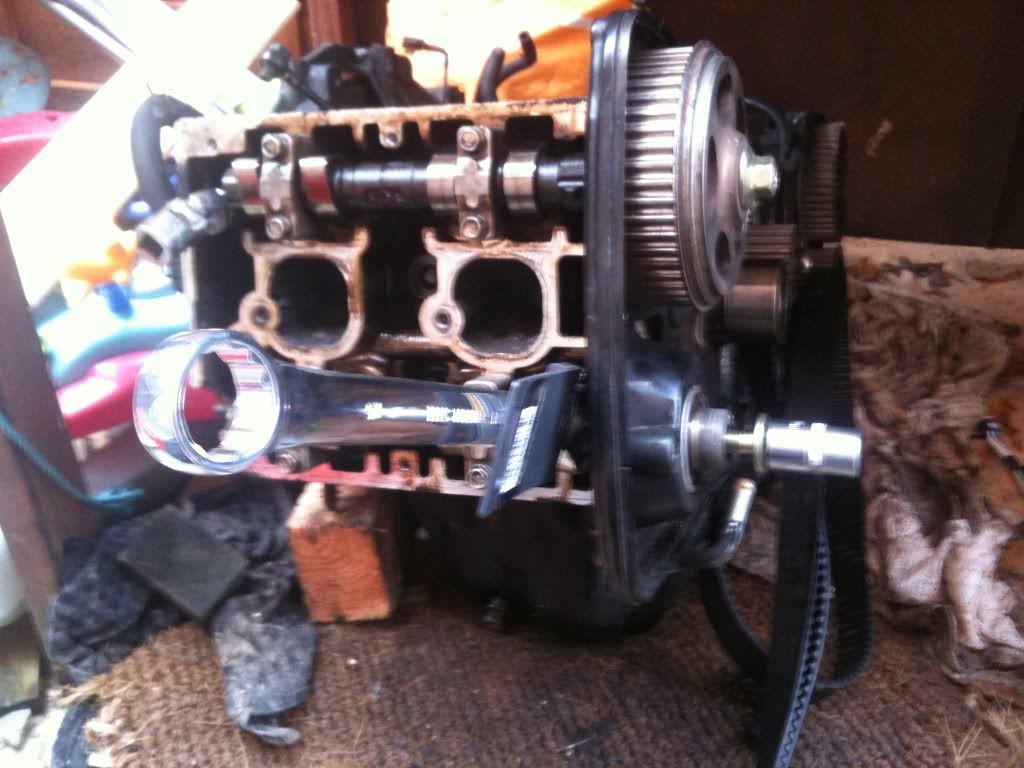
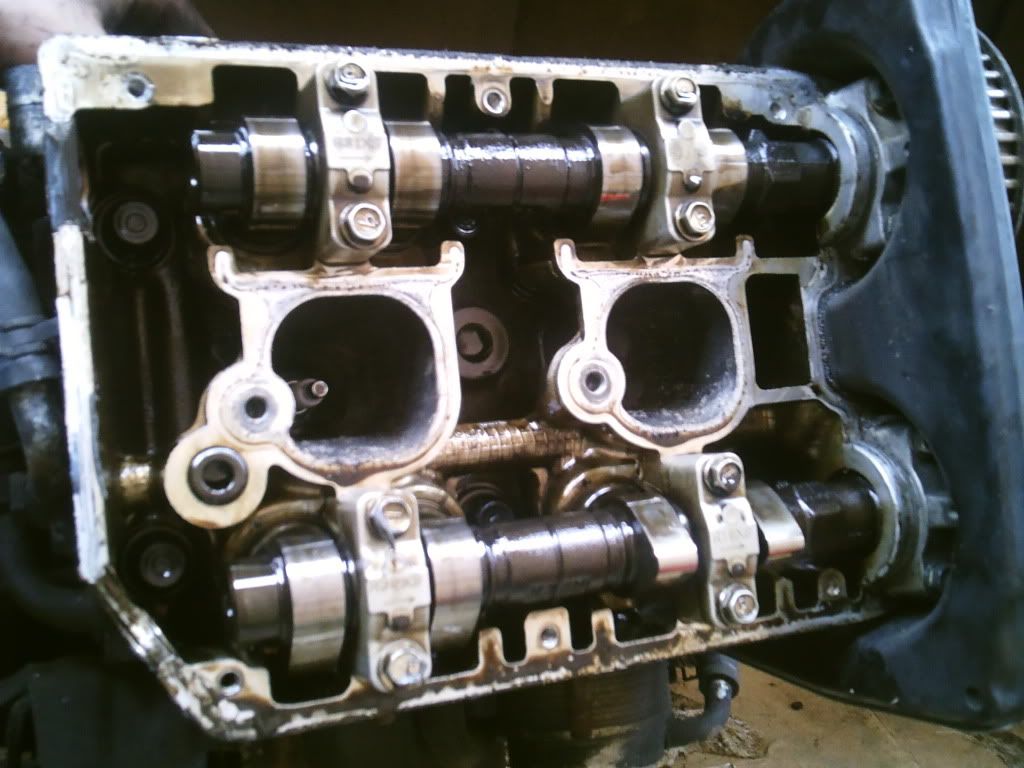
This worked a treat, although there's a little knurl on the cam which prevents you getting the spanner on fully, so the cam has to be in a certain position...
Pulley's off, time to take the cam caps off. So they were undone a bit at a time, diagonally although the cam was under no tension.
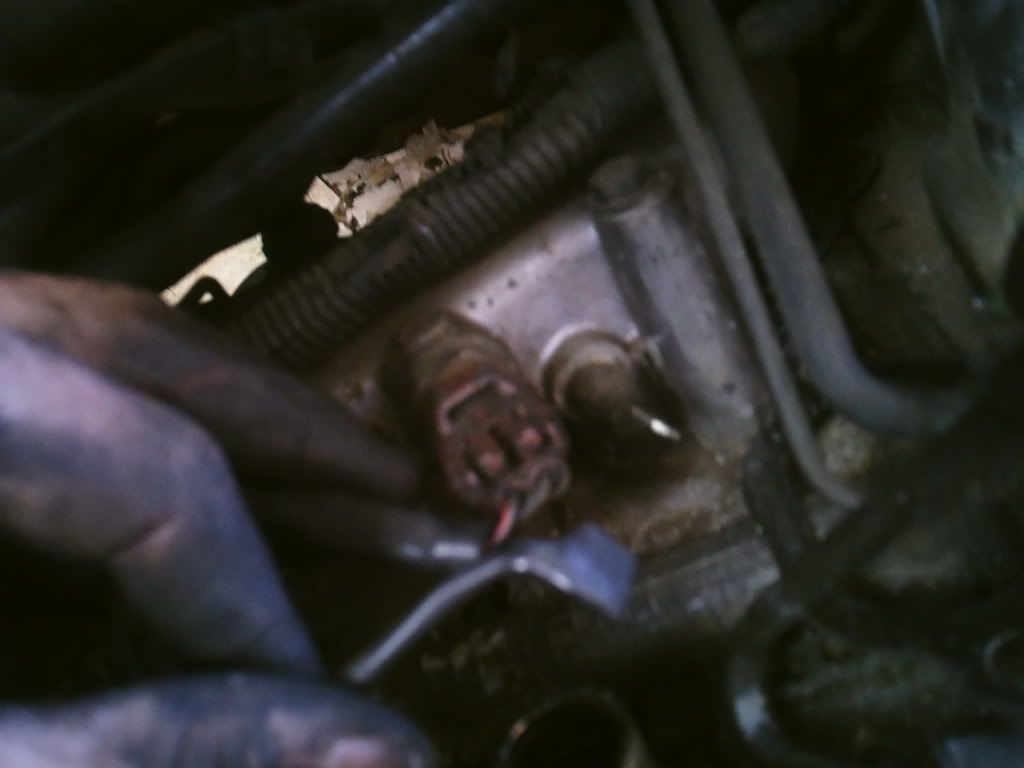
And the same on the other side... remembering to remove what i assume is the cam position sensor.
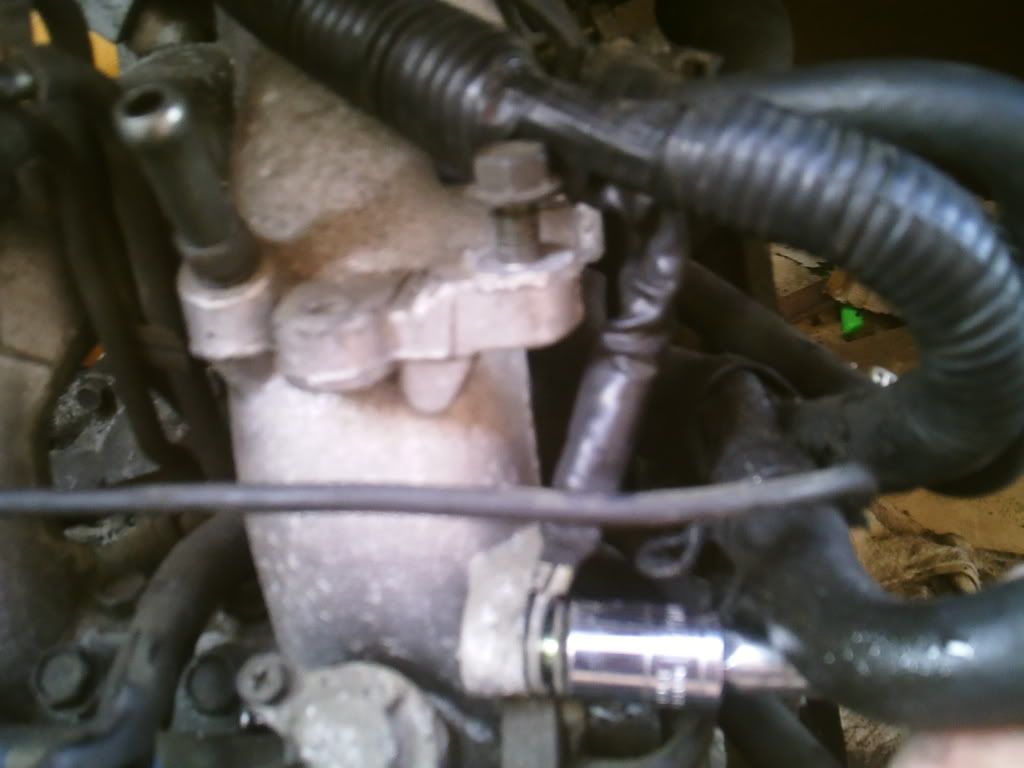
And then it was time to remove the sump, just several 10mm bolts around the bottom and a few taps from the rubber mallet..
And it was time to find the knock that DannyBoyGTI had said this engine was producing.....
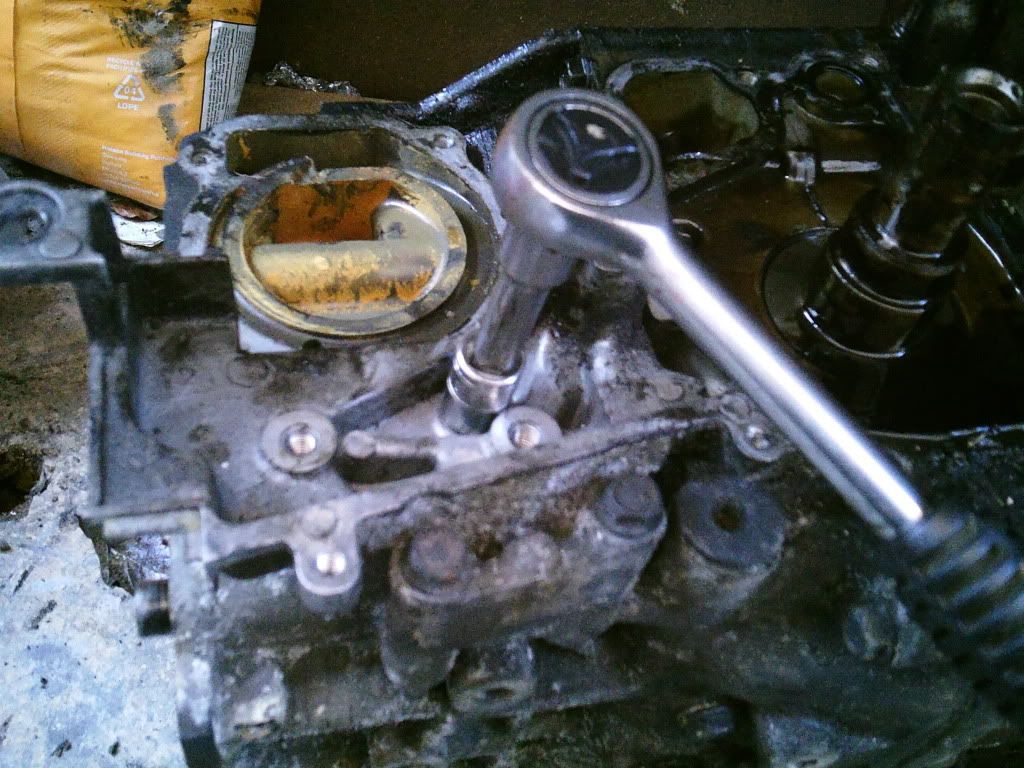
And that was it for today. I tried to get the head-bolts off, and managed a couple but i wasn't happy with how well the 14mm 12 sided socket fitted on the torx nuts. So i'll have to buy a 14mm torx, and apparently i'll need a 12mm also once the heads are off.
Cost of build so far �210.
Man Hours - 4.
This worked a treat, although there's a little knurl on the cam which prevents you getting the spanner on fully, so the cam has to be in a certain position...
Pulley's off, time to take the cam caps off. So they were undone a bit at a time, diagonally although the cam was under no tension.
And the same on the other side... remembering to remove what i assume is the cam position sensor.
And then it was time to remove the sump, just several 10mm bolts around the bottom and a few taps from the rubber mallet..
And it was time to find the knock that DannyBoyGTI had said this engine was producing.....
And that was it for today. I tried to get the head-bolts off, and managed a couple but i wasn't happy with how well the 14mm 12 sided socket fitted on the torx nuts. So i'll have to buy a 14mm torx, and apparently i'll need a 12mm also once the heads are off.
Cost of build so far �210.
Man Hours - 4.
Last edited by Kwik; 12 January 2012 at 07:58 PM.
14 January 2012, 06:45 PM
#22
Ok, so I searched for a better fitting socket for the headstuds, and tried a few different one's from a local autoparts shop then took them back to try others. I thought i had it sussed after "Miami" PM'd me some advice and mentioned a sealey socket so contacted the seller of this....
http://cgi.ebay.co.uk/ws/eBayISAPI.d...:X:RTQ:GB:1123
But the seller was convinced this wasn't the right part .
.
So i bit the bullet and bought another 14mm 12-point socket. I didn't think it would work, but it did!...
So followed the above and hey presto the heads were off.
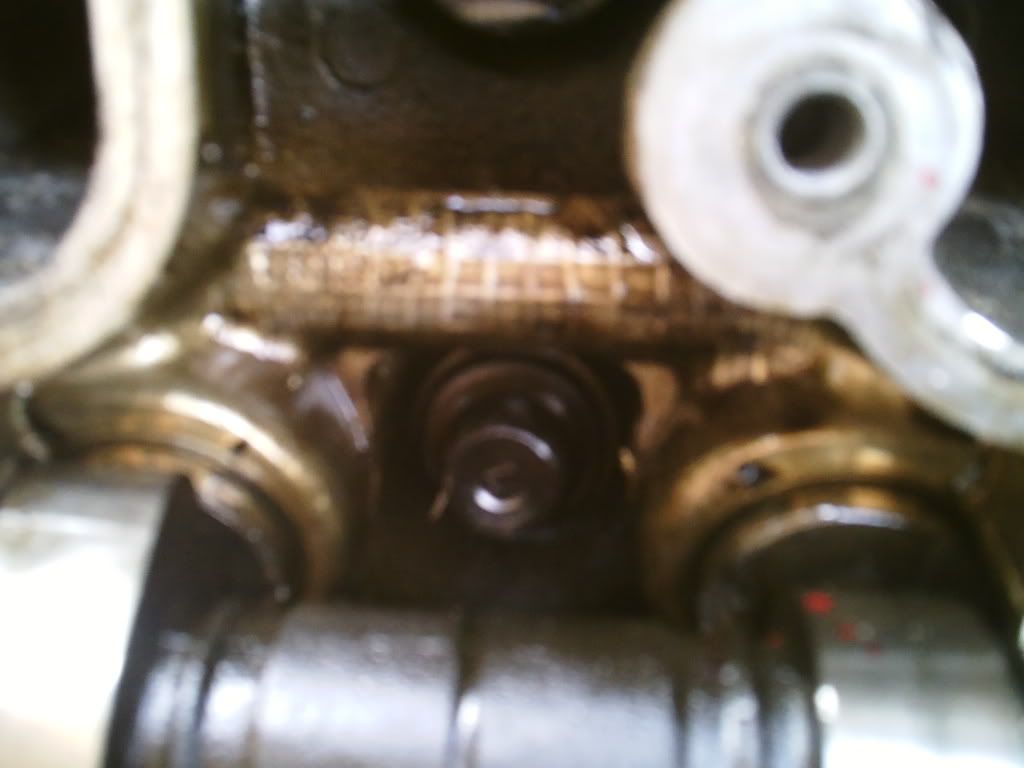
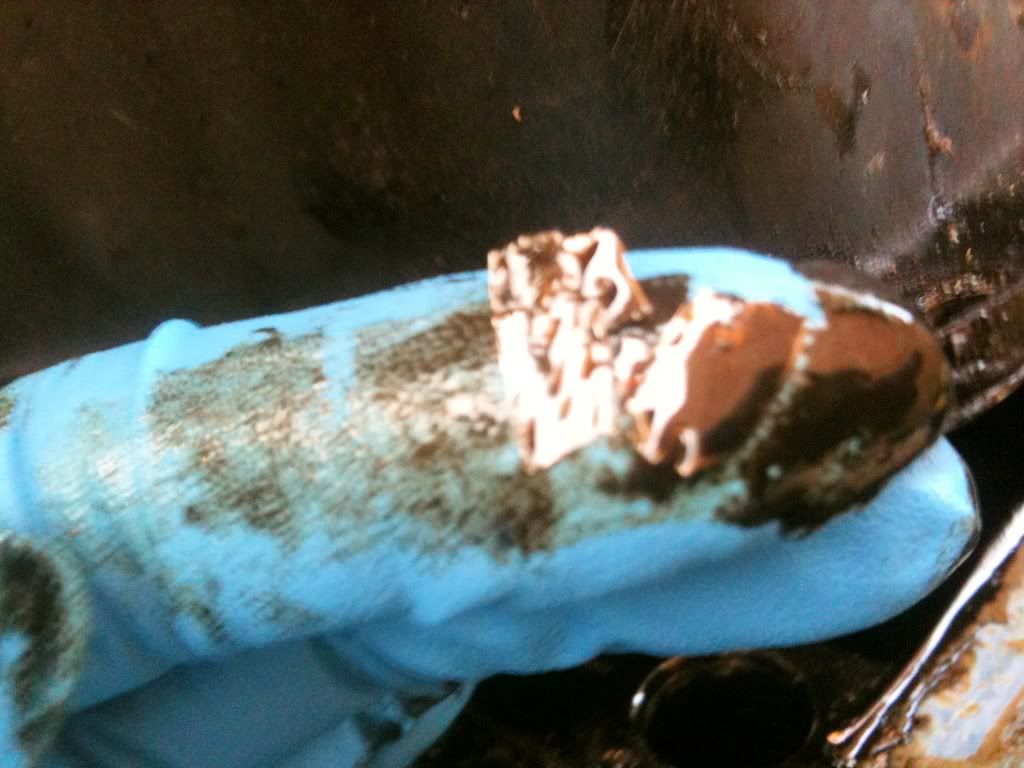
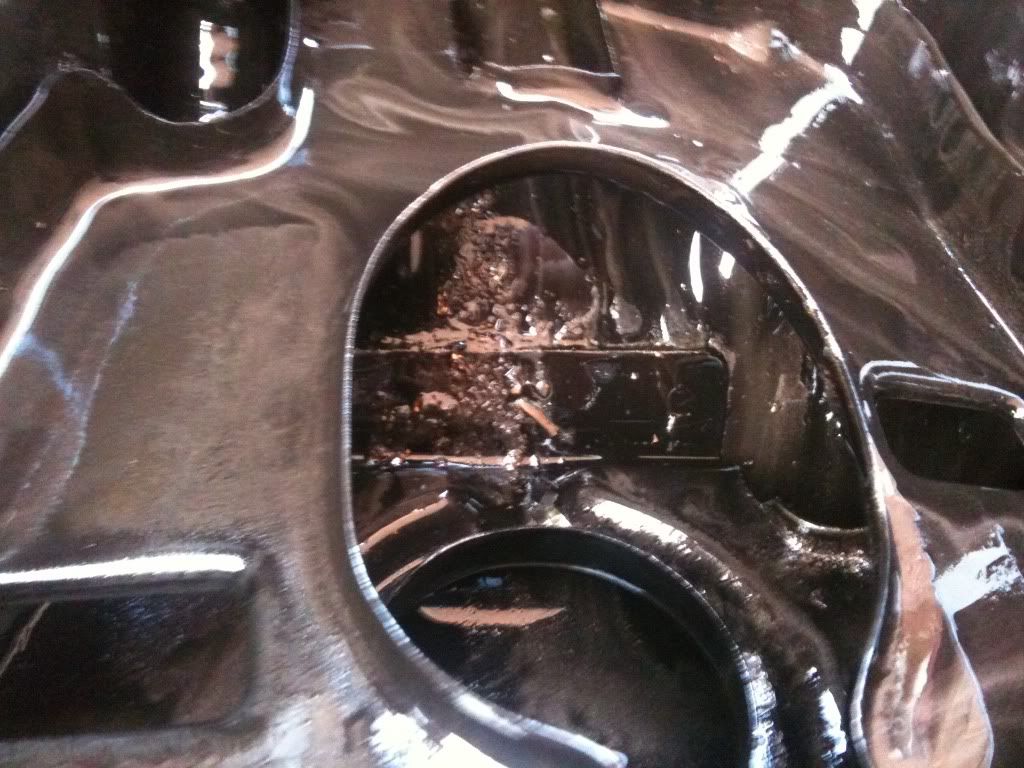
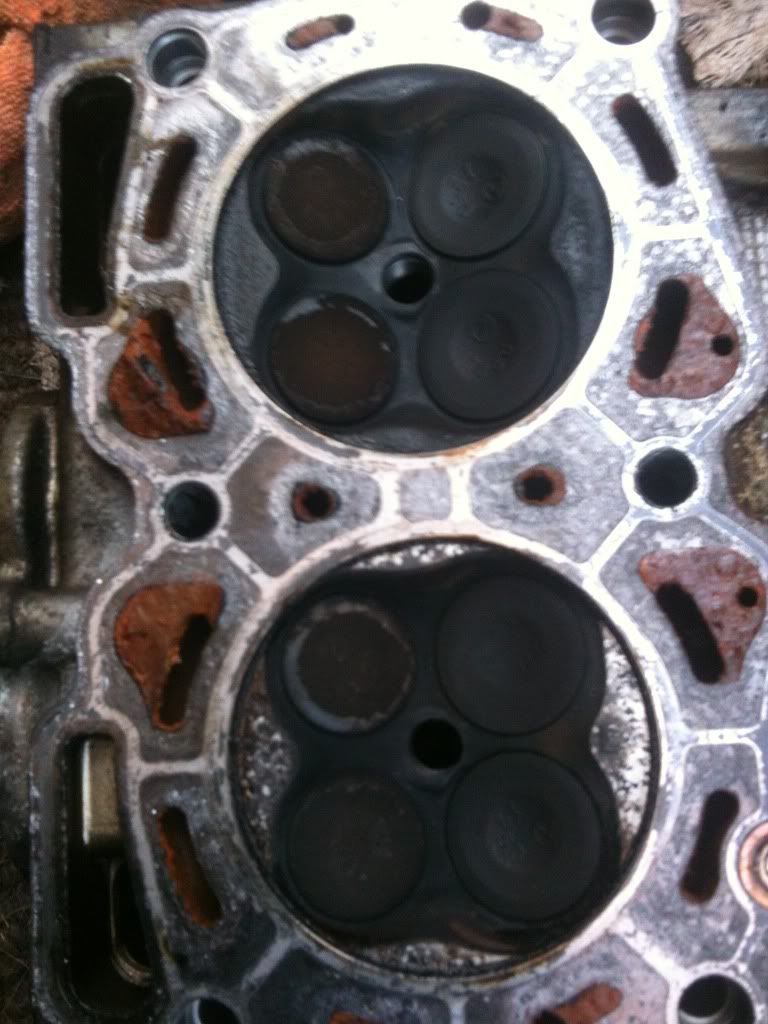
However when i removed the right head i found a large lump between the gasket and the head, it was rusty orange and once the gasket was off, you could see it would have been putting a lot of pressure on the gasket and i'd imagine was making cooling of the right head inefficient. I'm suprised the right hand head wasn't leaking at least water.
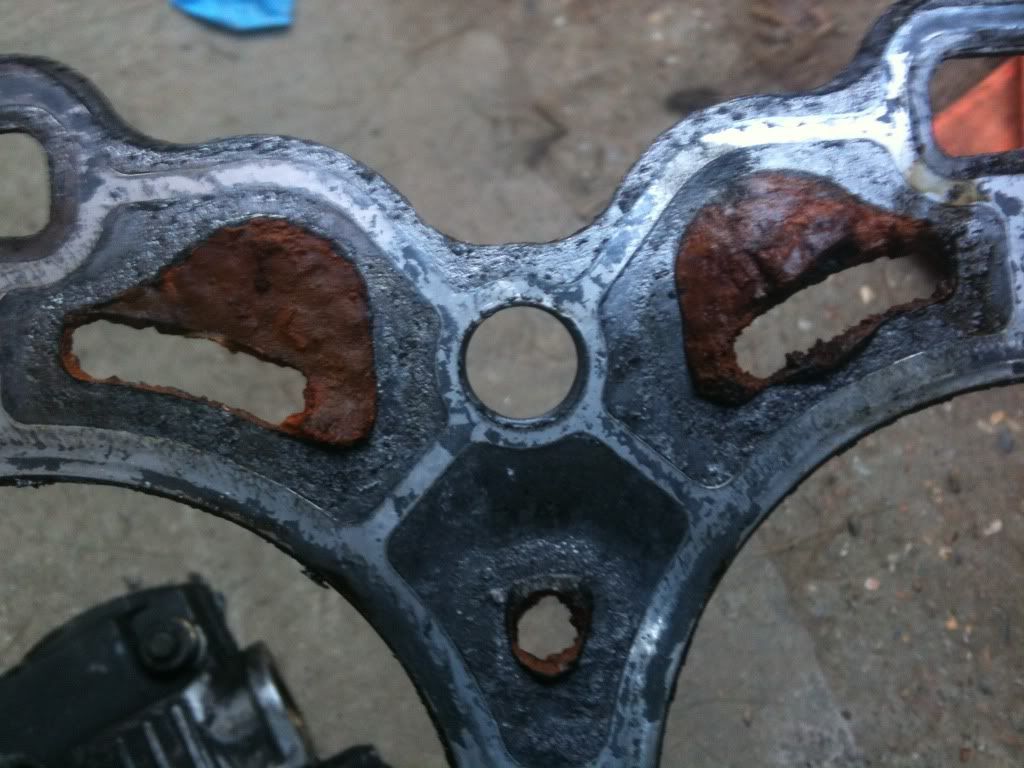
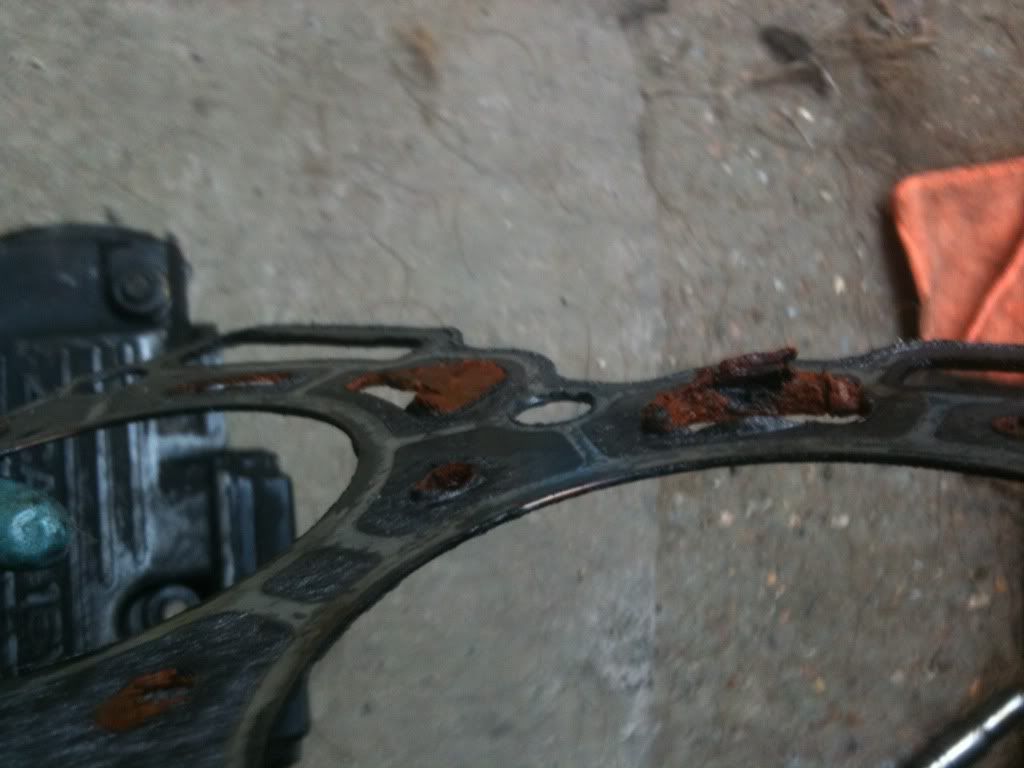
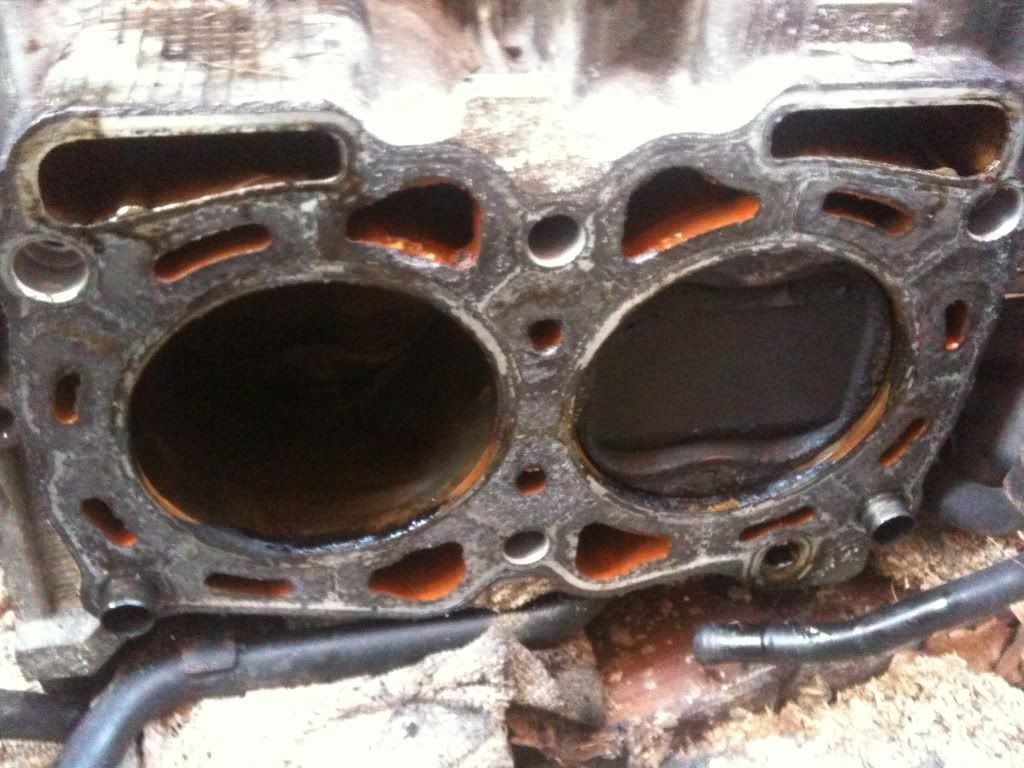
The left hand head though was fine and didn't cause too much trouble.
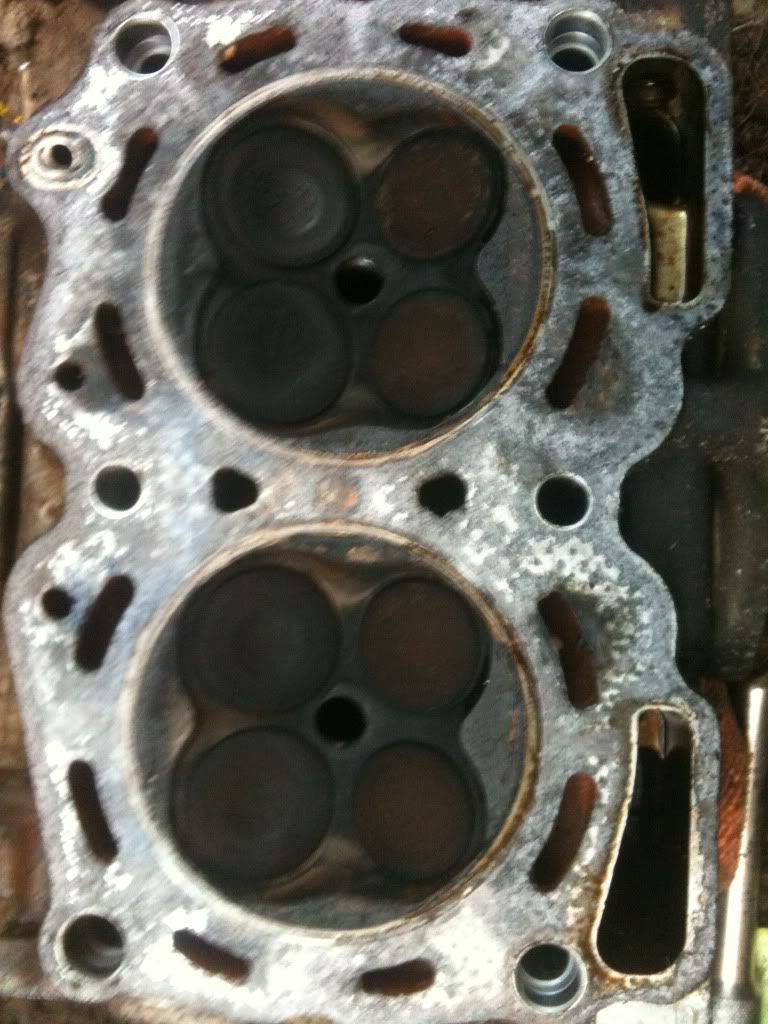
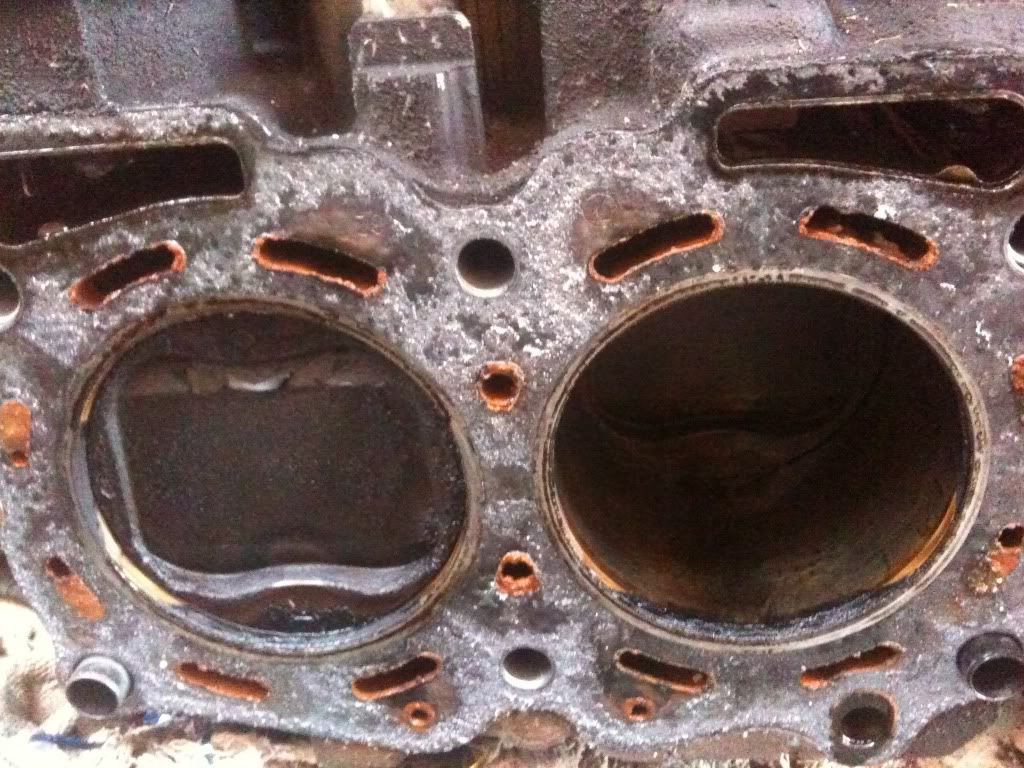
So if anyone has any opinions on this lump on the r/h head gasket let me know. Also I'm going to have clean the cooling channels thoroughly before the build, any idea's on the best way to do that?
I've also learnt my Iphone takes better pictures than my stupid digital camera/camcorder i was given for xmas. Its going back!
Cost of build so far �215 (socket)
Man hours - 5
Thanks to - Miami
http://cgi.ebay.co.uk/ws/eBayISAPI.d...:X:RTQ:GB:1123
But the seller was convinced this wasn't the right part
. So i bit the bullet and bought another 14mm 12-point socket. I didn't think it would work, but it did!...
So followed the above and hey presto the heads were off.
However when i removed the right head i found a large lump between the gasket and the head, it was rusty orange and once the gasket was off, you could see it would have been putting a lot of pressure on the gasket and i'd imagine was making cooling of the right head inefficient. I'm suprised the right hand head wasn't leaking at least water.
The left hand head though was fine and didn't cause too much trouble.
So if anyone has any opinions on this lump on the r/h head gasket let me know. Also I'm going to have clean the cooling channels thoroughly before the build, any idea's on the best way to do that?
I've also learnt my Iphone takes better pictures than my stupid digital camera/camcorder i was given for xmas. Its going back!
Cost of build so far �215 (socket)
Man hours - 5
Thanks to - Miami
Last edited by Kwik; 15 January 2012 at 08:43 AM.
15 January 2012, 09:27 PM
#23
A spare half hour whilst little'un was having a kip, the 2 boys were lego-building and the mrs was tidying the house. She gave me permission to "go and play" but after half hour my toes were numb.
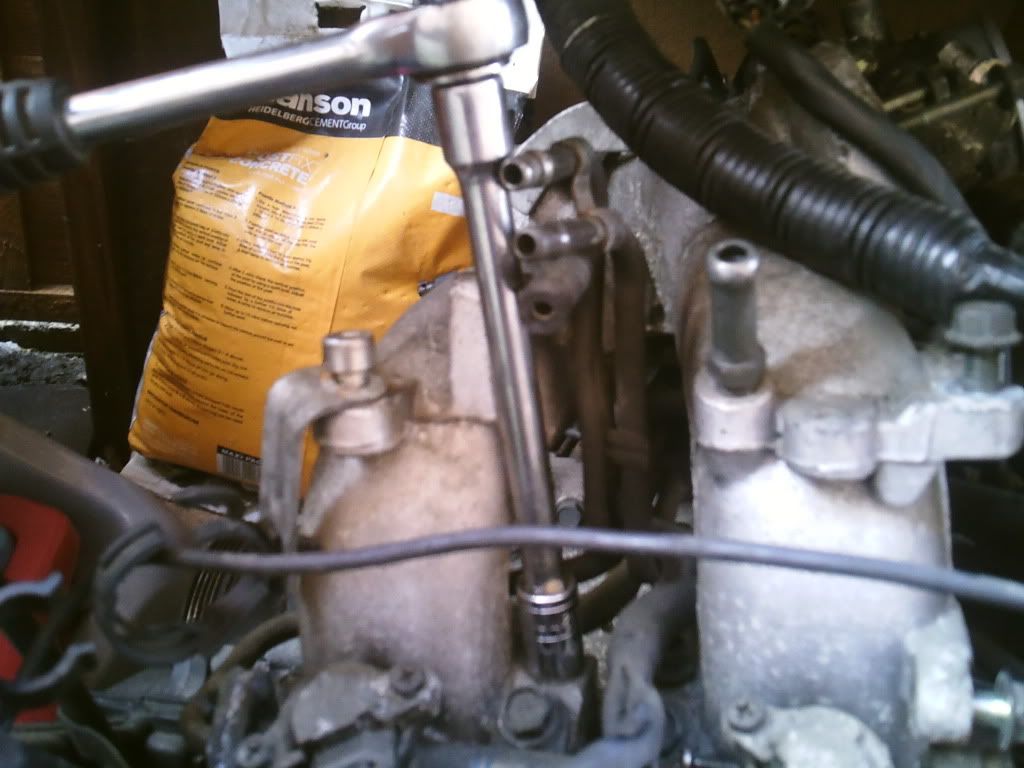
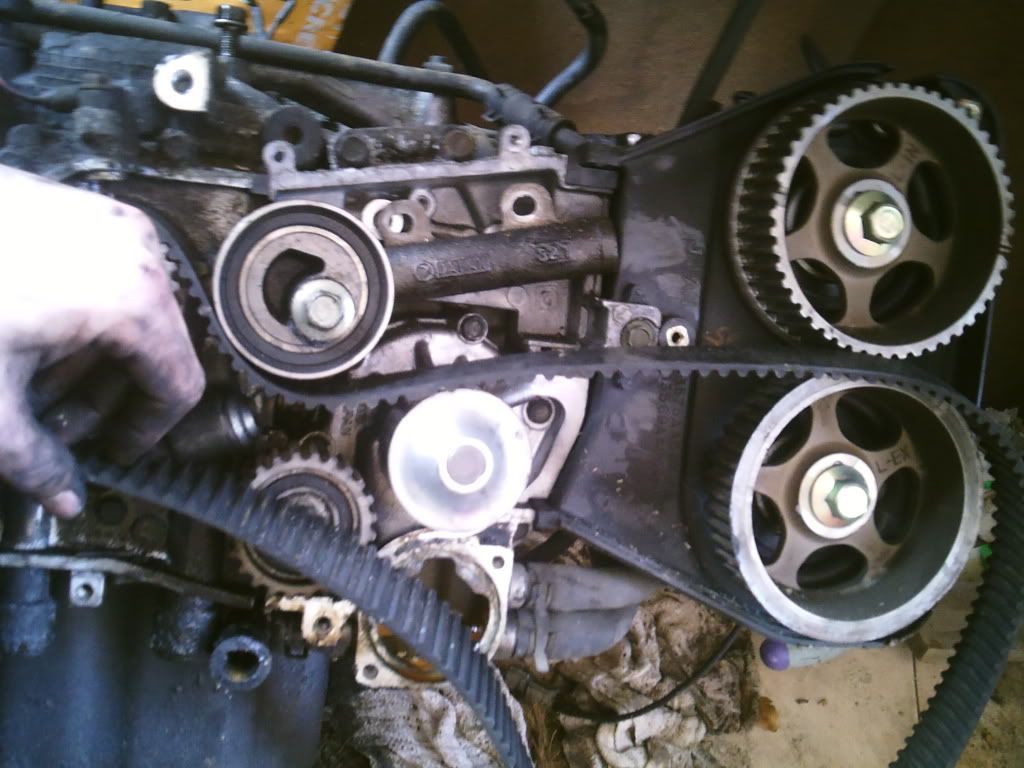
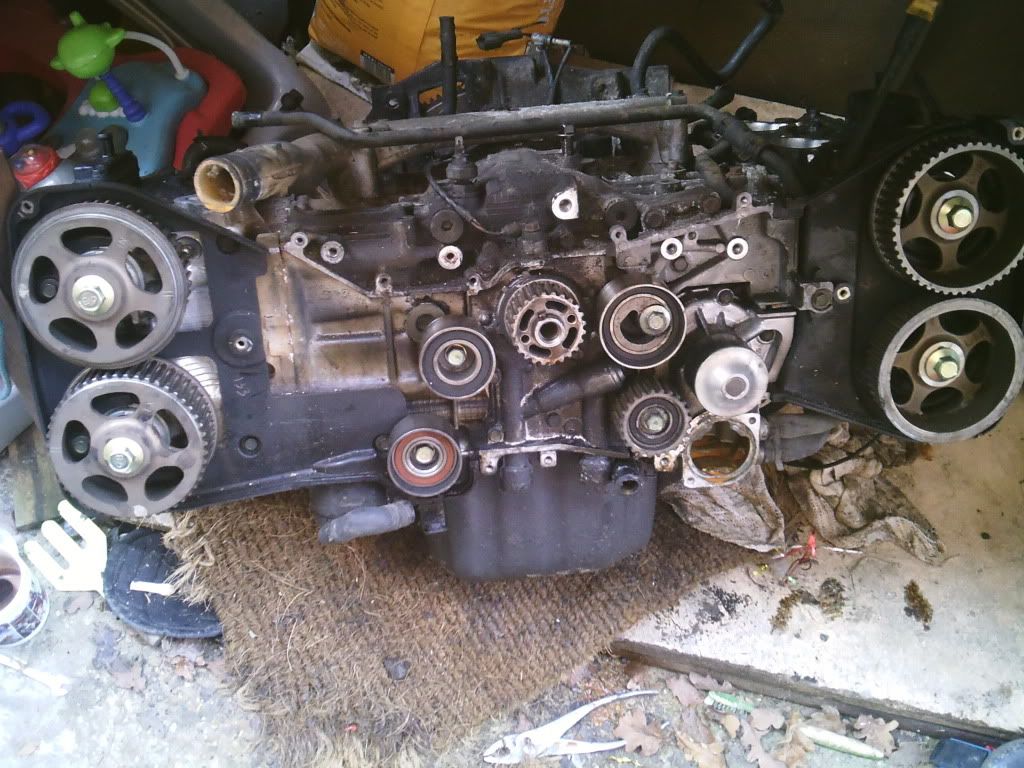
Last cam pulley off, all are 14mm bolts...
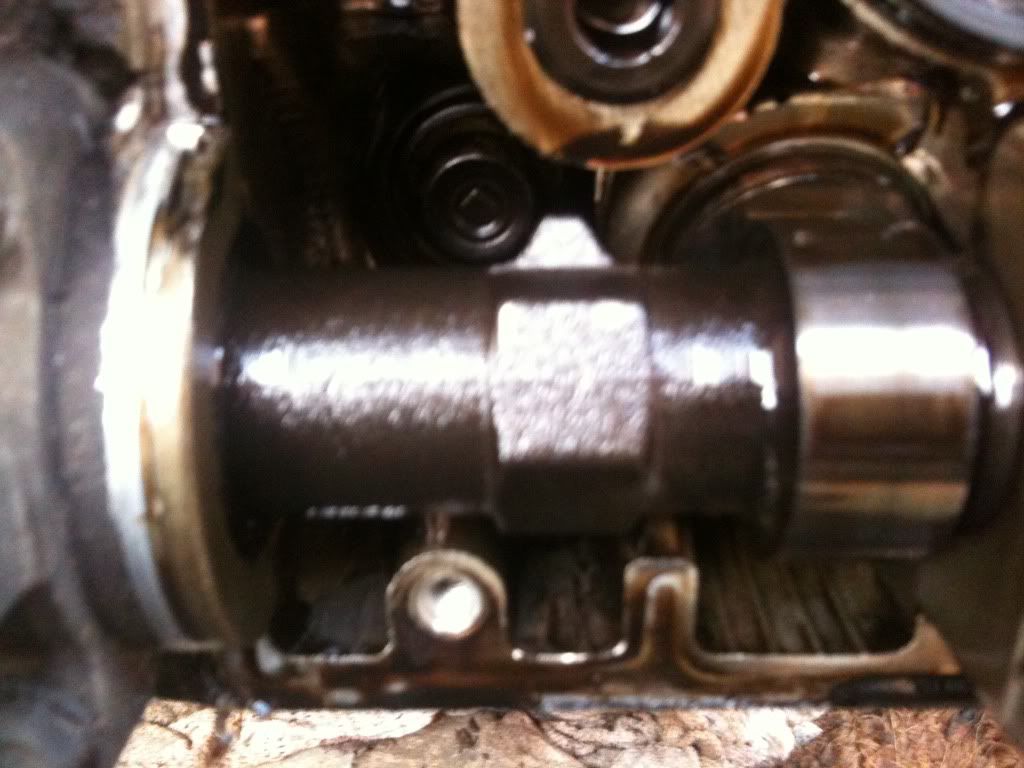
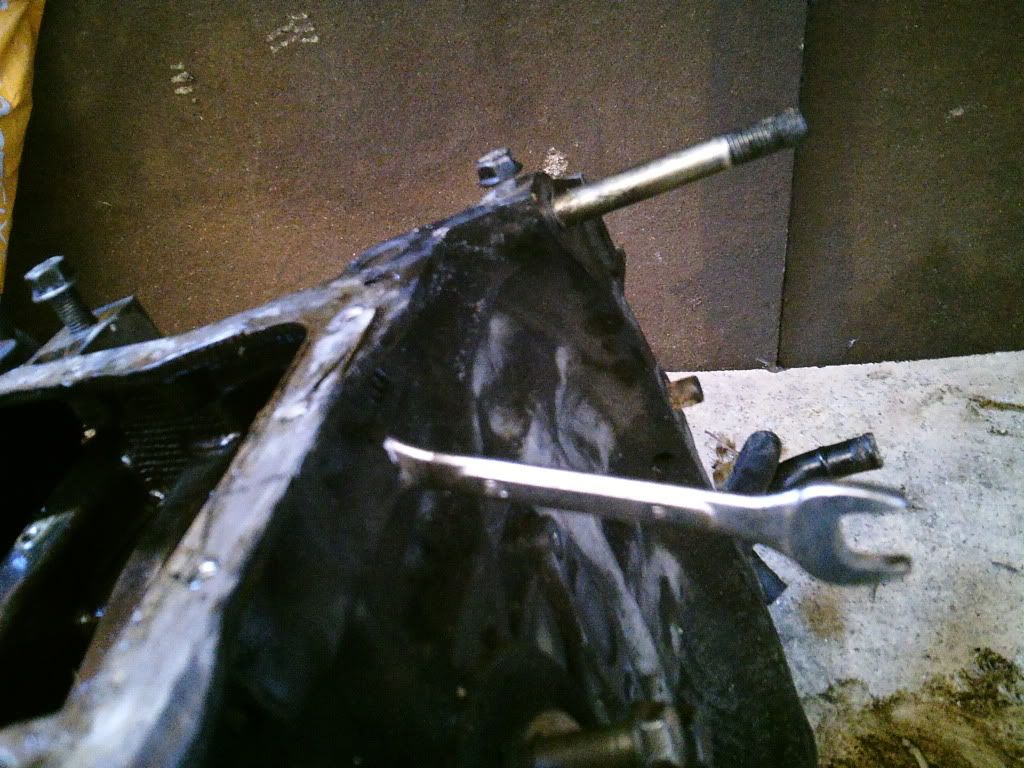
Then a problem, when removing the coolant pipe' 10mm bolts, with 1/4 turn one of them snapped off, the thread sitting flush with the case so a drill-out timesert jobbie. Also noticed a larger bolt with 8mm thread was already sheered off, if i'm lucky mulgrips will be able to sort that.
Water pump, 10mm bolts, straight forward.
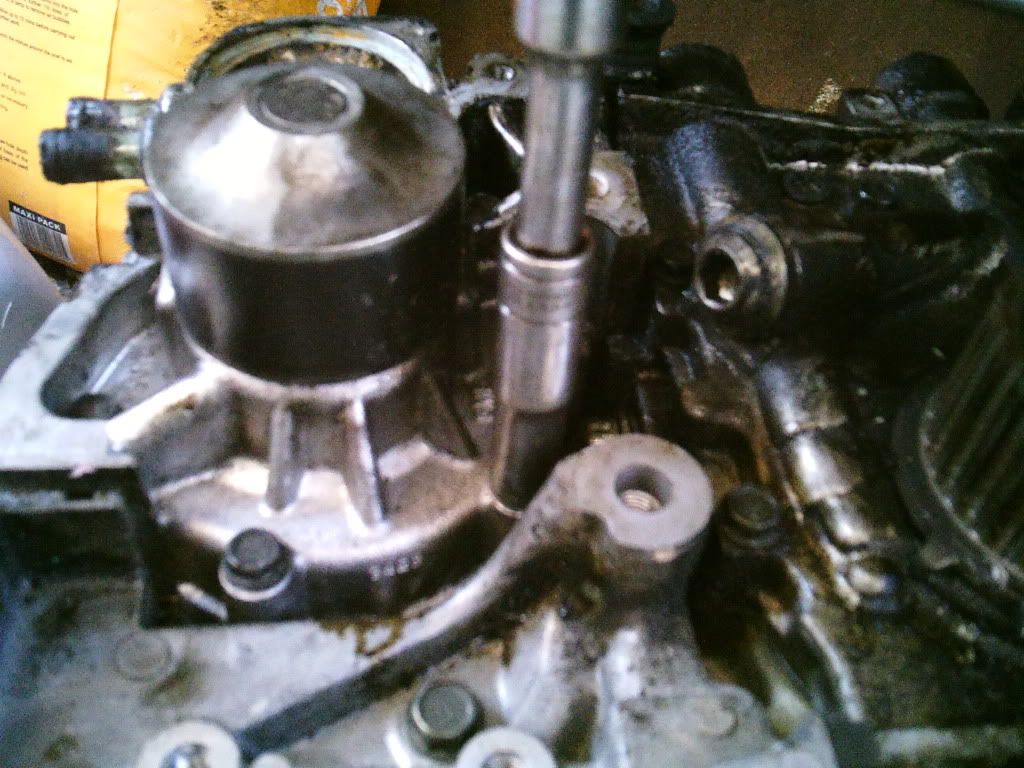
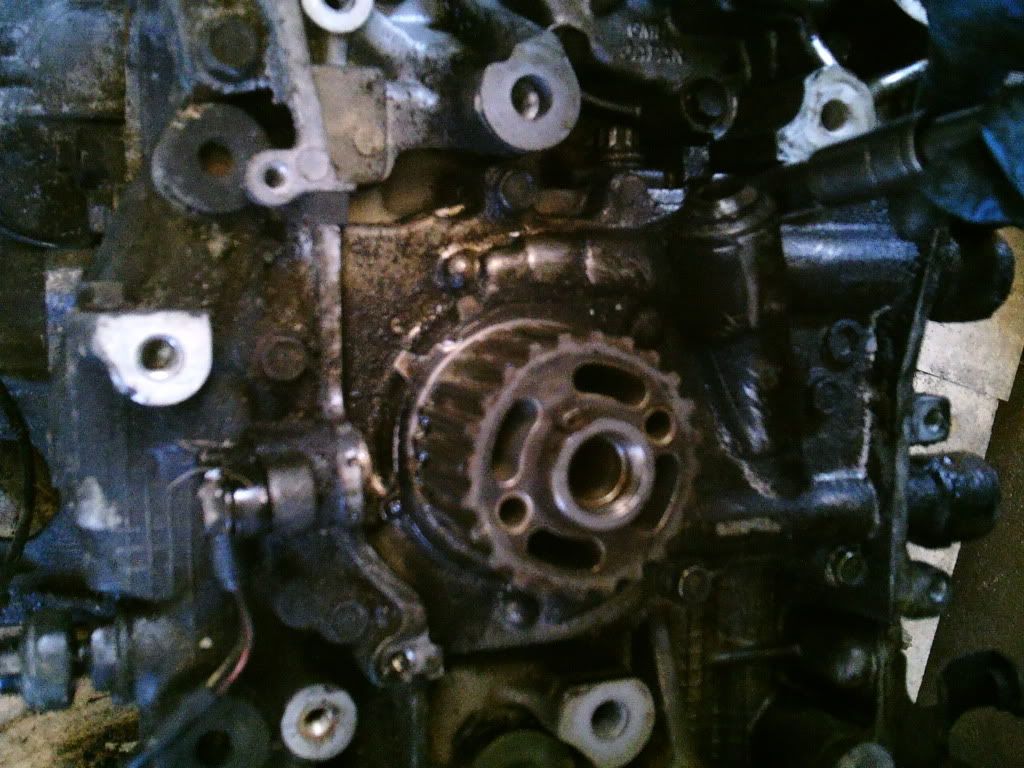
Then oil pump which was a bitch as the woodruff key just wouldn't let go of the last pulley over the oil pump. The secret was to loosen the pump and move the casing enough to get the rubber mallet and gently tap away at either end of the pump's casing to push the pulley up over the woodruff key.
Then case beside the water pump, again straight forward 3 bolt removal.
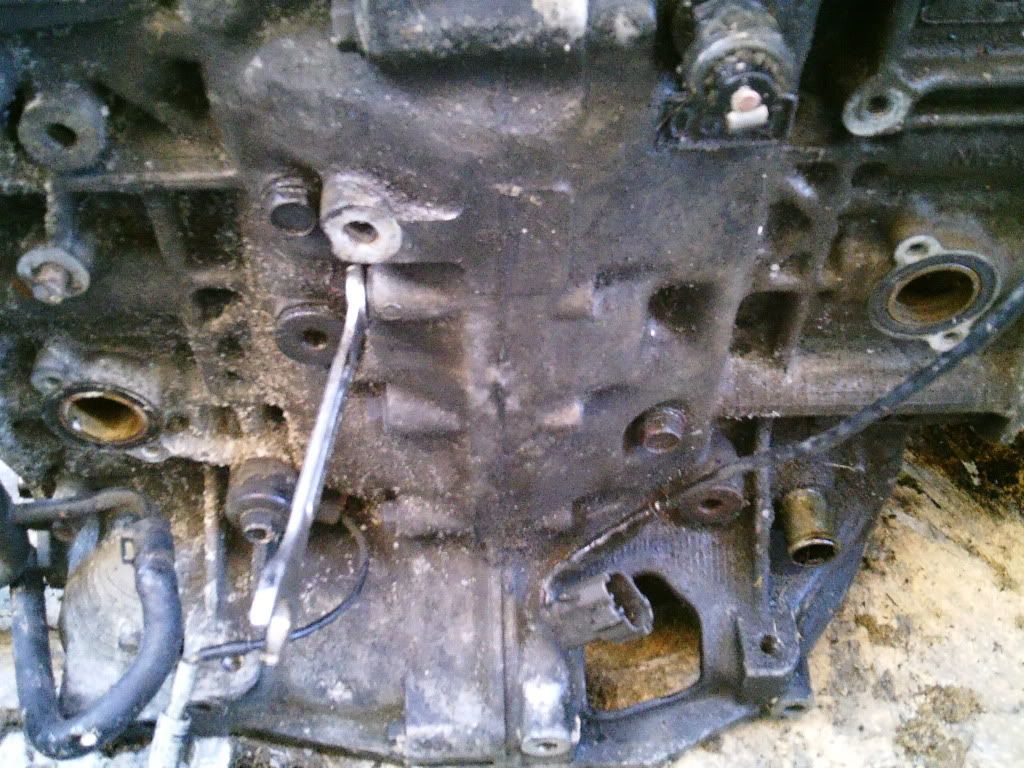
Then i made a quick start on the bolts holding the block halves together...
And thats it, block still together, i found 2 Torx shaped 12mm bolts just like the head bolts and thought about tackling them but think i'll go and buy a strong 12mm 12 point socket just like with the head bolts as i don't want to risk rounding them off.
Last cam pulley off, all are 14mm bolts...
Then a problem, when removing the coolant pipe' 10mm bolts, with 1/4 turn one of them snapped off, the thread sitting flush with the case so a drill-out timesert jobbie. Also noticed a larger bolt with 8mm thread was already sheered off, if i'm lucky mulgrips will be able to sort that.
Water pump, 10mm bolts, straight forward.
Then oil pump which was a bitch as the woodruff key just wouldn't let go of the last pulley over the oil pump. The secret was to loosen the pump and move the casing enough to get the rubber mallet and gently tap away at either end of the pump's casing to push the pulley up over the woodruff key.
Then case beside the water pump, again straight forward 3 bolt removal.
Then i made a quick start on the bolts holding the block halves together...
And thats it, block still together, i found 2 Torx shaped 12mm bolts just like the head bolts and thought about tackling them but think i'll go and buy a strong 12mm 12 point socket just like with the head bolts as i don't want to risk rounding them off.
16 January 2012, 11:27 AM
#24
Fantastic effort, glad to see its coming apart.
Just a bit of advice if you didnt already know, the block halves are held with 18 bolts altogether, theres a sneaky one in the sump area as i missed this one out when i got mine apart.
Just a bit of advice if you didnt already know, the block halves are held with 18 bolts altogether, theres a sneaky one in the sump area as i missed this one out when i got mine apart.
16 January 2012, 11:40 AM
#25
Are they hex bolts or my favourite Torx shaped jobbies?
16 January 2012, 05:15 PM
#26
Scooby Regular
iTrader: (16)
Join Date: Apr 2003
Location: Curlew FPSO
Posts: 2,771
Likes: 0
Received 0 Likes
on
0 Posts
Lol, i had a quick look round yesterday and thought "Hmm, there's only about 6 bolts holding this thing together" then read the manual last night and was shocked to see how many there were, sneaky little gits. I'm back at work this week now though so doubt I'll get much done this week until I'm paid Friday.
Are they hex bolts or my favourite Torx shaped jobbies?
Are they hex bolts or my favourite Torx shaped jobbies?
20 January 2012, 01:14 PM
#29
Thanks Dill, fancy donating your Type-R to the project? lol.
Small update, sold 5 coil packs (one i had as spare) on Ebay for �10 each to help my window shopping for a few months.....
Also grabbed myself a half decent breaker bar and a better quality 12mm 12-point socket, and hey presto the "torx" shaped ******* bolt i was having trouble with took 5 seconds to make that lovely snapping sound when cracked loose.
Cost of build so far (-�50 for coil packs, +�20 for breaker bar and socket) �185
Man hours - 5
20 January 2012, 09:24 PM
#30
Thats the best sound ever.....it would be great to see the damage on the big end bearing and/or the mains. Get some pics up.
Have you decided what parts your going to get and where from?
Have you decided what parts your going to get and where from?