
Engine Bay Tidy Up

Thread Starter
Scooby Regular
iTrader: (4)
Joined: Jun 2005
Posts: 3,618
Likes: 0
From: South Wales, Scoobless, Type R is gone!
Having recently swapped my old UK car for a Type R the engine bay needs a bit of a tidy up to bring it up to standard, so i'm gonna update this thread as i go.
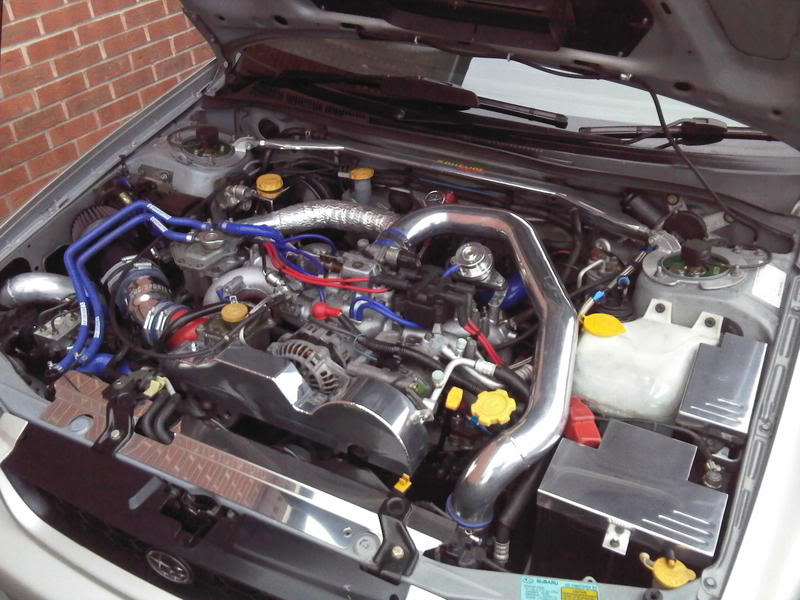
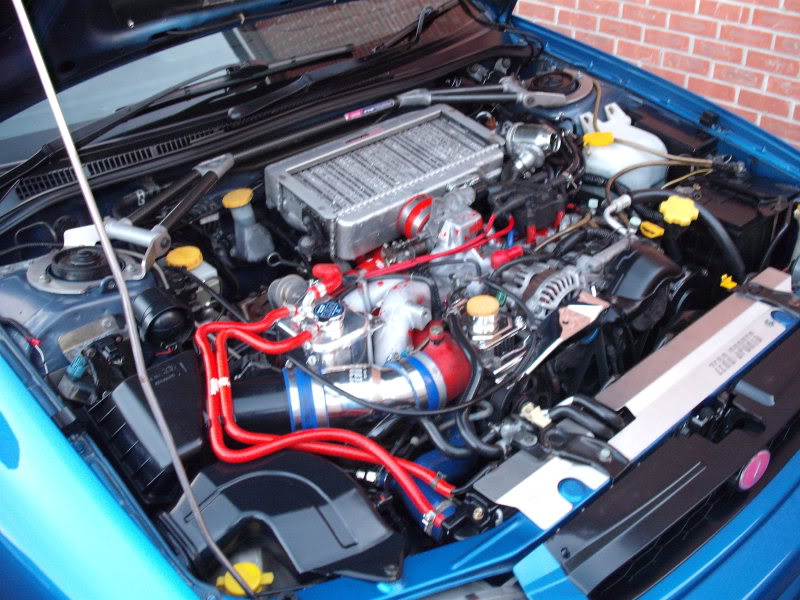
This is my old UK car so looking to get it better than this:
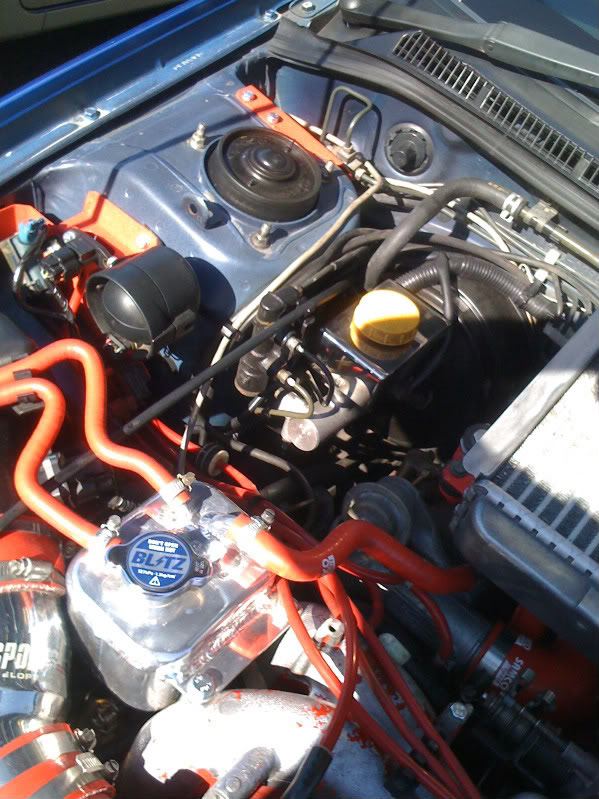
This how the under bonnet looked when i first had it:
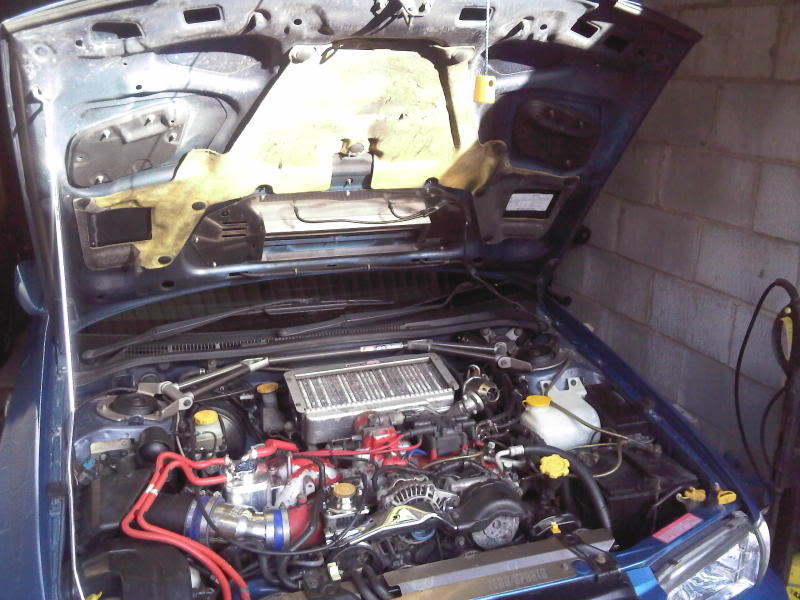
Someone has a had a go at painting the inlet manifold with normal red paint so it is all flaking off , already some nice bits on the car like the Forge header tank, ZeroSports induction pipe and the PAS tank and bonnet stay have been chromed.
Plans:
General Clean Up
Fit Polished Ally covers (like old car)
Change any Blue silicone hoses to Red
Renew all vaccum hoses in Red
Fit STI 8 Intercooler
Smooth and Polish Inlet manifold (and fit with manifold spacers)
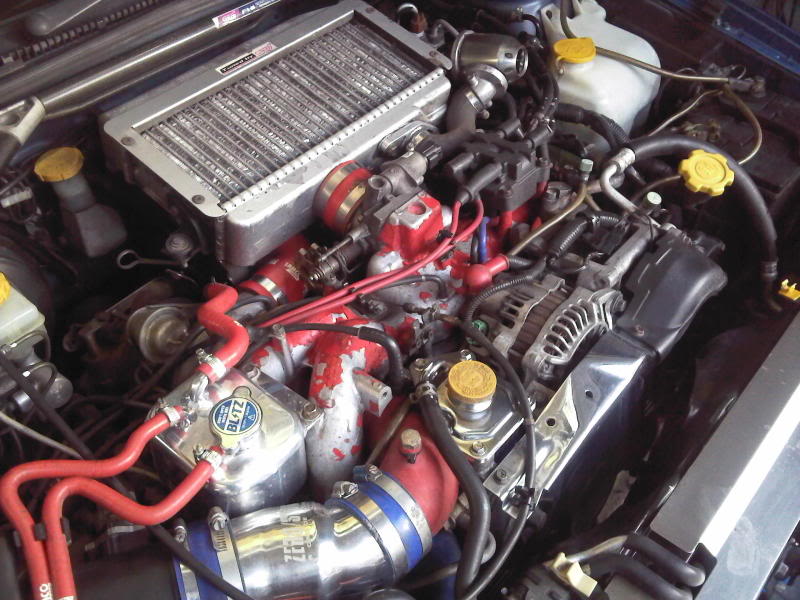
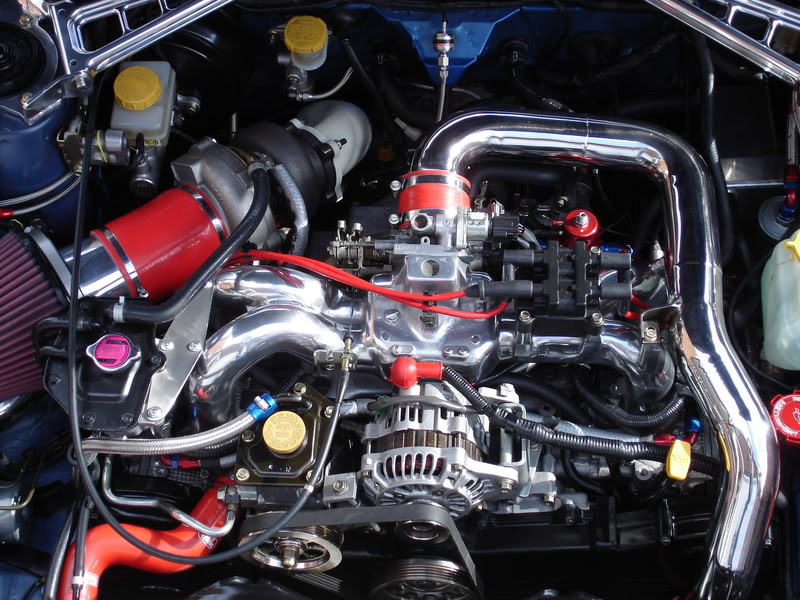
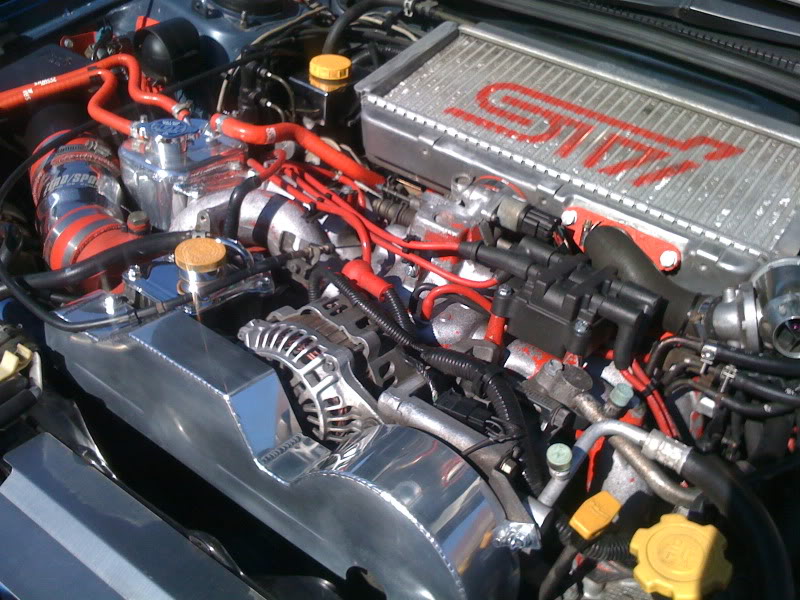
Hope to get the manfold like this (pic of martyP1's car, hope he doesn't mine me using his photo):
This is my old UK car so looking to get it better than this:
This how the under bonnet looked when i first had it:
Someone has a had a go at painting the inlet manifold with normal red paint so it is all flaking off
, already some nice bits on the car like the Forge header tank, ZeroSports induction pipe and the PAS tank and bonnet stay have been chromed.Plans:
General Clean Up
Fit Polished Ally covers (like old car)
Change any Blue silicone hoses to Red
Renew all vaccum hoses in Red
Fit STI 8 Intercooler
Smooth and Polish Inlet manifold (and fit with manifold spacers)
Hope to get the manfold like this (pic of martyP1's car, hope he doesn't mine me using his photo):
Last edited by turboDean; Mar 28, 2009 at 04:48 PM.
Thread Starter
Scooby Regular
iTrader: (4)
Joined: Jun 2005
Posts: 3,618
Likes: 0
From: South Wales, Scoobless, Type R is gone!
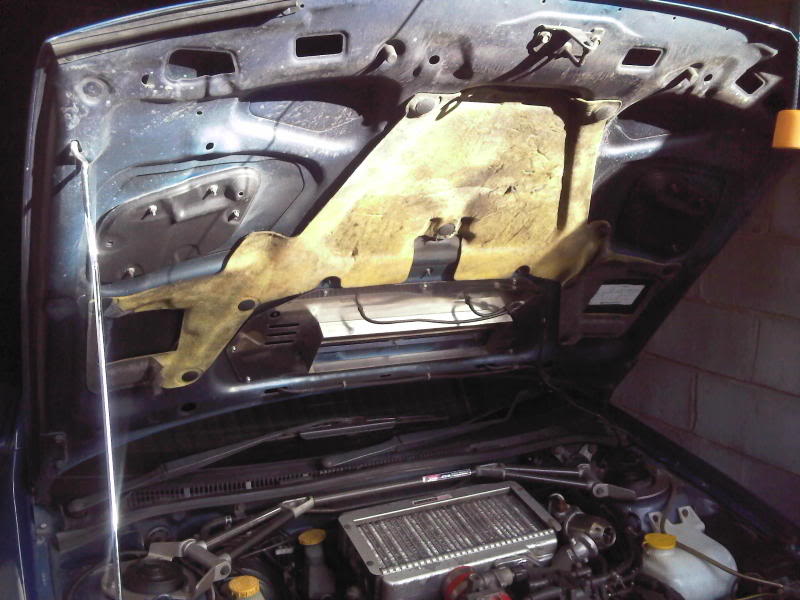
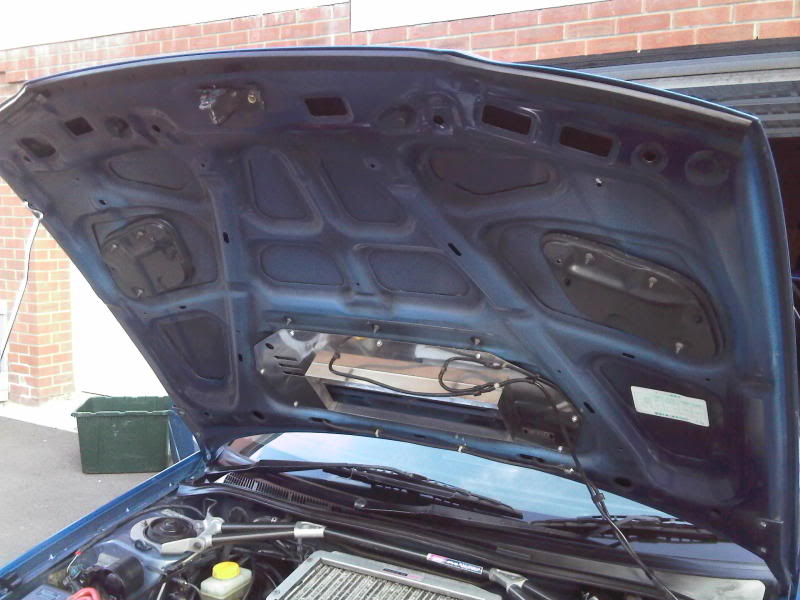
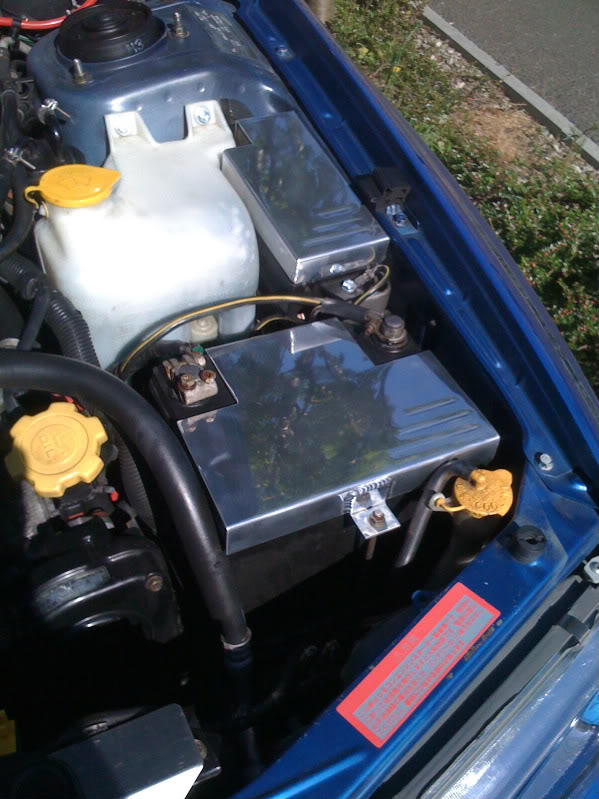
This is how it looks after an initail clean up, removed the sound deadening from the underside of the bonnet and replace the rubber seal at the front of the bonnet with one that goes all the way across to help keep all the dirt out.


Dean, the alternator cover on the Type R. Is it the standard one polished, or chromed, or just an aftermarket one?
Also, I'm pretty sure all of the red inlet manifolds flake off from the factory anyway.
Also, I'm pretty sure all of the red inlet manifolds flake off from the factory anyway.
Trending Topics
Thread Starter
Scooby Regular
iTrader: (4)
Joined: Jun 2005
Posts: 3,618
Likes: 0
From: South Wales, Scoobless, Type R is gone!
Thread Starter
Scooby Regular
iTrader: (4)
Joined: Jun 2005
Posts: 3,618
Likes: 0
From: South Wales, Scoobless, Type R is gone!
It will be getting replaced with a polished ally one like the one on my old car though

The paint on the inlet was flaking really bad and was too bright to be the factory red.
Last edited by turboDean; Apr 3, 2009 at 05:55 PM.

Thread Starter
Scooby Regular
iTrader: (4)
Joined: Jun 2005
Posts: 3,618
Likes: 0
From: South Wales, Scoobless, Type R is gone!
Thread Starter
Scooby Regular
iTrader: (4)
Joined: Jun 2005
Posts: 3,618
Likes: 0
From: South Wales, Scoobless, Type R is gone!

Hopefully get the STI 8 intercooler fitted this weekend.
I've ordered some red silicone hoses for the Zerosports induction pipe.
Next i need to get a red Samco top rad hose and some red vacuum hose.
Fit lots of polished Ally bits.
Polish and fit the spare inlet manifold i've got.
Maybe gets some brackets either powder coated or Chrome plated
Thread Starter
Scooby Regular
iTrader: (4)
Joined: Jun 2005
Posts: 3,618
Likes: 0
From: South Wales, Scoobless, Type R is gone!
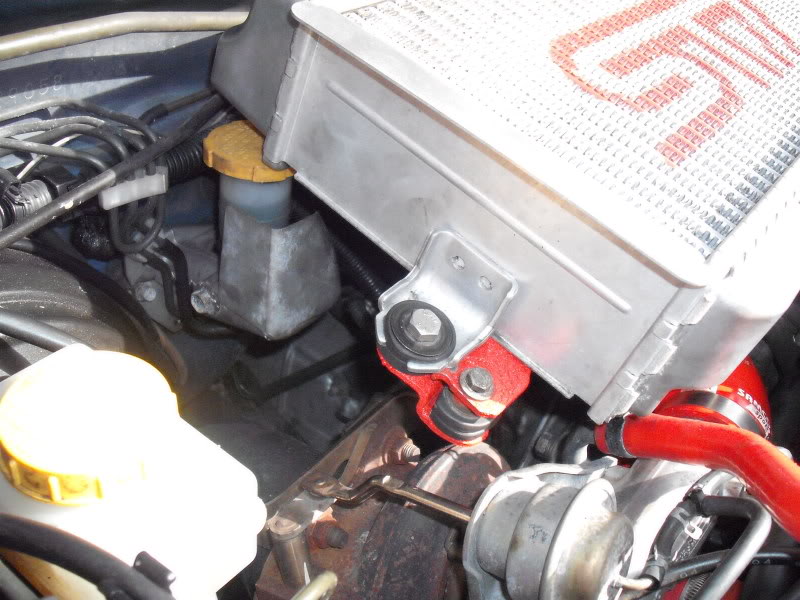
Started fitting the New intercooler today.
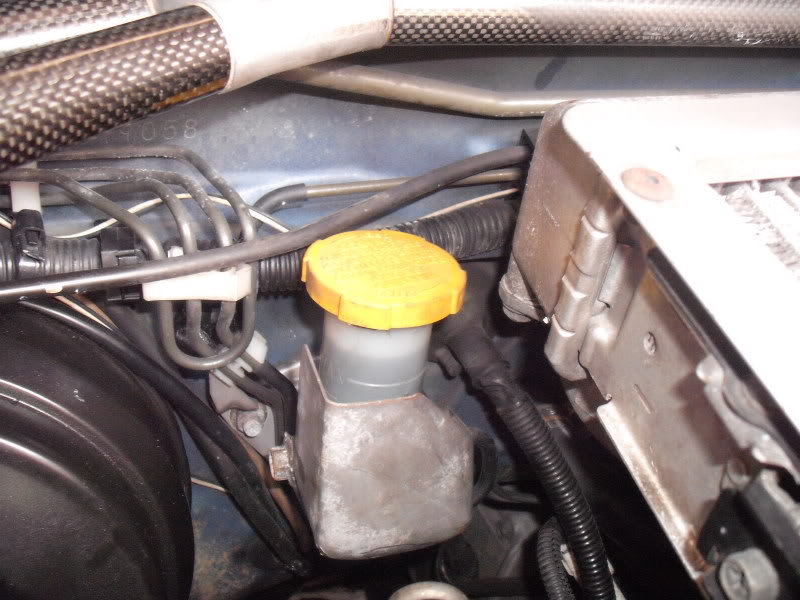
First job was to shorten the clutch fluid res:
Before
After:
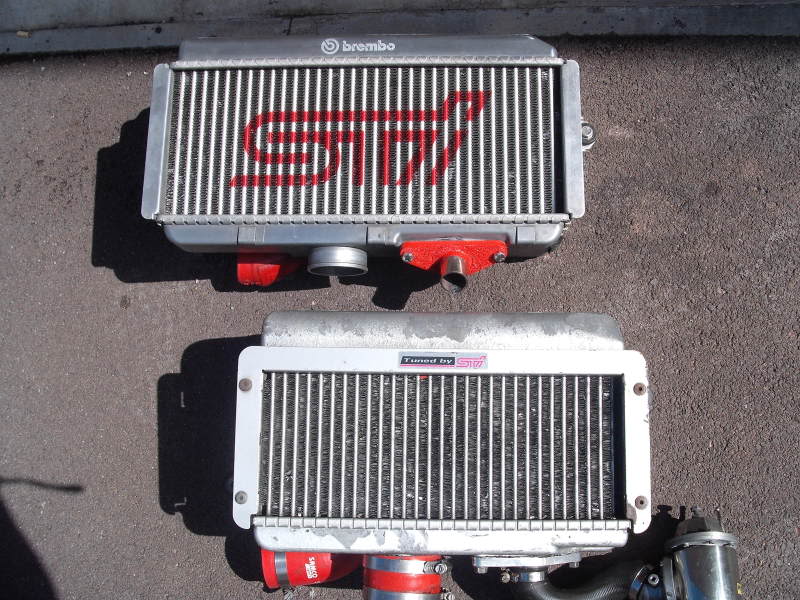
Then removed the old intercooler, pic to compare the size to the new one, Dump valve adaptor made in work and painted in wrinkle red:
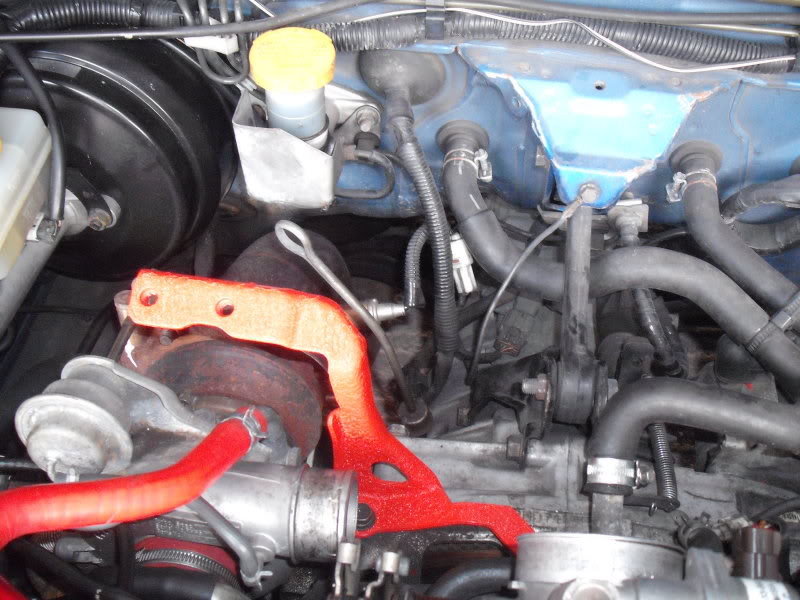
Fitted the Newage STI left hand bracket, painted first in wrinkle red:
More pics to follow tomorrow when its finished, had to bend and modify the right side bracket so waiting for the paint to dry on that.
First job was to shorten the clutch fluid res:
Before
After:
Then removed the old intercooler, pic to compare the size to the new one, Dump valve adaptor made in work and painted in wrinkle red:
Fitted the Newage STI left hand bracket, painted first in wrinkle red:
More pics to follow tomorrow when its finished, had to bend and modify the right side bracket so waiting for the paint to dry on that.
looking good!... you seem like quite a handy man ... how do you shorten the clutch res.?
... was in fact looking to do an STI8 intercooler too.... but, having second thoughts now hehe... looks like a lot of work ...
... was in fact looking to do an STI8 intercooler too.... but, having second thoughts now hehe... looks like a lot of work ...
Thread Starter
Scooby Regular
iTrader: (4)
Joined: Jun 2005
Posts: 3,618
Likes: 0
From: South Wales, Scoobless, Type R is gone!
There are full instruction on how to do the conversin here:
Scoobypedia | Trusted knowledge for everything Subaru | Knowledge / DIY - STi 8 Intercooler onto MY00 Classic
Although i didn't need to lower the coil pack as i'm using a HKS dump valve, and i used the STI8 Y pipe.
Thread Starter
Scooby Regular
iTrader: (4)
Joined: Jun 2005
Posts: 3,618
Likes: 0
From: South Wales, Scoobless, Type R is gone!
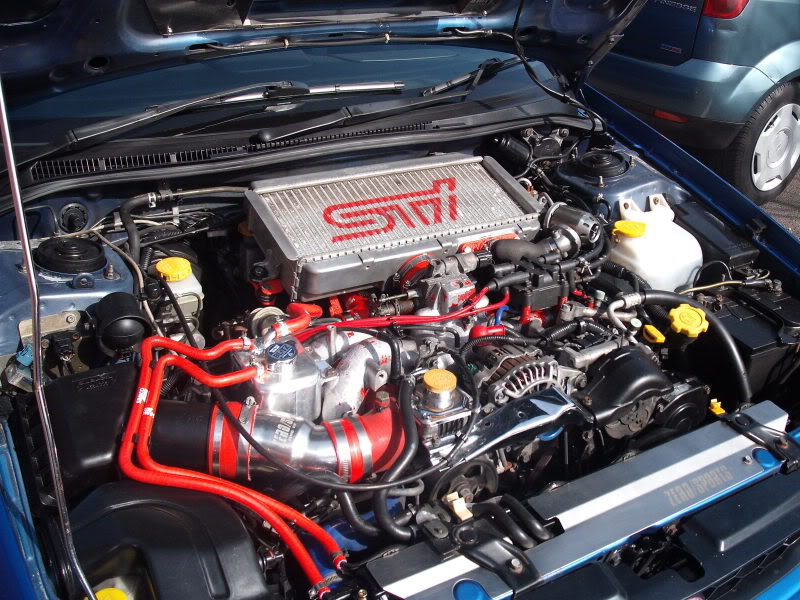
All Done  Also replaced the hoses on the zerosports induction pipe for red ones.
Left side Bracket modded, not a lot of clearance on the clutch res:
Right side bracket bent and painted:

Also replaced the hoses on the zerosports induction pipe for red ones.Left side Bracket modded, not a lot of clearance on the clutch res:
Right side bracket bent and painted:
Thread Starter
Scooby Regular
iTrader: (4)
Joined: Jun 2005
Posts: 3,618
Likes: 0
From: South Wales, Scoobless, Type R is gone!
Thread Starter
Scooby Regular
iTrader: (4)
Joined: Jun 2005
Posts: 3,618
Likes: 0
From: South Wales, Scoobless, Type R is gone!
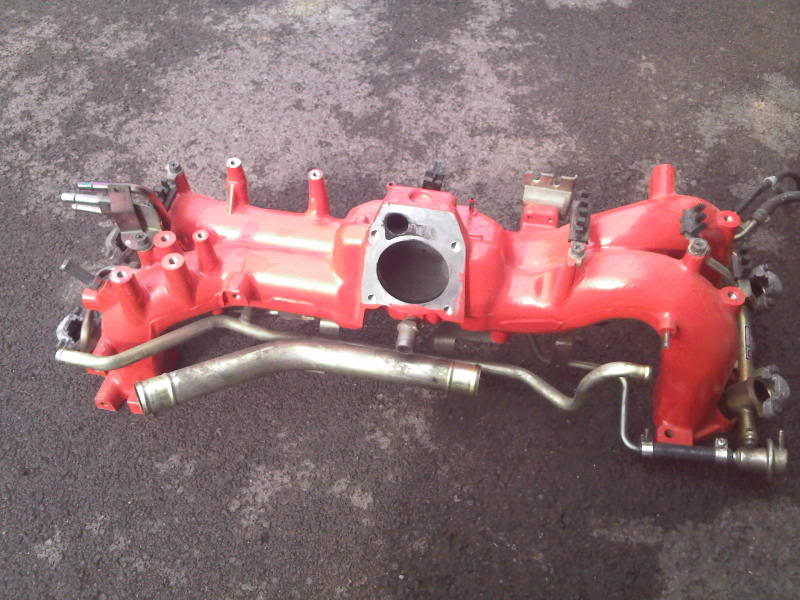
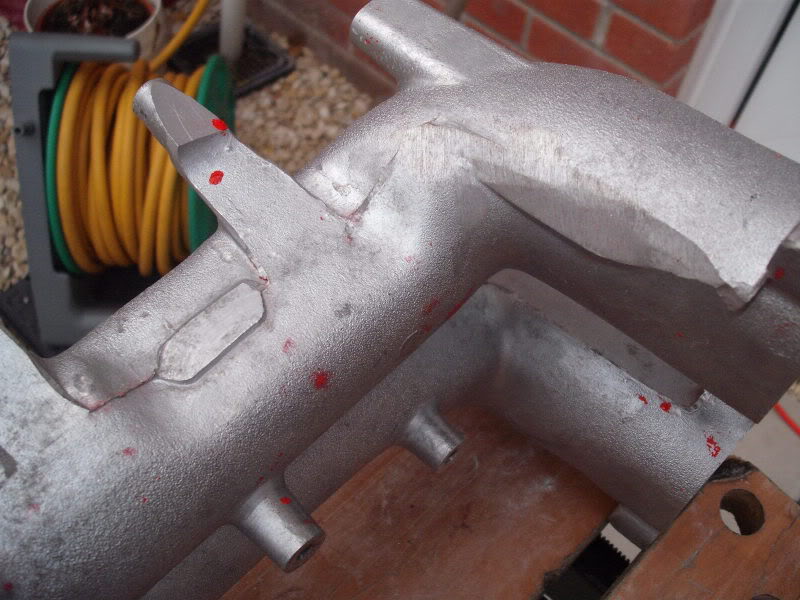
Made a start on the spare inlet manifold, this is how it was when i picked it up, painted red but not the right colour:
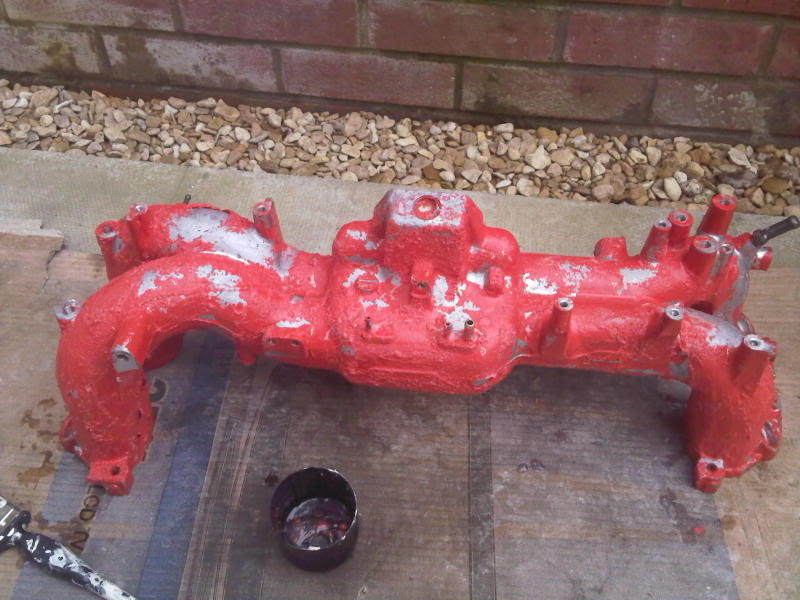
Was tempted to fit it but wouldn't of been hapy with colour and when i jet washed it bit of paint came off, so next step was to remove all the fuel rails etc and start wit the Nitromoors:
Most of the paint gone:
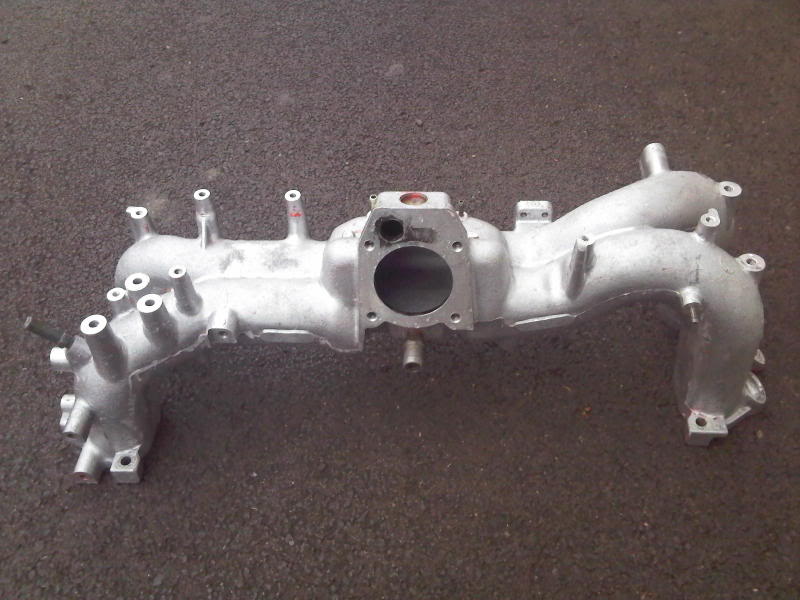
This show how much it is going to need smoothing out, very rough finish and lots of casting marks:
After a few hours with a grinder:
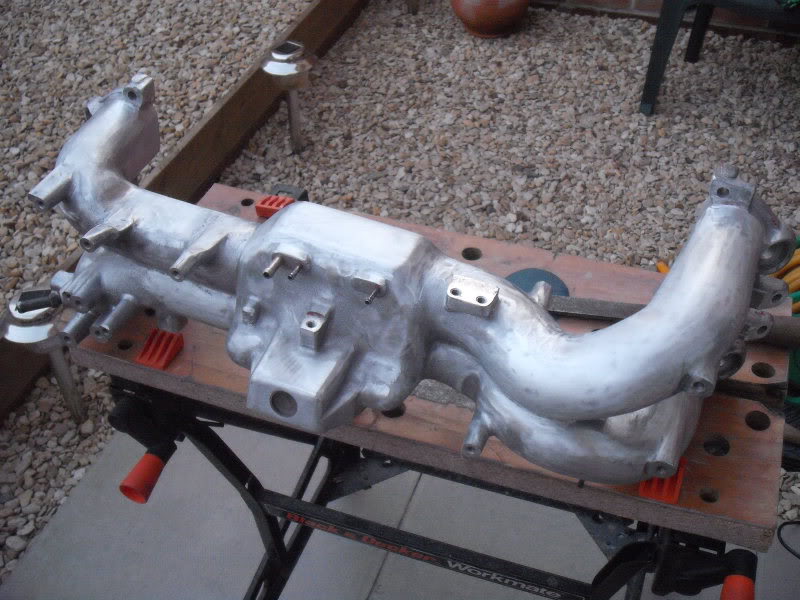

Need to get a dremel now to get into the tight areas, got a long way to go before its a nice polished finish.
Was tempted to fit it but wouldn't of been hapy with colour and when i jet washed it bit of paint came off, so next step was to remove all the fuel rails etc and start wit the Nitromoors:
Most of the paint gone:
This show how much it is going to need smoothing out, very rough finish and lots of casting marks:
After a few hours with a grinder:
Need to get a dremel now to get into the tight areas, got a long way to go before its a nice polished finish.
Last edited by turboDean; Apr 5, 2009 at 07:21 PM.


Thread Starter
Scooby Regular
iTrader: (4)
Joined: Jun 2005
Posts: 3,618
Likes: 0
From: South Wales, Scoobless, Type R is gone!
Thanks Both!!
Few more little bits done now, need to put up some up to date pics up this week.
Really need a red Top Rad Hose now and get the manifold finished.
Anyone one know of a Strut brace that will fit on a classic with a newage STI Intercooler????
Few more little bits done now, need to put up some up to date pics up this week.
Really need a red Top Rad Hose now and get the manifold finished.
Anyone one know of a Strut brace that will fit on a classic with a newage STI Intercooler????
Thread Starter
Scooby Regular
iTrader: (4)
Joined: Jun 2005
Posts: 3,618
Likes: 0
From: South Wales, Scoobless, Type R is gone!
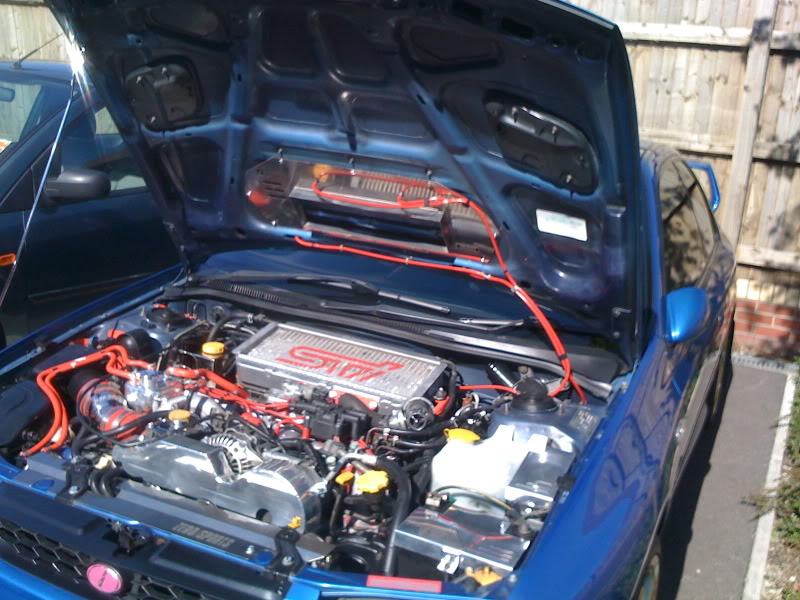
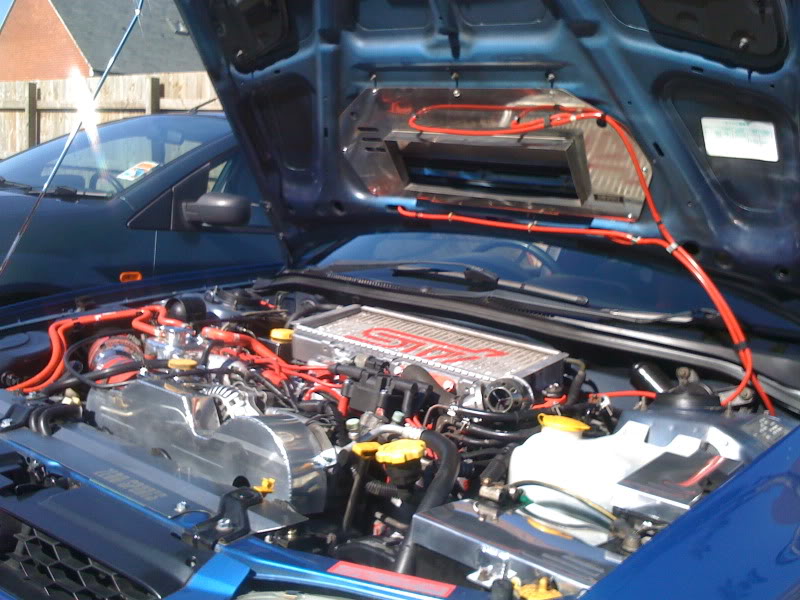
Polish ally covers now fitted, lots of vacuum pipe changed, lots of bolts replaced with nice new shiney ones and painted some brackets in crackle red.

Thread
Thread Starter
Forum
Replies
Last Post