
Cold CAIK

Thread Starter
18 June 1815 - Waterloo
iTrader: (31)
Joined: Dec 2004
Posts: 19,156
Likes: 15
From: To the valley men!
CAIK cold air upgrade
Many people fit Cold Air Induction kits then find that the performance is not necessarily improved. This is mainly due to the lack of cold air! as the main cone or mushroom is fitted inside the engine bay. Heat builds up from the engine itself and the turbo. Without vents in the bonnet above the cone or turbo this is increased. Also, when the vehicle is static for a while, people have experienced very poor performance from a stand still.
People have fitted the cone inside the wing but then there is the issue of access and water ingress through the ducting. So, the old grey cells got to work.
I spent a bit of time looking at alternatives and came up with this cunning plan. My Forester is fitted with the Zero Sport Kit and very nice it is. However, the inner wing is full of the remnants of the old air box fitting, mainly the large hopper thingey. This prevents much of the air that can be flowed through the wing from the lower inlet in the false Fog Covers that are fitted to a Foggy. When removed two large holes and a huge space are left inside the wing.
I bought the following parts from Merlin Motorsport, top bunch and surprisingly cheap and very good quality kit (Merlin Motorsport race parts, accessories, spares & equipment) .
Main Items
1m reinforced induction hose.
12v auxiliary fan (3 inch).
3 inch reducer ring and clip.
3 inch mesh
shrink wrap
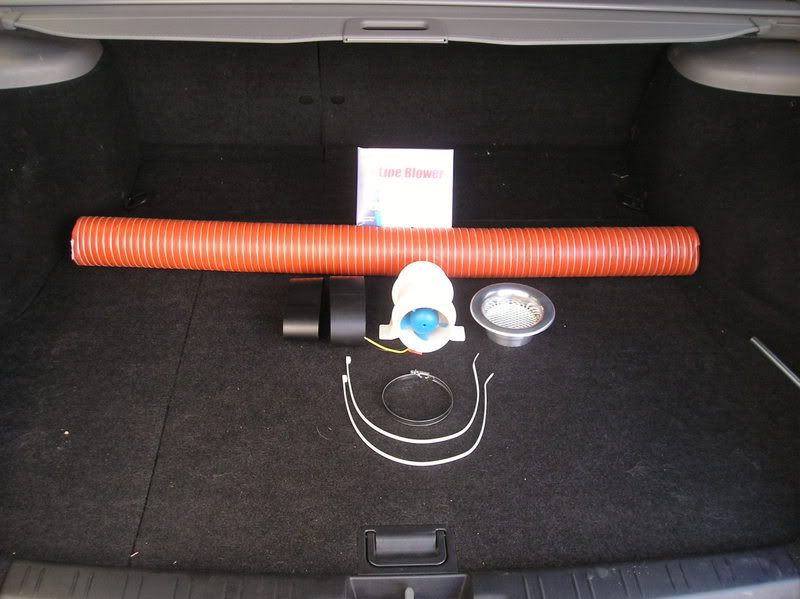
All in cost including VAT and delivery �82.
Extras (all in the back of the shed)
8 amp 12v Cable (green)
8 amp 12v Cable (blue)
5 amp inline fuse
Cable ties
Spade connecters
Various self tapping screws and clips.
Now what happenes next.
Jack up the OSF and remove the wheel. Remove the inner wing and wheel arch liner. These are the plastic twist and remove poppers. Be careful of the lone self tapper at the top near the shock.
Remove the OSF Fog cover.

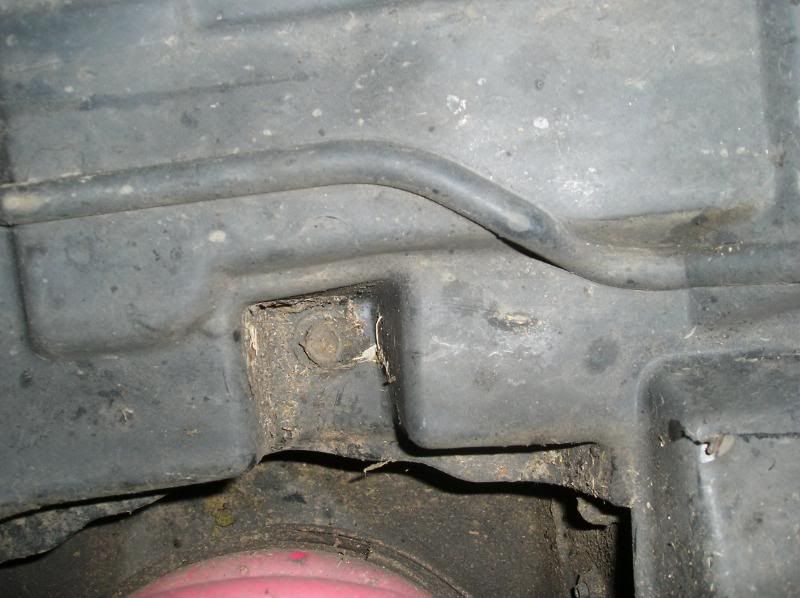
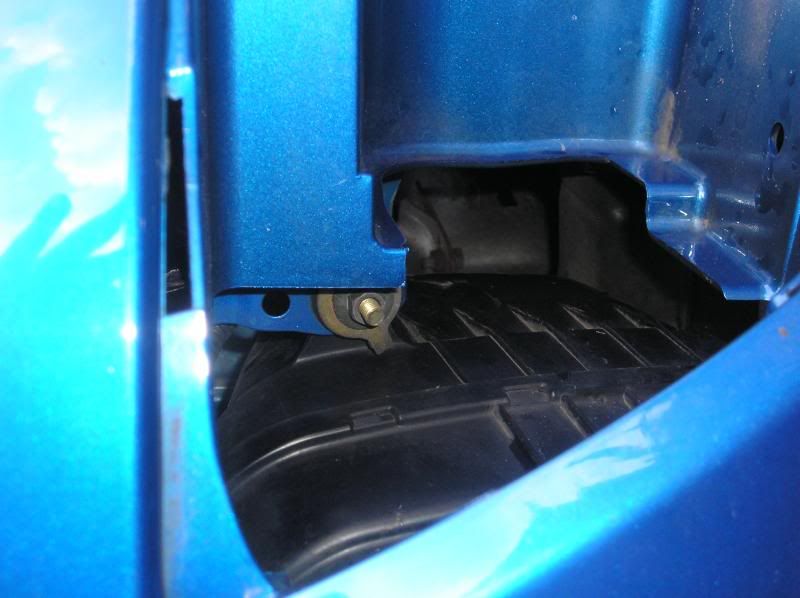
When the liner is off the air box hopper is attached by two nuts, one on the inner wing, in the engine side near the ABS Pump and one on the inside of the wing, you�ll see it.
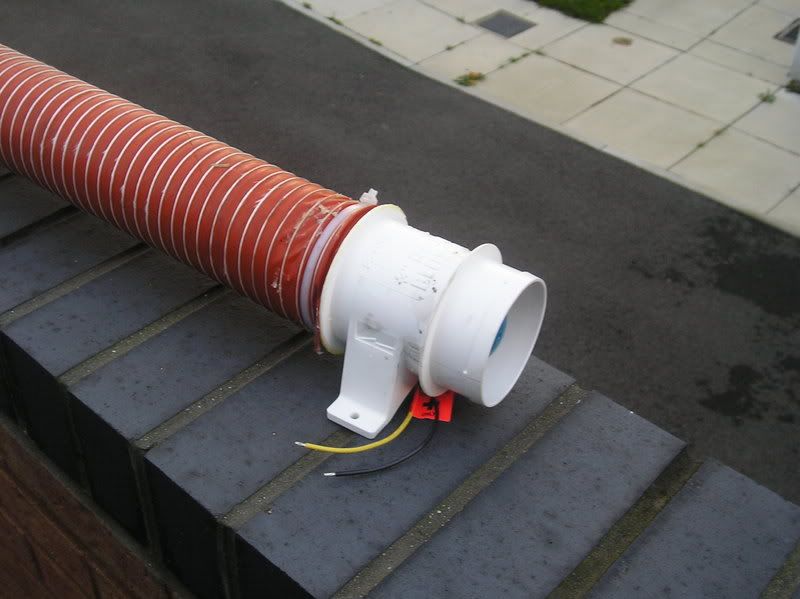
Once the box is out you will soon see the amount of room inside for the mod. Put the inner wing back on. Cut 2 x 12 inches sections of the hose and attach to either side of the fan. I used the cable ties supplied then put shrink wrap over these to form a good waterproof seal.
I then attached extra 4 feet lengths of cable to the wires on the fan to reach from the wing into the back of the dash (more later). These where connected with spade ends and again shrink wrap was applied for extra waterproofing. About 18 inches along the wire a 5amp inline fuse was also fitted.
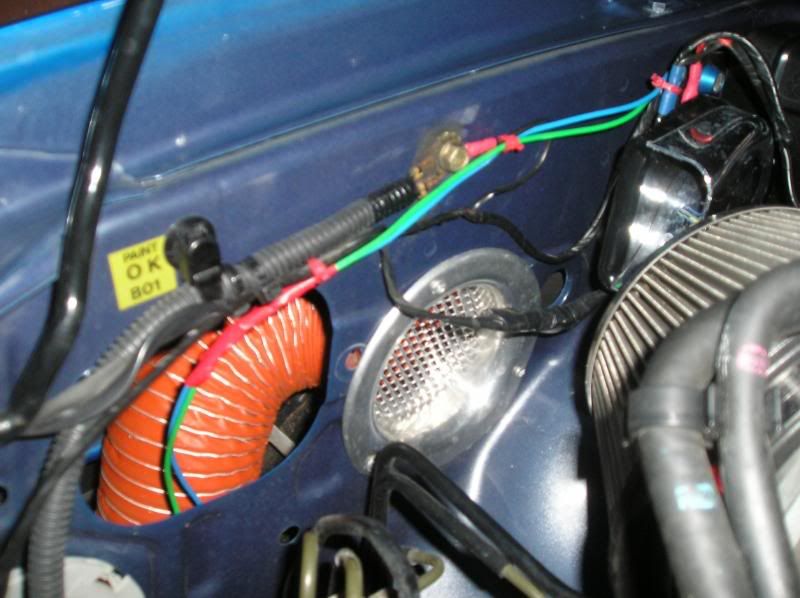
Pass the fan and hose assembly in through the Fog Cover and pull one end through the hole left by the air box hopper, make sure the flow arrow on the fan points toward the engine.
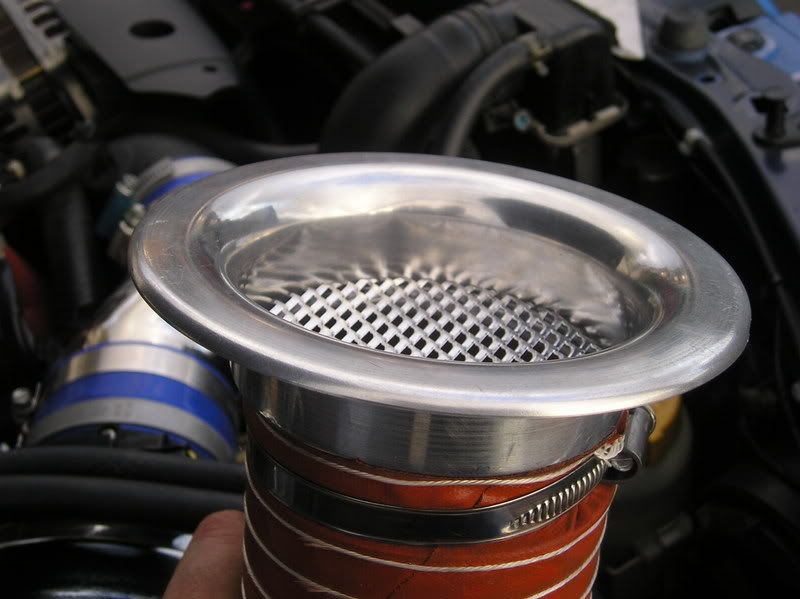
Drill 3 x 3 mm holes around the edge of the silver reducer ring. Now fit the silver reducer and connect with the jubilee clip. Ensure the fan sits flat against the inner wing. Push back into the hole and drill pilot holes in the inner wing and screw in some self tapping screws.
Using an awl, push holes through the feet of the fan into the inner wing skin. It�s quite soft and should not be a problem. Now get some 1 inch self tappers and screw them through the inner wing skin, through the holes in the feet of the fan and then locking clips. The fan should be about half way down the wing. If it�s too low just push it back up and the hose will concertina back up.

I currently have a second reducer on order and this will be fitted to the Fog Cover end. I don't want to cut a hole\ in the fog cover when the mess is doing such good job. The cable tie is doing a good job at the moment any way.
The wiring from the fan is then cable tied to the inner wing, loom and then passed through the bulk head grommet, from the inside this is above the clutch pedal.
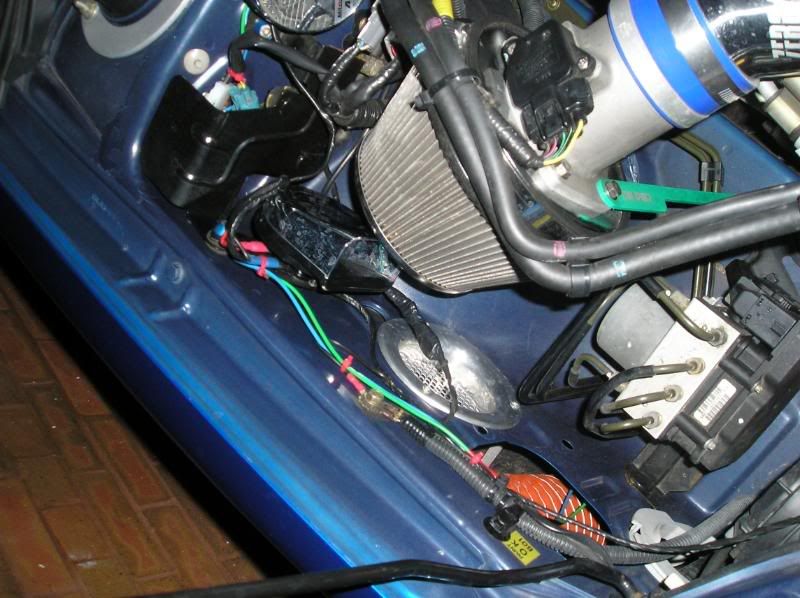


The inline fuse is tucked behind the Boost control electrics cover.
You can test the fan straight to the battery to get a quick check before wiring the cables to the loom. The cables are then fed behind the centre tunnel and wired into the front cigarette lighter. Most people have removed the handbrake gaiter and console at some stage, so off you go.
I will eventually fit a ON/OFF switch and this will be fitted to the blanking plates near the cubby on the Foggy. I intend to use a rear fog switch from a Newage, these will fit flush and look OE.
So far the flow is really good, I have had a blast about and the fan seems to cope really well. There is even flow across to the Turbo as well as directly on to the end of the CAIK Cone.
Cheap mod, easy to do and works a treat.
Many people fit Cold Air Induction kits then find that the performance is not necessarily improved. This is mainly due to the lack of cold air! as the main cone or mushroom is fitted inside the engine bay. Heat builds up from the engine itself and the turbo. Without vents in the bonnet above the cone or turbo this is increased. Also, when the vehicle is static for a while, people have experienced very poor performance from a stand still.
People have fitted the cone inside the wing but then there is the issue of access and water ingress through the ducting. So, the old grey cells got to work.
I spent a bit of time looking at alternatives and came up with this cunning plan. My Forester is fitted with the Zero Sport Kit and very nice it is. However, the inner wing is full of the remnants of the old air box fitting, mainly the large hopper thingey. This prevents much of the air that can be flowed through the wing from the lower inlet in the false Fog Covers that are fitted to a Foggy. When removed two large holes and a huge space are left inside the wing.
I bought the following parts from Merlin Motorsport, top bunch and surprisingly cheap and very good quality kit (Merlin Motorsport race parts, accessories, spares & equipment) .
Main Items
1m reinforced induction hose.
12v auxiliary fan (3 inch).
3 inch reducer ring and clip.
3 inch mesh
shrink wrap
All in cost including VAT and delivery �82.
Extras (all in the back of the shed)
8 amp 12v Cable (green)
8 amp 12v Cable (blue)
5 amp inline fuse
Cable ties
Spade connecters
Various self tapping screws and clips.
Now what happenes next.
Jack up the OSF and remove the wheel. Remove the inner wing and wheel arch liner. These are the plastic twist and remove poppers. Be careful of the lone self tapper at the top near the shock.
Remove the OSF Fog cover.
When the liner is off the air box hopper is attached by two nuts, one on the inner wing, in the engine side near the ABS Pump and one on the inside of the wing, you�ll see it.
Once the box is out you will soon see the amount of room inside for the mod. Put the inner wing back on. Cut 2 x 12 inches sections of the hose and attach to either side of the fan. I used the cable ties supplied then put shrink wrap over these to form a good waterproof seal.
I then attached extra 4 feet lengths of cable to the wires on the fan to reach from the wing into the back of the dash (more later). These where connected with spade ends and again shrink wrap was applied for extra waterproofing. About 18 inches along the wire a 5amp inline fuse was also fitted.
Pass the fan and hose assembly in through the Fog Cover and pull one end through the hole left by the air box hopper, make sure the flow arrow on the fan points toward the engine.
Drill 3 x 3 mm holes around the edge of the silver reducer ring. Now fit the silver reducer and connect with the jubilee clip. Ensure the fan sits flat against the inner wing. Push back into the hole and drill pilot holes in the inner wing and screw in some self tapping screws.
Using an awl, push holes through the feet of the fan into the inner wing skin. It�s quite soft and should not be a problem. Now get some 1 inch self tappers and screw them through the inner wing skin, through the holes in the feet of the fan and then locking clips. The fan should be about half way down the wing. If it�s too low just push it back up and the hose will concertina back up.
I currently have a second reducer on order and this will be fitted to the Fog Cover end. I don't want to cut a hole\ in the fog cover when the mess is doing such good job. The cable tie is doing a good job at the moment any way.
The wiring from the fan is then cable tied to the inner wing, loom and then passed through the bulk head grommet, from the inside this is above the clutch pedal.
The inline fuse is tucked behind the Boost control electrics cover.
You can test the fan straight to the battery to get a quick check before wiring the cables to the loom. The cables are then fed behind the centre tunnel and wired into the front cigarette lighter. Most people have removed the handbrake gaiter and console at some stage, so off you go.
I will eventually fit a ON/OFF switch and this will be fitted to the blanking plates near the cubby on the Foggy. I intend to use a rear fog switch from a Newage, these will fit flush and look OE.
So far the flow is really good, I have had a blast about and the fan seems to cope really well. There is even flow across to the Turbo as well as directly on to the end of the CAIK Cone.
Cheap mod, easy to do and works a treat.


It will blow "fresh" air across the filter and into the engine bay with the car at a standstill, hence preventing (or helping to) engine bay and intake temperature rise when stationary.
Well......that's my take on it anyway lol
Well......that's my take on it anyway lol
Trending Topics


May be me, but I thought cold air kits put the filter away from the hot air / engine bay anyway. else are just a cone filter kit!... OK they are inaccessible in the inner wing and other possible issues ....
Good job anyway, sounds like it works well
Good job anyway, sounds like it works well

Thread
Thread Starter
Forum
Replies
Last Post
aaron_ions
General Technical
17
Nov 3, 2021 11:07 AM
aaron_ions
General Technical
1
Sep 17, 2015 10:42 AM