
Project Rebuild / Few Mods


Thread Starter
Scooby Regular
Joined: Mar 2008
Posts: 566
Likes: 0
From: Torbay, Devon
This thread can also be known as the "will it ever start again thread"
After owning my lovley scooby for 7 weeks the big end bearings started to get a bit to audible!
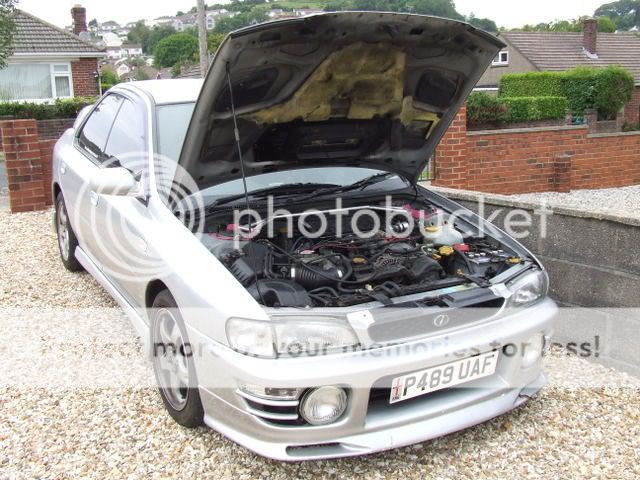
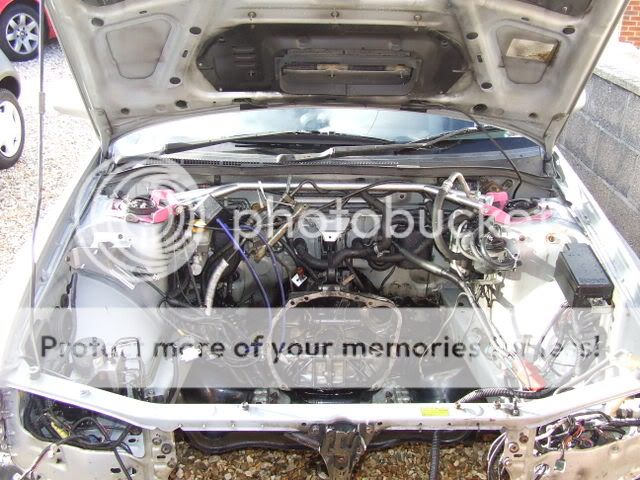
Before:

Then the madness began:
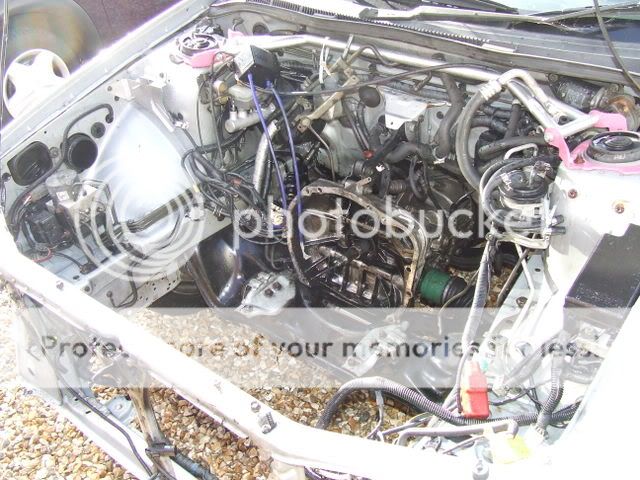
Battery, Top Mount, Air Filter & Gril Removed.
By the end of the first few hours of attack it started to look like this

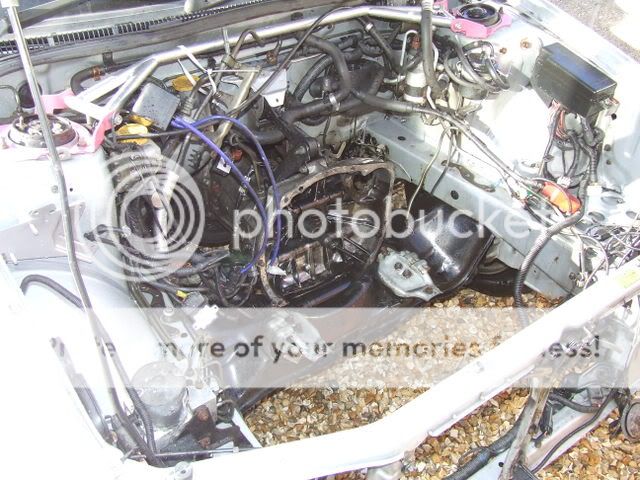
Then it started to look worse

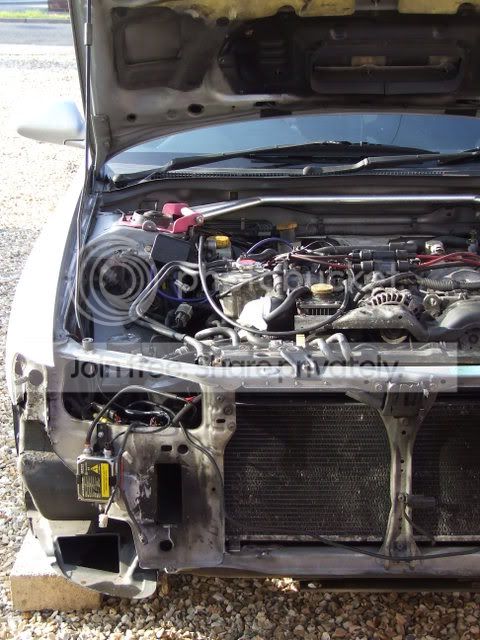
Radiator Off
Washer Bottle Off & ignition leads
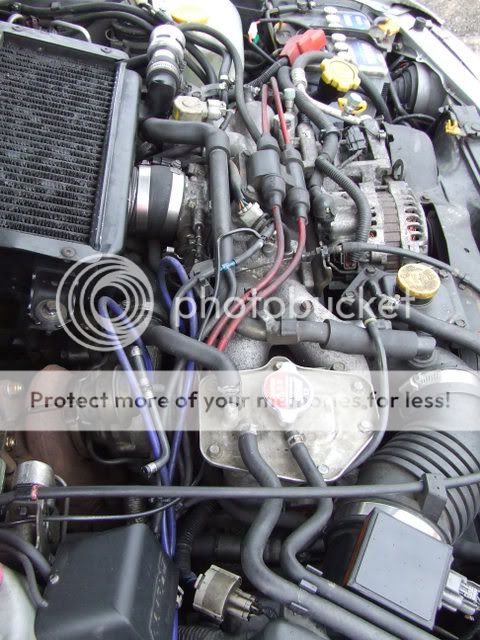
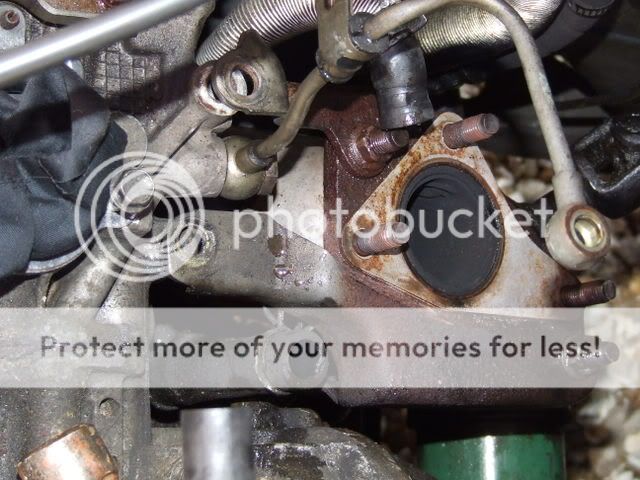
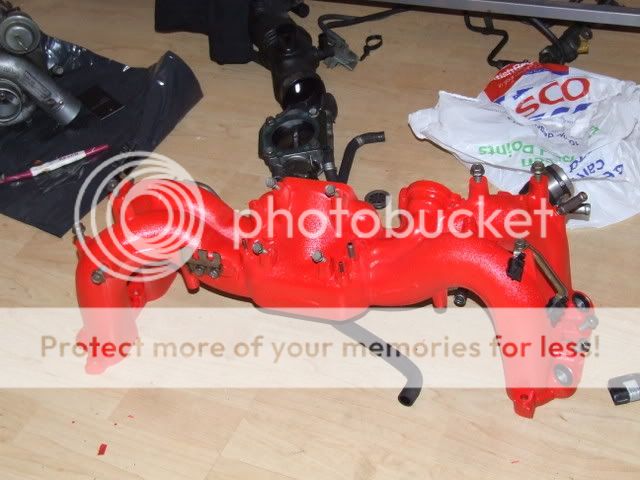
Fuel pipes off, all breather hoses, inlet manifold off
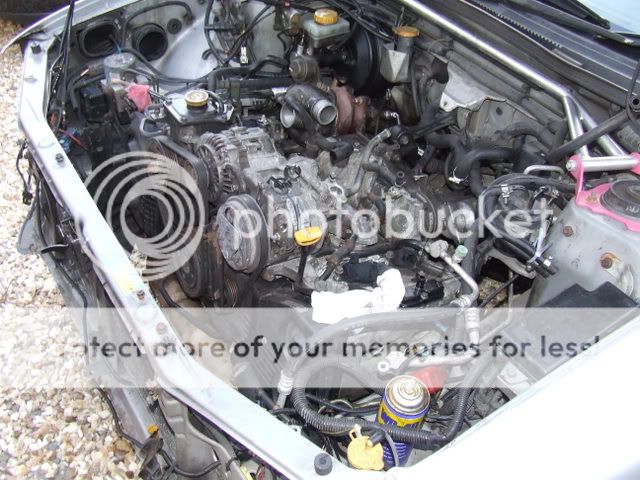
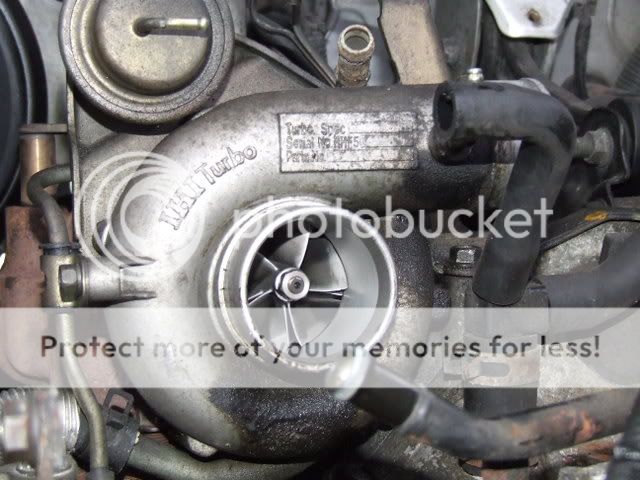
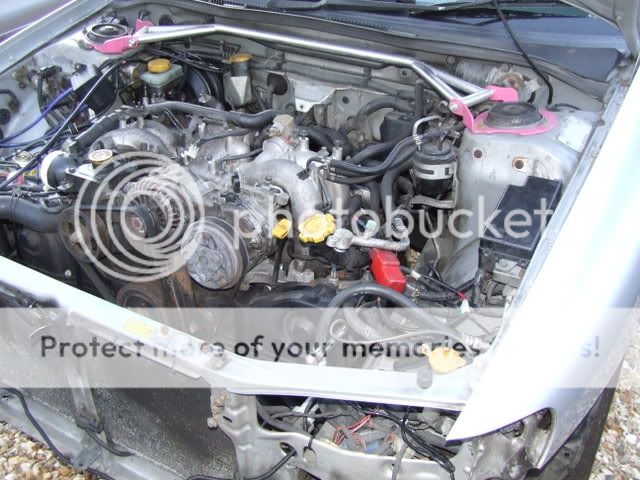
Turbo off - WAS A BUGGER!
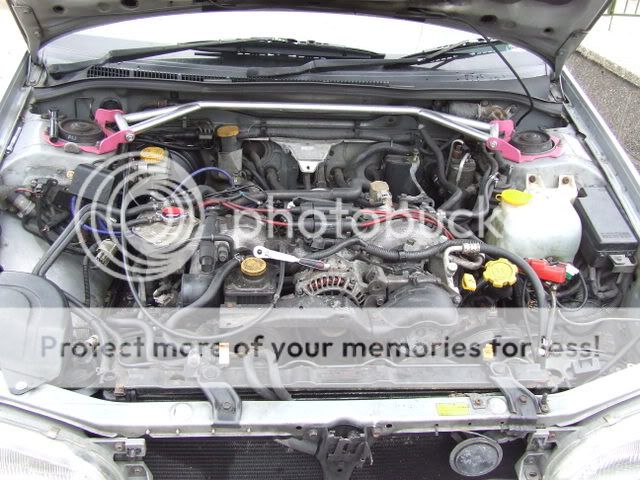
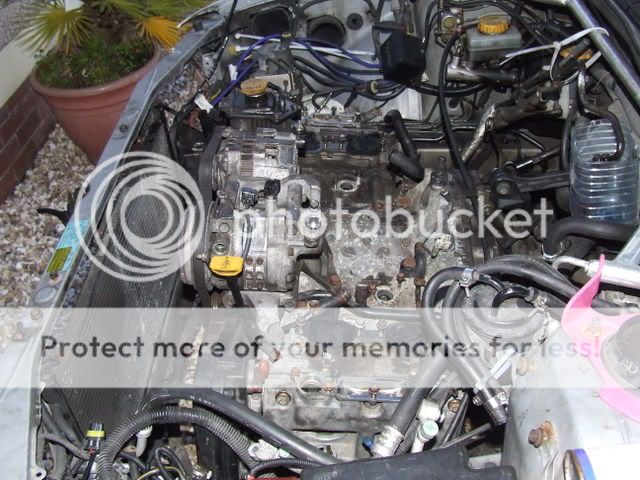
Started to get a bit more room
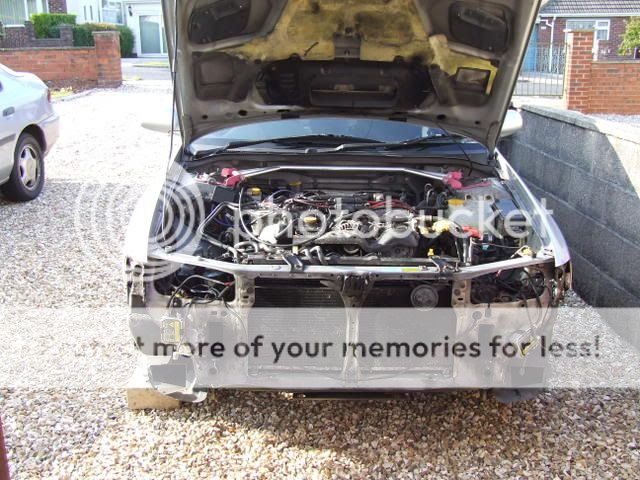
sadley the garage dident.....
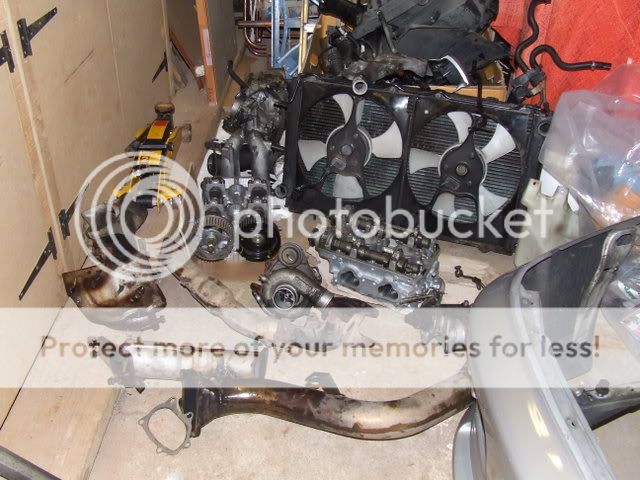
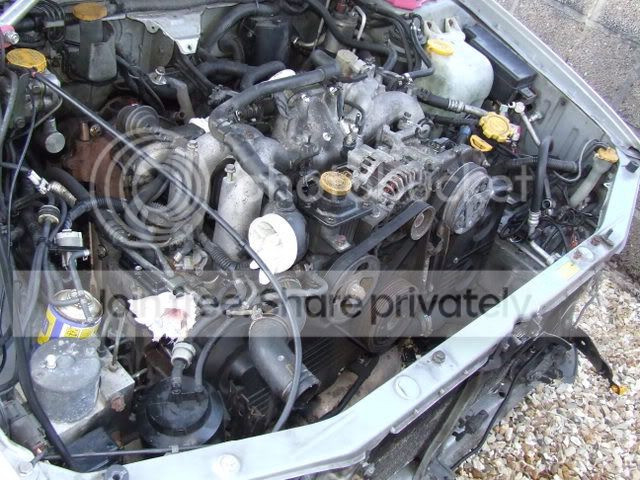
Long story short..... Gear box disconnected, Engine mounts disconnected, Power steering pump, altinator, air con pump, headers, up pipe, downpipe, clutch fork, starter motor. also the rain was primed and running like usual
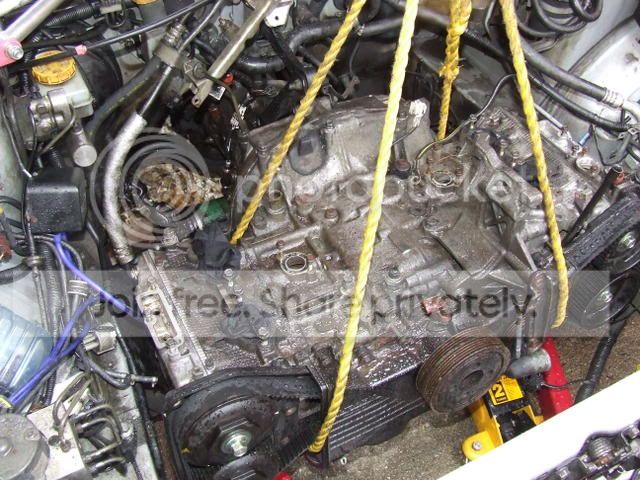
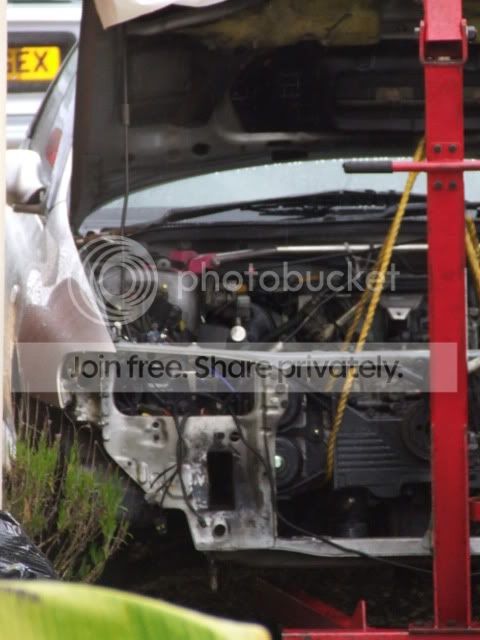
then she rest on her new home, ready for strip down...
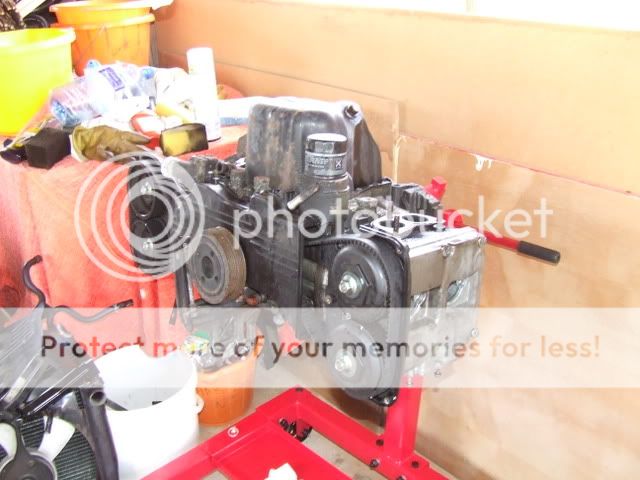
Clutch, Flywheel, Crank Pulley, cam covers all off.
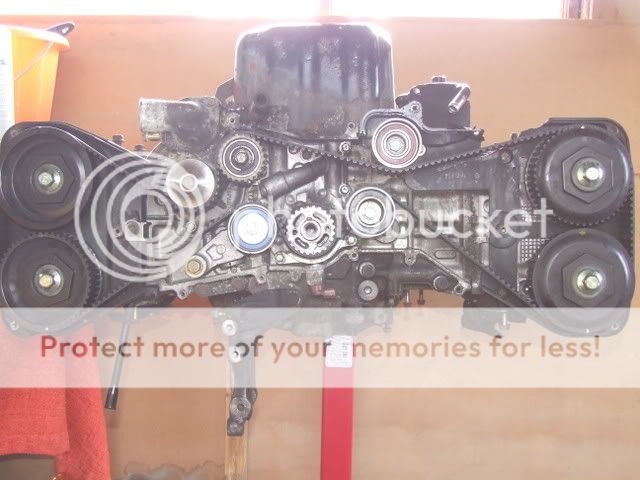
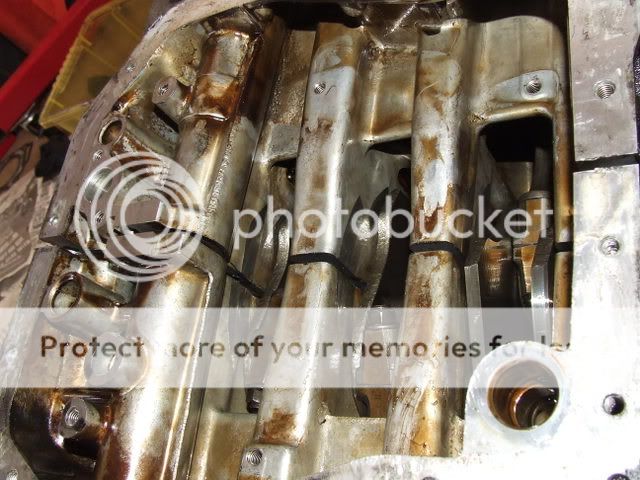
Cam Betl, Tensioners and all idlers off, Sump off
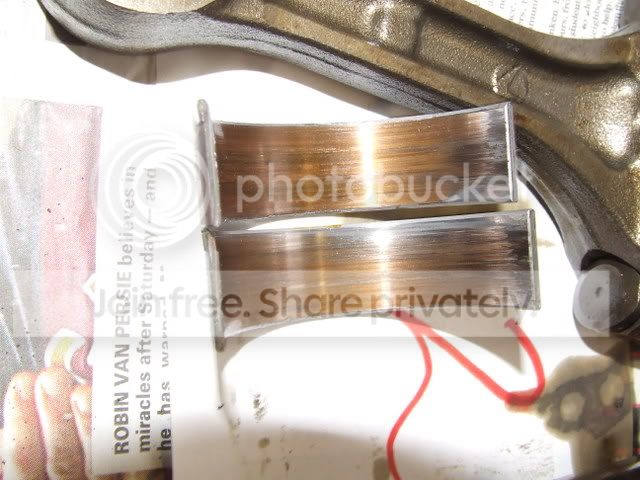
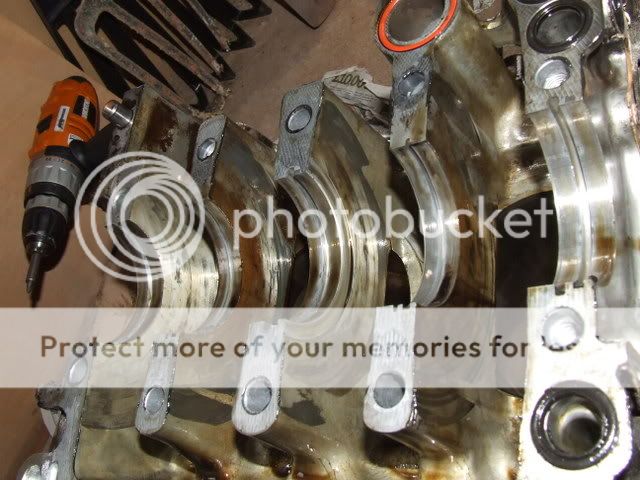
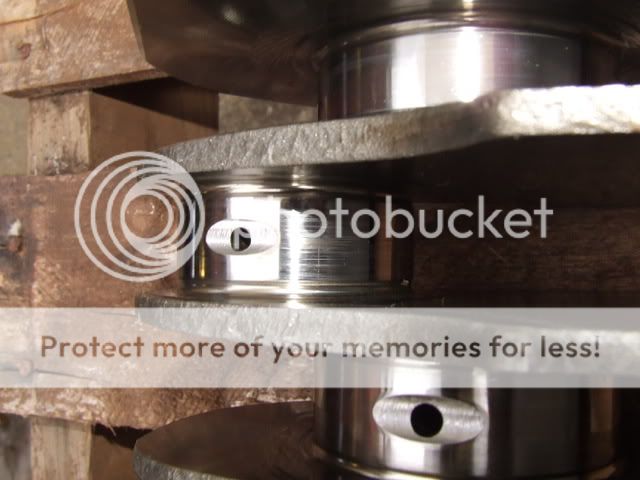
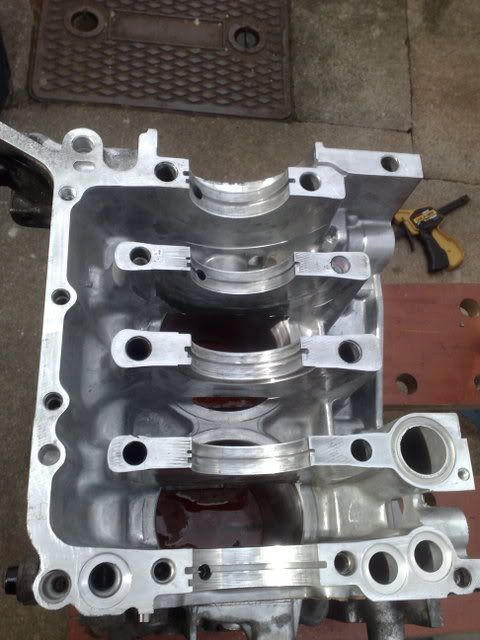
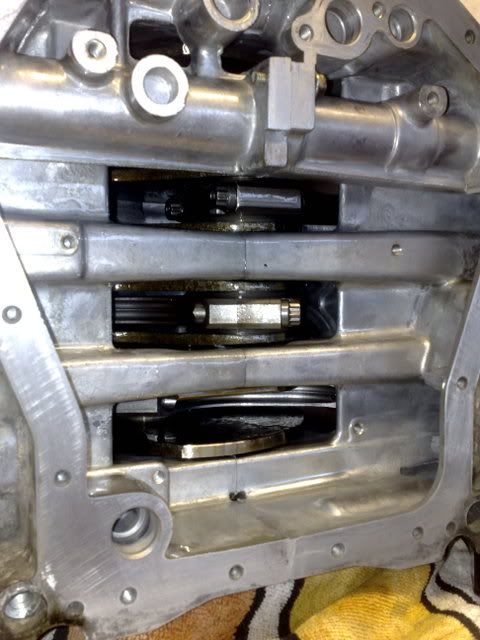
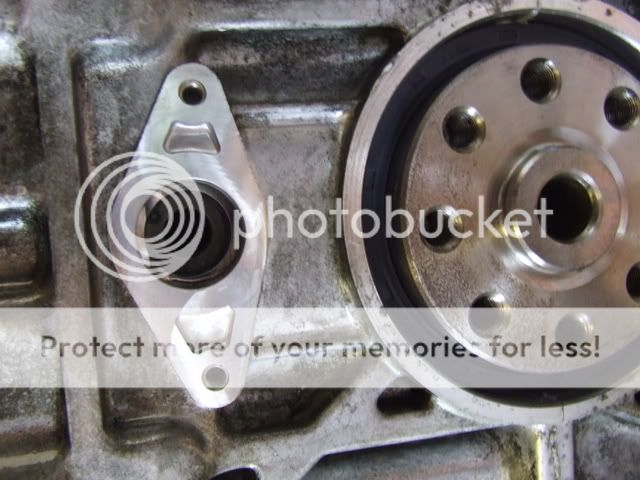
Oil Strainer off, Crank and Rods Revealed

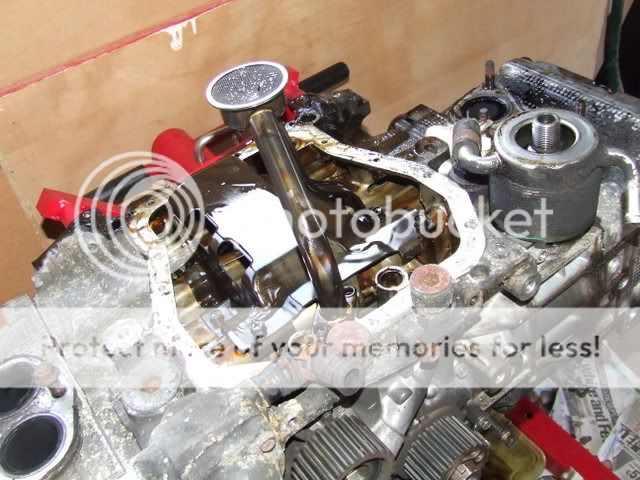
Rocker covers off, Cams & Buckets & Shims Removed.
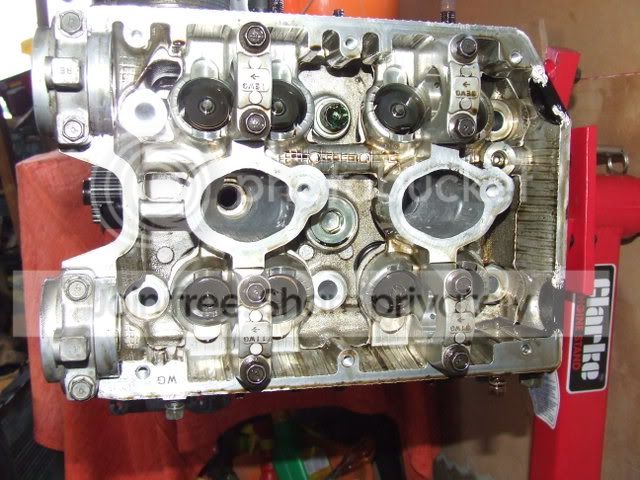
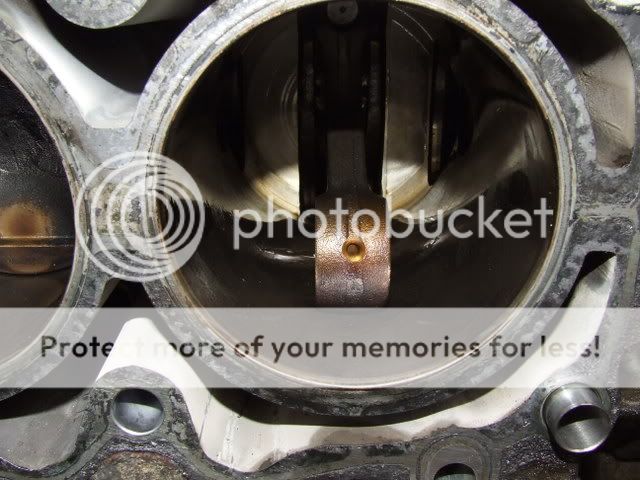
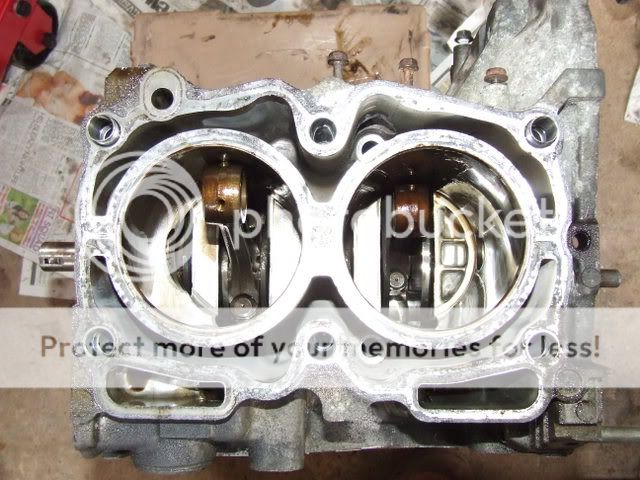
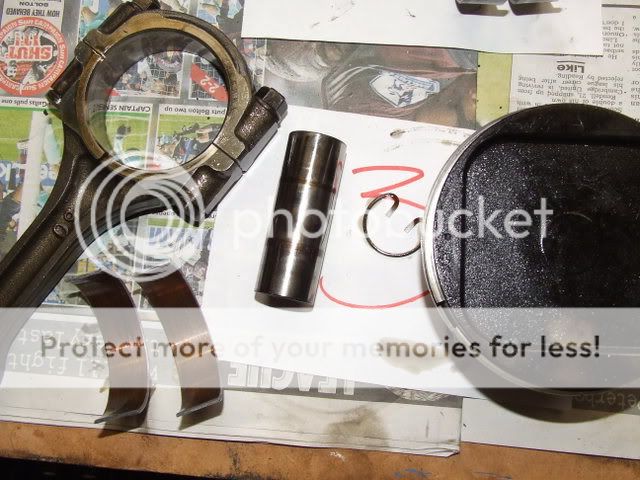
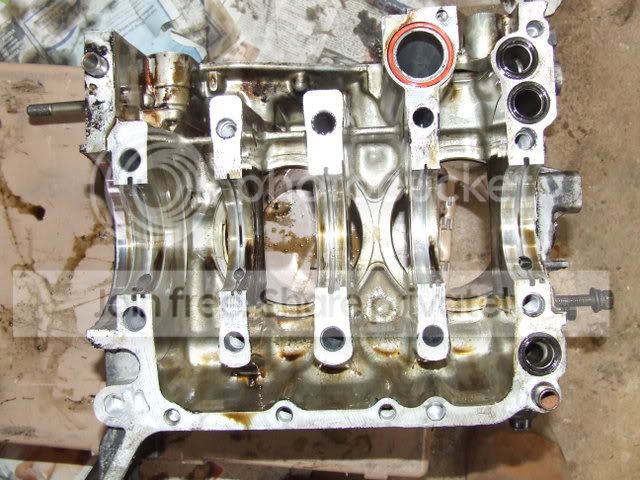
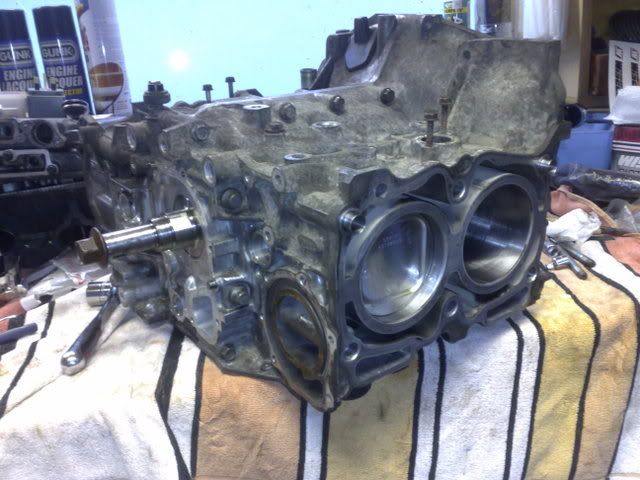
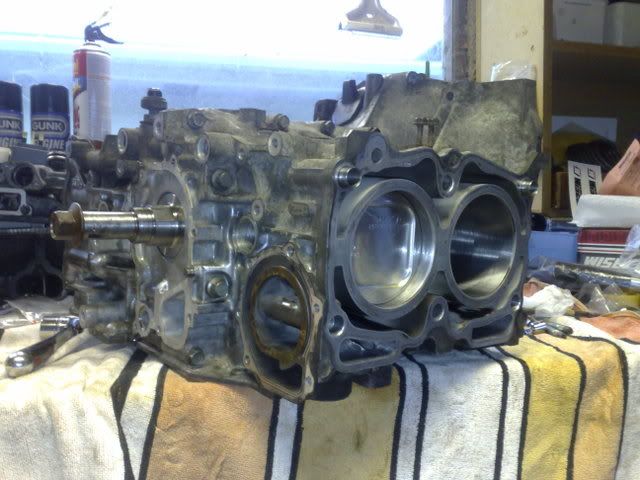
Heads Off, Pistons Revealed
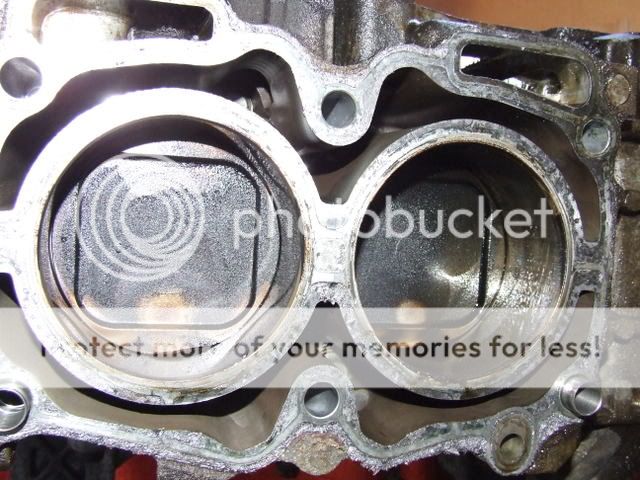
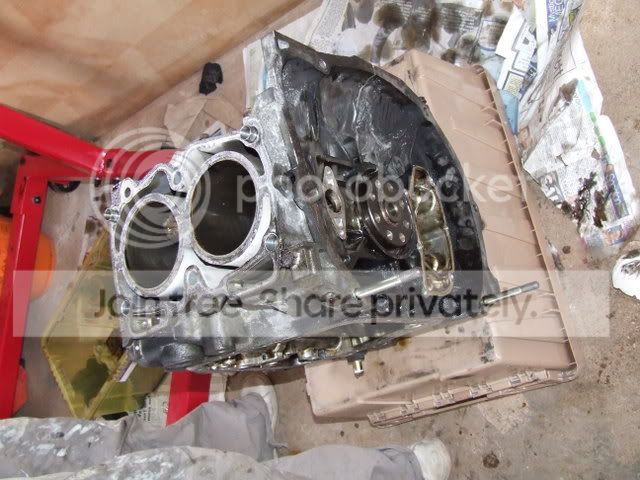
Next i took the pistons out and split the block....
the opening!
All out
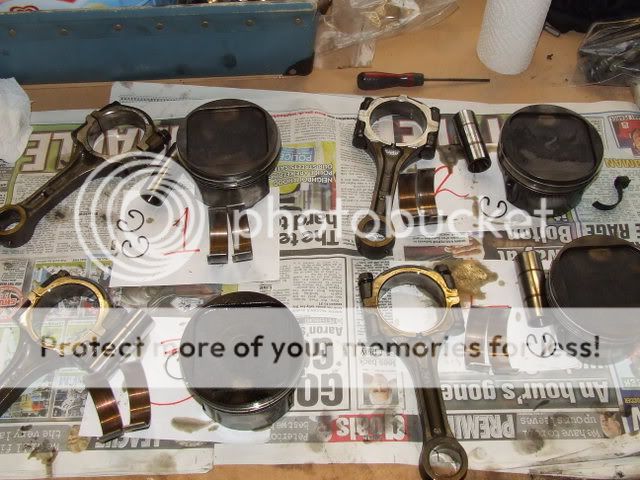
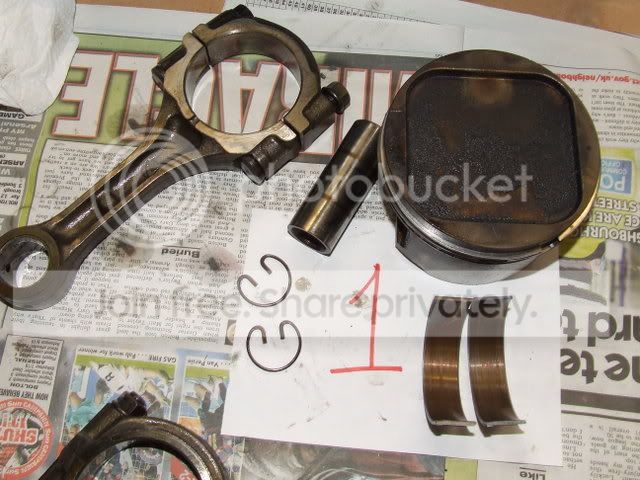
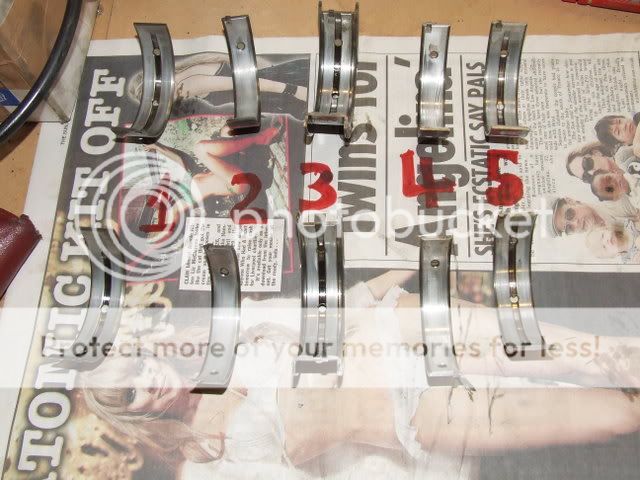
number 1
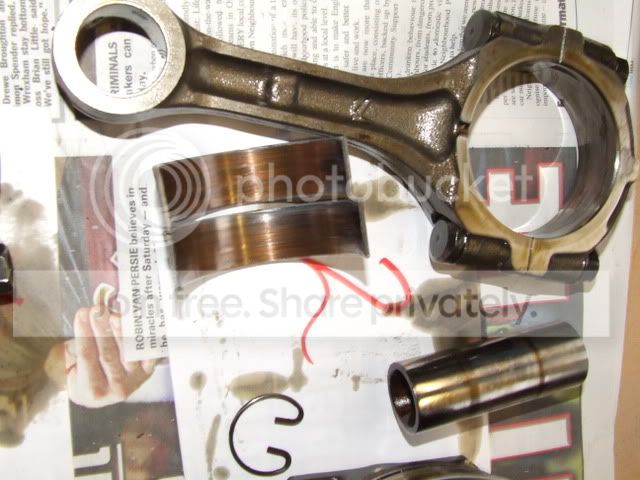
Number 2
Number 3

Number 4
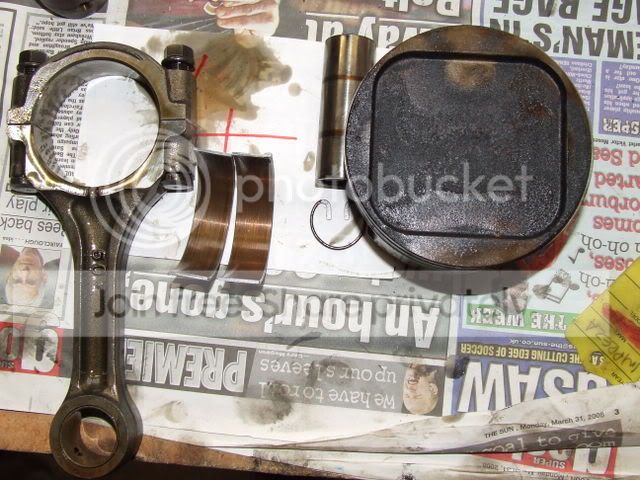
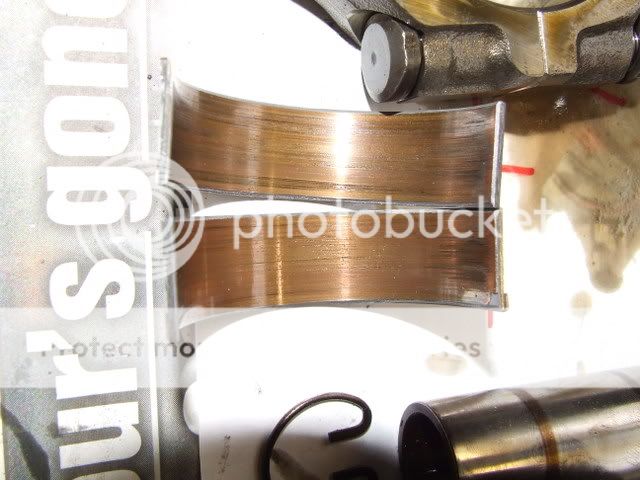
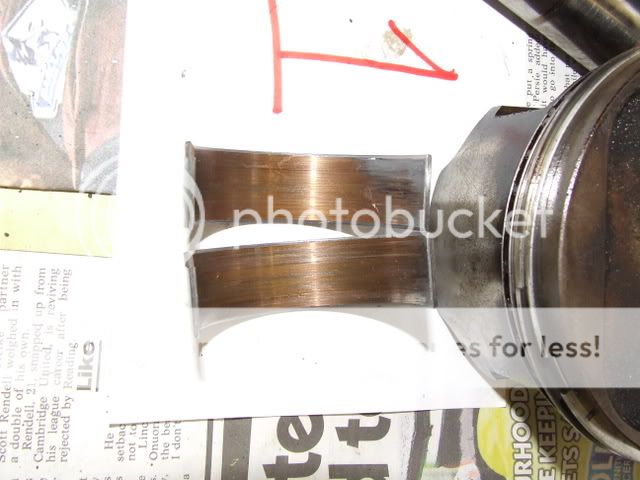
Main bearings
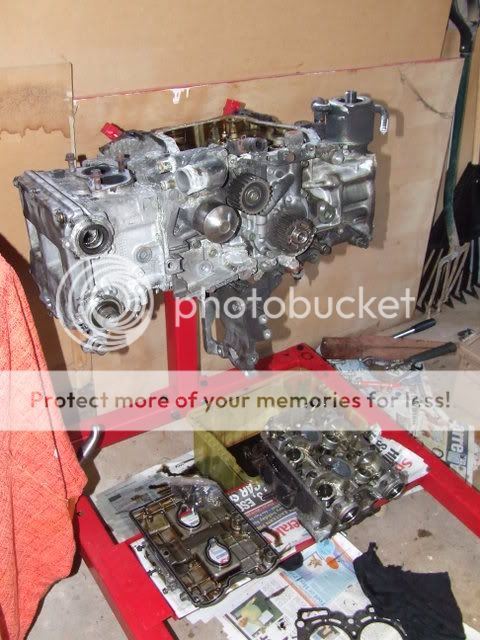
The Block half's

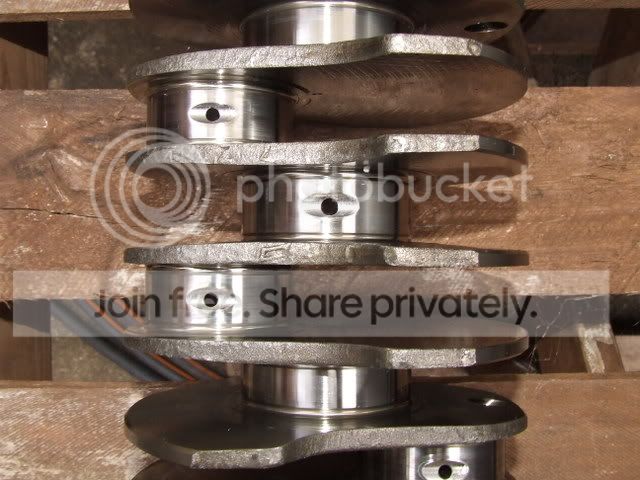
Crank Shaft


Done one or two things since the strip down.
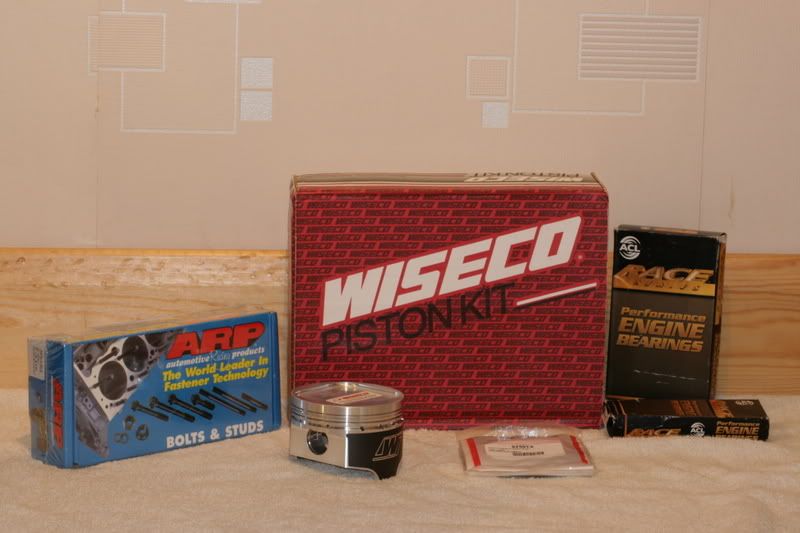
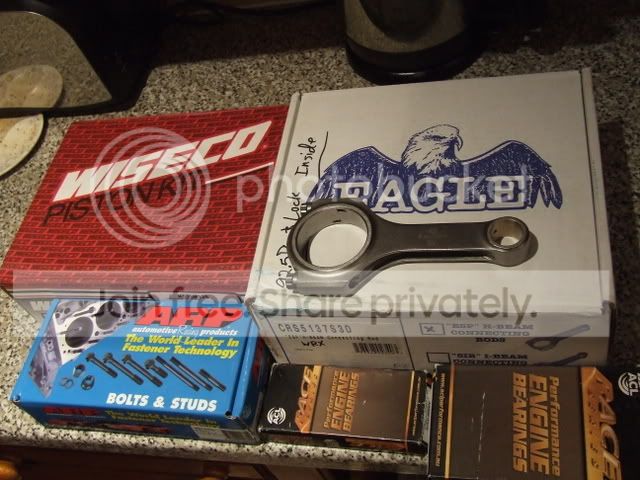
Few Parts have turned up. Gaskets, Gauges, Oil Pump, Water Pump, Crank. Hopefully the rods and pistons and bearings will be here this week.
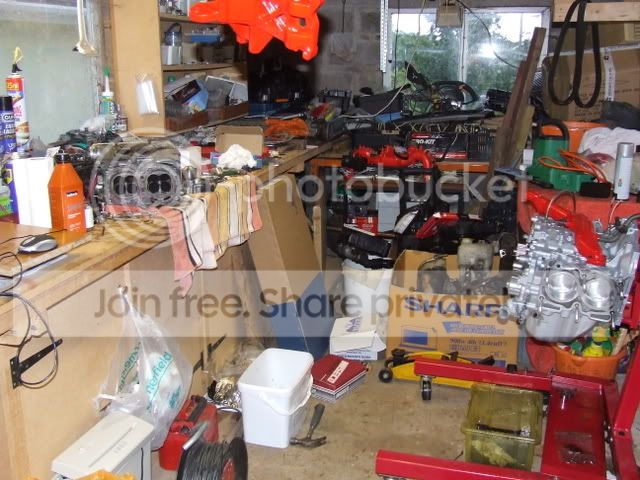
Garage looks a state.
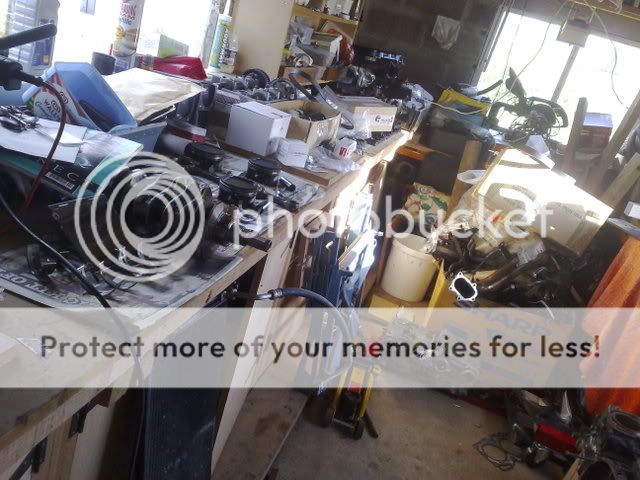
There are parts everywhere!
After owning my lovley scooby for 7 weeks the big end bearings started to get a bit to audible!
Before:
Then the madness began:
Battery, Top Mount, Air Filter & Gril Removed.
By the end of the first few hours of attack it started to look like this
Then it started to look worse
Radiator Off
Washer Bottle Off & ignition leads
Fuel pipes off, all breather hoses, inlet manifold off
Turbo off - WAS A BUGGER!
Started to get a bit more room
sadley the garage dident.....
Long story short..... Gear box disconnected, Engine mounts disconnected, Power steering pump, altinator, air con pump, headers, up pipe, downpipe, clutch fork, starter motor. also the rain was primed and running like usual
then she rest on her new home, ready for strip down...
Clutch, Flywheel, Crank Pulley, cam covers all off.
Cam Betl, Tensioners and all idlers off, Sump off
Oil Strainer off, Crank and Rods Revealed
Rocker covers off, Cams & Buckets & Shims Removed.
Heads Off, Pistons Revealed
Next i took the pistons out and split the block....
the opening!
All out
number 1
Number 2
Number 3
Number 4
Main bearings
The Block half's
Crank Shaft
Done one or two things since the strip down.
Few Parts have turned up. Gaskets, Gauges, Oil Pump, Water Pump, Crank. Hopefully the rods and pistons and bearings will be here this week.
Garage looks a state.
There are parts everywhere!
Trending Topics

hi mate doing well so far  im doing a 2.5 build as we speak
  thought you might be intrested in this link, its for a 2.5 build but i supose it's the same for 2.0liter here you go Subie TV
im doing a 2.5 build as we speak thought you might be intrested in this link, its for a 2.5 build but i supose it's the same for 2.0liter here you go Subie TV
Thread Starter
Scooby Regular
Joined: Mar 2008
Posts: 566
Likes: 0
From: Torbay, Devon
hi mate doing well so far im doing a 2.5 build as we speak thought you might be intrested in this link, its for a 2.5 build but i supose it's the same for 2.0liter here you go Subie TV
im doing a 2.5 build as we speak thought you might be intrested in this link, its for a 2.5 build but i supose it's the same for 2.0liter here you go Subie TV
Thread Starter
Scooby Regular
Joined: Mar 2008
Posts: 566
Likes: 0
From: Torbay, Devon
Ok not much done today. Dropped the block off to be bored and honed.
My brakes looked a little shabby so i am going to upgrade them and paint them while the car is off the road.
Not looking to pretty
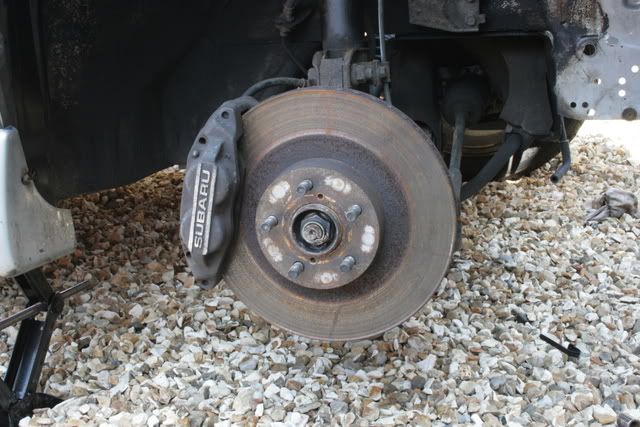
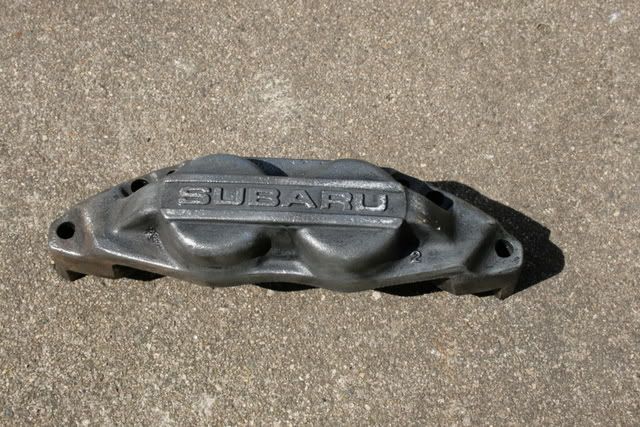
Took the caliper off
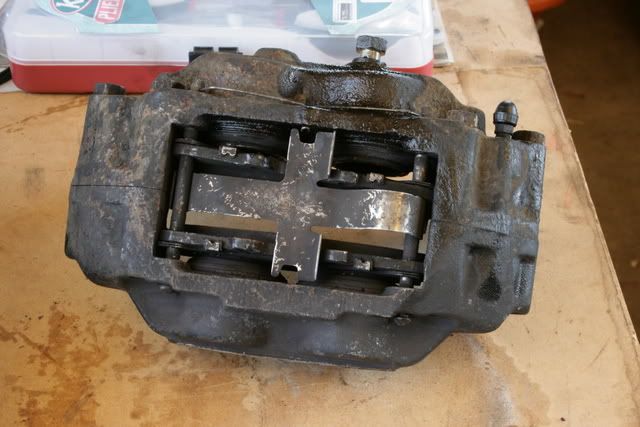
Cracked it open
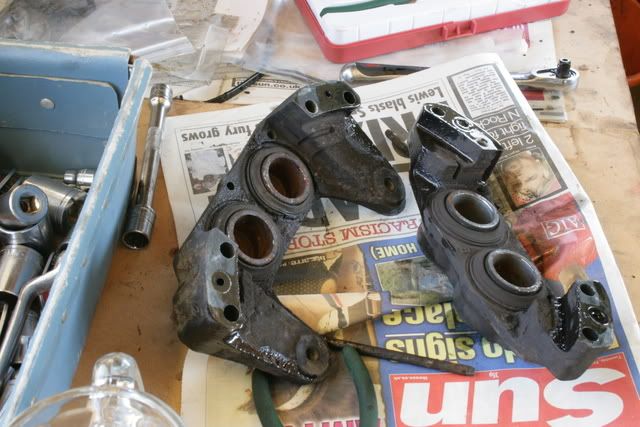
Cleaned the halfs up a little, going to clean them some more then paint them
Also decided to do the brakes on fathers ST3, Will post a pic of how they turned out tomorrow.

My brakes looked a little shabby so i am going to upgrade them and paint them while the car is off the road.
Not looking to pretty
Took the caliper off
Cracked it open
Cleaned the halfs up a little, going to clean them some more then paint them
Also decided to do the brakes on fathers ST3, Will post a pic of how they turned out tomorrow.
Thread Starter
Scooby Regular
Joined: Mar 2008
Posts: 566
Likes: 0
From: Torbay, Devon
Well today i done a bit more to the brakes. I also cleaned up the wheels as 12 years of brake dust was making them look a little shabby. Its hard to tell from the pictures but the calipers are black with glitter specs on the with gold lettering. Will try to get some petter pics sometime.
Painted Calipers after a bit more cleaning
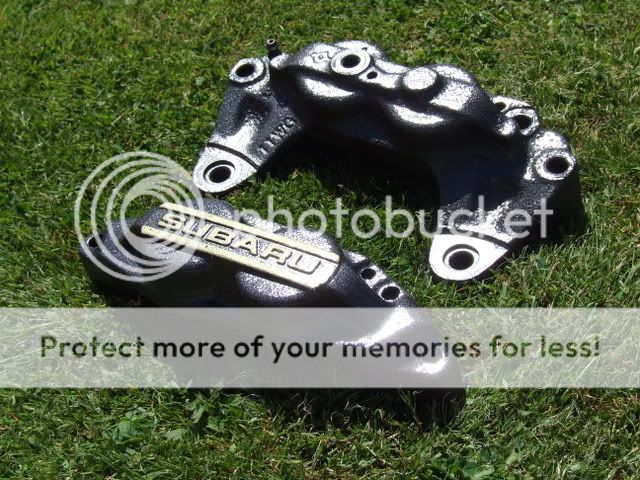
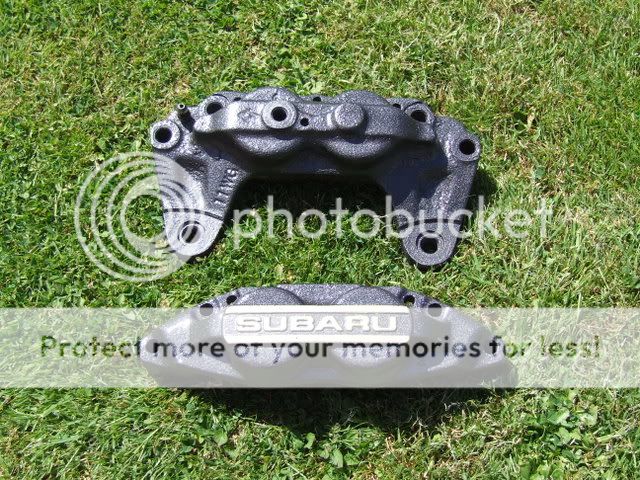

Cleaned up the Wheels


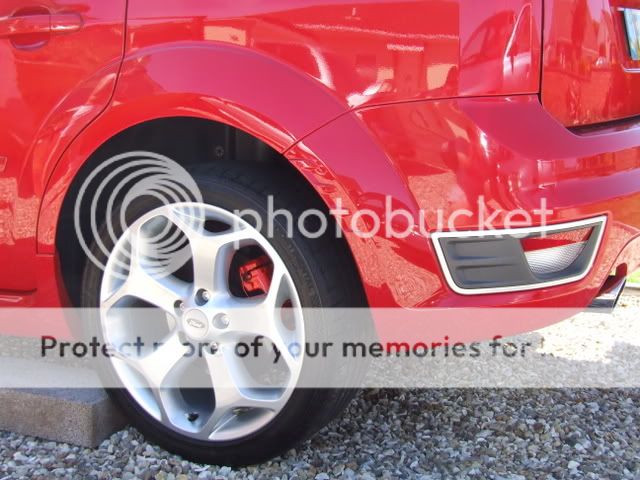
Fathers Calipers on the ST3

Back Was jacked up at the time.
Painted Calipers after a bit more cleaning
Cleaned up the Wheels
Fathers Calipers on the ST3
Back Was jacked up at the time.

Thread Starter
Scooby Regular
Joined: Mar 2008
Posts: 566
Likes: 0
From: Torbay, Devon
yes the paints designed to cope with high temperatures. Was going to do the block silver and maybe heilight certin parts of the engine with it but im not sure, if anyone havs gont any ideas they would be appreshiated.


Scooby Regular
Joined: Aug 2005
Posts: 3,957
Likes: 1
From: East coast.
Nice work Matt. I think you're going to pull ahead of me soon. How much was your new rad - I was wondering whether it might be worth getting one anyway just because mine was really old and cruddy. Your calipers look mint. I must redo mine really, and clean my engine bay up.
As far as the paint scheme goes, I'm doing my block silver (which obviously it already is, but giving it a good even coat of paint will tidy it up) but my heads black. So they look evil.
As far as the paint scheme goes, I'm doing my block silver (which obviously it already is, but giving it a good even coat of paint will tidy it up) but my heads black. So they look evil.
Thread Starter
Scooby Regular
Joined: Mar 2008
Posts: 566
Likes: 0
From: Torbay, Devon
Im not sure if i should do mine all silver or what, but tbh thats the least of my worries. The rad was �63 delivered. I know a few people who are running them and they can not fault them mate. Pick up my block from allan today, Well chuffed. now i can start putting it all back together some measurements and a lot of cleaning!
Last edited by Matt578; Aug 2, 2008 at 12:33 PM.
Thread Starter
Scooby Regular
Joined: Mar 2008
Posts: 566
Likes: 0
From: Torbay, Devon
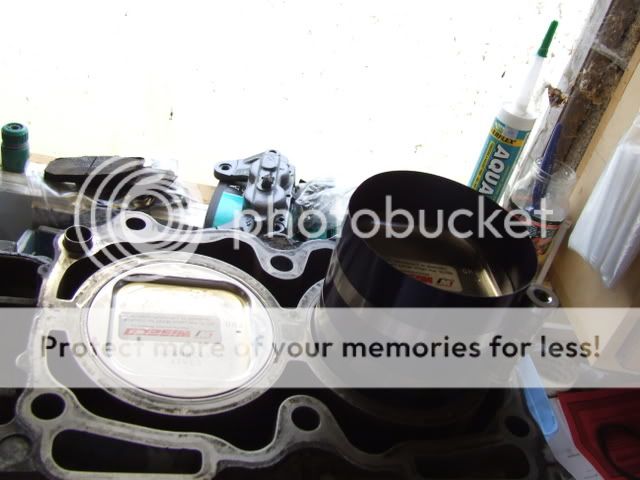
Ok since i picked the block up first thing yesterday i have been working pretty much flat out on it. Most of the day was taken up from cleaning out all the oil gallerys and trying to undo one oil gallery plug that i suspect superman had tightened. Im not rushing anything i just want to make sure its all clean and it all right so you will have to ignore the slow progress.
This is the block during the cleaning i gave it (about half way through)
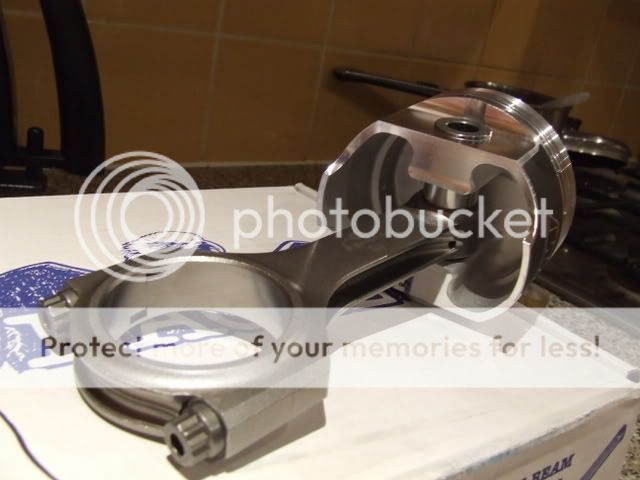
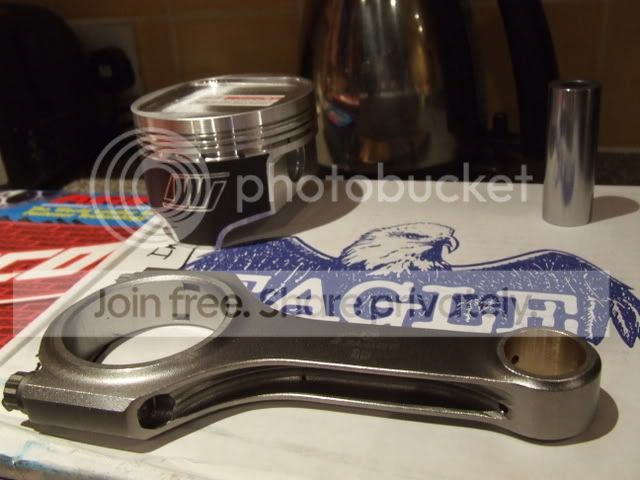
Then i slowly installed the bearings and the eagle rods

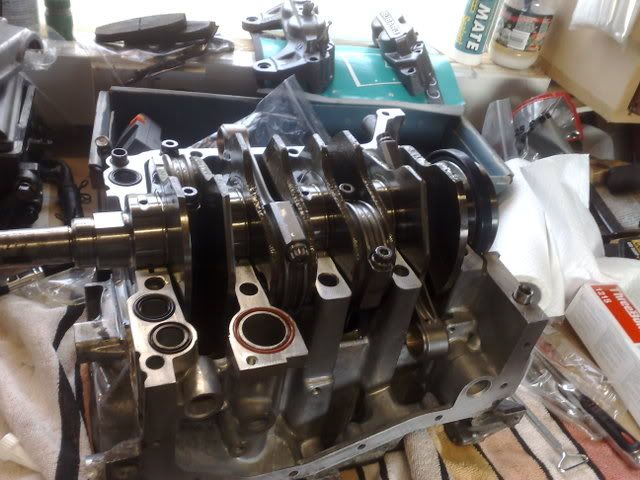
After double checking everthing again i clamped the two block halfs together once again.
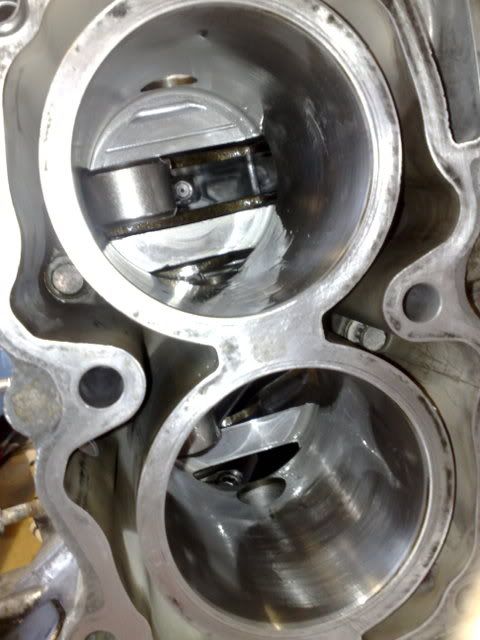
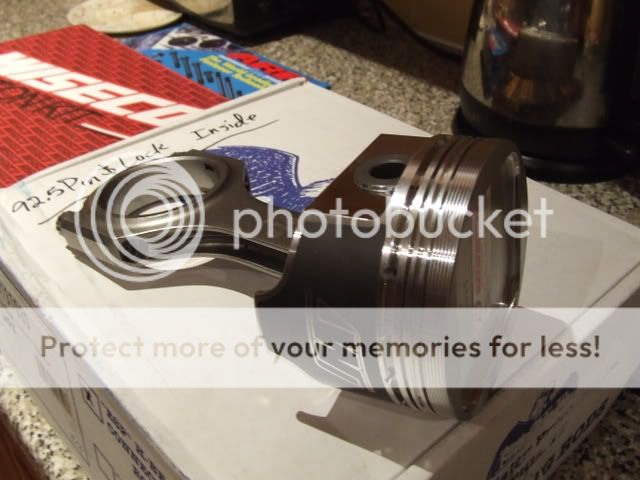
Then i installed one of the sets of the rings to the wiseco pistons and installed the piston its self
That done it for last night, im going to head back up there in a minute to get a bit more done. Would also like to say thanks to alan jeffries for being so welcoming at his shop and showing us all his current projects. Top bloke
This is the block during the cleaning i gave it (about half way through)
Then i slowly installed the bearings and the eagle rods
After double checking everthing again i clamped the two block halfs together once again.
Then i installed one of the sets of the rings to the wiseco pistons and installed the piston its self
That done it for last night, im going to head back up there in a minute to get a bit more done. Would also like to say thanks to alan jeffries for being so welcoming at his shop and showing us all his current projects. Top bloke
Thread Starter
Scooby Regular
Joined: Mar 2008
Posts: 566
Likes: 0
From: Torbay, Devon
Well today i made a bit of progress, and the day started well!
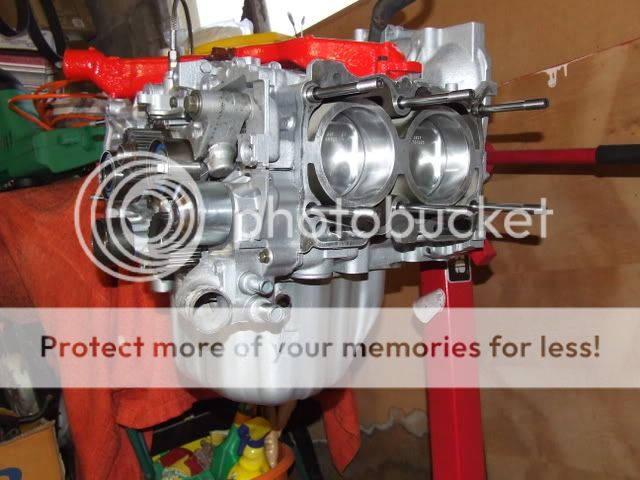
Then back to work getting the rest of the pistons in
New water pump

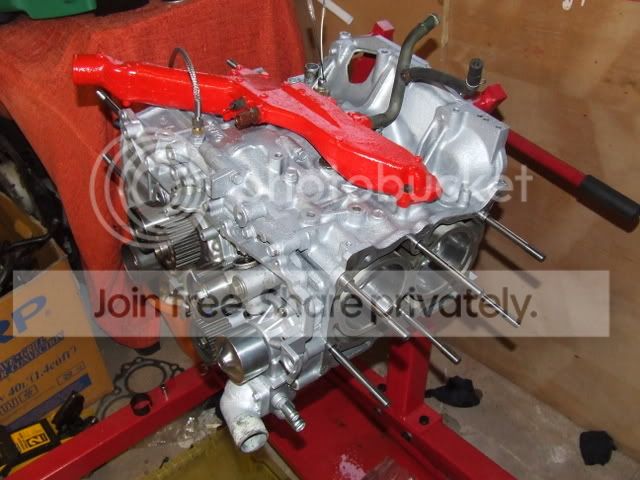
water pump & Sump back on, Now shes back on the stand as she was getting heavy!
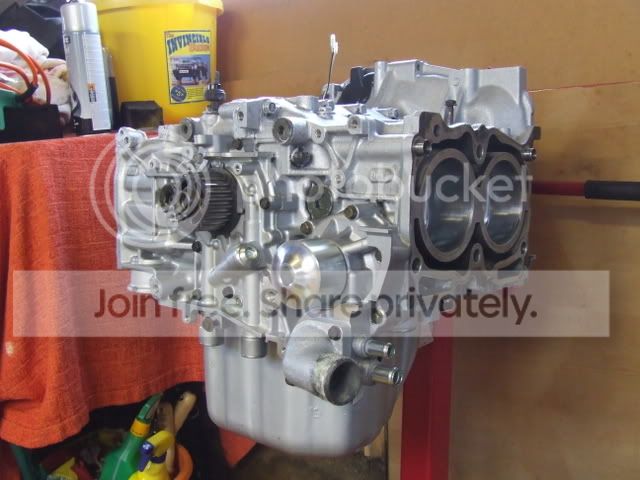
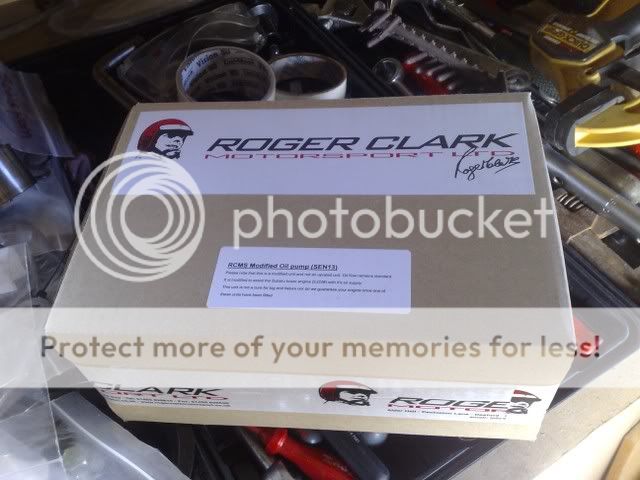
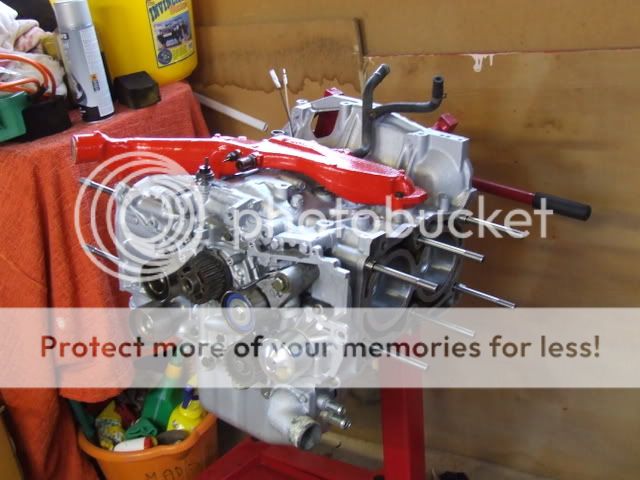
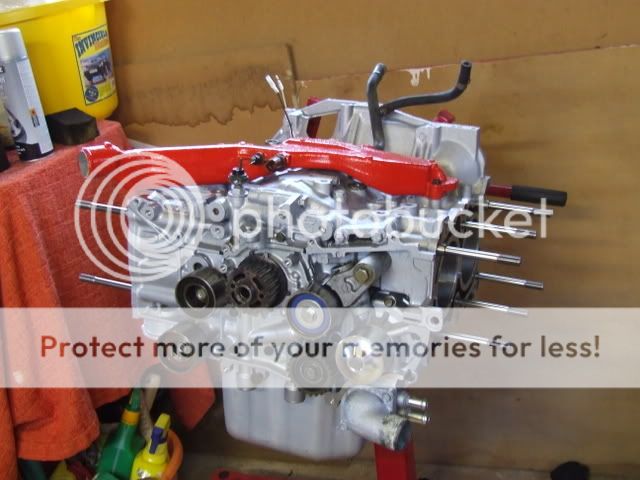
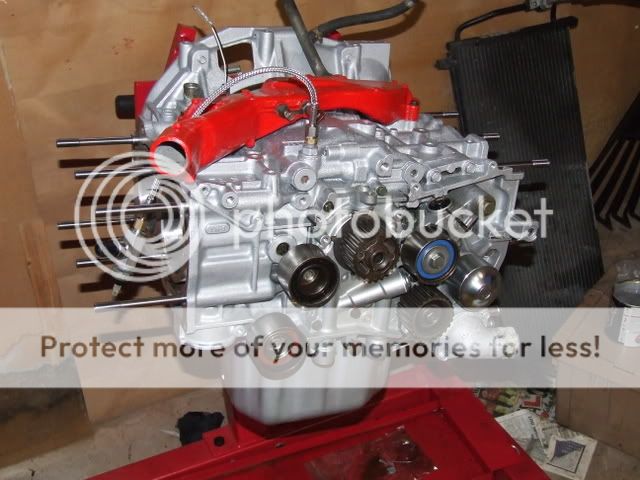
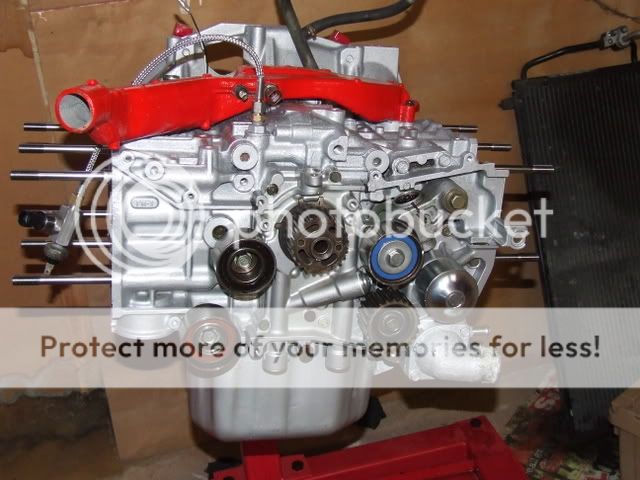
RCM Oil pump on, ARP head studs, Tensioners, Idlers, Pulleys, and a few other bits.
Garage is a state!
Also i just brought a new clutch
Then back to work getting the rest of the pistons in
New water pump
water pump & Sump back on, Now shes back on the stand as she was getting heavy!
RCM Oil pump on, ARP head studs, Tensioners, Idlers, Pulleys, and a few other bits.
Garage is a state!
Also i just brought a new clutch
Looking good
Garage may be a mess bit the motor is gleaming
Did you get away with reusing the crank?
You sorted what heads you are using??
Garage may be a mess bit the motor is gleaming
Did you get away with reusing the crank?
You sorted what heads you are using??
Last edited by rbaz; Aug 3, 2008 at 10:24 PM.

Thread Starter
Scooby Regular
Joined: Mar 2008
Posts: 566
Likes: 0
From: Torbay, Devon
Thread Starter
Scooby Regular
Joined: Mar 2008
Posts: 566
Likes: 0
From: Torbay, Devon
Thread Starter
Scooby Regular
Joined: Mar 2008
Posts: 566
Likes: 0
From: Torbay, Devon