New Track Car/ Rally Car Project
 25 October 2007, 07:47 PM
#1
Scooby Regular
Thread Starter

Join Date: Mar 2003
Posts: 395
Likes: 0
Received 0 Likes
on
0 Posts
Hi all
Finally got home in time from work with some daylight left to get some pics of the new project car. Bought the car from a good friend after lengthy negotiation.. last week, and got back home with the help of a friendly car transporter...
Trying to decide now the order in which to carry out the work.....I obviously need to get the harnessess fitted to get the car to my local specialist for its MOT and alignment...mechanically the timing belt needs done, the rear box which I got needs fitted and we should be ready to roll.
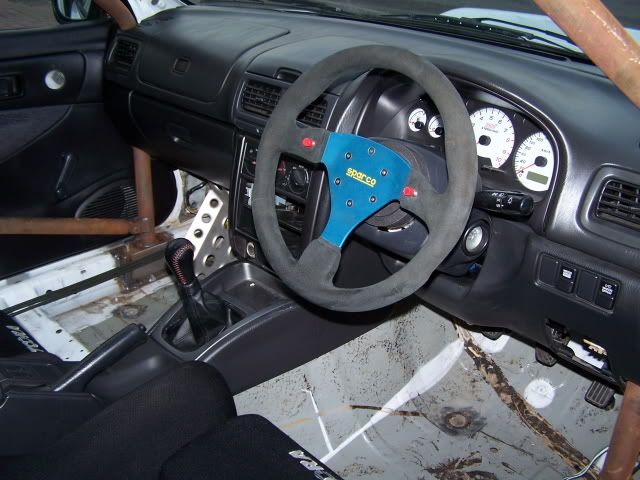
Ordered some harness mounting plates of ebay so should be able to get those in this weekend...and fortunately with working in paintshops most days, I have access to a nice spanky Devilbiss pressure pot system to spray the interior gloss white.....so thankfully the previous owner had carried out most of the mechanical stuff, just leaving me the interior and general servicing to be done....so here is some pics for now...obviously for those that know me wont be going into the technical detail....but then I'm quite daft that way....
The aim at the end of it all...a well sorted rally replica that I will insure for very limited road use, and will insure for the odd track day...and just spend the rest of the time looking at it and smiling very broadly...

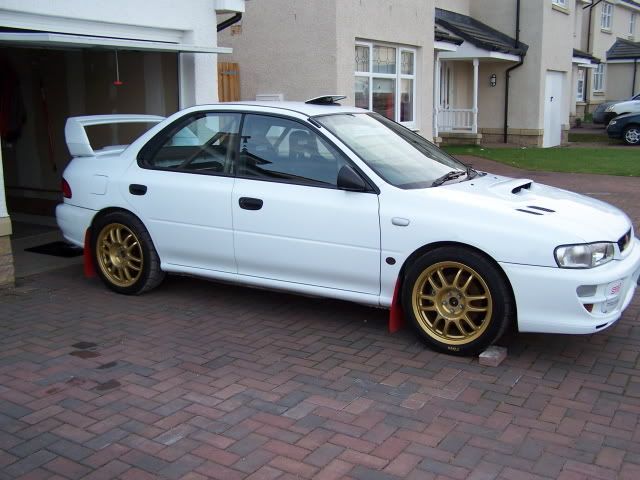

Finally got home in time from work with some daylight left to get some pics of the new project car. Bought the car from a good friend after lengthy negotiation.. last week, and got back home with the help of a friendly car transporter...
Trying to decide now the order in which to carry out the work.....I obviously need to get the harnessess fitted to get the car to my local specialist for its MOT and alignment...mechanically the timing belt needs done, the rear box which I got needs fitted and we should be ready to roll.
Ordered some harness mounting plates of ebay so should be able to get those in this weekend...and fortunately with working in paintshops most days, I have access to a nice spanky Devilbiss pressure pot system to spray the interior gloss white.....so thankfully the previous owner had carried out most of the mechanical stuff, just leaving me the interior and general servicing to be done....so here is some pics for now...obviously for those that know me wont be going into the technical detail....but then I'm quite daft that way....
The aim at the end of it all...a well sorted rally replica that I will insure for very limited road use, and will insure for the odd track day...and just spend the rest of the time looking at it and smiling very broadly...


 25 October 2007, 09:13 PM
#6
Scooby Regular

Join Date: Jun 2002
Location: Ayrshire
Posts: 350
Likes: 0
Received 0 Likes
on
0 Posts
Very very nice mate! White is the best colour. Looks like quite a job to spray the cage, does the dash need to come out?
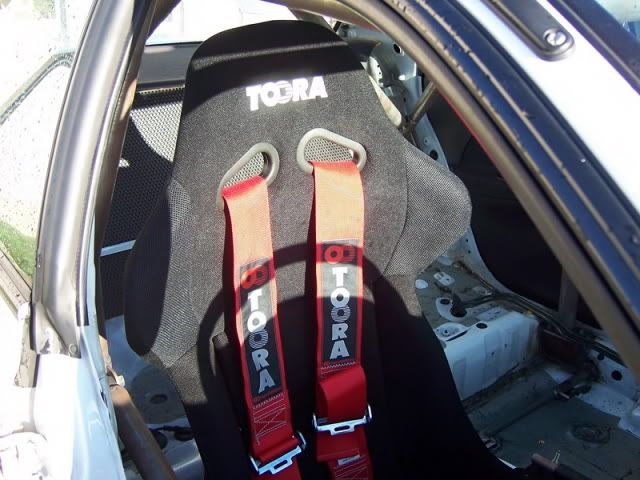
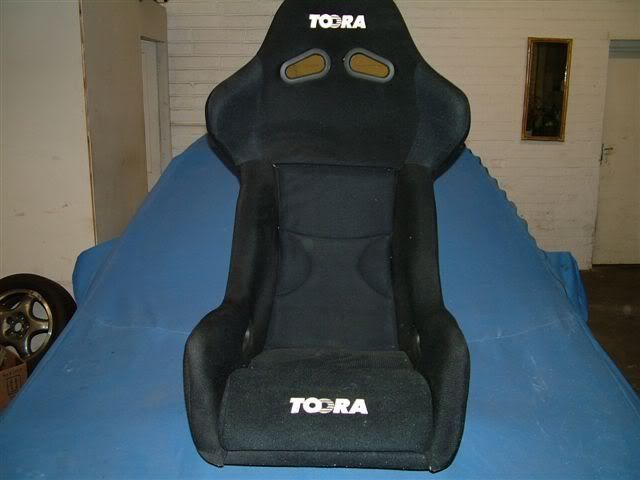
Toora seats from Italy? They make a whole range of kit similar to Sparco.
Toora seats from Italy? They make a whole range of kit similar to Sparco.
25 October 2007, 09:36 PM
#7
Scooby Regular
Thread Starter
Join Date: Mar 2003
Posts: 395
Likes: 0
Received 0 Likes
on
0 Posts
yes Andy.....they are Toora seats...in fairness I didnt choose them the previous owner did....got a nice 6 point Toora harness set as well to finish them of...as for the inside yes it is a big job, but my work involves lots of time in paintshops advising on prep, abrasives, masking etc...so should be alright on that front...and it will be done gloss white..already got the cage rubbed down since i took the pics the other night...and the paint is on order...will keep you all updated if anyone is intersted...will look for other pics of the seat..and snazzy lightweight prodrive mounts they are on...
thanks for the comments guys..
thanks for the comments guys..
Trending Topics
 26 October 2007, 08:07 AM
#10
Scooby Regular
Thread Starter
Join Date: Mar 2003
Posts: 395
Likes: 0
Received 0 Likes
on
0 Posts
yes it is an OMP cage.....not sure where it came from as I bought it in its current set up....with my job being to finish it of.....but I tell you its solid as a rock..good job..


 26 October 2007, 10:43 PM
#14
Scooby Regular
Thread Starter
Join Date: Mar 2003
Posts: 395
Likes: 0
Received 0 Likes
on
0 Posts
well I've got the compressor all set up...and endless supply of 3m scotchbrite discs and a crakin high speed air sander all ready for some serious prepping over the weekend....will get more photos of the cage when its a bit cleaner....as Clarkson would say just looks like rusty scaffolding at the minute...keep you all posted..thanks for the comments really encouraging...
cheers
Paul
cheers
Paul
27 October 2007, 06:16 PM
#15

I remember this car when it was for sale, and thought it a really nice starting point for someone.
I will be gutting the interior of my hillclimb Sti V3 this winter, so will be very interested to see what you use to prep the surfaces etc.
Please keep us informed.
Maybe this thread would be better in Projects?
I will be gutting the interior of my hillclimb Sti V3 this winter, so will be very interested to see what you use to prep the surfaces etc.
Please keep us informed.
Maybe this thread would be better in Projects?

 27 October 2007, 07:23 PM
#18
Scooby Regular
Thread Starter
Join Date: Mar 2003
Posts: 395
Likes: 0
Received 0 Likes
on
0 Posts
perhaps the mods could move it to the projects section......suppose it would be better there...didnt think anyone would be interested in my tinkering...
thanks
Paul
thanks
Paul
27 October 2007, 08:55 PM
#19
Scooby Regular

Join Date: Mar 2005
Location: "Speed has never killed anyone, suddenly becoming stationary...Now that's what gets you."
Posts: 729
Likes: 0
Received 0 Likes
on
0 Posts
your tinkering is why i will be keep a close eye on your thread. i did see the car was up for sale but funds and my other half soon put a stop to it going any futher than just looking.
you have a very good base project to start with, like said before white is the only colour for a rally car
mark
p.s post it in projects
you have a very good base project to start with, like said before white is the only colour for a rally car
mark
p.s post it in projects
Last edited by mark28; 28 October 2007 at 09:57 AM.
27 October 2007, 10:54 PM
#21
Scooby Regular
Thread Starter
Join Date: Mar 2003
Posts: 395
Likes: 0
Received 0 Likes
on
0 Posts
Andy
No I didnt get the cover with the car...that particular photo of the seat was taken at the rally prep place where my mate originally bought the car from....
sorry..cant help on that one...
Mark, thanks for the comments ........did some base priming today inside...was very difficult to get the floor pan rubbed clean...the adhesive that I presume originally held the carpet in was a **** to get of....but the white primer is on, just tried out some Hammerite smooth on a section of the cage and it comes up really well...with no brush marks...just what it says on the tin for a change.....will post some updates tomorrow when i finish the first primer layer...suppose i could move and repost in the projects thread...
thanks...
28 October 2007, 09:05 AM
#22
As if by magic it's here!
Much easier to follow.
I know 3M do an adhesive remover that works. I am a great fan of Smoothrite if applied under the right conditions it works really well.
My plan was to gut the interior and aerosol spray the 'bare bits' in smoothrite white (my car is white).
As an aside, Prodrive spray the inside of their cars in base colour and do not clear coat it to save weight and stop glare on the surfaces.
Graham
ps: do not forget the pics!
28 October 2007, 09:36 AM
#23
Scooby Regular
Thread Starter
Join Date: Mar 2003
Posts: 395
Likes: 0
Received 0 Likes
on
0 Posts
Grahmam
You will have a real laugh if I tell you that I work for one of the largest 3M distributors in Europe.....I did manage to get most of it of by scraping slowly and then just using the sander with a 3M scotchbrite disc to refine the surface beneath...
I take it by smoothrite you mean something similar to Hammerite smooth...I have tried that on a section of the cage and it works really well to be honest...was most suprised at the lack of brush marks...so now Im questioning the point of setting up all this spray equipment...because I just sprayed yesterday with a basic Halfords white primer...seemed to cover really well..and if I can get a reasonable finish with the Hammerite I might just do that will save a lot of effort and complaints from neighbours...etc....I mean I have to remember this is a raw track car, Im not looking for a show n shine finish inside.....have some pics but need to resize them first will post shortly..
Paul
28 October 2007, 09:51 AM
#24
Scooby Regular
Thread Starter
Join Date: Mar 2003
Posts: 395
Likes: 0
Received 0 Likes
on
0 Posts
Graham
Pics...bear in mind this is just the first coat of primer..was only really trying to see if the adhesive marks would bleed through but think it looks okay..will finish the rest of today and then decide how to move forward with a top coat....
passenger footwell untouched....
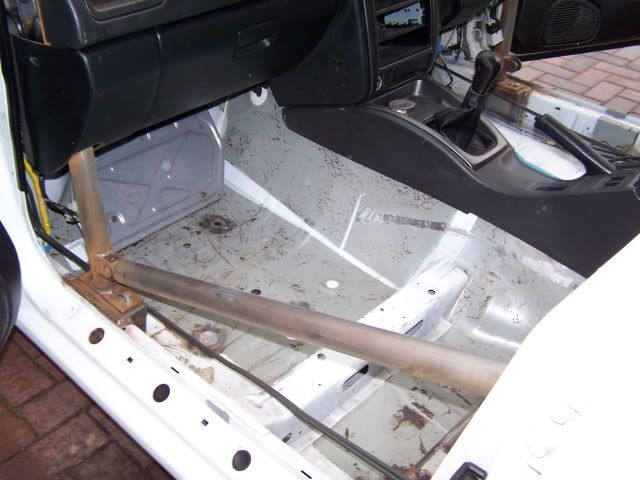
driver footwell primed...
didnt want to do beneath the seats but will finish those of today..just wanted to see what the visible bits would be like
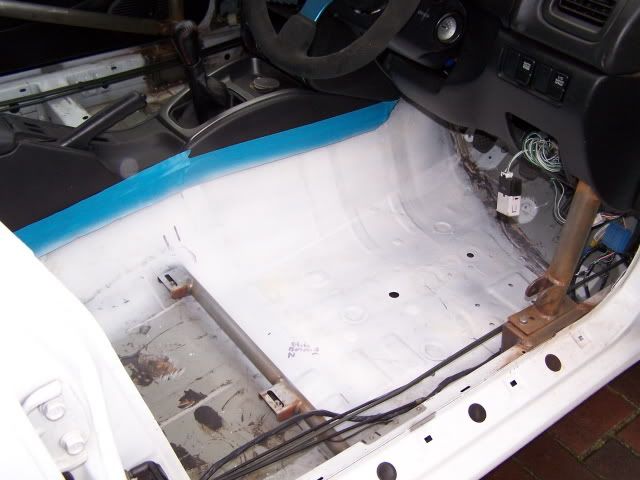
back seat area with one very quick pass....
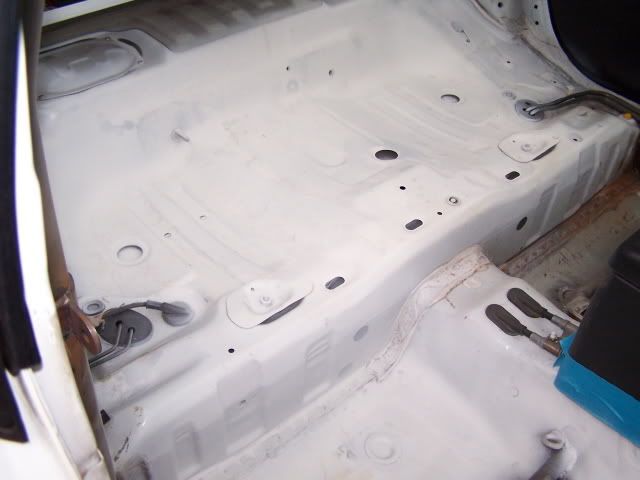
so will get the passenger footwell and give the rest another pass over today and see what it looks like..
Paul
Pics...bear in mind this is just the first coat of primer..was only really trying to see if the adhesive marks would bleed through but think it looks okay..will finish the rest of today and then decide how to move forward with a top coat....
passenger footwell untouched....
driver footwell primed...
didnt want to do beneath the seats but will finish those of today..just wanted to see what the visible bits would be like
back seat area with one very quick pass....
so will get the passenger footwell and give the rest another pass over today and see what it looks like..
Paul
28 October 2007, 09:55 AM
#25
I used to paint all my cars in the garage with cellulose...good old days..
You are spot-on though. These are track cars and while it is nice to get then right a run or two does not matter.
Getting round the cage would be a hard job with t small gun, but an areosol/brush will work well enough.
I had thought od stripping the sound deadening off the floor and then REPLACING the carpet to cover it all as the carpet is almost weightless.
My 6 point cage is already powder blace when i ordred it so that looks smart as it is.(matt black)
I will remove the full lower underside of the dash which shows a lot of bare steel, so same approach with the Hammerite.
My role-model car is the RCMS Gobstopper.
28 October 2007, 10:12 AM
#26
Scooby Regular
Thread Starter
Join Date: Mar 2003
Posts: 395
Likes: 0
Received 0 Likes
on
0 Posts
Yep...have the very magazine featuring the RC car in the garage...look at it get depressed and realise it will never look like that....had the chance to look at the car close up during time attack at Knockhill following an SIDC track morning...boy its clean....i mean clinically clean everywhere...dont think I have the time or money to be that precise...want it painted and out on the track as soon as.....
28 October 2007, 05:04 PM
#29
Scooby Regular
You don't actually need a harness bar Puff (although they do look cool ), most of the rally cars I've occupied the passenger seat of have had the harnesses fixed to the redundant rear seat belt anchors
There's no point sticking extra weight in when the manufacturer has kindly provided proper fixxings already
), most of the rally cars I've occupied the passenger seat of have had the harnesses fixed to the redundant rear seat belt anchorsThere's no point sticking extra weight in when the manufacturer has kindly provided proper fixxings already


