
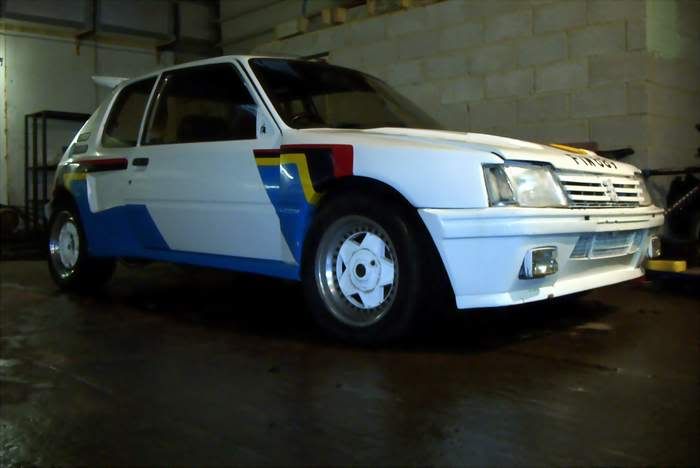
Project 205 Mi16 - time for an update.


Thread Starter
Scooby Regular


Joined: Feb 2000
Posts: 9,846
Likes: 4
From: Lancashire
Been working on rebuilding my 205 since summer, so thought it may be time to update the Scoobynet other marques forum with my progress. 
Taken from the 205 BBS:
-----------------------------------------------------------------------
Well its time to make a start on my ambitious project of removing my kaput Mi16 unit and replacing it with something else. Ambitious cos the most mechanical 205 jobs I've done are new discs/pads and new radiator - never ever tried removing an engine or putting one back in. I will also be minting the engine bay in between as well.
UPDATE 1
Right, finally made a start on the car last night.
Current position of car, and starting point:


Removal of front end, lights, grill etc:

Battery, rad, fans, hoses

Inlet, injection, coil, HT leads etc

And where all the bits are going for now:

Will do some more tonight and post an update at the weekend - the bloody inlet manifold was a right git!!
-----------------------------------------------------------------------
UPDATE 2
More progress made now - wiring is all separated into individual looms away from the engine, more ancillary bits removed and exhaust manifold removed.

-----------------------------------------------------------------------
UPDATE 3
Well the engine is finally out - hooray!!
We couldn't manage to transport the crane over safely enough, so had to take the unit out the bottom without the crane.

Everything was relatively easy really such as driveshafts, engine mounts etc etc.
Most stuff came off with the minimum of fuss. Hardest part was lowering the engine down. We put 2 pallets underneath, then just dropped the gearbox mount and the engine had a comfy landing on the soaking wet pallets.


We then had to drop the cambelt side and finally had the engine on the pallets. We then smashed the top pallet which dropped the engine onto pallet 1 and then had to jack the car up about 3 feet before smashing the final pallet and pulling the engine out.

I would advise anyone doing this to get an engine crane though. I'll defo get one for the engine going back in. Only casualties were a bent quickshift linkage and my muscles
Next step is to jetwash the engine bay, replace any rusty parts and clean up other parts such as MC etc - also going to be removing the PAS pipes. Also need to dismantle the current engine and have a nose inside it.
-----------------------------------------------------------------------
UPDATE 4
More progress today
Managed to remove most of the PAS system, and then jetwashed the entire engine bay, suspension and sub frame area so its all nice and clean now. Also started on dismantling the engine. Just need a T55 torx bit now for the head removal.
-----------------------------------------------------------------------
UPDATE 5
Well, plenty more progress this week.
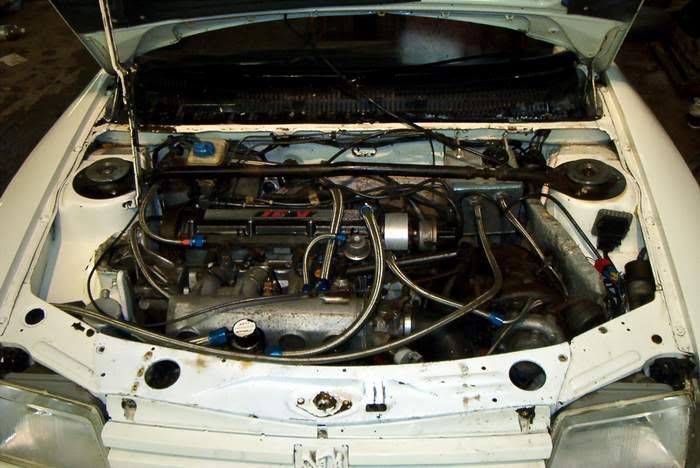
Started with a good jetwashing of the engine bay as everything was covered in years of old oil, so it ended up like this:

Just need to paint a few bits up now to make it look good.
Then had to start on dismantling the engine as it was outside in the rain

First job was to remove the head, which resulted in skinning two knuckles..


Head is very carbonised. Block now on its own (rust is from last few days rain only.

Then had to work on removing the clutch, flywheel and finally pistons/liners.

Considering it was the piston rings that were gone, everything looked remarkably sound to my untrained eye. The bearings did have some scoring on them though, and a couple were orange as you can see above - looked burnt. The 0.5-1mm lip on the piston liners was causing the problem though.
Crankshaft:

The components once everything had been separated.

And now all the other bits i've removed - I had to take all the bits out of the boot to re-arrange them so I could fit the engine inside - this scared me a little, as I realised how much stuff I have removed, and hence need to replace.

And finally, the full engine and gearbox in the boot

So next phase is to find a new engine, and sort out how to fit my new GSXR 750 TB's onto the Mi16 motor - i'm going for the all out "grass roots" setup if poss.
Also need to work on a detachable loom that I have in mind - i.e. a wiring loom that can be unplugged easily for any future engine removal.
UPDATE 6
OK, time for this week's progress report
Initial news is the purchase of some GSXR 750 TB's which will be run in conjunction with an Emerald ECU. These have a 40mm outlet port which is good enough for 200bhp, and only 1mm in total shy of the std inlet ports.


Nice and clean and only �63 from Ebay
I now have the manifold and fuel rail downstairs which I will be working on shortly - the manifold will be cut and shut to mate the TB's up with the head.
Spent some time yesterday removing the exhaust manifold (rusted bolt nightmare), and removing the final parts of the PAS system - ram pipe, final piping etc.
Then decided to remove the entire loom from the engine bay, and continue to clean up the bay ready for some minor spraying. Bought some Miami Blue paint from Halfrauds to touch up the minor scratches you can see.

All in all though, the bay is looking pretty good so far.
Then removed the std ECU and wiring, which will allow me to create a bespoke "plug and play" loom for the Emerald replacement.

Still lots to do (like finding a new engine), but its getting there.
Just ordered the Emerald 3D ECU as well which should arrive next week.
-----------------------------------------------------------------------
UPDATE 7
Stripped the existing wiring loom wire by wire last night - that was fun especially the bit where I slipped trying to cut some old insulation tape and drove the end of the scissors straight into my index finger.
So thats about 10 plasters i'm up to now.
Need to start on the new loom when the Emerald arrives.
Cleaned the engine bay up yesterday, and sanded and primed any rusty bits ready for spraying.
I also primed the slam panel as I want it in body colour, and generally went mad with primer on any scratches, rust spots etc.
Next step is to spray the bay and remove the exhaust centre section so I can have a new s/s one ready for fitting. The actual car will be completed then, ready for the new engine (if I can find one).
Now need to concentrate on the induction and Emerald wiring loom nightmare
-----------------------------------------------------------------------
UPDATE 8
Right, engine bay was tidied and sprayed yesterday, so the actual car is pretty much ready now, bar a few tidying of lighting wires etc.
Bay before tidying:

After some sanding:

Primed and ready:


Shiny new bay, slam panel, servo and MC:


There are some runs to sort on the stickers, but may just remove them
Need to start building the Emerald loom next, but with moving house, Xmas etc, time is short.
Bought 2 x Corbeau bucket seats for the interior.
UPDATE 9
Moving house at the moment, so no progress.
The 205 will have its own little garage to kip in over the winter once moved.
So, I will be trailering it to its new home next week, where it will get a thorough clean and polish and be put to bed over the festive period, ready for its new lump in Jan/Feb some time.
Will still be working on the Emerald/induction in the meantime though, so will keep updating this post with info.
To be continued.............
Taken from the 205 BBS:
-----------------------------------------------------------------------
Well its time to make a start on my ambitious project of removing my kaput Mi16 unit and replacing it with something else. Ambitious cos the most mechanical 205 jobs I've done are new discs/pads and new radiator - never ever tried removing an engine or putting one back in. I will also be minting the engine bay in between as well.
UPDATE 1
Right, finally made a start on the car last night.
Current position of car, and starting point:
Removal of front end, lights, grill etc:
Battery, rad, fans, hoses
Inlet, injection, coil, HT leads etc
And where all the bits are going for now:
Will do some more tonight and post an update at the weekend - the bloody inlet manifold was a right git!!
-----------------------------------------------------------------------
UPDATE 2
More progress made now - wiring is all separated into individual looms away from the engine, more ancillary bits removed and exhaust manifold removed.
-----------------------------------------------------------------------
UPDATE 3
Well the engine is finally out - hooray!!
We couldn't manage to transport the crane over safely enough, so had to take the unit out the bottom without the crane.
Everything was relatively easy really such as driveshafts, engine mounts etc etc.
Most stuff came off with the minimum of fuss. Hardest part was lowering the engine down. We put 2 pallets underneath, then just dropped the gearbox mount and the engine had a comfy landing on the soaking wet pallets.
We then had to drop the cambelt side and finally had the engine on the pallets. We then smashed the top pallet which dropped the engine onto pallet 1 and then had to jack the car up about 3 feet before smashing the final pallet and pulling the engine out.
I would advise anyone doing this to get an engine crane though. I'll defo get one for the engine going back in. Only casualties were a bent quickshift linkage and my muscles
Next step is to jetwash the engine bay, replace any rusty parts and clean up other parts such as MC etc - also going to be removing the PAS pipes. Also need to dismantle the current engine and have a nose inside it.
-----------------------------------------------------------------------
UPDATE 4
More progress today
Managed to remove most of the PAS system, and then jetwashed the entire engine bay, suspension and sub frame area so its all nice and clean now. Also started on dismantling the engine. Just need a T55 torx bit now for the head removal.
-----------------------------------------------------------------------
UPDATE 5
Well, plenty more progress this week.
Started with a good jetwashing of the engine bay as everything was covered in years of old oil, so it ended up like this:
Just need to paint a few bits up now to make it look good.
Then had to start on dismantling the engine as it was outside in the rain
First job was to remove the head, which resulted in skinning two knuckles..
Head is very carbonised. Block now on its own (rust is from last few days rain only.
Then had to work on removing the clutch, flywheel and finally pistons/liners.
Considering it was the piston rings that were gone, everything looked remarkably sound to my untrained eye. The bearings did have some scoring on them though, and a couple were orange as you can see above - looked burnt. The 0.5-1mm lip on the piston liners was causing the problem though.
Crankshaft:
The components once everything had been separated.
And now all the other bits i've removed - I had to take all the bits out of the boot to re-arrange them so I could fit the engine inside - this scared me a little, as I realised how much stuff I have removed, and hence need to replace.
And finally, the full engine and gearbox in the boot
So next phase is to find a new engine, and sort out how to fit my new GSXR 750 TB's onto the Mi16 motor - i'm going for the all out "grass roots" setup if poss.
Also need to work on a detachable loom that I have in mind - i.e. a wiring loom that can be unplugged easily for any future engine removal.
UPDATE 6
OK, time for this week's progress report
Initial news is the purchase of some GSXR 750 TB's which will be run in conjunction with an Emerald ECU. These have a 40mm outlet port which is good enough for 200bhp, and only 1mm in total shy of the std inlet ports.
Nice and clean and only �63 from Ebay
I now have the manifold and fuel rail downstairs which I will be working on shortly - the manifold will be cut and shut to mate the TB's up with the head.
Spent some time yesterday removing the exhaust manifold (rusted bolt nightmare), and removing the final parts of the PAS system - ram pipe, final piping etc.
Then decided to remove the entire loom from the engine bay, and continue to clean up the bay ready for some minor spraying. Bought some Miami Blue paint from Halfrauds to touch up the minor scratches you can see.
All in all though, the bay is looking pretty good so far.
Then removed the std ECU and wiring, which will allow me to create a bespoke "plug and play" loom for the Emerald replacement.
Still lots to do (like finding a new engine), but its getting there.
Just ordered the Emerald 3D ECU as well which should arrive next week.
-----------------------------------------------------------------------
UPDATE 7
Stripped the existing wiring loom wire by wire last night - that was fun especially the bit where I slipped trying to cut some old insulation tape and drove the end of the scissors straight into my index finger.
So thats about 10 plasters i'm up to now.
Need to start on the new loom when the Emerald arrives.
Cleaned the engine bay up yesterday, and sanded and primed any rusty bits ready for spraying.
I also primed the slam panel as I want it in body colour, and generally went mad with primer on any scratches, rust spots etc.
Next step is to spray the bay and remove the exhaust centre section so I can have a new s/s one ready for fitting. The actual car will be completed then, ready for the new engine (if I can find one).
Now need to concentrate on the induction and Emerald wiring loom nightmare
-----------------------------------------------------------------------
UPDATE 8
Right, engine bay was tidied and sprayed yesterday, so the actual car is pretty much ready now, bar a few tidying of lighting wires etc.
Bay before tidying:
After some sanding:
Primed and ready:
Shiny new bay, slam panel, servo and MC:
There are some runs to sort on the stickers, but may just remove them
Need to start building the Emerald loom next, but with moving house, Xmas etc, time is short.
Bought 2 x Corbeau bucket seats for the interior.
UPDATE 9
Moving house at the moment, so no progress.
The 205 will have its own little garage to kip in over the winter once moved.
So, I will be trailering it to its new home next week, where it will get a thorough clean and polish and be put to bed over the festive period, ready for its new lump in Jan/Feb some time.
Will still be working on the Emerald/induction in the meantime though, so will keep updating this post with info.
To be continued.............

Thread Starter
Scooby Regular
Joined: Feb 2000
Posts: 9,846
Likes: 4
From: Lancashire
No!! Its a bloody nightmare 
I need to chop the current inlet manifold off, just after the injectors then fabricate a method of clamping the TB's to the manifold.
A mate has a big alloy saw, but due to the manifold being curved we couldnt get it to clamp firmly enough to cut through, so i'm using old fashioned methods - a hacksaw
That and creating the brand new Emerald loom are the hardest bits. Here's the loom I need to build from scratch:
http://www.kreature.co.uk/netimg/pro...6/emerald3.gif
Originally Posted by Dream Weaver
No!! Its a bloody nightmare
I need to chop the current inlet manifold off, just after the injectors then fabricate a method of clamping the TB's to the manifold.
A mate has a big alloy saw, but due to the manifold being curved we couldnt get it to clamp firmly enough to cut through, so i'm using old fashioned methods - a hacksaw
That and creating the brand new Emerald loom are the hardest bits. Here's the loom I need to build from scratch:
http://www.kreature.co.uk/netimg/pro...6/emerald3.gif
 Sounds like a nightmare to me!!! I wouldn't know where to start and it's too cold at the moment to be playing with cars anyway
Thread Starter
Scooby Regular
Joined: Feb 2000
Posts: 9,846
Likes: 4
From: Lancashire
This is where the idea came from for the TB's:
http://www.honda-tech.com/zerothread?id=775280
http://www.honda-tech.com/zerothread?id=975931&page=1
http://www.honda-tech.com/zerothread?id=775280
http://www.honda-tech.com/zerothread?id=975931&page=1
Trending Topics
Thread Starter
Scooby Regular
Joined: Feb 2000
Posts: 9,846
Likes: 4
From: Lancashire
Keeping them in the inlet with the original fuel rail close to the ports, for better fuel atomisation.
I could use them in the TB's for more torque, but the TB ports would need machining out a bit, and I would need a new fuel rail etc - easier to use the existing holes and weld the TB's up.
I could use them in the TB's for more torque, but the TB ports would need machining out a bit, and I would need a new fuel rail etc - easier to use the existing holes and weld the TB's up.


Originally Posted by Dream Weaver
Keeping them in the inlet with the original fuel rail close to the ports, for better fuel atomisation.
I could use them in the TB's for more torque, but the TB ports would need machining out a bit, and I would need a new fuel rail etc - easier to use the existing holes and weld the TB's up.
I could use them in the TB's for more torque, but the TB ports would need machining out a bit, and I would need a new fuel rail etc - easier to use the existing holes and weld the TB's up.
Now this is interesting, I might actually copy you
Let me gues this wright you want to use the flange and the injector plucs from the Mi manifold and mate them to the Tb's.So the only problem is the mating ie a new flange needs to be made to attach the the Tb's well if I copy you i'll get two flanges made up and welded to the manifold
 thats if you want to anyway
Thread Starter
Scooby Regular
Joined: Feb 2000
Posts: 9,846
Likes: 4
From: Lancashire
I dont mind anyone copying me, fire away
The idea is to cut the manifold just after the injector holes. So, you keep the manifold, injectors and fuel rail as they are now.
You then extend the TB's slightly, as they need about 5mm between each one to fit the manifold. The main work is getting these to connect to the manifold - the Honda boys use silicon hosing to clamp the manifold to the TB's which is apparently how the bike TB's are mounted OEM anyway.
I will then need to make a new throttle linkage, and extend the current ones slightly.
I like the tapping idea, may be easier. I am also going to be using one of the current TB injector holes to supply vacuum to the brake servo so will need a pipe join welded in.
It will probably work out more expensive than Jenvey's, but I like the idea of DIY stuff.
Scooby Regular

Joined: Sep 2001
Posts: 9,465
Likes: 0
From: The Cheshire end of the emasculated Cat & Fiddle
Originally Posted by NotoriousREV
Looking good, although I'm not sure the GSX-R TB's will flow enough for 200bhp, I know some GSX-R 1000 tuners bore out those TB's before they hit the magic 200 figure.
Scooby Regular
Joined: Sep 2001
Posts: 9,465
Likes: 0
From: The Cheshire end of the emasculated Cat & Fiddle
Originally Posted by Dream Weaver
Keeping them in the inlet with the original fuel rail close to the ports, for better fuel atomisation.
I could use them in the TB's for more torque, but the TB ports would need machining out a bit, and I would need a new fuel rail etc - easier to use the existing holes and weld the TB's up.
I could use them in the TB's for more torque, but the TB ports would need machining out a bit, and I would need a new fuel rail etc - easier to use the existing holes and weld the TB's up.
Get the best of both worlds then


Scooby Regular
Joined: Jun 2002
Posts: 2,905
Likes: 0
From: From Kent to Gloucestershire to Berkshire
My recollection of the emarald loom was that it wasn't that tricky to sort . . . Brother's 2 litre Zetec Fisher Fury is running Emerald (M3D IIRC) with Jenvey bodies (45mm, again IIRC). As the resident expert in electric-trickery at the time, I sorted a lot of his loom, and a bit of "real time map tweaking" too. One thing I do remember though is that at first it fried a couple of ignition amplifiers (think his was running "wasted spark", definitely 2 cylinders per amplifier, anyway). Make sure they are solidly mounted to a decent bit of metal to act as heatsink, his problem was they were attached to fibreglass via a small bit of thin plate.
I still have vivid memories of him chasing a Lotus Carlton with the roof down, whilst I was desperately hanging on to the lap-top with one hand, and using the other to use emerald's real-time "mixture offset" based on lambda sensor readings (he was running a "generic zetec" base map at the time). It's an odd but nice feeling going at 130mph to feel the engine pick up in time to you pressing the "+" key on a laptop. Couldn't condone it on UK roads, of course.
Anyway, looks like a nice project, all the best with it.
I still have vivid memories of him chasing a Lotus Carlton with the roof down, whilst I was desperately hanging on to the lap-top with one hand, and using the other to use emerald's real-time "mixture offset" based on lambda sensor readings (he was running a "generic zetec" base map at the time). It's an odd but nice feeling going at 130mph to feel the engine pick up in time to you pressing the "+" key on a laptop.
Couldn't condone it on UK roads, of course.Anyway, looks like a nice project, all the best with it.

Scooby Regular
iTrader: (7)
Joined: Aug 2002
Posts: 2,989
Likes: 0
From: Lancashire & District Subaru
Lookin good Simon.
Any luck with the new unit from Sly's cousins contact ?
If not I'm sure I'll sniff out a Mi16 unit if I put my nose to the air
Shout if I can help.
Chris
Any luck with the new unit from Sly's cousins contact ?
If not I'm sure I'll sniff out a Mi16 unit if I put my nose to the air
Shout if I can help.
Chris
Thread Starter
Scooby Regular
Joined: Feb 2000
Posts: 9,846
Likes: 4
From: Lancashire
Cheers all.
Chris - Sly is sorting me with the trailer first, will look into the engine once i've moved, but keep your ear to the ground.
BOB - LOL
Chrispduk - considered the 8 injectors as the Emerald supports it, but that means twice as much to go wrong with the fitting You can set it up to run 4 injectors at low RPM, then fir another 4 in at say 4500rpm for huge power.
Dingy, looking good, is Martin helping with that?
Chris - Sly is sorting me with the trailer first, will look into the engine once i've moved, but keep your ear to the ground.
BOB - LOL
Chrispduk - considered the 8 injectors as the Emerald supports it, but that means twice as much to go wrong with the fitting
You can set it up to run 4 injectors at low RPM, then fir another 4 in at say 4500rpm for huge power. Dingy, looking good, is Martin helping with that?
Scooby Regular
Joined: Sep 2001
Posts: 9,465
Likes: 0
From: The Cheshire end of the emasculated Cat & Fiddle
Originally Posted by Dream Weaver
Chrispduk - considered the 8 injectors as the Emerald supports it, but that means twice as much to go wrong with the fitting You can set it up to run 4 injectors at low RPM, then fir another 4 in at say 4500rpm for huge power.
You can set it up to run 4 injectors at low RPM, then fir another 4 in at say 4500rpm for huge power. 

Scooby Regular
Joined: Feb 2003
Posts: 1,156
Likes: 0
From: Ecosse
Originally Posted by dingy
you mean like this

John.

Scooby Regular
Joined: Apr 2001
Posts: 760
Likes: 0
>Chrispduk - considered the 8 injectors as the Emerald supports it, but that means twice as much to go wrong with the fitting You can set it up to run 4 injectors at lo
w RPM, then fir another 4 in at say 4500rpm for huge power.
My Golf 16v Mk2 Turbo Technics runs kinda like that - 4 mechanical injectors as standard and 4 extra electronic injs tapped into the manifold which cut in when the boost demands more fuel... lots of plumbing and messing about but it works... :-)
Last edited by JonW; Dec 1, 2004 at 05:40 PM.

Scooby Regular
Joined: Aug 2000
Posts: 1,842
Likes: 0
John this car was from scotland and has never run or at least properly since the cossie management was fitted..
Apparently superchips mapped it, which is amazing considering the dizzy phase was going normal cossie style, and the phase is opposite on this engine LOL so would never run right.
Runs like a dream now LOL
Dream weaver - martin aint helping with this project as far as i am aware, karl norris is mapping it, me and oli got it running
Scooby Regular
Joined: Feb 2003
Posts: 1,156
Likes: 0
From: Ecosse
Originally Posted by dingy
John this car was from scotland and has never run or at least properly since the cossie management was fitted..
Apparently superchips mapped it, which is amazing considering the dizzy phase was going normal cossie style, and the phase is opposite on this engine LOL so would never run right.
Runs like a dream now LOL
Dream weaver - martin aint helping with this project as far as i am aware, karl norris is mapping it, me and oli got it running
Apparently superchips mapped it, which is amazing considering the dizzy phase was going normal cossie style, and the phase is opposite on this engine LOL so would never run right.
Runs like a dream now LOL
Dream weaver - martin aint helping with this project as far as i am aware, karl norris is mapping it, me and oli got it running
almost got ramshakled into helping out on it a few years ago, I took one look a the mess the loom was in at the time and said no way. Good to see it finally up and running as it had all the right bits on it when I last looked at it. IIRC it cost the original owner a very sizeable chunk of cash to build it.John.
Can't wait for you to finish this Simon...
My other mate with the 205 Mi16 (that bought my Clio Cup off me) needs to get his @rse into gear and sort his engine out too, this might spur him into action!
My other mate with the 205 Mi16 (that bought my Clio Cup off me) needs to get his @rse into gear and sort his engine out too, this might spur him into action!
Thread Starter
Scooby Regular
Joined: Feb 2000
Posts: 9,846
Likes: 4
From: Lancashire
Originally Posted by Rich D
Can't wait for you to finish this Simon...
My other mate with the 205 Mi16 (that bought my Clio Cup off me) needs to get his @rse into gear and sort his engine out too, this might spur him into action!
My other mate with the 205 Mi16 (that bought my Clio Cup off me) needs to get his @rse into gear and sort his engine out too, this might spur him into action!
Dont even have a net connection yet, using my mums
Originally Posted by Dream Weaver
Rick, will let you know when its done, just moved into a new house on Friday so in a bit of a mess as yet. Need to sort the garage out, then transfer the 205 up there.
Dont even have a net connection yet, using my mums
Dont even have a net connection yet, using my mums

Thread
Thread Starter
Forum
Replies
Last Post