Finished my pointing, YAY!!!!!!!!!
 13 August 2011, 08:23 PM
#1

10 sq m od lime mortar into a stone wall, has taken me five days to do.
If anyone wants a TOTAL ball-ache of a job, this is it. The lime mortar, (chaux), is an absolute swine to mix, even with a mixer on a drill, it either clags up to hell, and spins the bucket, or won't mix the stuff in the bottom of the bucket, which remains powder. Then it mixes and turns into the consistency of putty, add a BIT more water and it's like thin cream: useless.
So, after adding loads more powder, breathing in the fumes, (cough!), it's finaly the consistency of a good mousse.......you know it's right when it FALLS off the large mixing spoon without sticking.
Then it's into a plastic bag, triangular in shape like a large icing bag, roll the top and squeeze.
But wait! the wall needs to be quite wet before squeezing any chaux into it, or the stuff just falls out again, won't stick. But get the wall TOO wet, and the whole lot runs down the wall, staining the stones you want to show off.
Finally you get it in place, leave it to nearly set, push it into place and semi-smooth it with a long thin trowel known as a "cat's tongue", and finally brush it all over with a bannister brush.
Looks good when done, but what a BLOODY job!


 14 August 2011, 09:59 AM
#6
Ha! THAT'S dead easy.........just follow the mortar lines. (WEll, not dead easy, but easier than mine, which is random stone). I'll post pics once I get the area in front cleaned up, plus a pic of a wall awaiting new chaux, and one of a wall with the old stuff still in place.
Most of the old stuff is mud.........
Most of the old stuff is mud.........
Trending Topics


 14 August 2011, 02:05 PM
#11
Scooby Regular

Join Date: Dec 2002
Location: France
Posts: 906
Likes: 0
Received 0 Likes
on
0 Posts
Pointing sucks nuts to do, but looks nice when finished.
The living room walls are finished - need to start the kitchen soon.


'Scuse the mess and unfinished bits.
The living room walls are finished - need to start the kitchen soon.
'Scuse the mess and unfinished bits.
14 August 2011, 03:24 PM
#12
Some pics of the finished wall and others done slightly differently, plus what it looks like before, and when the old stuff has been removed.......which is a job in itself, I get the wife to do it 
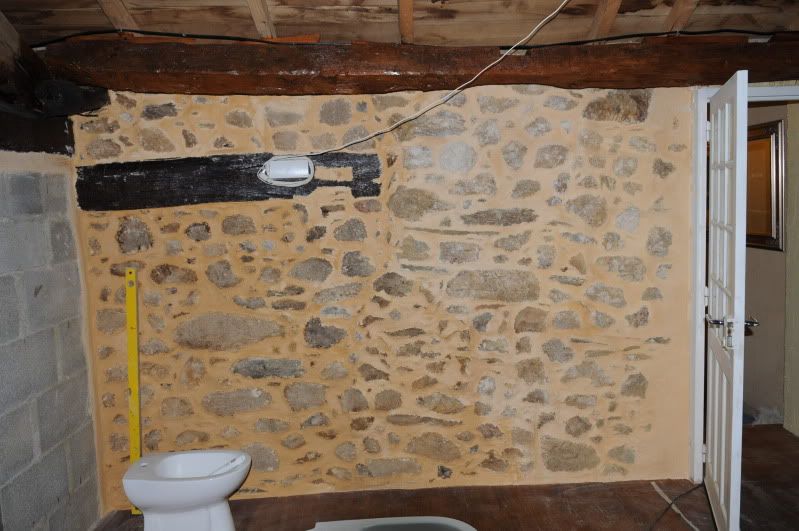
That's the finished wall, above, the colour dries stone, believe it or not, the different colours are caused by the different days' work, different thicknesses of chaux, plus light from the velux window above. It will dry a uniform stone, but it takes two to three wekks to dry completely.
The block wall to the left will be tiled.
The wiring is for the electrics for the velux window, above. It can be opened and closed electrically, plus it has a self-close feature after a preset variable time, and closes automatically if it rains when it's open. The wiring will be hidden once she is happy with where the box is
Bidet and new toilet in foreground, sorry, poorly composed shot

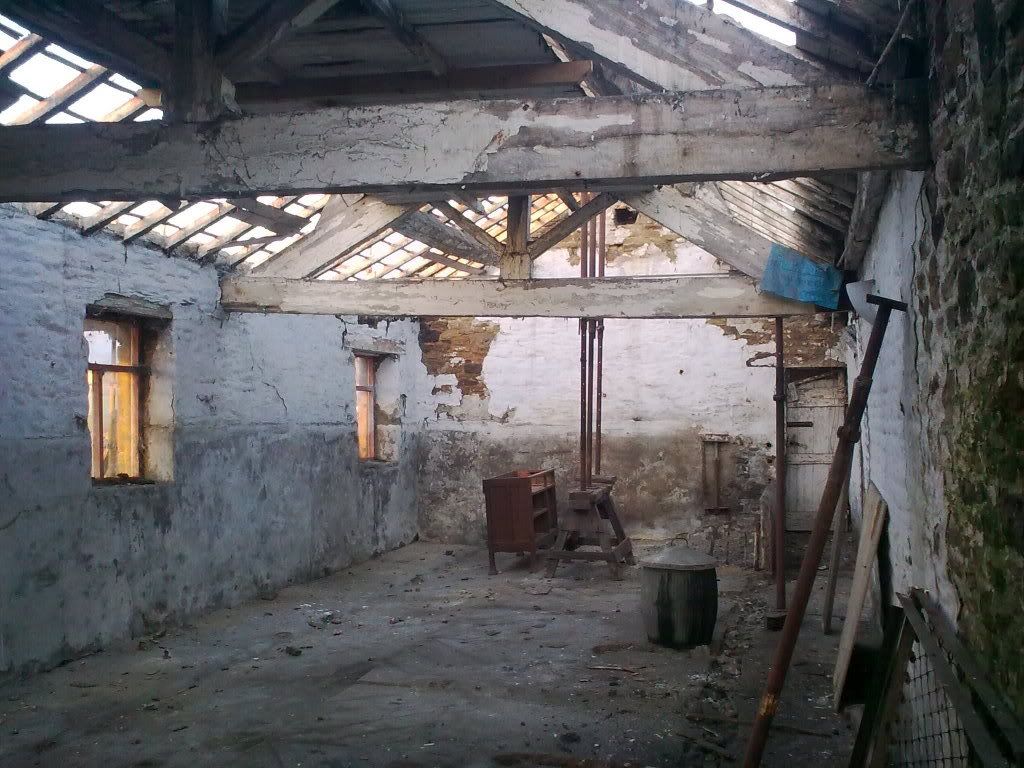
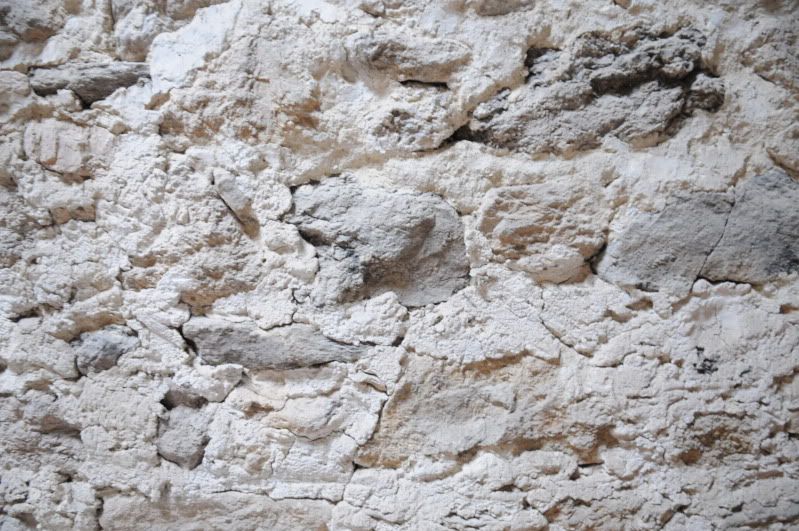
This one, above, shows the downstairs of the same wall, done in the Limousin style, where most of the stone disappears and you get to see more mortar than stones, probably because it's cheaper, the area is still very rural. This is SLIGHTLY lighter than the stuff upstairs will end up. She wanted lighter as it's a dark-ish end of the room.

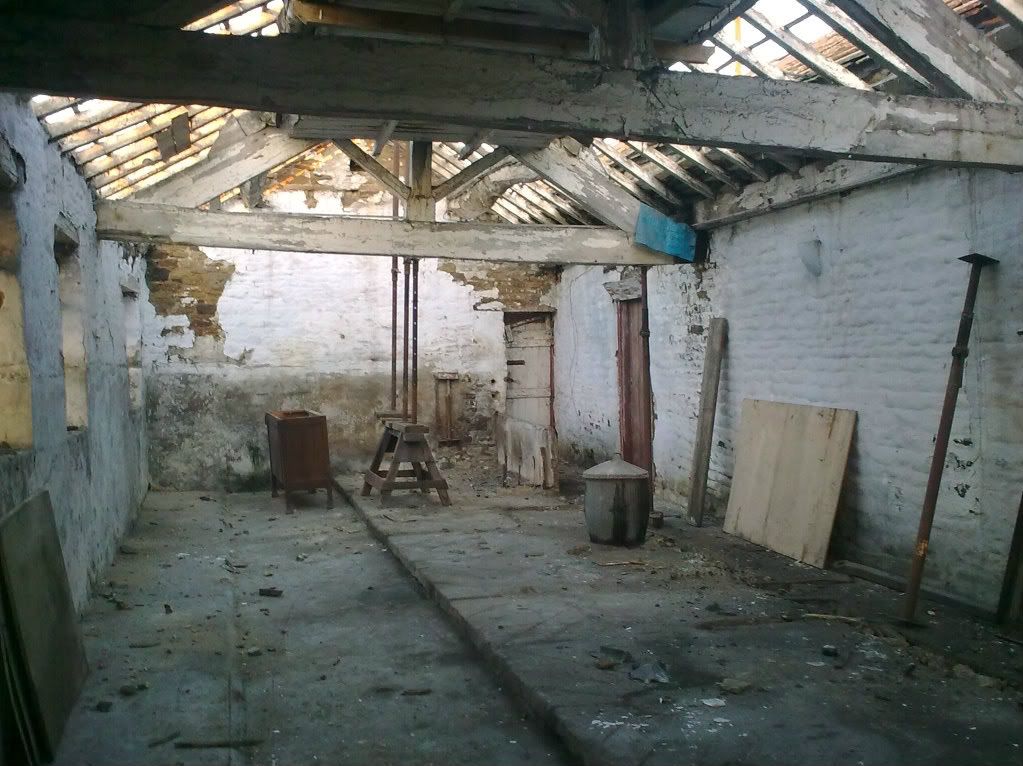
This one, above, is a long wall the wife has removed most of the old chaux, it is now awaiting power-washing, (which has to be done carefully, since most of what is left is mud between the stones, so you don't want to balst it ALL out, but you DO need the stones clean, the dust removed and the whole lot damp.
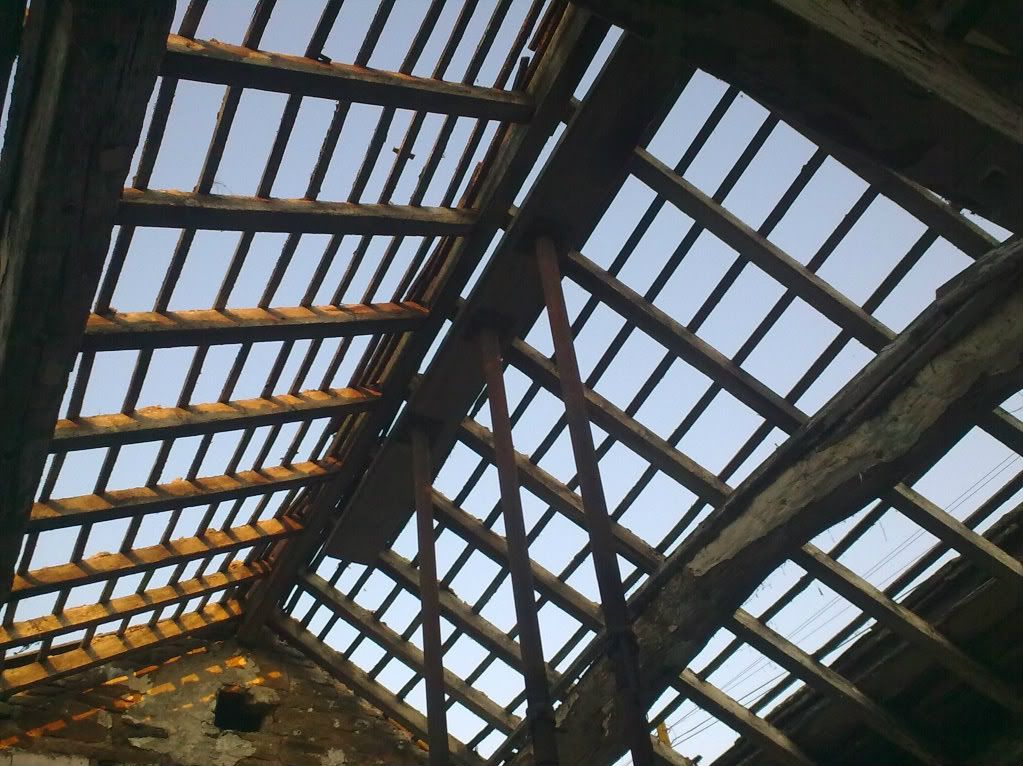
This last one, above, shows the wall the other side of the block wall in the firtst photo, it will eventually be in an en-suite area for the main bedroom, once it gets a ceiing and some walls, LOL. The blockwall is to the right, out of pic, it will be tiled in the ensuite and rough-plastered in the bedroom. You can see the old chaux. This lot was quite high up in the old barn, so it's REASONABLY clean, although ready for removal. The stuff downstairs was filthy, three hundred years of cows, I reckon. We still have the old byre removed for renovation and parts of it will be varnished and re-used.
The Mrs LOVES old stuff like that, the older, more decrepit and worse for wear, the better. (Probably why she stays with me). Plus she has ZERO tolerance of it's WEIGHT. The bottom beam of the byre, for example, took SIX men to carry it when it was removed. But us TWO are reckoned to be going to put it back..........it's only TEN metres long and around 12" square, solid oak!!!!
That's the finished wall, above, the colour dries stone, believe it or not, the different colours are caused by the different days' work, different thicknesses of chaux, plus light from the velux window above. It will dry a uniform stone, but it takes two to three wekks to dry completely.
The block wall to the left will be tiled.
The wiring is for the electrics for the velux window, above. It can be opened and closed electrically, plus it has a self-close feature after a preset variable time, and closes automatically if it rains when it's open. The wiring will be hidden once she is happy with where the box is
Bidet and new toilet in foreground, sorry, poorly composed shot
This one, above, shows the downstairs of the same wall, done in the Limousin style, where most of the stone disappears and you get to see more mortar than stones, probably because it's cheaper, the area is still very rural. This is SLIGHTLY lighter than the stuff upstairs will end up. She wanted lighter as it's a dark-ish end of the room.
This one, above, is a long wall the wife has removed most of the old chaux, it is now awaiting power-washing, (which has to be done carefully, since most of what is left is mud between the stones, so you don't want to balst it ALL out, but you DO need the stones clean, the dust removed and the whole lot damp.
This last one, above, shows the wall the other side of the block wall in the firtst photo, it will eventually be in an en-suite area for the main bedroom, once it gets a ceiing and some walls, LOL
. The blockwall is to the right, out of pic, it will be tiled in the ensuite and rough-plastered in the bedroom. You can see the old chaux. This lot was quite high up in the old barn, so it's REASONABLY clean, although ready for removal. The stuff downstairs was filthy, three hundred years of cows, I reckon. We still have the old byre removed for renovation and parts of it will be varnished and re-used.The Mrs LOVES old stuff like that, the older, more decrepit and worse for wear, the better. (Probably why she stays with me
). Plus she has ZERO tolerance of it's WEIGHT. The bottom beam of the byre, for example, took SIX men to carry it when it was removed. But us TWO are reckoned to be going to put it back..........it's only TEN metres long and around 12" square, solid oak!!!!
14 August 2011, 03:47 PM
#13
Scooby Regular
iTrader: (22)
Join Date: May 2006
Location: Doncaster, S. Yorks.
Posts: 21,415
Received 0 Likes
on
0 Posts
10 sq m od lime mortar into a stone wall, has taken me five days to do.
If anyone wants a TOTAL ball-ache of a job, this is it. The lime mortar, (chaux), is an absolute swine to mix, even with a mixer on a drill, it either clags up to hell, and spins the bucket, or won't mix the stuff in the bottom of the bucket, which remains powder. Then it mixes and turns into the consistency of putty, add a BIT more water and it's like thin cream: useless.
So, after adding loads more powder, breathing in the fumes, (cough!), it's finaly the consistency of a good mousse.......you know it's right when it FALLS off the large mixing spoon without sticking.
Then it's into a plastic bag, triangular in shape like a large icing bag, roll the top and squeeze.
But wait! the wall needs to be quite wet before squeezing any chaux into it, or the stuff just falls out again, won't stick. But get the wall TOO wet, and the whole lot runs down the wall, staining the stones you want to show off.
Finally you get it in place, leave it to nearly set, push it into place and semi-smooth it with a long thin trowel known as a "cat's tongue", and finally brush it all over with a bannister brush.
Looks good when done, but what a BLOODY job!
If anyone wants a TOTAL ball-ache of a job, this is it. The lime mortar, (chaux), is an absolute swine to mix, even with a mixer on a drill, it either clags up to hell, and spins the bucket, or won't mix the stuff in the bottom of the bucket, which remains powder. Then it mixes and turns into the consistency of putty, add a BIT more water and it's like thin cream: useless.
So, after adding loads more powder, breathing in the fumes, (cough!), it's finaly the consistency of a good mousse.......you know it's right when it FALLS off the large mixing spoon without sticking.
Then it's into a plastic bag, triangular in shape like a large icing bag, roll the top and squeeze.
But wait! the wall needs to be quite wet before squeezing any chaux into it, or the stuff just falls out again, won't stick. But get the wall TOO wet, and the whole lot runs down the wall, staining the stones you want to show off.
Finally you get it in place, leave it to nearly set, push it into place and semi-smooth it with a long thin trowel known as a "cat's tongue", and finally brush it all over with a bannister brush.
Looks good when done, but what a BLOODY job!
http://www.youtube.com/watch?v=8XfeME9348Y

 Rather you than me though!
 15 August 2011, 10:10 AM
#17
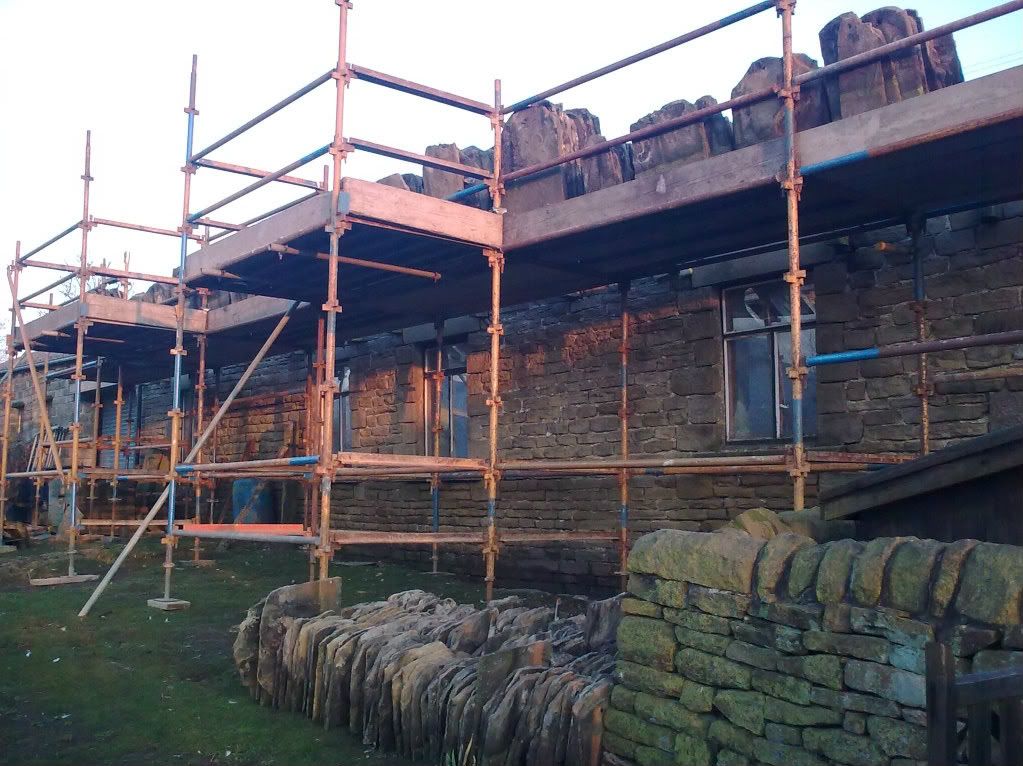
It's an attached barn.
Basically, in the Limousin, houses were always built in the countryside with a barn attached, sometimes two, one either side of the house, or both on the same side. Saves on stone and building costs.
Our house here is "L" shaped, the main house was 2 up-2 down, but we have expanded it outwards into one of the barns, leaving the other for a storage area, etc.
The whole thing is random stone, but the front of the original house is done in "crepi", a sort of rough cement rendering.
The whole lot dates back over 300 years, and has 2000 sq m of land attached, including two huge walnut trees, plus peaches, nectarines, apricots, cherry and plum, and a sweet chestnut tree in one corner.......a laugh a minute trying to keep the "garden" under control, especially with the weather as it has been, rain and shine.")
Brambles can easily grow a two foot extension in under a week. I think the French for bramble must be "le triffid".
Basically, in the Limousin, houses were always built in the countryside with a barn attached, sometimes two, one either side of the house, or both on the same side. Saves on stone and building costs.
Our house here is "L" shaped, the main house was 2 up-2 down, but we have expanded it outwards into one of the barns, leaving the other for a storage area, etc.
The whole thing is random stone, but the front of the original house is done in "crepi", a sort of rough cement rendering.
The whole lot dates back over 300 years, and has 2000 sq m of land attached, including two huge walnut trees, plus peaches, nectarines, apricots, cherry and plum, and a sweet chestnut tree in one corner.......a laugh a minute trying to keep the "garden" under control, especially with the weather as it has been, rain and shine.
Brambles can easily grow a two foot extension in under a week. I think the French for bramble must be "le triffid".
 15 August 2011, 05:31 PM
#20
A bit of a no-no, yes, especially if the wall is to remain with the stones showing, it doesn't breathe with concrete in there.
My greatest problem here is damp. Tha main part of the house is stone built, no cavity, and the outer walls are below ground level in places, ie: if you drilled through from ground level OUTside, you'd end up about 18" ABOVE floor level inside.
We are slowly rectifying this, by excavating a trench outside, plus the fitting of a gutter along the back, which it hasn't, at present, and spouting the rainwater into the street.


Thread
Thread Starter
Forum
Replies
Last Post
Sam Witwicky
Engine Management and ECU Remapping
17
13 November 2015 10:49 AM