Swiss' Version of the JACKO Igloo Part I
 09 January 2010, 05:05 PM
#1

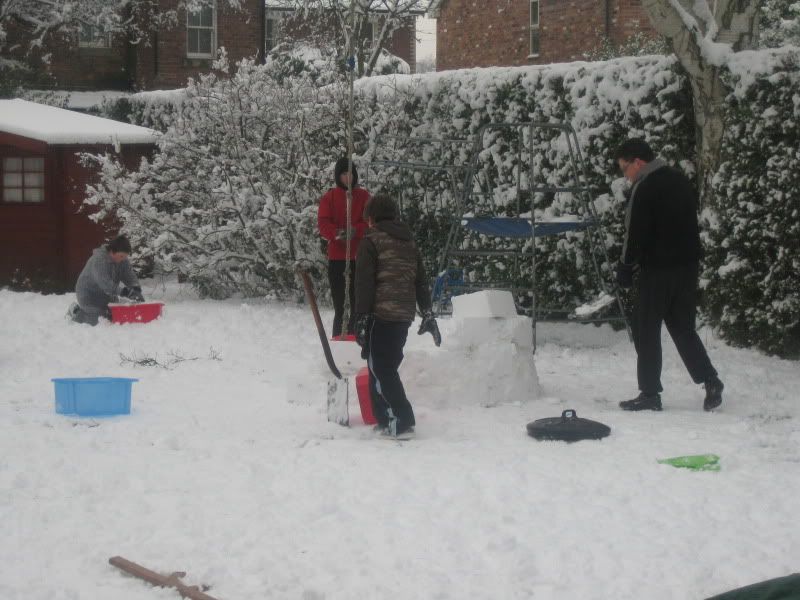
Inspired by him making an igloo with his kids, after a long day of sledging and mucking about, my eldest and I decided to have a go 
Found some containers in the garage and found a spot at the top of the garden
This is it after the first two layers


My eldest trying it out for size

I got him to do the cementing whilst I made the bricks

A close up of the bricks...

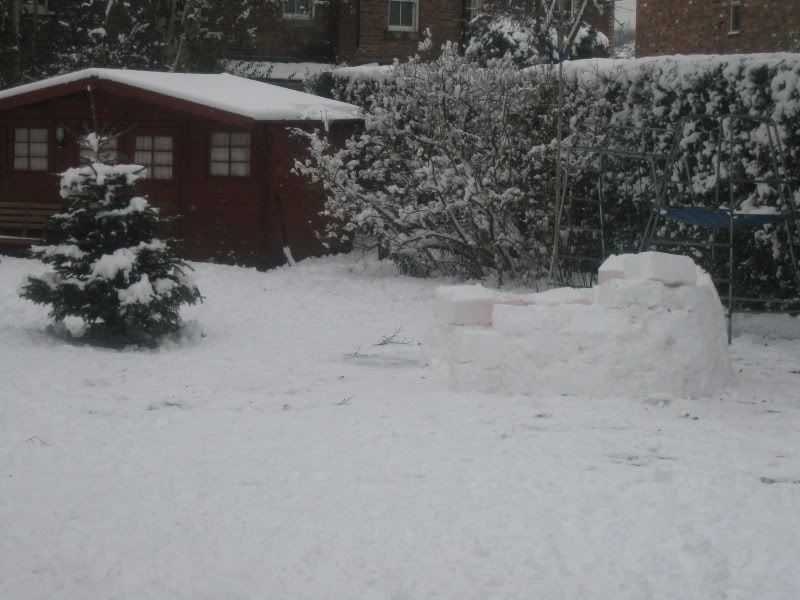
Three up

And as it was getting dark, finished on four layers


My hod carrier gave up as it was getting a liddle widdle bit cold for him")
Part II will continue tomorrow if I can work out how to do the roof
Found some containers in the garage and found a spot at the top of the garden
This is it after the first two layers
My eldest trying it out for size
I got him to do the cementing whilst I made the bricks
A close up of the bricks...
Three up
And as it was getting dark, finished on four layers
My hod carrier gave up as it was getting a liddle widdle bit cold for him
Part II will continue tomorrow
if I can work out how to do the roof
 09 January 2010, 05:39 PM
#4
Scooby Senior
Join Date: Jun 2006
Location: RIP - Tam the bam & Andy the Jock
Posts: 14,333
Likes: 0
Received 0 Likes
on
0 Posts
Each row, after 30% of the required height should slope slightly inwards... ergo a dome should form. The last centre block will then act as a 'key stone' and add strength to the rest of the structure.
Good work Swiss.....
DCI IMIM (Institute of Master Igloo Makers)
Good work Swiss.....
DCI IMIM (Institute of Master Igloo Makers)
09 January 2010, 05:39 PM
#5
Guest
Posts: n/a
The wife has made one as well using one of the kids beach buckets so bricks are a little small 
She has got it about 3' high but stopped as soon as it got to doing the roof. Also she has done no 'cementing' and let the heavy snow falls fill in the gaps. I've been no help what so ever as if I touch it and it falls over it will be my fault. Whilst chucking snow ***** at the kids I hit the igloo and all hell broke loose for causing a hole in it, it's not very projectile proof
Finishing it and doing the roof looks a total nightmare and i've no idea how to do it. Jacko we are in need of the igloo experts, can you send your lads over?!
09 January 2010, 05:39 PM
#6

Looking good, will be like rock in the morning for when you continue !
Think you need to start curving it in, to do the roof, put the blocks on and then shave a consistent ammount off to angle it inwards rather than just putting one on top of the other, and perhaps put them a bit closer together, me being an Igloo consultant nowadays
Get the doorway narrower so that you can build the top in a bit and then use one block for a lintel.
Ours is still sat here fully intact three days later, I get the impression that if the temperature stayed below zero it would last indefinitely, keep showing it off to anyone that visits !
09 January 2010, 05:42 PM
#7
Scooby Senior
Join Date: Jun 2006
Location: RIP - Tam the bam & Andy the Jock
Posts: 14,333
Likes: 0
Received 0 Likes
on
0 Posts
An old saw should be used to shave the slope on the blocks after you've set a row down, also almost the last thing to do is cut a door into your igloo.....
Trending Topics


 09 January 2010, 05:50 PM
#10
Scooby Regular
Join Date: Jul 2002
Posts: 10,765
Likes: 0
Received 0 Likes
on
0 Posts
09 January 2010, 05:53 PM
#11
Each row, after 30% of the required height should slope slightly inwards... ergo a dome should form. The last centre block will then act as a 'key stone' and add strength to the rest of the structure.
Good work Swiss.....
DCI IMIM (Institute of Master Igloo Makers)
Good work Swiss.....
DCI IMIM (Institute of Master Igloo Makers)
Whilst chucking snow ***** at the kids I hit the igloo and all hell broke loose for causing a hole in it, it's not very projectile proof
Finishing it and doing the roof looks a total nightmare and i've no idea how to do it. Jacko we are in need of the igloo experts, can you send your lads over?!
Finishing it and doing the roof looks a total nightmare and i've no idea how to do it. Jacko we are in need of the igloo experts, can you send your lads over?!
Looking good, will be like rock in the morning for when you continue !
Think you need to start curving it in, to do the roof, put the blocks on and then shave a consistent ammount off to angle it inwards rather than just putting one on top of the other, and perhaps put them a bit closer together, me being an Igloo consultant nowadays
Get the doorway narrower so that you can build the top in a bit and then use one block for a lintel.
Ours is still sat here fully intact three days later, I get the impression that if the temperature stayed below zero it would last indefinitely, keep showing it off to anyone that visits !
Think you need to start curving it in, to do the roof, put the blocks on and then shave a consistent ammount off to angle it inwards rather than just putting one on top of the other, and perhaps put them a bit closer together, me being an Igloo consultant nowadays
Get the doorway narrower so that you can build the top in a bit and then use one block for a lintel.
Ours is still sat here fully intact three days later, I get the impression that if the temperature stayed below zero it would last indefinitely, keep showing it off to anyone that visits !
I cant get them any closer as there is a lip on the container so I have to fill in the gaps with soft snow.
09 January 2010, 05:57 PM
#12
Scooby Regular
Join Date: Jul 2002
Posts: 10,765
Likes: 0
Received 0 Likes
on
0 Posts
09 January 2010, 06:01 PM
#14
Scooby Regular
Join Date: Jul 2002
Posts: 10,765
Likes: 0
Received 0 Likes
on
0 Posts
09 January 2010, 06:06 PM
#15
Scooby Regular
Join Date: Sep 2003
Location: At the diesel pump...
Posts: 8,677
Likes: 0
Received 0 Likes
on
0 Posts
You'd be better off making a Quinze (sp).
Make a huge mound of snow, then shove twigs in from the outside. Then hollow out, stopping when you hit the end of the twigs.
And yes, I have made a couple
Make a huge mound of snow, then shove twigs in from the outside. Then hollow out, stopping when you hit the end of the twigs.
And yes, I have made a couple
09 January 2010, 06:07 PM
#16
I popped the bricks out onto the floor then placed them on as the lip is indeed a pain, I worked from inside stood up until the hole was too small then placed from the inside knelt down and lifted the into place, I used a bit of thin wood to shave snow off to shape it as I went.
Sometimes you need to hold them for a little while until they stick a bit, I looked at an online guide but the Eskimo route involves packed snow cut in blocks rather than compressed in a box so it isnt quite the same, you need to just do what feels right to you, dont be affraid to cut blocks to fill gaps either, they need to get saller as you get near the top.
I started canting the blocks in by about 25 degrees here,
Bit further on
Bit further still, I curved it in quite a bit after here,

Sttod up working,
And crouched doing the final bits,
Sometimes you need to hold them for a little while until they stick a bit, I looked at an online guide but the Eskimo route involves packed snow cut in blocks rather than compressed in a box so it isnt quite the same, you need to just do what feels right to you, dont be affraid to cut blocks to fill gaps either, they need to get saller as you get near the top.
I started canting the blocks in by about 25 degrees here,
Bit further on
Bit further still, I curved it in quite a bit after here,
Sttod up working,
And crouched doing the final bits,
Last edited by J4CKO; 09 January 2010 at 06:12 PM.
09 January 2010, 06:23 PM
#17
Scooby Senior
Join Date: Jun 2006
Location: RIP - Tam the bam & Andy the Jock
Posts: 14,333
Likes: 0
Received 0 Likes
on
0 Posts
That's clearly the wrong type of snow being used JACKO, try to find the lighter blue coloured snow as that bonds more effectively. Also consider an 'ice' block to allow light in.... and finally that door is way too big, you'd struggle to keep a polar bear out with an entrance like that.
09 January 2010, 06:32 PM
#19
That's clearly the wrong type of snow being used JACKO, try to find the lighter blue coloured snow as that bonds more effectively. Also consider an 'ice' block to allow light in.... and finally that door is way too big, you'd struggle to keep a polar bear out with an entrance like that.
09 January 2010, 06:43 PM
#20
Scooby Senior
Join Date: Jun 2006
Location: RIP - Tam the bam & Andy the Jock
Posts: 14,333
Likes: 0
Received 0 Likes
on
0 Posts
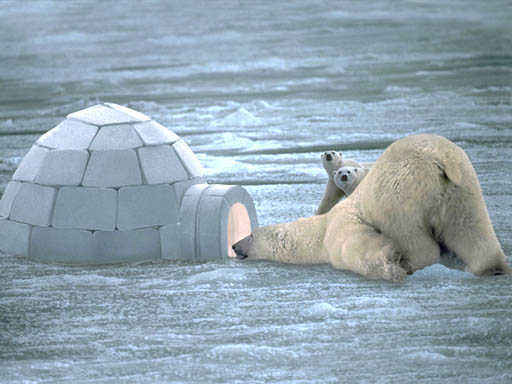
........... hello JACKO............., it's alright kids this fat **** will keep us going for weeks!

Last edited by DCI Gene Hunt; 09 January 2010 at 06:44 PM.

 10 January 2010, 05:05 PM
#24
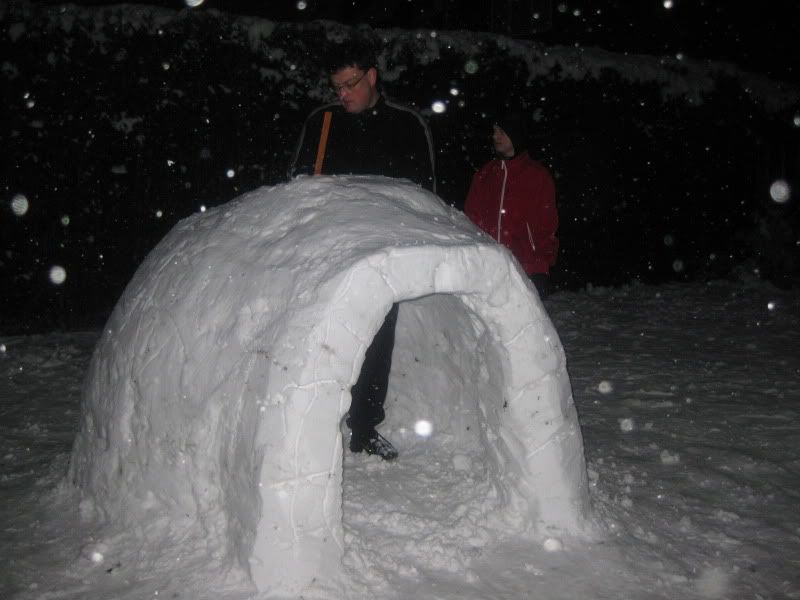
Well the overnight made the snow much better to work and when we went outside to view the igloo, we found it rock solid and so started Part II
Obviously we had the tricky roof and door lintel to work out but my work force was doubled

Here we are now with a few extra levels on

Youngest son checks out daddy's handiwork

Mortar was needed

Discovered that the doorway was too wide for the lintel so had to build up a door jamb


Then the tricky lintel


Finally worked with half size bricks to complete the top. Workforce increased in size

Roof went on and it is at last finished
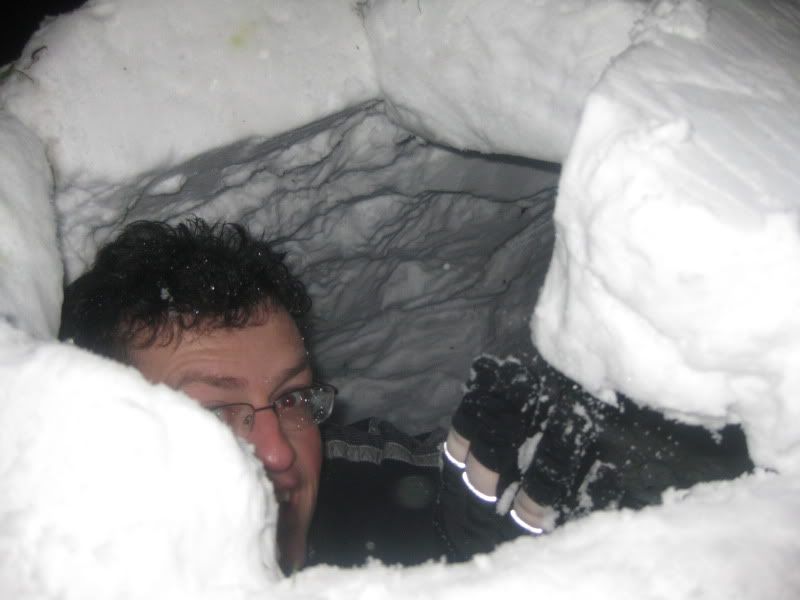
Everyone wanted a photo


I guess that when the snow melts there will be a lovely green lawn and this blooming igloo still there
Obviously we had the tricky roof and door lintel to work out but my work force was doubled
Here we are now with a few extra levels on
Youngest son checks out daddy's handiwork
Mortar was needed
Discovered that the doorway was too wide for the lintel so had to build up a door jamb
Then the tricky lintel
Finally worked with half size bricks to complete the top. Workforce increased in size
Roof went on and it is at last finished
Everyone wanted a photo
I guess that when the snow melts there will be a lovely green lawn and this blooming igloo still there
10 January 2010, 05:50 PM
#28
Scooby Senior
Join Date: Jun 2006
Location: RIP - Tam the bam & Andy the Jock
Posts: 14,333
Likes: 0
Received 0 Likes
on
0 Posts
Good work Swiss & Family (emphasis on the 'Family'), I for one am looking forward to your sandcastle building exploits during summer 2010.
DCI.
DCI.
10 January 2010, 07:34 PM
#30