Blob Eye Speaker Adventure
 13 August 2012, 01:51 AM
#1
Scooby Regular
Thread Starter

Join Date: Aug 2012
Location: Bromsgrove
Posts: 51
Likes: 0
Received 0 Likes
on
0 Posts
Thought I would share my experiences with my audio upgrade, so far, as I would have found this info useful when I started out 
Being a lazy consumer, I purchased a set of Pioneer coaxes off Ebay, 13cm front with plastic spacers and 10cm rear; advertised as upgrade for 00 onwards Impreza.
Although the front spacers are three cornered (SAK 2820) they dont line up with the standard holes. I used them, but in hindsight I would probably get 20mm thick MDF rings and use the old speakers to drill them to the standard pattern, then screw the new speakers directly onto these.
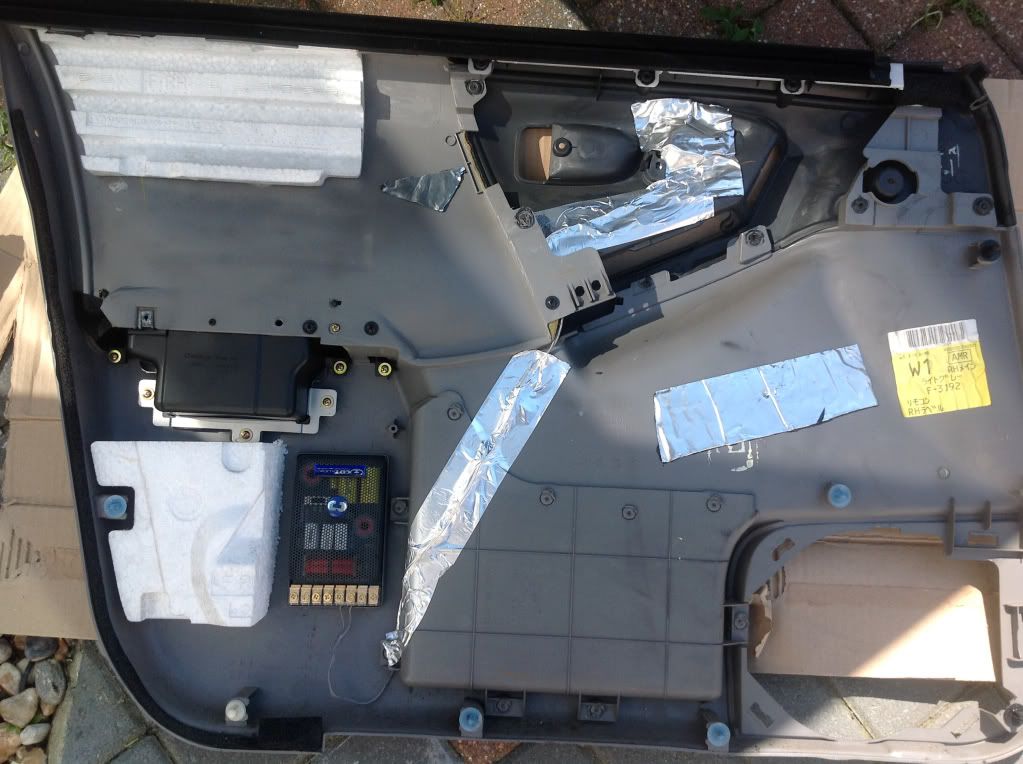
Used Dynamat cut to shape around each front speaker, which didnt go too badly
Came to fit the rear speakers, and found that the mounting holes for the 10cm hardly meet the edges of the standard speaker hole. Removed the front speakers again and tried them in the rear, but basket fouls edges if hole.
New plan; use 10mm thick MDF rings to make spacers to install 13cm Pioneer coaxes in rear doors.
Retain plastic spacers up front and mount 13cm components, which should arrive next week
The thing to take from this is that with a 20mm spacer up front, your maxium speaker mounting depth is about 65mm, or 60 to be safe. Thicker spacer would require trimming inside of door card.
The rear door has no real clearance issue for depth, but the apature causes interferance with the basket. The rear door card is quiet narrow, so wont tolerate a thick spacer without modification.
Will update in the next saga
Being a lazy consumer, I purchased a set of Pioneer coaxes off Ebay, 13cm front with plastic spacers and 10cm rear; advertised as upgrade for 00 onwards Impreza.
Although the front spacers are three cornered (SAK 2820) they dont line up with the standard holes. I used them, but in hindsight I would probably get 20mm thick MDF rings and use the old speakers to drill them to the standard pattern, then screw the new speakers directly onto these.
Used Dynamat cut to shape around each front speaker, which didnt go too badly
Came to fit the rear speakers, and found that the mounting holes for the 10cm hardly meet the edges of the standard speaker hole. Removed the front speakers again and tried them in the rear, but basket fouls edges if hole.
New plan; use 10mm thick MDF rings to make spacers to install 13cm Pioneer coaxes in rear doors.
Retain plastic spacers up front and mount 13cm components, which should arrive next week
The thing to take from this is that with a 20mm spacer up front, your maxium speaker mounting depth is about 65mm, or 60 to be safe. Thicker spacer would require trimming inside of door card.
The rear door has no real clearance issue for depth, but the apature causes interferance with the basket. The rear door card is quiet narrow, so wont tolerate a thick spacer without modification.
Will update in the next saga
 13 August 2012, 06:55 AM
#2
Scooby Regular
iTrader: (12)
Join Date: Apr 2007
Location: Littlehampton
Posts: 2,427
Likes: 0
Received 0 Likes
on
0 Posts
I've had 16.5cm speakers in my car for years, just moved them from the impreza into the forester but the process for fitting is the same, I used 16mm MDF as when P40'd the door car it's as rigid as 20mm.
Stage 1 was to remove the front door cards, the speaker grilles clip off but otherwise it's very similar to an impreza.
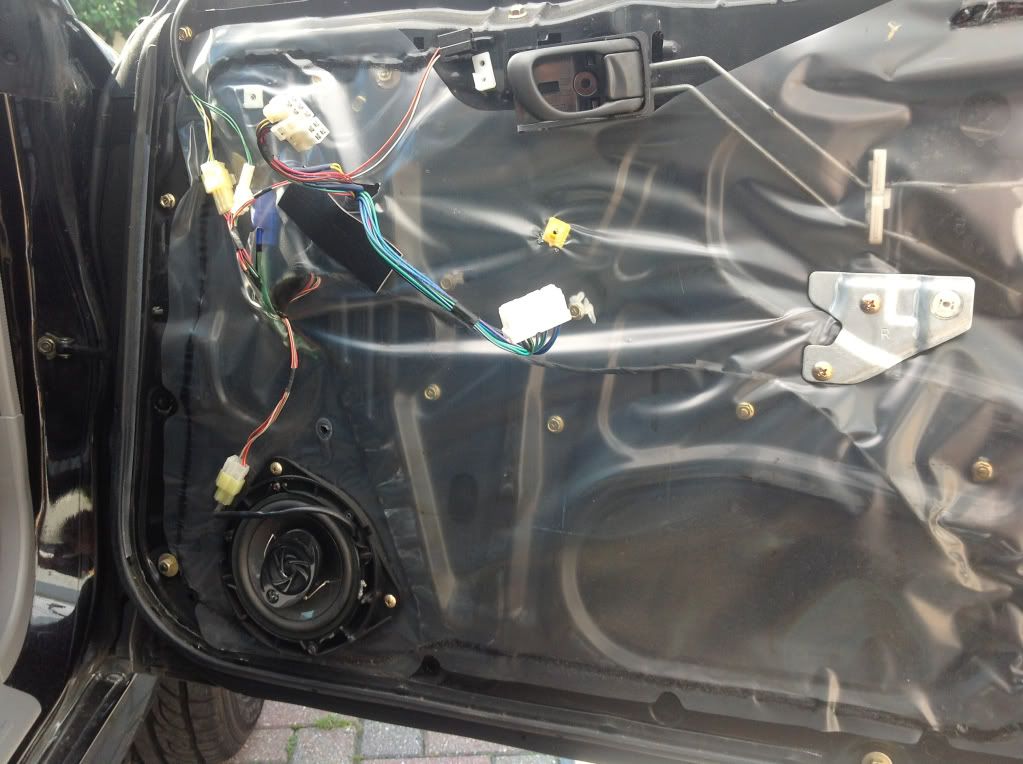
Then I stripped the inner liner and removed the speaker plus the mount.
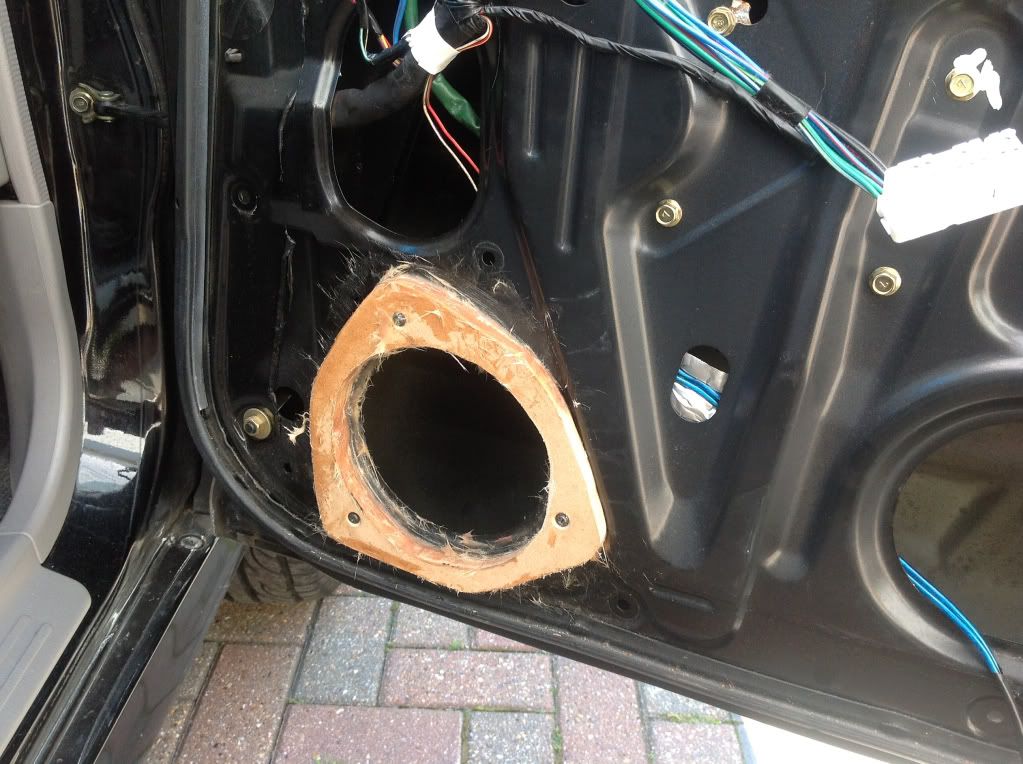
Stage 2 was to make up a spacer to take the 6.5' midrange, by tracing around the original mount (or speaker in a impreza) and cutting a spacer out of 16mm MDF, this was then trial fitted and clearances checked.
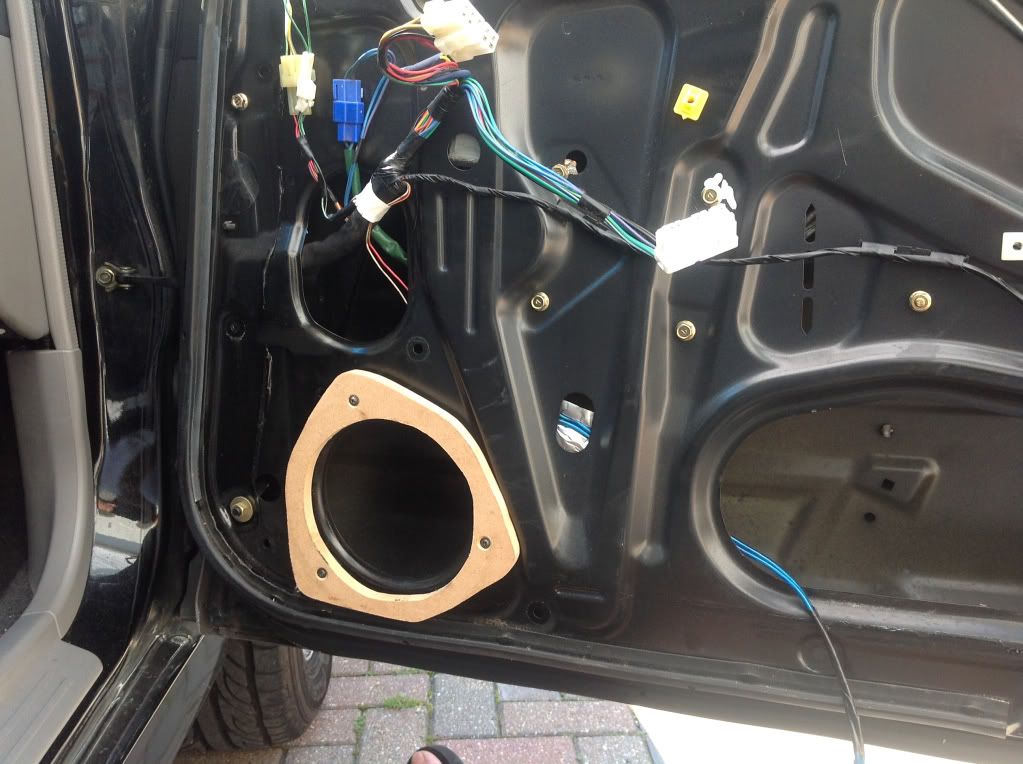
Stage 3 was to bond the spacer to the door skin using P40 filler, I'd stood the spacer off the door skin slightly to allow good clearance behind.
Stage 4 (after a bit of sanding) was to fit the sound deadening material to the inner skin, this involved making sure the wires were all run correctly. I used the off cut from the speaker hole on the outer skin directly behind the speaker.
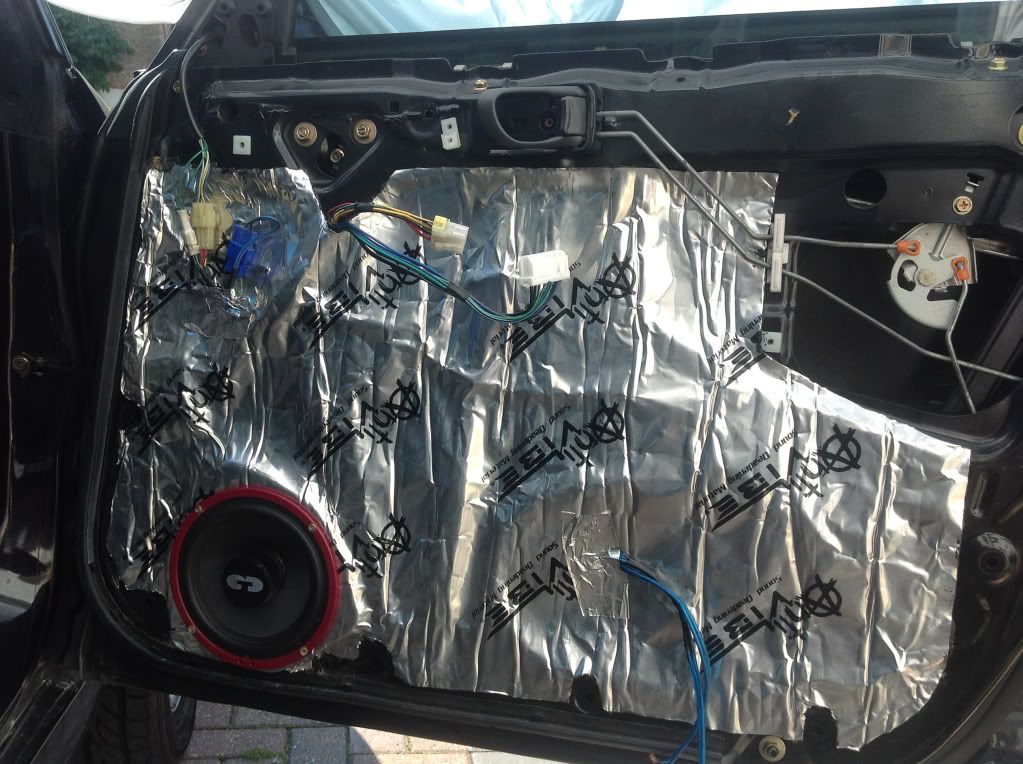
Stage 5 as the speakers are pretty high end (CDT components with front mounted magnets) the crossovers are a bit bulky so I fitted them to the inside of the door card and by using an off cut of the sound deadening I was able to mount the main tweeter to the back of the card as well. I will fit the imaging tweeters to the A pillars later on to lift the soundstage further if needed.
Stage 6 was to refit the door card.
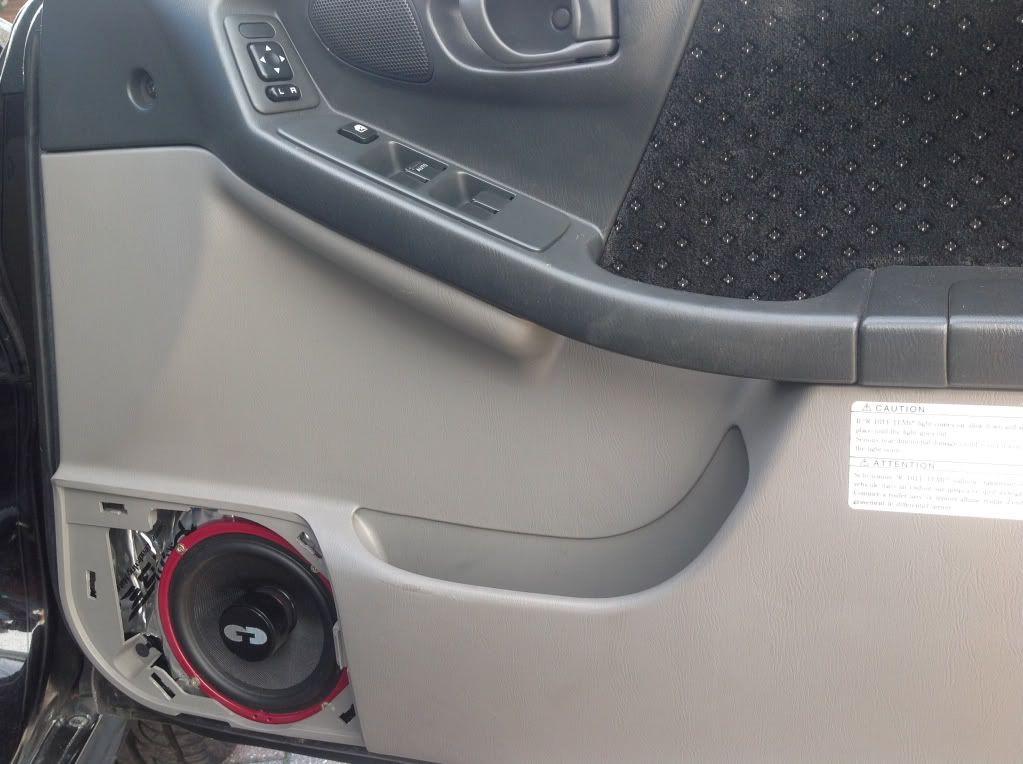
Sound is so much better now!
Stage 1 was to remove the front door cards, the speaker grilles clip off but otherwise it's very similar to an impreza.
Then I stripped the inner liner and removed the speaker plus the mount.
Stage 2 was to make up a spacer to take the 6.5' midrange, by tracing around the original mount (or speaker in a impreza) and cutting a spacer out of 16mm MDF, this was then trial fitted and clearances checked.
Stage 3 was to bond the spacer to the door skin using P40 filler, I'd stood the spacer off the door skin slightly to allow good clearance behind.
Stage 4 (after a bit of sanding) was to fit the sound deadening material to the inner skin, this involved making sure the wires were all run correctly. I used the off cut from the speaker hole on the outer skin directly behind the speaker.
Stage 5 as the speakers are pretty high end (CDT components with front mounted magnets) the crossovers are a bit bulky so I fitted them to the inside of the door card and by using an off cut of the sound deadening I was able to mount the main tweeter to the back of the card as well. I will fit the imaging tweeters to the A pillars later on to lift the soundstage further if needed.
Stage 6 was to refit the door card.
Sound is so much better now!

 13 August 2012, 11:41 AM
#6
i bought plastic spacers from the us which were cheap and did the job great also included were clips to space out the doorcards a little.
also be carefull your front window clears the back of the speaker when it is down.
i had trouble with this and had to space the speakers further out.
the back doors are fine as the window doesnt drop to the speaker
also be carefull your front window clears the back of the speaker when it is down.
i had trouble with this and had to space the speakers further out.
the back doors are fine as the window doesnt drop to the speaker
Last edited by tubbytommy; 13 August 2012 at 11:43 AM.
13 August 2012, 01:41 PM
#7
Scooby Regular
Thread Starter
Join Date: Aug 2012
Location: Bromsgrove
Posts: 51
Likes: 0
Received 0 Likes
on
0 Posts
Yeah, that was my experience... The front spacer gives me 70mm max to that white clip on the bottom edge of the window when it is down. In my mind, this gives me max 65mm depth and the components I have bought alledge 61mm depth, so all should be good
Trending Topics


Thread
Thread Starter
Forum
Replies
Last Post