Nylon to Alloy header tank fitment guide
 24 September 2006, 08:33 PM
#1
Scooby Regular
Thread Starter

Join Date: Sep 2005
Location: Whitley Bay
Posts: 1,563
Likes: 0
Received 0 Likes
on
0 Posts
OK, last week my black nylon header tank started to leak around the chrome seal. I looked at a few options (new nylon, Spec-R, Forge and a later spec alloy unit). Rang around and found an MY97+ alloy unit at essex scooby breakers, delivered for Ł40!!!
I then looked for a fitting guide on here, but there wasn't one! So here we are...
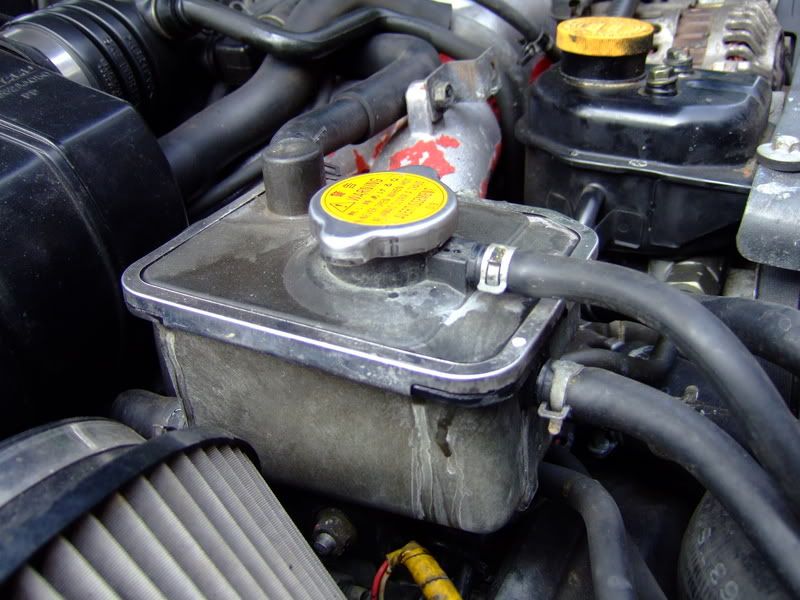
1.) Firstly, you can see the water marks on the old black nylon header tank -
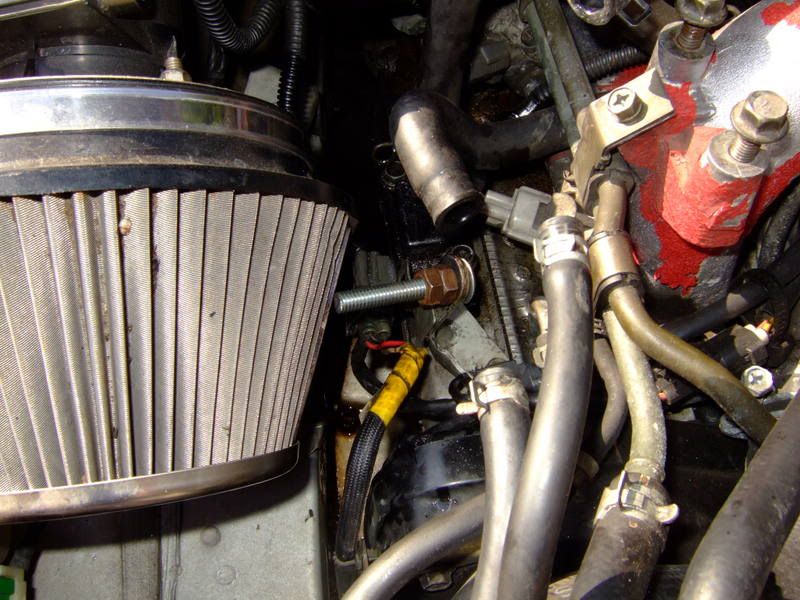
2.) Undo the 13mm bolts holding the tank in place and take off the pipes. Coolant will leak from the pipes but will stop shortly afterwards.
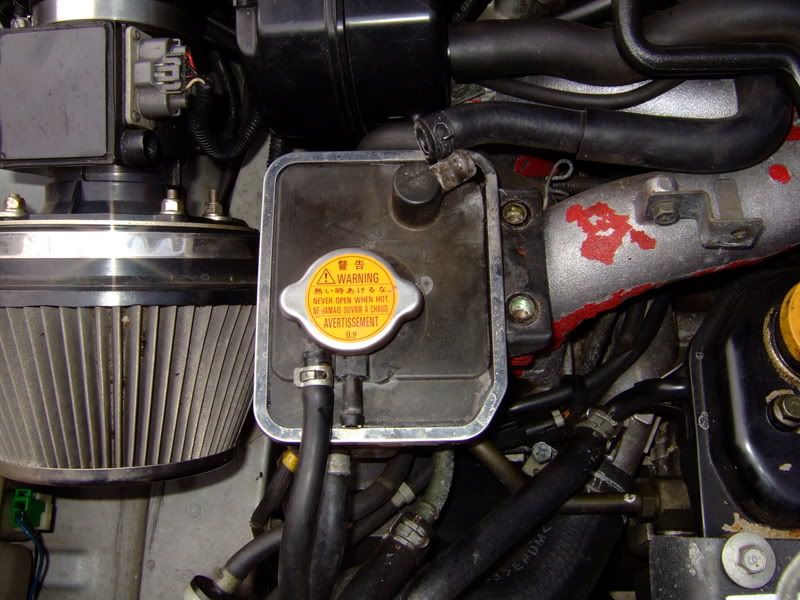
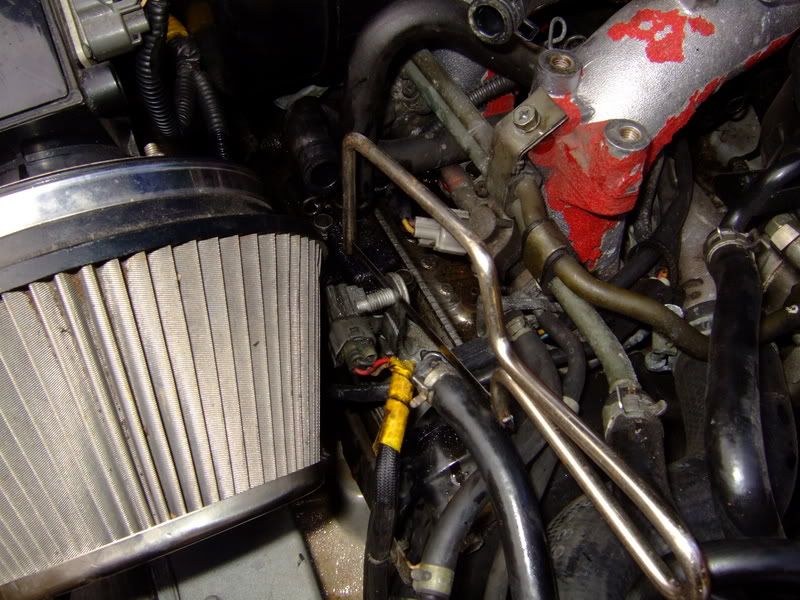
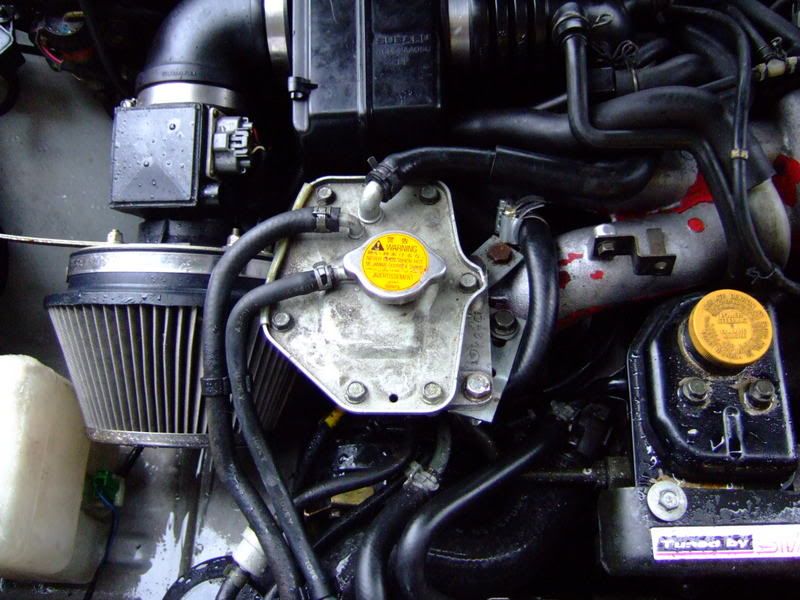
3.) Bay should then look like this -
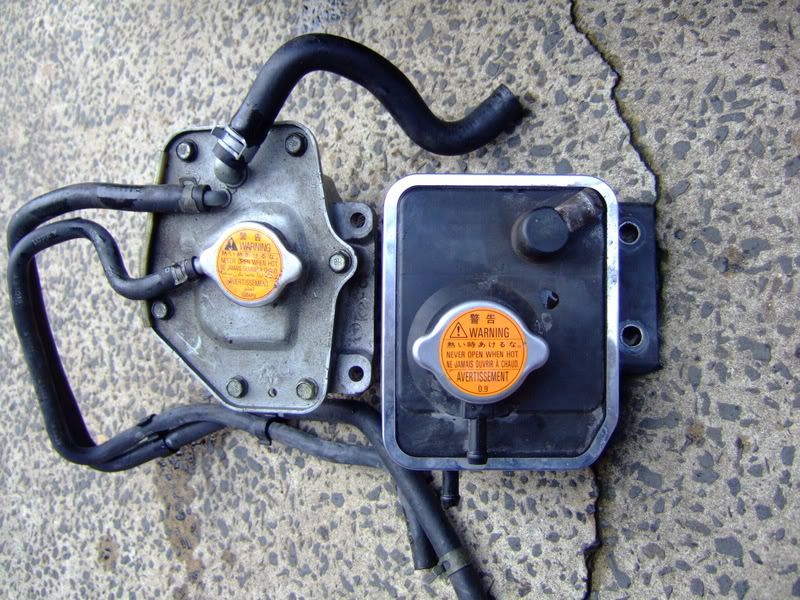
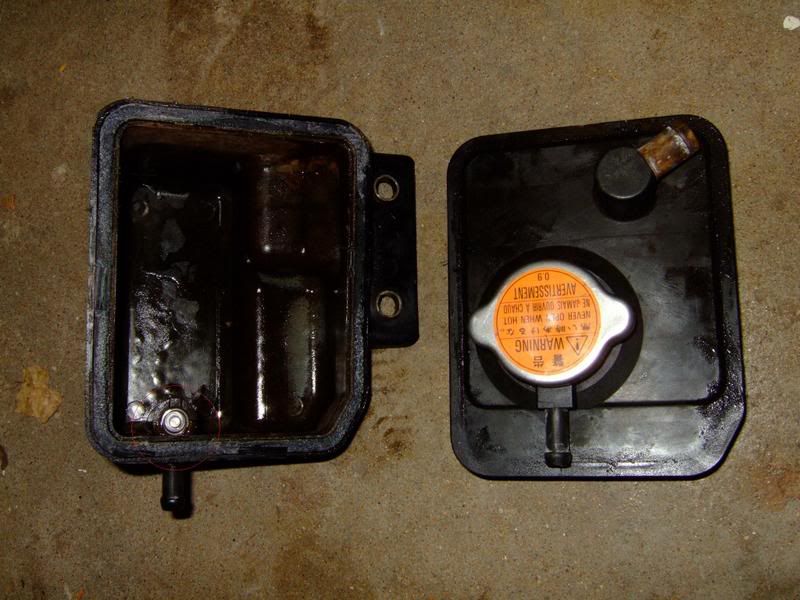
4.) Original on the right, alloy one on the left. You can see how the mounting holes are further apart. There is also more obstruction on the alloy tank underneath, it fouls part of a bracket.
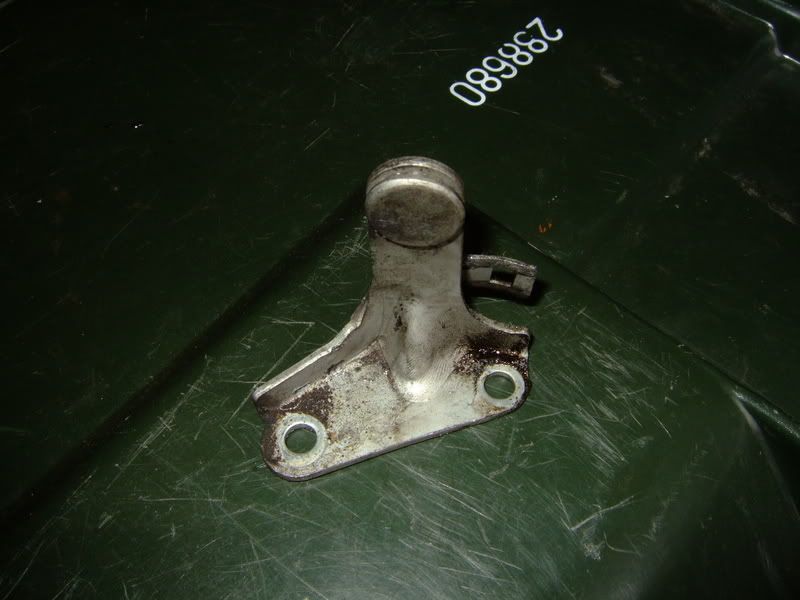
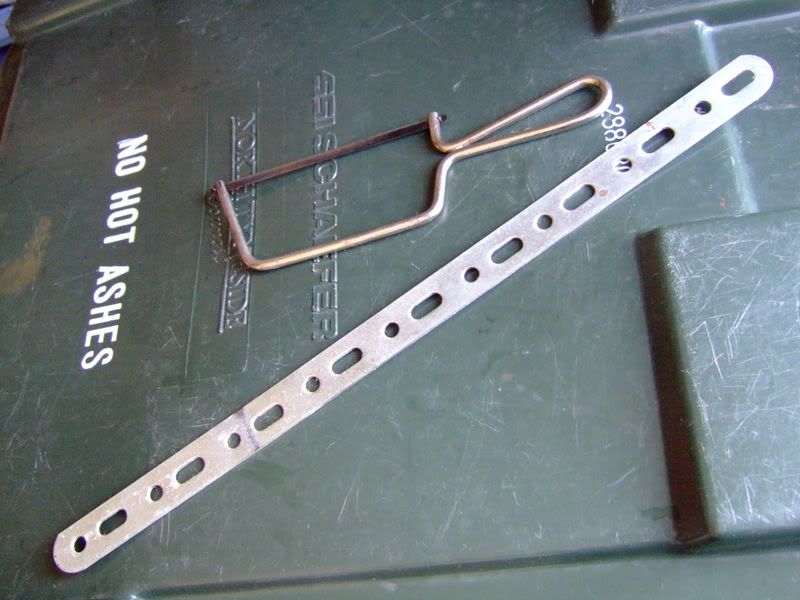
5.) Using a junior hacksaw, saw off the thread from the bottom bracket.
6.) Using a phillips head screwdriver, take off the bracket, only 2 bolts.
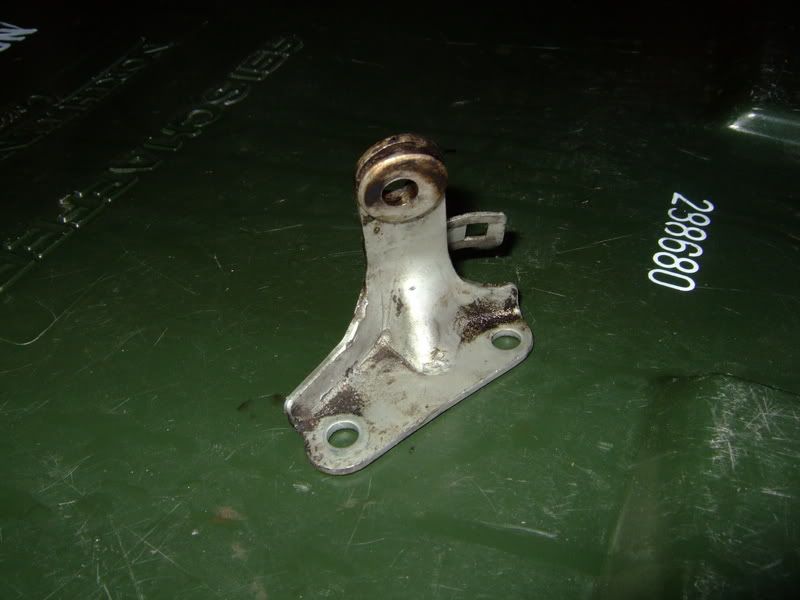
7.) Drill a hole big enough for a bolt of your choice to go through -
8.) Put a bolt through and tighten with a nut on the other side -
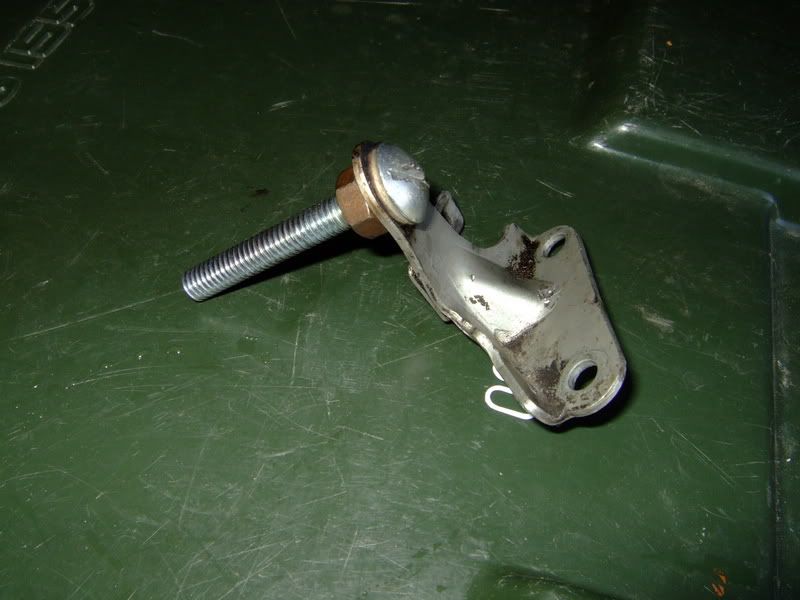
9.) Fix the bracket back in with the original two bolts.
10.) Due to the positions of the hoses being different on the header tanks, the larger pipe that connects to the bottom of the nylon tank has to be lengthen to be able to fit onto the alloy tank. I used a piece of 15mm copper pipe and some spare pipe I received with the tank. You could buy some hose from your local motor factors if needed -
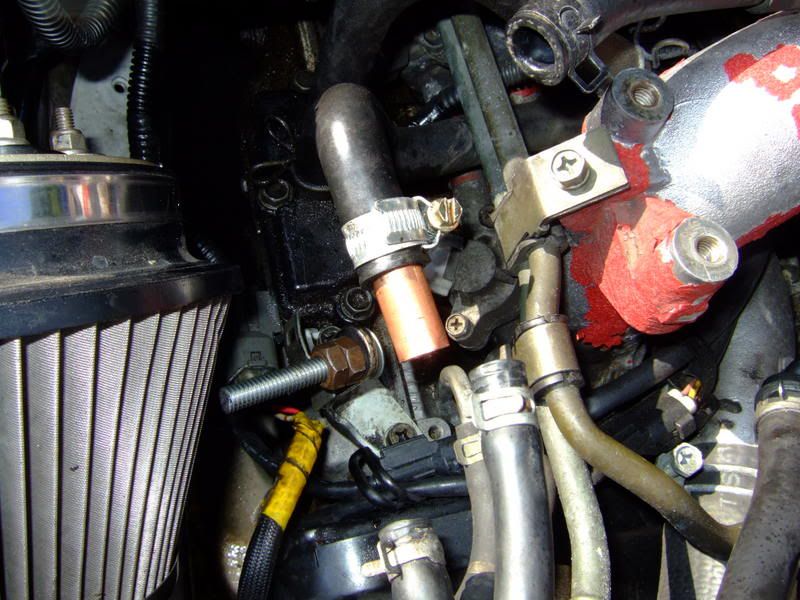
11.) Attatch the extra bit of hose to the copper pipe -
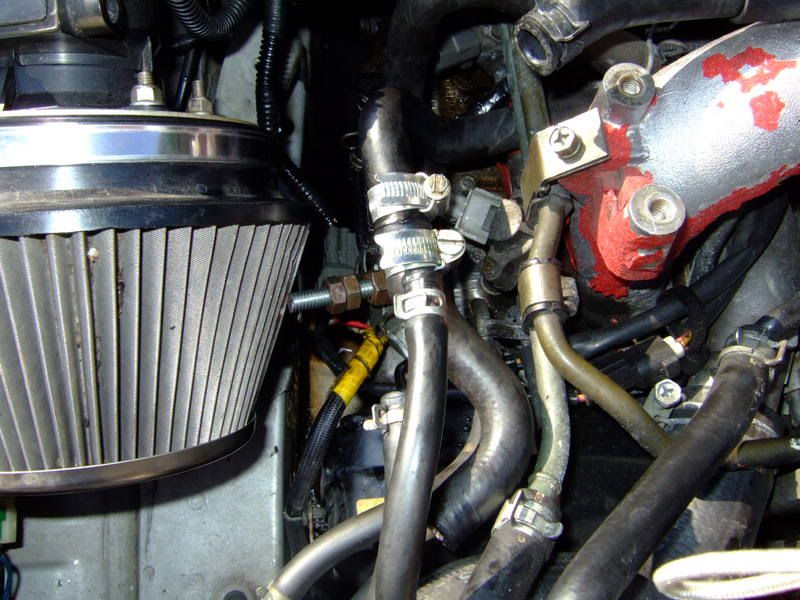
12.) Place the alloy tank in position and connect all of the rubber hoses to their relevant location -
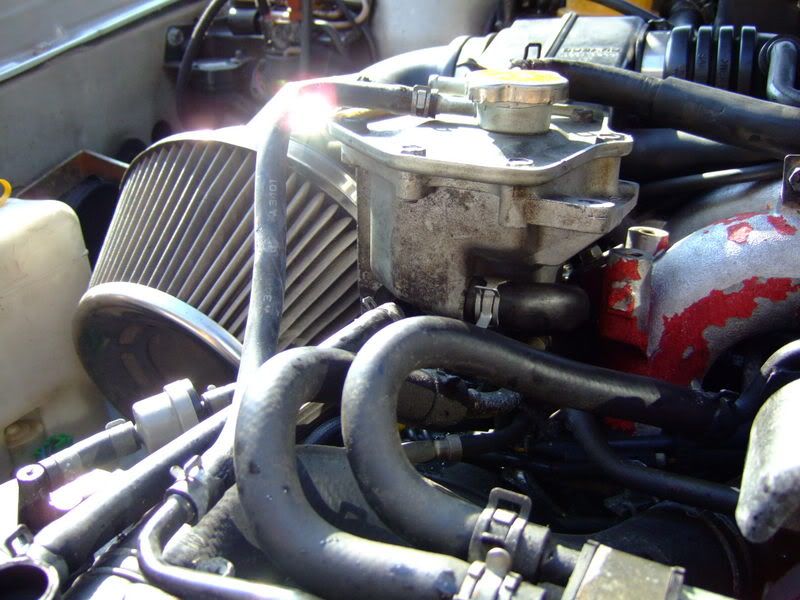
13.) I used large 'mechano' like strips and 2 nuts & bolts to hold the alloy tank in place -
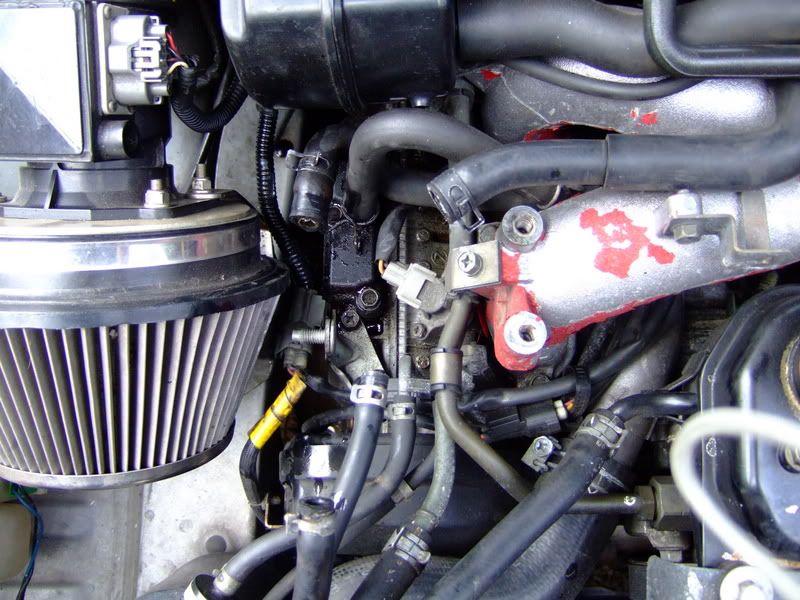
14.) When you have tightened the brackets and tank in place it should look like this -
Remember to fill up your water system and check it after a short drive!
Of course there are other ways of fitting the tank, this is just the way I did mine!
Hope this guide helps somebody!!!!!
Nick
I then looked for a fitting guide on here, but there wasn't one! So here we are...
1.) Firstly, you can see the water marks on the old black nylon header tank -
2.) Undo the 13mm bolts holding the tank in place and take off the pipes. Coolant will leak from the pipes but will stop shortly afterwards.
3.) Bay should then look like this -
4.) Original on the right, alloy one on the left. You can see how the mounting holes are further apart. There is also more obstruction on the alloy tank underneath, it fouls part of a bracket.
5.) Using a junior hacksaw, saw off the thread from the bottom bracket.
6.) Using a phillips head screwdriver, take off the bracket, only 2 bolts.
7.) Drill a hole big enough for a bolt of your choice to go through -
8.) Put a bolt through and tighten with a nut on the other side -
9.) Fix the bracket back in with the original two bolts.
10.) Due to the positions of the hoses being different on the header tanks, the larger pipe that connects to the bottom of the nylon tank has to be lengthen to be able to fit onto the alloy tank. I used a piece of 15mm copper pipe and some spare pipe I received with the tank. You could buy some hose from your local motor factors if needed -
11.) Attatch the extra bit of hose to the copper pipe -
12.) Place the alloy tank in position and connect all of the rubber hoses to their relevant location -
13.) I used large 'mechano' like strips and 2 nuts & bolts to hold the alloy tank in place -
14.) When you have tightened the brackets and tank in place it should look like this -
Remember to fill up your water system and check it after a short drive!
Of course there are other ways of fitting the tank, this is just the way I did mine!
Hope this guide helps somebody!!!!!
Nick
Last edited by nickwrxstiV2; 24 September 2006 at 10:07 PM.

 25 September 2006, 07:35 AM
#3
Scooby Regular

Join Date: Aug 2004
Location: east sussex
Posts: 126
Likes: 0
Received 0 Likes
on
0 Posts
i was warned that the old tank had a one way valve in one of the pipes and removing it may cause a problem of the system over pressurising.i have since had the rad split dont know if its connected or rad just went with age.i think the valve is in the tank housing in one of the front 2 pipes .i dont know if its worth fitting a one way valve in one of the pipes or not? or will not running one cause problems ? anyone with an answer to this?
cheers rob
cheers rob
25 September 2006, 07:55 AM
#4
Scooby Regular
iTrader: (1)
Join Date: Aug 2005
Location: Manchester ish
Posts: 18,547
Likes: 0
Received 0 Likes
on
0 Posts
dont know about the valve I ve not seen one. The rads are generally weak anyway and do go on the end tanks with age. I have just recently changed my second one!

 25 September 2006, 08:11 PM
#7
Scooby Regular
Thread Starter
Join Date: Sep 2005
Location: Whitley Bay
Posts: 1,563
Likes: 0
Received 0 Likes
on
0 Posts
OK - took the chrome strip off and used a chisel to split the old nylon tank in 2. And the answer is........ YES! There is a 1-way valve in the tank (circled in red). It connects to the hose that goes around the front of the car (above the radiator) and connects to the bottom of the expansion tank (In nearside wing). -
Trending Topics

Thread
Thread Starter
Forum
Replies
Last Post
Mattybr5@MB Developments
Full Cars Breaking For Spares
28
28 December 2015 11:07 PM
Mattybr5@MB Developments
Full Cars Breaking For Spares
12
18 November 2015 07:03 AM