Polished Bliss: My Impreza WR1.
 04 May 2008, 01:00 PM
#1
Former Sponsor
Thread Starter

Join Date: Mar 2007
Location: Aberdeen
Posts: 181
Likes: 0
Received 0 Likes
on
0 Posts
Well this weekend i finally managed to find a free day so i figured i better make good use of it and give the Impreza a proper clean as up untill now i've only managed to wash it a couple of times (although it did have AG lifeshine on it so it would have been good for a few years yet!  )
)
This write up is a bit different to all the others in the sense that its almost like a beginners guide to detailing. Reason being that the guys on the WR1 forum asked to see loads of pics of the process etc and they wont all know our "detailing talk" yet, so you'll just have to bare with me if it's all a bit obvious
So, onto the detail:
Here is the car at 8am this morning after my drive to the unit, not much dirt on it at all to be honest:

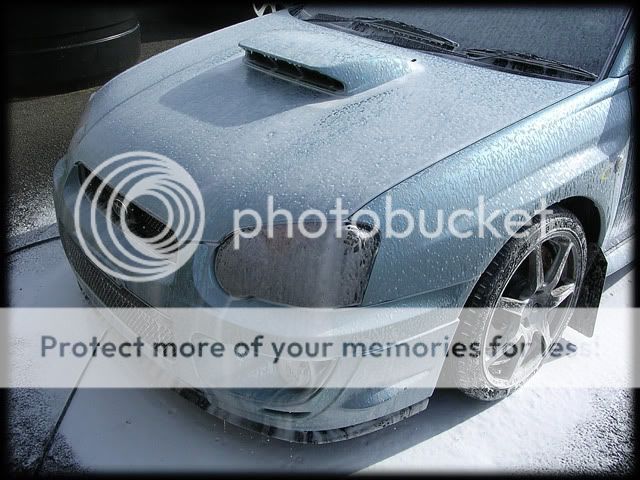
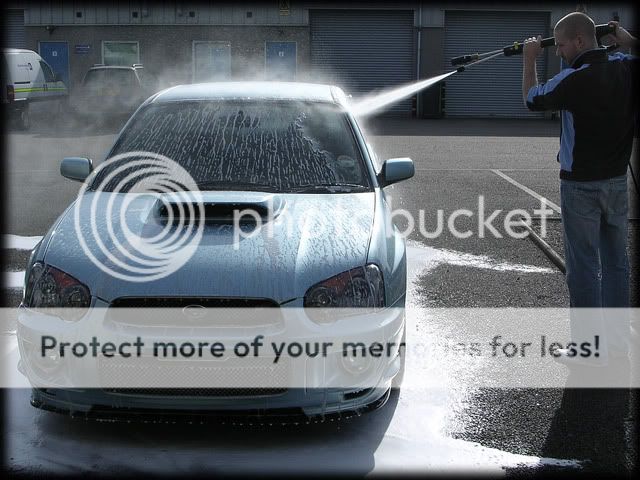
The first thing to do was to pre-foam the car with Meguiars Hyper Wash through the lance @60 degrees:
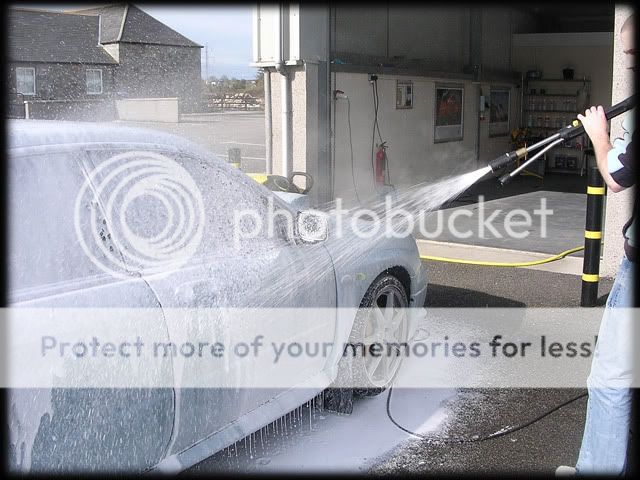
This helps to pull any loose dirt/grime off the paintwork and is left to dwell for 5 minutes:
The car was then rinsed at high pressure @ 60 degrees:
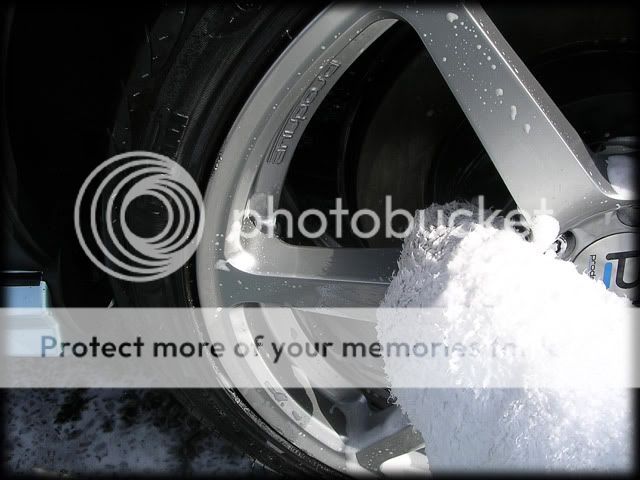
I then moved onto the wheels. I do these before washing the car as if you do it the other way around you can end up with streaks and water spots before you manage to get the wheels completely done, so this makes more sense - especially when some cars can take up to a couple of hours to get the wheels spot on!
Luckily mine are ok, so all i needed was normal shampoo and warm water with a Meguiars MF wash mitt:
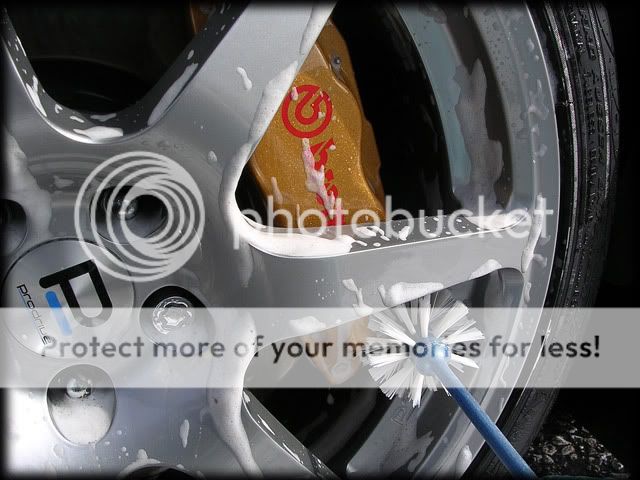
One of our wheel back brushes was used for the innner rims and calipers:
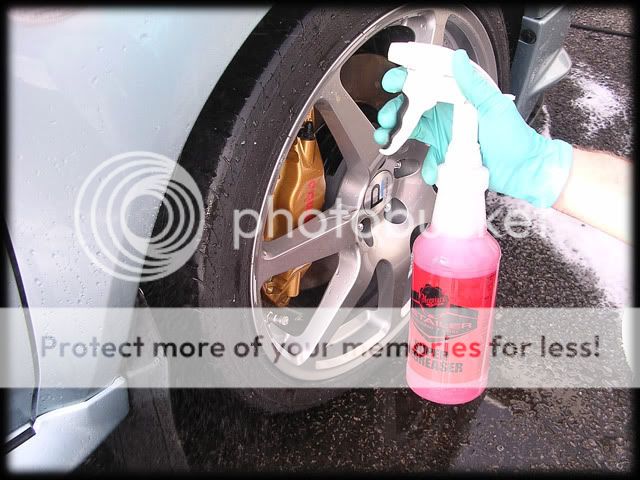
The wheels were now 95% clean but still needed a bit more attention as there were a few tar spots, so i gave them a quick spray with some Autosmart Tardis - which after a minute or two starts to disolve the tar as can be seen in the pic below:
A quick wipe with a MF cloth easily removes the tar:
I then soaked the arches and tyres with Meguiars Superdegreaser and used a soft brush to agitate them before rinsing off again:
It's important to give your tyres a good clean if you want any dressings to stay on them for any decent length of time, plus it keeps them in better condition and prevents them from turning brown
I gave the car a quick rinse again as the sun had pretty much completely dried it and then washed it with the two bucket method, using Meguiars Shampoo Plus and a lambswool mitt.
Pictured below are the two buckets after the car had been washed (left is the rinse bucket and right is the suds) and you can see why this method is so effective. My car wasnt even that dirty but you can still see in the left hand bucket that there is still a fair bit of dirt that would have gone back into your "clean" water if you were to only use one bucket:

The car still wasnt completely clean yet though, so back out with the tar remover which was sprayed onto the lower halfs of the car:
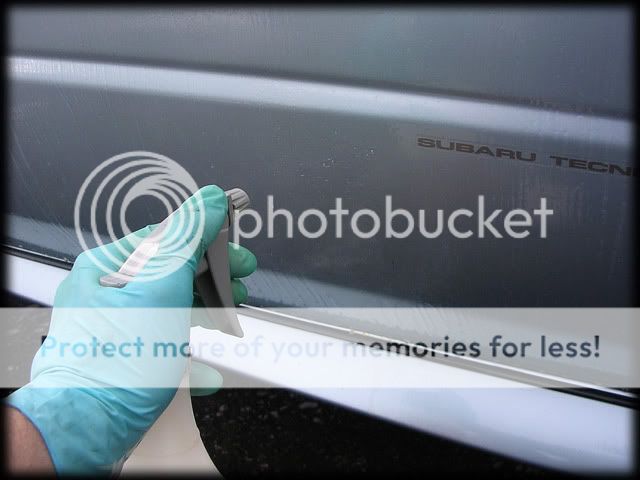
This was left for around a minute untill i could see the tar beginning to disolve:

I then wiped it off with a soft MF cloth and gave the car another quick rinse with hot water.
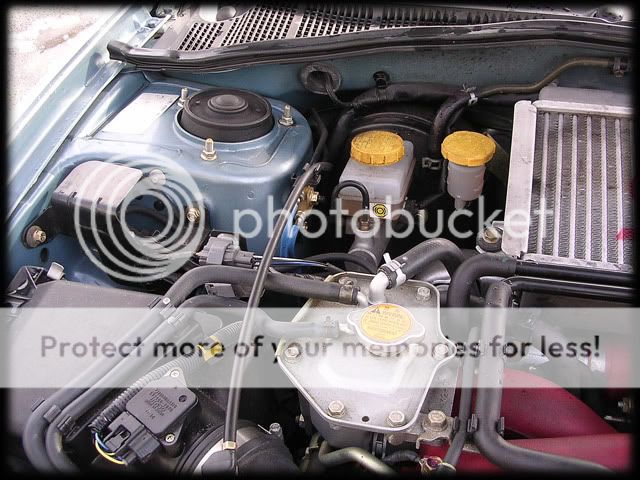
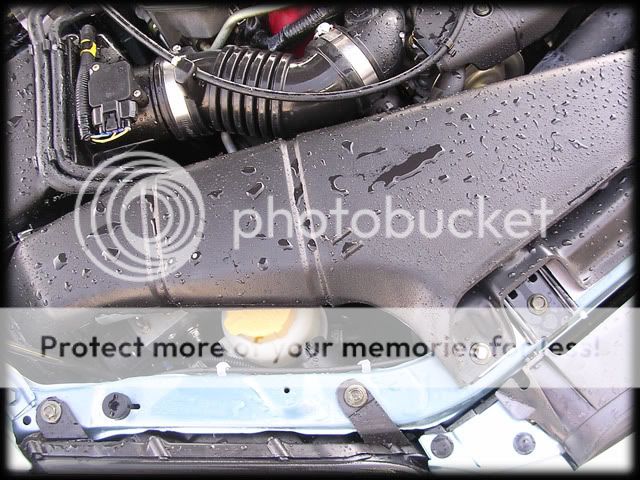
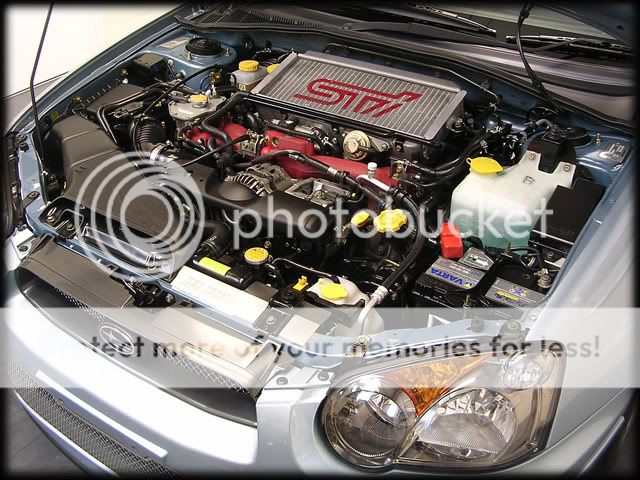
The last job i had to do before putting the car inside was to do the engine, which to be fair wasnt that bad - just grubby and dusty more than anything:
Before i could begine to clean it i had to cover up any exposed electrical parts such as the alternator, battery terminals etc...

Once that was done i soaked the bay and under the bonnet with Meguiars Superdegreaser:
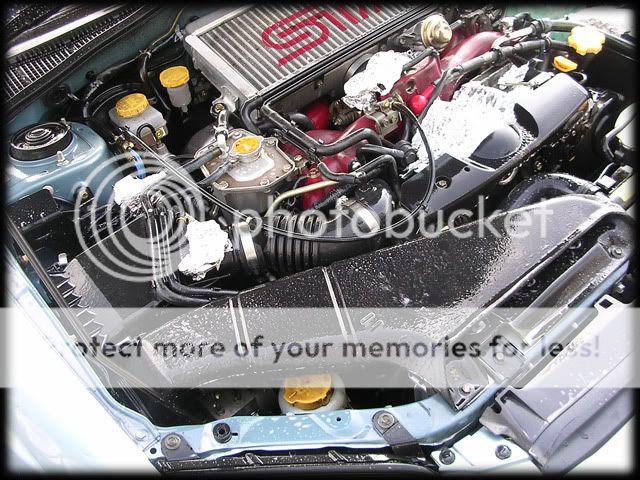
I agitated the worst bits with a brush and then pressure washed at medium pressure @ 50 degrees. This left everything squeaky clean:
I then moved the car inside to clay the paintwork.
For those who dont know what a clay bar is - it is just as it sounds. A bar of clay:

It is essentially an abrasive product (different grades are available such as "mild" or "aggressive") which uses the clay as a carrier and we use this to remove bonded contaminants such as tree sap,minor tar spots, paint overspray, metal filings etc etc. It works by firstly spraying a lubricant such as water or quick detailer onto the paintwork and then using fingertip pressure, you glide the clay back and forward over the paintwork untill it is as smooth as glass. The clay will aqua-plane over the areas of paint that has no contaminants and shear off any that are there, hence leaving you with a lovely smooth base to go from when it comes to polishing/waxing etc.
As you can see in the pic of the clay above, my car had next to no contaminants on the paintwork at all so the clay stage didnt take too long, which made a fine change
Now that the paintwork was completely clean and ready to polish, i dried the car off with a waffle weave towel. These are much softer than a chamois and are kinder to your paint as they have a pile that allows any dust particles etc to escape to, instead of being dragged across your paint as a chamois would do. You also dont get any streaking with a waffle weave and they dont need to be wrung out so often either
A leaf blower was also used to get rid of any little water traces in the panel gaps and wheels.
Total work time up to this point was around 4 hours (I wasnt keeping a mega close eye on the clock but i think it was around that time scale).
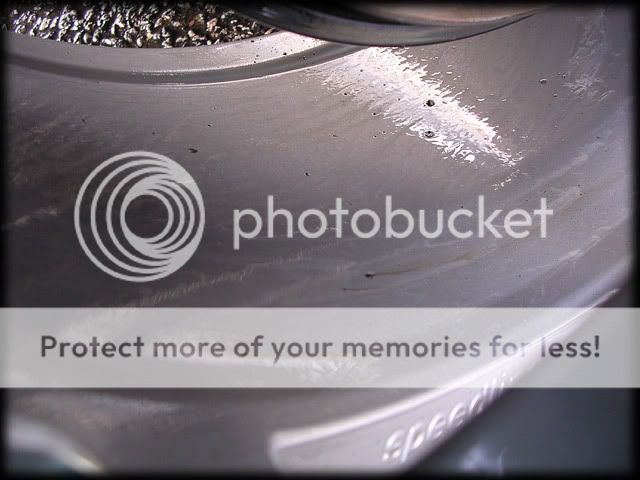
Next up was the polishing stage, but before i could begin that i had to take paint thickness readings to give me an indication of whether there were any low spots or areas with high readings which would suggest signs of a re-spray. Fortunately all the paint on the car is original and the majority of it was a healthy enough level:
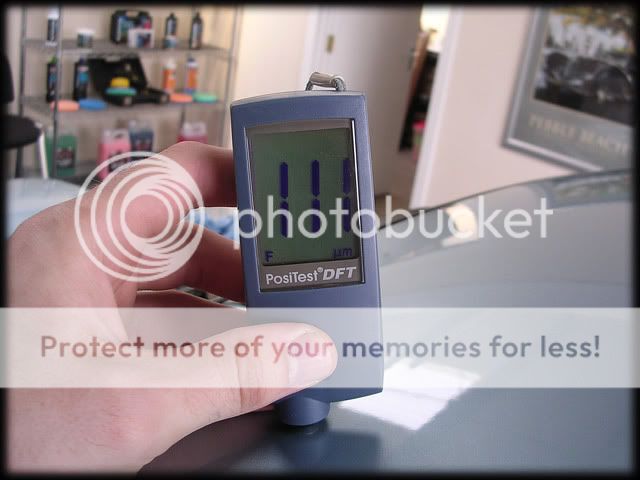
111 microns.
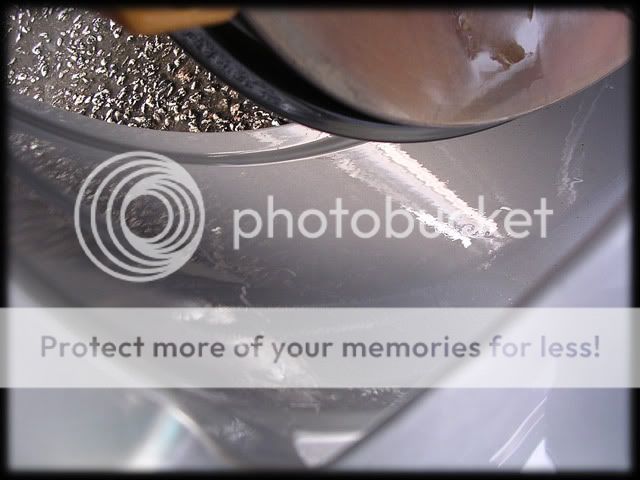
There were a few low spots though, which is not an unusual trend for a japanese car:

76 microns.
For those who may not quite know how thick these kind of readings are, the first picture below is of a calibration shim that is 129 microns thick:
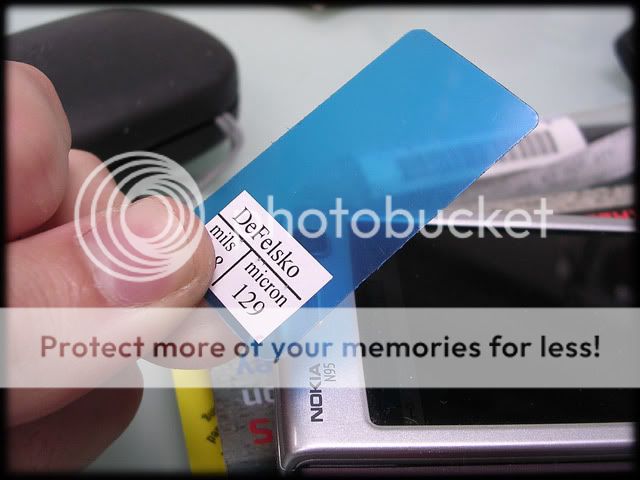
120-130 microns is generally quite a good average reading on most cars (certainly on BMW's/AUDI's etc) but this is usually made up of the basecoat,pigment (colour) and clear coat. So if you have a reading of 129 microns, this doesnt necessarily mean you have that level of clear coat to play with.
You can see just how thin this is when looking at the shim side on:
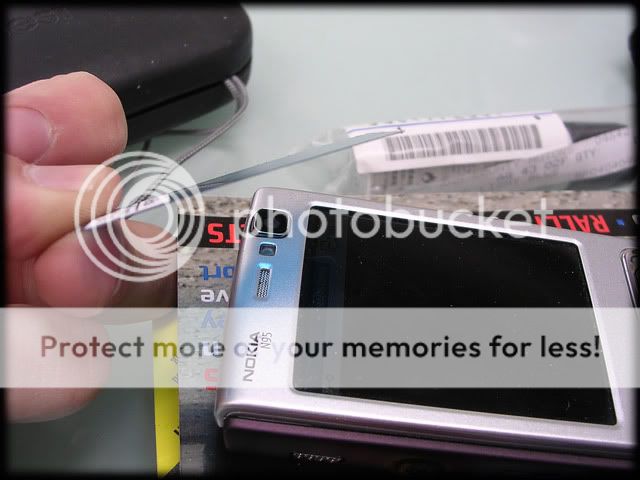
This is usually the average level of clear coat on an original painted car (27 microns):

And looking at it side on:

This is what we have to play with on most cars when machine polishing/wet sanding. Quite scary when you look at it like that huh?
This is why paint thickness gauges are so important in order to let you safely polish a car
Anyways, enough rambling!
Now i knew what paint levels i was working with i removed the side repeaters...

...And taped up all the necessary bits:

This is to prevent getting any polish residue on the trim and it also stops any trim being burned from the machine polisher.
Now, this is usually the bit where i show the pics of the defects but after 20 minutes of trying to capture them on camera i gave up! I'm actually quite surprised at just how little defects the car had, the previous owner had taken seriously good care of the paintwork and there was very little in the way of swirling at all
This allowed me to go for a nice mild polish and pad combination:

Menzerna 106FF finishing polish and a 3M Finishing Pad. I used this @1500 rpm's which gave a result of around 98% defect removal with just a few bits remaining here and there but given the colour of the car you would never see them so i couldnt justify removing more paint to polish them out.
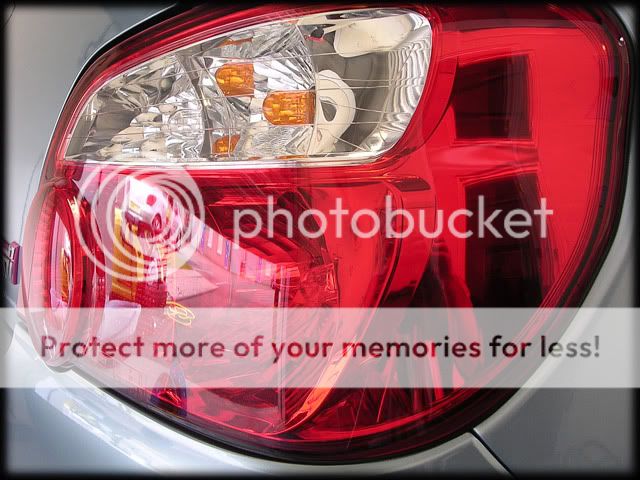
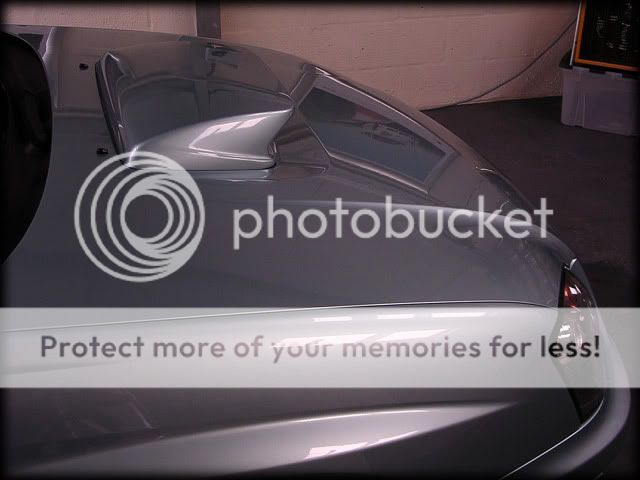
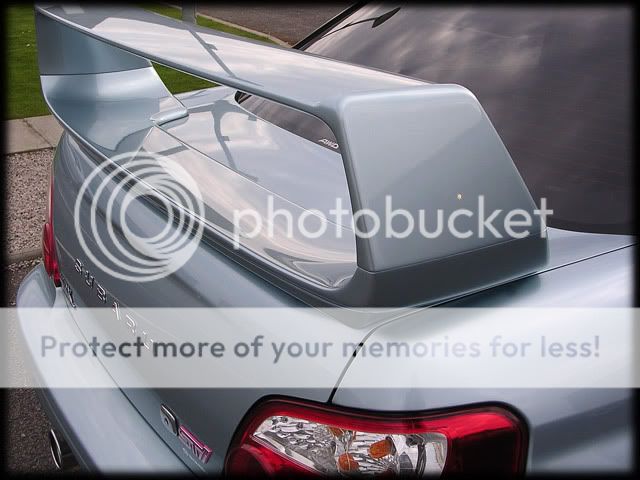
I managed to get a pic of the swirls on the rear tail lights though:
Before:

After:

Total polishing time was around 4.5 hours, which was a fraction of the time i'm used to spending on cars so this was turning into an enjoyable day
A quick dust down with the lambswool duster followed:
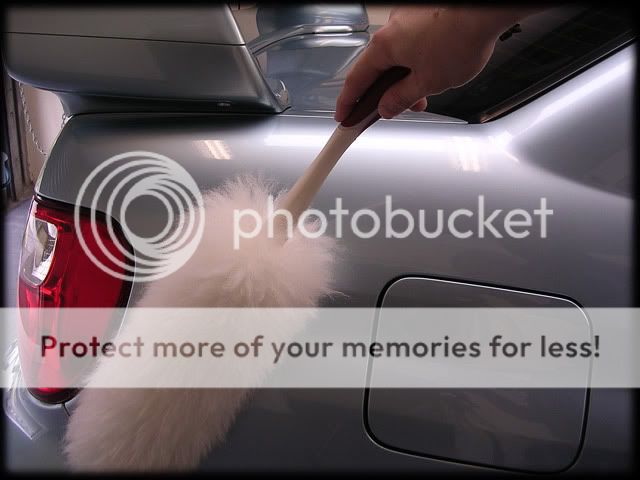
This safely removes any polishing dust from the paintwork without inducing any marring and leaves the paint ready for applying the LSP (Last Step Product).
On my Leon i used Zym0l Vintage and it was awesome, but on a car of this colour i couldnt help but think it would be wasted, so it was a toss up between either Zaino or Jeffs Werkstatt Acrylic system.
I've seen Zaino in the flesh recently and i can honestly say i wasnt overly impressed in terms of looks (it does seem to bead well). Now this may well be because the car i saw it on may need more than a couple of layers or it may be down to the fact that because so many people have "talked it up" to be something so amazing i was actually a bit disapointed. I must stress this is just my opinion and i will remain open minded on it
Anyways, as i know the Jeffs System inside out now i decided to go for that. When it comes to silvers and light metalic paints i think its a hard product to beat as it just seems to offer better gloss and reflectivity than most other products so far, including Vintage.
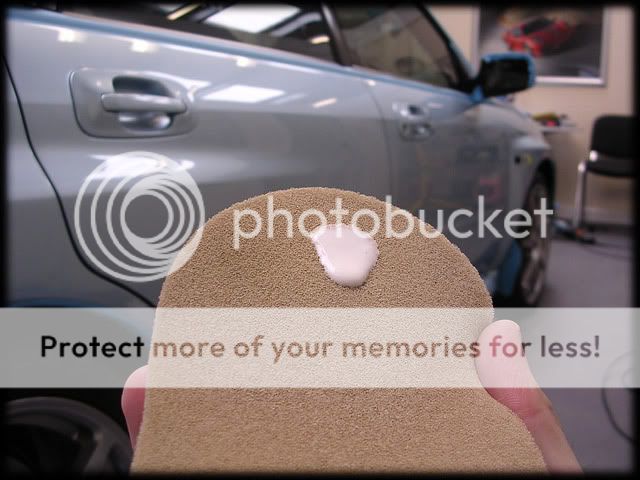
So up first was Acrylic Prime:

You can either apply this by hand or machine, but seeings as i had just machined the paint i knew it would be quicker by hand as i only needed to use it for its ability to remove any polishing oils and to lay down an initial sealant base:
I did a section at a time and used Acrylic Glos to help buff off any tacky patches that remained.
Acrylic Jett followed next:
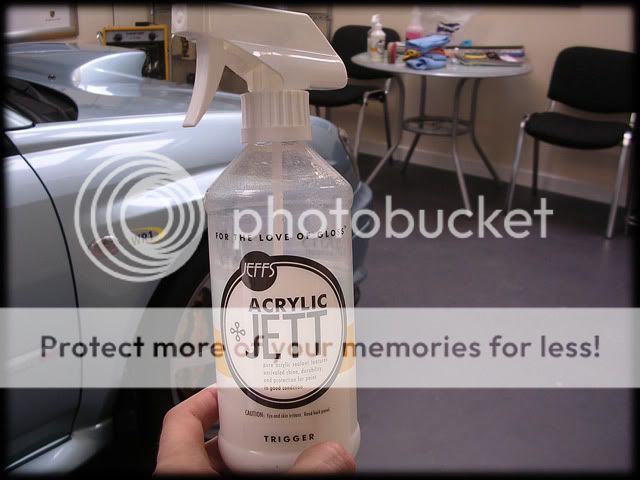
This was applied with a Poorboys DMT microfibre towel and i went over the car 3 times to ensure i got a nice even coverage and also to get maximum wetness and gloss
I then gave the car a final wipe down with Acrylic Glos to remove any slight smears that may have remained.
Now that the paintwork was all completed i moved onto the wheels. These were sealed with Poorboys Wheel Sealant:

The sealant was left for around 10 mins and then buffed off. The tyres were then dressed with Blackfire Long Lasting Tyre Gel.
Blackfire was again used for the tailpipe, using their Fine Cut Compound and a German Applicator, followed my Meguiars NXT Metal Polish:
Before:

After:
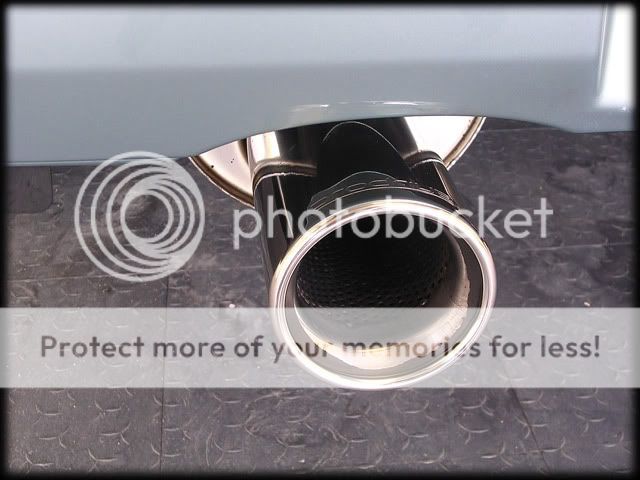
(think i'll have to take a dremel to the inside cos i couldnt get it 100% today)
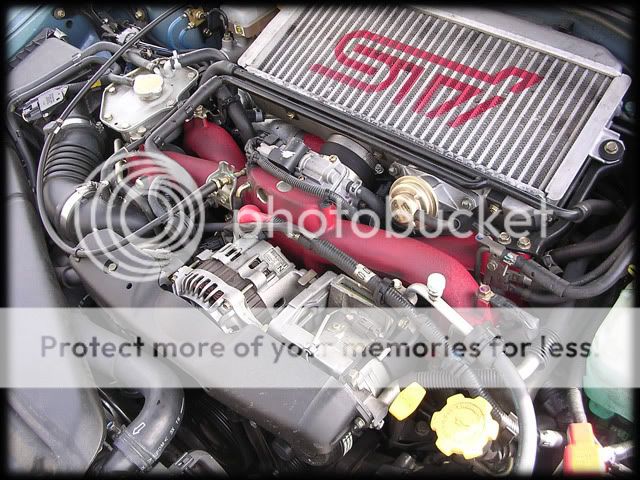
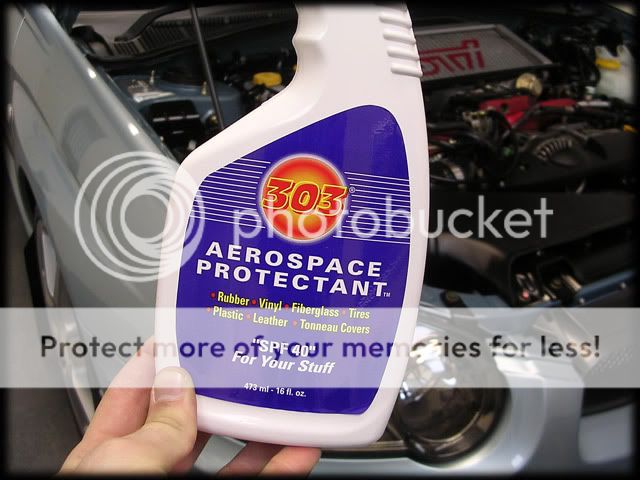
The engine bay was dressed with Aerospace 303 Protectant:


The interior was given a quick hoover and not much else more as it's completely minted anyways:


This wee dial is fun when its raining

I guess now all that remains is to show you the end result. I should apologise for the amount of pics but i'm not in the least bit sorry


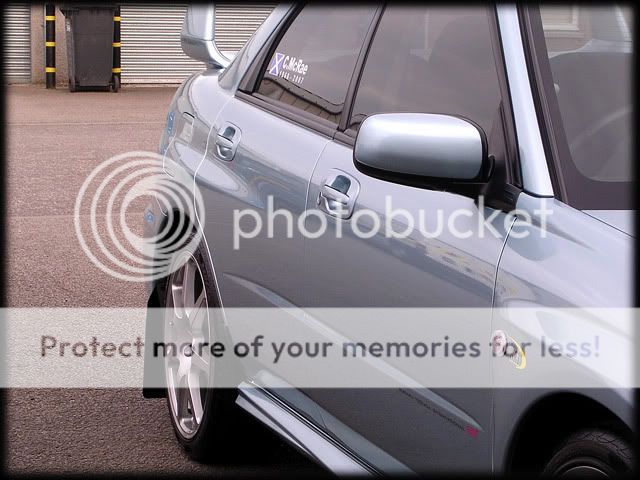


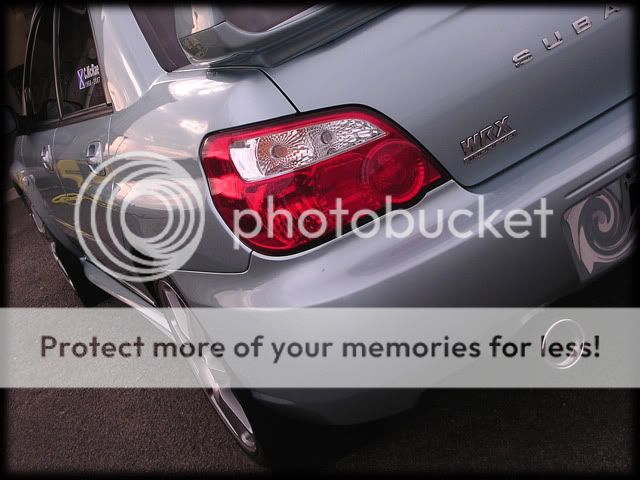

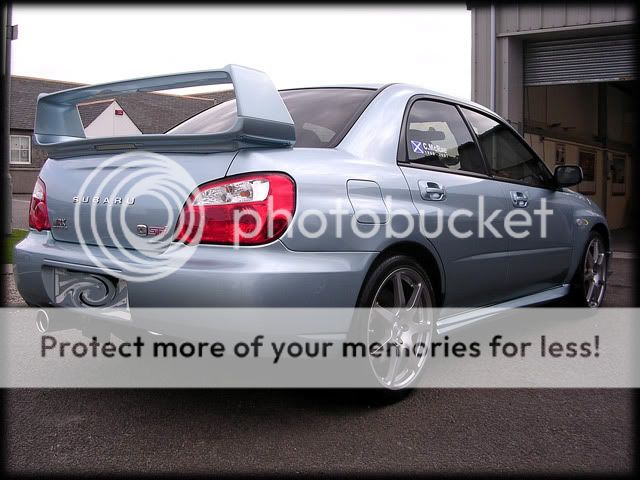


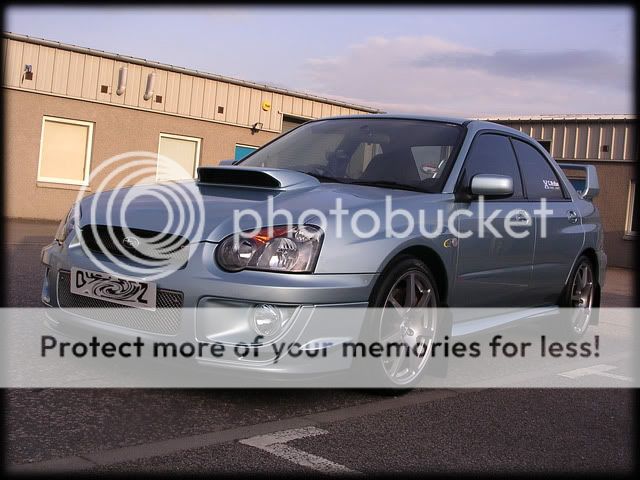
So there you have it, my new toy
Hopefully it wasn't too boring for some of you but we've all got to start somewhere and we were all beginners at some point.
Thanks for looking as always!
Clark
)This write up is a bit different to all the others in the sense that its almost like a beginners guide to detailing. Reason being that the guys on the WR1 forum asked to see loads of pics of the process etc and they wont all know our "detailing talk" yet, so you'll just have to bare with me if it's all a bit obvious
So, onto the detail:
Here is the car at 8am this morning after my drive to the unit, not much dirt on it at all to be honest:
The first thing to do was to pre-foam the car with Meguiars Hyper Wash through the lance @60 degrees:
This helps to pull any loose dirt/grime off the paintwork and is left to dwell for 5 minutes:
The car was then rinsed at high pressure @ 60 degrees:
I then moved onto the wheels. I do these before washing the car as if you do it the other way around you can end up with streaks and water spots before you manage to get the wheels completely done, so this makes more sense - especially when some cars can take up to a couple of hours to get the wheels spot on!
Luckily mine are ok, so all i needed was normal shampoo and warm water with a Meguiars MF wash mitt:
One of our wheel back brushes was used for the innner rims and calipers:
The wheels were now 95% clean but still needed a bit more attention as there were a few tar spots, so i gave them a quick spray with some Autosmart Tardis - which after a minute or two starts to disolve the tar as can be seen in the pic below:
A quick wipe with a MF cloth easily removes the tar:
I then soaked the arches and tyres with Meguiars Superdegreaser and used a soft brush to agitate them before rinsing off again:
It's important to give your tyres a good clean if you want any dressings to stay on them for any decent length of time, plus it keeps them in better condition and prevents them from turning brown
I gave the car a quick rinse again as the sun had pretty much completely dried it and then washed it with the two bucket method, using Meguiars Shampoo Plus and a lambswool mitt.
Pictured below are the two buckets after the car had been washed (left is the rinse bucket and right is the suds) and you can see why this method is so effective. My car wasnt even that dirty but you can still see in the left hand bucket that there is still a fair bit of dirt that would have gone back into your "clean" water if you were to only use one bucket:
The car still wasnt completely clean yet though, so back out with the tar remover which was sprayed onto the lower halfs of the car:
This was left for around a minute untill i could see the tar beginning to disolve:
I then wiped it off with a soft MF cloth and gave the car another quick rinse with hot water.
The last job i had to do before putting the car inside was to do the engine, which to be fair wasnt that bad - just grubby and dusty more than anything:
Before i could begine to clean it i had to cover up any exposed electrical parts such as the alternator, battery terminals etc...
Once that was done i soaked the bay and under the bonnet with Meguiars Superdegreaser:
I agitated the worst bits with a brush and then pressure washed at medium pressure @ 50 degrees. This left everything squeaky clean:
I then moved the car inside to clay the paintwork.
For those who dont know what a clay bar is - it is just as it sounds. A bar of clay:
It is essentially an abrasive product (different grades are available such as "mild" or "aggressive") which uses the clay as a carrier and we use this to remove bonded contaminants such as tree sap,minor tar spots, paint overspray, metal filings etc etc. It works by firstly spraying a lubricant such as water or quick detailer onto the paintwork and then using fingertip pressure, you glide the clay back and forward over the paintwork untill it is as smooth as glass. The clay will aqua-plane over the areas of paint that has no contaminants and shear off any that are there, hence leaving you with a lovely smooth base to go from when it comes to polishing/waxing etc.
As you can see in the pic of the clay above, my car had next to no contaminants on the paintwork at all so the clay stage didnt take too long, which made a fine change
Now that the paintwork was completely clean and ready to polish, i dried the car off with a waffle weave towel. These are much softer than a chamois and are kinder to your paint as they have a pile that allows any dust particles etc to escape to, instead of being dragged across your paint as a chamois would do. You also dont get any streaking with a waffle weave and they dont need to be wrung out so often either
A leaf blower was also used to get rid of any little water traces in the panel gaps and wheels.
Total work time up to this point was around 4 hours (I wasnt keeping a mega close eye on the clock but i think it was around that time scale).
Next up was the polishing stage, but before i could begin that i had to take paint thickness readings to give me an indication of whether there were any low spots or areas with high readings which would suggest signs of a re-spray. Fortunately all the paint on the car is original and the majority of it was a healthy enough level:
111 microns.
There were a few low spots though, which is not an unusual trend for a japanese car:
76 microns.
For those who may not quite know how thick these kind of readings are, the first picture below is of a calibration shim that is 129 microns thick:
120-130 microns is generally quite a good average reading on most cars (certainly on BMW's/AUDI's etc) but this is usually made up of the basecoat,pigment (colour) and clear coat. So if you have a reading of 129 microns, this doesnt necessarily mean you have that level of clear coat to play with.
You can see just how thin this is when looking at the shim side on:
This is usually the average level of clear coat on an original painted car (27 microns):
And looking at it side on:
This is what we have to play with on most cars when machine polishing/wet sanding. Quite scary when you look at it like that huh?
This is why paint thickness gauges are so important in order to let you safely polish a car
Anyways, enough rambling!
Now i knew what paint levels i was working with i removed the side repeaters...
...And taped up all the necessary bits:
This is to prevent getting any polish residue on the trim and it also stops any trim being burned from the machine polisher.
Now, this is usually the bit where i show the pics of the defects but after 20 minutes of trying to capture them on camera i gave up! I'm actually quite surprised at just how little defects the car had, the previous owner had taken seriously good care of the paintwork and there was very little in the way of swirling at all
This allowed me to go for a nice mild polish and pad combination:
Menzerna 106FF finishing polish and a 3M Finishing Pad. I used this @1500 rpm's which gave a result of around 98% defect removal with just a few bits remaining here and there but given the colour of the car you would never see them so i couldnt justify removing more paint to polish them out.
I managed to get a pic of the swirls on the rear tail lights though:
Before:
After:
Total polishing time was around 4.5 hours, which was a fraction of the time i'm used to spending on cars so this was turning into an enjoyable day
A quick dust down with the lambswool duster followed:
This safely removes any polishing dust from the paintwork without inducing any marring and leaves the paint ready for applying the LSP (Last Step Product).
On my Leon i used Zym0l Vintage and it was awesome, but on a car of this colour i couldnt help but think it would be wasted, so it was a toss up between either Zaino or Jeffs Werkstatt Acrylic system.
I've seen Zaino in the flesh recently and i can honestly say i wasnt overly impressed in terms of looks (it does seem to bead well). Now this may well be because the car i saw it on may need more than a couple of layers or it may be down to the fact that because so many people have "talked it up" to be something so amazing i was actually a bit disapointed. I must stress this is just my opinion and i will remain open minded on it
Anyways, as i know the Jeffs System inside out now i decided to go for that. When it comes to silvers and light metalic paints i think its a hard product to beat as it just seems to offer better gloss and reflectivity than most other products so far, including Vintage.
So up first was Acrylic Prime:
You can either apply this by hand or machine, but seeings as i had just machined the paint i knew it would be quicker by hand as i only needed to use it for its ability to remove any polishing oils and to lay down an initial sealant base:
I did a section at a time and used Acrylic Glos to help buff off any tacky patches that remained.
Acrylic Jett followed next:
This was applied with a Poorboys DMT microfibre towel and i went over the car 3 times to ensure i got a nice even coverage and also to get maximum wetness and gloss
I then gave the car a final wipe down with Acrylic Glos to remove any slight smears that may have remained.
Now that the paintwork was all completed i moved onto the wheels. These were sealed with Poorboys Wheel Sealant:
The sealant was left for around 10 mins and then buffed off. The tyres were then dressed with Blackfire Long Lasting Tyre Gel.
Blackfire was again used for the tailpipe, using their Fine Cut Compound and a German Applicator, followed my Meguiars NXT Metal Polish:
Before:
After:
(think i'll have to take a dremel to the inside cos i couldnt get it 100% today)
The engine bay was dressed with Aerospace 303 Protectant:
The interior was given a quick hoover and not much else more as it's completely minted anyways:
This wee dial is fun when its raining
I guess now all that remains is to show you the end result. I should apologise for the amount of pics but i'm not in the least bit sorry
So there you have it, my new toy
Hopefully it wasn't too boring for some of you but we've all got to start somewhere and we were all beginners at some point.
Thanks for looking as always!
Clark


 04 May 2008, 06:31 PM
#5
Scooby Regular
iTrader: (3)
Join Date: Sep 2005
Location: Clacton,Essex
Posts: 1,489
Likes: 0
Received 0 Likes
on
0 Posts
On the picures before the engine clean, the inter-cooler and dirty in places, then after all clean again, what product out of the 2 cleaned this part of the engine Super Degreaser or the 303 Areospace cleaner?.
My engine bay is as clean bar the inter-cooler, don't want to scrub at it due to damaging the fins.
My engine bay is as clean bar the inter-cooler, don't want to scrub at it due to damaging the fins.


Trending Topics
 05 May 2008, 09:13 AM
#10

Lovely - car and work ! Previous owner didn't half look after it !
So what do you do on your days off.....clean your own car - now that's a love for your job !
So what do you do on your days off.....clean your own car - now that's a love for your job !
Last edited by C_WRX; 05 May 2008 at 12:39 PM.
06 May 2008, 11:55 AM
#12
Scooby Regular
iTrader: (6)

Join Date: Jun 2001
Location: Northampton, Xbox GamerTag - Neanderthal1976
Posts: 6,850
Likes: 0
Received 0 Likes
on
0 Posts
I'm desperate to get my now almost 5 year old engine bay clean but was never sure how to actually do it. Now I've seen your write up I'm going to give it a try next weeked
06 May 2008, 09:37 PM
#13
Former Sponsor
Thread Starter
Join Date: Mar 2007
Location: Aberdeen
Posts: 181
Likes: 0
Received 0 Likes
on
0 Posts
 06 May 2008, 10:31 PM
#15
Scooby Regular
iTrader: (2)

Join Date: Jul 2002
Location: just to your right
Posts: 1,859
Likes: 0
Received 0 Likes
on
0 Posts
Nice motor Clark, I'll need to pop out sometime soon as I need to get some kit from you guys.
I'll be keeping my eye out for you.
If you see a white MY07 STi give us a wave, chances are it will either be Me, Clutdav or MarkyMark
Marc
I'll be keeping my eye out for you.
If you see a white MY07 STi give us a wave, chances are it will either be Me, Clutdav or MarkyMark
Marc
06 May 2008, 10:43 PM
#16
Scooby Regular
iTrader: (2)
Join Date: Apr 2002
Location: Buckinghamshire
Posts: 1,818
Likes: 0
Received 0 Likes
on
0 Posts
Clark,
If I'd have read it properly it might have helped! Plus seeing you in the photos might have been even a bigger clue. Mine loves my local Tesco rather than Shell as its right next to where I work now.
Andy
If I'd have read it properly it might have helped! Plus seeing you in the photos might have been even a bigger clue. Mine loves my local Tesco rather than Shell as its right next to where I work now.
Andy
 09 May 2008, 05:21 PM
#18
Former Sponsor
iTrader: (3)

Join Date: Feb 2006
Location: AB51 0TH
Posts: 2,562
Likes: 0
Received 0 Likes
on
0 Posts
On the picures before the engine clean, the inter-cooler and dirty in places, then after all clean again, what product out of the 2 cleaned this part of the engine Super Degreaser or the 303 Areospace cleaner?.
My engine bay is as clean bar the inter-cooler, don't want to scrub at it due to damaging the fins.
My engine bay is as clean bar the inter-cooler, don't want to scrub at it due to damaging the fins.


Thread
Thread Starter
Forum
Replies
Last Post
Jonny mac
ScoobyNet General
10
09 October 2015 12:25 PM