
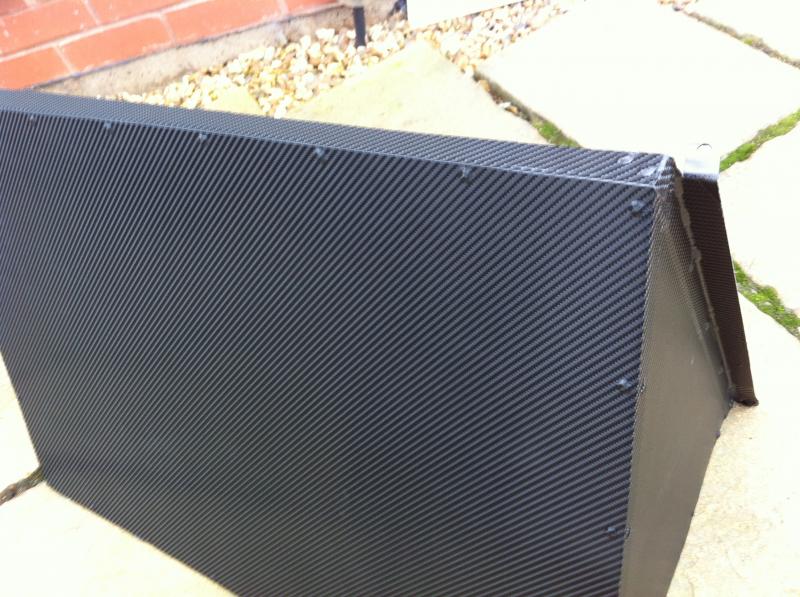
Subaru powered 205 track car.


 Looking good mate, painting doesnt look too bad, defiantly picked the best colour!!
Thread Starter
Scooby Regular
iTrader: (1)
Joined: Aug 2005
Posts: 1,378
Likes: 2
From: West midlands
James
Thread Starter
Scooby Regular
iTrader: (1)
Joined: Aug 2005
Posts: 1,378
Likes: 2
From: West midlands
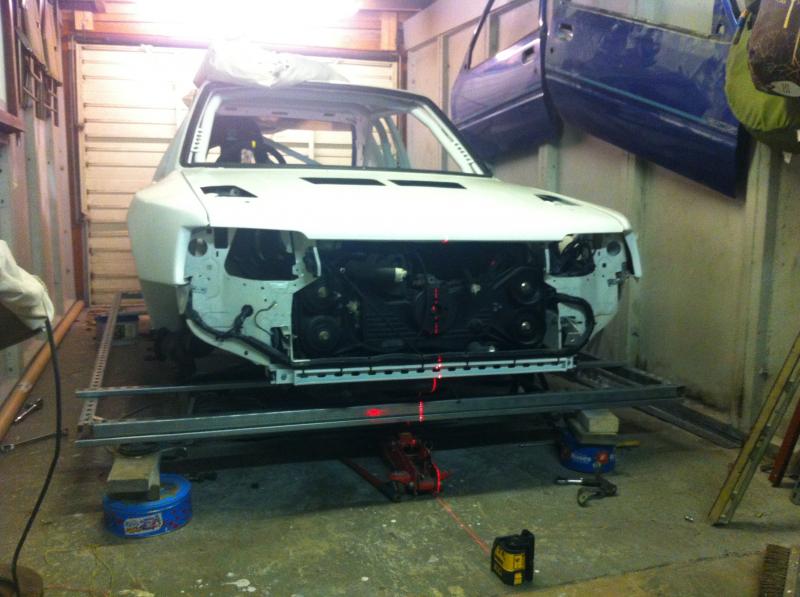
Bit of an update, I have set the car back up on the jig to line up the subframes its mad how far out of line it can be with the play in the bolt holes especially the front lower arms, I have managed to line up every thing to with in 0.5mm so I'm super happy.
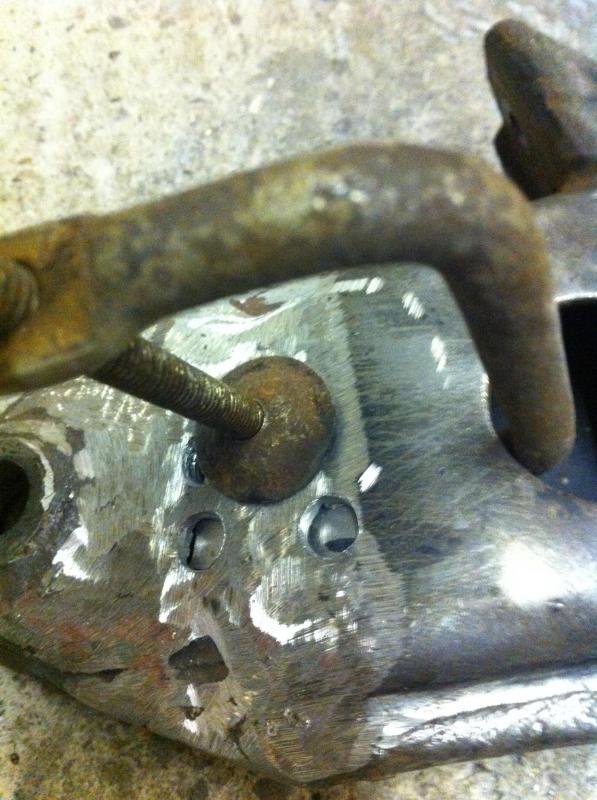
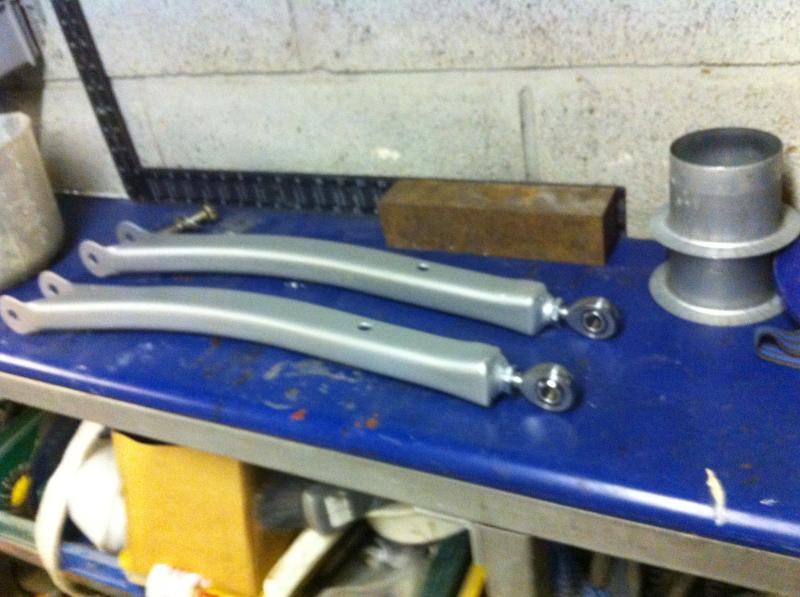
The next job was to modify the front lower arms. I purposely mounted the engine/gearbox etc slightly further back to make more room up front and this meant the front wheels would sit too far back in the arches but i had the idea of modifying the arms.
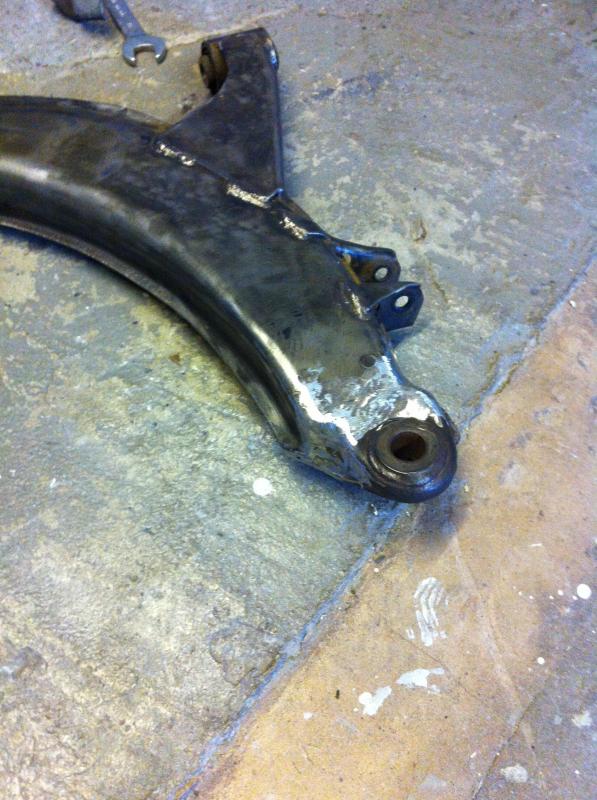
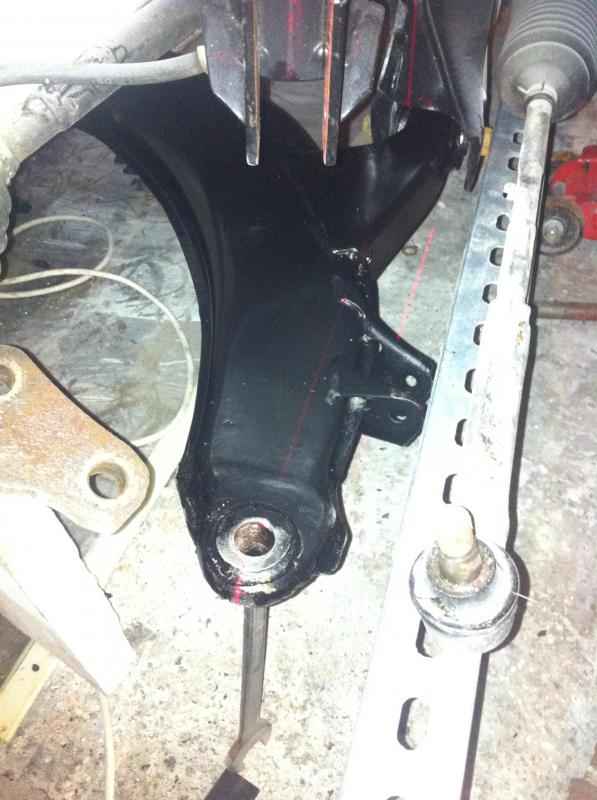
It doesn't look like it has moved forward much in the pic but I've actually cut the end off and moved it forward 30mm bringing the wheel back in check and with my camber/castor plates on max i can now get nearly 7 degrees positive castor so its worked out well, i have also fitted an internal plate where i cut the wishbone and plug welded it for extra strength.
The next job was to modify the front lower arms. I purposely mounted the engine/gearbox etc slightly further back to make more room up front and this meant the front wheels would sit too far back in the arches but i had the idea of modifying the arms.
It doesn't look like it has moved forward much in the pic but I've actually cut the end off and moved it forward 30mm bringing the wheel back in check and with my camber/castor plates on max i can now get nearly 7 degrees positive castor so its worked out well, i have also fitted an internal plate where i cut the wishbone and plug welded it for extra strength.
Last edited by rentonone; Feb 5, 2014 at 03:36 PM.
Looks like its coming on well. much left to do now??
I went to fastcar a couple of weeks ago, and thought id pop round yours on the way through, but no one was in!
I went to fastcar a couple of weeks ago, and thought id pop round yours on the way through, but no one was in!

Scooby Regular
Joined: Jun 2012
Posts: 324
Likes: 0
From: Bridgnorth
In a way I'm glad yours was out!!! Mine is out a few mil only measured with a tape not used a laser or string line yet, but did think I had mad a few mistakes,
Arms look good, how much more camber do you get now?
Have you had it running yet ?
Arms look good, how much more camber do you get now?
Have you had it running yet ?
Thread Starter
Scooby Regular
iTrader: (1)
Joined: Aug 2005
Posts: 1,378
Likes: 2
From: West midlands
Hi John, gutted I missed you I still haven't seen your new scoob yet either, theres not really much left to do on the pug just a matter of finding the time I,ll try and keep the pics coming.
Thread Starter
Scooby Regular
iTrader: (1)
Joined: Aug 2005
Posts: 1,378
Likes: 2
From: West midlands
No its still not been fired up but its getting close.

Thread Starter
Scooby Regular
iTrader: (1)
Joined: Aug 2005
Posts: 1,378
Likes: 2
From: West midlands
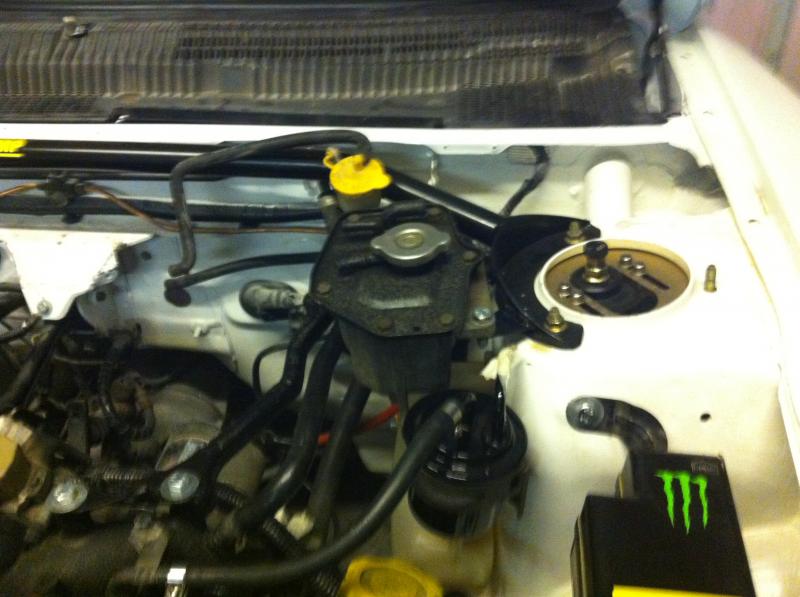
I've re located the coolant tank and mounted it as high as possible as it needs to be higher than the radiator in the boot to bleed the air out.
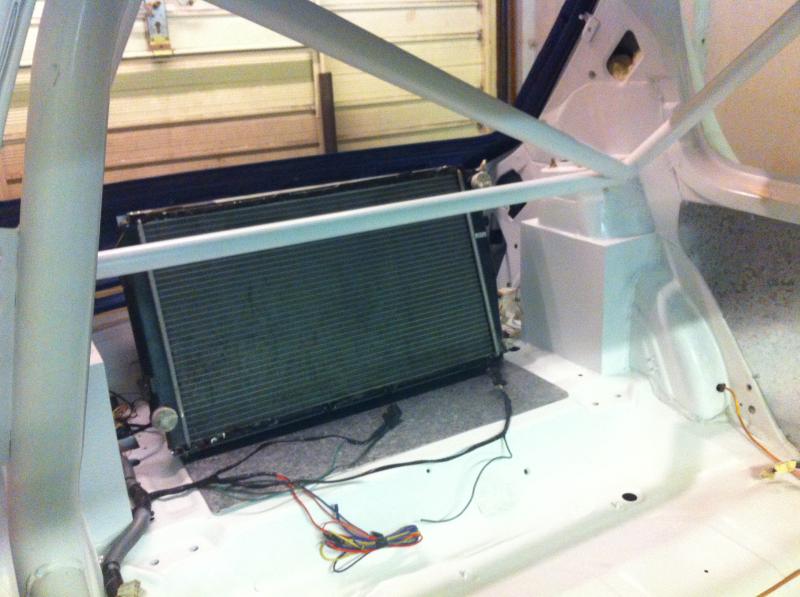
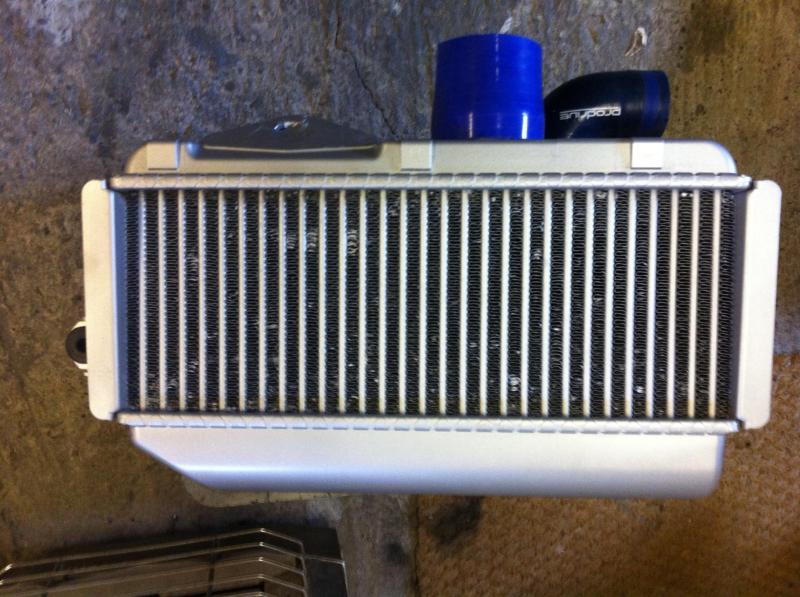
And now for the radiator, this has taken a lot of thought and I think i've come up with the best set up.
And now for the radiator, this has taken a lot of thought and I think i've come up with the best set up.
Thread Starter
Scooby Regular
iTrader: (1)
Joined: Aug 2005
Posts: 1,378
Likes: 2
From: West midlands
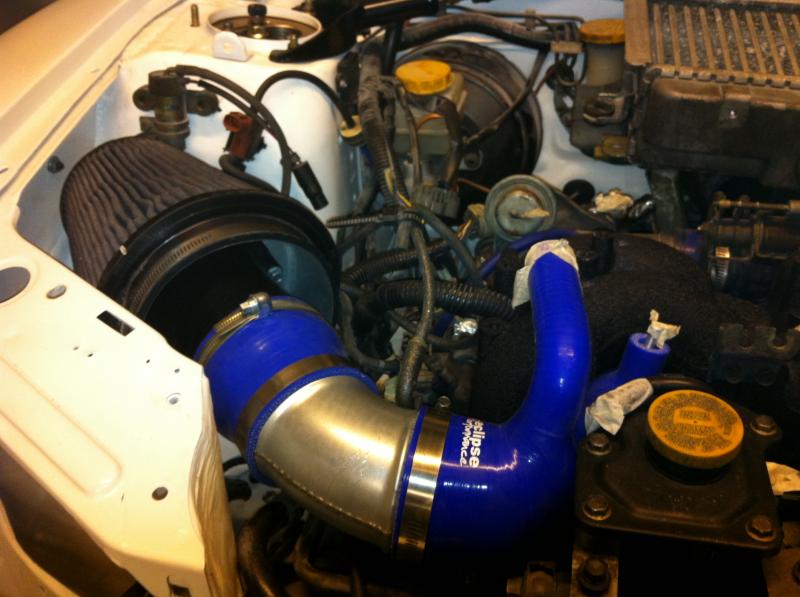
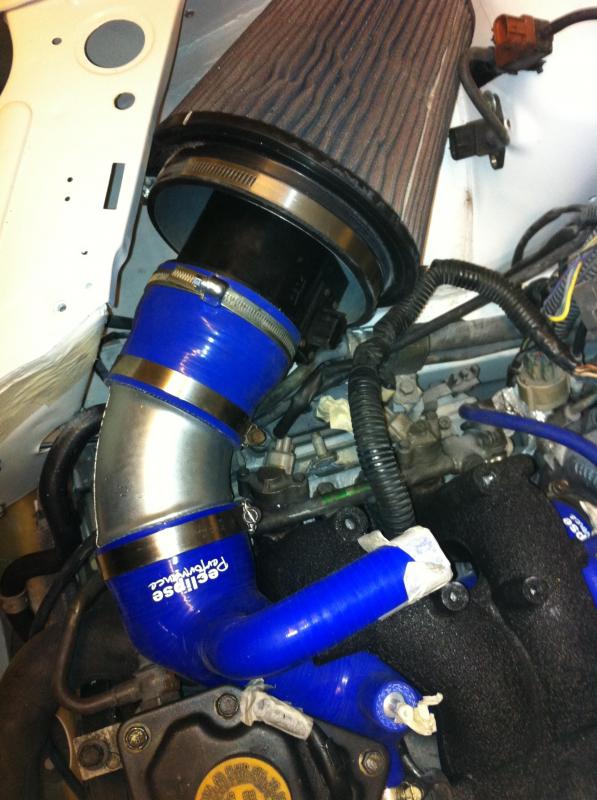
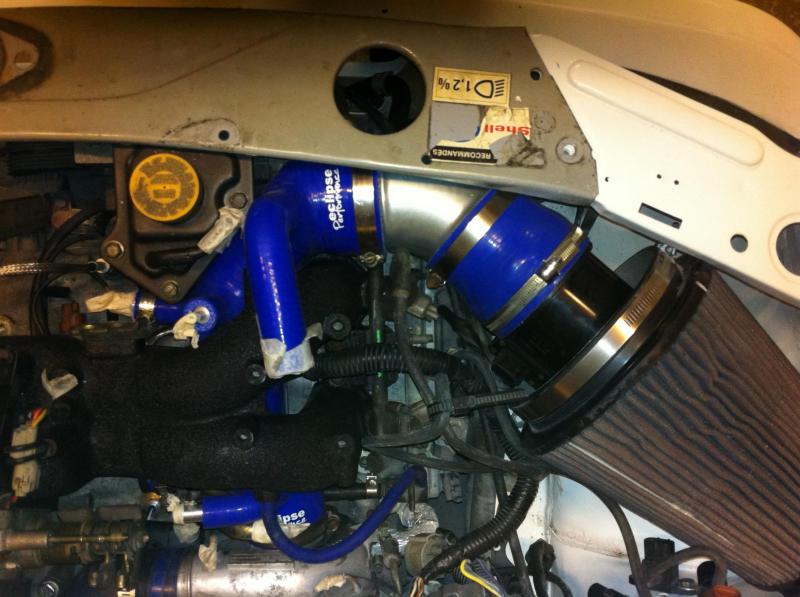
Inlet pipe and filter fitted just about, lol its bloody tight.
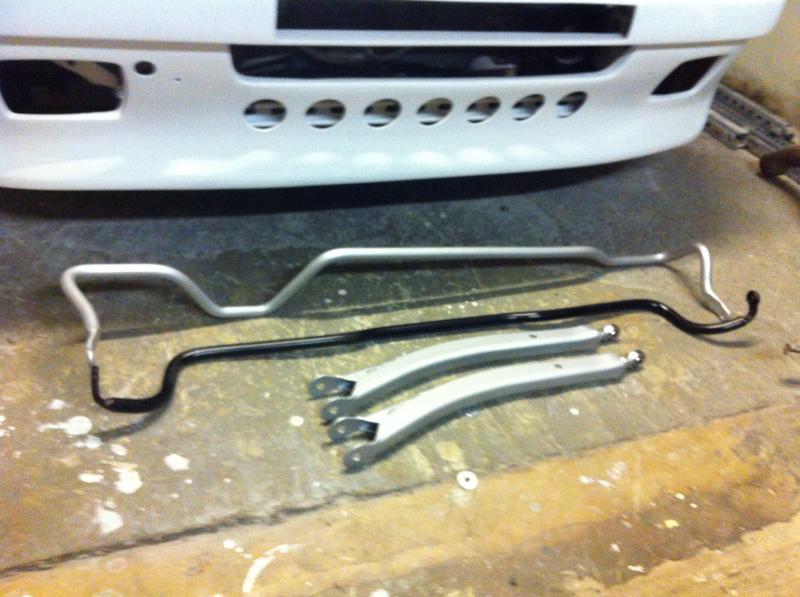
Rear trailing arms modified with ultra strength rose joints.
Roll bars painted ready to fit, I've stuck with standard sti ones and I will be looking for some uprated drop links.
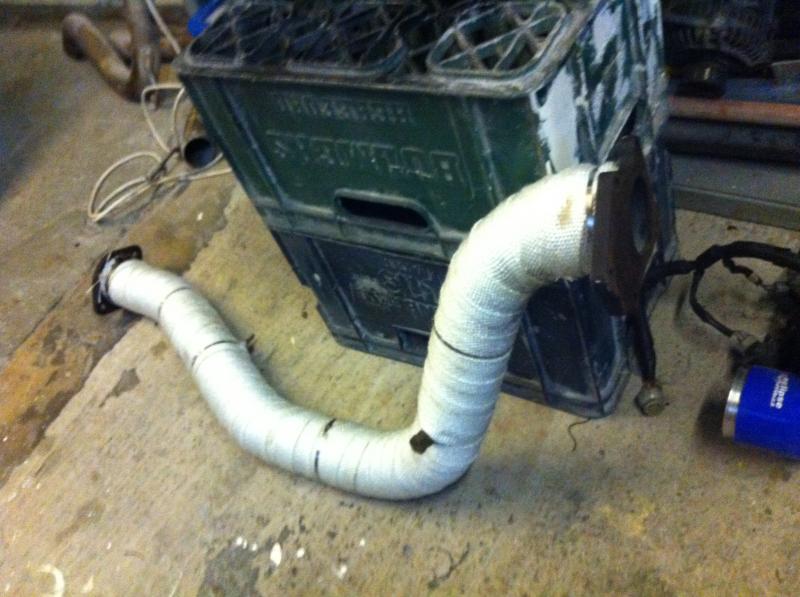
3inch downpipe wrapped now fitted.
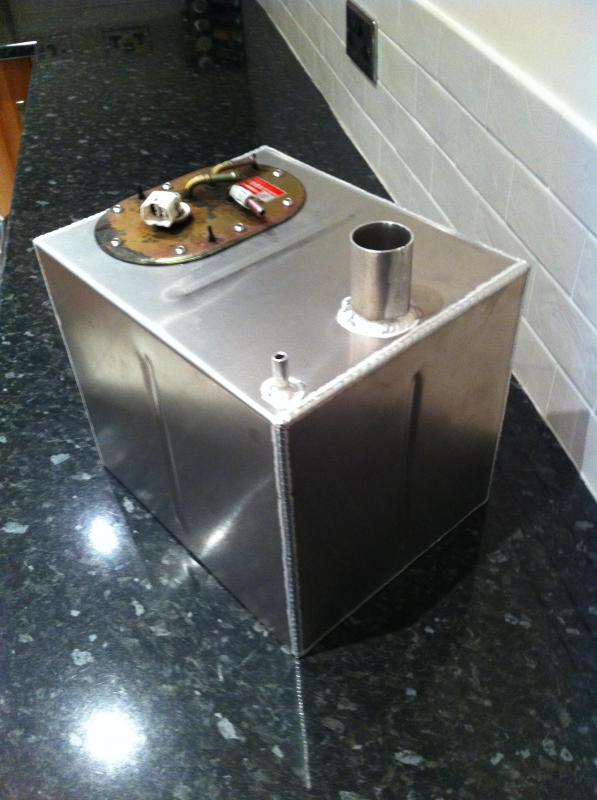
Alloy fuel tank I've had made to suite the standard in tank pump/sender assembly.
Rear trailing arms modified with ultra strength rose joints.
Roll bars painted ready to fit, I've stuck with standard sti ones and I will be looking for some uprated drop links.
3inch downpipe wrapped now fitted.
Alloy fuel tank I've had made to suite the standard in tank pump/sender assembly.

Thread Starter
Scooby Regular
iTrader: (1)
Joined: Aug 2005
Posts: 1,378
Likes: 2
From: West midlands
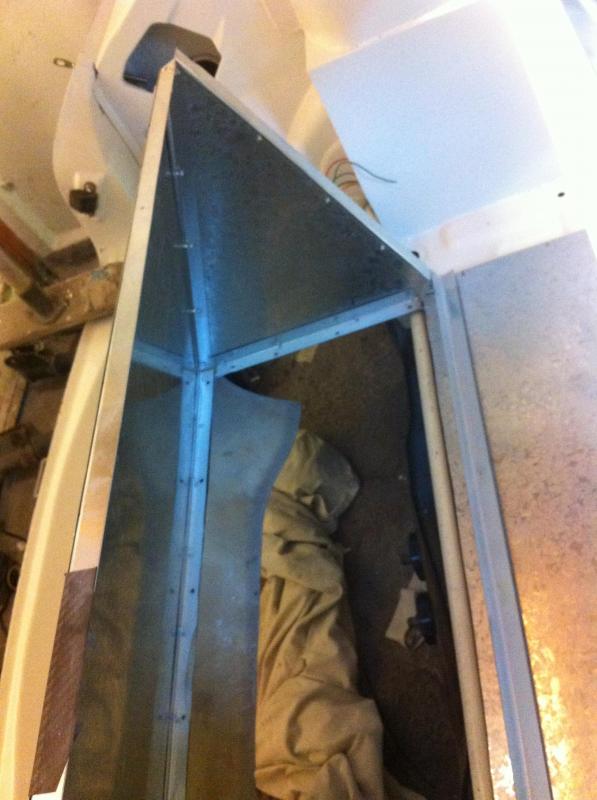
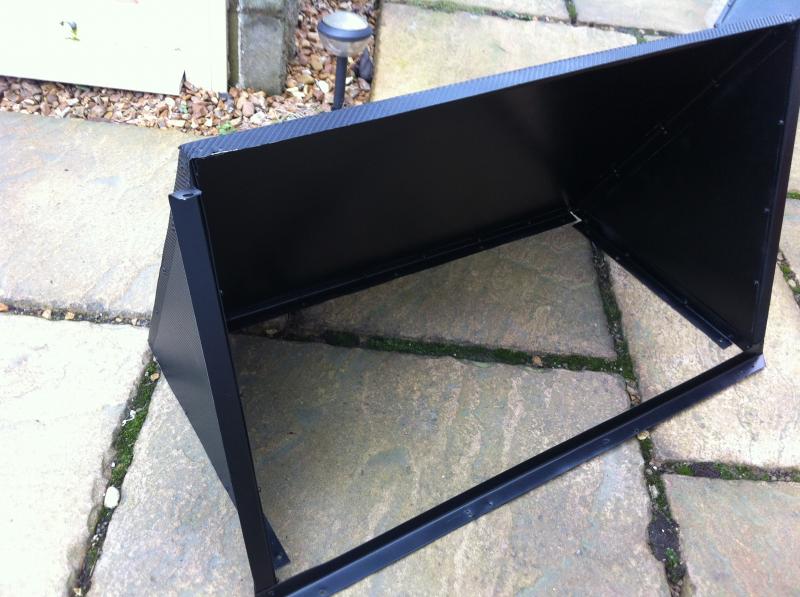
The size of the ducts might look big but as soon as the fans kick in they will need the free air space. I've seen similar set ups that have used just two 100 diameter flexes and to me as soon as the fans kick in its like trying to suck an apple up a straw kind of thing! I'm a ducter by trade lol.
Glad you liked the rear arms, I copied you on that

Thread Starter
Scooby Regular
iTrader: (1)
Joined: Aug 2005
Posts: 1,378
Likes: 2
From: West midlands
Poop!! Thanks for the heads up, I won't be running anymore than 300 hope it's ok at that, it did seem quite robust I thought,think its a triple ply! Obviously not strong enough if yours sucked in.
Last edited by rentonone; Feb 5, 2014 at 10:18 PM.
haha yeah i thought it would have been fine but 380 seems to be its limit under that it works perfectly well, good luck with rest of project will be watchin closely
Thread Starter
Scooby Regular
iTrader: (1)
Joined: Aug 2005
Posts: 1,378
Likes: 2
From: West midlands
Thread Starter
Scooby Regular
iTrader: (1)
Joined: Aug 2005
Posts: 1,378
Likes: 2
From: West midlands
Thread Starter
Scooby Regular
iTrader: (1)
Joined: Aug 2005
Posts: 1,378
Likes: 2
From: West midlands
Bit of an update!!!!!
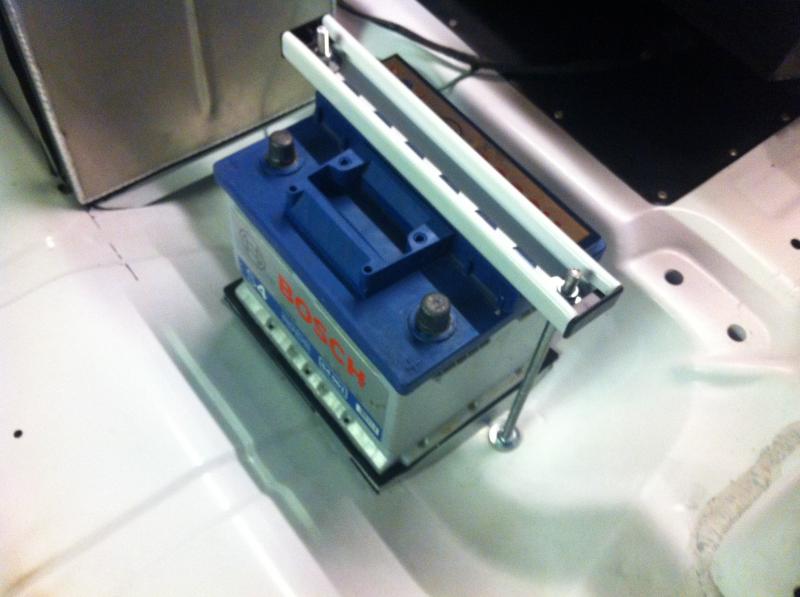
I have made a base for the fuel tank and the battery and clamped them down but I'm not really happy with how close the battery is to the fuel tank so I might fit a sealed battery box in case there was a fuel leak.

I have managed to plumb in most of the coolant pipes from the rear rad, its starting to get pretty busy now in the back and I'm trying to leave room for the flexi side vent ducts too.
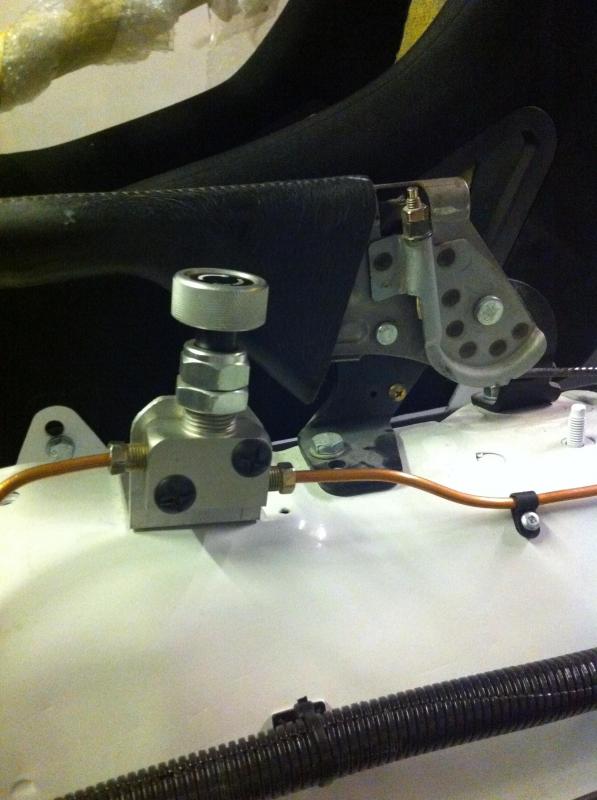
The brake lines are completely plumbed in now and I've fitted a bias adjuster for the rear brakes.
A few random jobs now, i.ve given the top mount I c a bit of a spruce up and modded the hoses to suite as its a newage one.

I have made a base for the fuel tank and the battery and clamped them down but I'm not really happy with how close the battery is to the fuel tank so I might fit a sealed battery box in case there was a fuel leak.
I have managed to plumb in most of the coolant pipes from the rear rad, its starting to get pretty busy now in the back and I'm trying to leave room for the flexi side vent ducts too.
The brake lines are completely plumbed in now and I've fitted a bias adjuster for the rear brakes.
A few random jobs now, i.ve given the top mount I c a bit of a spruce up and modded the hoses to suite as its a newage one.
Thread Starter
Scooby Regular
iTrader: (1)
Joined: Aug 2005
Posts: 1,378
Likes: 2
From: West midlands
.
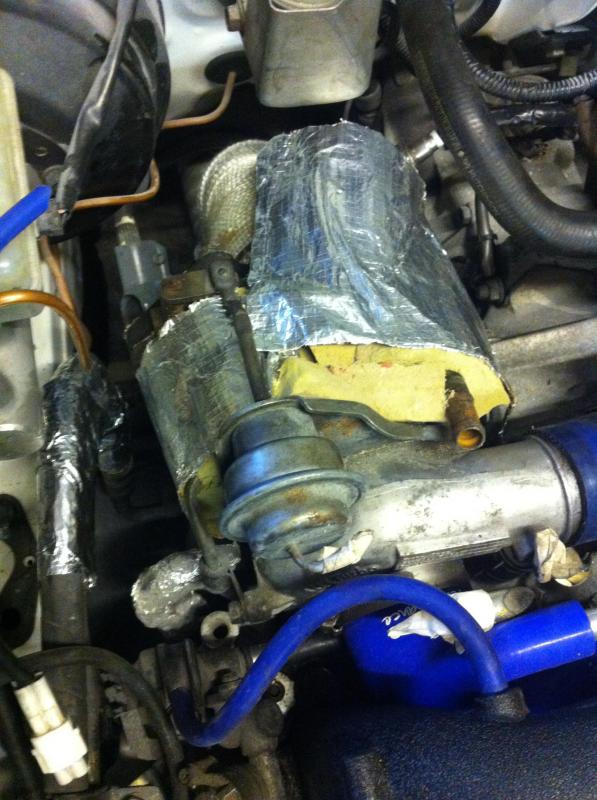
I've made a turbo heat blanket out of some pipe insulation and then wrapped it in heat wrap I'm hoping this will keep most of the heat off the I c.

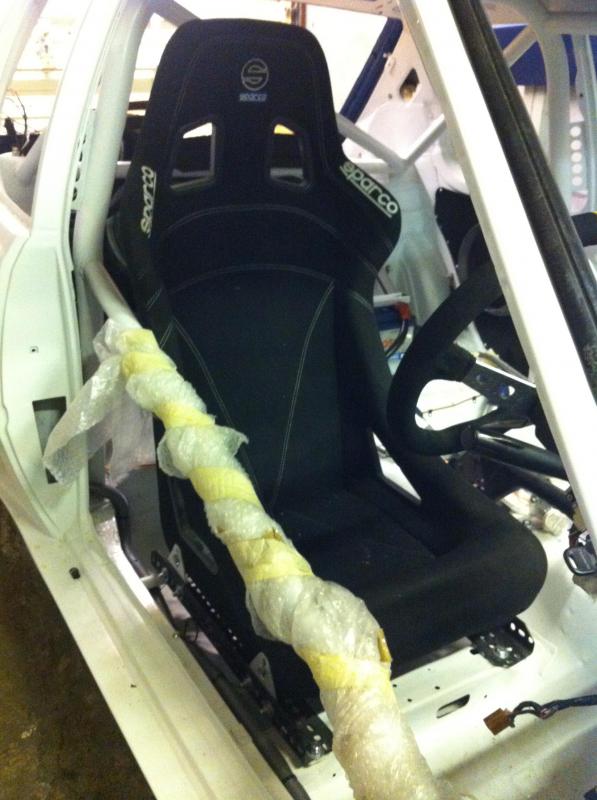
I've got my seat and steering wheel fitted now, things are getting exciting!
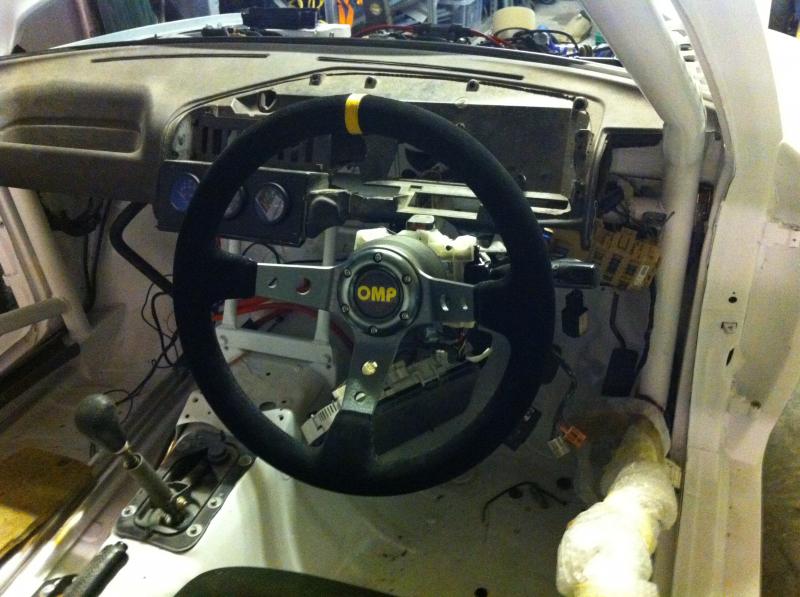
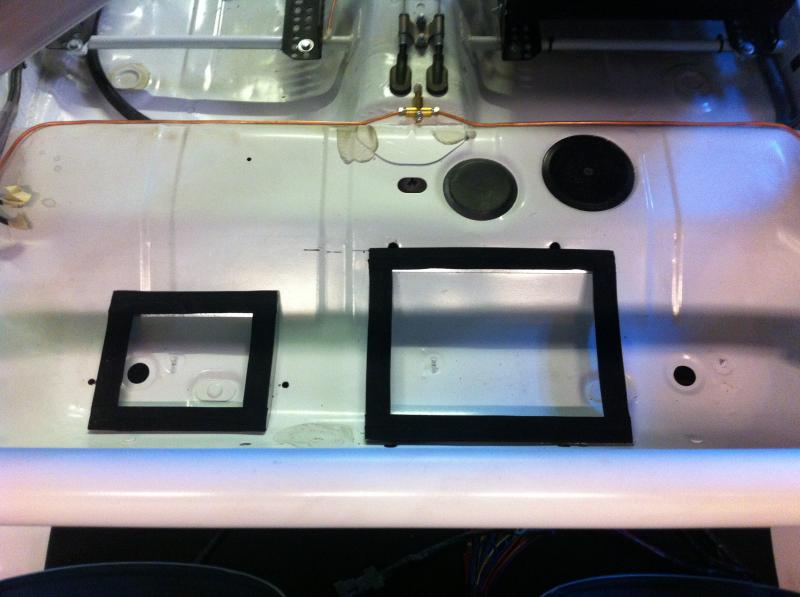
And now for the dashboard, I have spent so much time on this darn clock surround.
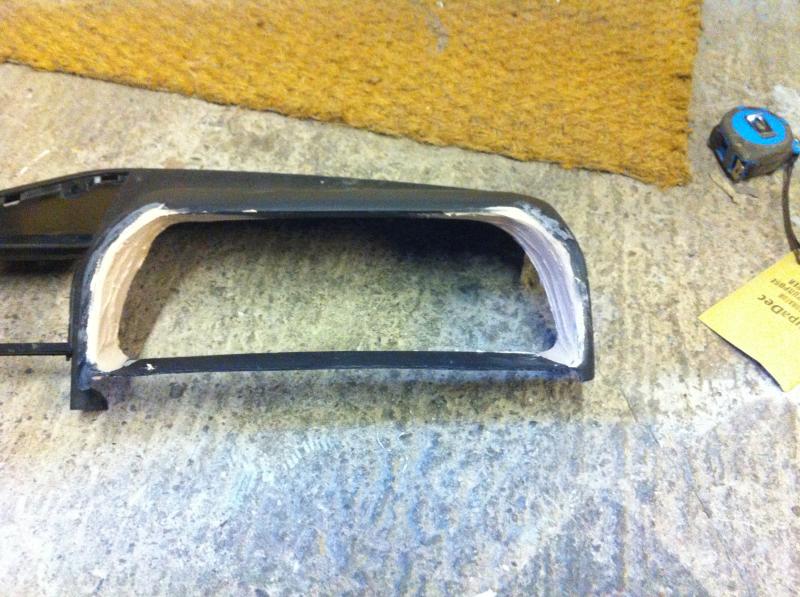
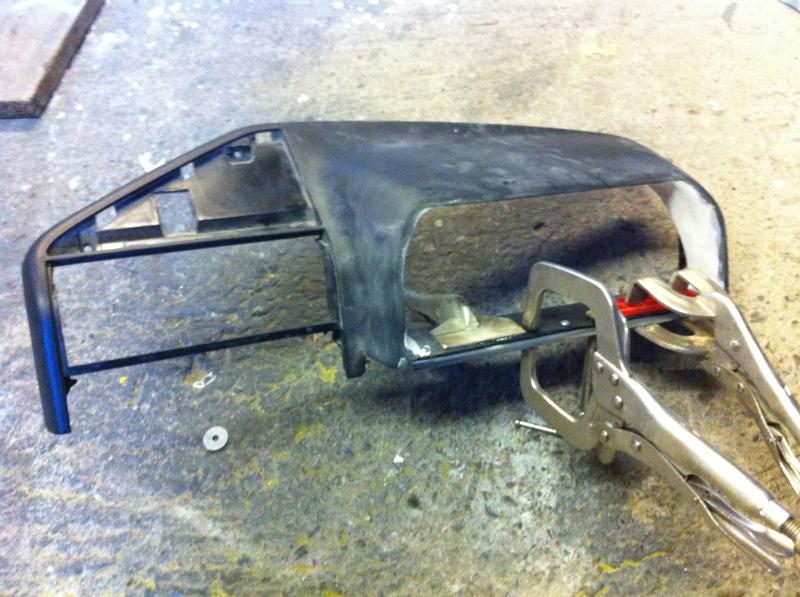
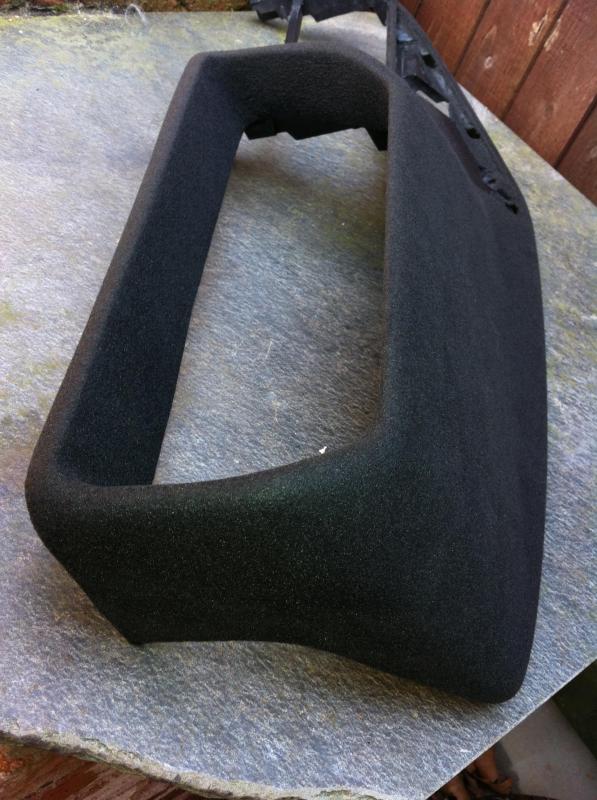
This was my third attempt at flocking this small piece of dash and man is a bugger to get off, I finally mastered it with a diy kit I found just to keep piling the flock on as the extra weight and pressure forces it into the glue.
Really happy with it!!
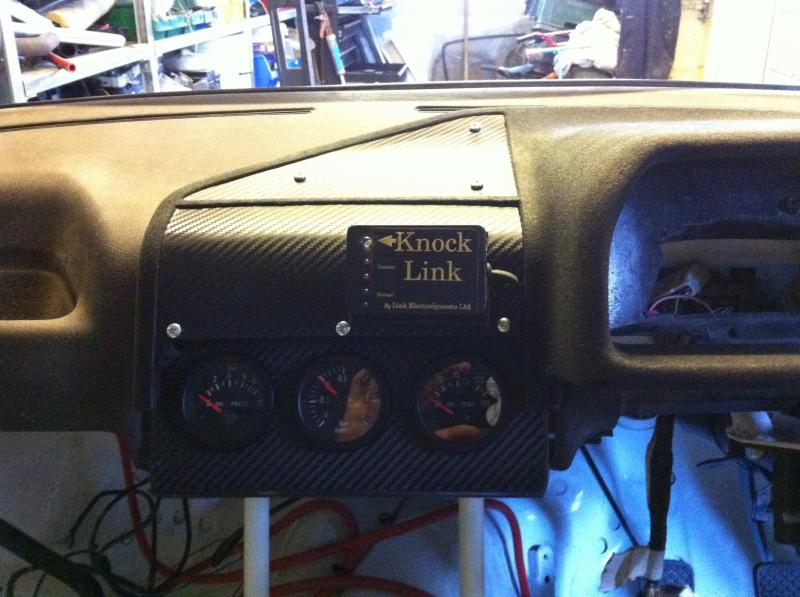
And I've carbon wrapped some plates for the dash and fitted my gauges and knock link.
Next job is to fab up a switch panel.
James
I've made a turbo heat blanket out of some pipe insulation and then wrapped it in heat wrap I'm hoping this will keep most of the heat off the I c.
I've got my seat and steering wheel fitted now, things are getting exciting!
And now for the dashboard, I have spent so much time on this darn clock surround.
This was my third attempt at flocking this small piece of dash and man is a bugger to get off, I finally mastered it with a diy kit I found just to keep piling the flock on as the extra weight and pressure forces it into the glue.
Really happy with it!!
And I've carbon wrapped some plates for the dash and fitted my gauges and knock link.
Next job is to fab up a switch panel.
James
Thread Starter
Scooby Regular
iTrader: (1)
Joined: Aug 2005
Posts: 1,378
Likes: 2
From: West midlands
Your cars is seriously coming on now too I've noticed, I will be over to drop this extract fan off so I can have a butchers in the flesh!!
James


