
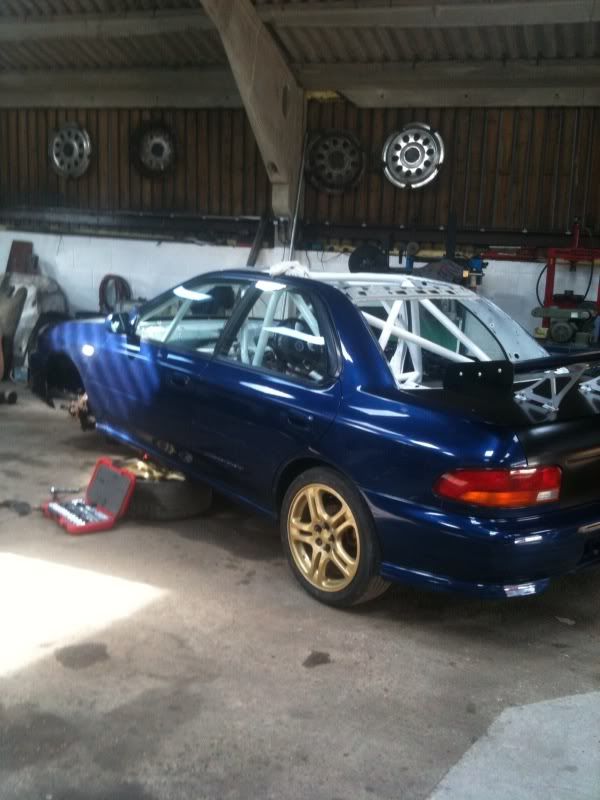
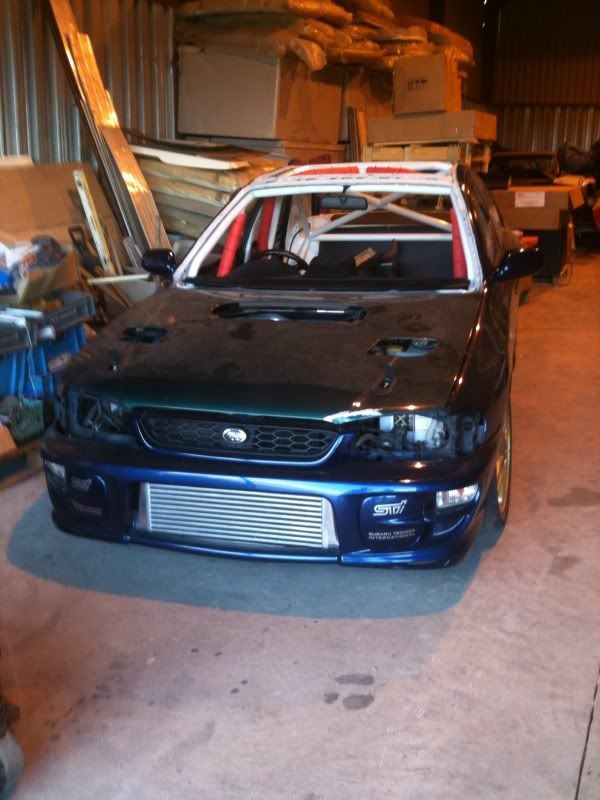
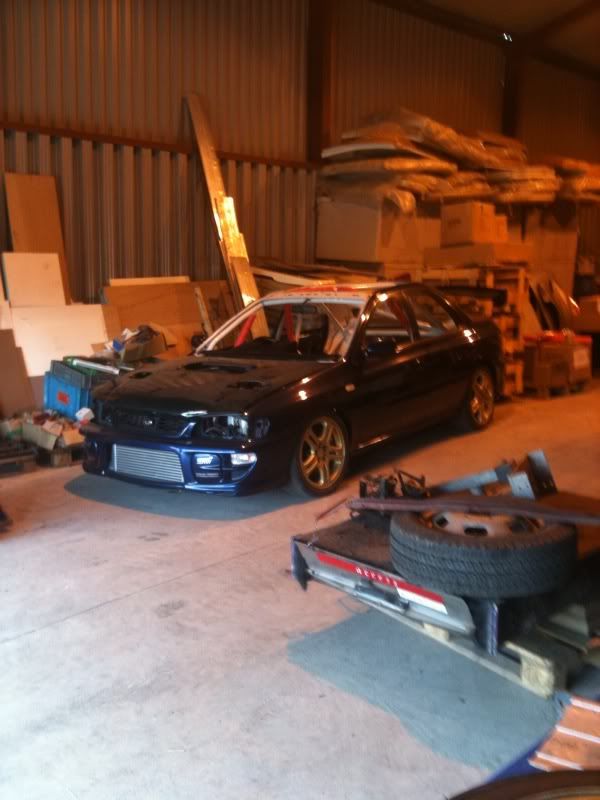
Project track car something for the weekend !

Thread Starter
Scooby Regular
iTrader: (37)
Joined: Jan 2005
Posts: 7,843
Likes: 1
From: never far away from my impreza
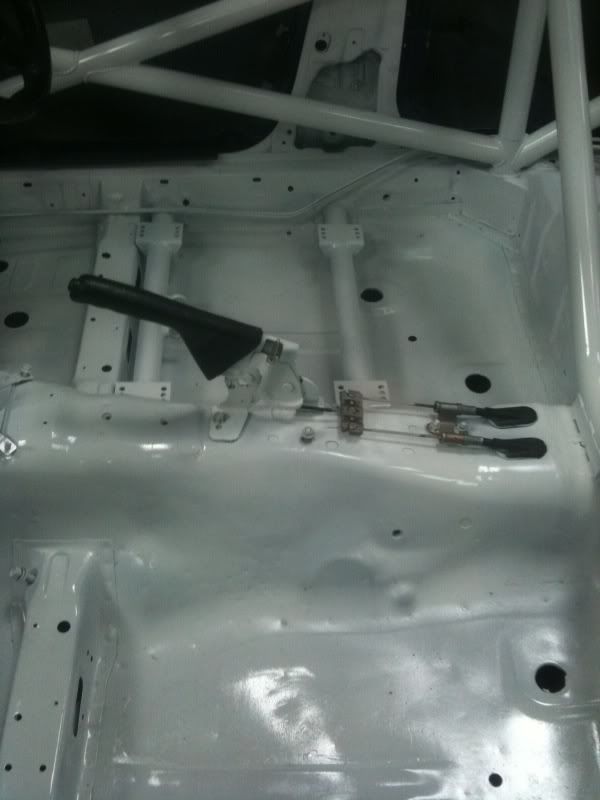
Well had a great day or should i say full day down the garage today first job was to paint and install handbrake which i can now use again instead of putting it in gear so it dosn't roll away
Then i had to finally put on the last 2 doors ready for door cards now.
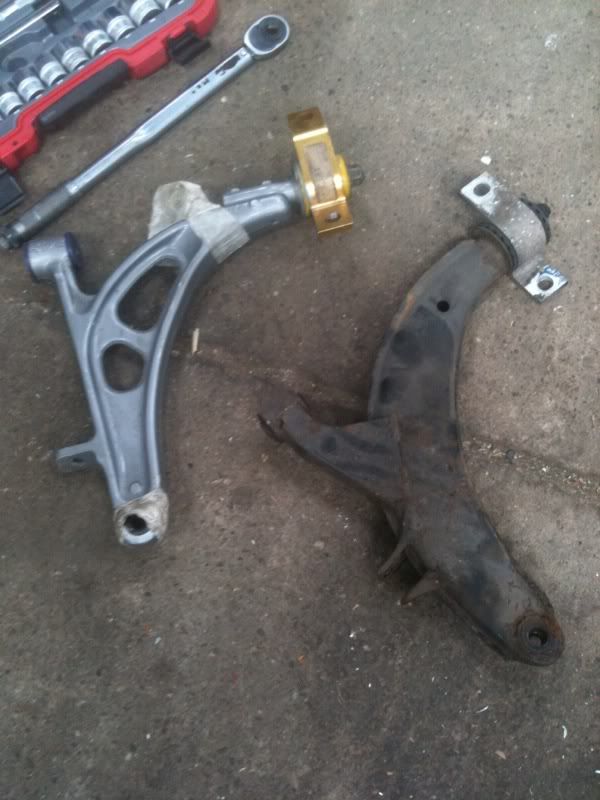
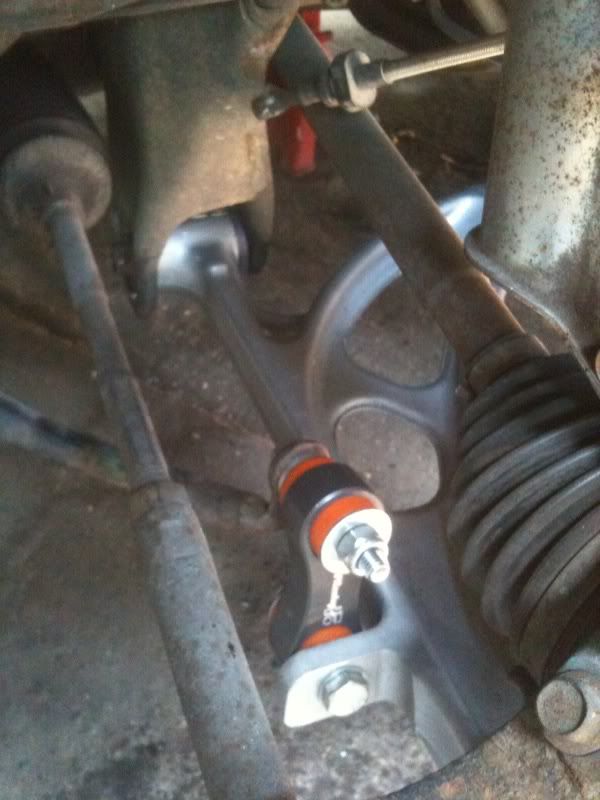
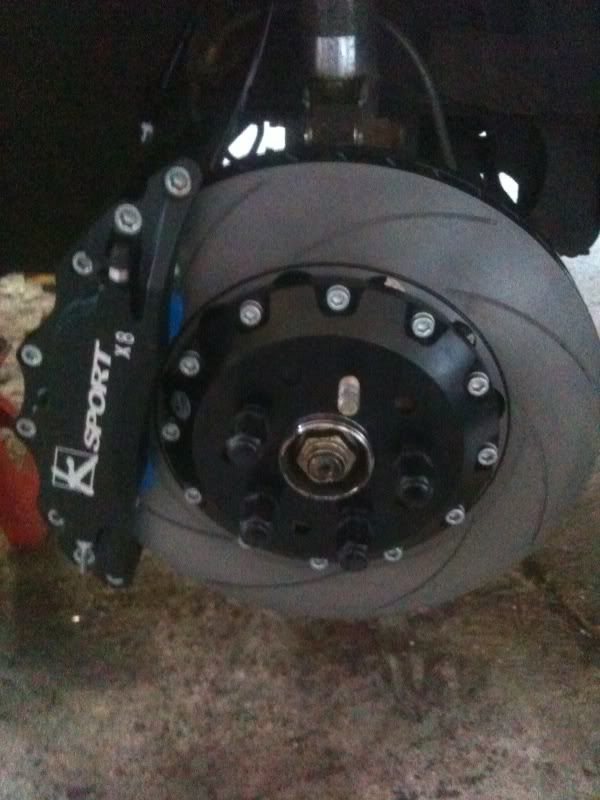
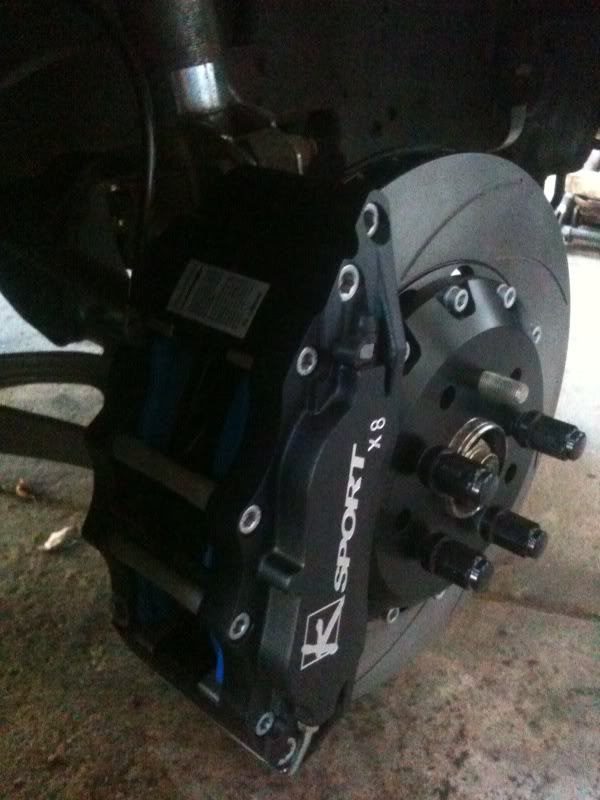
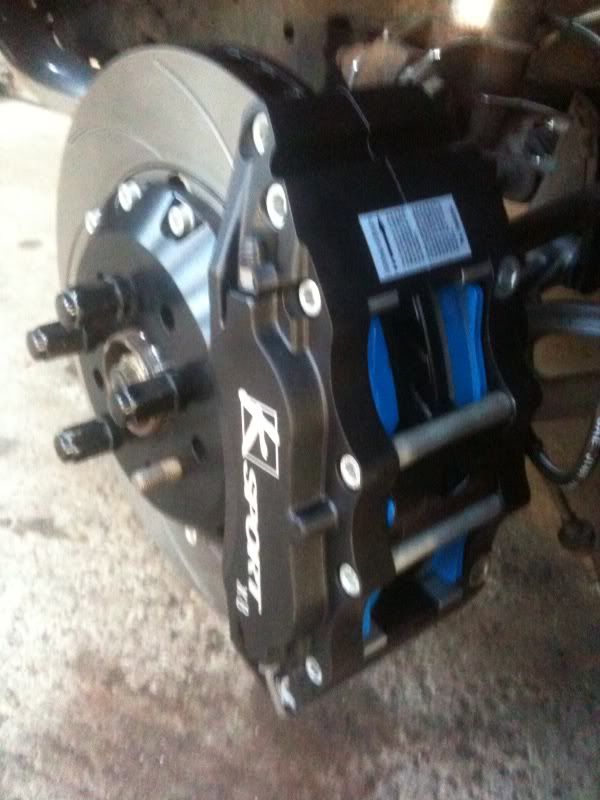
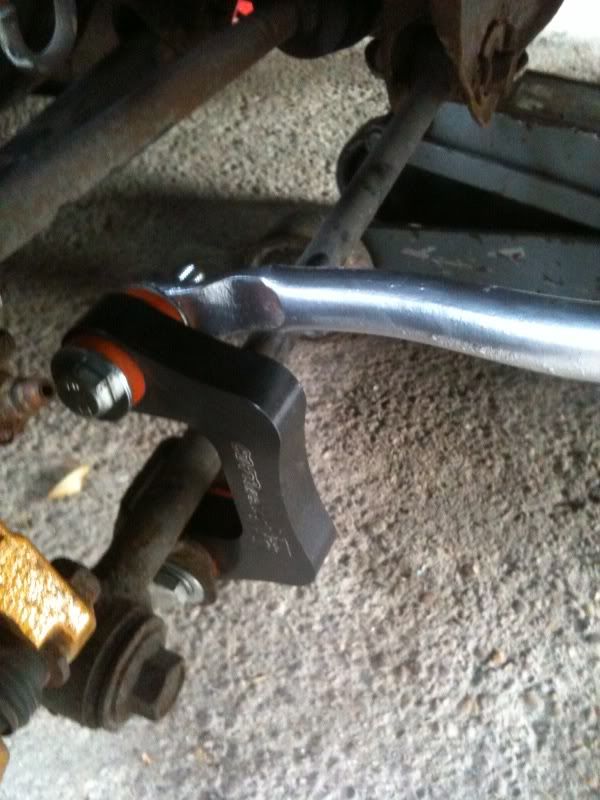
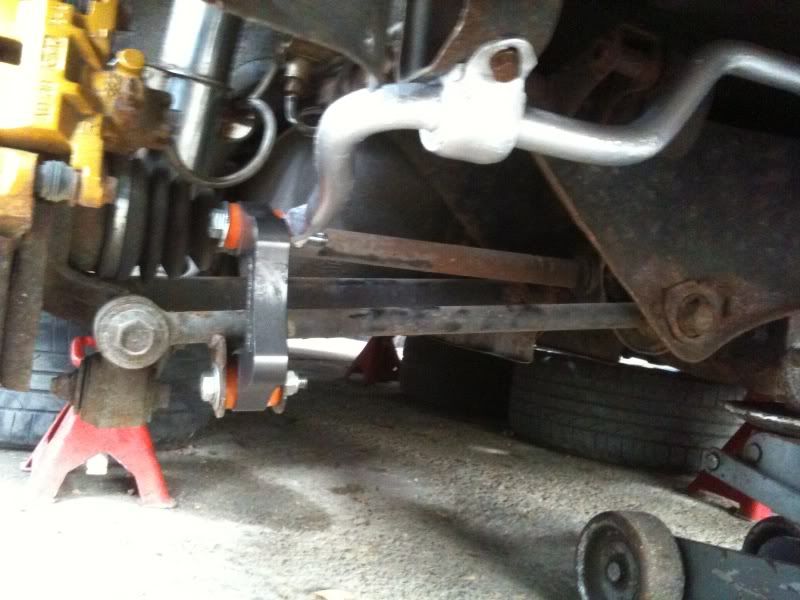
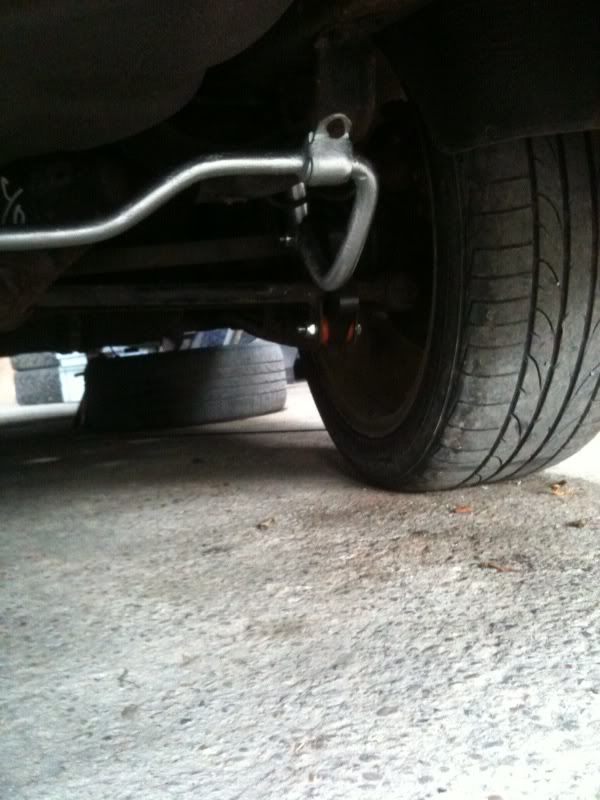
I then set too on the front wishbones new they were going to be a struggle but supprisingily came off quite easily.I then installed new alloy wishbones and antilift kit with CDF drop links and then aftyer 3 mths since ordering them finally fitted the brakes at long last ,i must say they are probebly the easiest kit i have ever installed just need to connect lines and bleed up tommorow .
Then i had to finally put on the last 2 doors ready for door cards now.
I then set too on the front wishbones new they were going to be a struggle but supprisingily came off quite easily.I then installed new alloy wishbones and antilift kit with CDF drop links and then aftyer 3 mths since ordering them finally fitted the brakes at long last ,i must say they are probebly the easiest kit i have ever installed just need to connect lines and bleed up tommorow .
Thread Starter
Scooby Regular
iTrader: (37)
Joined: Jan 2005
Posts: 7,843
Likes: 1
From: never far away from my impreza
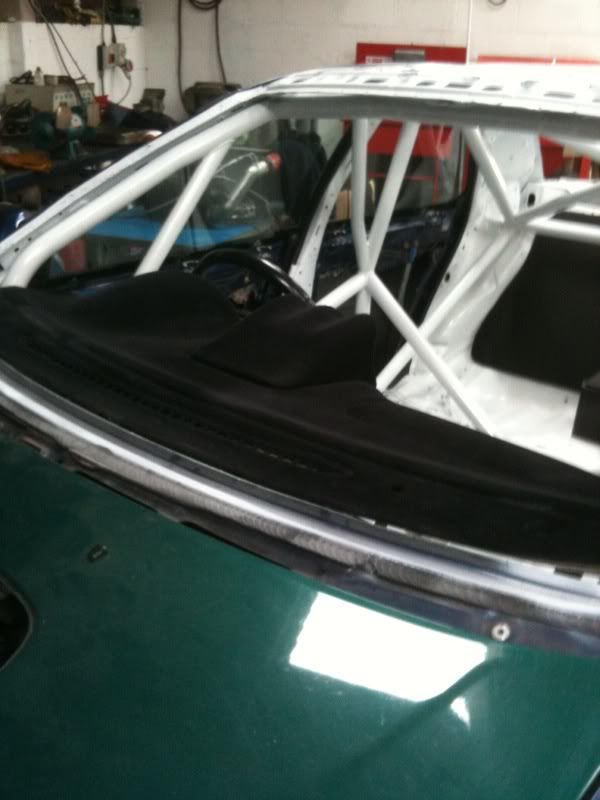
Rear drop links to be fitted today , and then trying to refit dash ,shouldn't be to hard just need to measure and cut the sides to accommodate the cage .
Pics up later of the day .
Pics up later of the day .


Great thread cant wait to see how you fit your dash as thats where i have been for a while avoiding puting my dash back in case i mess it up hope theres plenty of pics showing how you fitted it

Thread Starter
Scooby Regular
iTrader: (37)
Joined: Jan 2005
Posts: 7,843
Likes: 1
From: never far away from my impreza
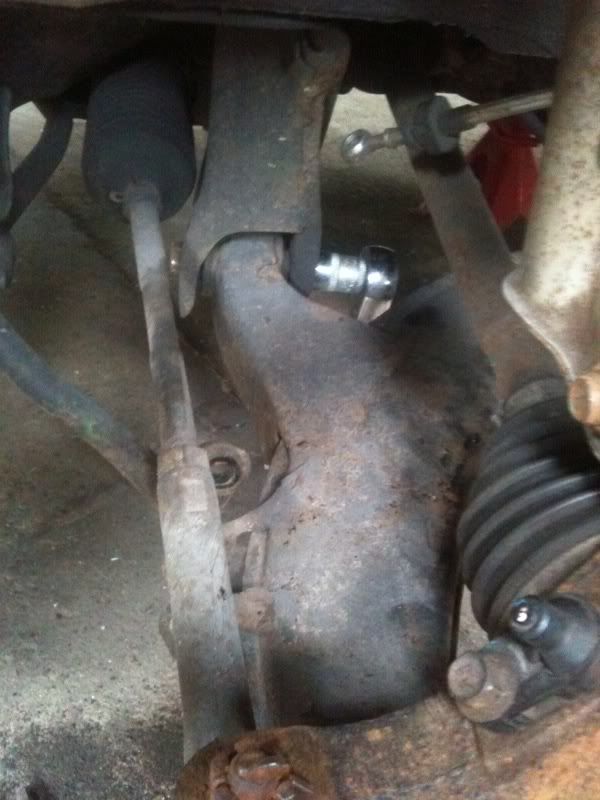
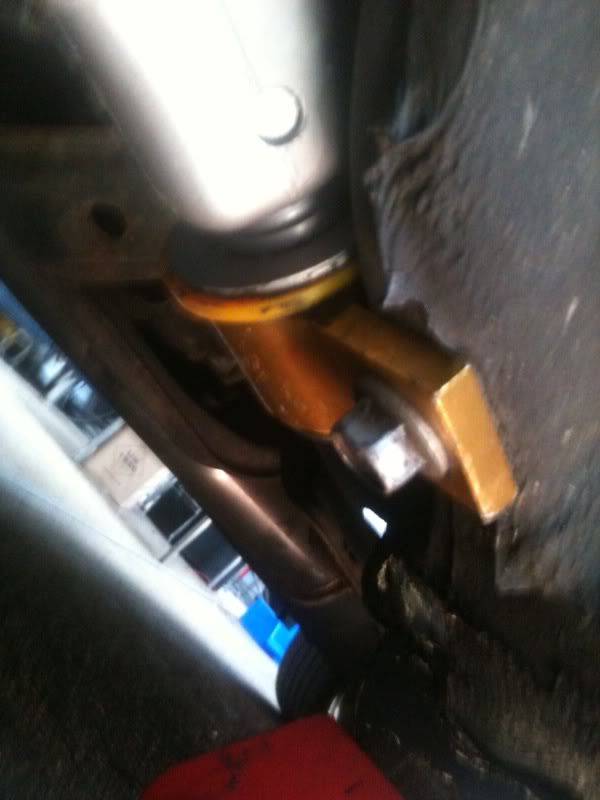
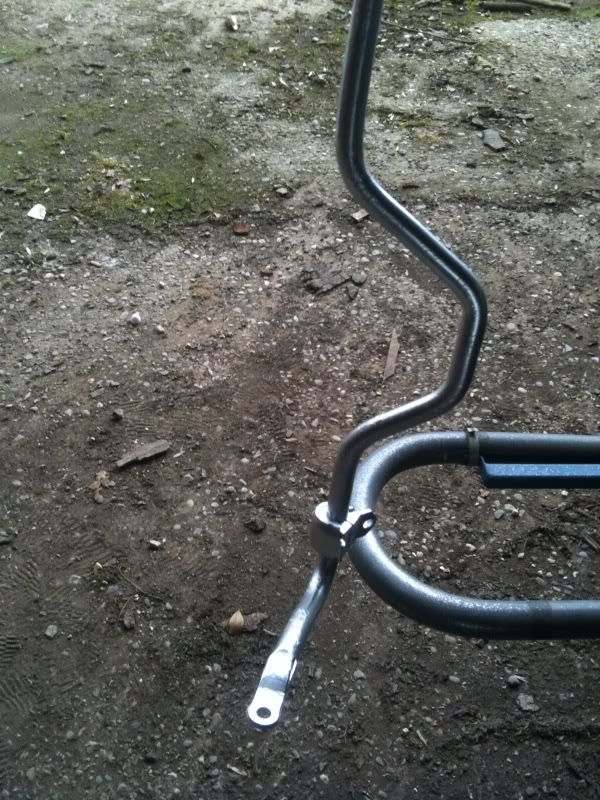
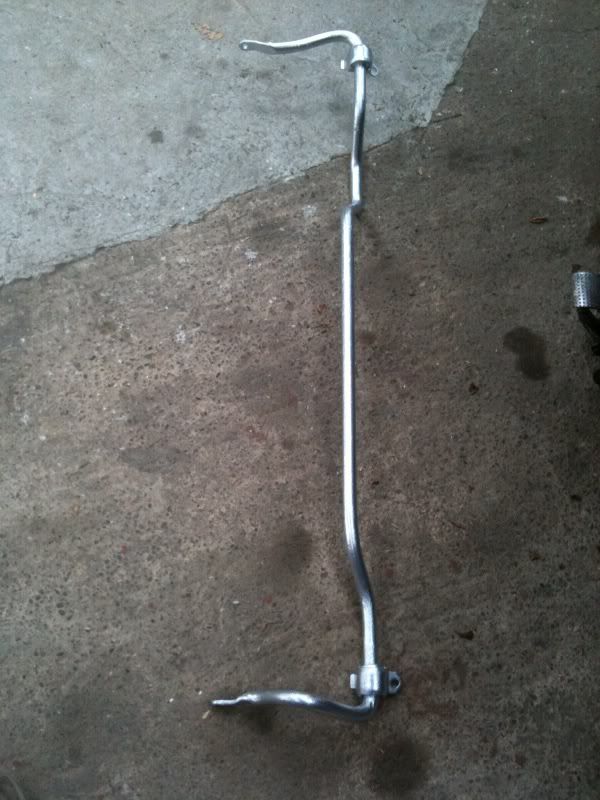
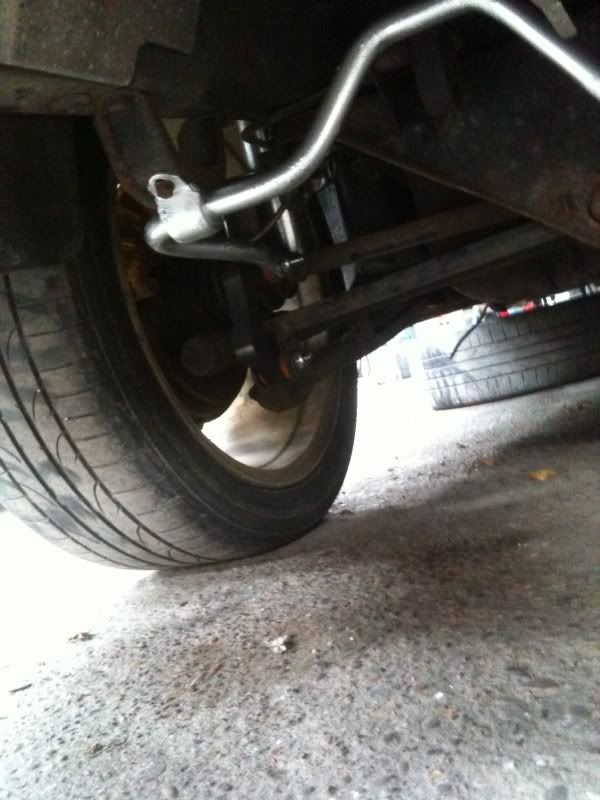
Another productive day ,i removed the old drop links and noticed the rear arb was in a sorry state so set too with a wire brush then a flappy disc in the grinder to get rid of the old paint that was flaking away.
I then primed a re painted in silver came up a treat .
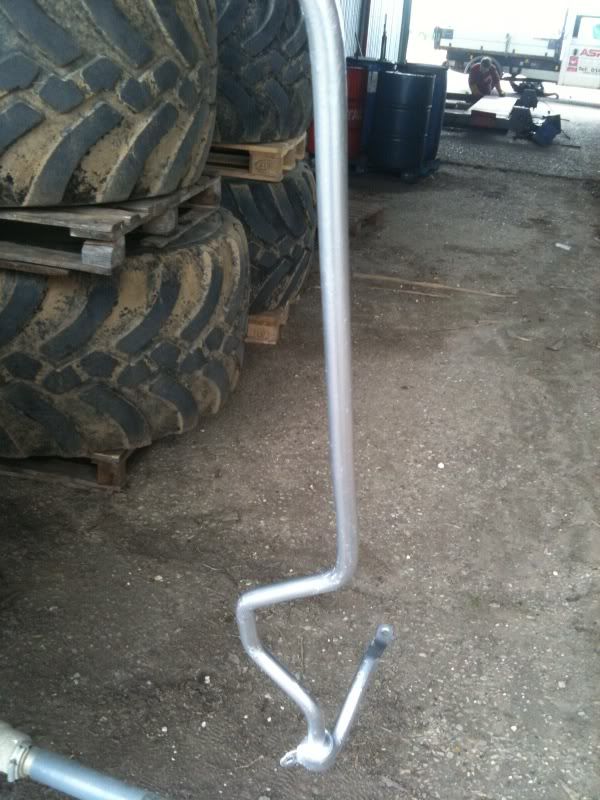
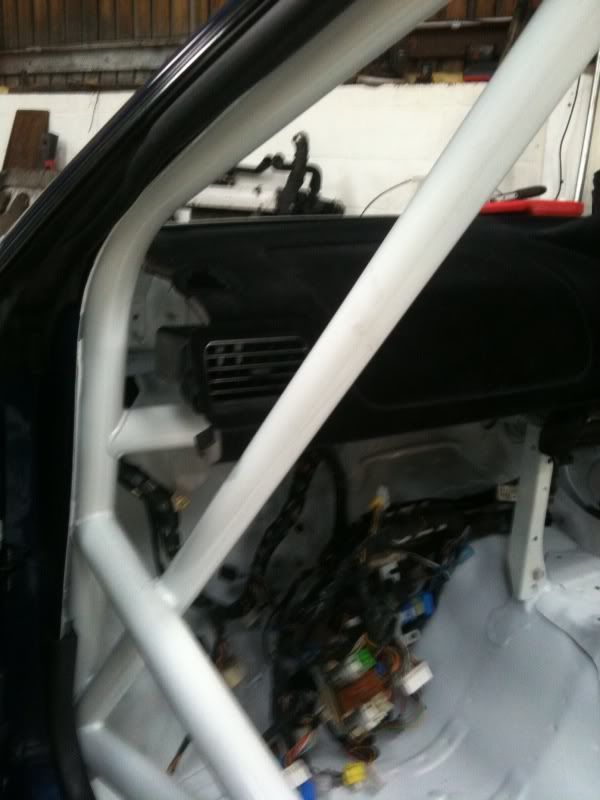
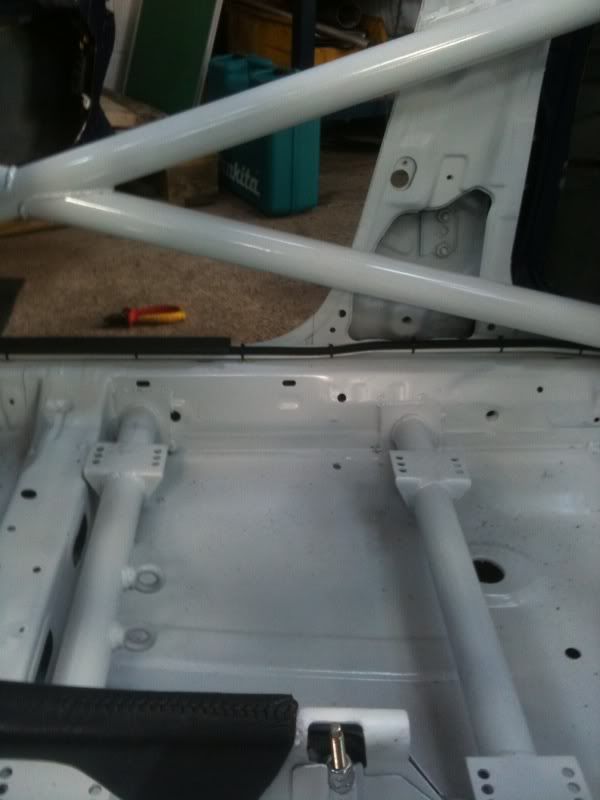
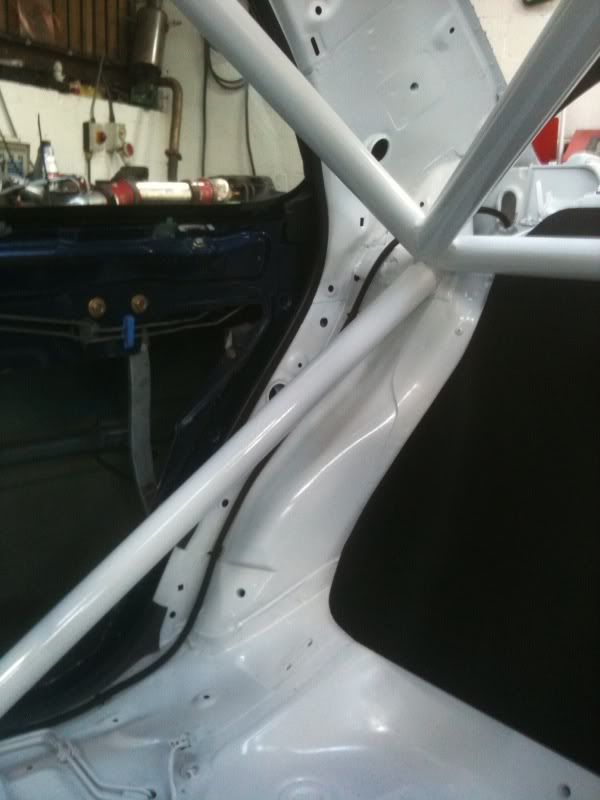
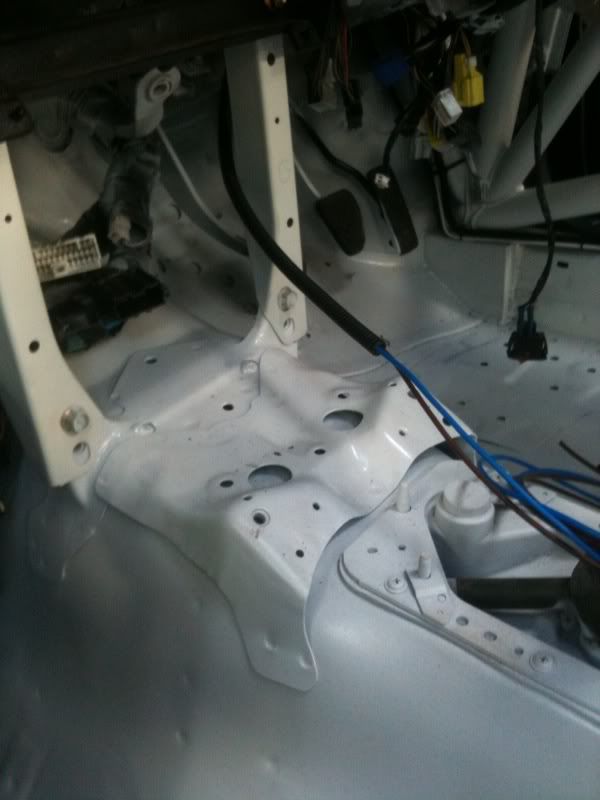
I then had the job of cutting the sides off the flocked dash to fit it in with the roll cage, this was a tricky job and was reluctant with my cutting but in the end alot had to come out as it woudn't fit in i will be making some end caps tommorow to tidy things up a bit but atleast its now in and ready for a box of CF to be made to fit in a fuse box and switches.
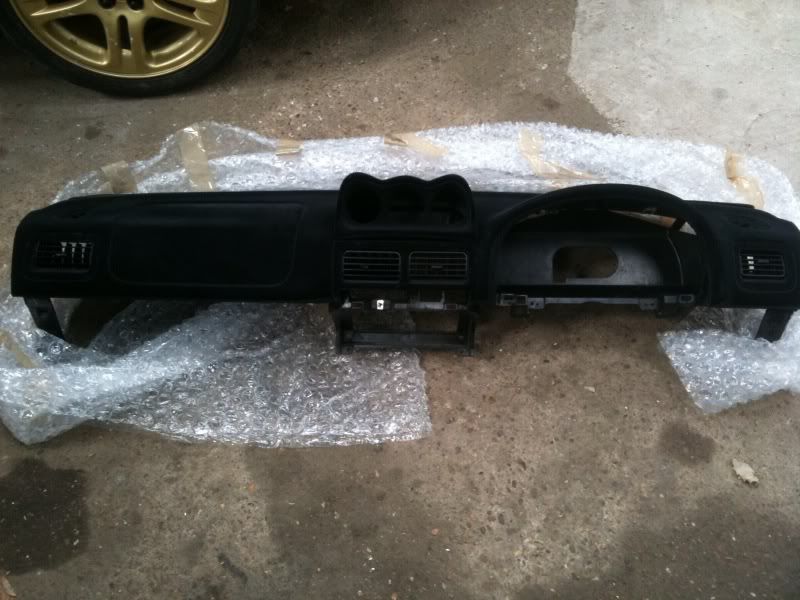
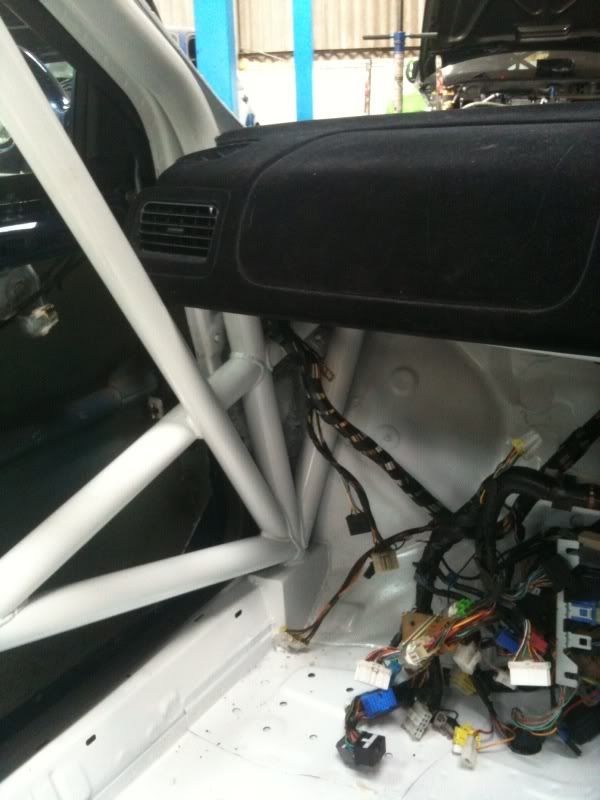
The 2 white brackets that i sprayed were left on the original dash bar which i cut just below the 6mm stud that fastens to the underside of the dash to help support it and its going now where if you get my drift.

I then primed a re painted in silver came up a treat .
I then had the job of cutting the sides off the flocked dash to fit it in with the roll cage, this was a tricky job and was reluctant with my cutting but in the end alot had to come out as it woudn't fit in i will be making some end caps tommorow to tidy things up a bit but atleast its now in and ready for a box of CF to be made to fit in a fuse box and switches.
The 2 white brackets that i sprayed were left on the original dash bar which i cut just below the 6mm stud that fastens to the underside of the dash to help support it and its going now where if you get my drift.
Thread Starter
Scooby Regular
iTrader: (37)
Joined: Jan 2005
Posts: 7,843
Likes: 1
From: never far away from my impreza
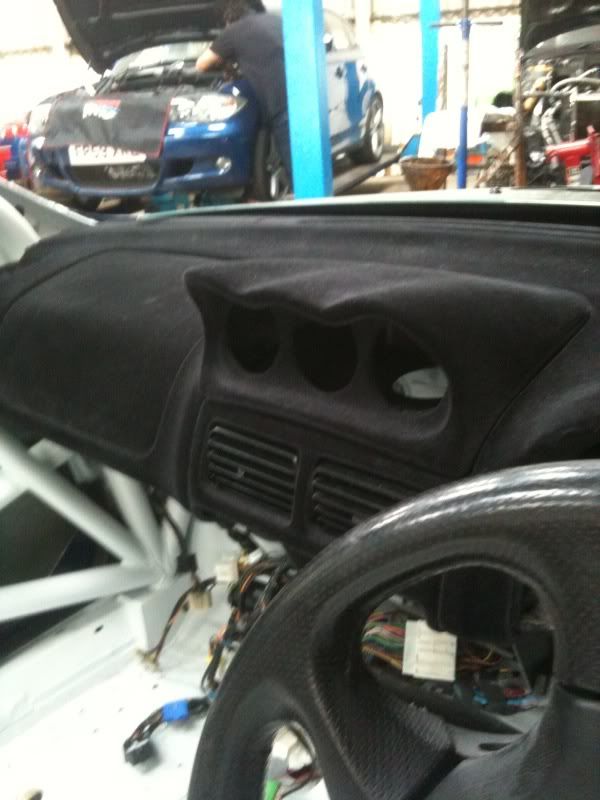
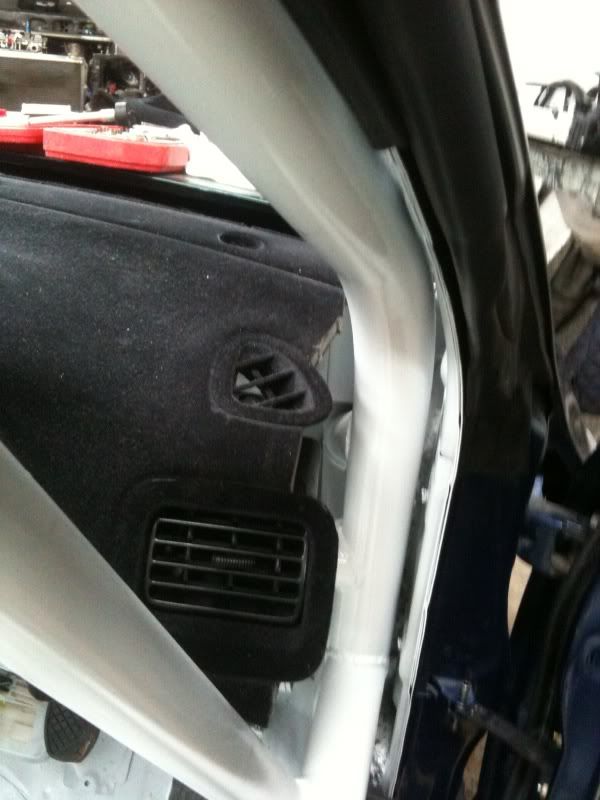
Im going to make some end caps that neatly go around the cage ,but i removed the vents as they just pop out before cutting then you can put them back later as i did
Thread Starter
Scooby Regular
iTrader: (37)
Joined: Jan 2005
Posts: 7,843
Likes: 1
From: never far away from my impreza
Cheers mate, when i started it early this year i didnt realise how long things take ,it's the little things that take the time ,if anyone else is planning doing it theres alot of time involved ,im down the garage 10hrs a day 6 days a week and still have loads to do .
Cant wait to start with the graphics ,and the switch panel,and the lateral arms and the turbo and the exhaust and the seats and the fuel lines the list is endless there is always something to do and to be truthfull im loving every minute ,i have waited years to do something like this as i love these cars and have always wanted a track/rally car of my own, and im finally in the zone so to speak .
Thanks for your support everyone who is following this and who has helped me with either parts i have purchased or information you have given me there will be a finish point when i dont know but keep following things will only get better and more pics to come.
Thread Starter
Scooby Regular
iTrader: (37)
Joined: Jan 2005
Posts: 7,843
Likes: 1
From: never far away from my impreza
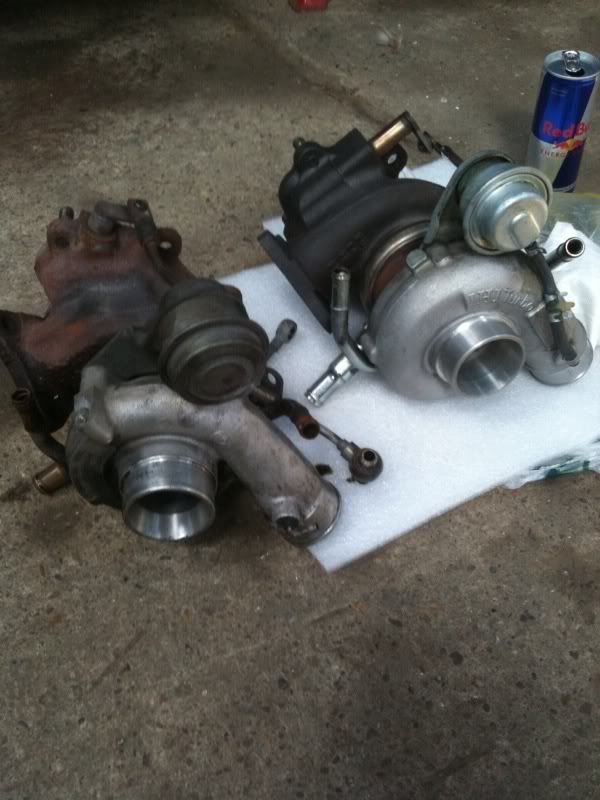
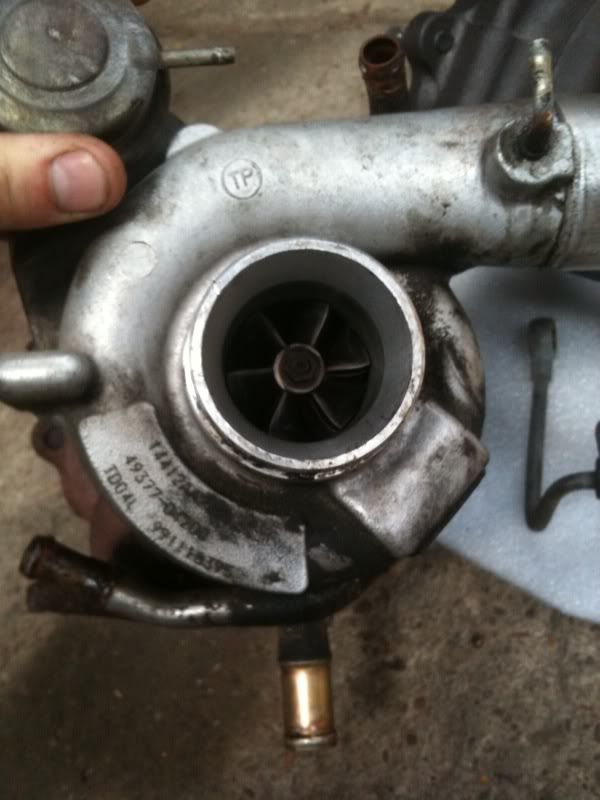
Well i have had a nightmare of a day i suppose you get them now and again, today was to remove the TDO4L Turbo and replace it with the VF48 i bought some time ago.
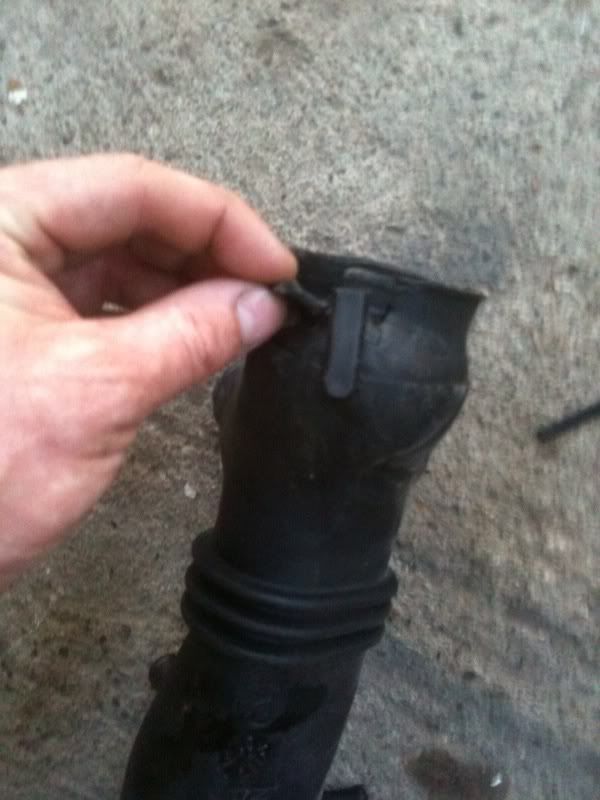
Removing the old one was easy but noticed yet again the intake pipe was split on the flexible rubber that attaches to the turbo under a jubilee clip.
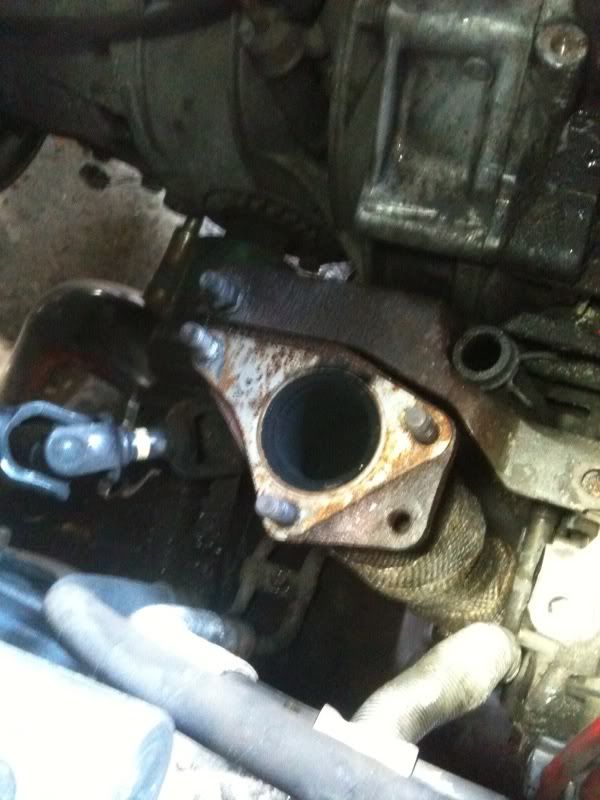
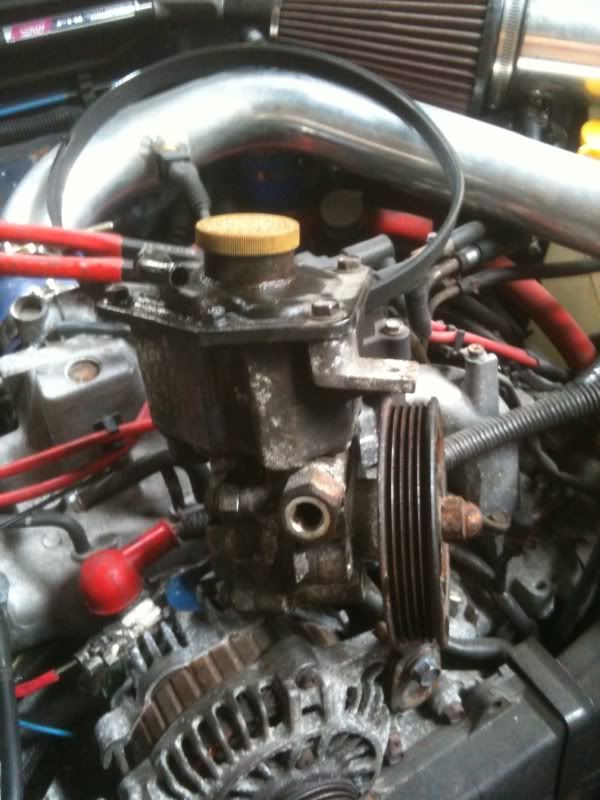
The power steering pump was in the way so this had to be removed as i didnt want the hassle of removing the inlet manifold as before.
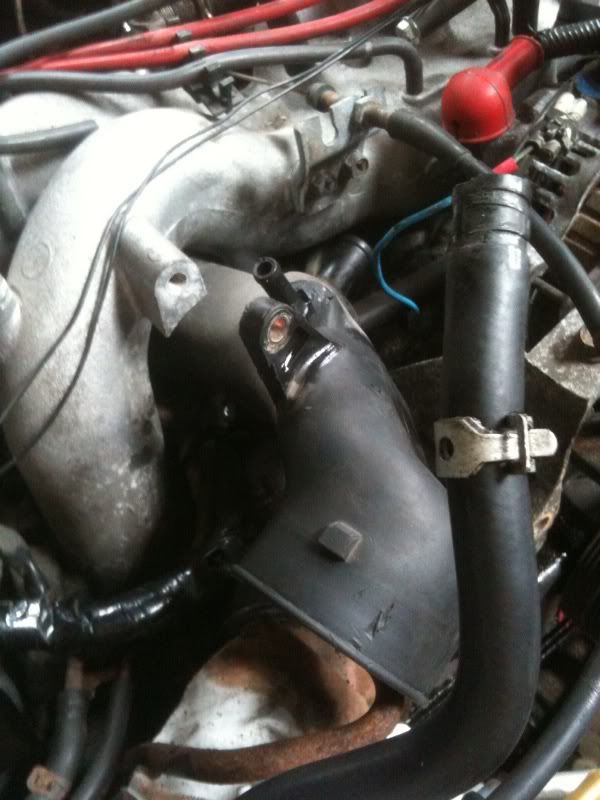
I then decided while it was off to give it an overhaul and good clean up ready for paint and refit tommorow.
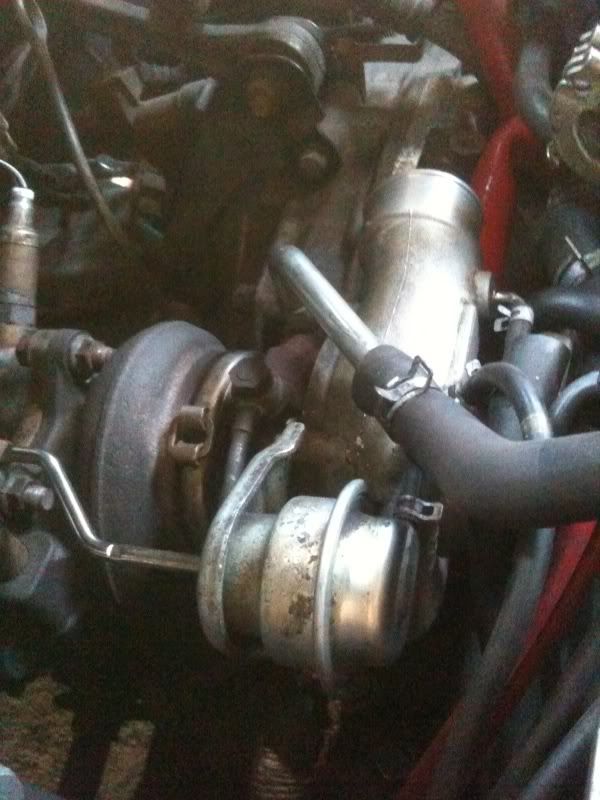
The turbo and downpipe are connected ready for uprated hose when it comes.
Removing the old one was easy but noticed yet again the intake pipe was split on the flexible rubber that attaches to the turbo under a jubilee clip.
The power steering pump was in the way so this had to be removed as i didnt want the hassle of removing the inlet manifold as before.
I then decided while it was off to give it an overhaul and good clean up ready for paint and refit tommorow.
The turbo and downpipe are connected ready for uprated hose when it comes.
Thread Starter
Scooby Regular
iTrader: (37)
Joined: Jan 2005
Posts: 7,843
Likes: 1
From: never far away from my impreza
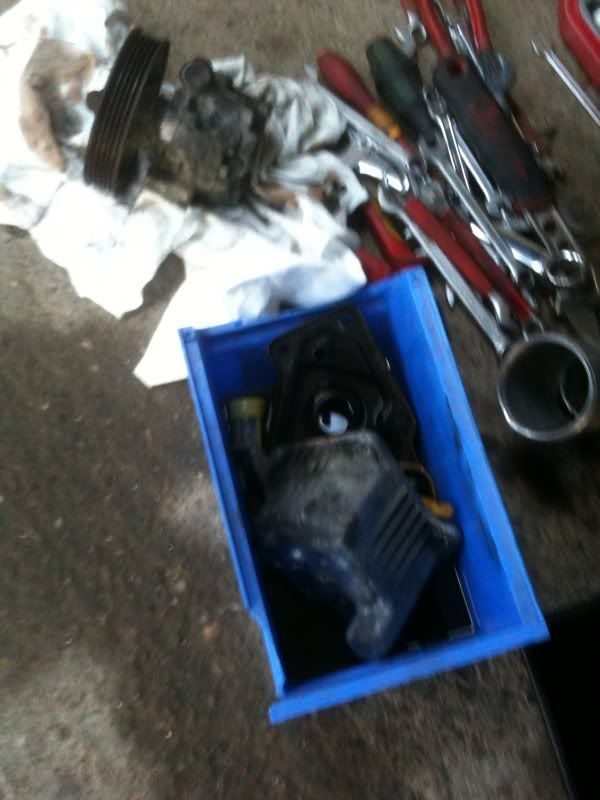
Removed the power steering pump stripped it down and cleaned and put it back together again,also cleaned and resprayed the brackets holding the power steering pump and alternator.
Re-fitted the rear view mirror as this was brought up on a previous thread about having a mirror or not so decided it would be a good idea to see who is coming up from behind while out on the track.
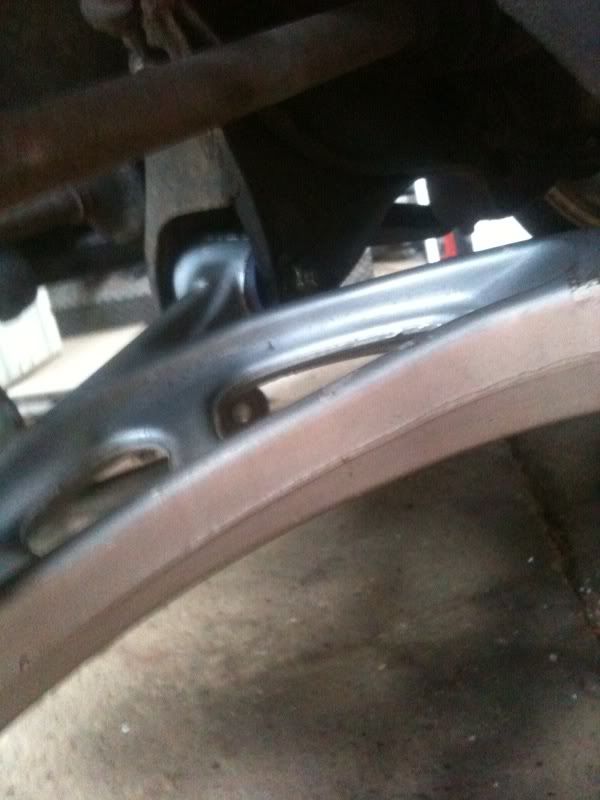
Need to locate a set of rear adjustable lateral arms ready for geomatry set up in a few weeks.
Re-fitted the rear view mirror as this was brought up on a previous thread about having a mirror or not so decided it would be a good idea to see who is coming up from behind while out on the track.
Need to locate a set of rear adjustable lateral arms ready for geomatry set up in a few weeks.

Did you manage to get them brake bits off to me?
Dan
 An Impreza monster truck would be awesome.
Thread Starter
Scooby Regular
iTrader: (37)
Joined: Jan 2005
Posts: 7,843
Likes: 1
From: never far away from my impreza
Thread Starter
Scooby Regular
iTrader: (37)
Joined: Jan 2005
Posts: 7,843
Likes: 1
From: never far away from my impreza

Thread Starter
Scooby Regular
iTrader: (37)
Joined: Jan 2005
Posts: 7,843
Likes: 1
From: never far away from my impreza
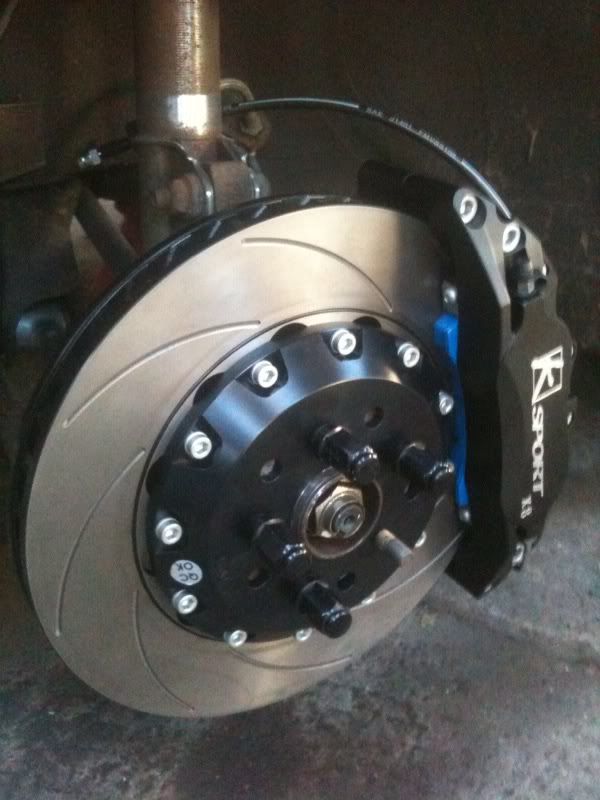
Cheers steve had another busy day , firstly started of with bleeding the brakes was going to use dot 5.1 but advised that they use this stuff in the rally cars alot better than 5.1
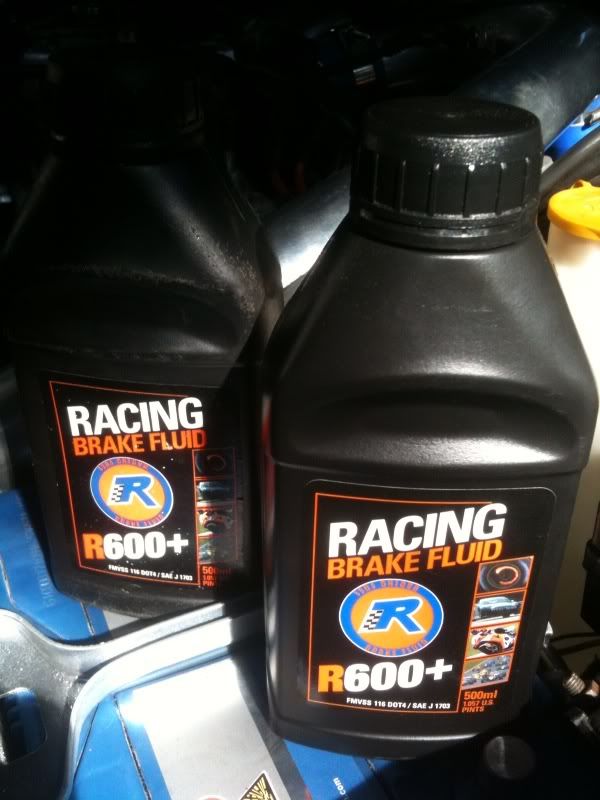
Brakes now spot on after 4 goes round all bleed nipples as the k sports have 2 nipples each supply 4 pots.
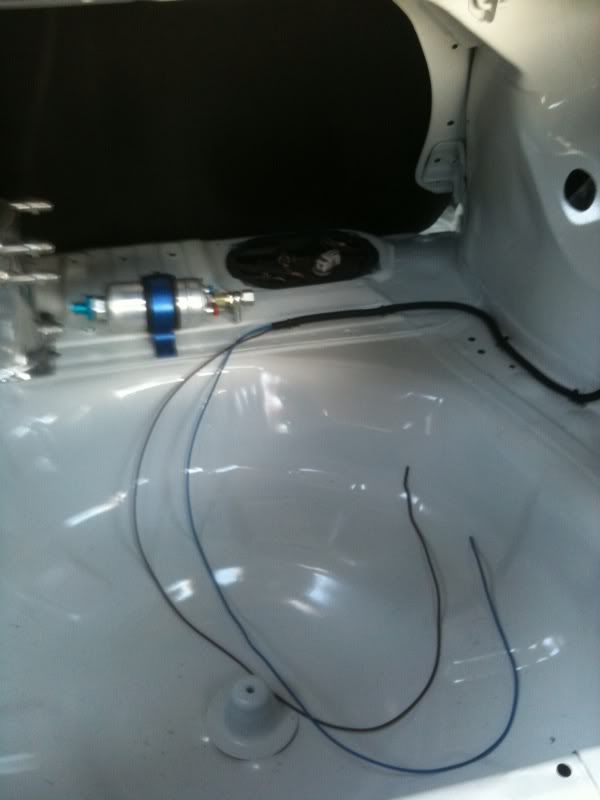
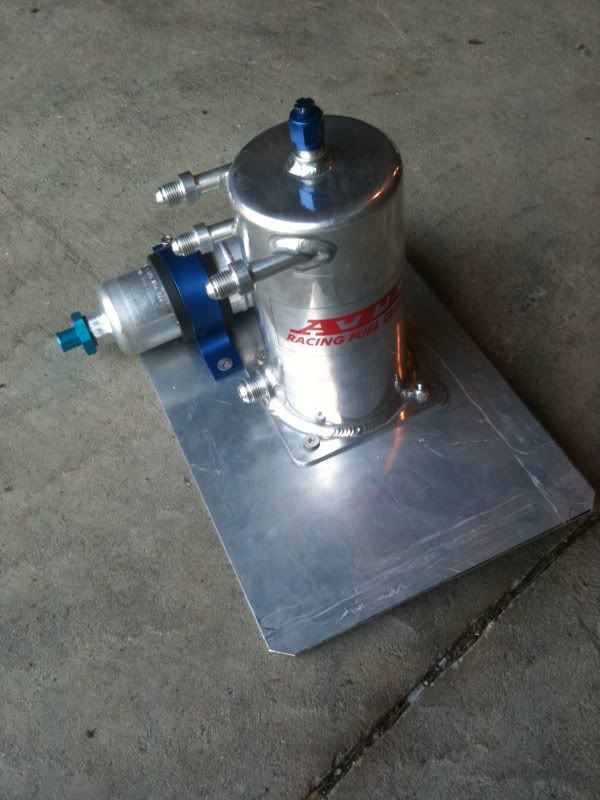
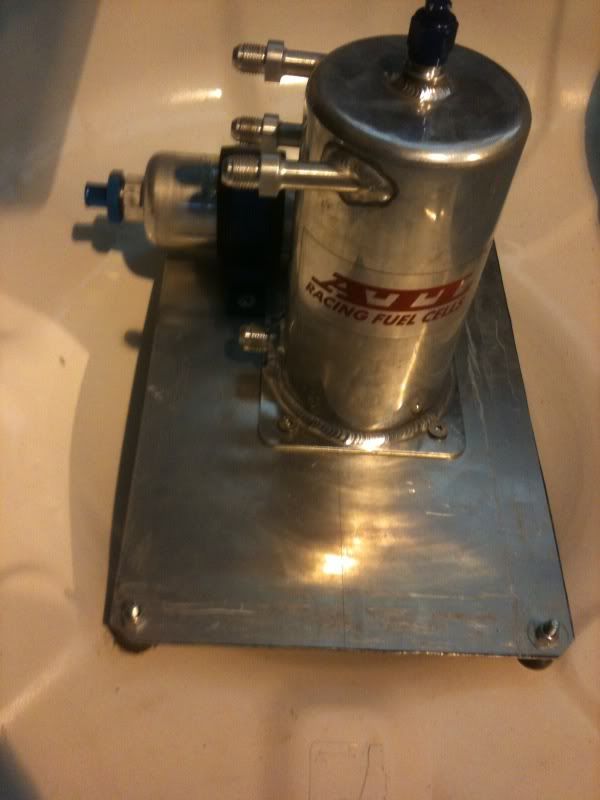
Then it was a job i needed to do which was clip brakelines and new loom for bosch 044 ext fuel pump,i fed 2 cables 1.5mm through plastic conduit and pot riveted clips with tie- wraps along the inside edge of the sills ,really tieded things up a great job i think.
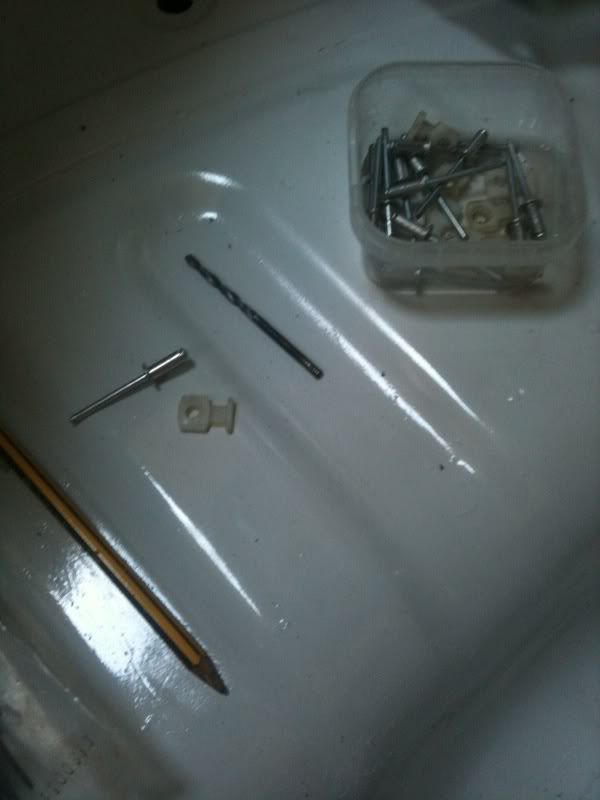
I used a 3mm drill bit as a pilot then 5mm to accept the rivet to fasten the clips
Just waiting for 6mm rubber mounts to fasten to swirlpot and pump ready to order aeroquipe braided lines
Brakes now spot on after 4 goes round all bleed nipples as the k sports have 2 nipples each supply 4 pots.
Then it was a job i needed to do which was clip brakelines and new loom for bosch 044 ext fuel pump,i fed 2 cables 1.5mm through plastic conduit and pot riveted clips with tie- wraps along the inside edge of the sills ,really tieded things up a great job i think.
I used a 3mm drill bit as a pilot then 5mm to accept the rivet to fasten the clips
Just waiting for 6mm rubber mounts to fasten to swirlpot and pump ready to order aeroquipe braided lines


Thread Starter
Scooby Regular
iTrader: (37)
Joined: Jan 2005
Posts: 7,843
Likes: 1
From: never far away from my impreza
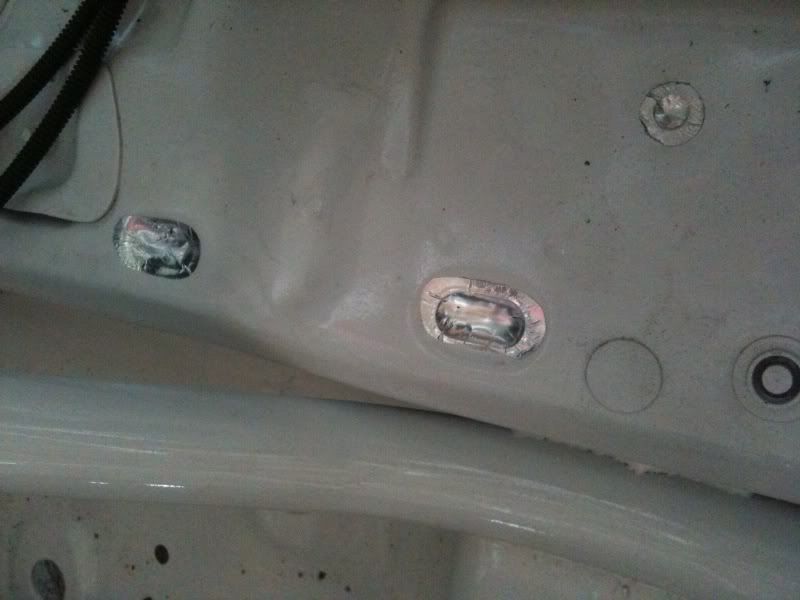
I need to fill in all the holes and have seen a special tape cut out with a punch of different sizes ,this is used on the rally cars to stop dust from getting into the cockpit and seals from moisture.

Thread Starter
Scooby Regular
iTrader: (37)
Joined: Jan 2005
Posts: 7,843
Likes: 1
From: never far away from my impreza
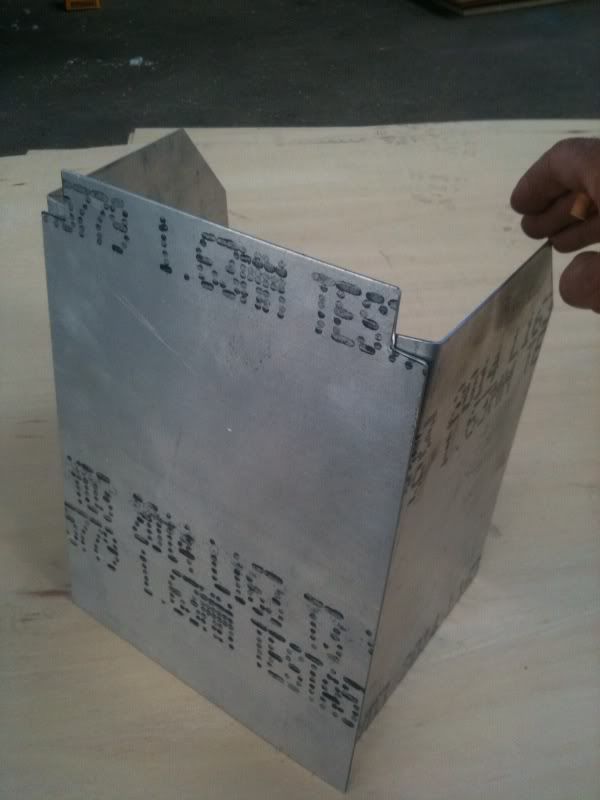
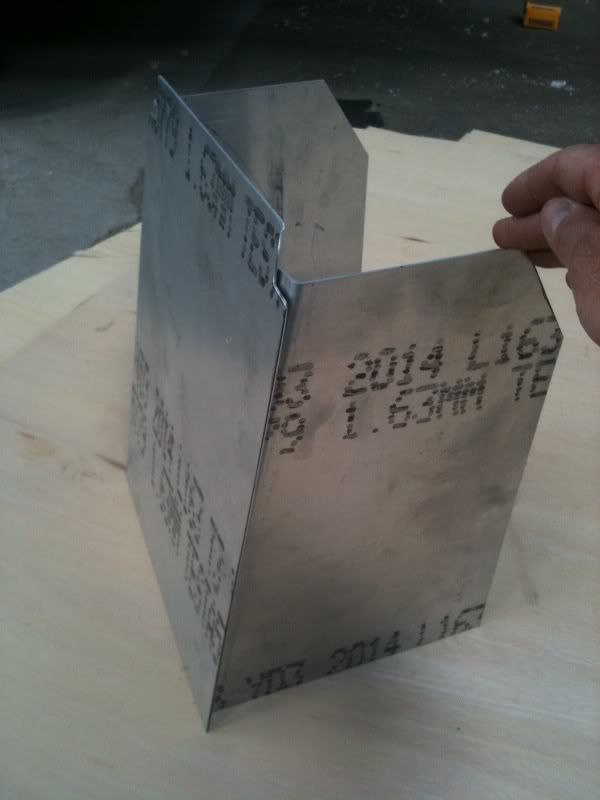
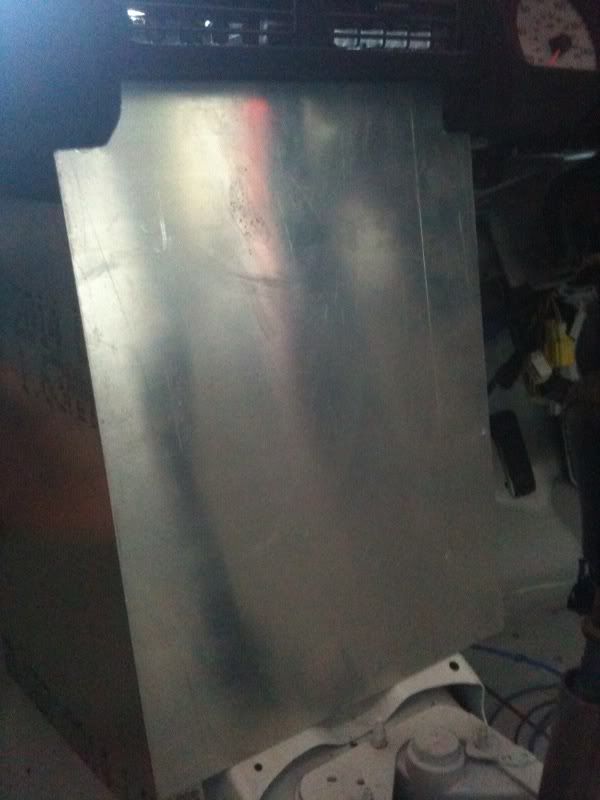
Made a template today for switch box for the dash where im going to mount the new fuse board and switches, i fabed it out of cardboard and will get it made from aluminium and then carbon wrap it should look good when finished .
Thread Starter
Scooby Regular
iTrader: (37)
Joined: Jan 2005
Posts: 7,843
Likes: 1
From: never far away from my impreza
Well just a small update as iv'e been busy with work.
I made a few weeks ago a cardboard template for my dash switch panel and have now had fabbed up this , it will be covered in carbon wrap after switch holes have been drilled out and new fuse board been fitted but you get the idea.
The cover plate will have fitted spring release screws for easy access something il be fitting tommorow.
I needed to cover all of the holes in the shell from when it was manufacturedo as iv'e seen on the rally car this is a good option and works well to stop any dust etc getting into he car.
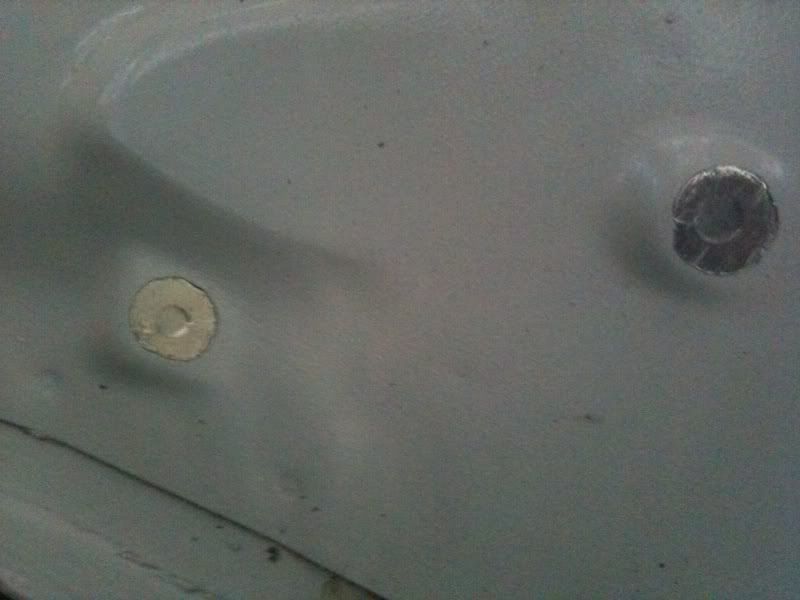
its basically lagging tape cut out with a hole punch and smoothed over the surface of the hole to seal it great idea i think !
I found the padding at work and its flame retardent so bonus nice colour aswell.
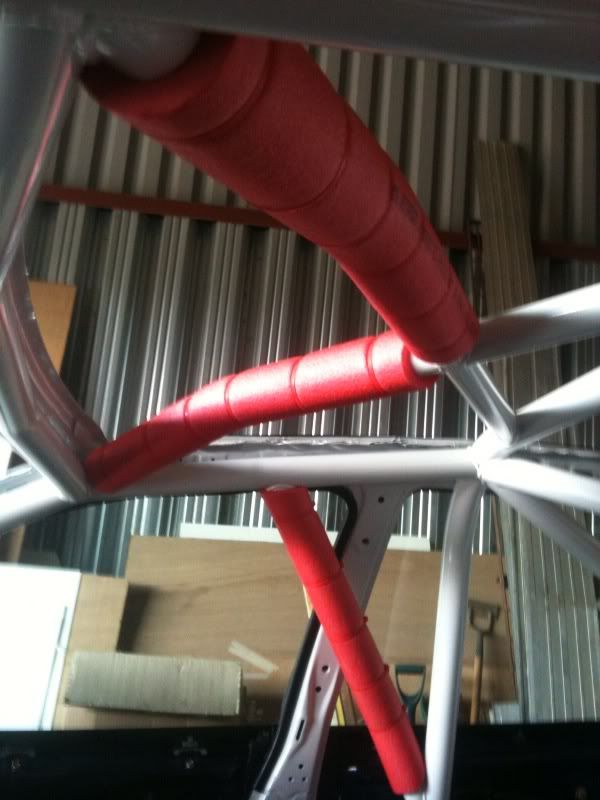
I had a look and feel of the FIA roll cage padding and its very hard infact if you hit your head on it it would do more damage than the cage itself so decided on this for now.
I made a few weeks ago a cardboard template for my dash switch panel and have now had fabbed up this , it will be covered in carbon wrap after switch holes have been drilled out and new fuse board been fitted but you get the idea.
The cover plate will have fitted spring release screws for easy access something il be fitting tommorow.
I needed to cover all of the holes in the shell from when it was manufacturedo as iv'e seen on the rally car this is a good option and works well to stop any dust etc getting into he car.
its basically lagging tape cut out with a hole punch and smoothed over the surface of the hole to seal it great idea i think !
I found the padding at work and its flame retardent so bonus nice colour aswell.
I had a look and feel of the FIA roll cage padding and its very hard infact if you hit your head on it it would do more damage than the cage itself so decided on this for now.
Thread Starter
Scooby Regular
iTrader: (37)
Joined: Jan 2005
Posts: 7,843
Likes: 1
From: never far away from my impreza
Been busy again today had a spare few hours this morning in between a nice breaky cooked on the BBQ.
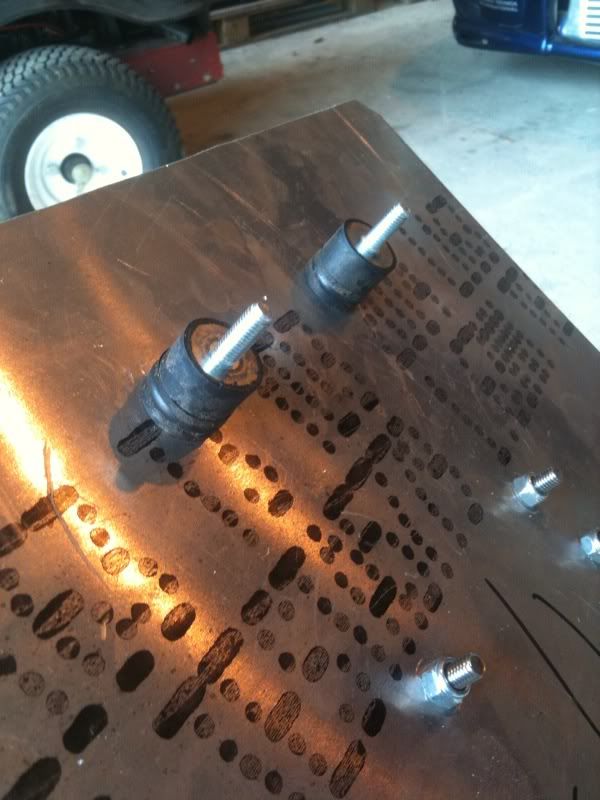
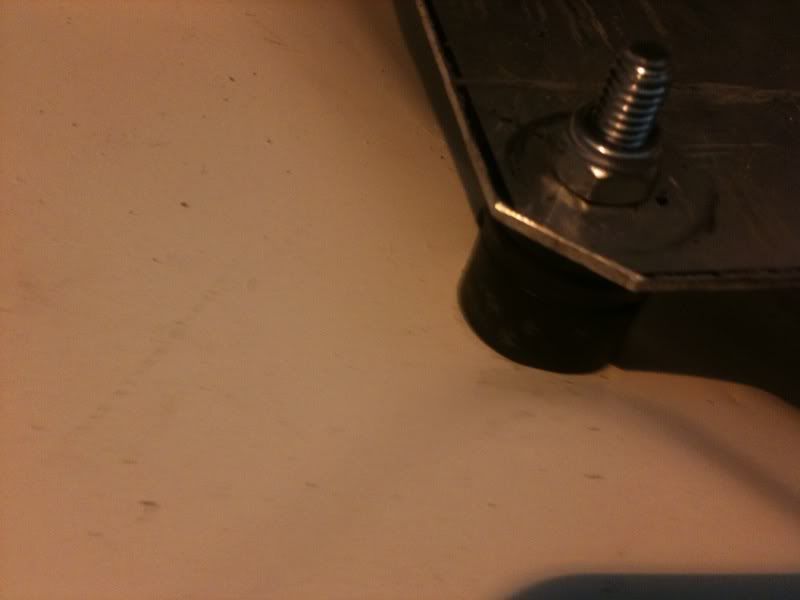
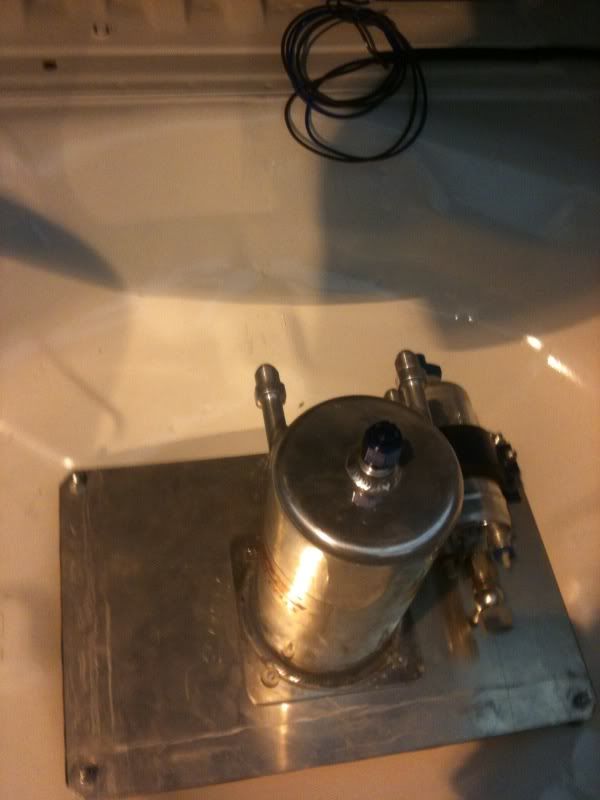
Well set too on the mounting plate for the swirlpot and fuel pump and just waiting on SARD fuel filter to mount next to the pot, i ordered x6 anti vibration mounts from BREMMER a local engineering supplier to us to mount the plate too in the spare wheel well as in the pictures
also carried on with the filling of the holes in the shell ,its a long tedious job that but has to be done a little at a time takes the monotony away.
Seeing your project has inspired me to get my spanners out and do a few bits to my car.
https://www.scoobynet.com/members-ga...l#post10128733
Keep up the good work!
https://www.scoobynet.com/members-ga...l#post10128733
Keep up the good work!
Last edited by C8 DHC 04WRX; Jul 10, 2011 at 12:03 AM.