
wagon fettle

Thread Starter


Joined: Nov 2003
Posts: 13,356
Likes: 58
From: in the woods...........555 Wagon Sqn
boost and oil pressure were due to a hose popping off and the oil pressure sender intermitantly shorting out on the block; both now resolved.
Terrible noise was due to a failed wheel bearing ($hit luck!), which Luke replaced for me at Mocom. After setting up the geometry again (!), it became apparant that the wheel bearing wasn't the only issue; there wa also a knock coming from the turret area. Upon further investigation the turret is flexing alarmingly, the only way to find out what's causing it will be to remove the struts again and check the top mounts and spring location. As I'm currently away I have no time to get the work done before NBO and at present its too much of a risk to drive all that way with an undiagnoised fault. I will be having a chat with a suspension guru from Ford, probably Friday night to decide if I'm going to NBO or not.
***** .
.
Terrible noise was due to a failed wheel bearing ($hit luck!), which Luke replaced for me at Mocom. After setting up the geometry again (!), it became apparant that the wheel bearing wasn't the only issue; there wa also a knock coming from the turret area. Upon further investigation the turret is flexing alarmingly, the only way to find out what's causing it will be to remove the struts again and check the top mounts and spring location. As I'm currently away I have no time to get the work done before NBO and at present its too much of a risk to drive all that way with an undiagnoised fault. I will be having a chat with a suspension guru from Ford, probably Friday night to decide if I'm going to NBO or not.
*****
.
Thread Starter
Joined: Nov 2003
Posts: 13,356
Likes: 58
From: in the woods...........555 Wagon Sqn
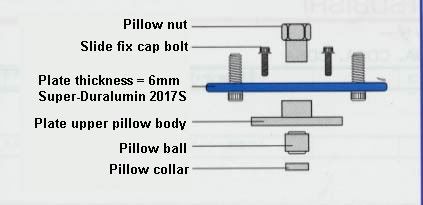
after removing and stripping the struts, it has become fairly obvious that a spacer is missing between the top mount and top spring cap which caused the knocking...I'd like to source proper Cusco spacers if possible so will begin the interweb trawl now.
Its called a pillow collar...any ideas anyone?
Its called a pillow collar...any ideas anyone?
Last edited by trails; Jun 16, 2008 at 05:22 PM.
Thread Starter
Joined: Nov 2003
Posts: 13,356
Likes: 58
From: in the woods...........555 Wagon Sqn
no luck sourcing the originals so after Zak measured up a collar for me one of my dads' friends has a lathe and is going to make me a pair up 
In the meanwhile I have been performing some cooling fettles...more later.
In the meanwhile I have been performing some cooling fettles...more later.
Last edited by trails; Jun 22, 2008 at 11:17 PM.
Thread Starter
Joined: Nov 2003
Posts: 13,356
Likes: 58
From: in the woods...........555 Wagon Sqn
big thank you to Allen for knocking these up...
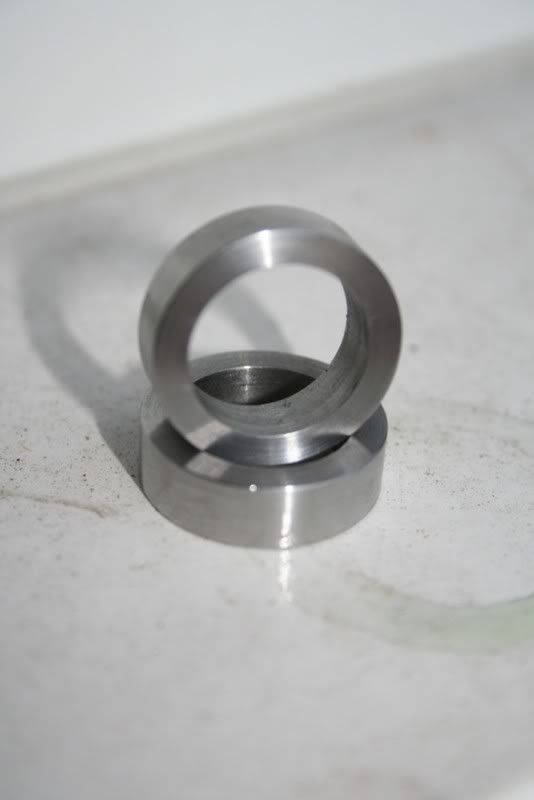
fitted perfectly and after putting the struts back on the car I had no knocks...front end is riding a little high now though so I may put some Whiteline flat out springs on the font to even it out. Then more geometry I guess

fitted perfectly and after putting the struts back on the car I had no knocks...front end is riding a little high now though so I may put some Whiteline flat out springs on the font to even it out. Then more geometry I guess
Thread Starter
Joined: Nov 2003
Posts: 13,356
Likes: 58
From: in the woods...........555 Wagon Sqn
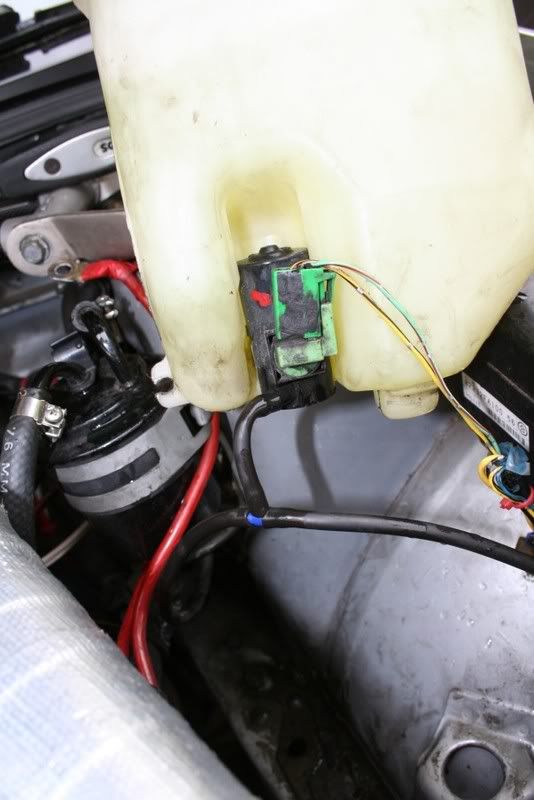
I've had a new change in mind for a few weeks now, thanks to Simon (SilverScoobySport) ; swapping my wiper washer bottle for the smaller WRX version. A quick trip to the local breakers and for �10 I have a WRX washer bottle and pump. So I've gone from this
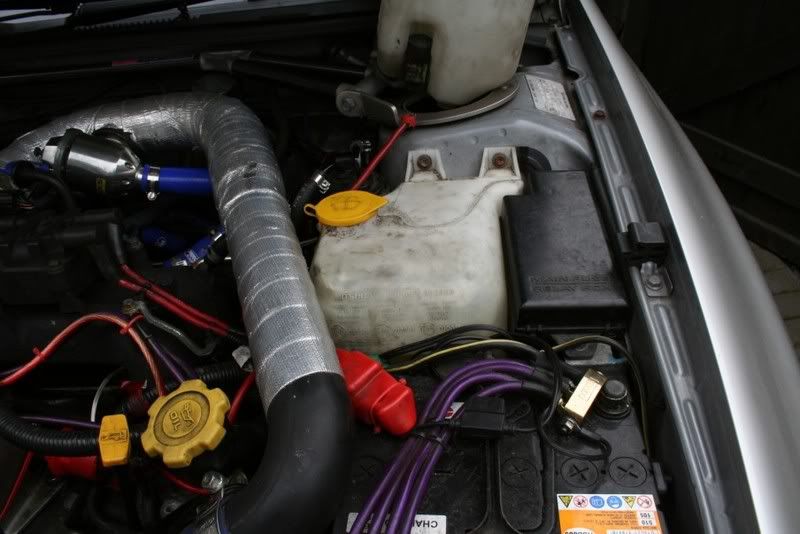
To this
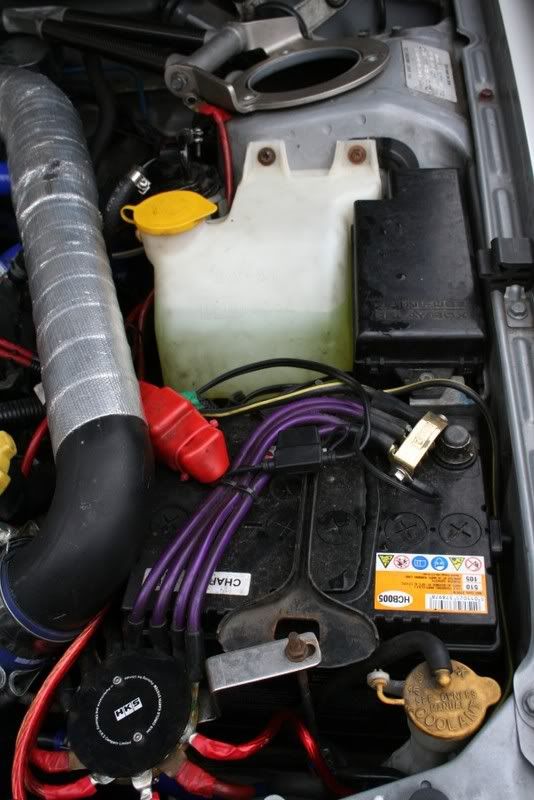
Binned the old one with the three pumps.

I've removed my headlamp washers anyway so only had the two front and rear washers to deal with so I T'd them in so they both fire via the front washer stalk button.
; swapping my wiper washer bottle for the smaller WRX version. A quick trip to the local breakers and for �10 I have a WRX washer bottle and pump. So I've gone from thisTo this
Binned the old one with the three pumps.
I've removed my headlamp washers anyway so only had the two front and rear washers to deal with so I T'd them in so they both fire via the front washer stalk button.
Last edited by trails; Jun 22, 2008 at 11:19 PM.
Thread Starter
Joined: Nov 2003
Posts: 13,356
Likes: 58
From: in the woods...........555 Wagon Sqn
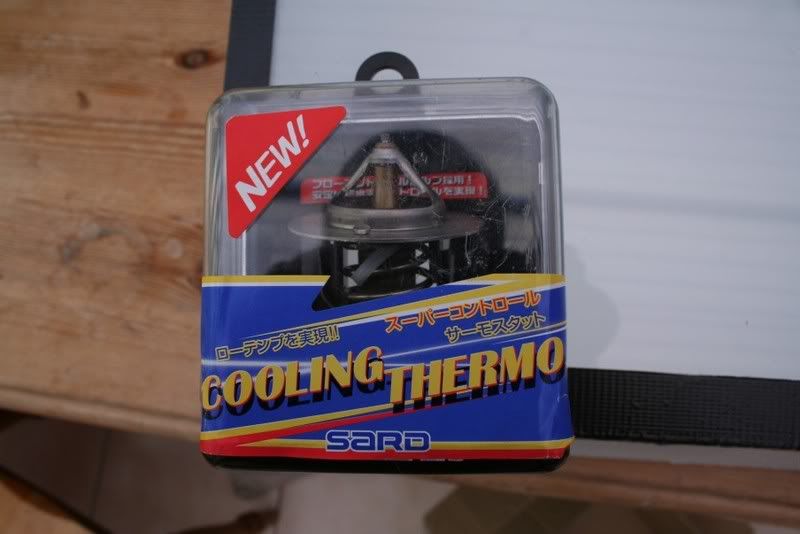
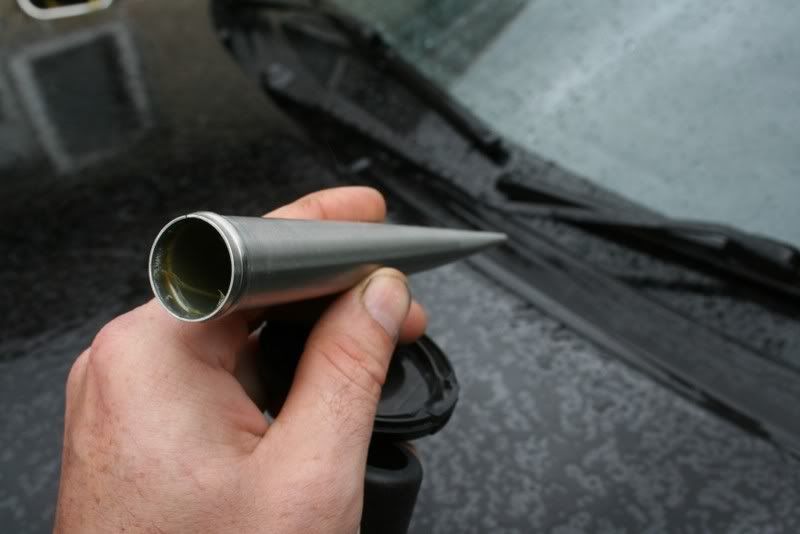
back to the cooling...It's the last area I think I want to cover before I venture out on track. H2o first; I've fitted a Sard thermostat that opens at 71 degrees rather than the OEM 80 degrees. Wanted one for ages but couldn't justify the �80 or so they retail for so i grabbed this one from the classified 
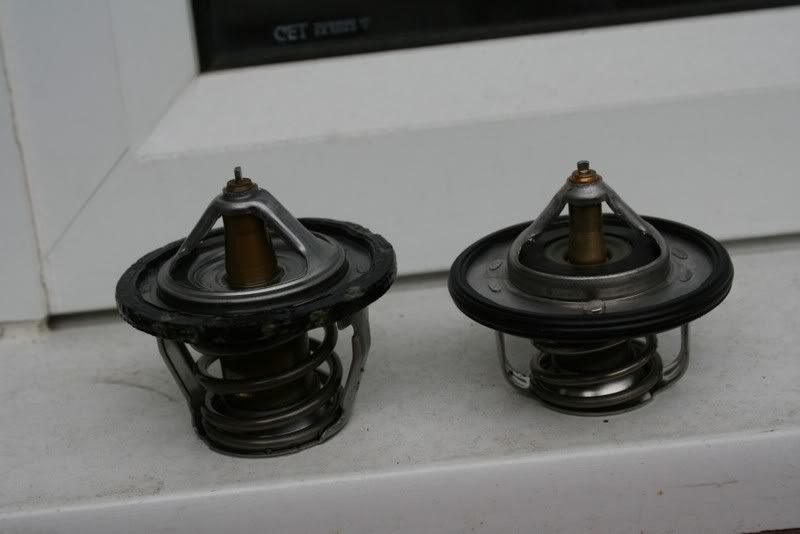
The OEM thermostat is on the left...
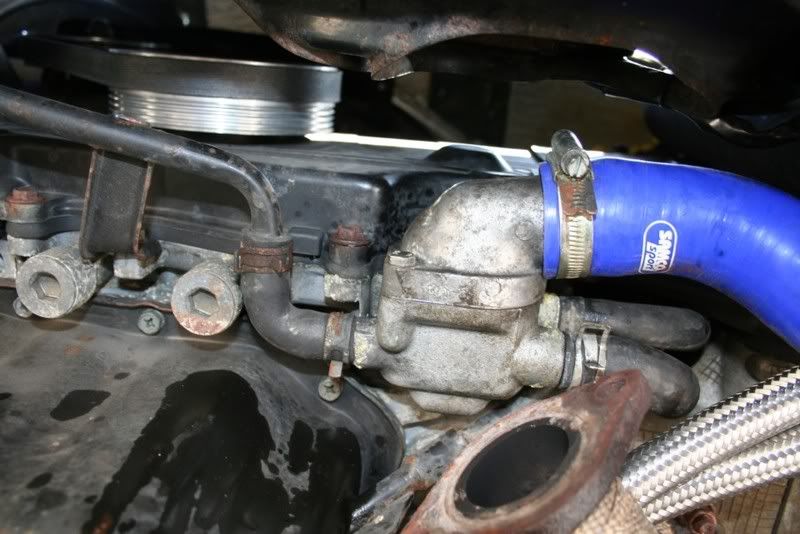
real pita to get to, I ended up removing the collector pipe (and snapping one bolt), you can see the alloy housing it sits in.
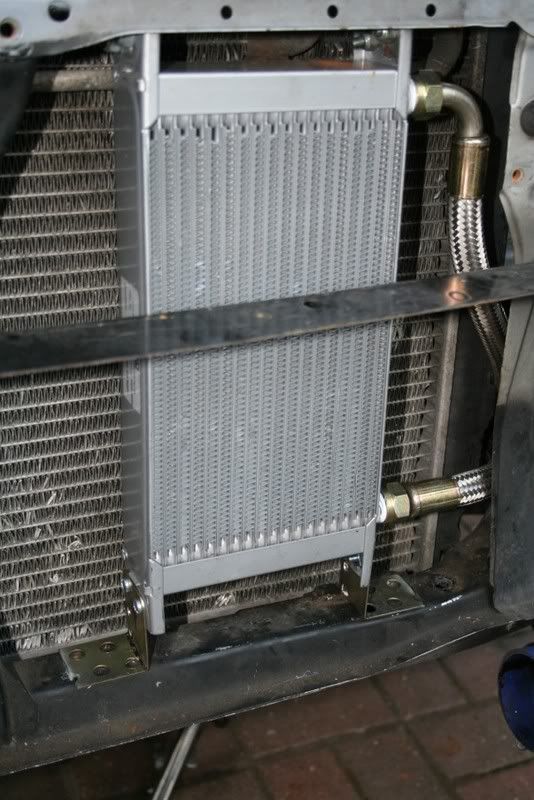
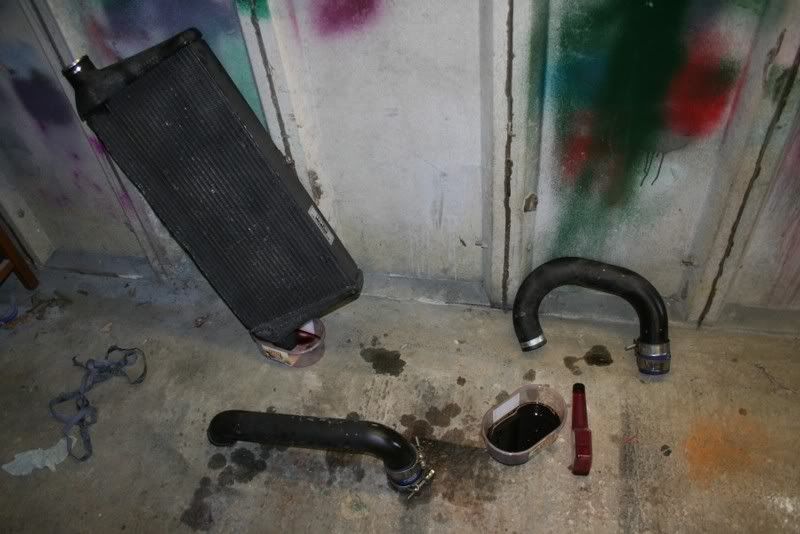
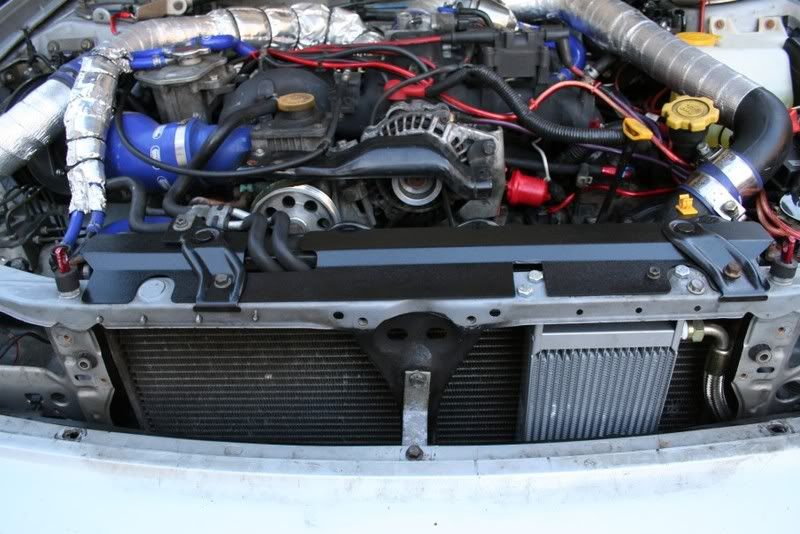
Onto oil then, i've had this kit for ages (another second hand bargain), so am pleased to finally get it almost done. I've hung the cooler by the slam panel and intend to fix it to the bottom cross beam too. Thats a bumper and fmic off job though which I'll attend to at a later date as the cooler is almost impossible to move.

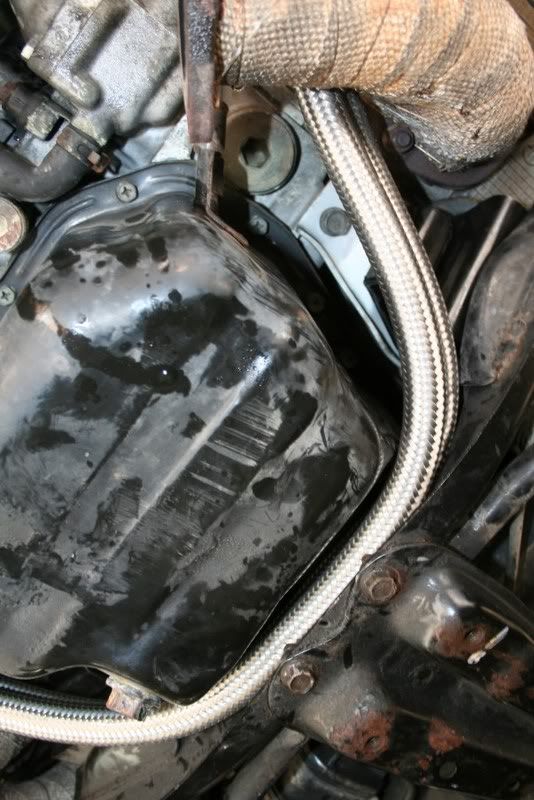
hoses are running behind the rad...
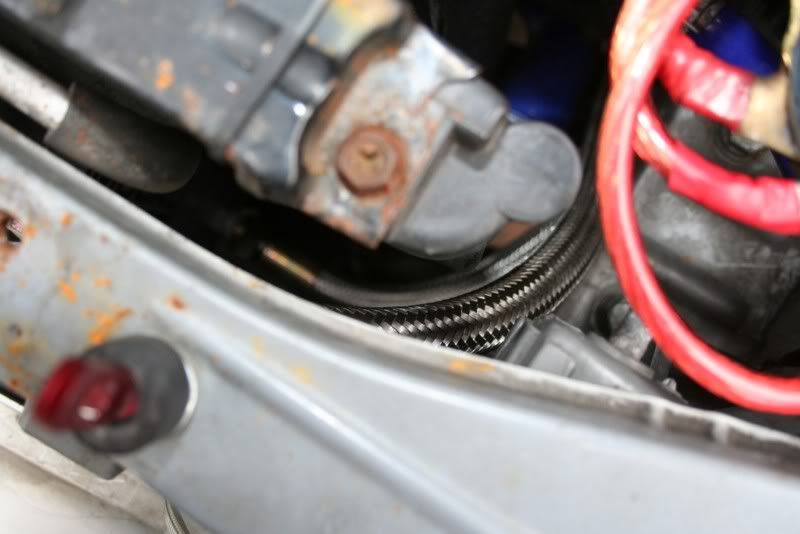
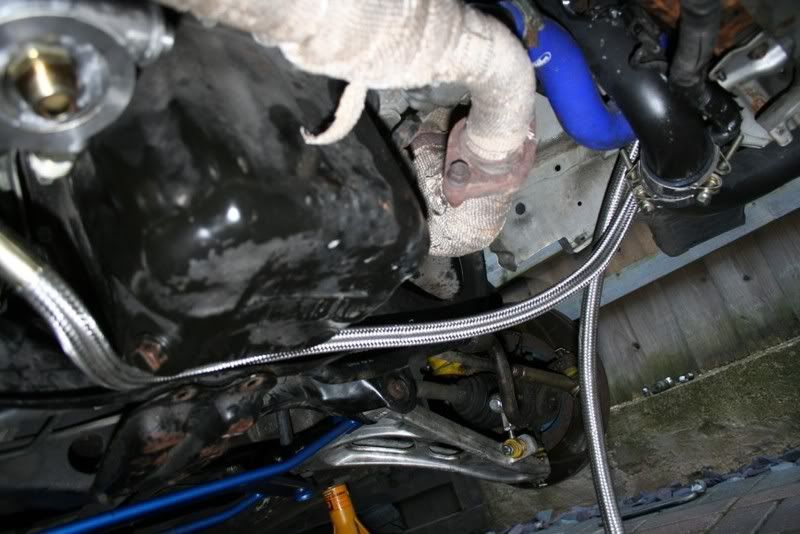
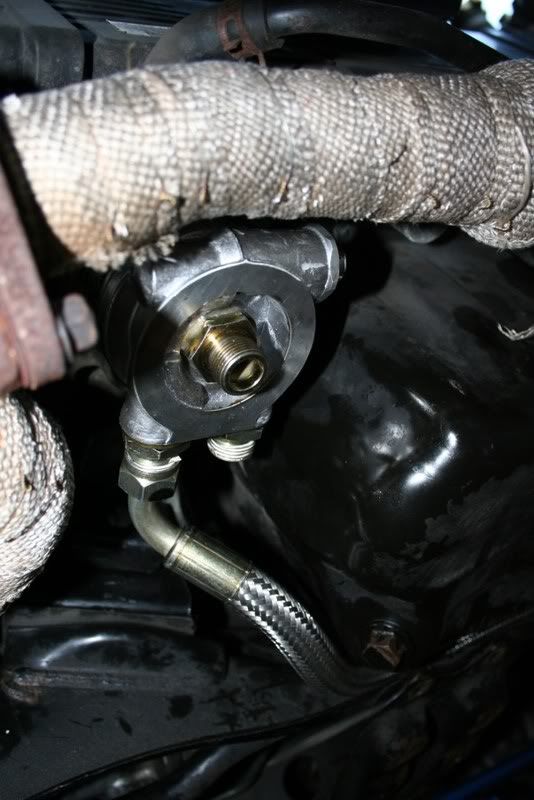
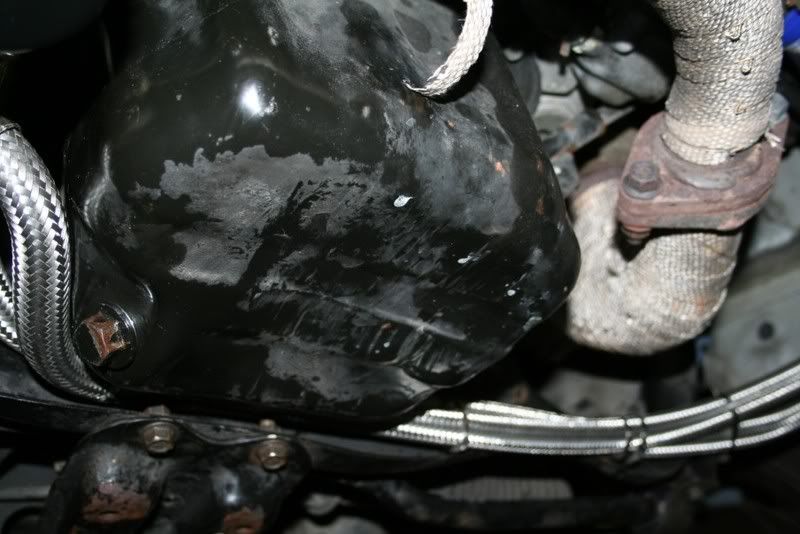
under the manifolds and tucked behind the sump, cross member support had to be loosened first but its a nice snug fit. I'm going to get some heat proof sleeve for the parts that pass closest to the manifolds by way of some extra fire protection.
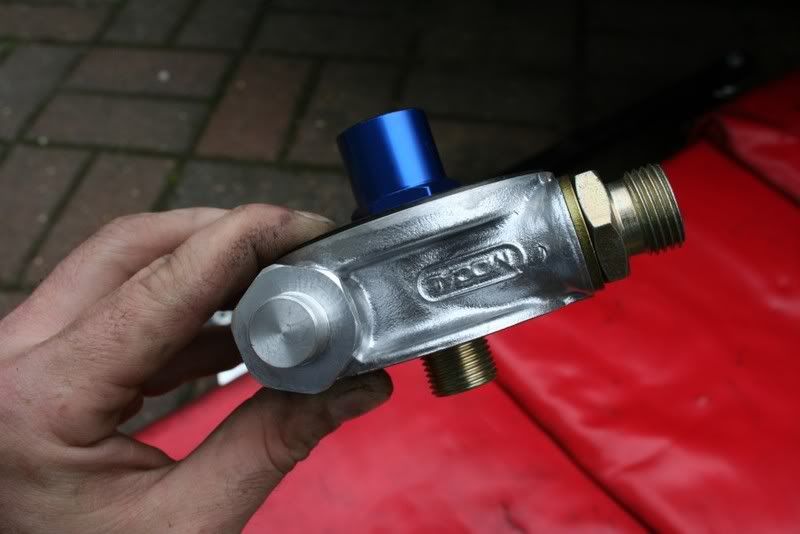
Everything is ready to go, i have my a Mocal thermostatically controlled sandwich plate and lots of Silkolene but at present I've yet to decide to plumb the feed from top to bottom or bottom to top. More research and then I'll fit it. Any advice gratefully received.
Its nice to have a going concern again...off to bed fairly content tonight
The OEM thermostat is on the left...
real pita to get to, I ended up removing the collector pipe (and snapping one bolt
), you can see the alloy housing it sits in.Onto oil then, i've had this kit for ages (another second hand bargain
), so am pleased to finally get it almost done. I've hung the cooler by the slam panel and intend to fix it to the bottom cross beam too. Thats a bumper and fmic off job though which I'll attend to at a later date as the cooler is almost impossible to move.hoses are running behind the rad...
under the manifolds and tucked behind the sump, cross member support had to be loosened first but its a nice snug fit. I'm going to get some heat proof sleeve for the parts that pass closest to the manifolds by way of some extra fire protection.
Everything is ready to go, i have my a Mocal thermostatically controlled sandwich plate and lots of Silkolene but at present I've yet to decide to plumb the feed from top to bottom or bottom to top. More research and then I'll fit it. Any advice gratefully received.
Its nice to have a going concern again...off to bed fairly content tonight


Thread Starter
Joined: Nov 2003
Posts: 13,356
Likes: 58
From: in the woods...........555 Wagon Sqn
Thread Starter
Joined: Nov 2003
Posts: 13,356
Likes: 58
From: in the woods...........555 Wagon Sqn
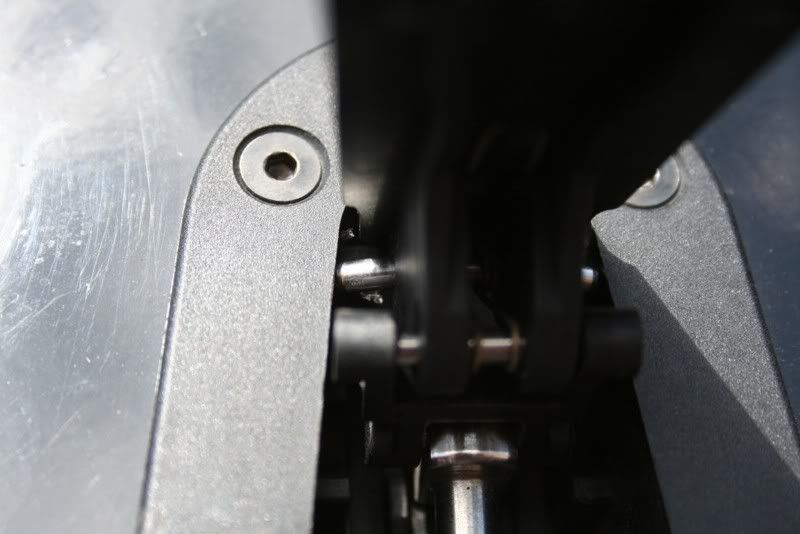
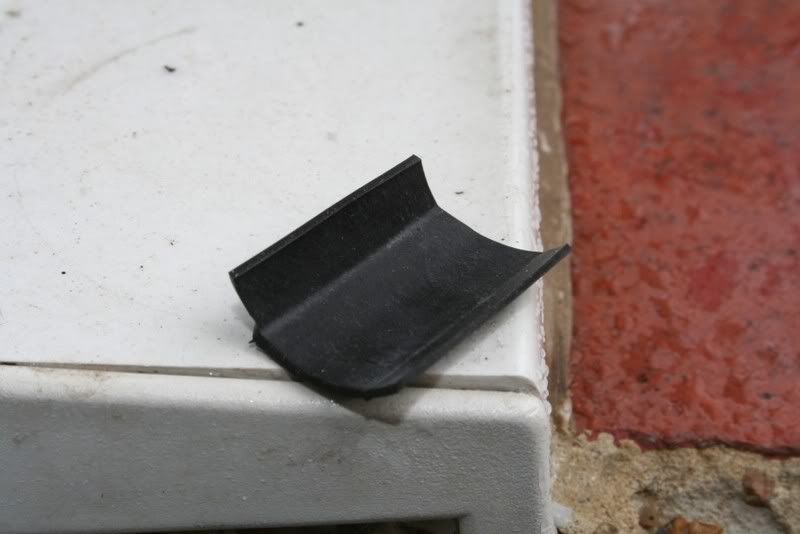
done well so far this week...yesterday I managed to break one of my aero catches, you can just see the steel bar that was the hinge until I snapped its seat
jacked the car up to re-route the oil cooler and noticed loads of grease on the n\s suspension components and inside the wheel rim...CV has split


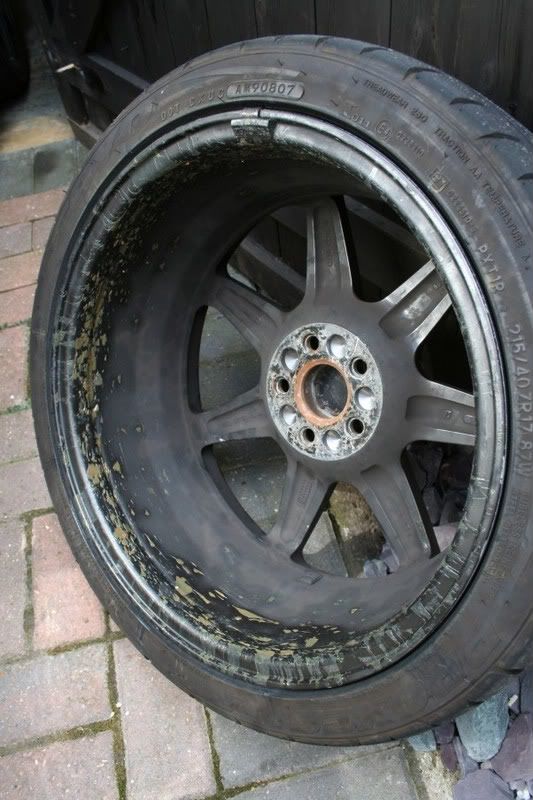
jacked the car up to re-route the oil cooler and noticed loads of grease on the n\s suspension components and inside the wheel rim...CV has split
Thread Starter
Joined: Nov 2003
Posts: 13,356
Likes: 58
From: in the woods...........555 Wagon Sqn
really couldn't be arsed with the CV gaiter today so did something I've been putting off...and took the bumper off again. Oh and the ic core 
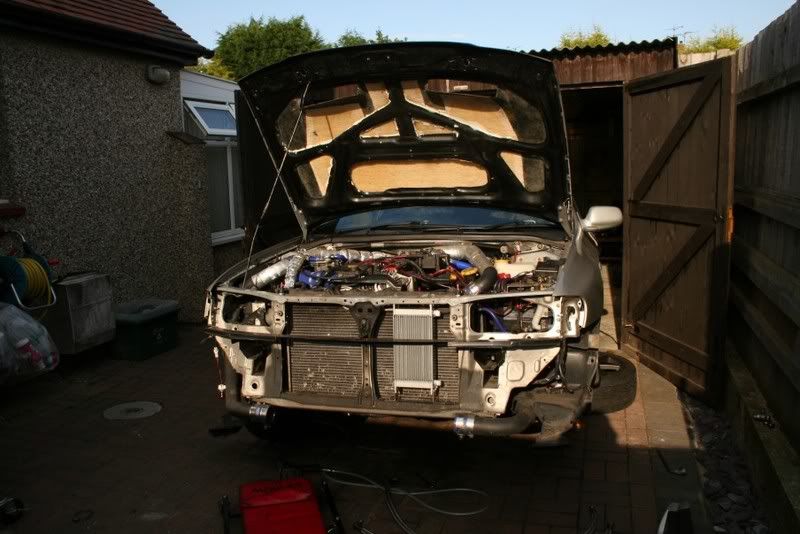
There are a few jobs I wanted to tackle that meant removing the bumper; oil in the core and the hard pipes from me mis-plumbing the catch can, securing the bottom of the oil cooler and lastly to try and refit the bumper without the terrible gaps I left last time") Oil cooler brackets were nice and easy (I'll be getting some metal roller ties to secure it), re-routed the hoses and fitted the sandwich plate. All I have to do now is work out how to prime it...
Oil cooler brackets were nice and easy (I'll be getting some metal roller ties to secure it), re-routed the hoses and fitted the sandwich plate. All I have to do now is work out how to prime it...
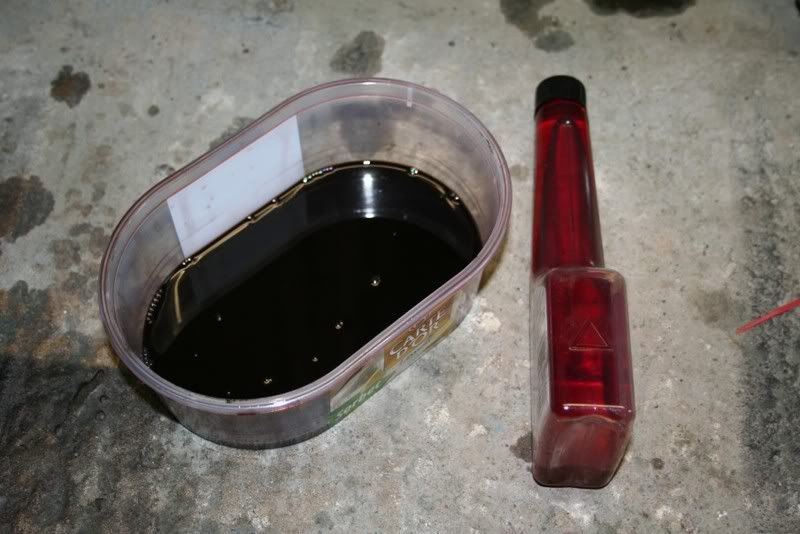
After removing the core and the hard pipes that I thought would be worse effected I used some Redex I had laying around to flush them. You can see form the last picture the colour change after flushing, I'm pleased I've done it anyway
There are a few jobs I wanted to tackle that meant removing the bumper; oil in the core and the hard pipes from me mis-plumbing the catch can, securing the bottom of the oil cooler and lastly to try and refit the bumper without the terrible gaps I left last time
Oil cooler brackets were nice and easy (I'll be getting some metal roller ties to secure it), re-routed the hoses and fitted the sandwich plate. All I have to do now is work out how to prime it...After removing the core and the hard pipes that I thought would be worse effected I used some Redex I had laying around to flush them. You can see form the last picture the colour change after flushing, I'm pleased I've done it anyway

Thread Starter
Joined: Nov 2003
Posts: 13,356
Likes: 58
From: in the woods...........555 Wagon Sqn
seems like i'm doing nothing else at present Keith  Anyway fixed the oil cooler's bottom brackets and replaced the cold air feed ducting...�3.49 from Screw Fix
  Its much more flexible than the old metal ducting and returns holds its shape allowing much better airflow.

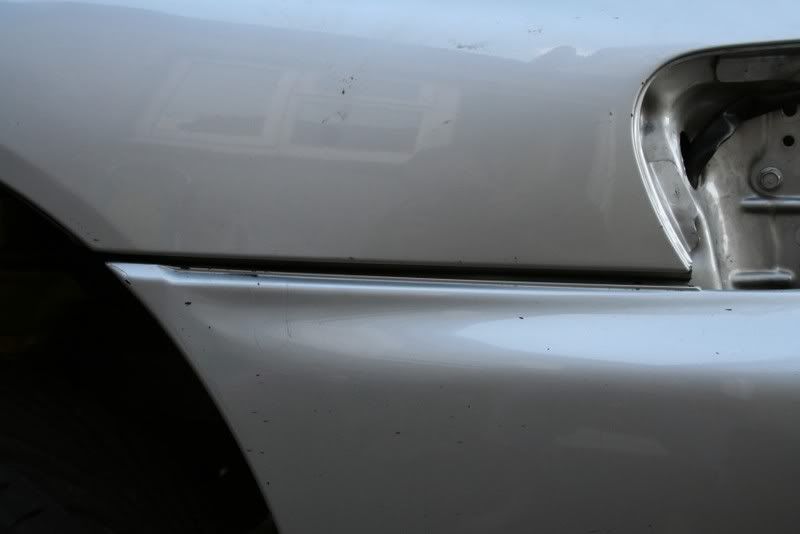
after partially fitting the bumper I'm still left with big gaps, I'm using the correct subaru fixings but still no better...does anyone have any tips?

lastly I've repainted my slam panel and rad fixings flat black, never really liked the shiny finish. Hopefully the three coats of lacquer will stop it scratching too easily.
Anyway fixed the oil cooler's bottom brackets and replaced the cold air feed ducting...�3.49 from Screw Fix Its much more flexible than the old metal ducting and returns holds its shape allowing much better airflow.after partially fitting the bumper I'm still left with big gaps, I'm using the correct subaru fixings but still no better...does anyone have any tips?
lastly I've repainted my slam panel and rad fixings flat black, never really liked the shiny finish. Hopefully the three coats of lacquer will stop it scratching too easily.
Thread Starter
Joined: Nov 2003
Posts: 13,356
Likes: 58
From: in the woods...........555 Wagon Sqn

Thread Starter
Joined: Nov 2003
Posts: 13,356
Likes: 58
From: in the woods...........555 Wagon Sqn
I think its the automotive variation of OCD to be honest
Have to admit sometimes I have asked myself why did I start that but I do get a lot of satisfaction doing it...especially when all I seem to do at work is send e-mails and write reports!!
Have to admit sometimes I have asked myself why did I start that but I do get a lot of satisfaction doing it...especially when all I seem to do at work is send e-mails and write reports!!
Thread Starter
Joined: Nov 2003
Posts: 13,356
Likes: 58
From: in the woods...........555 Wagon Sqn
I spoke to a very helpfull chap at ThinkAuto (Mocal distributor), and he advised me to add an extra half litre of oil to fill the cooler and hoses. a couple of pics of the oil cooler now its installed...
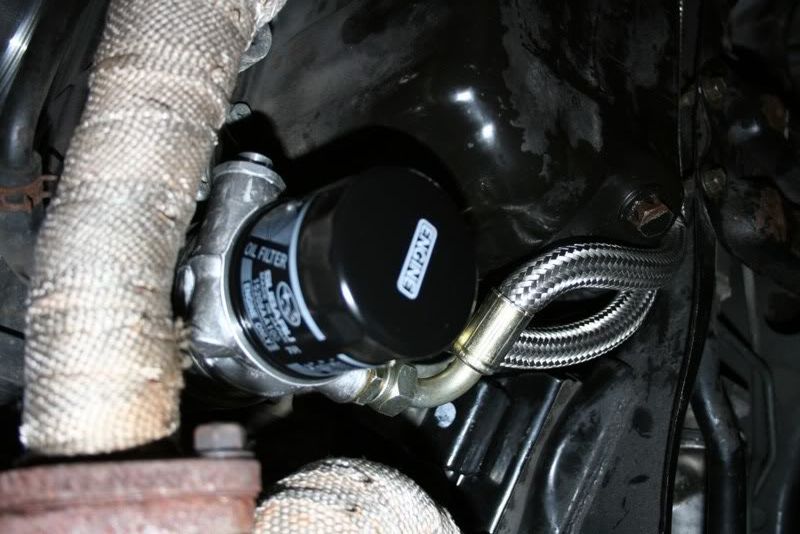

a lot further away from the header now

a lot further away from the header now
Thread Starter
Joined: Nov 2003
Posts: 13,356
Likes: 58
From: in the woods...........555 Wagon Sqn

Thread Starter
Joined: Nov 2003
Posts: 13,356
Likes: 58
From: in the woods...........555 Wagon Sqn
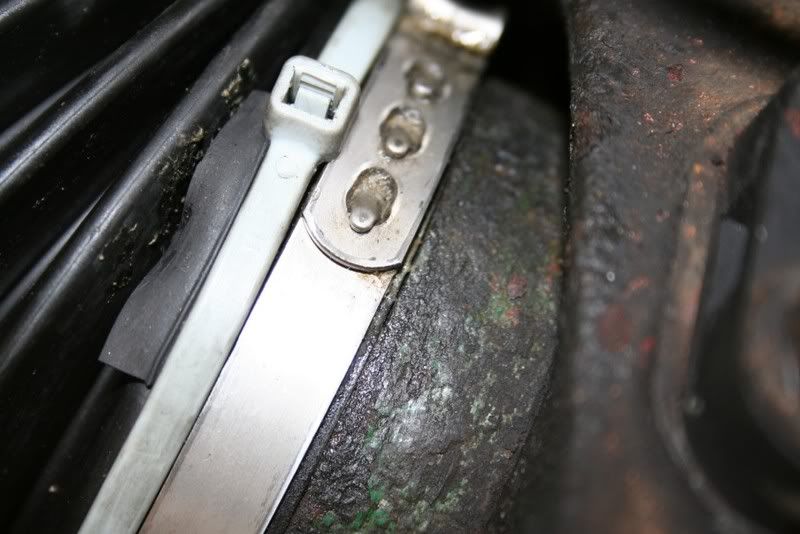
a few pics of my attempted CV boot repair, not sure how successful I've been as I need to take it out for an extensive test...no bumper is a little bit of an issue though The split was right on the edge of the boot.
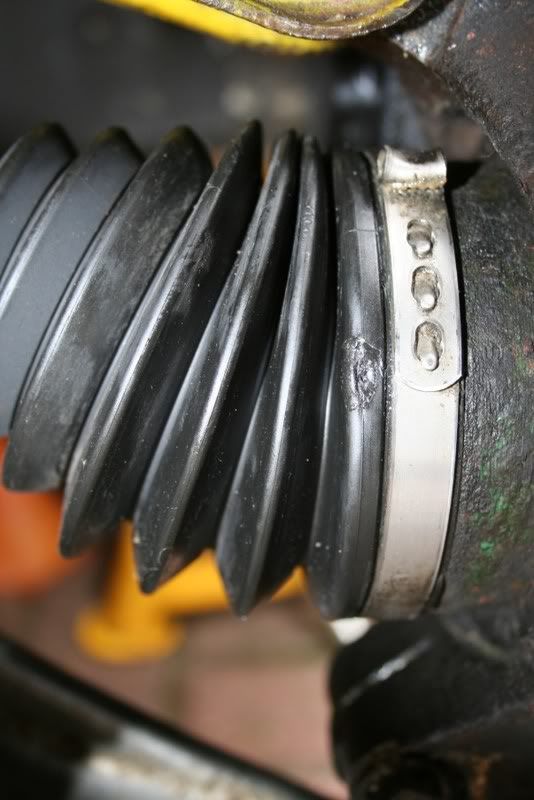
I used a turkey baster to inject some grease back into the boot.
Then cut up an inner tube and stuck the patch on with impact adhesive.
It seemed to stick well enough but just to be on the safe side I've also cable tied it to the joint. The cable tie doesn't foul anywhere, I guess I'll have to wait and see how well it works.
I'll be hacking my bumper up to try and get rid of the gaps next...not looking forward to that.
The split was right on the edge of the boot.I used a turkey baster to inject some grease back into the boot.
Then cut up an inner tube and stuck the patch on with impact adhesive.
It seemed to stick well enough but just to be on the safe side I've also cable tied it to the joint. The cable tie doesn't foul anywhere, I guess I'll have to wait and see how well it works.
I'll be hacking my bumper up to try and get rid of the gaps next...not looking forward to that.
Thread Starter
Joined: Nov 2003
Posts: 13,356
Likes: 58
From: in the woods...........555 Wagon Sqn
Lol, I've brought some new dremel bits so I'll pass on the jigsaw for now

Thread Starter
Joined: Nov 2003
Posts: 13,356
Likes: 58
From: in the woods...........555 Wagon Sqn
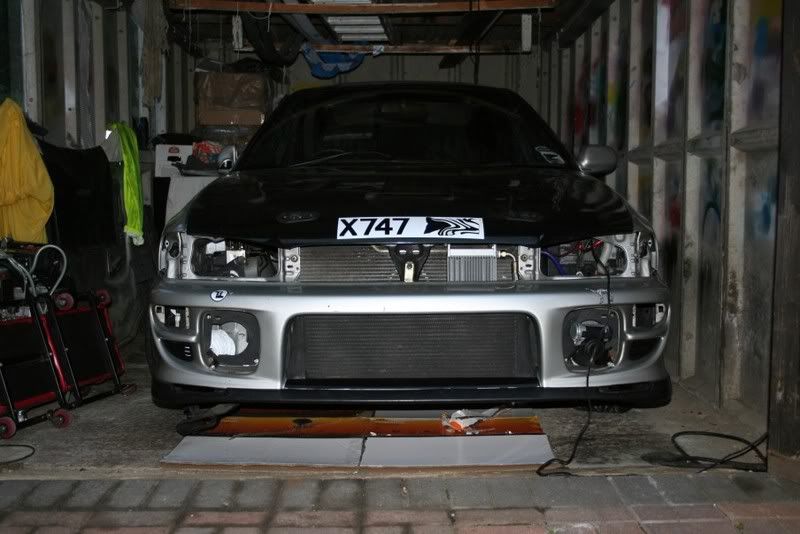
after trying to ignore my bumper for a week or so I finally bit the bullet and ripped off the mesh and trimmed it down. I posted on NASOIC (asking advice about my bumper gaps), and was told to check the bumper\ic-core clearance, if it was touching it would push the bumper out making bigger gaps...no way I can reuse the mesh as its all out of shape after being removed, I did fix it very securely
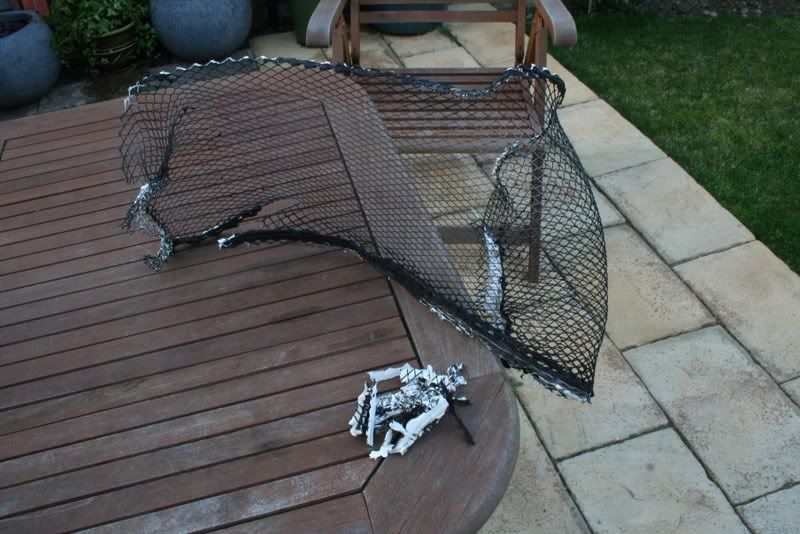
the gaps look better already and the bumper goes on more easily, I'll have to wait and get some more mesh from B&Q before I can finish re-fitting it though.
My Whiteline flatout front springs should be here in a day or two, so I'm hoping to get down to Mocom fit them and get my geometry set up again...I might even be able to drive it again soon
