
wagon fettle


quick question mate, did you have to do much modding to get the STI steering wheel to fit, i feel like i'm driving a bus with the size of the standard one lol
regards
mark
regards
mark
Thread Starter
Joined: Nov 2003
Posts: 13,356
Likes: 58
From: in the woods...........555 Wagon Sqn
I can't believe I just read all 29 pages and it's not finished.
 Hats off to ya mate. Definitely some hard work gone into it.
Looking forward to seeing the finished result as I'm sure you are.
Top thread.
Hats off to ya mate. Definitely some hard work gone into it.Looking forward to seeing the finished result as I'm sure you are.
Top thread.
Thread Starter
Joined: Nov 2003
Posts: 13,356
Likes: 58
From: in the woods...........555 Wagon Sqn

That spring 2011 before Granby posts up to ask which year


Thread Starter
Joined: Nov 2003
Posts: 13,356
Likes: 58
From: in the woods...........555 Wagon Sqn
an actual update 
bumper...finally needs a bit of a clean up though, particularly the fmic trimming I need to fill the waher jet holes too so not a case of just fitting it. I thinnk I'm going to get some help with the vent this time

P1 lamp covers...almost a shame to mess with them the finish is so good...will make prep for paint nice and straight forward.

bumper...finally
needs a bit of a clean up though, particularly the fmic trimming I need to fill the waher jet holes too so not a case of just fitting it. I thinnk I'm going to get some help with the vent this timeP1 lamp covers...almost a shame to mess with them the finish is so good...will make prep for paint nice and straight forward.
Thread Starter
Joined: Nov 2003
Posts: 13,356
Likes: 58
From: in the woods...........555 Wagon Sqn
trimmed the bumper to fit today and washed it to have a good look...well the short story is it needs repainted...which I wanted to avoid. *****. scuffs to both sides and a washer jet glued in place. 
preped the fog lamp covers for painting too.


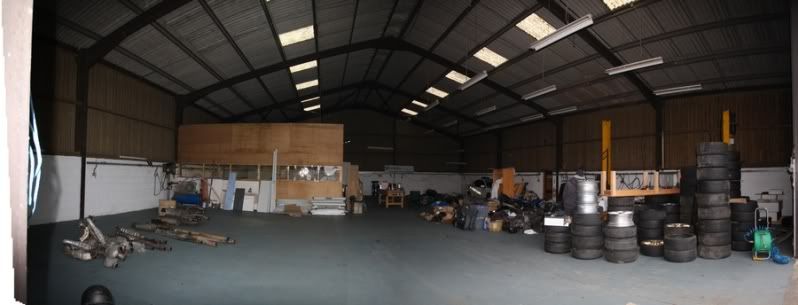
been getting its engine transplant venue ready too
preped the fog lamp covers for painting too.
been getting its engine transplant venue ready too
Last edited by trails; Jan 30, 2011 at 08:21 PM.
Thread Starter
Joined: Nov 2003
Posts: 13,356
Likes: 58
From: in the woods...........555 Wagon Sqn
found this...some cracking styling ideas.
Griswold Woody here I come
http://www.stationwagonforums.com/forums/index.php?
Griswold Woody here I come
http://www.stationwagonforums.com/forums/index.php?
Thread Starter
Joined: Nov 2003
Posts: 13,356
Likes: 58
From: in the woods...........555 Wagon Sqn
Ending up taking all my engine bits home while we are moving premises at Mocom, I've dropped the block off at DTW Engines to be cleaned ready for assembly and took the water cross over pipe and alternator bracket along as I'm too lazy to scrub them


You can see all the swarf that needs to be removed from where Steve at SMG decked block. Hopefully be ready for collection next week then the build can start; the bottom end needs building and compression ratio calculated before my heads can be matched to the bores.

got a Gucci part from Frayz Engineering; a custom oil cooler shroud and some induction trumpets...to say I'm pleased is an understament, its exactly what I wanted and the fit is spot on (check out the cut outs for the mounting points and hose fittings), big thanks to Frayz and Ian
 Yeah, i know there are a lot of pics but its sadly never gonna be seen once fitted


I've got three trumpets, two for the fog lamps and the one with the larger square flange for the duct itself. Once I'm fixed the trumpets to the fog lamp covers (fibreglass maybe?), it should make fitting and keeping the hose in place nice and straightforward.


You can see all the swarf that needs to be removed from where Steve at SMG decked block. Hopefully be ready for collection next week then the build can start; the bottom end needs building and compression ratio calculated before my heads can be matched to the bores.
got a Gucci part from Frayz Engineering; a custom oil cooler shroud and some induction trumpets...to say I'm pleased is an understament, its exactly what I wanted and the fit is spot on (check out the cut outs for the mounting points and hose fittings), big thanks to Frayz and Ian
Yeah, i know there are a lot of pics but its sadly never gonna be seen once fitted I've got three trumpets, two for the fog lamps and the one with the larger square flange for the duct itself. Once I'm fixed the trumpets to the fog lamp covers (fibreglass maybe?), it should make fitting and keeping the hose in place nice and straightforward.
Thread Starter
Joined: Nov 2003
Posts: 13,356
Likes: 58
From: in the woods...........555 Wagon Sqn
after a lengthy Dremel session I've fitted the induction trumpet to the duct; I took my time as I wanted to get the fit as tight as possible and didn't want to destroy other people hard work...I can clean up the adhesive once its dried...all I need to do is find my double sided high density foam and I can fit it


Thread Starter
Joined: Nov 2003
Posts: 13,356
Likes: 58
From: in the woods...........555 Wagon Sqn
block is ready for collection...price could be problematic though 
duct all ready for fitting, a bit messy on the reverse but very happy overall


duct all ready for fitting, a bit messy on the reverse but very happy overall
Thread Starter
Joined: Nov 2003
Posts: 13,356
Likes: 58
From: in the woods...........555 Wagon Sqn


Thread Starter
Joined: Nov 2003
Posts: 13,356
Likes: 58
From: in the woods...........555 Wagon Sqn
picked up the block, water cross over pipe and alternator bracket up from DTW on Wednesday...I may have made a mistake getting the alternator bracket cleaned as it makes my alternator look blimming awful 


I've been advised to paint them now to help counteract corrosion so I'll be buying some silver Smoothrite later today I think.
Block is pristine, just needs to be assembled...


Had a drive up to Northampton\Beds yesterday and picked some bits up; correct colour bumper (cheers Nige), wings and some more JDM rims...my new wings have been very, very quickly; thanks to Sy for his generosity and Clive for bringing them to Pod for me

I'll be selling my Superleggers as JDM goodness wins for me...pretty good nick Advan RC's with the exception of one rim;


I can only assume the previous owner let his wife park the car on a couple of occasions They are gonna get a nasty paint job anyway so no loss


I've been advised to paint them now to help counteract corrosion so I'll be buying some silver Smoothrite later today I think.
Block is pristine, just needs to be assembled...
Had a drive up to Northampton\Beds yesterday and picked some bits up; correct colour bumper (cheers Nige
), wings and some more JDM rims...my new wings have been very, very quickly; thanks to Sy for his generosity and Clive for bringing them to Pod for me I'll be selling my Superleggers as JDM goodness wins for me...pretty good nick Advan RC's with the exception of one rim;
I can only assume the previous owner let his wife park the car on a couple of occasions
They are gonna get a nasty paint job anyway so no loss
Last edited by trails; Mar 27, 2011 at 10:56 AM.
Thread Starter
Joined: Nov 2003
Posts: 13,356
Likes: 58
From: in the woods...........555 Wagon Sqn
Cheers Ian, two posts in one day
I'll have to change that corroded old nut once the belt is on...
PS pump cleaned up to match the bracket...ready to go back on.


I'll have to change that corroded old nut once the belt is on...
PS pump cleaned up to match the bracket...ready to go back on.