Introduce my WRC Replica Project...(GB)

 09 March 2008, 03:05 PM
#122
Scooby Regular
Thread Starter

Join Date: Feb 2007
Location: The Netherlands
Posts: 330
Likes: 0
Received 0 Likes
on
0 Posts
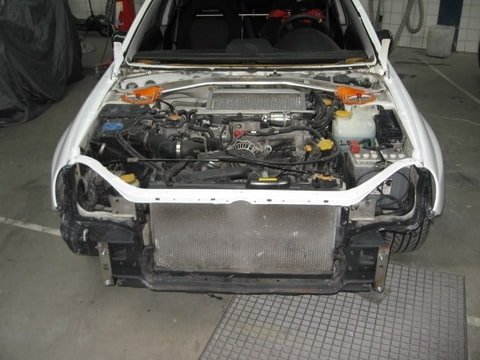
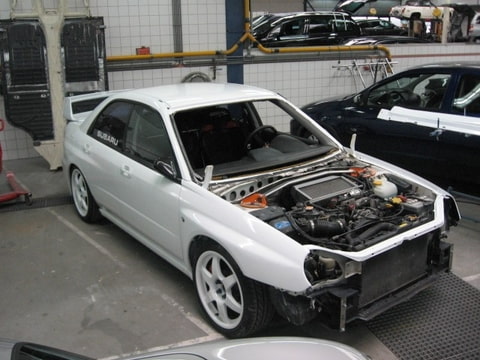
Well he's painted ...
I am so happy... The guy's did a great job !
Look for your self �
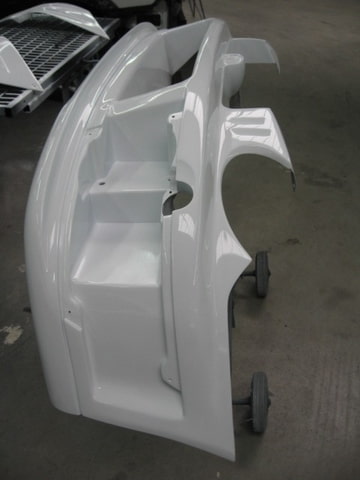
Front lock beam...
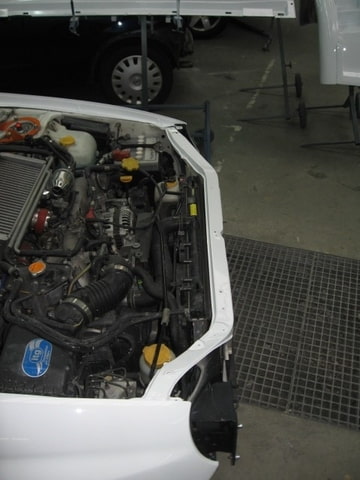
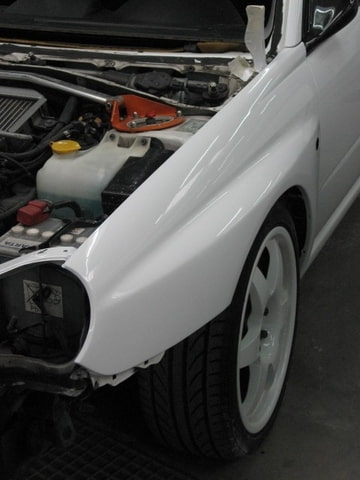
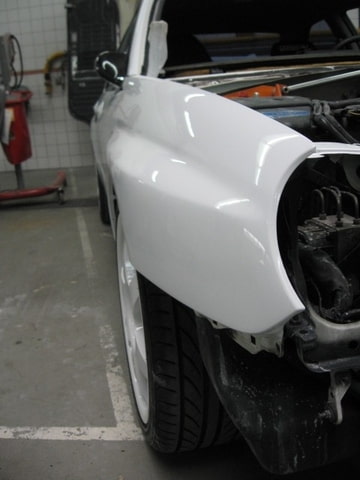
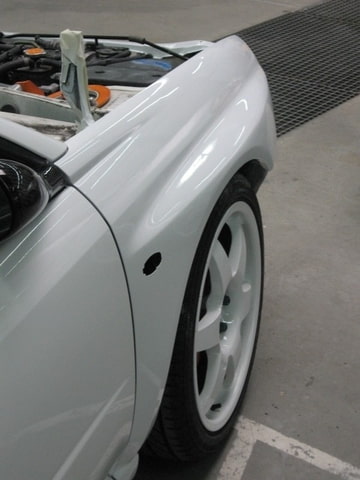
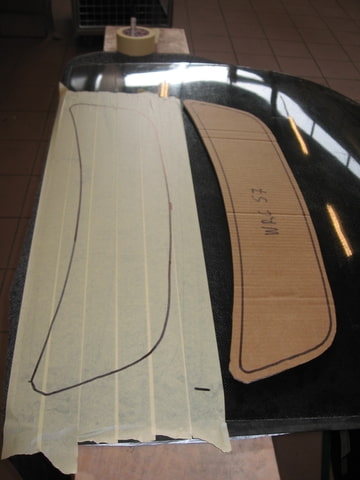
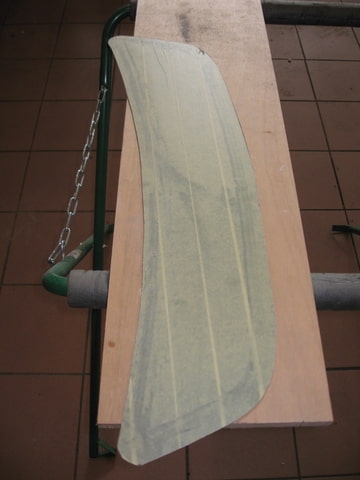
Front wings...
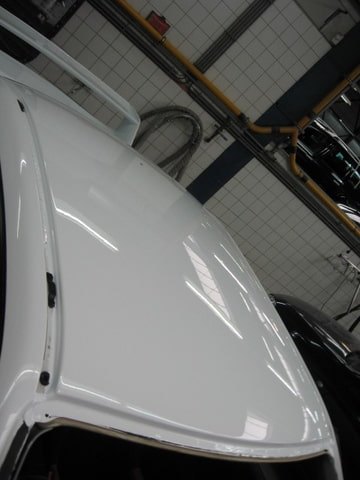
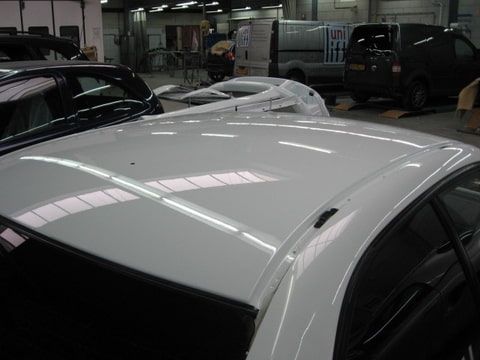
The roof �
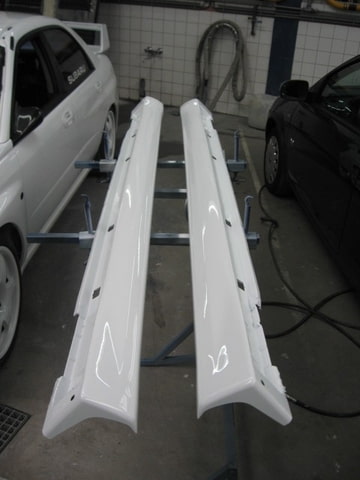
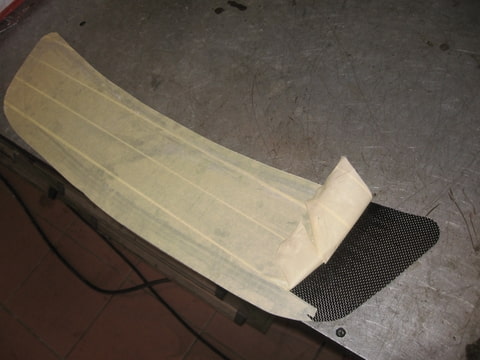
Side skirt spoilers ...
WRC S7 Front bumper...
Don�t forget the Fog light covers...
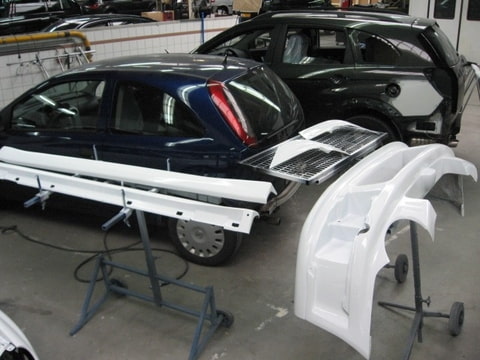
Then off course, The WRC S7 hood...
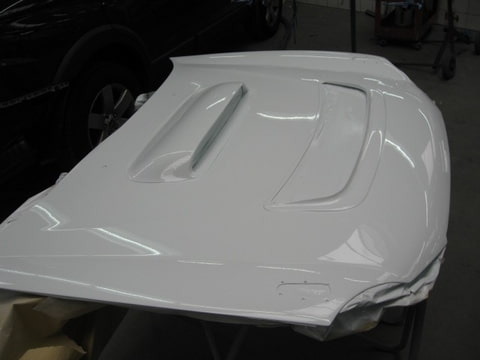
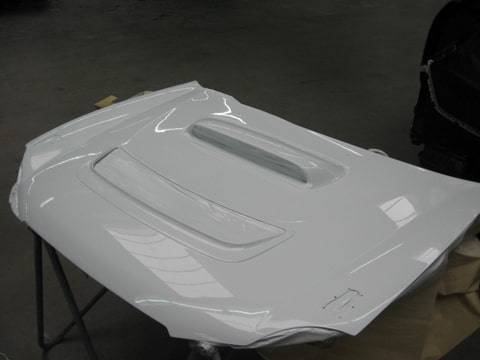
Total...
Then when they drove the car outside in daylight,
and they were not satisfied with the colour and did also the two
front doors a little because of a little colour difference...
(That�s why the car is not back yet, but on Monday )
That�s all for now...Thnx for taking a view
I am so happy... The guy's did a great job !
Look for your self �
Front lock beam...
Front wings...
The roof �
Side skirt spoilers ...
WRC S7 Front bumper...
Don�t forget the Fog light covers...
Then off course, The WRC S7 hood...
Total...
Then when they drove the car outside in daylight,
and they were not
satisfied with the colour and did also the two front doors a little because of a little colour difference...
(That�s why the car is not back yet, but on Monday
)That�s all for now...Thnx for taking a view
 09 March 2008, 08:36 PM
#125
Scooby Regular
Thread Starter
Join Date: Feb 2007
Location: The Netherlands
Posts: 330
Likes: 0
Received 0 Likes
on
0 Posts
TurboAndy wow that looks stunning m8
frayz Thats gonna look the **** mate.
Looks so, so, soooooooo good on the compomotives
Looks so, so, soooooooo good on the compomotives
Have another update... U want??
 09 March 2008, 09:06 PM
#128
Scooby Regular
Thread Starter
Join Date: Feb 2007
Location: The Netherlands
Posts: 330
Likes: 0
Received 0 Likes
on
0 Posts
Because the car didn�t arrive on Friday, we went on with other items..
Hope that they make the deadline, because the guy who mounts my new
Front window (with sun banner ) is coming on Monday !!!
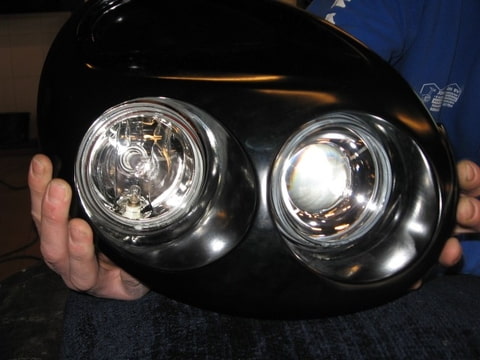
In the mean time I was busy with the WRC S7 front bumper
and the WRC S7 headlights�
I put already the turn lights in, so that the Bumper could get mounted completely �
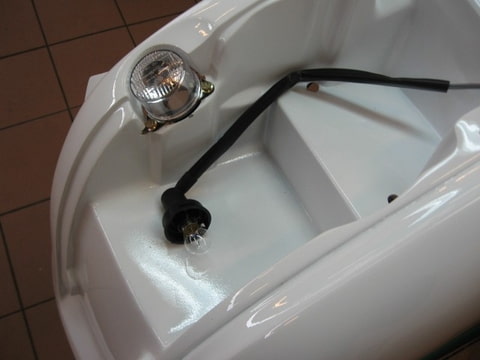
Had to make a few minor late minute adjustments,
but I think it looks great (now)
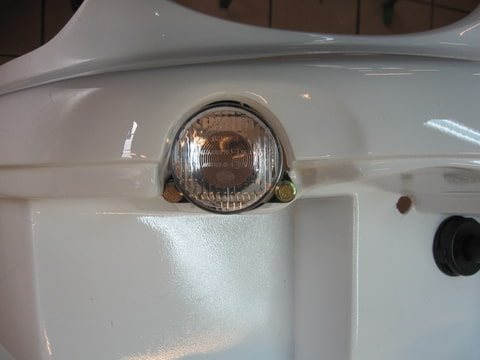

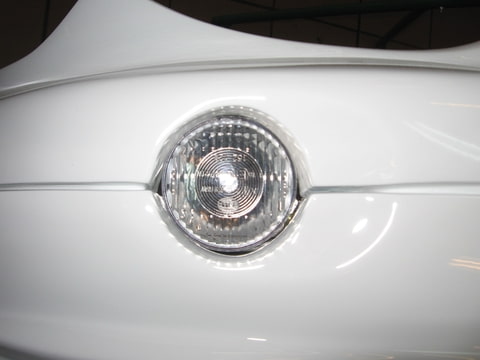
This one , I put the amber (orange) coloured lamp�s in...
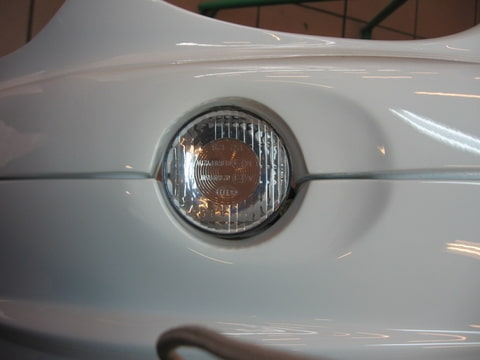
Don't think that was it... this clear lamp is nicer, don't you think �?
Hope that they make the deadline, because the guy who mounts my new
Front window (with sun banner ) is coming on Monday !!!
In the mean time I was busy with the WRC S7 front bumper
and the WRC S7 headlights�
I put already the turn lights in, so that the Bumper could get mounted completely �
Had to make a few minor late minute adjustments,
but I think it looks great (now)
This one , I put the amber (orange) coloured lamp�s in...
Don't think that was it... this clear lamp is nicer, don't you think �?
09 March 2008, 09:08 PM
#129
Scooby Regular
Thread Starter
Join Date: Feb 2007
Location: The Netherlands
Posts: 330
Likes: 0
Received 0 Likes
on
0 Posts
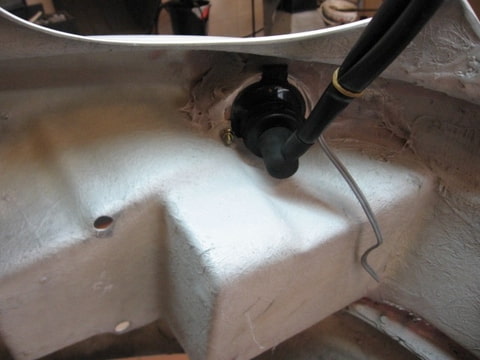
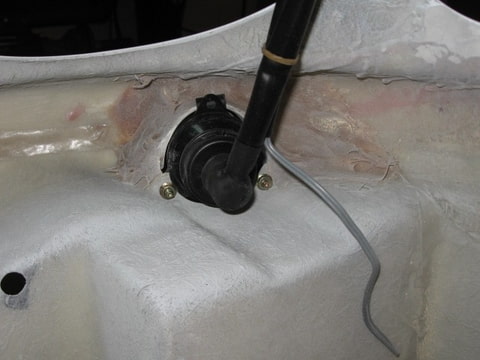
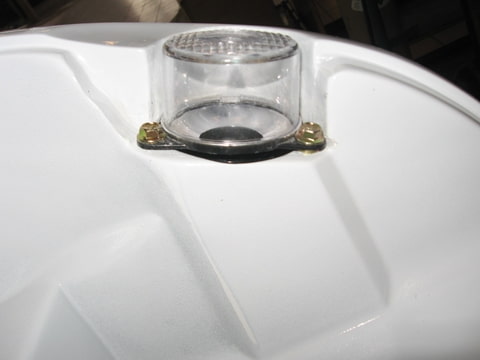
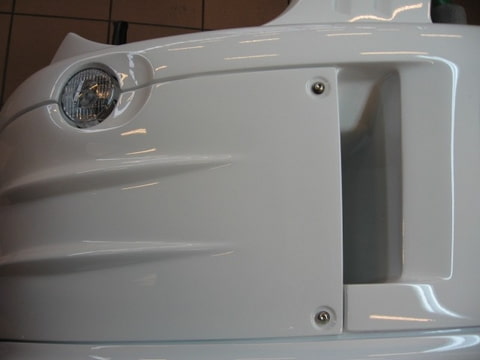
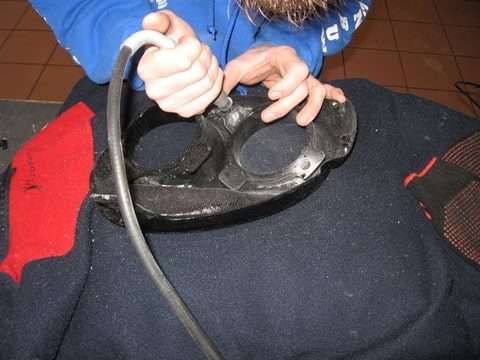
Next the fog light covers...
Because off the not so smooth back,
the bolts went in a little crooked when I mounted it ...
So we hade to make the back side nice and strait, so the bolts went in nicely and strait....
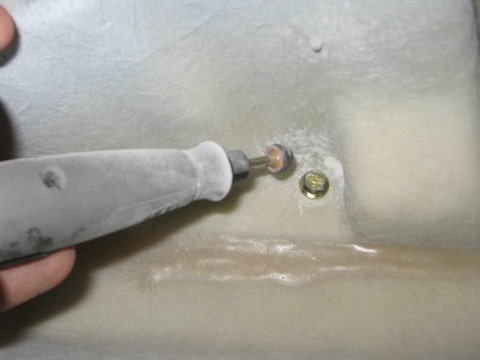
Now I am happy with the results...
Because off the not so smooth back,
the bolts went in a little crooked when I mounted it ...
So we hade to make the back side nice and strait, so the bolts went in nicely and strait....
Now I am happy with the results...
09 March 2008, 09:10 PM
#130
Scooby Regular
Thread Starter
Join Date: Feb 2007
Location: The Netherlands
Posts: 330
Likes: 0
Received 0 Likes
on
0 Posts
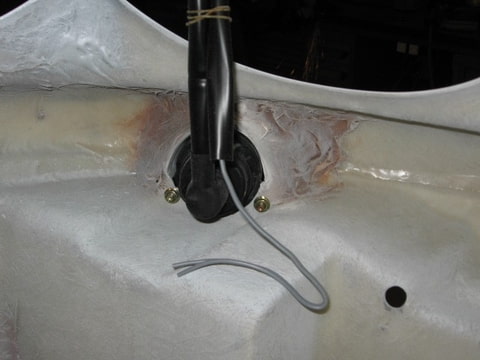
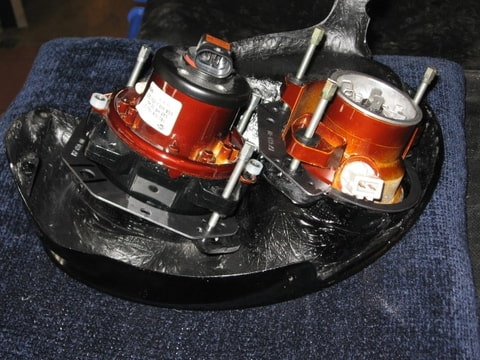
Then we hade to put the Hella 90mm lights in the WRC S7 Bezels ...
This was not a easy job I can tell you....
First we had to make the mounting plates off the Hella's, to fit the bezels...
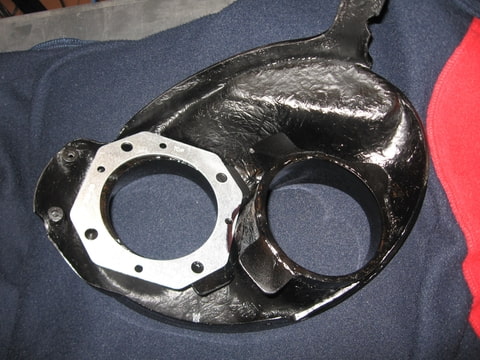
Here's my mate helping me with the plates, making them fit...
He did a great job ...
When they where done, it got a spray of paint ...
The finished plates...
Next we had to assembly the Hella's ...

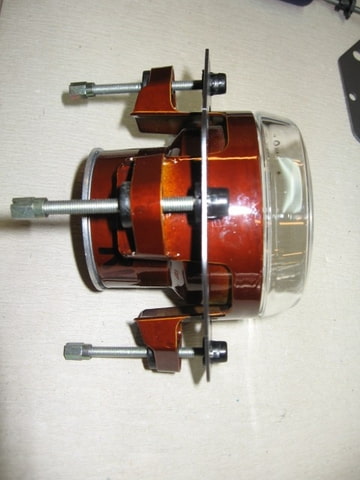
And make some more modifications to the bezels...
The back looks like this...
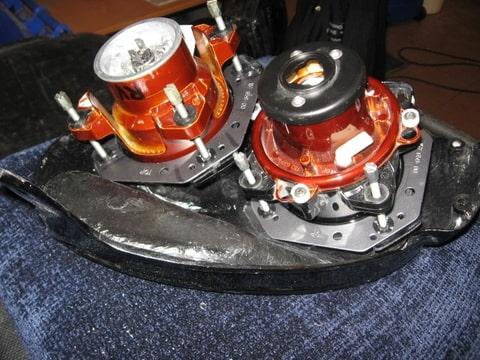
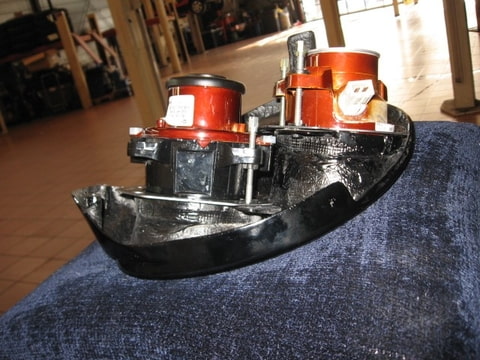
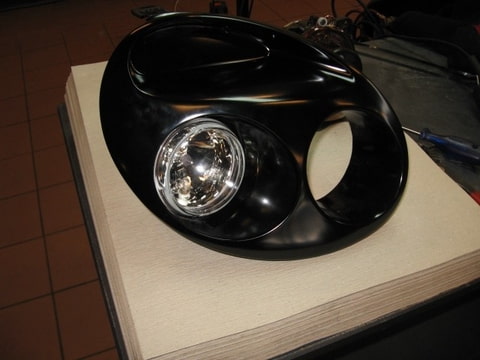
And (almost) finish product...
This was not a easy job I can tell you....
First we had to make the mounting plates off the Hella's, to fit the bezels...
Here's my mate helping me with the plates, making them fit...
He did a great job ...
When they where done, it got a spray of paint ...
The finished plates...
Next we had to assembly the Hella's ...
And make some more modifications to the bezels...
The back looks like this...
And (almost) finish product...
09 March 2008, 09:12 PM
#131
Scooby Regular
Thread Starter
Join Date: Feb 2007
Location: The Netherlands
Posts: 330
Likes: 0
Received 0 Likes
on
0 Posts
Then we had some time to make a (temporary) Carbon sheet for the hole in the WRC S7 hood (warm air outlet) ...
I already had made measurements...
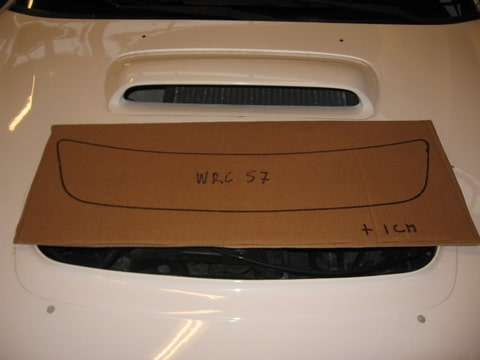
Looks nice for a temporary... don't you think �?
When my search of the WRC S7 outlet is completed, I will make a update on that!
This was it for now, but... I will keep you posted.
I already had made measurements...
Looks nice for a temporary... don't you think �?
When my search of the WRC S7 outlet is completed, I will make a update on that!
This was it for now, but... I will keep you posted.
09 March 2008, 09:21 PM
#134
Scooby Regular
Join Date: Mar 2006
Location: Wiltshire
Posts: 548
Likes: 0
Received 0 Likes
on
0 Posts
Blimey
After all that work i think i would put the finished car in an oxygen tent and not take it outside!!!
Looking better and better each day, it's great to see you taking so much time and care over the project. A real labour of love
After all that work i think i would put the finished car in an oxygen tent and not take it outside!!!
Looking better and better each day, it's great to see you taking so much time and care over the project. A real labour of love
09 March 2008, 09:23 PM
#135
Scooby Regular
Thread Starter
Join Date: Feb 2007
Location: The Netherlands
Posts: 330
Likes: 0
Received 0 Likes
on
0 Posts
It's remarks like this , that makes it all worth while..
Thnx mate, i love my hobby...
Last edited by WimprezawrX; 09 March 2008 at 09:45 PM.
09 March 2008, 10:10 PM
#137
Scooby Regular
Thread Starter
Join Date: Feb 2007
Location: The Netherlands
Posts: 330
Likes: 0
Received 0 Likes
on
0 Posts
09 March 2008, 11:15 PM
#142
Scooby Regular

Join Date: Dec 2005
Posts: 512
Likes: 0
Received 0 Likes
on
0 Posts
I`d say go for it  although I won`t be there
Frayz, I bet that would be some pictorial history too! I`ve only seen odd bits of things you`ve done so I can only imagine what it would be like in total
although I won`t be thereFrayz, I bet that would be some pictorial history too! I`ve only seen odd bits of things you`ve done so I can only imagine what it would be like in total
 10 March 2008, 10:30 AM
#146

The most interesting thread on SN that I have seen in a long time!! Car looks amazing. Cant wait to see the finished product. (from a fellow bug owner )
)
Last edited by Feffers; 10 March 2008 at 10:32 AM.
10 March 2008, 06:43 PM
#147
Scooby Regular
Thread Starter
Join Date: Feb 2007
Location: The Netherlands
Posts: 330
Likes: 0
Received 0 Likes
on
0 Posts
shaggy1973 credit where its due. cant wait to see it finished.
Feffers The most interesting thread on SN that I have seen in a long time!! Car looks amazing. Cant wait to see the finished product. (from a fellow bug owner )
This makes me happy...
10 March 2008, 07:33 PM
#148
Scooby Regular
Thread Starter
Join Date: Feb 2007
Location: The Netherlands
Posts: 330
Likes: 0
Received 0 Likes
on
0 Posts
Thnx guy's...
These lines of comments and remarks,
makes it just more fun to continue...
More to come:
Installing Perrin Control Arms/ Lateral Links Adjustable STi

Installing WRC (style) Front mounted intercooler
Installing Perrin Subframe and rear differencial lockdown
Installing WRC brake disks + overhaul Brembo/Porsche brake calipers
Installing R160 Limited slip differential
Installing Hydrolic Hand brake WRC style
Inslalling Aeromotive fuel rail's + SX fuel reg + goodridge fuel lines
Installing Invidia EL header + Tial external waste gate (In preparation)

Installing DCCD electronic controler ...

Installing Mocal oilcooler + oil filter plate


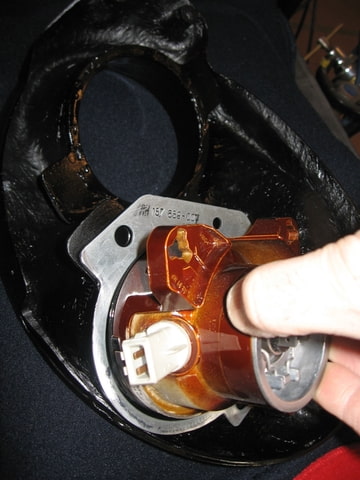
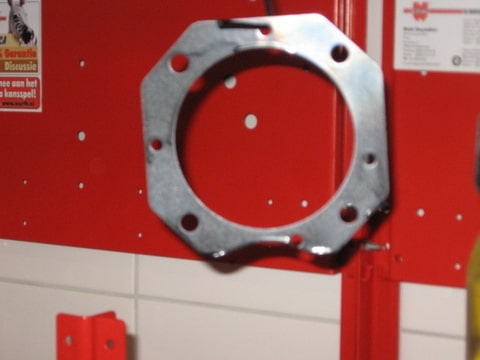
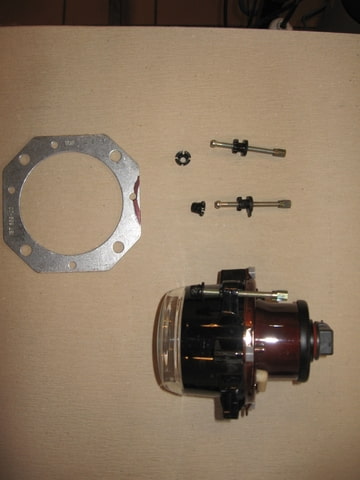
Installing 12volt generator replacement. (In preparation)
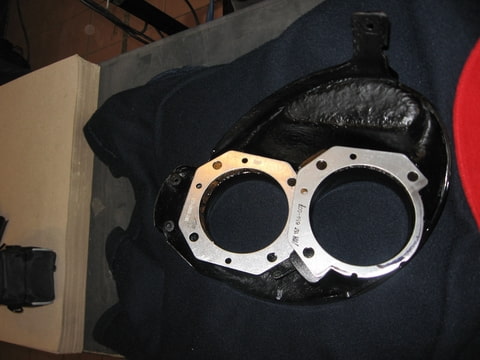
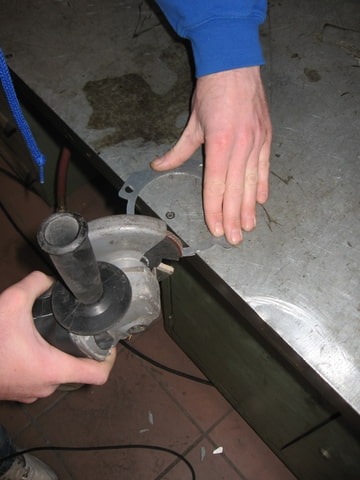
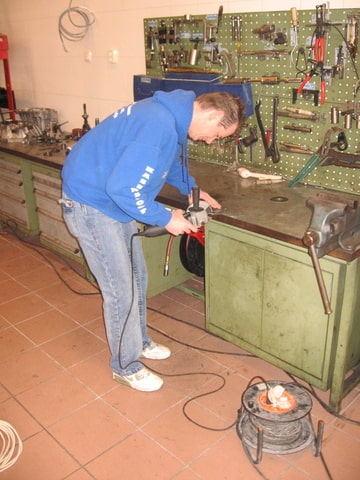
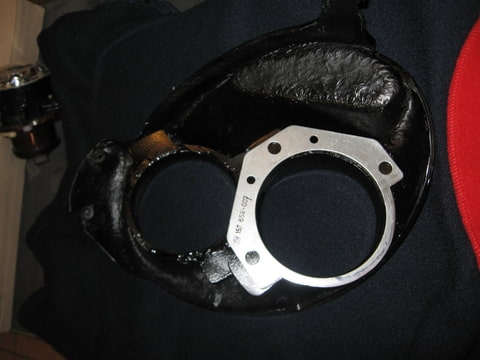
Laser cut bracket...
Installing Self build Reverse inlet manifold / del thumbelvalve's
(now in preparation and progress...)
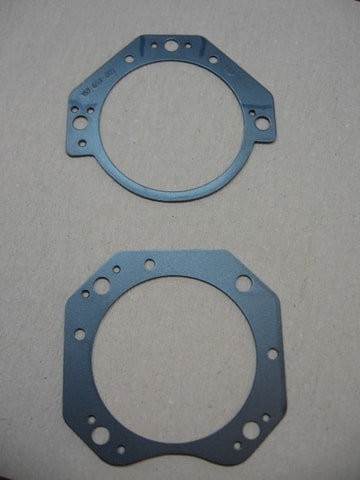
Laser cut flanges...

self made manifold...

These last pictures is neceserry for the WRC (style) front mounted intercooler...
so there is more where this is coming from...
These lines of comments and remarks,
makes it just more fun to continue...
More to come:
Installing Perrin Control Arms/ Lateral Links Adjustable STi
Installing WRC (style) Front mounted intercooler
Installing Perrin Subframe and rear differencial lockdown
Installing WRC brake disks + overhaul Brembo/Porsche brake calipers
Installing R160 Limited slip differential
Installing Hydrolic Hand brake WRC style
Inslalling Aeromotive fuel rail's + SX fuel reg + goodridge fuel lines
Installing Invidia EL header + Tial external waste gate (In preparation)
Installing DCCD electronic controler ...
Installing Mocal oilcooler + oil filter plate
Installing 12volt generator replacement. (In preparation)
Laser cut bracket...
Installing Self build Reverse inlet manifold / del thumbelvalve's
(now in preparation and progress...
)Laser cut flanges...
self made manifold...
These last pictures is neceserry for the WRC (style) front mounted intercooler...
so there is more where this is coming from...
10 March 2008, 08:05 PM
#150
Scooby Regular
Thread Starter
Join Date: Feb 2007
Location: The Netherlands
Posts: 330
Likes: 0
Received 0 Likes
on
0 Posts