Introduce my WRC Replica Project...(GB)
 03 March 2008, 07:58 PM
#91
Scooby Regular
Thread Starter

Join Date: Feb 2007
Location: The Netherlands
Posts: 330
Likes: 0
Received 0 Likes
on
0 Posts

Here you can order one...

Subaru Impreza 2001-2004 WRC Parts
Price is around 590 pounds, and is a high qaulity fiberglass

 03 March 2008, 08:58 PM
#92
Scooby Regular
Thread Starter
Join Date: Feb 2007
Location: The Netherlands
Posts: 330
Likes: 0
Received 0 Likes
on
0 Posts
I mentioned earlier that I got a lot of help from my mate Patrick.�
Here are some pic�s of his car, witch has a lot of carbon and P1 goodies on �

Here are his 18X8 Compomotive�s and Stoptech BBK�s�


A lot off carbon one this one, hood and scoop..


And this wing , that a original P1 from Prodrive with carbon inlay�


His latest punched are original carbon Prodrive GPR �A � rally mirrors..


I wich to thank him already for al his efforts and help during my WRCS7 project..
Without you I did not have come so far�
THNX MATE !!!
Here are some pic�s of his car, witch has a lot of carbon and P1 goodies on �
Here are his 18X8 Compomotive�s and Stoptech BBK�s�
A lot off carbon one this one, hood and scoop..
And this wing , that a original P1 from Prodrive with carbon inlay�
His latest punched are original carbon Prodrive GPR �A � rally mirrors..
I wich to thank him already for al his efforts and help during my WRCS7 project..
Without you I did not have come so far�
THNX MATE !!!
 04 March 2008, 04:37 PM
#95
Scooby Regular
Thread Starter
Join Date: Feb 2007
Location: The Netherlands
Posts: 330
Likes: 0
Received 0 Likes
on
0 Posts
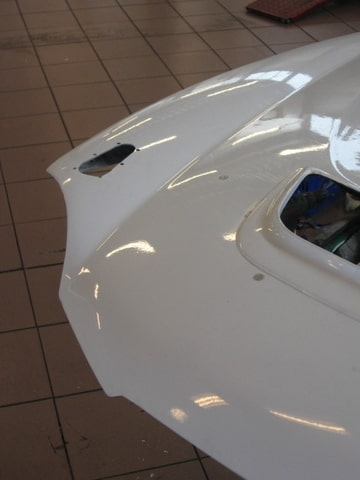
Also been busy with the hood locks� was a bit off work to do in tidy en clean�
Here where the holes for the temporary hoodpins�
Ready to cut the holes�
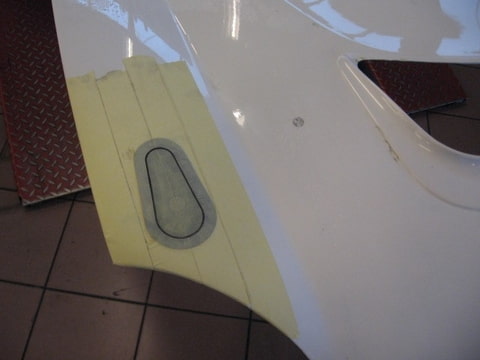
Holes are cut..
Also there is a naked MY01 in the back ground� hahahaha�
Al most ready�
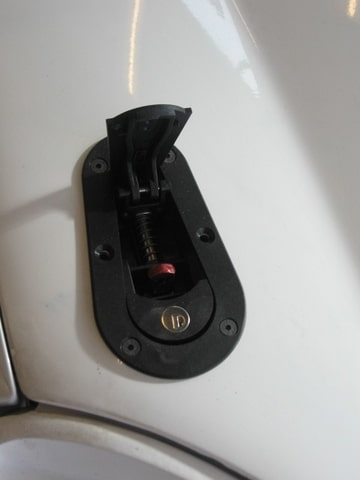
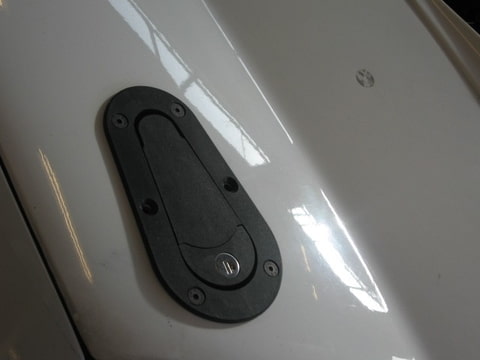
Very happy with the first results, next my hero will go ahead with
the fitment of all the seams�so every thing will fit properly�
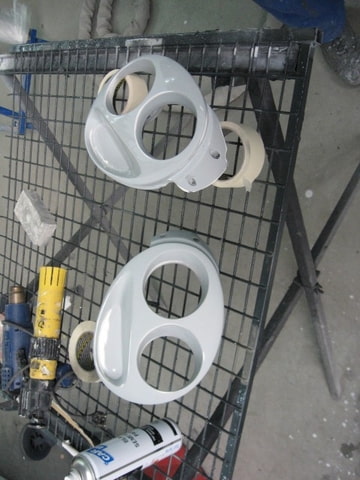
Next the fitment off the WRC S7 Headlight bezels
Little look ahead�
Here where the holes for the temporary hoodpins�
Ready to cut the holes�
Holes are cut..
Also there is a naked MY01 in the back ground� hahahaha�
Al most ready�
Very happy with the first results, next my hero will go ahead with
the fitment of all the seams�so every thing will fit properly�
Next the fitment off the WRC S7 Headlight bezels
Little look ahead�
04 March 2008, 04:40 PM
#97
Scooby Regular
Thread Starter
Join Date: Feb 2007
Location: The Netherlands
Posts: 330
Likes: 0
Received 0 Likes
on
0 Posts

 04 March 2008, 07:06 PM
#100
Scooby Regular
Thread Starter
Join Date: Feb 2007
Location: The Netherlands
Posts: 330
Likes: 0
Received 0 Likes
on
0 Posts
Bullitt_Rich I look forward to seeing the end result...
frayz Loving the aerocatch's mate, ive been looking at some of those for myself recently.
Loving the quality of the mods on this car, really enjoying following the thread
Loving the quality of the mods on this car, really enjoying following the thread

helps me throu diffecould times..
04 March 2008, 09:55 PM
#101
Scooby Regular
Join Date: Mar 2006
Location: Wiltshire
Posts: 548
Likes: 0
Received 0 Likes
on
0 Posts
That hood looks well smart. It gives the car a real mean look from the front.
You certainly have a good team around you helping with the work, very professional work
Keep the pics and info coming.
You certainly have a good team around you helping with the work, very professional work
Keep the pics and info coming.
04 March 2008, 10:06 PM
#102
Scooby Regular
Thread Starter
Join Date: Feb 2007
Location: The Netherlands
Posts: 330
Likes: 0
Received 0 Likes
on
0 Posts
The most i do my self
, but can't forget my mate's .. 
THNX Again guy's
 05 March 2008, 09:32 AM
#104
Scooby Regular
Join Date: Mar 2006
Location: Wiltshire
Posts: 548
Likes: 0
Received 0 Likes
on
0 Posts
05 March 2008, 04:58 PM
#105
Scooby Regular
Thread Starter
Join Date: Feb 2007
Location: The Netherlands
Posts: 330
Likes: 0
Received 0 Likes
on
0 Posts
Today 01:49
ScuuBdoo Very nice project. I would have sprayed the new bonnet locks though.
ScuuBdoo Very nice project. I would have sprayed the new bonnet locks though.
jayb1970 Quote:
Originally Posted by WimprezawrX
Thnx my friend...
The most i do my self , but can't forget my mate's ..
THNX Again guy's
Sorry, i realise that just didn't come out that way in the post.
Originally Posted by WimprezawrX
Thnx my friend...
The most i do my self , but can't forget my mate's ..
THNX Again guy's
Sorry, i realise that just didn't come out that way in the post.
05 March 2008, 05:10 PM
#106
Scooby Regular
Thread Starter
Join Date: Feb 2007
Location: The Netherlands
Posts: 330
Likes: 0
Received 0 Likes
on
0 Posts
Okay,
Let�s see�
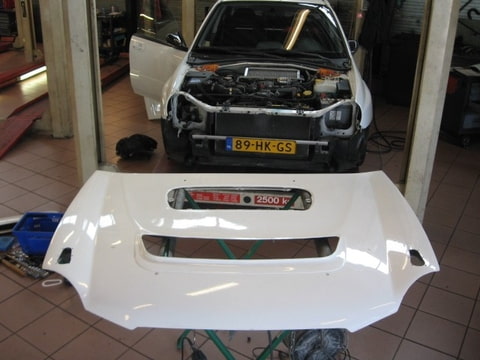
Bumper check..
Hood check..
Hood locks check..
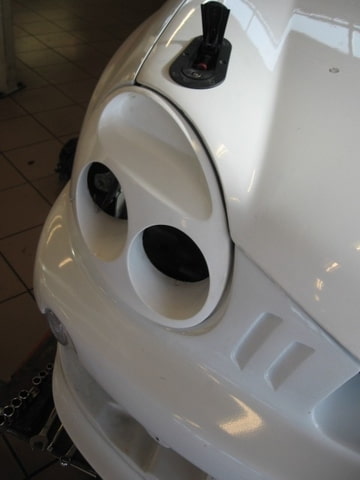
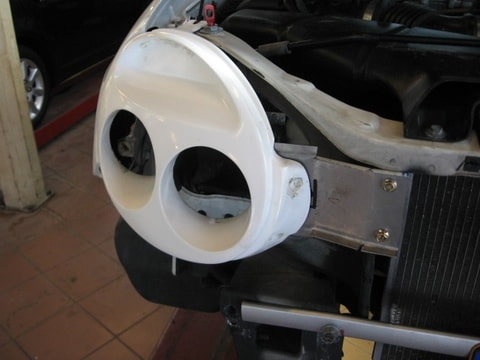
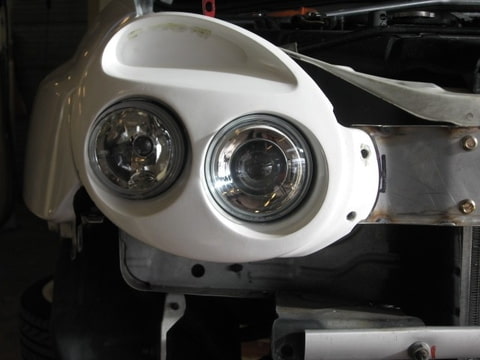
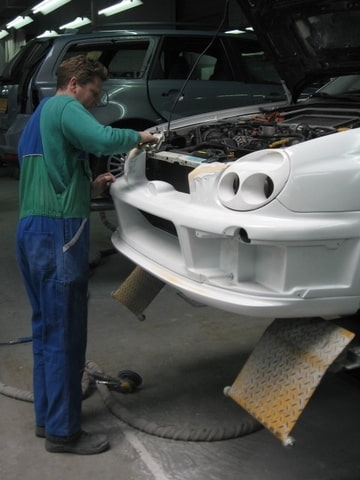
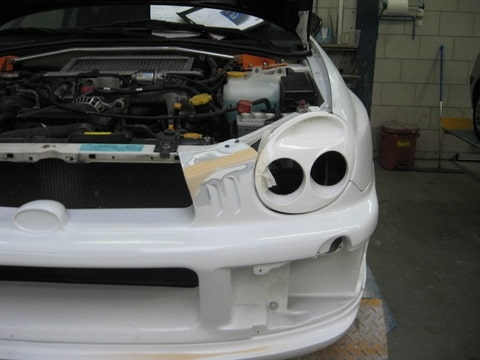
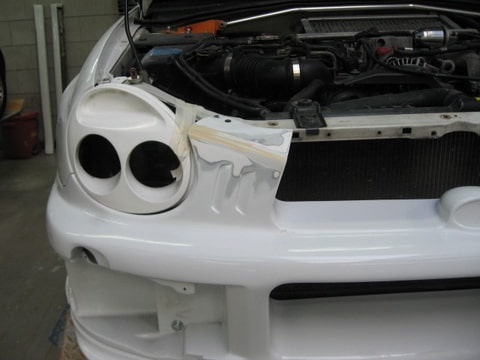
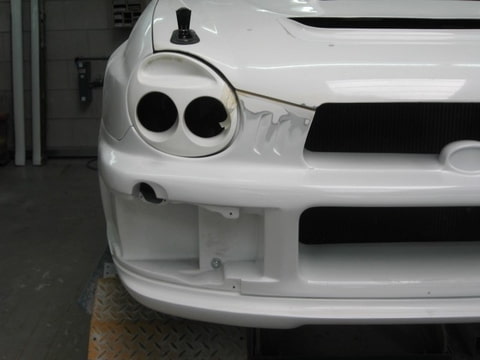
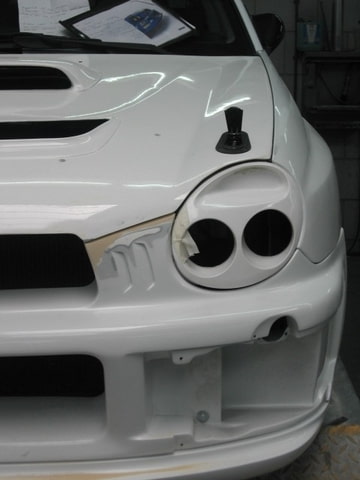
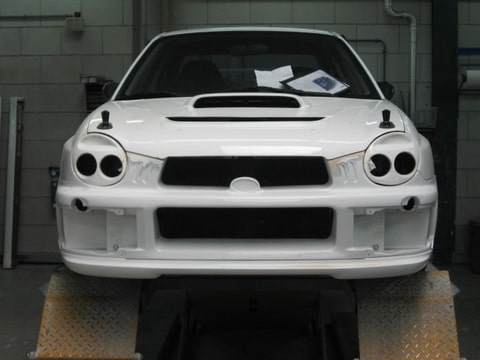
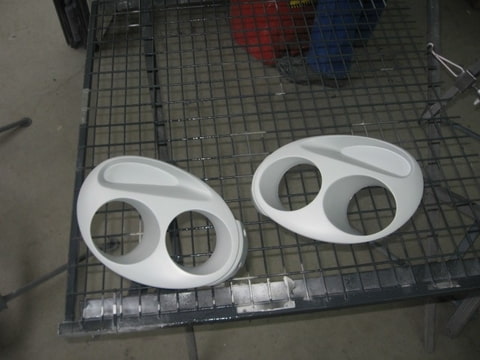
Now mounting the WRC S7 headlights�
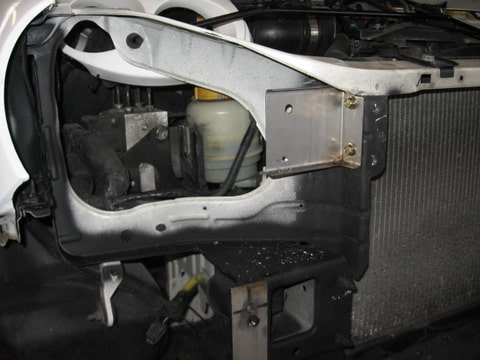
That was also not as easy, because the WRC car has no horizontal lock mount and hood lock catcher and of course the mount of the headlights are gone�
Because off the big intercooler that is mounted very high in the hood..
So I decided to keep the original headlamp mount on the car, and to make brackets for left and right.
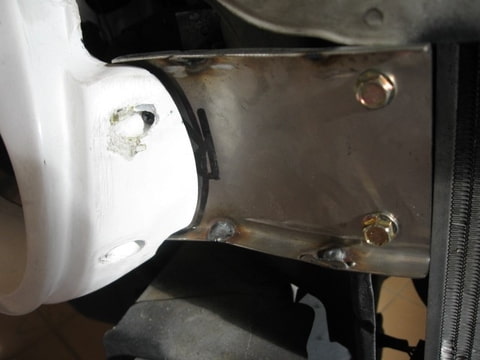
This also wasn�t easy I can tell you�
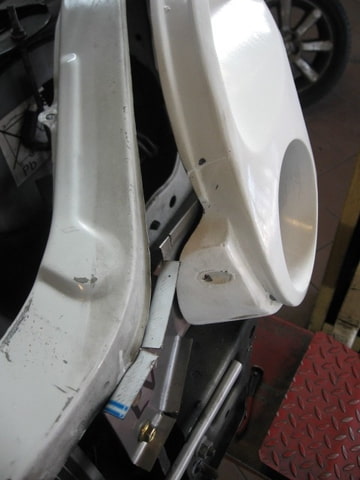
Had to be going, something like this�
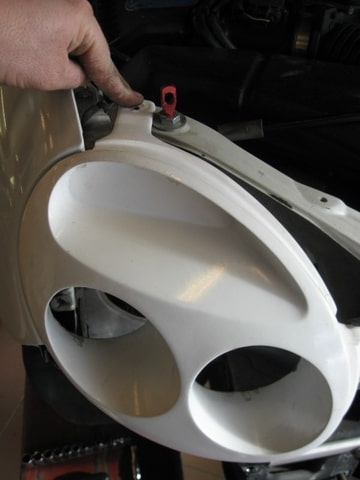
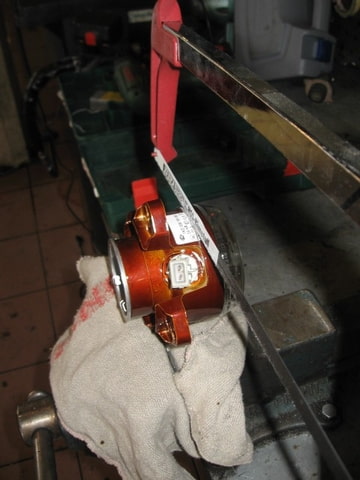
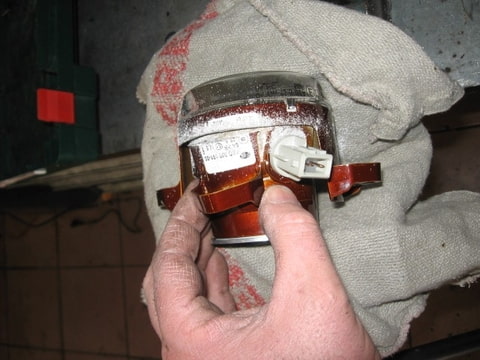
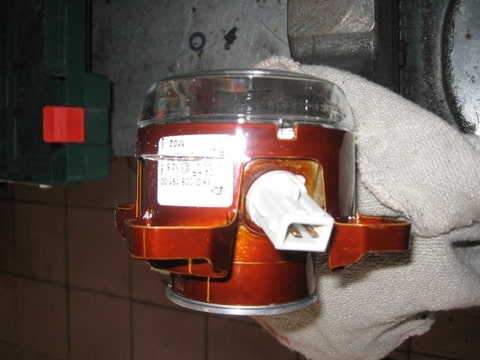
Step two was getting de Hella 90mm units in there�
It was a tight spot for the outer ones, so I hade to do some modifications�
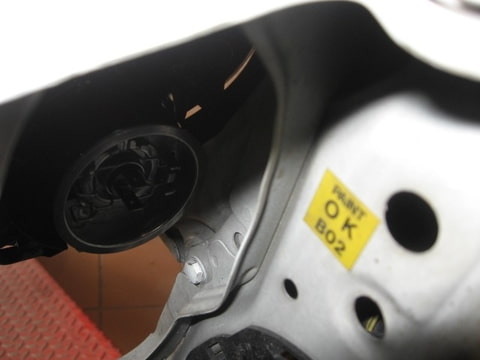
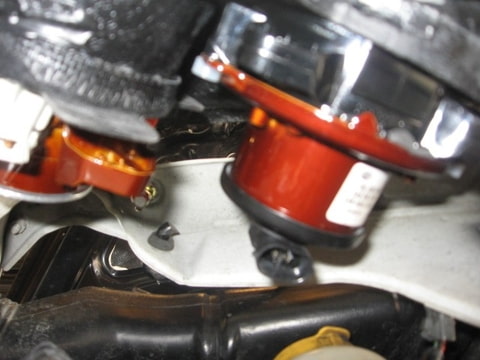
This is how it�s going to be, but�
Still wasn�t happy with the brackets, so we made new ones�

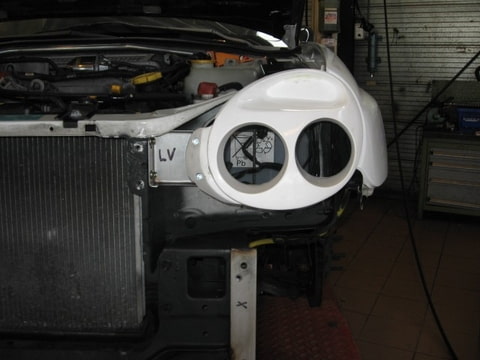
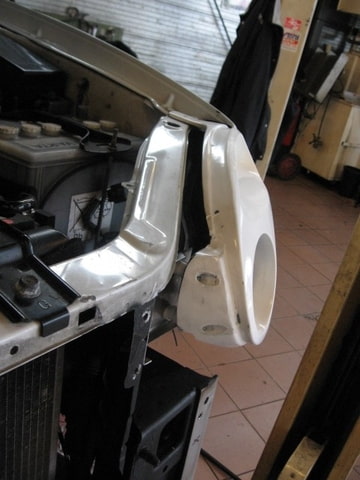
Now I was happy with the end product, and was also ready to get painted black of course�
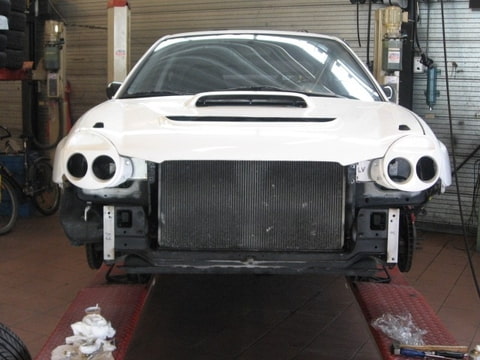
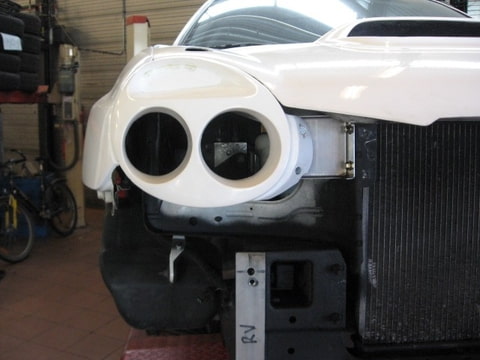
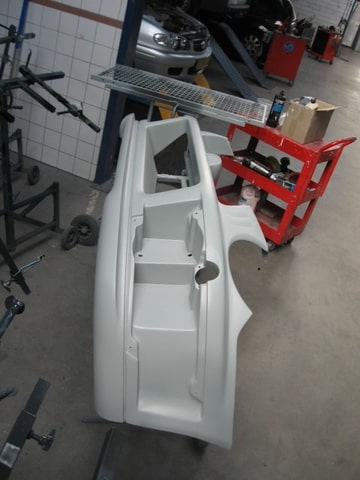
Also welded two mountings to mount the WRC front bumper�
So we could mount the bumper also�and look at the end product !

Next we are going to the painter�
Let�s see�
Bumper check..
Hood check..
Hood locks check..
Now mounting the WRC S7 headlights�
That was also not as easy, because the WRC car has no horizontal lock mount and hood lock catcher and of course the mount of the headlights are gone�
Because off the big intercooler that is mounted very high in the hood..
So I decided to keep the original headlamp mount on the car, and to make brackets for left and right.
This also wasn�t easy I can tell you�
Had to be going, something like this�
Step two was getting de Hella 90mm units in there�
It was a tight spot for the outer ones, so I hade to do some modifications�
This is how it�s going to be, but�
Still wasn�t happy with the brackets, so we made new ones�
Now I was happy with the end product, and was also ready to get painted black of course�
Also welded two mountings to mount the WRC front bumper�
So we could mount the bumper also�and look at the end product !
Next we are going to the painter�
Last edited by WimprezawrX; 05 March 2008 at 05:30 PM.
05 March 2008, 08:15 PM
#108
Scooby Regular
Thread Starter
Join Date: Feb 2007
Location: The Netherlands
Posts: 330
Likes: 0
Received 0 Likes
on
0 Posts

It's these of kind words that is keeping the project going...
More to come...

 06 March 2008, 05:39 PM
#110
Scooby Regular
Thread Starter
Join Date: Feb 2007
Location: The Netherlands
Posts: 330
Likes: 0
Received 0 Likes
on
0 Posts
 06 March 2008, 06:16 PM
#113
Scooby Regular
Thread Starter
Join Date: Feb 2007
Location: The Netherlands
Posts: 330
Likes: 0
Received 0 Likes
on
0 Posts
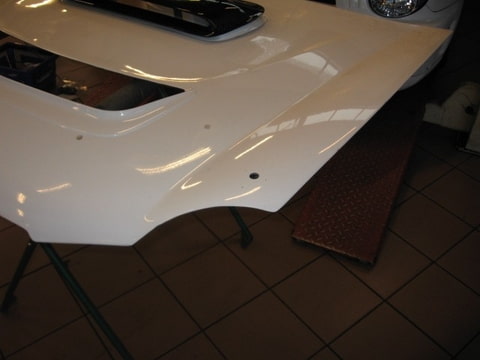
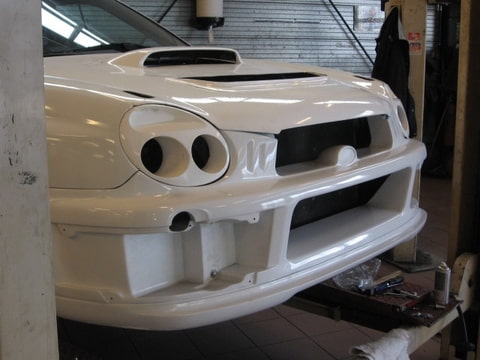
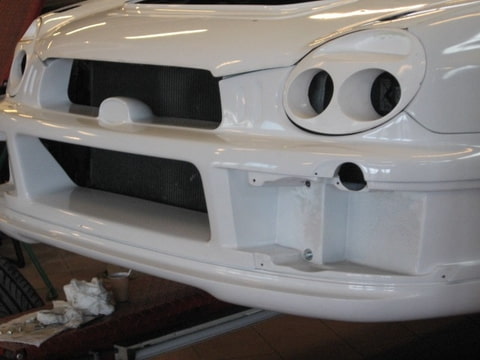
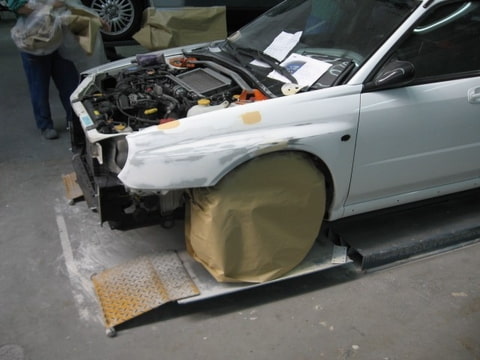
We arrived at the paint shop�
Because it all are WRC S7 (GRP) replica parts, the fitment was not to my satisfaction..
So my hero had to do his magic�
first he had to make all the (how do you call that) seams? fit properly..
Its getting better already...
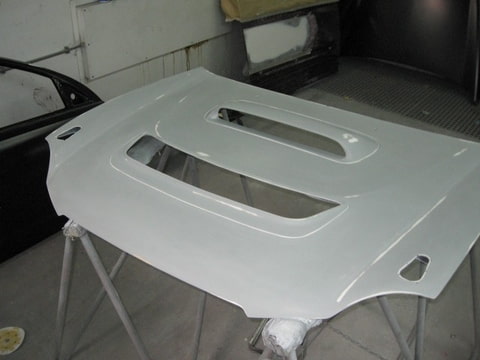
Also the hood was not forgotten...
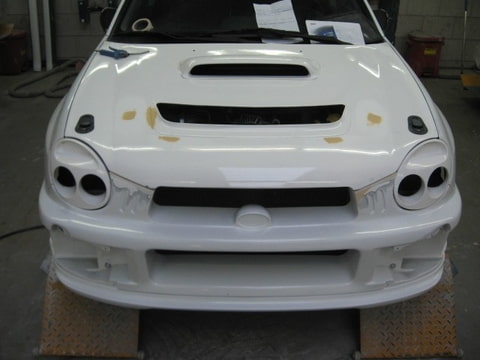
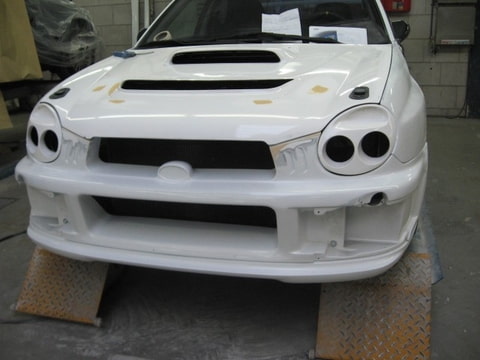
Getting better with each picture don't you think?
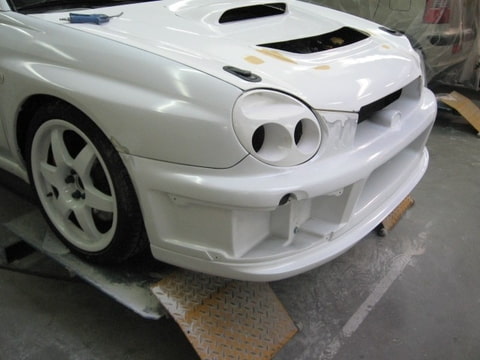

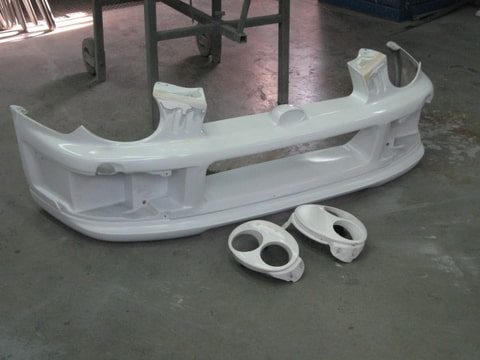
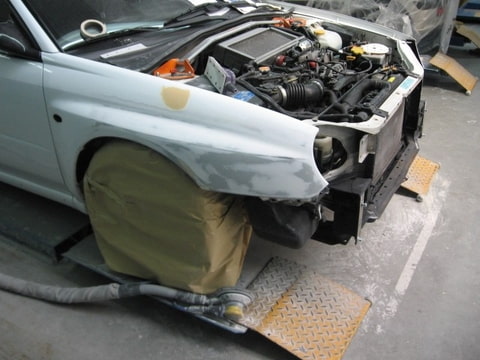
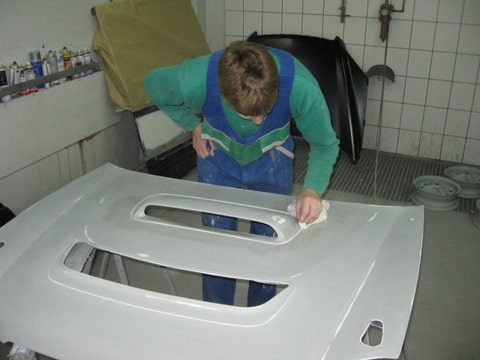
Then when everything had a perfect fit, it's been de-mounted for more sanding and spraying...
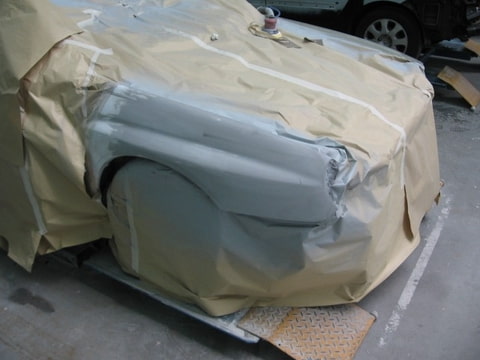
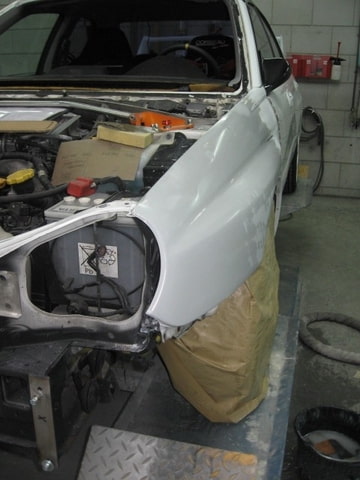
Also the front wings came on turn...
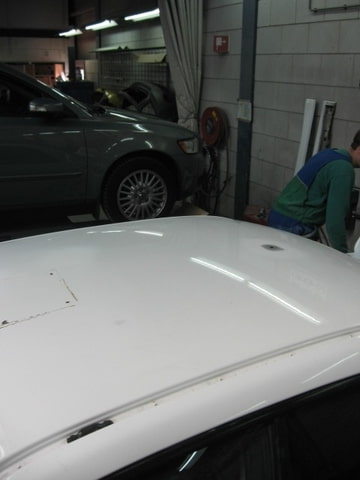
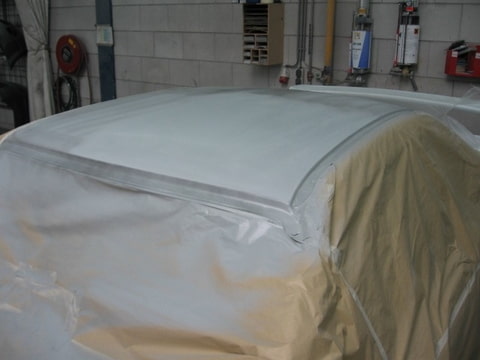
Because I de-mounted all the extra's of the roof, it also need spraying...
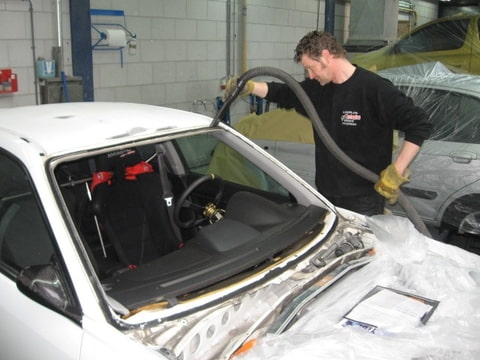
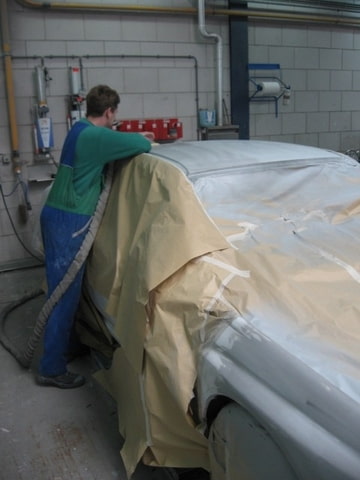
The best way to do that is get everything out of the way, that�s why this guy has taken out the front windscreen...
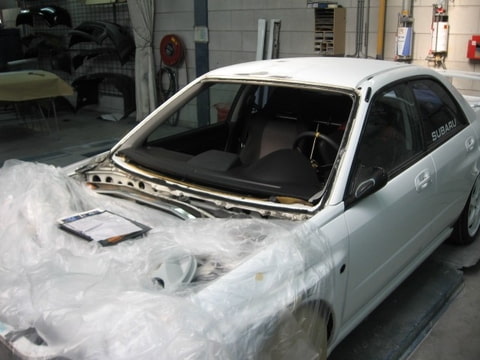
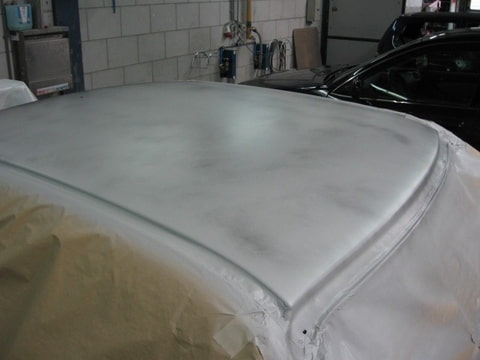
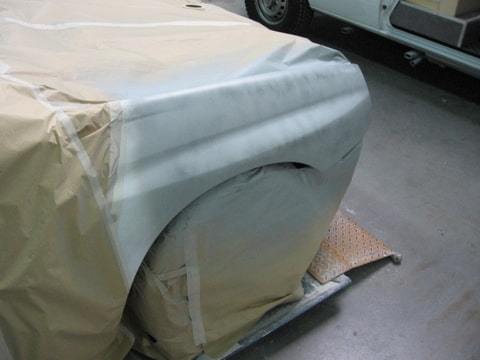
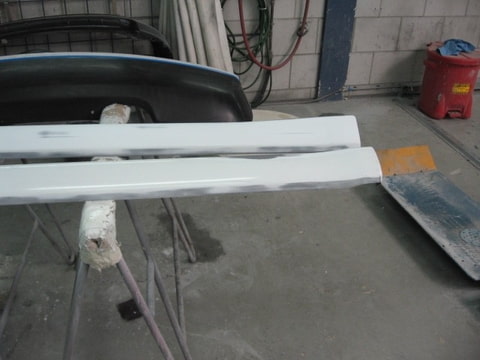
Next everything was sanded down en sprayd in the primer polyester coating...
Also the body parts are done like that...
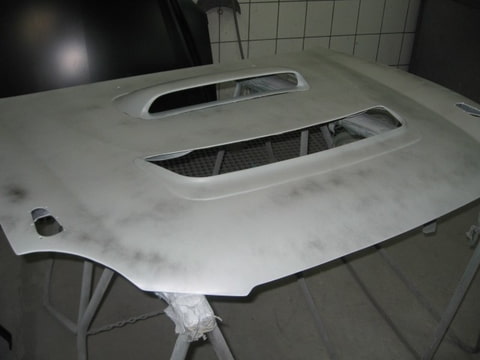
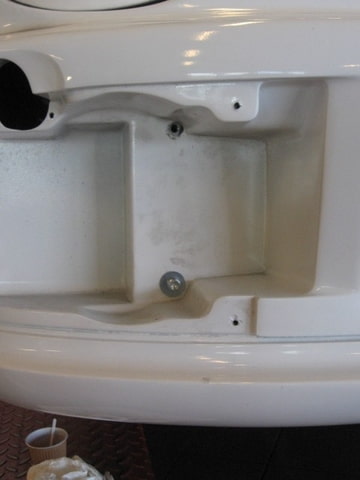
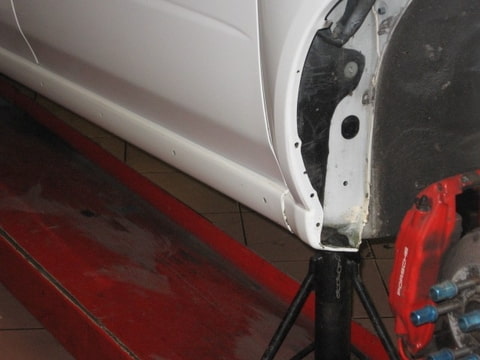
We did also change the wrc scoop from the inside, that mounting wasn't as clean as i would have liked...
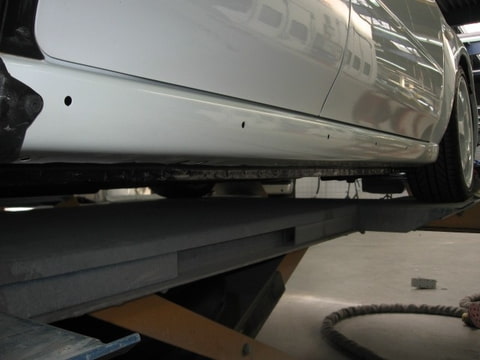
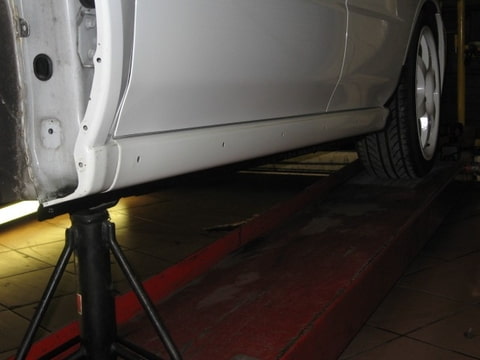
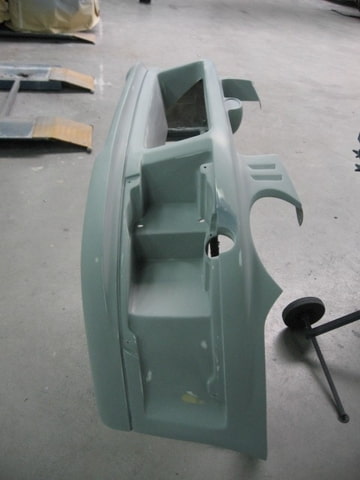
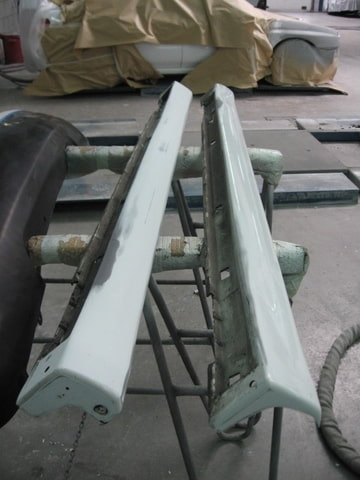
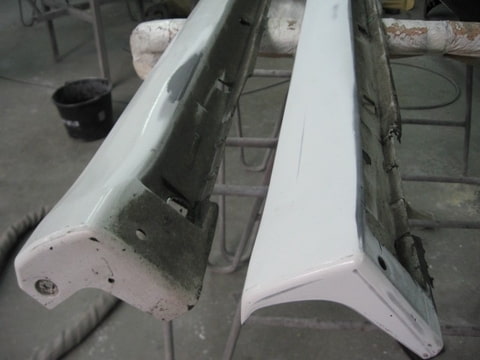
That also has to get sprayed is, rear spoiler, skirts beause the old paint was broken...
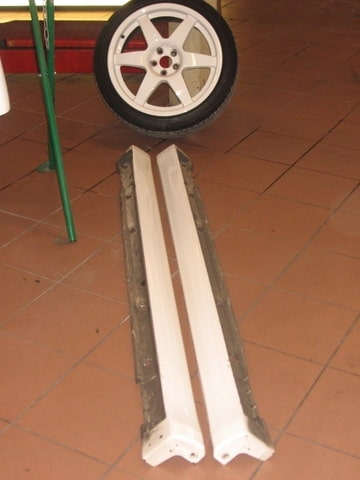
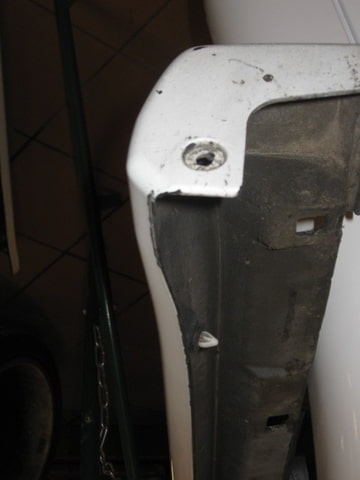
Now they where taken off, I could wash en clean the parts where the skirt was...also (because of many trackdays) it was slightly damagd off the jack of changing wheels...so I straitnd everything and painted it with a speciaal paint for protaction...
Because it all are WRC S7 (GRP) replica parts, the fitment was not to my satisfaction..
So my hero had to do his magic�
first he had to make all the (how do you call that) seams? fit properly..
Its getting better already...
Also the hood was not forgotten...
Getting better with each picture don't you think?
Then when everything had a perfect fit, it's been de-mounted for more sanding and spraying...
Also the front wings came on turn...
Because I de-mounted all the extra's of the roof, it also need spraying...
The best way to do that is get everything out of the way, that�s why this guy has taken out the front windscreen...
Next everything was sanded down en sprayd in the primer polyester coating...
Also the body parts are done like that...
We did also change the wrc scoop from the inside, that mounting wasn't as clean as i would have liked...
That also has to get sprayed is, rear spoiler, skirts beause the old paint was broken...
Now they where taken off, I could wash en clean the parts where the skirt was...also (because of many trackdays) it was slightly damagd off the jack of changing wheels...so I straitnd everything and painted it with a speciaal paint for protaction...
Last edited by WimprezawrX; 06 March 2008 at 06:26 PM.
06 March 2008, 06:59 PM
#115
Scooby Regular
Thread Starter
Join Date: Feb 2007
Location: The Netherlands
Posts: 330
Likes: 0
Received 0 Likes
on
0 Posts


 07 March 2008, 07:26 PM
#116
Scooby Regular
Thread Starter
Join Date: Feb 2007
Location: The Netherlands
Posts: 330
Likes: 0
Received 0 Likes
on
0 Posts
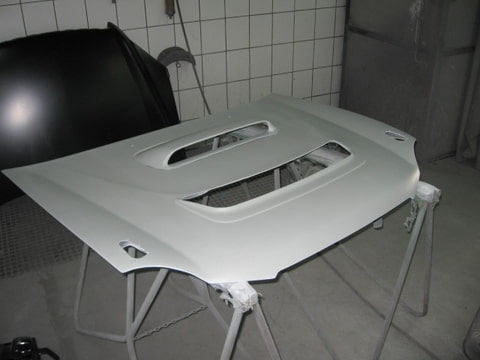
The next day...
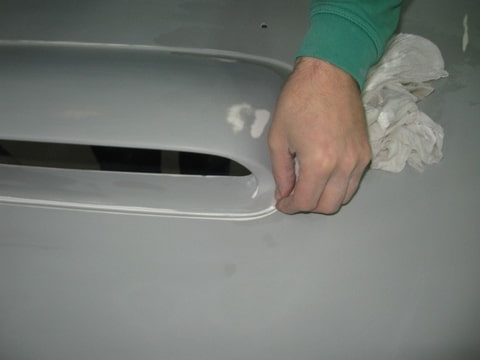
I let the scoop bonded on the hood,
this because everything is very light and of polyester...
But also i did not want to see any bonding or kit, that�s why here it's been washed in... and will look like oem.
The guy's at the painter had a surprise for me...
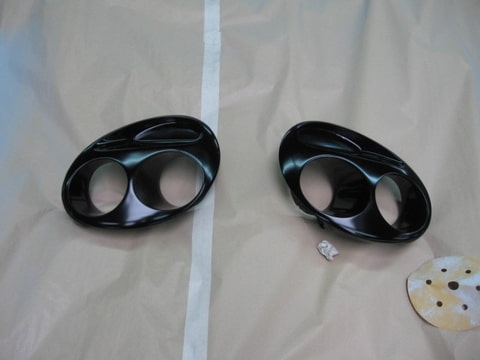
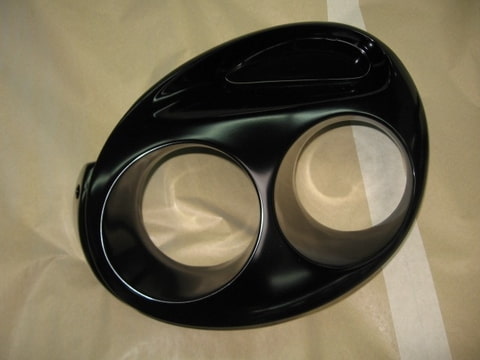
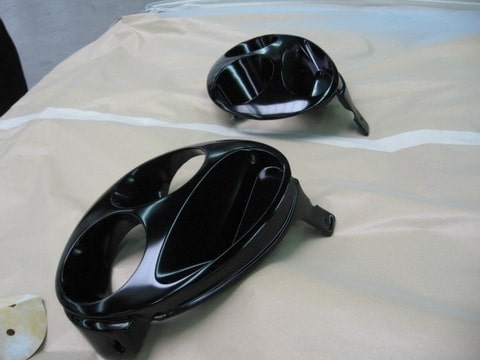
I think they turned out very nice, black but not to glossy...
My hero at the spray/body shop, is making a practical joke with me here, because I asked him to be extra careful with my baby...
But everything has come to a end, back to work...
This guy is really a wizard... (Thnx mate )
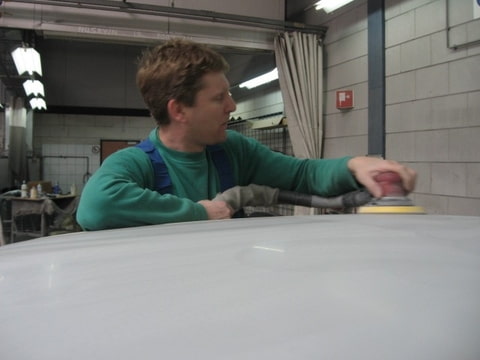
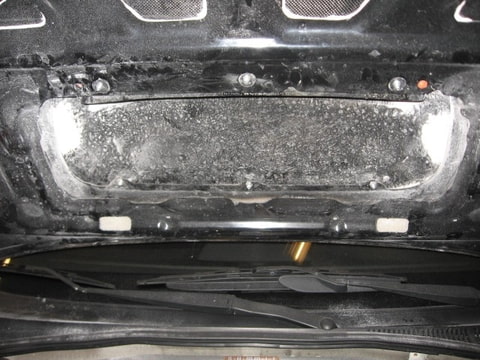
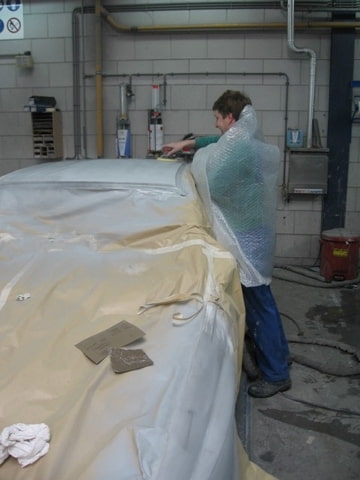
This one is ready for paint, its been sanded down with waterproof sandpaper..
At this picture you see a strip with magnets, it prevents that the sandpaper
will hit the door and scratch it...
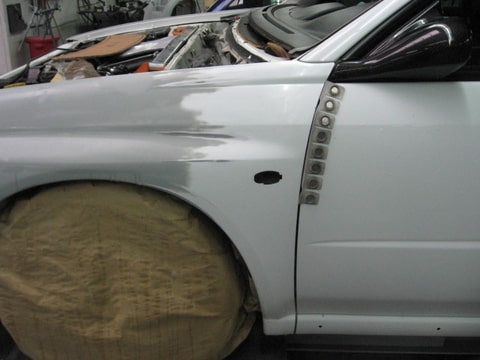
The guy's also toke my skirts under hands (this wasn�t planned thnx guy�s)...

Well this it for now...
Won't take long now.. can't wait...
I let the scoop bonded on the hood,
this because everything is very light and of polyester...
But also i did not want to see any bonding or kit, that�s why here it's been washed in... and will look like oem.
The guy's at the painter had a surprise for me...
I think they turned out very nice, black but not to glossy...
My hero at the spray/body shop, is making a practical joke with me here, because I asked him to be extra careful with my baby...
But everything has come to a end, back to work...
This guy is really a wizard...
(Thnx mate )This one is ready for paint, its been sanded down with waterproof sandpaper..
At this picture you see a strip with magnets, it prevents that the sandpaper
will hit the door and scratch it...
The guy's also toke my skirts under hands (this wasn�t planned thnx guy�s)...
Well this it for now...
Won't take long now.. can't wait...
07 March 2008, 10:36 PM
#119
Scooby Regular
Thread Starter
Join Date: Feb 2007
Location: The Netherlands
Posts: 330
Likes: 0
Received 0 Likes
on
0 Posts
[QUOTEtiny gsy Thats some amount of progress mate nearly done now ][/QUOTE]
THNX again guy's
Today seen it sprayed...
Will update soon...
frayz Awesome
Today seen it sprayed...
Will update soon...