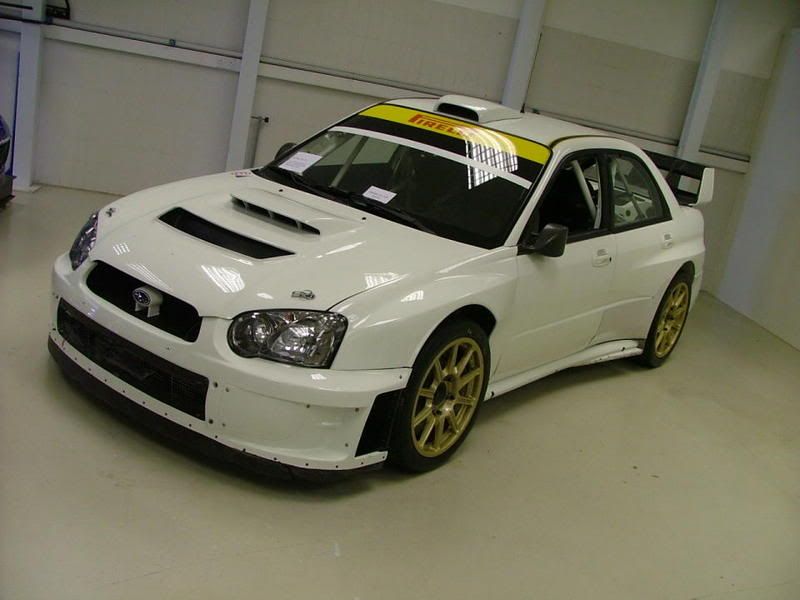
Wide arch, 400+bhp Newage rebuild...For the road :)


Scooby Regular
iTrader: (2)
Joined: Mar 2005
Posts: 858
Likes: 0
From: sunny stockton in a 300bhp scooby
hi 911
really mate not much difference to thousands of other people, worked very hard. great pension scheme and last but not least . i was very lucking to fall in with top jobs. pure luck not skill. enjoying it mate gives me plenty of time to do the scoob
cheers mick.
really mate not much difference to thousands of other people, worked very hard. great pension scheme and last but not least . i was very lucking to fall in with top jobs. pure luck not skill. enjoying it mate gives me plenty of time to do the scoob
cheers mick.
Scooby Regular
iTrader: (2)
Joined: Mar 2005
Posts: 858
Likes: 0
From: sunny stockton in a 300bhp scooby
Scooby Regular
iTrader: (2)
Joined: Mar 2005
Posts: 858
Likes: 0
From: sunny stockton in a 300bhp scooby


LOL@ Graham 

After much deliberation, I think I have made a choice on wheels.
Taking into consideration the extreme offset I need, which will be ET 20, and the width, 9", I have decided that weight will be the deciding factor, in preference to cost, and taste.
I really wanted something along the lines of my OZ Superleggera III split rims, but they are both costly (circa �3K) and not that light...
Next choice was Compomotive MO's, which are the only option with 9" wheel width, in the 6 spoke variety.
These are extremely heavy, and not to costly (circa �1K).
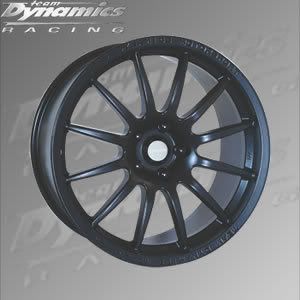
The last choice is Team Dynamics pro-race 1.2.
These are extremely light, and cheap too (circa �600).
So there we have it....
I think....")
After much deliberation, I think I have made a choice on wheels.
Taking into consideration the extreme offset I need, which will be ET 20, and the width, 9", I have decided that weight will be the deciding factor, in preference to cost, and taste.
I really wanted something along the lines of my OZ Superleggera III split rims, but they are both costly (circa �3K) and not that light...
Next choice was Compomotive MO's, which are the only option with 9" wheel width, in the 6 spoke variety.
These are extremely heavy, and not to costly (circa �1K).
The last choice is Team Dynamics pro-race 1.2.
These are extremely light, and cheap too (circa �600).
So there we have it....
I think....

Cheers for the comment chaps...
Got some more done last night..
After some guestmations, and a bit of measuring, I thought I'd get started with cutting out the rear arches, to allow clearance for the new wheels..
First step/mistake, is to cut and weld one side first, only to find that there still won't be enough clearance for the wheel/suspension set up I am using..
Then re-mark where we need to cut...again
The outer arch is then cut, and the inner is also cut about 10-15mm up from that, and fold the outer wing inwards to form a return to weld to.
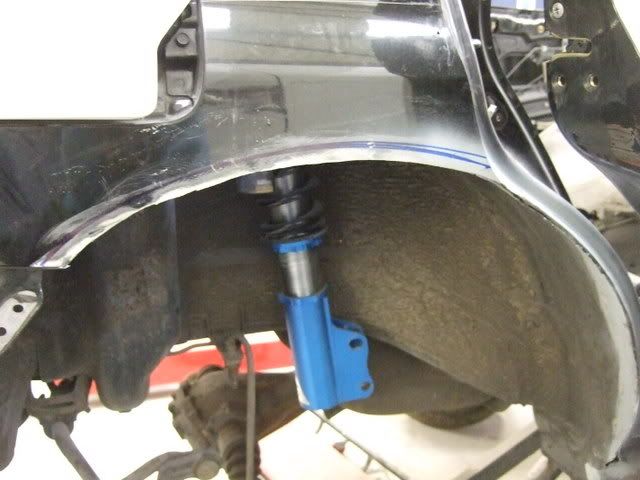
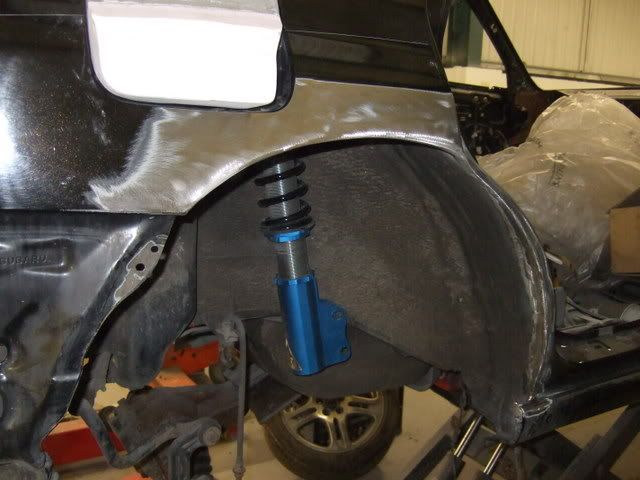
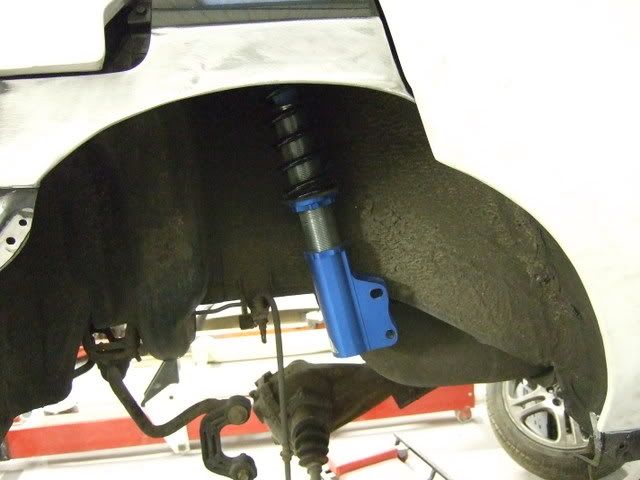
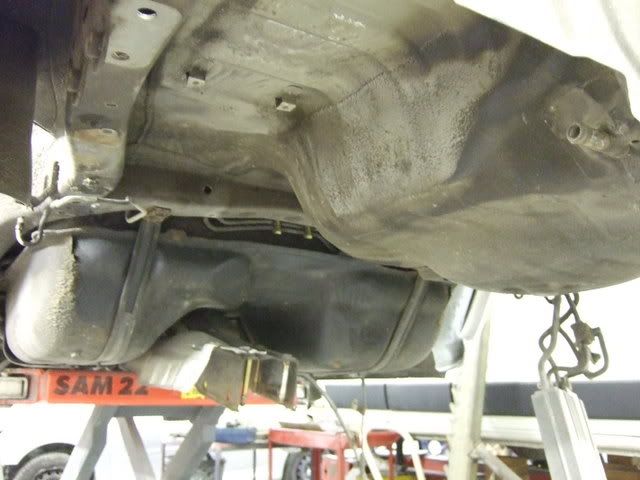
Heres a few shots from under the arches.
First with the metalwork cut.

And then with the outer folded around the inner, to make a nice join to weld together..
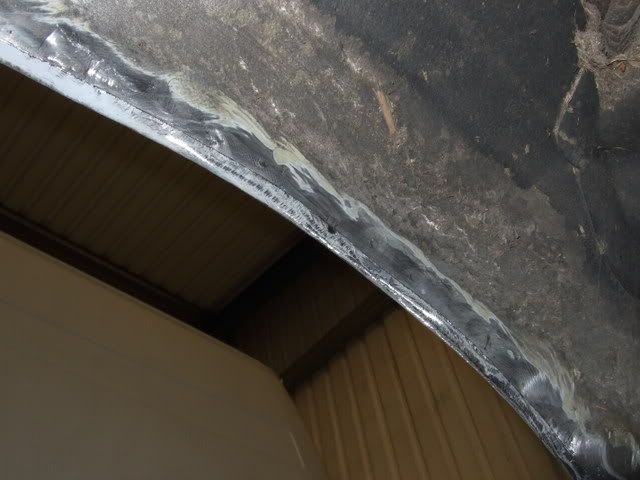
Next step, weld as necesary, being careful not to distort the metal as much as possible.
The trick is to spot/stitch in one spot, then move to another spot, and so on, until is is totally welded up all around..
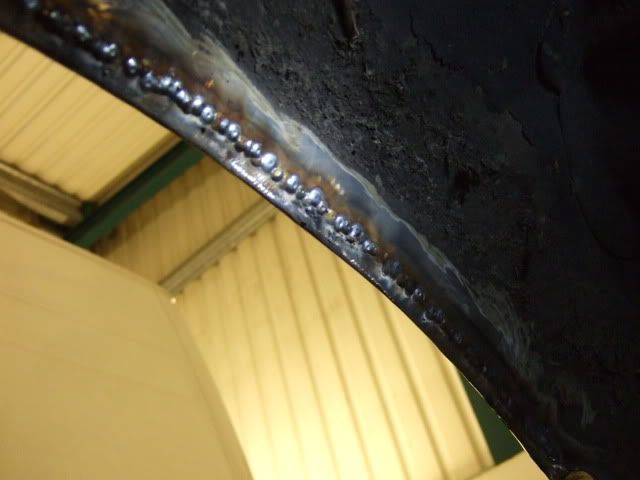
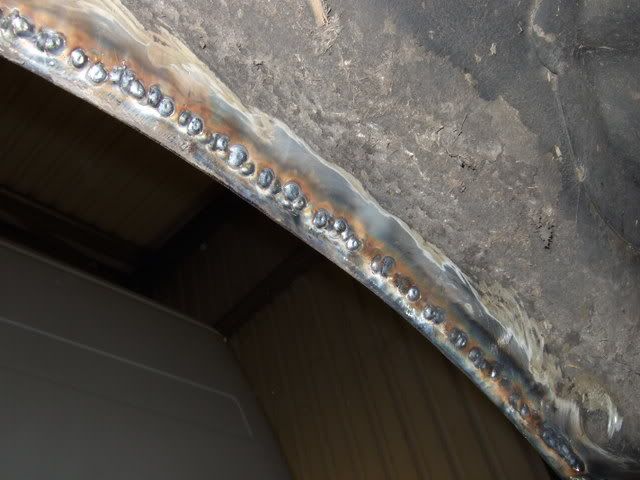
The metal is very thin on both the inner and outer arches...
Got some more done last night..
After some guestmations, and a bit of measuring, I thought I'd get started with cutting out the rear arches, to allow clearance for the new wheels..
First step/mistake, is to cut and weld one side first, only to find that there still won't be enough clearance for the wheel/suspension set up I am using..
Then re-mark where we need to cut...again
The outer arch is then cut, and the inner is also cut about 10-15mm up from that, and fold the outer wing inwards to form a return to weld to.
Heres a few shots from under the arches.
First with the metalwork cut.
And then with the outer folded around the inner, to make a nice join to weld together..
Next step, weld as necesary, being careful not to distort the metal as much as possible.
The trick is to spot/stitch in one spot, then move to another spot, and so on, until is is totally welded up all around..
The metal is very thin on both the inner and outer arches...
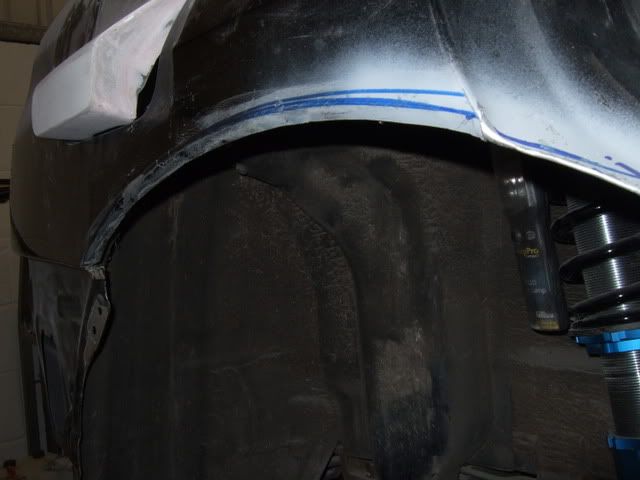
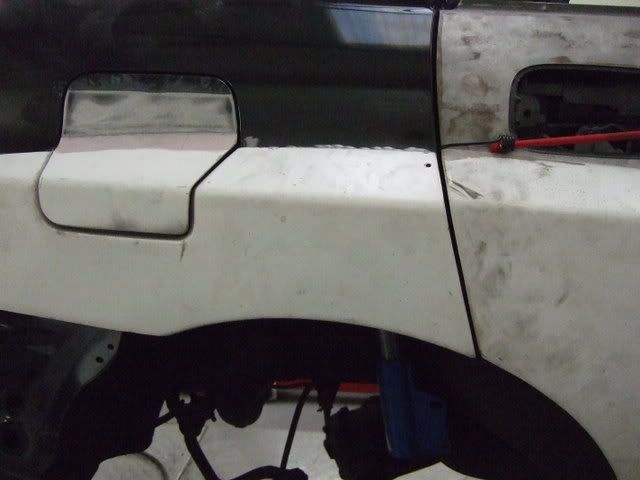
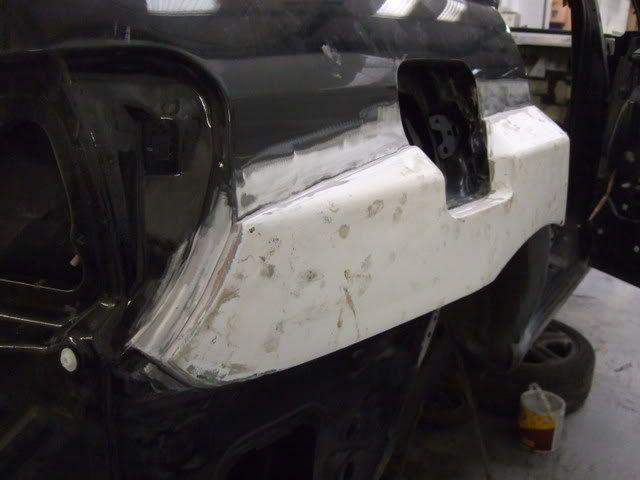
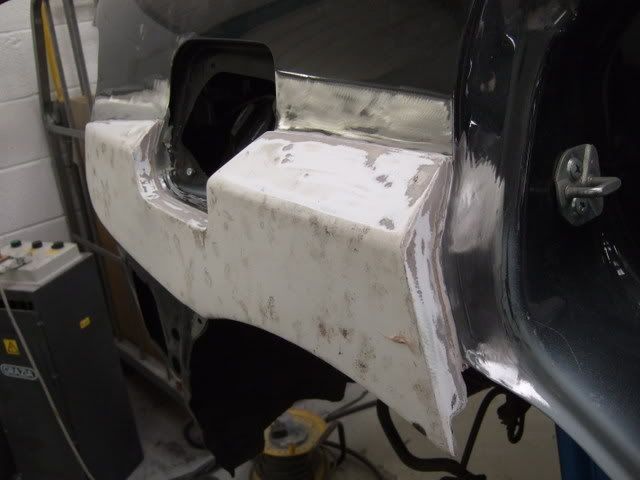
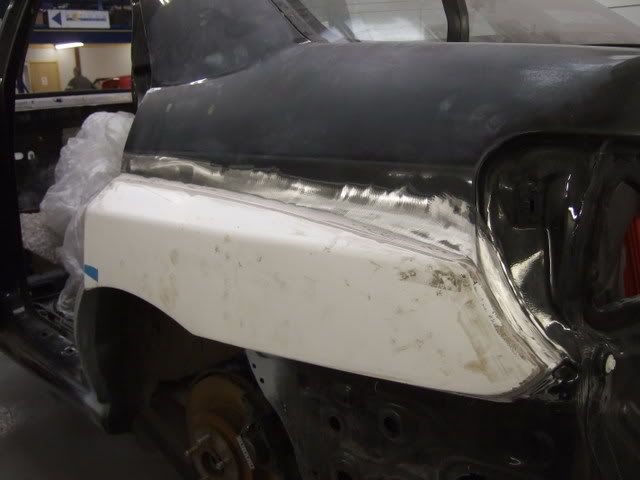
Next step, is to clean up the welds..
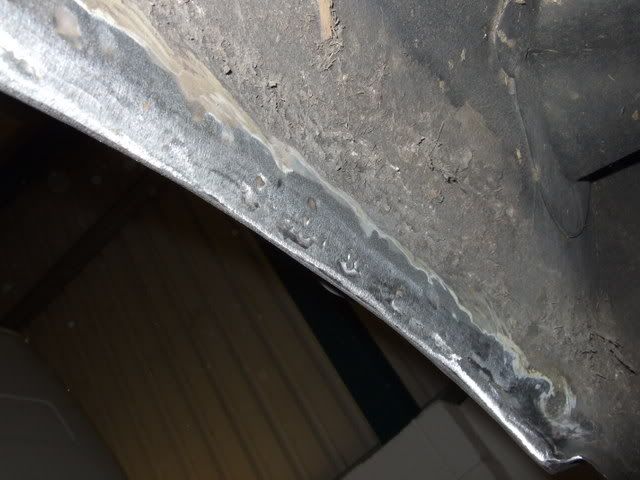
Here's a shot of the outside of the arch.
Here you can see the gap left where the old arch met the rear door..
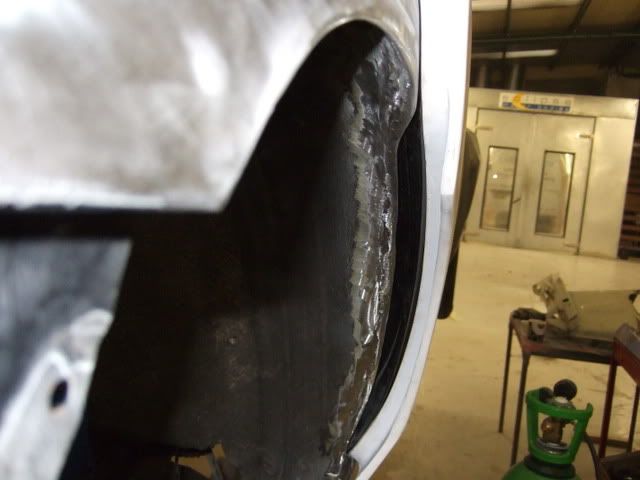
This will have some sort of rubber strip fixed to the door once painted/built up, to stop excess crap being thrown into the rear door shut.
Here you can see how much the arch line has been raised.
The arch is approximately 4" higher, so should allow plenty of room for wheel travel....I hope.
Now all I need to do, is the other side to match
Here's a shot of the outside of the arch.
Here you can see the gap left where the old arch met the rear door..
This will have some sort of rubber strip fixed to the door once painted/built up, to stop excess crap being thrown into the rear door shut.
Here you can see how much the arch line has been raised.
The arch is approximately 4" higher, so should allow plenty of room for wheel travel....I hope.
Now all I need to do, is the other side to match
Scooby Regular
iTrader: (2)
Joined: Mar 2005
Posts: 858
Likes: 0
From: sunny stockton in a 300bhp scooby
Next step, is to clean up the welds..
Here's a shot of the outside of the arch.
Here you can see the gap left where the old arch met the rear door..
This will have some sort of rubber strip fixed to the door once painted/built up, to stop excess crap being thrown into the rear door shut.
Here you can see how much the arch line has been raised.
The arch is approximately 4" higher, so should allow plenty of room for wheel travel....I hope.
Now all I need to do, is the other side to match
cheers mick


Glad to hear it Mick
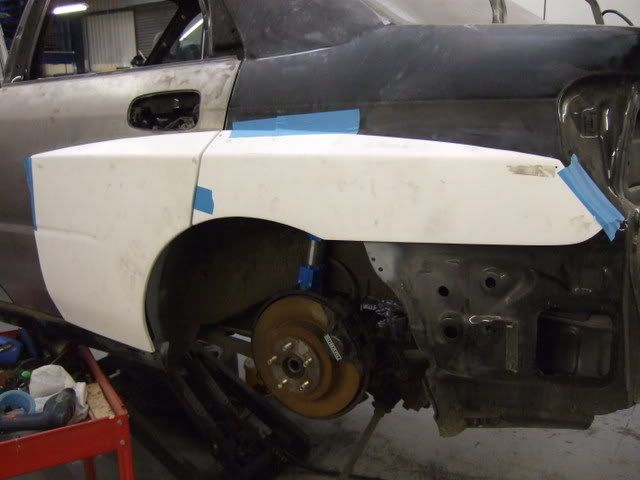
Ok, got the other side all cut up and welded back today..

Also started to get the rear quarter sections into place as well..
First step, grind back to bare metal where they will be bonded on..
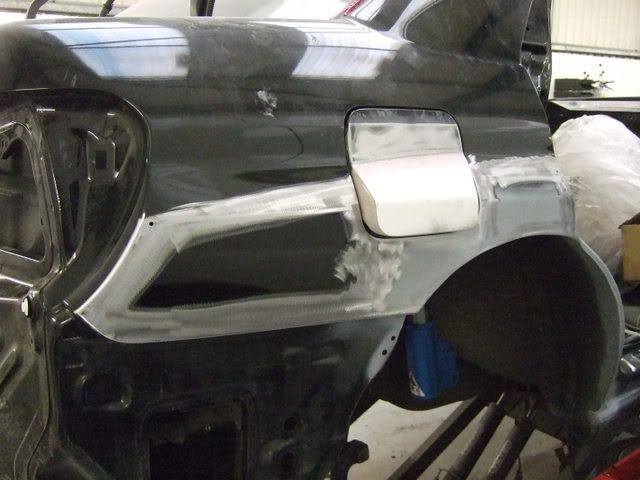
Then it was a case of aligning the parts, and then use a couple of self tapper screws as locating points..
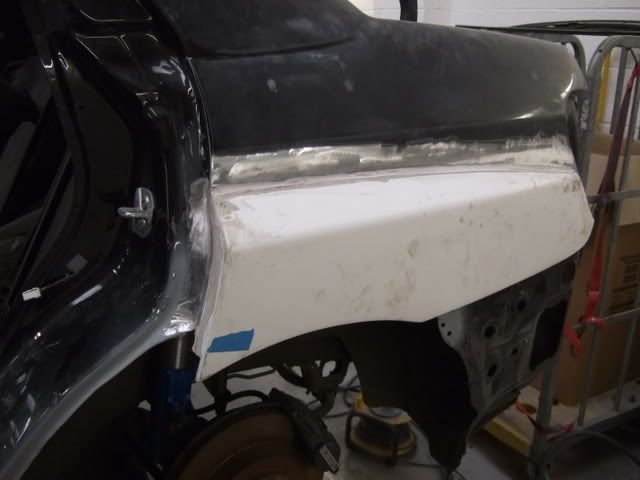
Next, remove the panels, and key the areas to be bonded, along with a nice chamfer along all the outer edges..
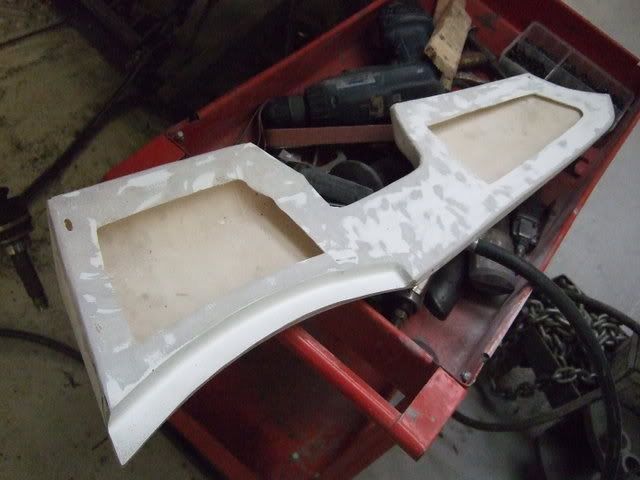
Then I used some top secret bonding gear to bond the parts onto the car..
Now, a lot of 'other' places would maybe use a 1K adhesive, such as Sikoflex, which would be fine if the parts were just bonded on, and not blended into the metalwork of the car..
However, I am doing just that, and if that method was used and then the joint blended into the lines of the car with filler, it would ultimately crack.
This is down to the 1K adhesive being flexible, and the filler not being flexible, therefore a crack would appear over a very short period of time.
Anyway, here is one side bonded on..
Ok, got the other side all cut up and welded back today..
Also started to get the rear quarter sections into place as well..
First step, grind back to bare metal where they will be bonded on..
Then it was a case of aligning the parts, and then use a couple of self tapper screws as locating points..
Next, remove the panels, and key the areas to be bonded, along with a nice chamfer along all the outer edges..
Then I used some top secret bonding gear to bond the parts onto the car..
Now, a lot of 'other' places would maybe use a 1K adhesive, such as Sikoflex, which would be fine if the parts were just bonded on, and not blended into the metalwork of the car..
However, I am doing just that, and if that method was used and then the joint blended into the lines of the car with filler, it would ultimately crack.
This is down to the 1K adhesive being flexible, and the filler not being flexible, therefore a crack would appear over a very short period of time.
Anyway, here is one side bonded on..


Scooby Regular
Joined: May 2004
Posts: 11,341
Likes: 1
Big progress, most impressed.
The strength must be = to OEM after the welding.
That gap is interesting, never expected that, but you will have all the clearence you need on full compression.
Keep on going!
Graham
The strength must be = to OEM after the welding.
That gap is interesting, never expected that, but you will have all the clearence you need on full compression.
Keep on going!
Graham
Probably more than OEM Graham, as they normally have spot welds every inch or so.
Now it is pretty much seam welded..
The gap is maybe overkill, but as you say,on full compression is when you need the clearance.
Now it is pretty much seam welded..
The gap is maybe overkill, but as you say,on full compression is when you need the clearance.
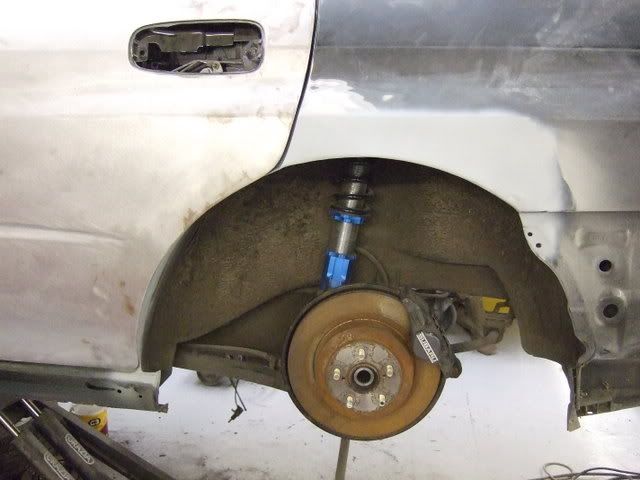
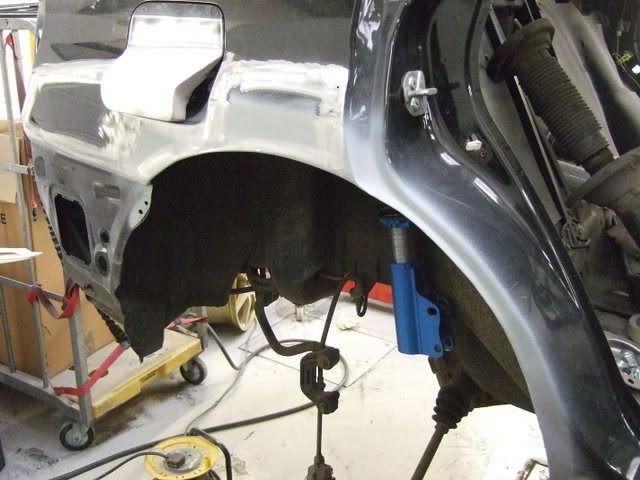
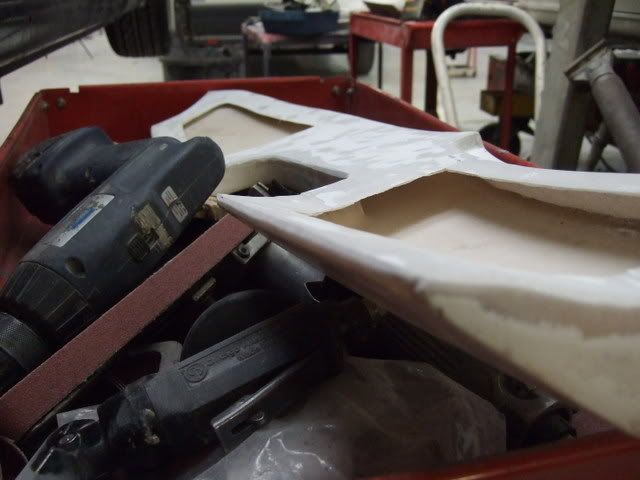
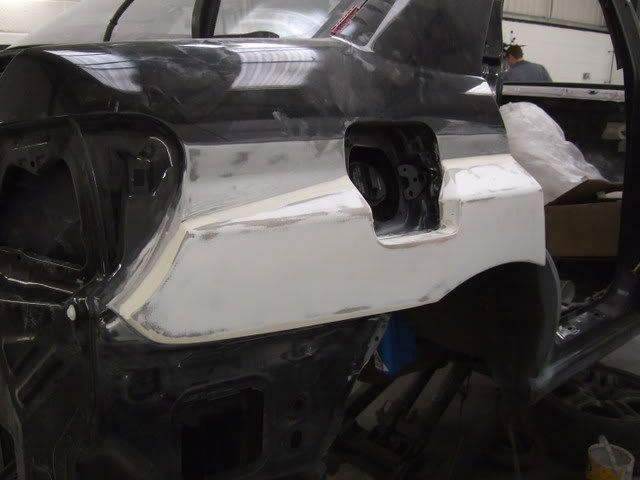
Removed all the rear suspension last night.
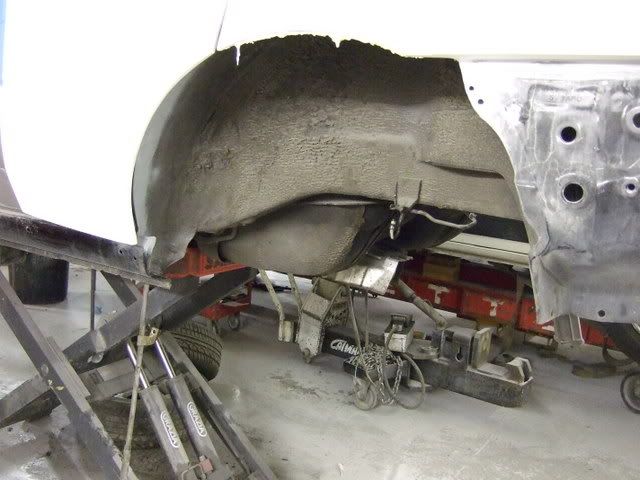
And set about sorting out the gap between the new outer wings, and the existing metal work..
Basically we have a large gap, and I needed to come up with a soultion to fill it in.
I thought about welding a metal plate there, but really there is no need for that, as it is not structural, and therefore not neccesary.
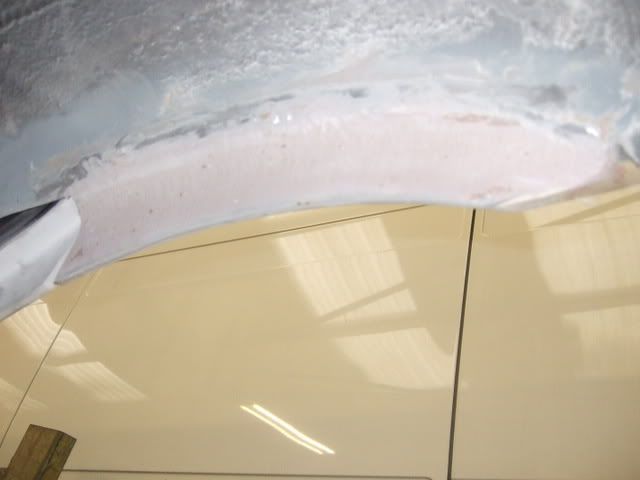
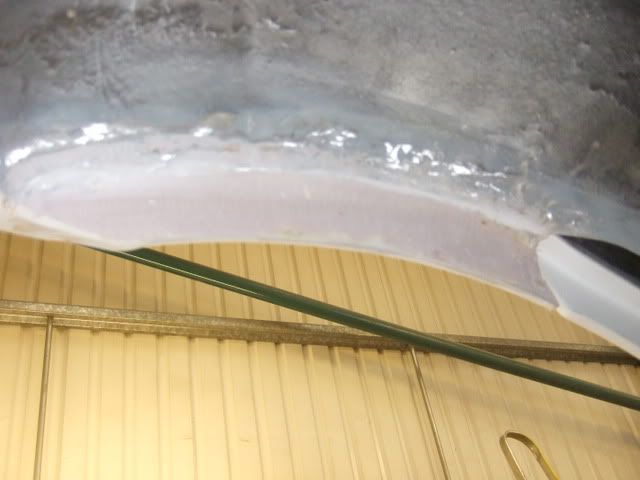
I came up with using a can of expanding foam...
This was used, like so..
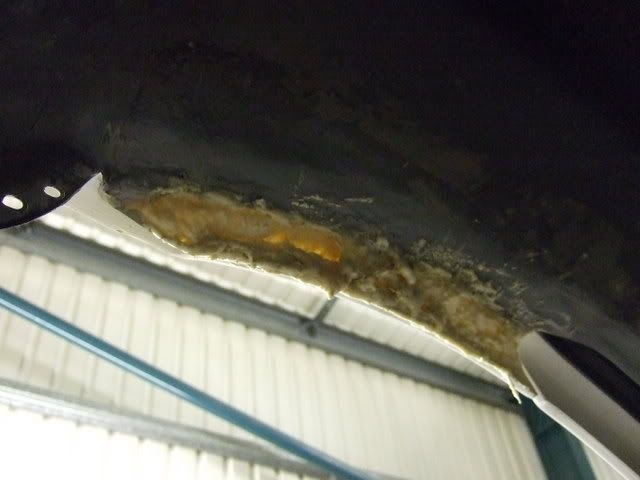
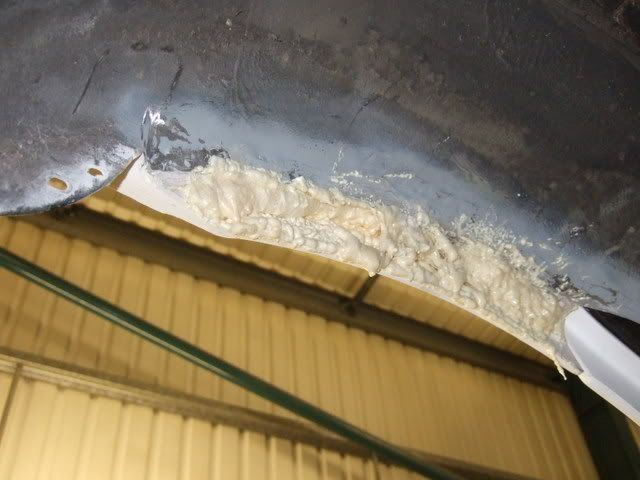
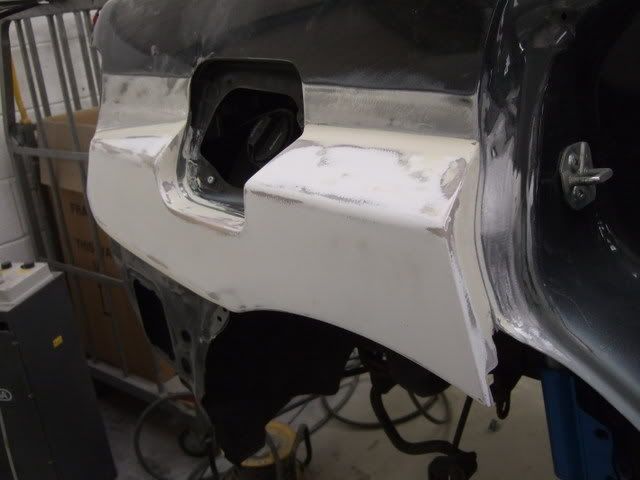
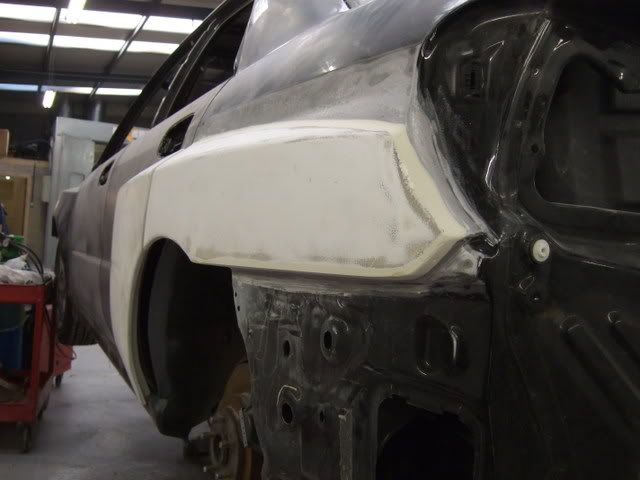
This I did last night as well, and today after a bit of trimming, looks like this..

And set about sorting out the gap between the new outer wings, and the existing metal work..
Basically we have a large gap, and I needed to come up with a soultion to fill it in.
I thought about welding a metal plate there, but really there is no need for that, as it is not structural, and therefore not neccesary.
I came up with using a can of expanding foam...
This was used, like so..
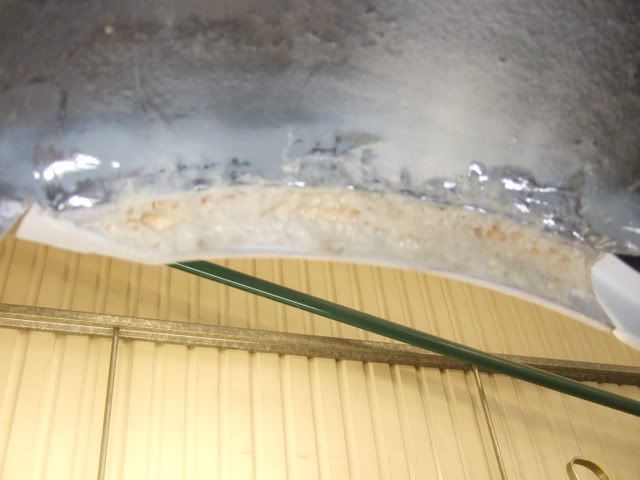
This I did last night as well, and today after a bit of trimming, looks like this..
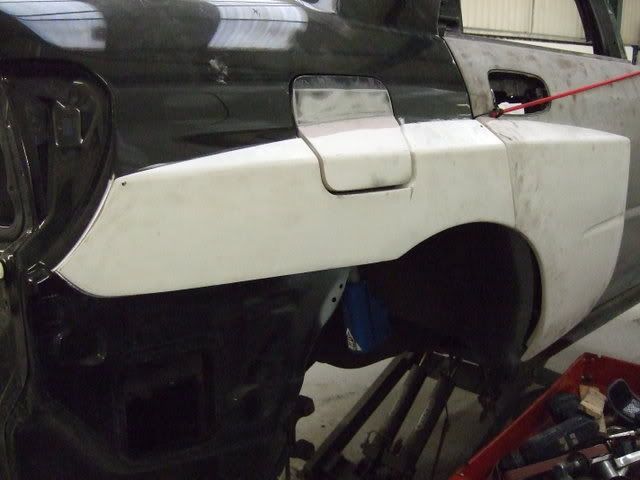
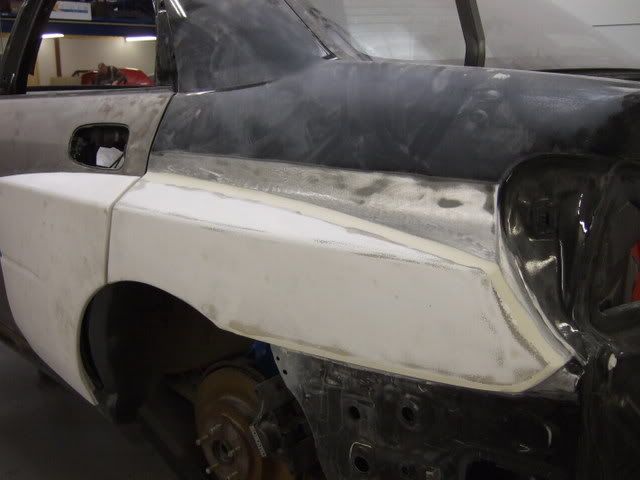
Next step, was to get some fibre glass on there, which was done, and again trimmed back into shape..
Apologies for the crappie pics, got a touch of the shakes this morning due to an excessive night last night...

Anyway, the arches are pretty much, well and truly bonded on now, and feel pretty strong around the wheel arch area, which is good.
In fact, I can actually lift the car using the new, fibreglass, rear arches, so good enough for me.
Having said which, it is just a shell...
Apologies for the crappie pics, got a touch of the shakes this morning due to an excessive night last night...
Anyway, the arches are pretty much, well and truly bonded on now, and feel pretty strong around the wheel arch area, which is good.
In fact, I can actually lift the car using the new, fibreglass, rear arches, so good enough for me.
Having said which, it is just a shell...

Scooby Regular
Joined: Feb 2003
Posts: 21,611
Likes: 0
From: Zed Ess Won Hay Tee
would be intrested in this "top secret" bonding stuff as i`m doing my classic rears soon
to be honest you have just done the job exactly the same way that i had allready planned it
cut the arches back, weld up/seal and bond the ones over the top.
i had even planned to use expanding foam to bridge any gaps as i used this years ago when putting a daft bulge onto a vectras bonnet
the classic arches are different and you only need one pretty small blend job around the c pillar, had not settled on a bonding agent yet but was looking at the windscreen stuff yesterday
Micky, If you are going to be blending the new rear wings into your existing ones,ie: up the C pillar and along the rear wings, do not use the windscreen stuff.
It is great stuff, but like I say, it flexes, and you dont want that if you are putting filler over the join..
This new top secret stuff is in prototype stage at the mo, and I will let you know how it performs...
It is great stuff, but like I say, it flexes, and you dont want that if you are putting filler over the join..
This new top secret stuff is in prototype stage at the mo, and I will let you know how it performs...
Scooby Regular
Joined: Feb 2003
Posts: 21,611
Likes: 0
From: Zed Ess Won Hay Tee
i was speaking to a bloke who owns a local bodyshop (he is a regular punter of mine) and he was telling me about some "new stuff" that the windscreen fitters were trying out, that dries solid in 2 hours, he couldnt give me a name at the time.
i have just actually tried to ring A-B-W to order my rear arches and doorskins but they must be closed lol
the bodyshop owner did give me a bit of an idea on fitting them, and recommended getting the c pillar section ground down so it fits as flush as possible around the "join" and just using some white tigerseal to smooth the join in, This is with the new arches pre painted anyway) he seams to think if done well it would be barely noticeable and match the car anyway as its white, his reasoning with this was the fact that i own a 4 door car anyway and everybody will know that they never made a 4 door car with 22b rear arches so why go out of your way when nobody would ever believe its factory, it does kinda make sense in a way!
suppose this would all need to be taken into consideration when the arches arrive and i can see how well they fit.
a mate has just had a rs4 conversion onto his audi and the front end kit came with a special 2 pack glue to join the bonnet and grill extension onto the original bonnet, this is then blended in, his has been fine so far!
At least you are going down the right route by getting your arches from Darren at ABW...
Not so sure about grinding your new C-pillars and sealing with tiger seal to be honest..
Have a word with Darren before you make a decision, and let us know what you decide to use, and how you go on with it
Not so sure about grinding your new C-pillars and sealing with tiger seal to be honest..
Have a word with Darren before you make a decision, and let us know what you decide to use, and how you go on with it
Scooby Regular
Joined: Feb 2003
Posts: 21,611
Likes: 0
From: Zed Ess Won Hay Tee
At least you are going down the right route by getting your arches from Darren at ABW...
Not so sure about grinding your new C-pillars and sealing with tiger seal to be honest..
Have a word with Darren before you make a decision, and let us know what you decide to use, and how you go on with it
Not so sure about grinding your new C-pillars and sealing with tiger seal to be honest..
Have a word with Darren before you make a decision, and let us know what you decide to use, and how you go on with it
compleatly forgot about asking the bloke at a-b-w about the best way to fit them, LOL
what a cracking idea