
Wide arch, 400+bhp Newage rebuild...For the road :)


OK,I thought it was about time I shared my latest little project with everybody..
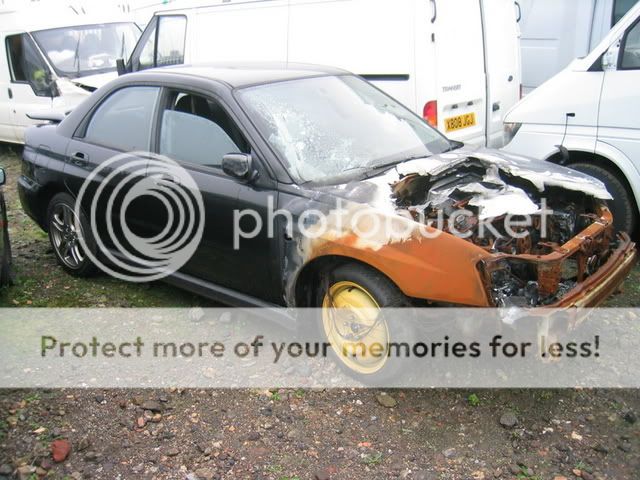
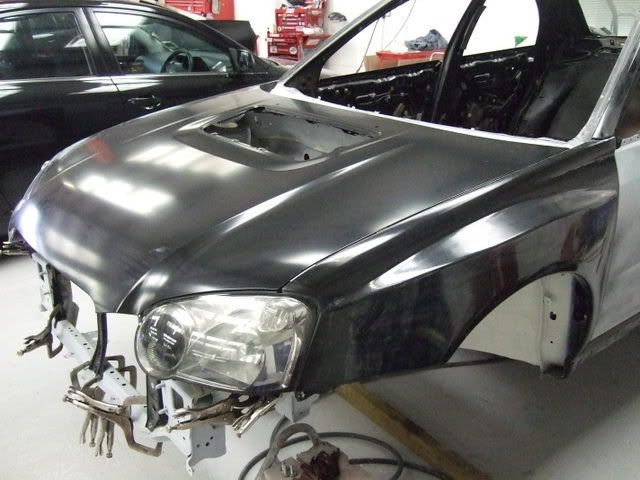
It started off when I bought a 2003 WRX back in August 2006, which had had a bit of a fire.. :shock:
As can be seen from the pics, it had got a touch hot, especially in the engine bay area, which had sustained most of the damage.
The interior also was a bit of a mess, mainly due to smoke damage.
Here is what I bought...

I am obviously quite lucky, in that I work in the trade, and have all the facilities at my disposal to carry out all the work myself.
Even though, this job is being carried out on a 'As I can afford it basis', so is being done in various stages, due to finances and time constraints...
First job was to strip all the crusty burnt stuff out of the car, mainly due to the toxic nature of the remains, and of course to throw it all in the skip...
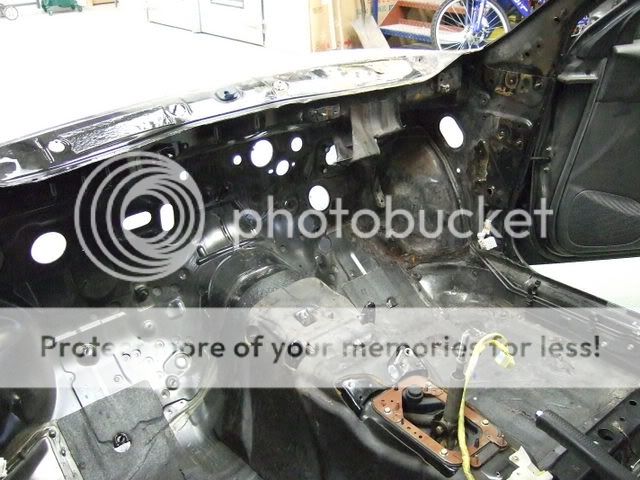
All the interior, and the engine bay area were stripped completely, and the engine bay was shot blasted, to clean up all the metal.
This was carried out by a mobile blaster, who normally blasts buildings, for the bargain price of �50.00.
Well worth it, took him about an hour to do something that would have took me days to complete, and still would not have been as good.
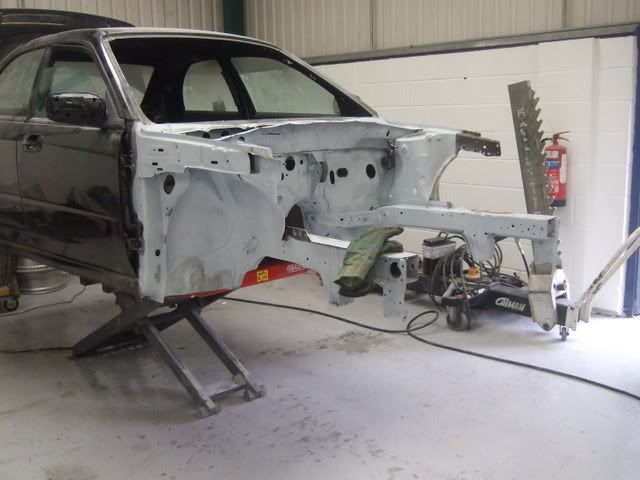
Due the fire, all of the outer front body panels were scrap, and the some of the structural panels in the engine bay wre damaged and would need replacing.
The front panels and cross members were also badly damaged, probably because of what would appear to be the attempts made by the Fire Services to open the bonnet at the time of the fire, so these too would need replacing, and have been removed.
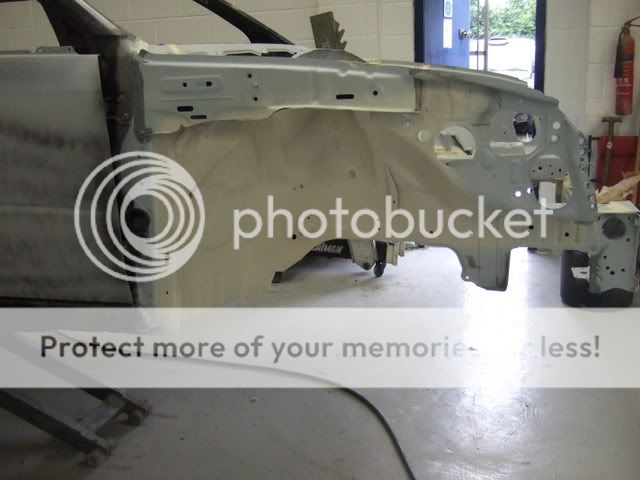
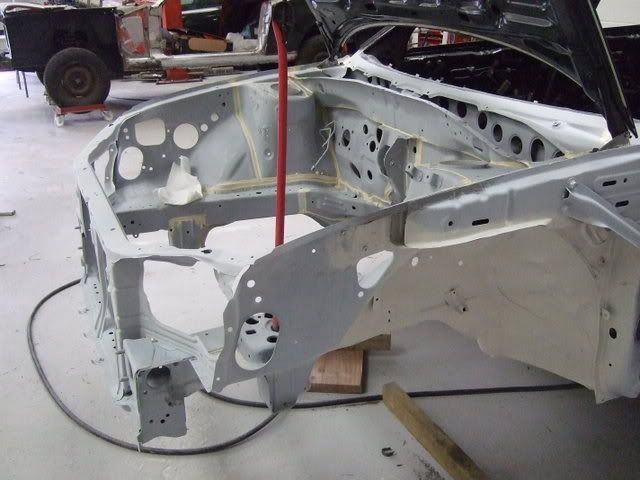
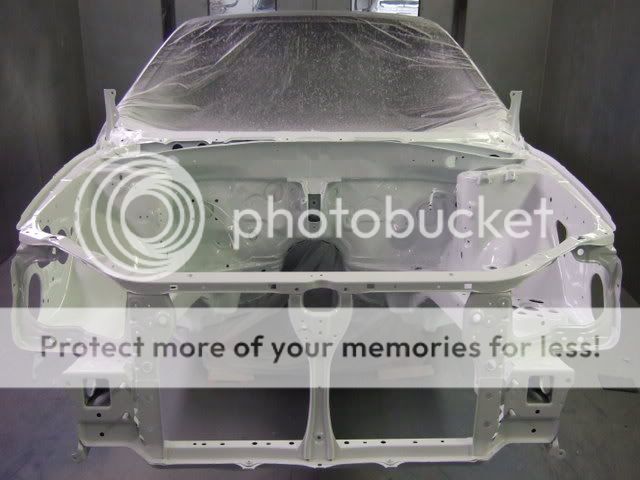
Here it is once shotblasted, and with a quick coat of etching primer to avoid any rusting...
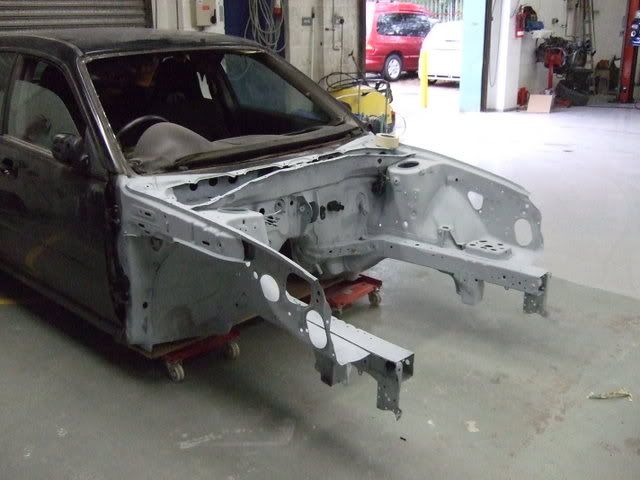
The inner wings were a bit distorted as well, so these were removed, ready for new panels to be fitted.
I managed to get hold of a front cross member set up, along with inner wings from a breakers up in fleetwood ( ScoobyTeknixUK the North West Subaru Performance Specialists. ) which not only makes the job a bit easier, but cheaper too
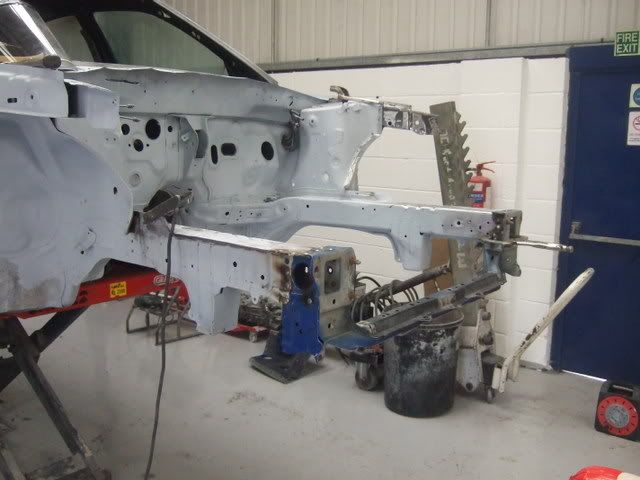
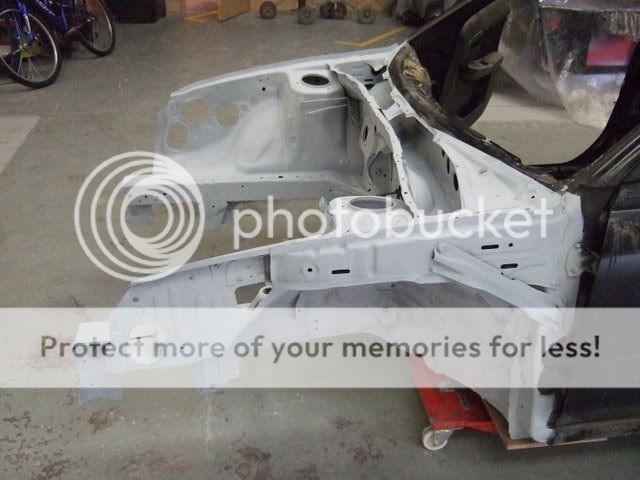
Here you can see where the new (used) panels have been welded into place, along with a few coats of primer, again to avoid any surface corrosion.
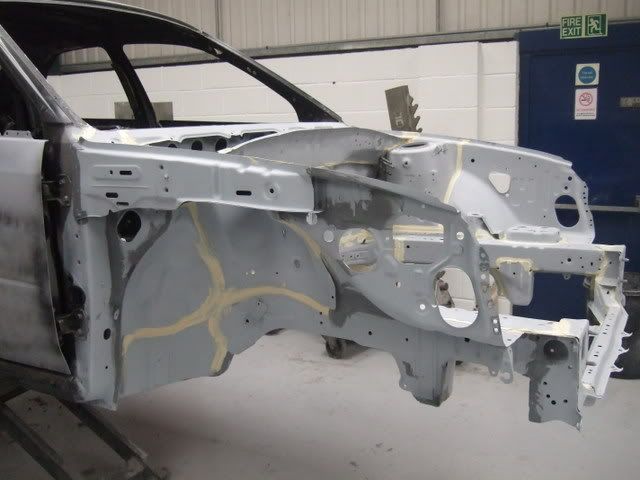
You can also see where all the seams have been sealed up, due to the original being burnt off.
With all the underseal protection also being burnt off, I thought it wise to replace this, so a few coats of stonechip have been applied to the required areas.
Next stage is to purchase new front panels from the dealers , and get it looking at least like a Scoob again
It started off when I bought a 2003 WRX back in August 2006, which had had a bit of a fire.. :shock:
As can be seen from the pics, it had got a touch hot, especially in the engine bay area, which had sustained most of the damage.
The interior also was a bit of a mess, mainly due to smoke damage.
Here is what I bought...
I am obviously quite lucky, in that I work in the trade, and have all the facilities at my disposal to carry out all the work myself.
Even though, this job is being carried out on a 'As I can afford it basis', so is being done in various stages, due to finances and time constraints...
First job was to strip all the crusty burnt stuff out of the car, mainly due to the toxic nature of the remains, and of course to throw it all in the skip...
All the interior, and the engine bay area were stripped completely, and the engine bay was shot blasted, to clean up all the metal.
This was carried out by a mobile blaster, who normally blasts buildings, for the bargain price of �50.00.
Well worth it, took him about an hour to do something that would have took me days to complete, and still would not have been as good.
Due the fire, all of the outer front body panels were scrap, and the some of the structural panels in the engine bay wre damaged and would need replacing.
The front panels and cross members were also badly damaged, probably because of what would appear to be the attempts made by the Fire Services to open the bonnet at the time of the fire, so these too would need replacing, and have been removed.
Here it is once shotblasted, and with a quick coat of etching primer to avoid any rusting...
The inner wings were a bit distorted as well, so these were removed, ready for new panels to be fitted.
I managed to get hold of a front cross member set up, along with inner wings from a breakers up in fleetwood ( ScoobyTeknixUK the North West Subaru Performance Specialists. ) which not only makes the job a bit easier, but cheaper too
Here you can see where the new (used) panels have been welded into place, along with a few coats of primer, again to avoid any surface corrosion.
You can also see where all the seams have been sealed up, due to the original being burnt off.
With all the underseal protection also being burnt off, I thought it wise to replace this, so a few coats of stonechip have been applied to the required areas.
Next stage is to purchase new front panels from the dealers
, and get it looking at least like a Scoob again
Last edited by Neil..; Jan 16, 2009 at 04:25 PM.
Next up, new panels and goodies.... 
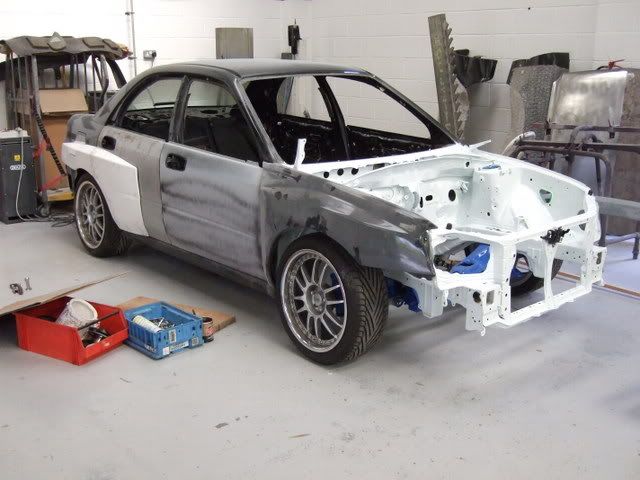
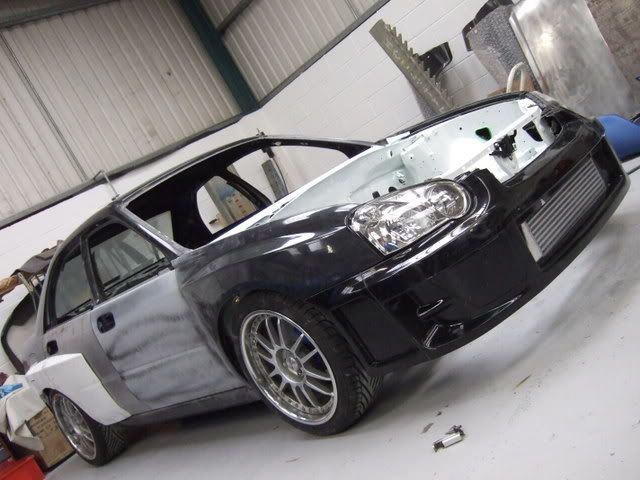
OK, got new front panels, so time to line everything up and see what it's gonna look like..
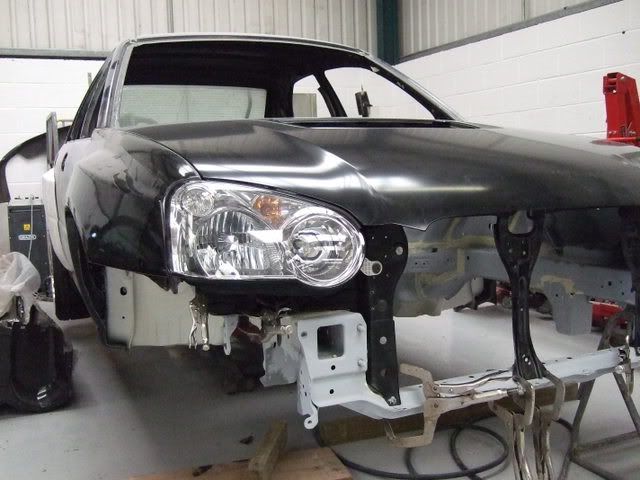
Front wings are wide arched, and are fibreglass, and as such I expected some fitting issues.
However, they are an extremely good fit, and line up with the doors/bonnet and lights as factory intended.
The front wings are from Darren at www.a-b-w.co.uk,and are good value IMHO.
Here is the front all welded up and ready for paint..
Now comes the part the takes the longest amount of time...
What colour to go for... :roll:
OK, got new front panels, so time to line everything up and see what it's gonna look like..
Front wings are wide arched, and are fibreglass, and as such I expected some fitting issues.
However, they are an extremely good fit, and line up with the doors/bonnet and lights as factory intended.
The front wings are from Darren at www.a-b-w.co.uk,and are good value IMHO.
Here is the front all welded up and ready for paint..
Now comes the part the takes the longest amount of time...
What colour to go for... :roll:


The replaced panels were distorted due to heat.
Although a lot of measurements were made to check the straightness of the main chassis rails beforehand, the new panels simply sloted into place, and the front panels are lined up using the wings/bonnet and lights as a guide.
Once these parts all gap up nicely, then you can't go far wrong.
Trending Topics


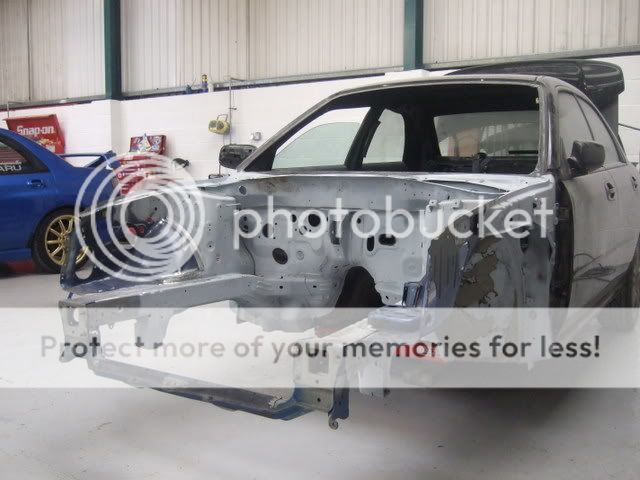
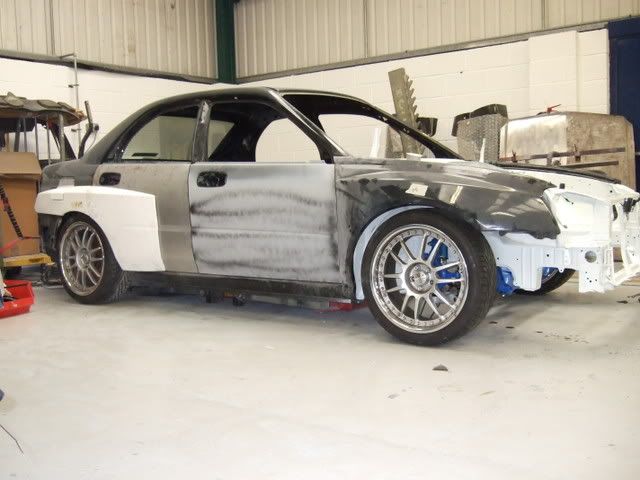
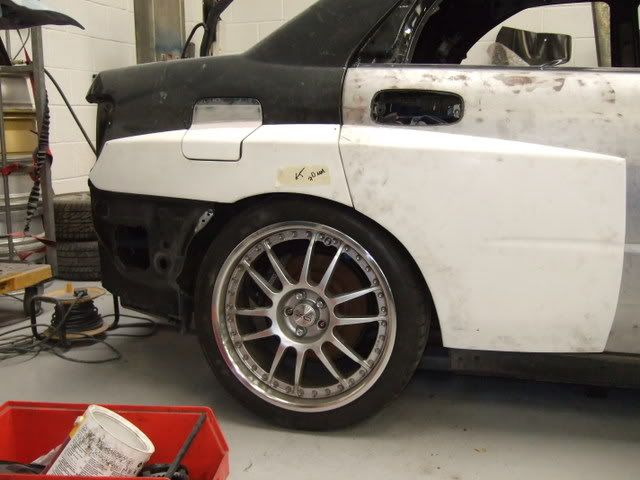
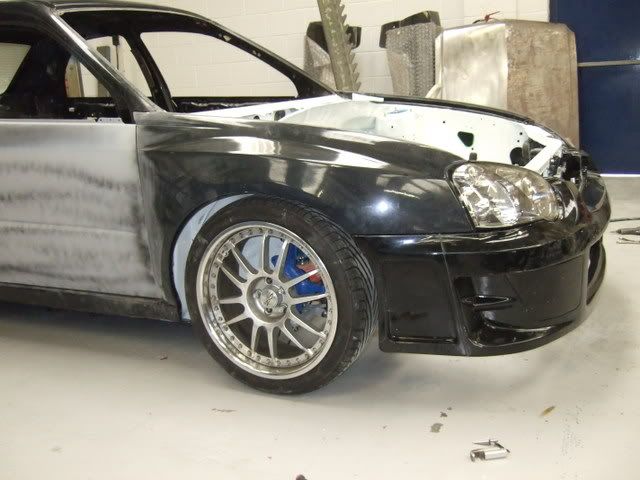
As can be seen from the front pics, the wide arches are simply replacement front wings, the rear however is a bit more complex..
Here's are some shots showing one side, roughly in place..
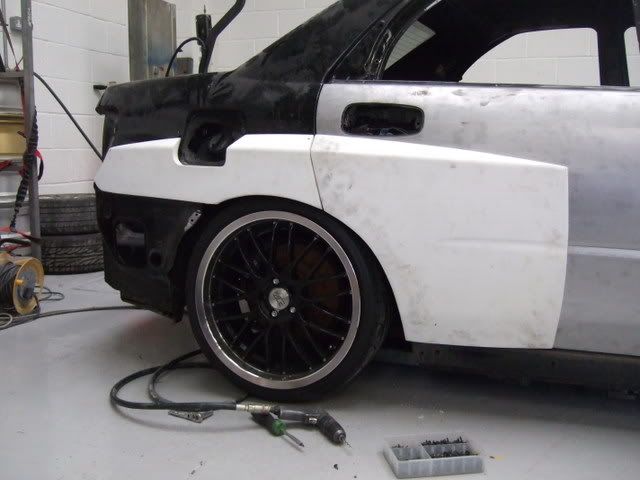
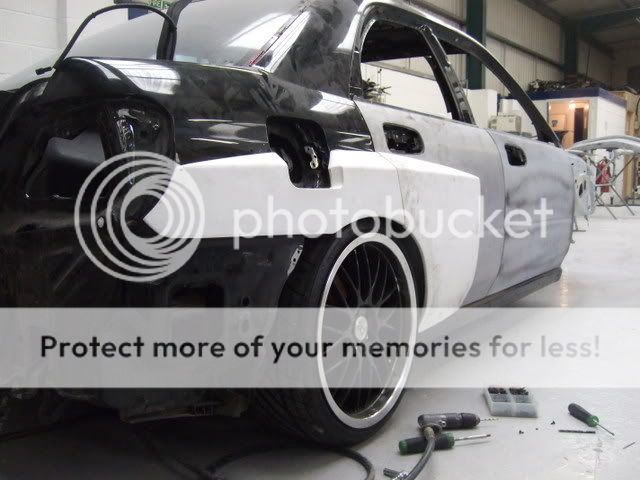
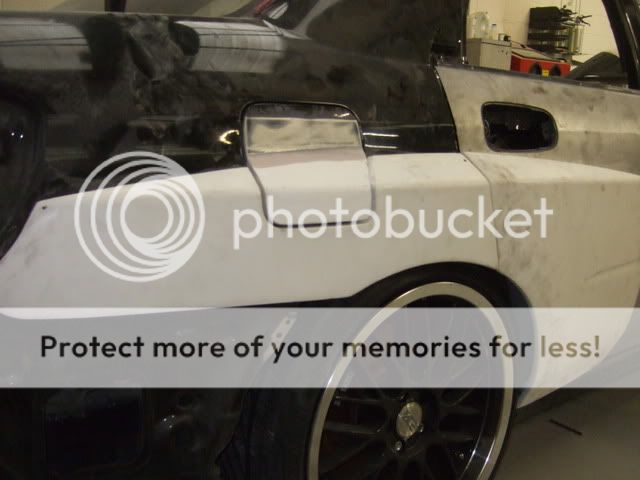

With the new arches in place, the next job would be to cut out the original rear arches, in order to gain clearance for the new rear axle width.
Before I carry this out though, I need to sort out the ride height, suspension travel and the size of wheel neccesary..
I have roughly calculated that I am going to need a 9" wide rim, with an ET of 15-25mm, in order to fill the arches..
But I don't know if that will be too much for the front, so I'm going to get the front suspension all built up, and get the car at normal ride height and try some wheels on.
Problem is, getting wheels at that size/offset, means either getting a set made, or sending my existing OZ wheels back to Italy to be altered.
Both are going to be a bit costly, so I need to make sure I work it out accurately
The wheels shown in the pics for reference are 8.5"x18" with an ET of 35mm, bolted on with 10mm spacers for the time being, and they are just a bit too narrow for the rear arches as they stand by about 10mm (depending on camber angle).
Gets a bit complicated for my brain trying to work all these measurements out")
Here's are some shots showing one side, roughly in place..
With the new arches in place, the next job would be to cut out the original rear arches, in order to gain clearance for the new rear axle width.
Before I carry this out though, I need to sort out the ride height, suspension travel and the size of wheel neccesary..
I have roughly calculated that I am going to need a 9" wide rim, with an ET of 15-25mm, in order to fill the arches..
But I don't know if that will be too much for the front, so I'm going to get the front suspension all built up, and get the car at normal ride height and try some wheels on.
Problem is, getting wheels at that size/offset, means either getting a set made, or sending my existing OZ wheels back to Italy to be altered.
Both are going to be a bit costly, so I need to make sure I work it out accurately
The wheels shown in the pics for reference are 8.5"x18" with an ET of 35mm, bolted on with 10mm spacers for the time being, and they are just a bit too narrow for the rear arches as they stand by about 10mm (depending on camber angle).
Gets a bit complicated for my brain trying to work all these measurements out
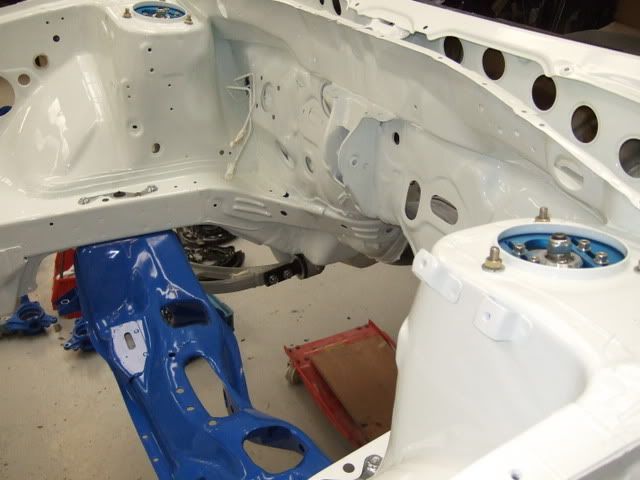
Managed to get hold of some rather nice powder coated suspension components this week,along with a box of shiney nuts/bolts and brackets, courtesy of someone else's unfinished project 
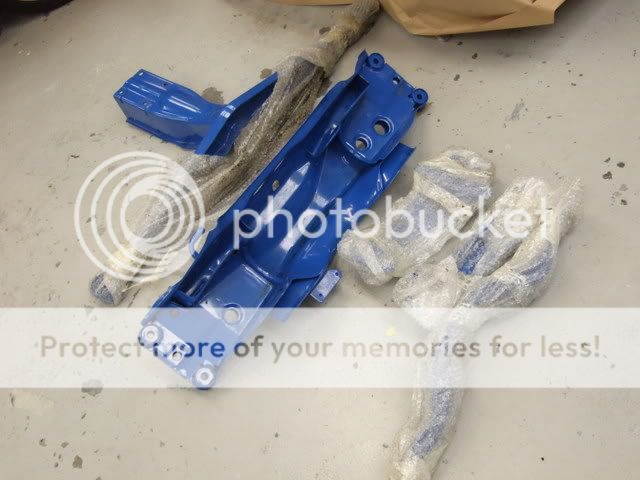
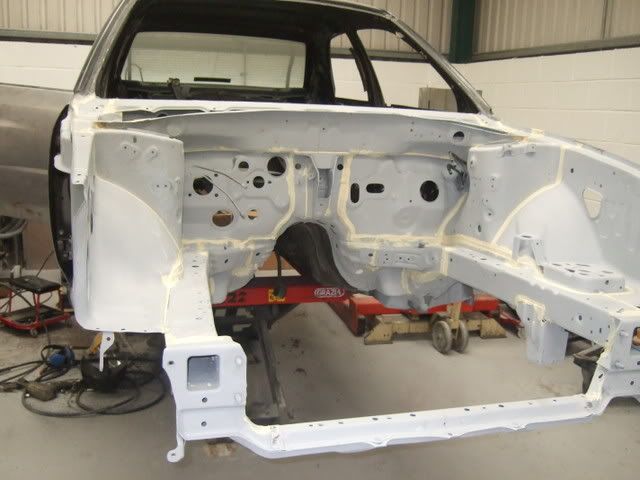
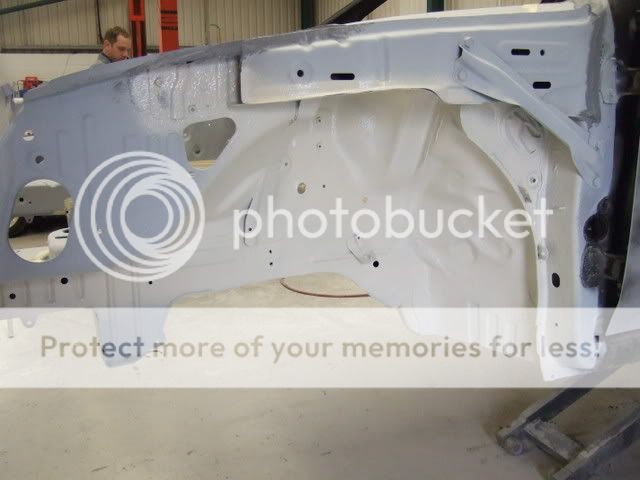
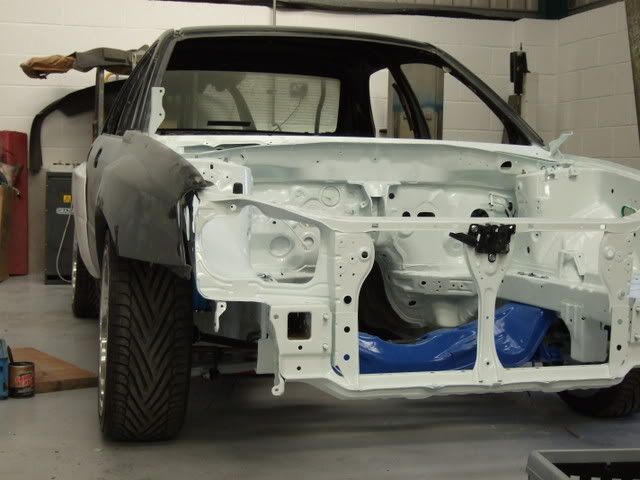
I've also managed to get some paint thrown at it..
Here's the engine bay during paint..

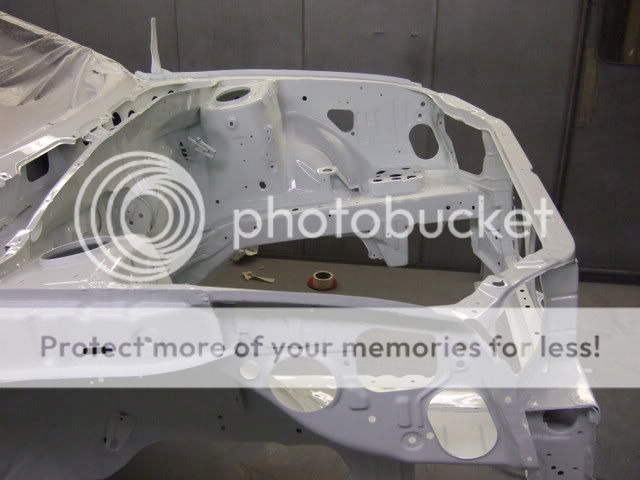
White is the new black...apparently..
I've also managed to get some paint thrown at it..
Here's the engine bay during paint..
White is the new black...apparently..
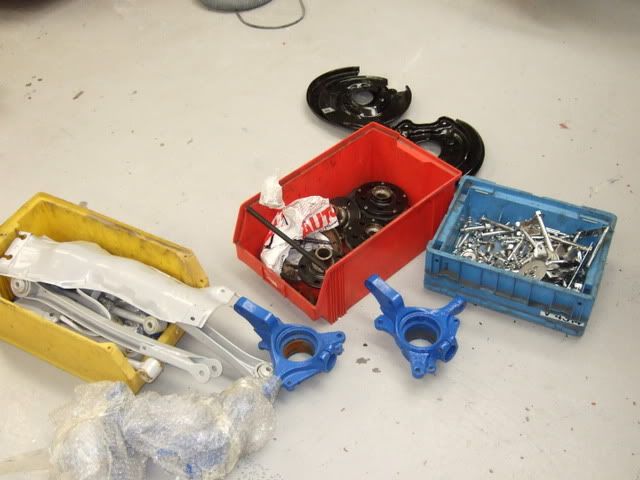
Also, I thought it would be rude not to get some of them luverly bits bolted upto the car..
The bottom arms even came with new ball joints
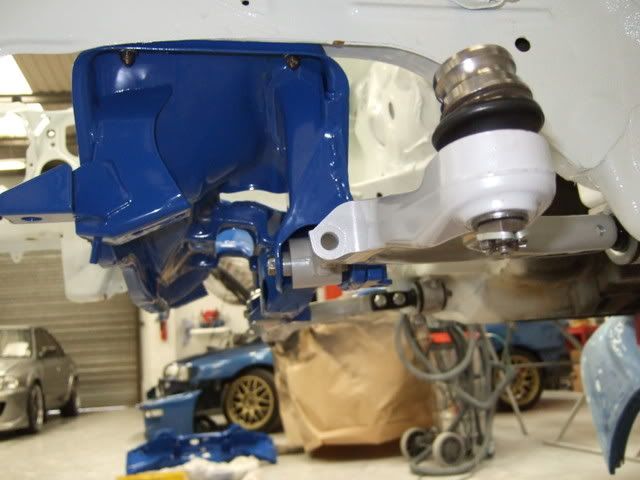
And a little shot of a nice chrome bracket, which won't be seen once built up
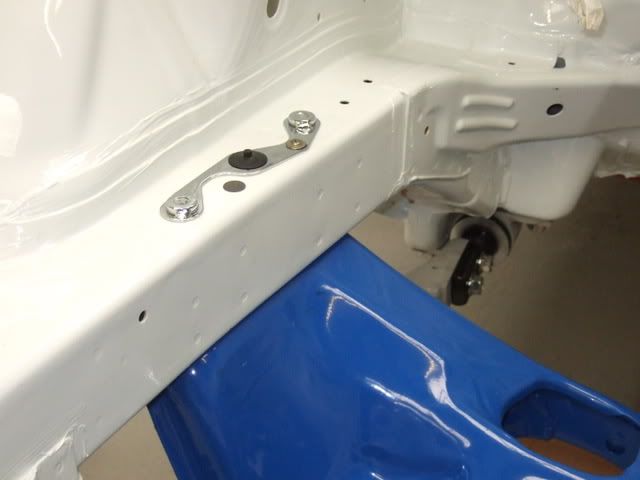
Next job is going to get the front hubs built up with new wheel bearings, and back on its wheels, so I can determine ride height for clearance issues..
I have a newage WRX steering rack to go on, but I also have a rack off an STi8 available as well.
I'm not sure if the STi rack would be a better option over the WRX one...?
The bottom arms even came with new ball joints
And a little shot of a nice chrome bracket, which won't be seen once built up
Next job is going to get the front hubs built up with new wheel bearings, and back on its wheels, so I can determine ride height for clearance issues..
I have a newage WRX steering rack to go on, but I also have a rack off an STi8 available as well.
I'm not sure if the STi rack would be a better option over the WRX one...?

Going to look very nice indeed Neil, like the rest of the scoobs you have done.
I would have done the engine bay black, but thats just my option if i was doing it.
Right, to send that email to you now!
S!
I would have done the engine bay black, but thats just my option if i was doing it.
Right, to send that email to you now!
S!
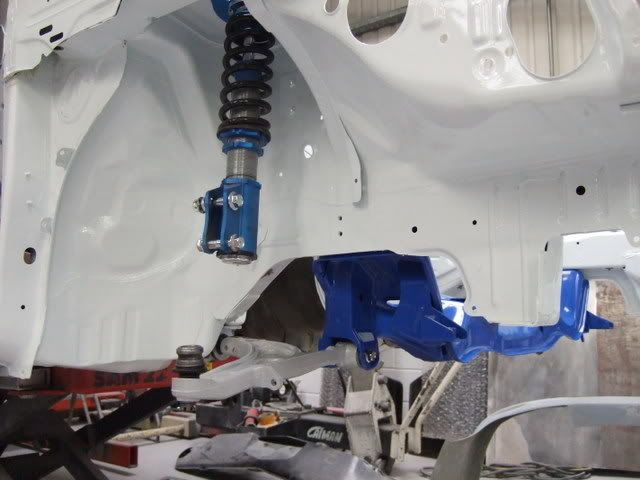
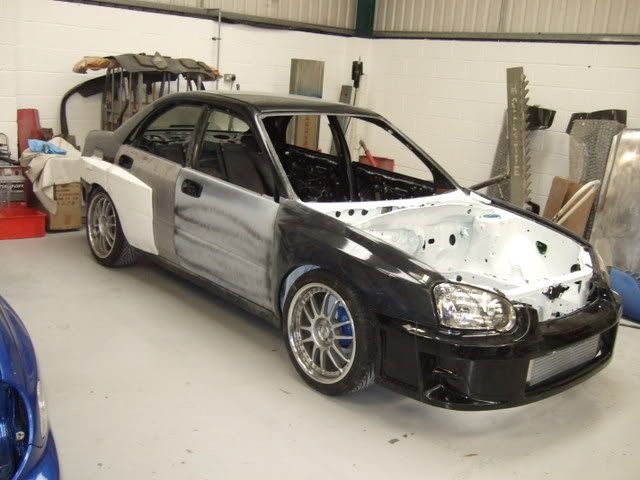
Got some new bearings fitted today, along with the front suspension temporarily built up, and got it down on its wheels tonight.
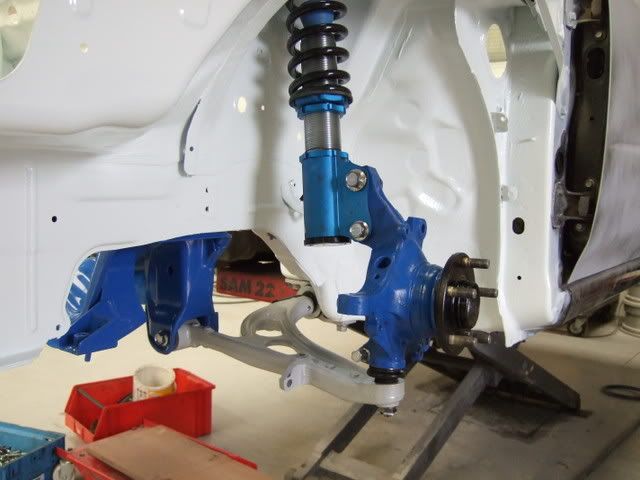
Looking a bit on the high side at first, although the camera angle doesn't quite show it...
Just dropped it 25mm all round, and it's getting there..
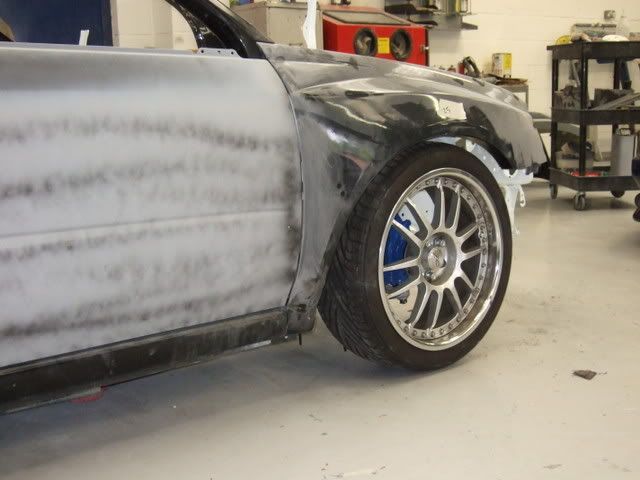
Just need to try and work out what size wheels I definately need now, as the ones on it are just too skinny...
Then I can attack the rear arches for clearance, and get all the underside and inner rear arches looking like the front (not a job I am looking forward to).
Also, with the rack attached, the steering arms look like they are pointing upwards already, so I am a little concearned regarding bump steer
Not sure if this is a major problem on Scoobs..?
Looking a bit on the high side at first, although the camera angle doesn't quite show it...
Just dropped it 25mm all round, and it's getting there..
Just need to try and work out what size wheels I definately need now, as the ones on it are just too skinny...
Then I can attack the rear arches for clearance, and get all the underside and inner rear arches looking like the front (not a job I am looking forward to).
Also, with the rack attached, the steering arms look like they are pointing upwards already, so I am a little concearned regarding bump steer
Not sure if this is a major problem on Scoobs..?


Scooby Regular
iTrader: (2)
Joined: Mar 2005
Posts: 858
Likes: 0
From: sunny stockton in a 300bhp scooby
hi neil
i see im not the only one thats bloody mad enough to take something like this on. wish i had my old workshop back. getting bloody tight in my garage lol. the powder coated suspension is the dogs. oh no not something else i might do. that is some job to take on m8. i know your in the trade. but even so a big job by anyone standards, really looking forward to the rest of the rebuild, im at the fiddlly stage custom fittings for instruments etc, but still enjoying it got my suspension but a look of work before that goes on.
keep up the good work cracking thread
cheers mick
Cheers chaps..
Mick, if you are thinking of powder coating suspension parts etc..., then I will have a spare set available, which you could get powder coated, and then fit it without the car being off the road for too long...
Mick, if you are thinking of powder coating suspension parts etc..., then I will have a spare set available, which you could get powder coated, and then fit it without the car being off the road for too long...
Scooby Regular
iTrader: (2)
Joined: Mar 2005
Posts: 858
Likes: 0
From: sunny stockton in a 300bhp scooby
and the rest of the transformation is going well. enjoying it bit tight in the garage even though its a double. again thanks for the offer but i wil manage with mine have you sorted the drop yet. i think you were at 25mm
cheers
mick


Scooby Regular
Joined: May 2004
Posts: 11,341
Likes: 1
If it helps any, my hillclimb Sti V3 has zero bumpsteer (measured by Powerstation) with no mods and the lower alloy wishbones are level to the floor, ie horizontal looking at them from the front.
The car can get lower still by wheel/tyre size of course.
The car can get lower still by wheel/tyre size of course.


Cheers Graham, That's reassuring to know.
I will be keeping to 18" wheels, with a similar size side wall to the 225/40's that are on it at the mo, so the wheel/car height should be pretty much what it is now.
As it is now, the car body is sitting 40mm lower than a std STi, measured at the B post window.
At the very most I will drop the car another 10mm, depending on clearance issues.
RON, I work in a place that does a few scoobs, and I can't really say any more unfortunately myself..
Scooby Regular
iTrader: (2)
Joined: Mar 2005
Posts: 858
Likes: 0
From: sunny stockton in a 300bhp scooby
Cheers Graham, That's reassuring to know.
I will be keeping to 18" wheels, with a similar size side wall to the 225/40's that are on it at the mo, so the wheel/car height should be pretty much what it is now.
As it is now, the car body is sitting 40mm lower than a std STi, measured at the B post window.
At the very most I will drop the car another 10mm, depending on clearance issues.
RON, I work in a place that does a few scoobs, and I can't really say any more unfortunately myself..
 let me think. i know
  eclipse motor bodies that the one. top lads cheers
 mick
Not done much else, but I did get my new front bumper support, so I thought I would try the front bumper on, and see how it fits.
Here's the front bumper support, nice lightweight alloy job
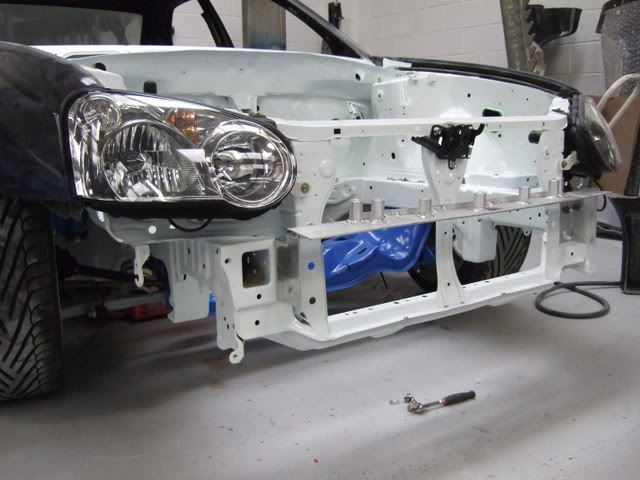
And here's a few pics with the bumper on.
Starting to look a bit like a car now
Oh, and here's what's behind the bumper
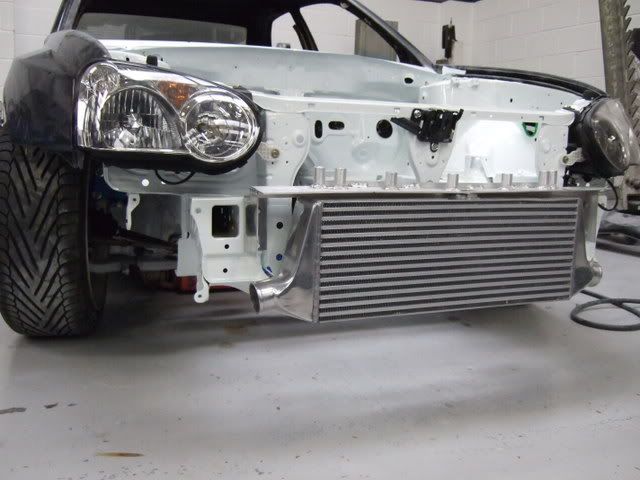
Think I'll get the intercooler anodised black though..
I really need to get the rear arches sorted out now, but the wheel situation is holding me up
Here's the front bumper support, nice lightweight alloy job
And here's a few pics with the bumper on.
Starting to look a bit like a car now
Oh, and here's what's behind the bumper
Think I'll get the intercooler anodised black though..
I really need to get the rear arches sorted out now, but the wheel situation is holding me up