Wide arch, 400+bhp Newage rebuild...For the road :)


 20 May 2008, 08:05 PM
#395
Scooby Regular
Thread Starter
iTrader: (35)

Join Date: Nov 2006
Posts: 2,784
Likes: 0
Received 0 Likes
on
0 Posts
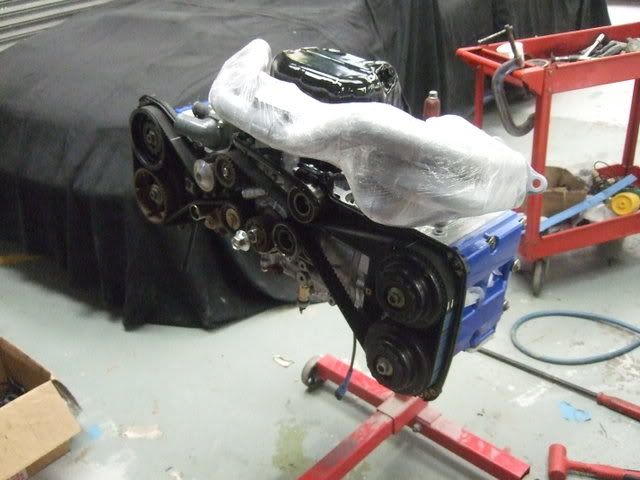
Today was the day that I went and picked up this...
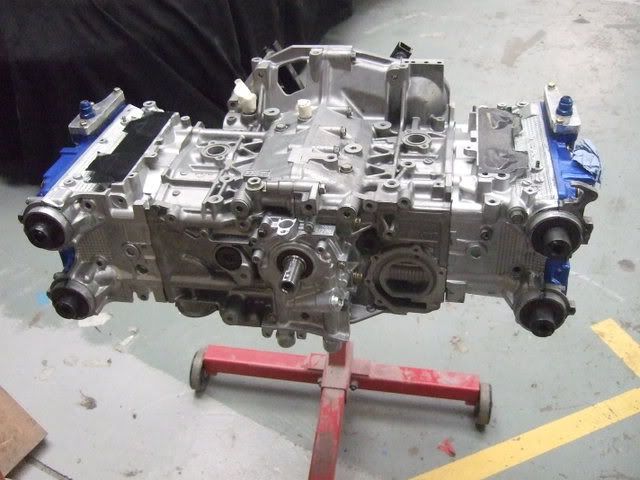
Big thanks to Paul at Zen for building this motor up for me, despite their busy time getting their time attack car sorted, and my weeks of mithering...
Anyway, the spec is..
2.5 engine
Bores honed to suit new Lateral pistons
Lateral fast road con rods
ARP con rod bolts
New EJ257 crank
ACL race bearings
RCM oil pump
Triple layer steel head gaskets
ARP head studs/nuts
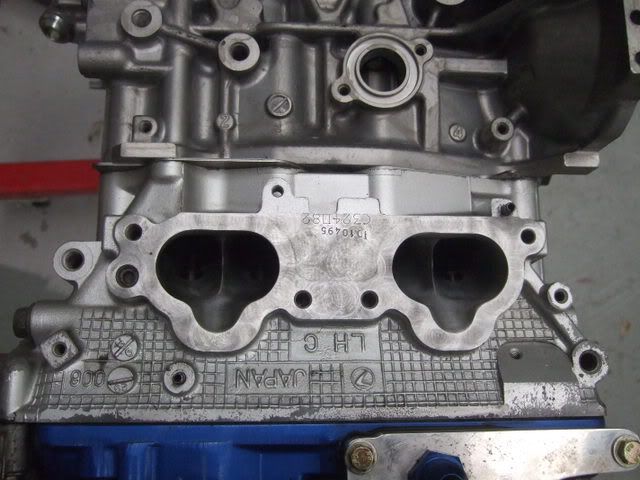
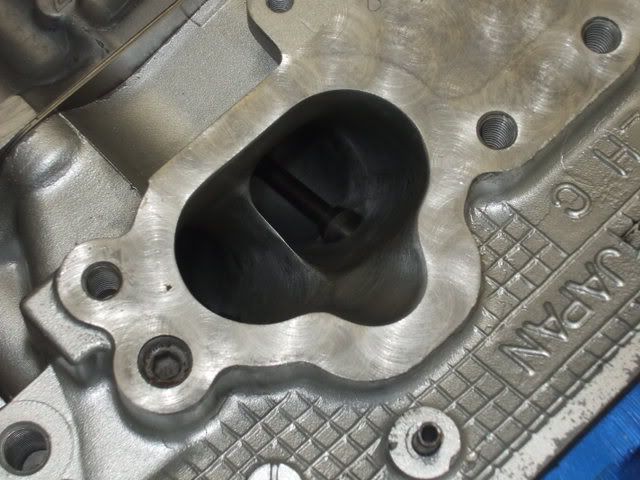
Gas flowed/ported STi5 cylinder heads
Piper cams (mild spec)
Few shots of the porting..
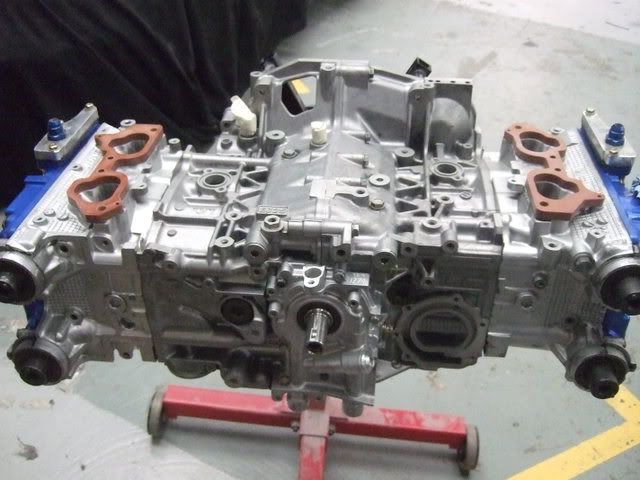
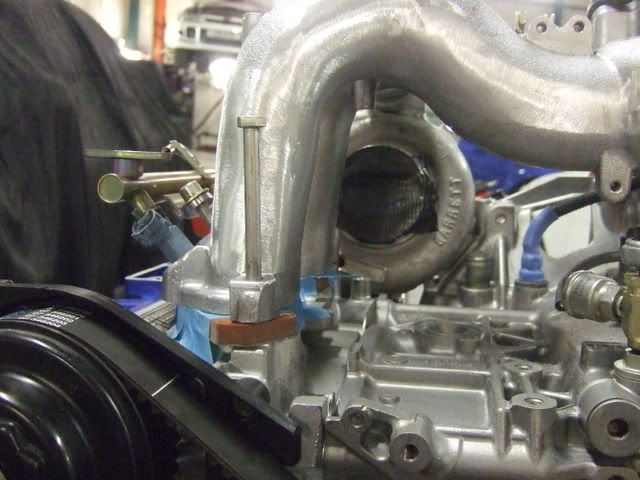
Insulating inlet manifold spacers fitted (big job I know )..
)..
Oil temp/pressure fittings..
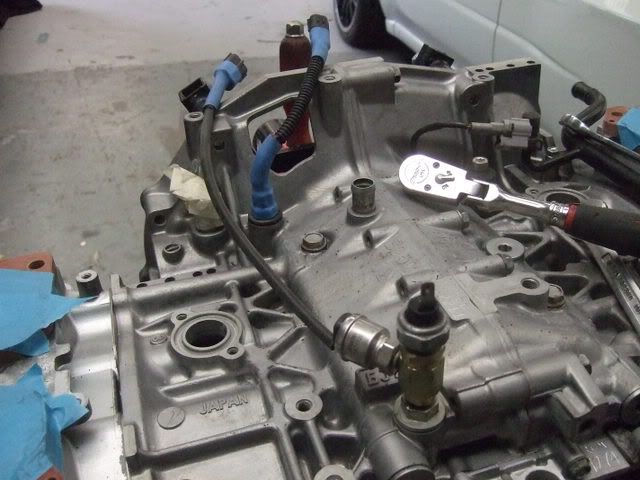
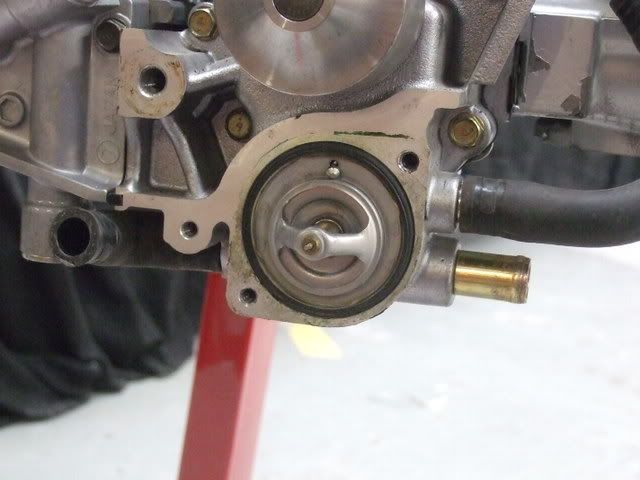
71 degree C thermostat..
Got to get some parts(nuts/bolts/brackets) re-plated, so hopefully should have the engine fully built and in the car over the coming weekend..
Big thanks to Paul at Zen for building this motor up for me, despite their busy time getting their time attack car sorted, and my weeks of mithering...
Anyway, the spec is..
2.5 engine
Bores honed to suit new Lateral pistons
Lateral fast road con rods
ARP con rod bolts
New EJ257 crank
ACL race bearings
RCM oil pump
Triple layer steel head gaskets
ARP head studs/nuts
Gas flowed/ported STi5 cylinder heads
Piper cams (mild spec)
Few shots of the porting..
Insulating inlet manifold spacers fitted (big job I know
)..Oil temp/pressure fittings..
71 degree C thermostat..
Got to get some parts(nuts/bolts/brackets) re-plated, so hopefully should have the engine fully built and in the car over the coming weekend..

 20 May 2008, 11:22 PM
#400

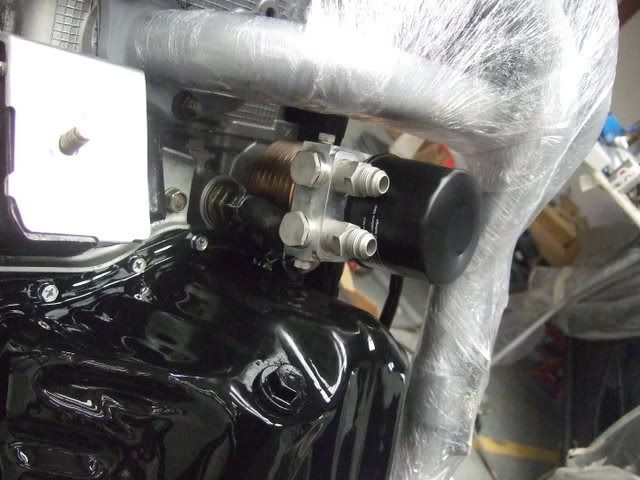
The one at the top is the oil pressure switch that the stock ECU uses, and activates the 'engine fugged' light on the dash. The one of the side is the Defi gauge pressure sender.
22 May 2008, 05:56 PM
#403
Scooby Regular
Thread Starter
iTrader: (35)
Join Date: Nov 2006
Posts: 2,784
Likes: 0
Received 0 Likes
on
0 Posts
Small update..
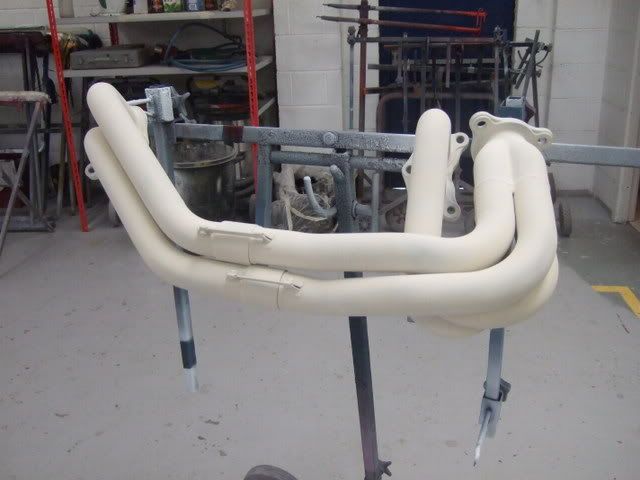
As mentioned earlier, I had my exhaust manifold/up-pipe ceramic coated. Whilst this is a great idea, it is also a PITA to keep clean, especially whilst working on the engine/car.
So, I came up with a cunning plan.
Here it is in all it's white virginity..
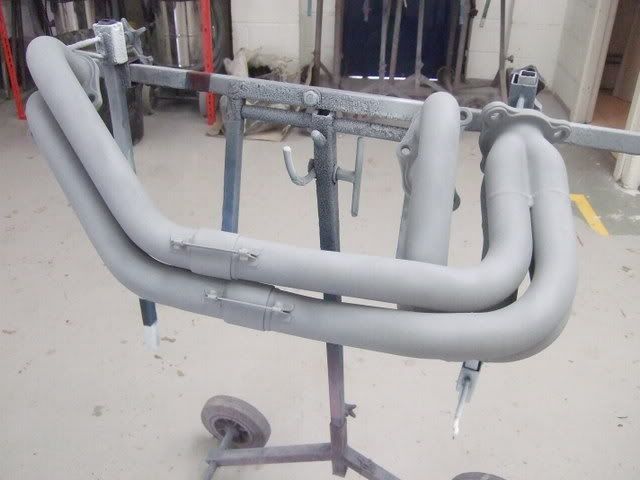
Then a coat or 2 of silver VHT paint, which in itself is not as prone to grime (although it looks a bit grey in the pics)..
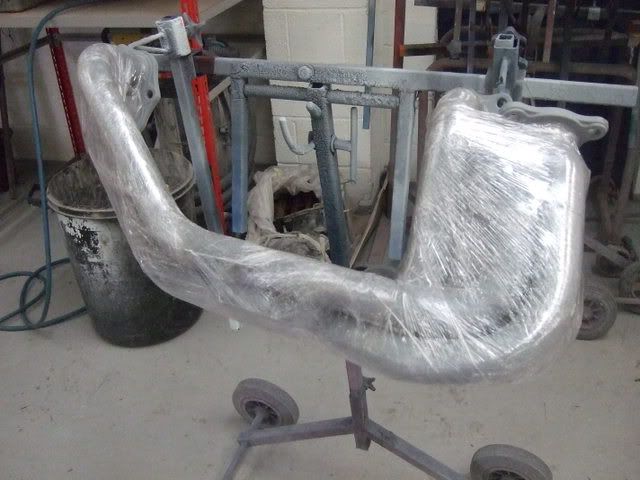
And then, a bit of cling film (must remember to remove on start up)...
And fitted to the engine, not a dirty hand print in sight
More updates to come...
As mentioned earlier, I had my exhaust manifold/up-pipe ceramic coated. Whilst this is a great idea, it is also a PITA to keep clean, especially whilst working on the engine/car.
So, I came up with a cunning plan.
Here it is in all it's white virginity..
Then a coat or 2 of silver VHT paint, which in itself is not as prone to grime (although it looks a bit grey in the pics)..
And then, a bit of cling film
(must remember to remove on start up)...And fitted to the engine, not a dirty hand print in sight
More updates to come...
22 May 2008, 06:48 PM
#404
Scooby Regular
Thread Starter
iTrader: (35)
Join Date: Nov 2006
Posts: 2,784
Likes: 0
Received 0 Likes
on
0 Posts
Few random pics of the engine..
Shiney sump with shiney bolts..
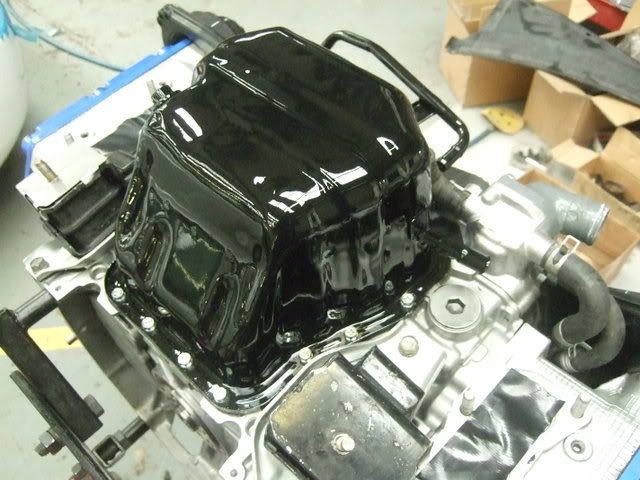
New oil/water modine, complete with take off for oil cooler pipework..
Parts various trail fitting..
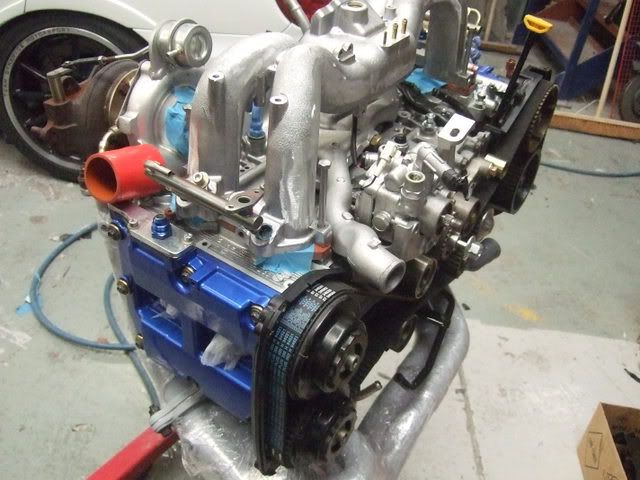
Progress can seem so slow sometimes when nothing is standard...
Shiney sump with shiney bolts..
New oil/water modine, complete with take off for oil cooler pipework..
Parts various trail fitting..
Progress can seem so slow sometimes when nothing is standard...
23 May 2008, 01:07 AM
#406
Scooby Regular

That does look good.. you doing something with the inlet manifold, or leaving it 'naked' like that??
Pretty handy spec too, should see you past your goal without too much hassle.
Cheers,
Grant
P.S: Price rec'd from the guy at CS, just gotta save the pennies and it'll be ordered up. Thanks for the info.
Pretty handy spec too, should see you past your goal without too much hassle.
Cheers,
Grant
P.S: Price rec'd from the guy at CS, just gotta save the pennies and it'll be ordered up. Thanks for the info.
23 May 2008, 10:22 AM
#407
Scooby Regular

Join Date: Oct 2005
Location: South Wales, near Cardiff
Posts: 741
Likes: 0
Received 0 Likes
on
0 Posts
Superb Neil and once again I am feeling much better after my "fix". Looking good, looking very good indeed.
Love the cling film - I almost choked on a mouthful of coffee, fortunately I didn't spray it all over the laptop . Hope all goes well this weekend, with the engine in, at least you will see a difference in the ride height at the front and hopefully it will help the car sit as you wanted it to.
Can't wait for the next update - loving this thread.
Keep up the good work, I am starting to wonder what else will be getting cling-filmed at this rate though. Do you suffer from a mild OCD related to cleanliness .
Have a great and very productive weekend!
Paul
Love the cling film - I almost choked on a mouthful of coffee, fortunately I didn't spray it all over the laptop
. Hope all goes well this weekend, with the engine in, at least you will see a difference in the ride height at the front and hopefully it will help the car sit as you wanted it to.Can't wait for the next update - loving this thread.
Keep up the good work, I am starting to wonder what else will be getting cling-filmed at this rate though. Do you suffer from a mild OCD related to cleanliness
.Have a great and very productive weekend!
Paul

 couldnt have put it better myself
26 May 2008, 12:49 PM
couldnt have put it better myself
26 May 2008, 12:49 PM
#411
Scooby Regular
Thread Starter
iTrader: (35)
Join Date: Nov 2006
Posts: 2,784
Likes: 0
Received 0 Likes
on
0 Posts
Few updates...
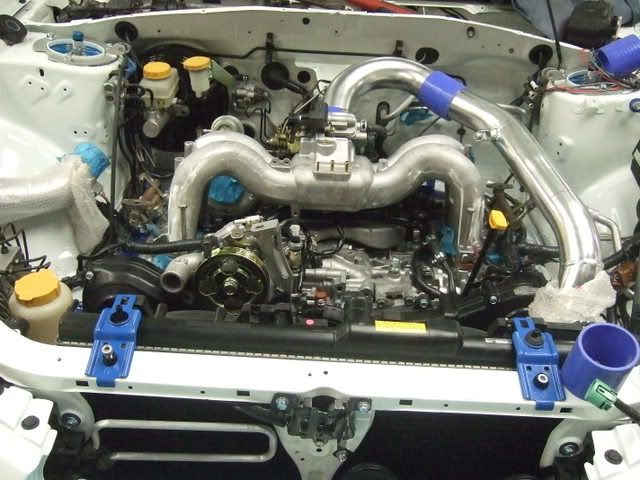
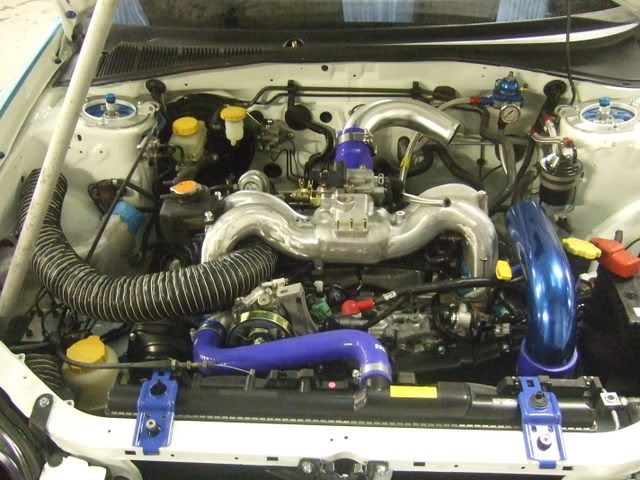
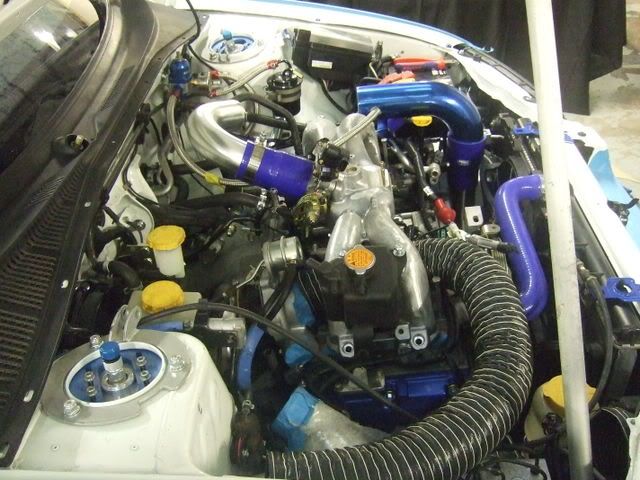
Firstly, it's in..
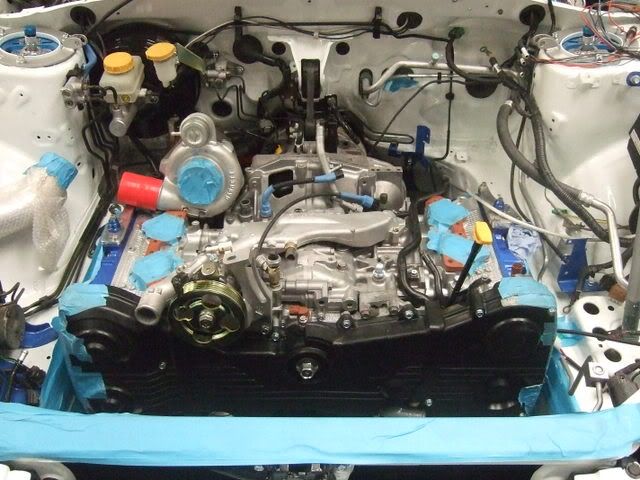
Standard engine loom now in place, with all the wiring/plugs for the tumbler valves removed..
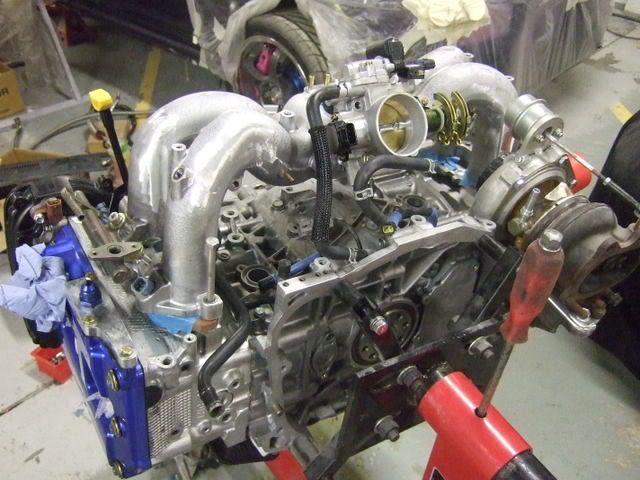
Position of turbo outlet, which now needs a 45 degree reducer to complete the join..
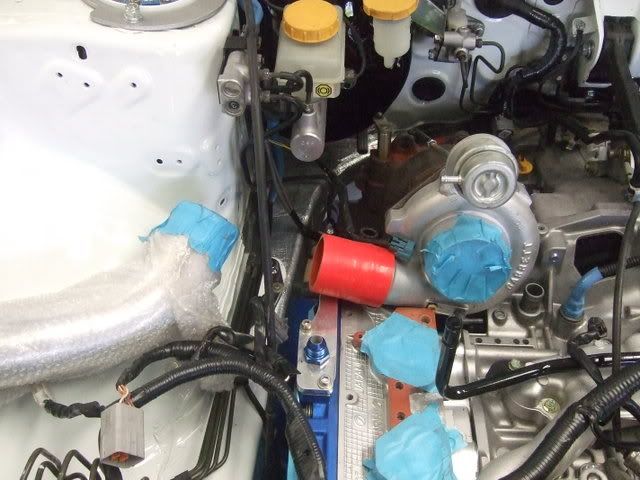
First mock up of inlet manifold/inlet pipework..
And with new version in progress..
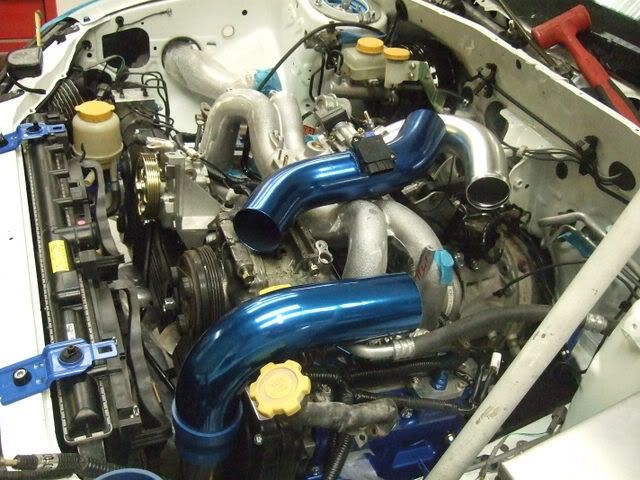
Trying to get as long and as straight a piece of 70-80mm pipework in place for the placement of the Maf element, but proving a bit tricky at the mo...
More to come..
Firstly, it's in..
Standard engine loom now in place, with all the wiring/plugs for the tumbler valves removed..
Position of turbo outlet, which now needs a 45 degree reducer to complete the join..
First mock up of inlet manifold/inlet pipework..
And with new version in progress..
Trying to get as long and as straight a piece of 70-80mm pipework in place for the placement of the Maf element, but proving a bit tricky at the mo...
More to come..
26 May 2008, 04:04 PM
#413
Scooby Regular

Join Date: Mar 2007
Location: In a world of my own.
Posts: 574
Likes: 0
Received 0 Likes
on
0 Posts
Holy hell!!!
This is the nicest build of any car i have ever seen. Your work is borderline genius and attention to detail is impeccable. I thinks its great that you keep the progress moving along at a nice steady rate instead of long gaps keeping us all in suspenders.
Great work Neil
Rich
This is the nicest build of any car i have ever seen. Your work is borderline genius and attention to detail is impeccable. I thinks its great that you keep the progress moving along at a nice steady rate instead of long gaps keeping us all in suspenders.
Great work Neil
Rich
26 May 2008, 08:56 PM
#414
Scooby Regular
Thread Starter
iTrader: (35)
Join Date: Nov 2006
Posts: 2,784
Likes: 0
Received 0 Likes
on
0 Posts
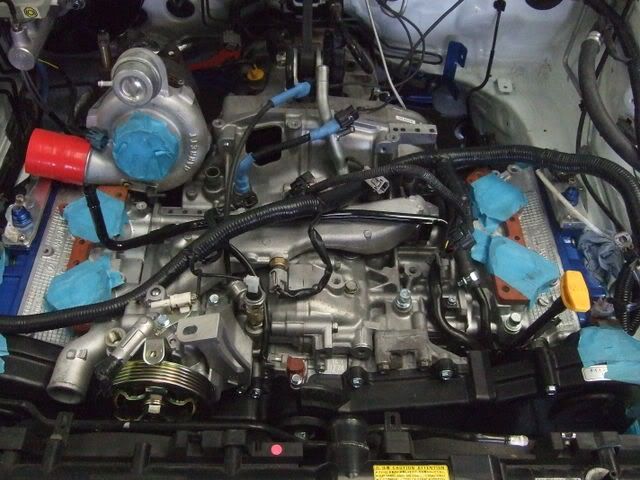
Managed to get a few little jobs out of the way..
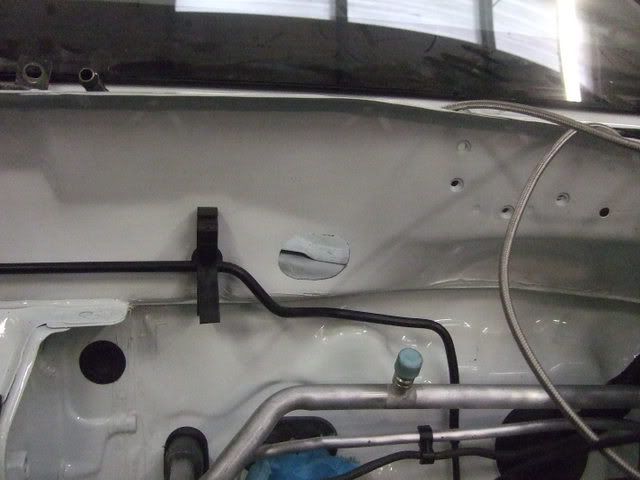
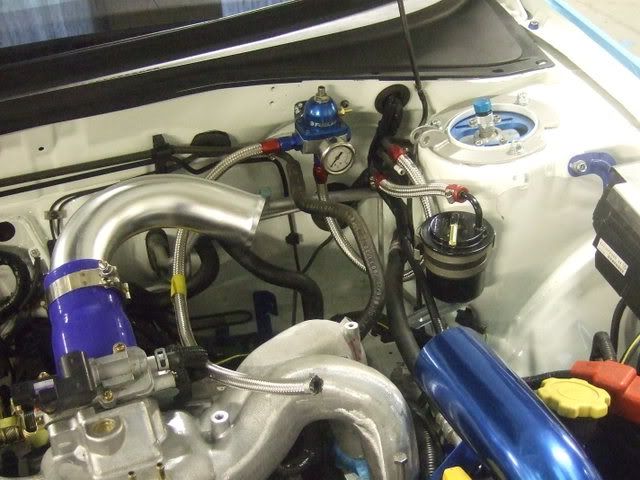
Defi wiring/sensor all hid in the scuttle area..
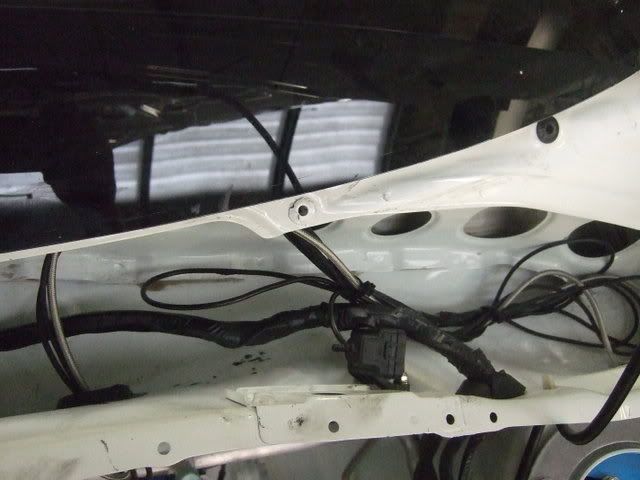
With wiring going through the bulkhead via dedicated grommet in this hole..
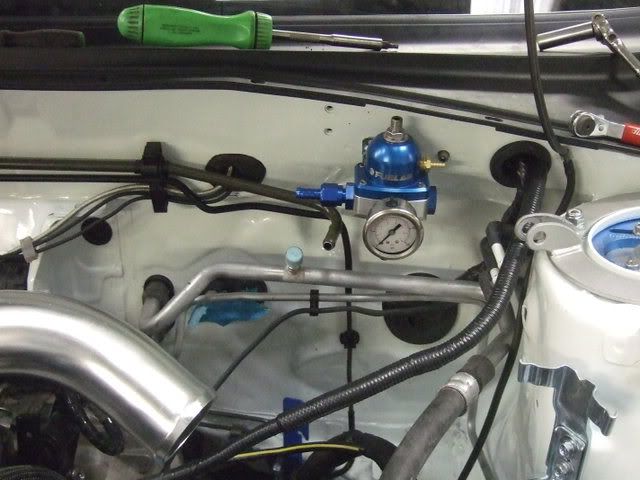
Et viola, complete with fitted fuel regulator..
Also got the MAF sensor wiring altered, and in place ready for connection.
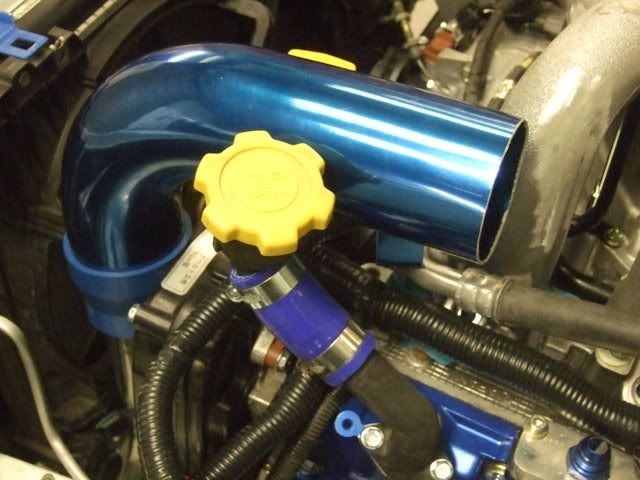
Also modified the oil filler neck to allow for the new pipework to pass through neater/straighter..
All battery cables are in place, along with new fabricated earth leads where neccesary...
Defi wiring/sensor all hid in the scuttle area..
With wiring going through the bulkhead via dedicated grommet in this hole..
Et viola, complete with fitted fuel regulator..
Also got the MAF sensor wiring altered, and in place ready for connection.
Also modified the oil filler neck to allow for the new pipework to pass through neater/straighter..
All battery cables are in place, along with new fabricated earth leads where neccesary...
26 May 2008, 09:11 PM
#415
Scooby Regular
Thread Starter
iTrader: (35)
Join Date: Nov 2006
Posts: 2,784
Likes: 0
Received 0 Likes
on
0 Posts
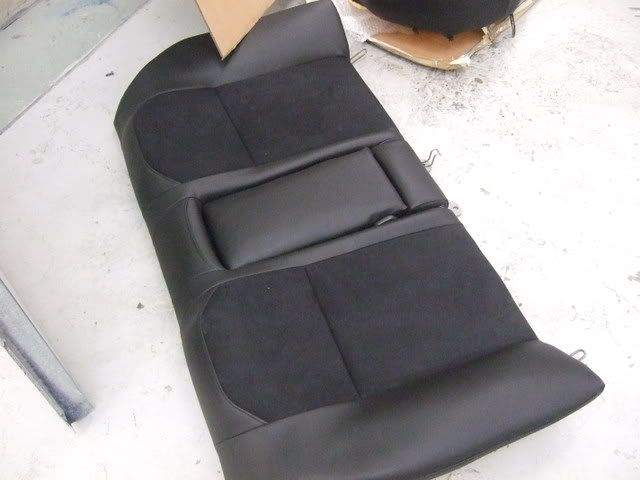
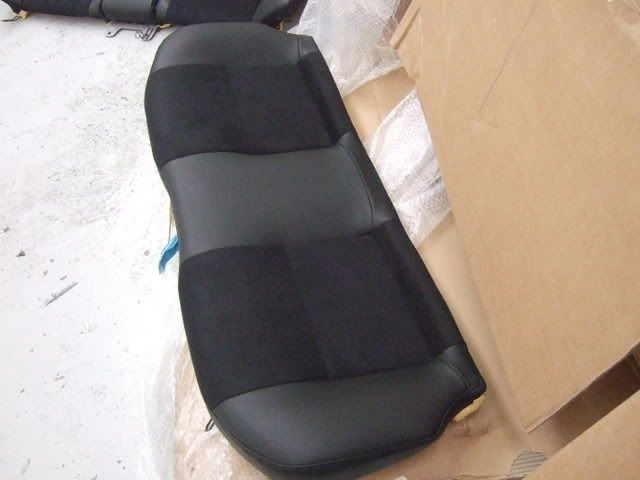
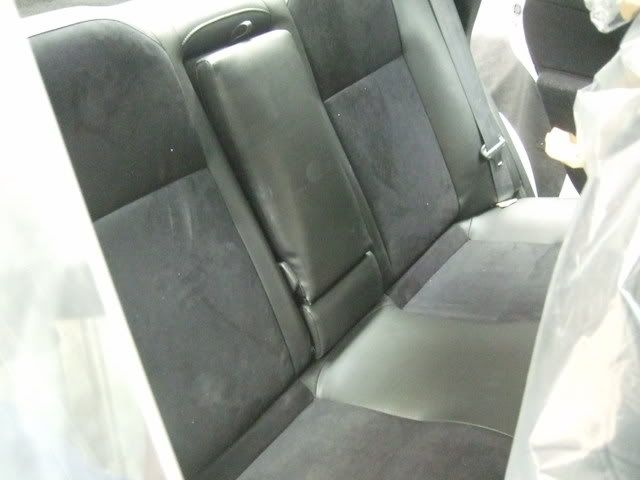
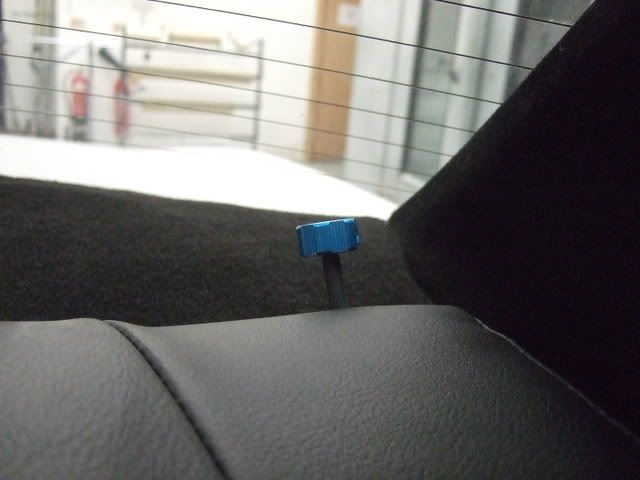
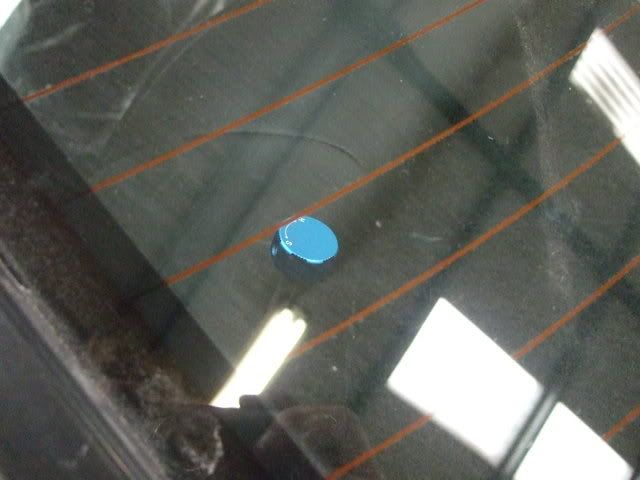
Quick correction here on an earlier post/idea...
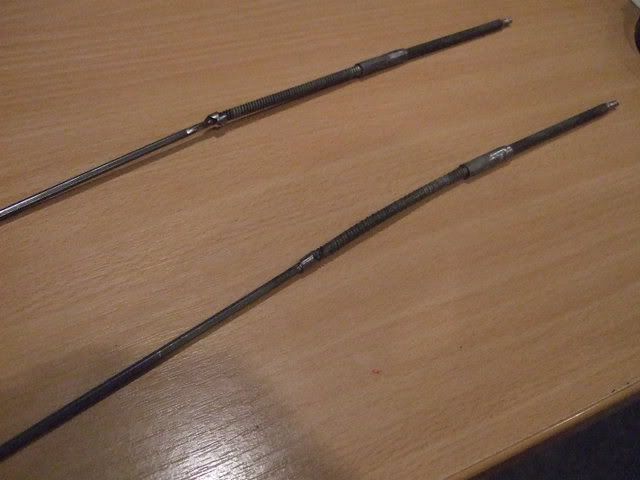
You may remember my rear suspension adjuster modifications I carried out...well once the rear seat was in place, they never worked..")
Basically this was due to the fact that the gap between the rear seat and the parcel shelf wasn't exactly straight, and the adjuster ended up at a bit of an angle..
So I had to modify the modified adjuster, using the remains of my flexible nut/bolt picker up thingie..
Like so..
Bit of heat shrink to tidy up, and in place with the old trusty cable tie collar device...

And with the seat in place, it actually works.
You may remember my rear suspension adjuster modifications I carried out...well once the rear seat was in place, they never worked..
Basically this was due to the fact that the gap between the rear seat and the parcel shelf wasn't exactly straight, and the adjuster ended up at a bit of an angle..
So I had to modify the modified adjuster, using the remains of my flexible nut/bolt picker up thingie..
Like so..
Bit of heat shrink to tidy up, and in place with the old trusty cable tie collar device...
And with the seat in place, it actually works.

 28 May 2008, 09:31 PM
#419
Scooby Regular
Thread Starter
iTrader: (35)
Join Date: Nov 2006
Posts: 2,784
Likes: 0
Received 0 Likes
on
0 Posts
Fuel rails..
As some of you may have gathered, I am not using a standard inlet manifold, and using one sourced for me by Paul @ Zen, which I am told is off a late legacy...
Anyway, it fits the engine, and gives me enough clearance for the inlet pipework.
However the injectors fit in, but the fuel rails do not mate up so easy..
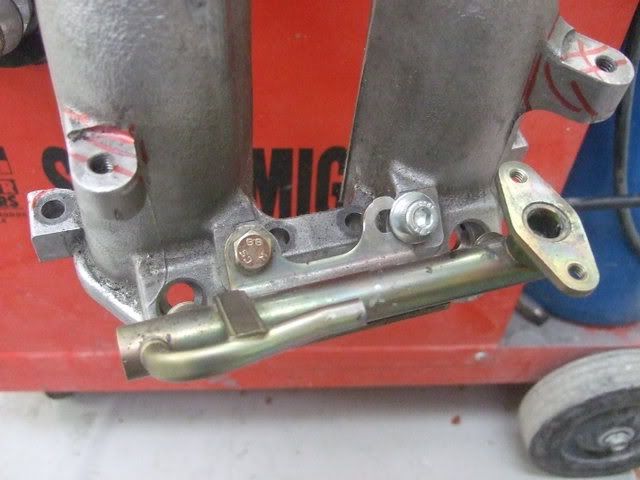
One hole is 11mm out, so had to come up with a solution, like so..
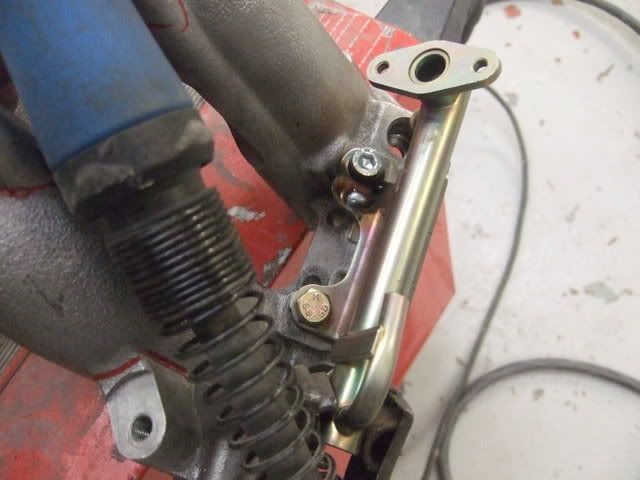
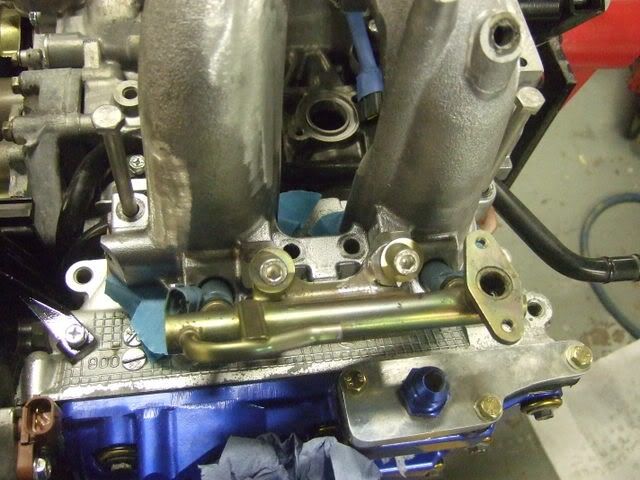
Bit of welding and grinding, and they fit.
I just need to get some spacers machined now to bolt it up nice...
As we speak the fuel rails are having -6 ends fitted to enable the use of braided hose and fittings..
Also this week has been a case of fit something, fit another thing, take first thing off as it no longer fits etc etc...
So jobs actually done are:-
Oil cooler sealed in its ducting.
Wastgate solenoid fitted/wired/plumbed in.
Some fuel lines fitted, along with filter.
Battery cables fitted, battery in.
Spent a full day working out why not a lot works electrically, only to realise that I have still more control units from under the dash to locate/fit..
But the main thing is that the fuel pump primes, and the starter feed is all ok...
Most coolant hoses are on/or in place.
Power steering reservoir in ts final place, and half plumbed.
I have pretty much sussed out what I need to complete the pipework to the throttle body and house the MAF, so kinda happy with that so far.
A few shots of dummy building (no smart jokes) and my work in progress...

Getting somewhere...
As some of you may have gathered, I am not using a standard inlet manifold, and using one sourced for me by Paul @ Zen, which I am told is off a late legacy...
Anyway, it fits the engine, and gives me enough clearance for the inlet pipework.
However the injectors fit in, but the fuel rails do not mate up so easy..
One hole is 11mm out, so had to come up with a solution, like so..
Bit of welding and grinding, and they fit.
I just need to get some spacers machined now to bolt it up nice...
As we speak the fuel rails are having -6 ends fitted to enable the use of braided hose and fittings..
Also this week has been a case of fit something, fit another thing, take first thing off as it no longer fits etc etc...
So jobs actually done are:-
Oil cooler sealed in its ducting.
Wastgate solenoid fitted/wired/plumbed in.
Some fuel lines fitted, along with filter.
Battery cables fitted, battery in.
Spent a full day working out why not a lot works electrically, only to realise that I have still more control units from under the dash to locate/fit..
But the main thing is that the fuel pump primes, and the starter feed is all ok...
Most coolant hoses are on/or in place.
Power steering reservoir in ts final place, and half plumbed.
I have pretty much sussed out what I need to complete the pipework to the throttle body and house the MAF, so kinda happy with that so far.
A few shots of dummy building (no smart jokes) and my work in progress...
Getting somewhere...
