
Frayz's little tuning update..


Scooby Regular
Joined: Feb 2007
Posts: 57
Likes: 0
Frayz,
Nice to see the build started, good luck with it all. Keep the pics coming!
I'd say you've got 2 options for the inlet manifold:
1. Crinkle Red. Ties up nicely with the CAI and the red pulleys, plus it's nice to have just a splash of colour under the bonnet.
2. Crinkle Black. Would need to paint the CAI, but would keep the whole induction path silver & black. Downside is the red pulleys wouldn't tie-in with anything then.
If you don't want to change pulleys then I'd stay with the red, but don't go glossy, it just doesn't look right in an engine bay.


Scooby Regular
Joined: Apr 2005
Posts: 7,623
Likes: 0
From: I've joined the Focus family
What about CF ??


Thread Starter
Joined: Sep 2005
Posts: 19,945
Likes: 2
From: "Engineering Perfection in Essex"
Truth be known i like the red, so i think i'll go with that. Might do the APS in black though.... dunno yet.
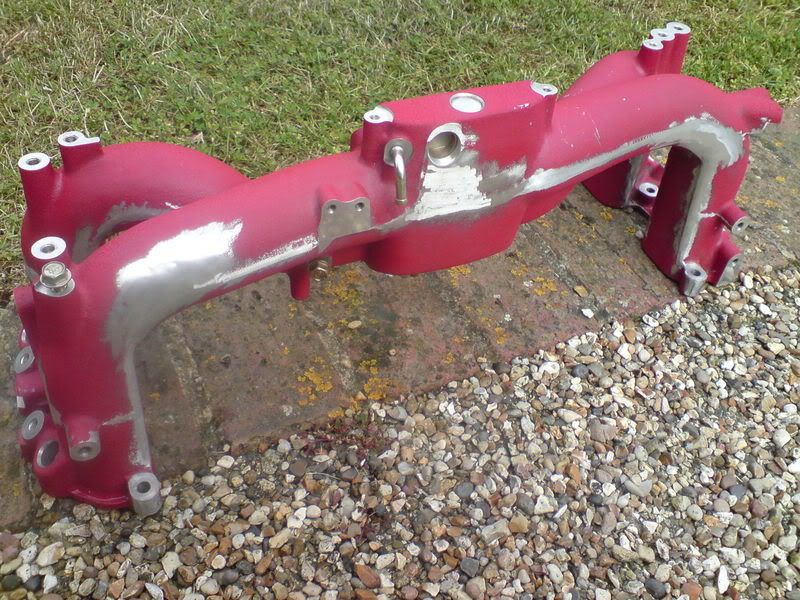
Heres what 4 hours with a die grinder on a manifold looks like.
Absolutely **** job to do. Its messy and awkward. Ive removed a few lugs that i wont need and have removed practically every casting mark i can get to. I also cleaned the sharp edges where the manifold runners are cast. This will provide a smooth area for the inlet hose to run along.
Now for some bead blasting, Nitro Moors and then a fresh coat of paint


Thread Starter
Joined: Sep 2005
Posts: 19,945
Likes: 2
From: "Engineering Perfection in Essex"
Yeah i think so, the manifold looks a right state now so anything will look better ha ha.
Hopefully Nitromoors it back to bare metal later and prep for paint. Its about all i can do at the mo whilst waiting for my crank to arrive. lol.
Hopefully Nitromoors it back to bare metal later and prep for paint. Its about all i can do at the mo whilst waiting for my crank to arrive. lol.


Thread Starter
Joined: Sep 2005
Posts: 19,945
Likes: 2
From: "Engineering Perfection in Essex"
Got a bit more done today guys.
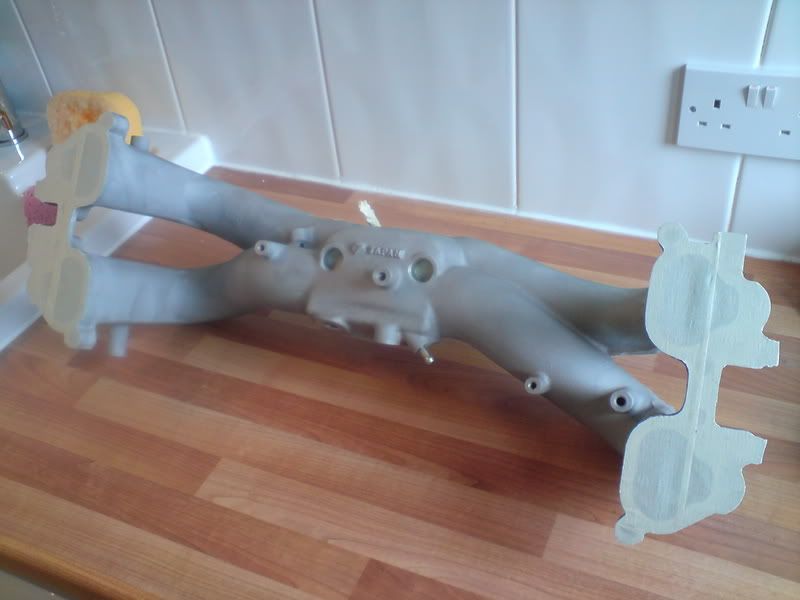
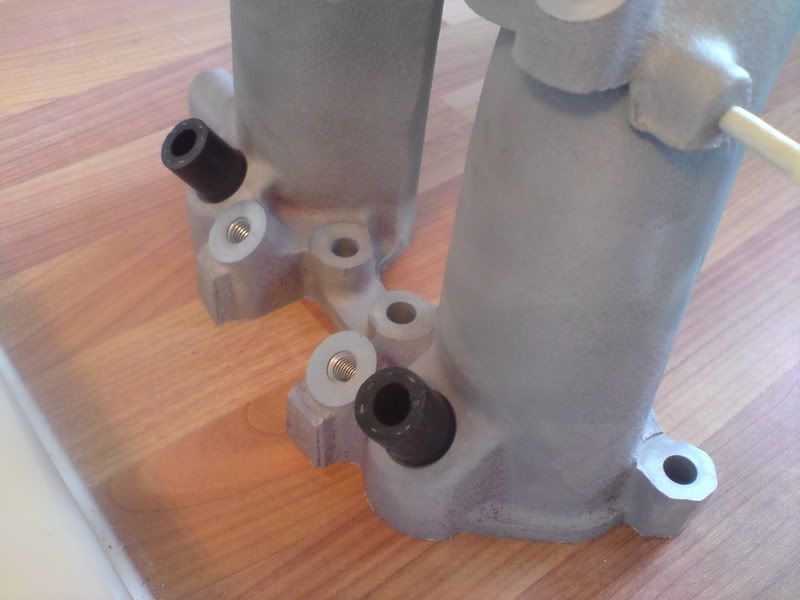
I managed to bead blast the manifold so it nows has an even finish all over. I oil stoned all the machined faces too so they are all flat and true.
It was then re-washed and masked up for some paint.
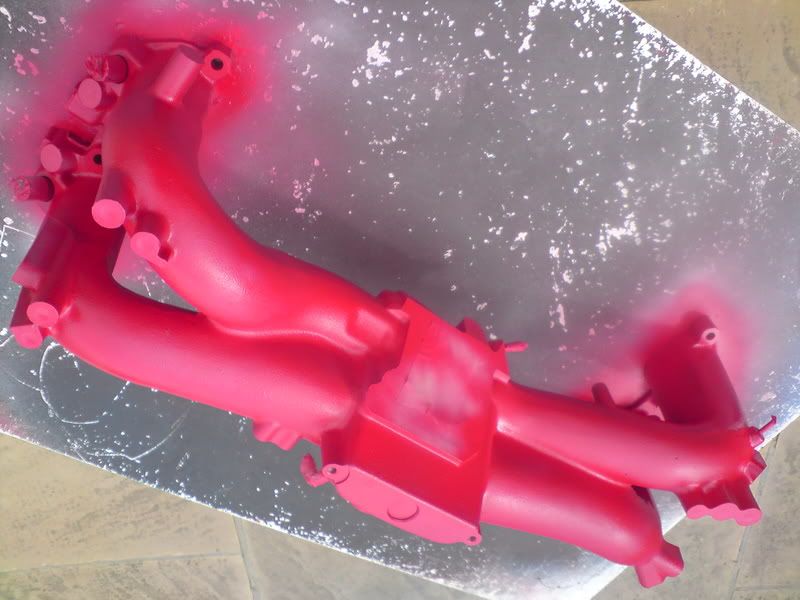
Im looking to get it looking as close to original as possible so i took the time to mask all the machined faces apart from some which i think would look better painted. It then got a light coat of etch primer and a light dusting of red basecoat. This should provide a good base for the crinkle red finish.
I'll leave it to dry for a day or so now before i put on the wrinkle finish top coat


I managed to bead blast the manifold so it nows has an even finish all over. I oil stoned all the machined faces too so they are all flat and true.
It was then re-washed and masked up for some paint.
Im looking to get it looking as close to original as possible so i took the time to mask all the machined faces apart from some which i think would look better painted. It then got a light coat of etch primer and a light dusting of red basecoat. This should provide a good base for the crinkle red finish.
I'll leave it to dry for a day or so now before i put on the wrinkle finish top coat


Joined: Nov 2003
Posts: 13,356
Likes: 58
From: in the woods...........555 Wagon Sqn
looks good in red Frayz, very OEM...a black one wouldn't look as good as mine anyway 
Last edited by trails; Jun 29, 2008 at 05:36 PM. Reason: 5555 posts :D


Building the engine is a bit like waiting for a baby!
What are your views on the Hardrace mounts Frayz? You expressed a small concern on the GB thread about quality. Mine came yesterday and thought they seem pretty solid....
If you want to know what the metallic red would look like, have a look at the engine pic in my scooby <<<<<<<<<<
What are your views on the Hardrace mounts Frayz? You expressed a small concern on the GB thread about quality. Mine came yesterday and thought they seem pretty solid....
If you want to know what the metallic red would look like, have a look at the engine pic in my scooby <<<<<<<<<<
Last edited by rossi_p; Jul 1, 2008 at 04:40 PM.
Thread Starter
Joined: Sep 2005
Posts: 19,945
Likes: 2
From: "Engineering Perfection in Essex"
Yeah i thought the engine mounts were pretty nice to be honest but the proofs in the pudding when theyre fitted mate.
I'll let you know when they go on.
Also wondering if i should bother painting my rocker covers at all?
I'll let you know when they go on.
Also wondering if i should bother painting my rocker covers at all?
Joined: Nov 2003
Posts: 13,356
Likes: 58
From: in the woods...........555 Wagon Sqn
Thread Starter
Joined: Sep 2005
Posts: 19,945
Likes: 2
From: "Engineering Perfection in Essex"
From what i can see the dogbone looks identical to the OEM one mate, but who knows. The mounts certainly feel more rigid in your hands than OEM though.
As for painting the covers, will it make it any quicker? Probably not but then would making anything look nice make it quicker? I think i have anough go fast parts to allow me to make my new build look as nice as it will hopefully go.
As for painting the covers, will it make it any quicker? Probably not but then would making anything look nice make it quicker? I think i have anough go fast parts to allow me to make my new build look as nice as it will hopefully go.
Thread Starter
Joined: Sep 2005
Posts: 19,945
Likes: 2
From: "Engineering Perfection in Essex"
Today saw a little more progress.
I inspected the block and measured the bores on 8 points on each bore, i also measured the main bearing liners in situe so i could calculate the crankshaft running clearances.
Once all that was sorted i washed the block in the hotwash, oiled the bores and bagged it ready for assembly.
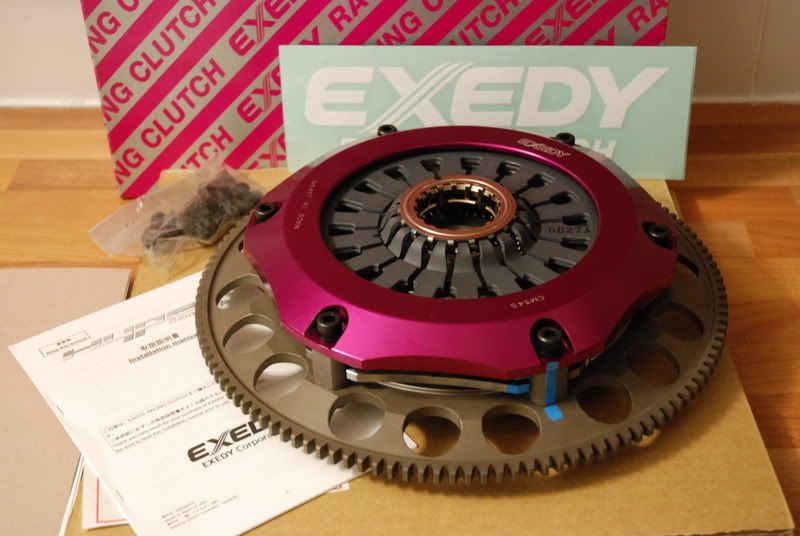
Another note, i colected my clutch today from Mocom.
Its a new Exedy Hyper twin plate. It comes with 2x 6 puck cerametalic driveplates, flywheel bolts, a lightened billet flywheel and the prettiest pressure plate available lol.
Im taking the time to show you guys now as it wont ever bee seen lol
I put it on the scales just for fun, the complete assembley comes in a a featherweight 10.2kg


I inspected the block and measured the bores on 8 points on each bore, i also measured the main bearing liners in situe so i could calculate the crankshaft running clearances.
Once all that was sorted i washed the block in the hotwash, oiled the bores and bagged it ready for assembly.
Another note, i colected my clutch today from Mocom.
Its a new Exedy Hyper twin plate. It comes with 2x 6 puck cerametalic driveplates, flywheel bolts, a lightened billet flywheel and the prettiest pressure plate available lol.
Im taking the time to show you guys now as it wont ever bee seen lol
I put it on the scales just for fun, the complete assembley comes in a a featherweight 10.2kg