Lets see your "One off" modifications!
 09 August 2009, 11:34 AM
#331
Scooby Regular
Join Date: May 2009
Location: Oxfordshire, Xbox GT: Hawker Fury, Car: 330s Hatch
Posts: 99
Likes: 0
Received 0 Likes
on
0 Posts
Most excellent thread chaps
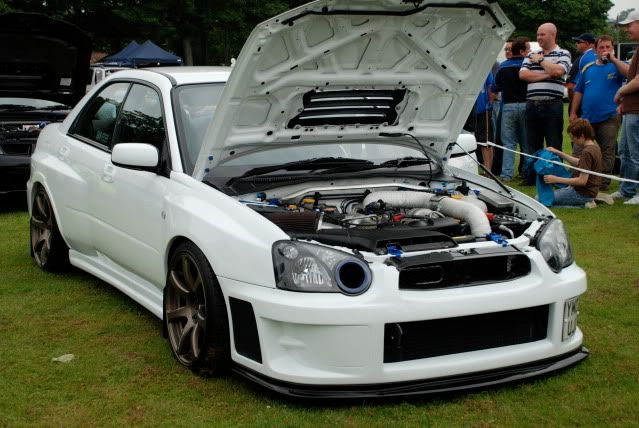
I made myself a full undercar exhaust system.
Seems like it took forever. I had intended on taking more photos of it but time was slipping and many late nights were spent at work trying to get it finished, one became an early morning
I remade the cat pipe, centre pipe and backbox.
The cat pipe has a s/steel flange cut to marry the end of the down pipe. The original tube was 2 1/2" in diameter but was made from quite thick steel. I have remade it in 20swg (0.9mm) thick 304 s/steel and kept the original diameter. At the end of the cat pipe where it joins the centre pipe I have done away with the sprung ball joint and used male/female rings with V band clamps. Also this pipe needed a bracket to hard mount it to the diff casing and a lambda sensor boss.

 Reduced: 98% of original size [ 1024 x 768 ] - Click to view full image

The old centre pipe was made from 60mm tube. This I have upped to 2 1/2" (63.5mm) and again made it from 0.9mm wall tube. I replaced the ball joint with a v band clamp which is a solid joint so to introduce some flexibility back into the system I have a s/steel braided flexi section. Then it runs down the car in the original tunnel, however I managed to get it a little higher than the stock one. This was helped by the fact that my centre pipe enters the backbox in the centre instead of over to one side like the original Prodrive. There is another v band clamp just before the backbox.
The backbox is also made from 0.9mm sheet, but where the centre pipe enters it there is a doubler made from 1.2mm sheet to reinforce this area. Is is cut in the shape of a "splat" to reduce the risk of vibration cracking and is the same for the "flower" which is welded around the lambda boss sensor.
The backbox has s/steel perf tube inside. They are merged at the side where the centre pipe enters and then split off to each side of the box. This part is 60mm tube. Then there is another bend out of the box to the tail pipes where it cones up to the tail pipe size of 3 1/2". This is the same size as the Prodrive box I took off. I have only made a single tail pipe exit each side as that was quicker and I didn't know if it would even sound ok I can change this at a later date if I wish but I thought I'd see how the single looks.
Reduced: 98% of original size [ 1024 x 768 ] - Click to view full image

Reduced: 98% of original size [ 1024 x 768 ] - Click to view full image

Reduced: 98% of original size [ 1024 x 768 ] - Click to view full image

Reduced: 98% of original size [ 1024 x 768 ] - Click to view full image

So it was all finished the other week on a friday night and the sound................ well it was exactly what I hoped for. It sounds pretty stock on tick over and if you just tickling around it is still quite subtle, tho it does sound more meaty still. Then when you open her up there is a nice flat four rumble and a bit of a bark too. On coast there are some pops too, but again not all the time and quite subtle. Thats exactly what I was after.
Inside you can hear it a lot better and it has got rid of the really annoying bass drone that it had. All round winner
Here's a video
YouTube - 09 Impreza Sti 330S new exhaust
Keep up the good work lads, there are some really good ideas in here
Cheers
Ben
I made myself a full undercar exhaust system.
Seems like it took forever. I had intended on taking more photos of it but time was slipping and many late nights were spent at work trying to get it finished, one became an early morning
I remade the cat pipe, centre pipe and backbox.
The cat pipe has a s/steel flange cut to marry the end of the down pipe. The original tube was 2 1/2" in diameter but was made from quite thick steel. I have remade it in 20swg (0.9mm) thick 304 s/steel and kept the original diameter. At the end of the cat pipe where it joins the centre pipe I have done away with the sprung ball joint and used male/female rings with V band clamps. Also this pipe needed a bracket to hard mount it to the diff casing and a lambda sensor boss.
Reduced: 98% of original size [ 1024 x 768 ] - Click to view full imageThe old centre pipe was made from 60mm tube. This I have upped to 2 1/2" (63.5mm) and again made it from 0.9mm wall tube. I replaced the ball joint with a v band clamp which is a solid joint so to introduce some flexibility back into the system I have a s/steel braided flexi section. Then it runs down the car in the original tunnel, however I managed to get it a little higher than the stock one. This was helped by the fact that my centre pipe enters the backbox in the centre instead of over to one side like the original Prodrive. There is another v band clamp just before the backbox.
The backbox is also made from 0.9mm sheet, but where the centre pipe enters it there is a doubler made from 1.2mm sheet to reinforce this area. Is is cut in the shape of a "splat" to reduce the risk of vibration cracking and is the same for the "flower" which is welded around the lambda boss sensor.
The backbox has s/steel perf tube inside. They are merged at the side where the centre pipe enters and then split off to each side of the box. This part is 60mm tube. Then there is another bend out of the box to the tail pipes where it cones up to the tail pipe size of 3 1/2". This is the same size as the Prodrive box I took off. I have only made a single tail pipe exit each side as that was quicker and I didn't know if it would even sound ok
I can change this at a later date if I wish but I thought I'd see how the single looks. Reduced: 98% of original size [ 1024 x 768 ] - Click to view full image Reduced: 98% of original size [ 1024 x 768 ] - Click to view full image Reduced: 98% of original size [ 1024 x 768 ] - Click to view full image Reduced: 98% of original size [ 1024 x 768 ] - Click to view full imageSo it was all finished the other week on a friday night
and the sound................ well it was exactly what I hoped for. It sounds pretty stock on tick over and if you just tickling around it is still quite subtle, tho it does sound more meaty still. Then when you open her up there is a nice flat four rumble and a bit of a bark too. On coast there are some pops too, but again not all the time and quite subtle. Thats exactly what I was after. Inside you can hear it a lot better and it has got rid of the really annoying bass drone that it had. All round winner
Here's a video
YouTube - 09 Impreza Sti 330S new exhaust
Keep up the good work lads, there are some really good ideas in here
Cheers
Ben


 10 August 2009, 06:14 PM
#337
Scooby Regular
Join Date: May 2009
Location: Oxfordshire, Xbox GT: Hawker Fury, Car: 330s Hatch
Posts: 99
Likes: 0
Received 0 Likes
on
0 Posts
Hey its no problem, everyone has their opinion
I actually quite like the quad tails too as the back end of the car is quite big and it looked a bit better balanced, but it was soooo much easier to make it with a single outlet and I had no idea if it was even going to sound ok. So I didn't want to invest even more time in something I wasn't pleased with. As it happens, I love it
I need to make 2off, 2 into 1 collectors and 2 more tailpipes to mod it and thats a lot of work, so I've left it, also I thought the singles may grow on me, which they have, so maybe in the future I'll do it. I made the singles so they could easily be replaced be the collector etc so one day............
Anyway, when I'm driving I cant see them, so its not my problem
Thanks for the kind words chaps
Ben


 18 August 2009, 08:59 PM
#344
Scooby Regular
iTrader: (2)
Join Date: Mar 2001
Location: Here and there
Posts: 8,353
Likes: 0
Received 0 Likes
on
0 Posts
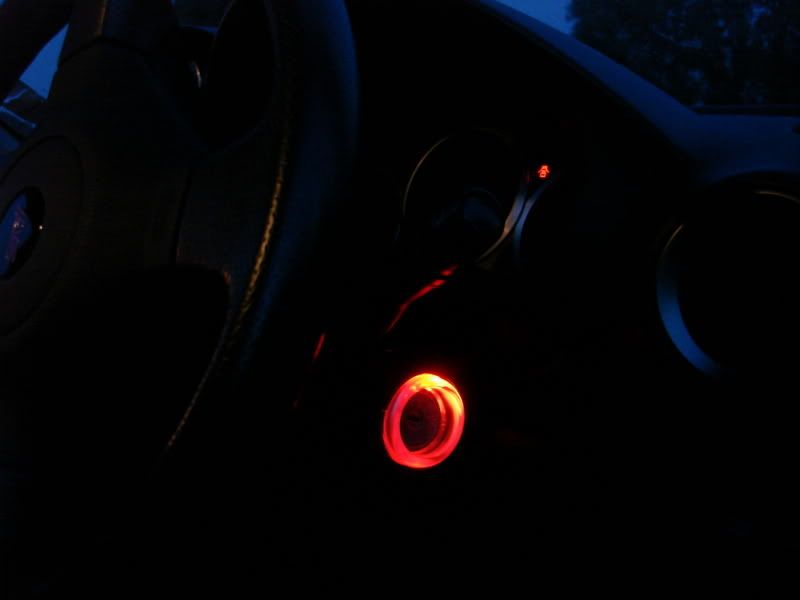
i soldered some additional red LEDS to the circuit board using an extra resistor so that they didnt blow and also painted the underside of the dials with red glass paint to spread the colour a bit better.As you can see from the pic i needed a little extra red in some parts of the dial.Everything now matches perfectly,and i have a spare HVAC set that i have done which i might put in the 'sale' section once im 100% happy with it
18 August 2009, 09:02 PM
#345
the effort amazing! im hoping to get time to start a fuew bits :-) already done my wrx to sti 4/5 conversion but this has been done before i have an idea rear difuser on a classic just gota get to work
 18 August 2009, 10:05 PM
#347
Scooby Regular
iTrader: (23)
Join Date: May 2006
Location: Rota Subzeros FOR sale!
Posts: 3,701
Likes: 0
Received 0 Likes
on
0 Posts
i soldered some additional red LEDS to the circuit board using an extra resistor so that they didnt blow and also painted the underside of the dials with red glass paint to spread the colour a bit better.As you can see from the pic i needed a little extra red in some parts of the dial.Everything now matches perfectly,and i have a spare HVAC set that i have done which i might put in the 'sale' section once im 100% happy with it
Ricey
 26 August 2009, 12:14 PM
#351
Scooby Regular
Join Date: Oct 2008
Location: Poole
Posts: 165
Likes: 0
Received 0 Likes
on
0 Posts
One of the best threads I've stumbled across for a long time, shame alot of the photos have gone from the early posts 
What other mods are there out there?
What other mods are there out there?
29 August 2009, 02:46 PM
#352

Can't remember if I've posted these before, Lets have another look...
Headlight air inlet ducting.

Defi's in heater vents..

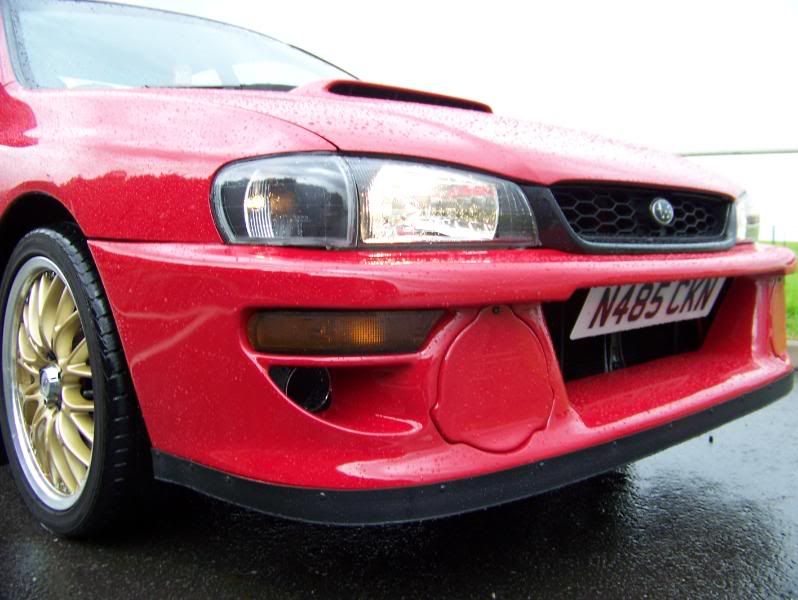
Oil cooler in front bumper.

Home made front splitter.
Bespoke Maf housing tube/intercooler pipework.

Ksport brakes machined and anodised blue, along with my company name.

Headlight air inlet ducting.
Defi's in heater vents..
Oil cooler in front bumper.
Home made front splitter.
Bespoke Maf housing tube/intercooler pipework.
Ksport brakes machined and anodised blue, along with my company name.
30 August 2009, 10:48 AM
#353

Not that great but here is my 22b front bumper with induction feed, DIY splitter and if you look closely you can see STI logo within the fog covers
Last edited by averyp2; 30 August 2009 at 10:50 AM.
30 August 2009, 12:00 PM
#354
Scooby Regular
Join Date: Jun 2008
Location: Midlands
Posts: 393
Likes: 0
Received 0 Likes
on
0 Posts
Development race rad with integrated oil cooler (You can just about see it on the left side), carbon cold air intake, under the bonnet theres a bespoke TMIC, and some other little bits and pieces here and there.


 31 August 2009, 06:33 PM
#356
Awesome looking car, and it goes some too, remember seeing this at a couple of the TA rounds
 31 August 2009, 07:02 PM
#358
Scooby Regular
Join Date: Jun 2008
Location: Midlands
Posts: 393
Likes: 0
Received 0 Likes
on
0 Posts
08 September 2009, 10:54 PM
#359
Scooby Regular
iTrader: (3)

Join Date: Jan 2003
Location: Oss, The Netherlands
Posts: 749
Likes: 0
Received 0 Likes
on
0 Posts
Reversed manifold/Reversed FMIC.
Nothing really fancy, but with me already having a Aluminium Radiator and FMIC I am not going to waste money on something like a Lateral Performance Radpack (which is undoubtedly of a higher quality/finesse.Also after a slight accident the lower beam on which the radiator sits was already loose, so I removed it completely, and welded in a sturdied one, as it has to hold both the IC and Radiator.
Only unique point I believe is that my piping runs the other way, I have never seen that before.
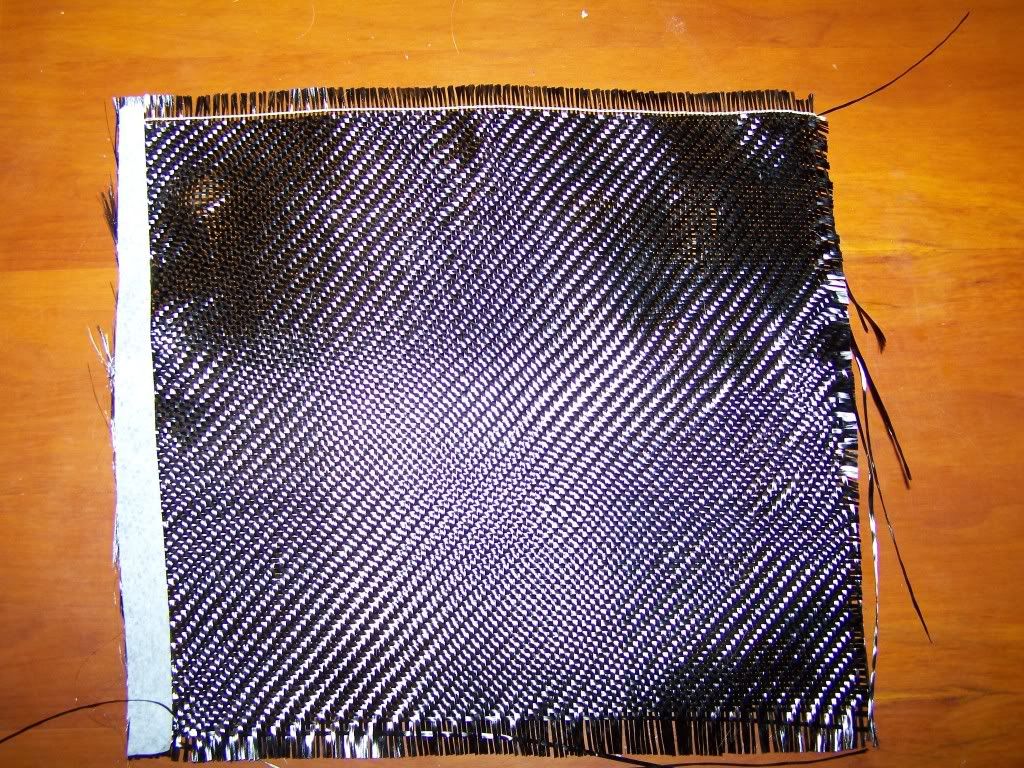
Here are some pictures of this still ongoing project.
Also I am busy with the Strutbar, as I am planning to relocate the fuel filter there, and my catchtank.Pictures of that tomorrow.


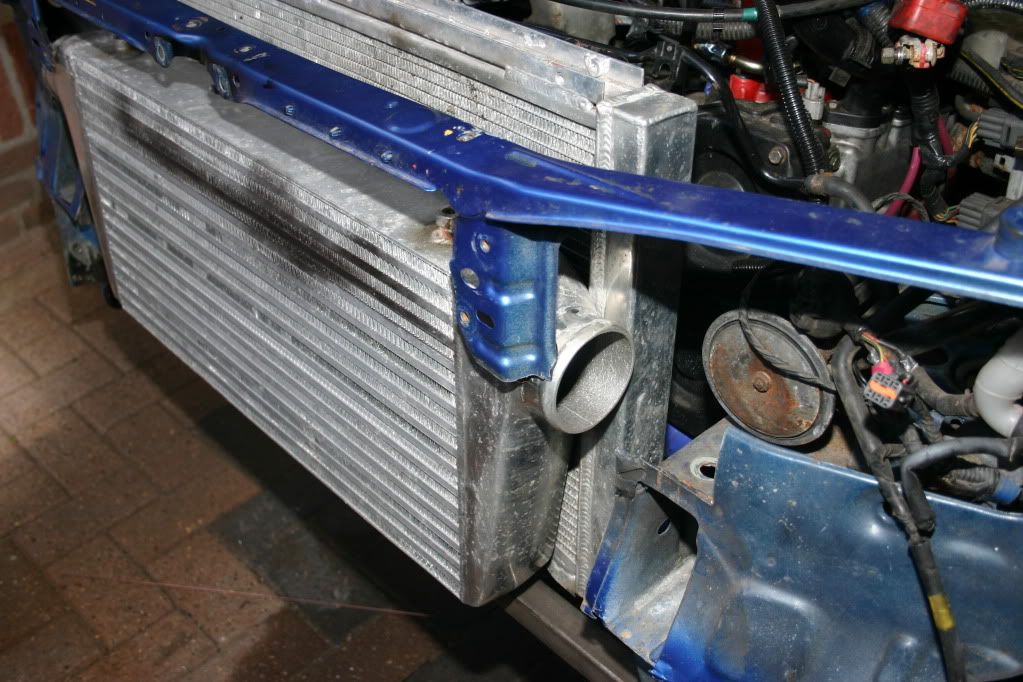
Nothing really fancy, but with me already having a Aluminium Radiator and FMIC I am not going to waste money on something like a Lateral Performance Radpack (which is undoubtedly of a higher quality/finesse.Also after a slight accident the lower beam on which the radiator sits was already loose, so I removed it completely, and welded in a sturdied one, as it has to hold both the IC and Radiator.
Only unique point I believe is that my piping runs the other way, I have never seen that before.
Here are some pictures of this still ongoing project.
Also I am busy with the Strutbar, as I am planning to relocate the fuel filter there, and my catchtank.Pictures of that tomorrow.


 used a legacy clock surround with no hole for auto gear lights