Floyd’s ‘economy’ Stage III


 Call me.
 05 October 2011, 02:25 PM
#607
Scooby Regular
Join Date: May 2008
Posts: 84
Likes: 0
Received 0 Likes
on
0 Posts
Great read Floyd.
I am aiming to keep my car (99 Classic) looking standard and have no intention of using it on track.
I am in the process of following you lead and porting my standard manifolds, cross pipe, and up pipe. I am just taking them out to the gasket edges and cleaning up the internals.
My question is about the turbo, how easy is it to take the turbo apart to give that a tidy up? Or should I leave it alone?
Also as the engine is out of the car is it worth fitting an up graded inlet pipe to the turbo?
Cheers
05 October 2011, 07:23 PM
#608
Scooby Regular
iTrader: (3)

Join Date: Aug 2003
Location: AL4 | W1B
Posts: 2,699
Likes: 0
Received 0 Likes
on
0 Posts
I'm sure I read that it was worth doing the inlet pipe I may be mistaken. But will you be removing the inlet manifold? If not it's quite difficult to fit.
05 October 2011, 08:07 PM
#609
Scooby Regular
Join Date: May 2008
Posts: 84
Likes: 0
Received 0 Likes
on
0 Posts
[QUOTE=olliecampbell;10268896]I tried to do similar on my MY00, I think it will depend on the turbo. I had one that I couldn't get apart and it took David @ API some serious work to separate so much so that it was damaged. He commented on how hard it was compared to all the others he separates.
I'm sure I read that it was worth doing the inlet pipe I may be mistaken. But will you be removing the inlet manifold? If not it's quite difficult to fit.[/QUOTE
Thanks for the reply.
Just returned in from the garage after removing exhaust, turbo and inlet manifold. I think I will leave the turbo alone, but am tempted to change the inlet pipe as the OE is quite narrow under the manifold, just got to decide which one and save up to buy it.
I have taken quite a few photos to help when I put it all back together after I have cleaned everything up, as there are pipes and wires going all over the place!!
 15 October 2011, 07:03 PM
#611
Don't mess with turbo internals. Inlet pipe can be swapped for a later model (STI) but Spec C probably won't fit.
Have taken the car to DN4 at the Ring in the summer and recently to Spa. Not changed anything apart from using the new EBC Blues all round. They worked well but had a little less feel than the Yellows/carbons f/r combo that I usually use. Low dust, no squeal.
I was new to Spa so I grabbed Chris Harris (Evo/Autocar Journo/racer) for some tuition. he's really good at that! I then got him to drive the car, which was enlightening especially when hassled GT3 RS's out of the way with headlight flashing. lol
The car is ready for Phase II.
13 February 2012, 01:10 PM
#612
I've just around to fitting my Tein camber or caster adjustable top mounts. Despite doing an internet search and asking on various forums, I wasn't able to get definitive info on how to fit them...
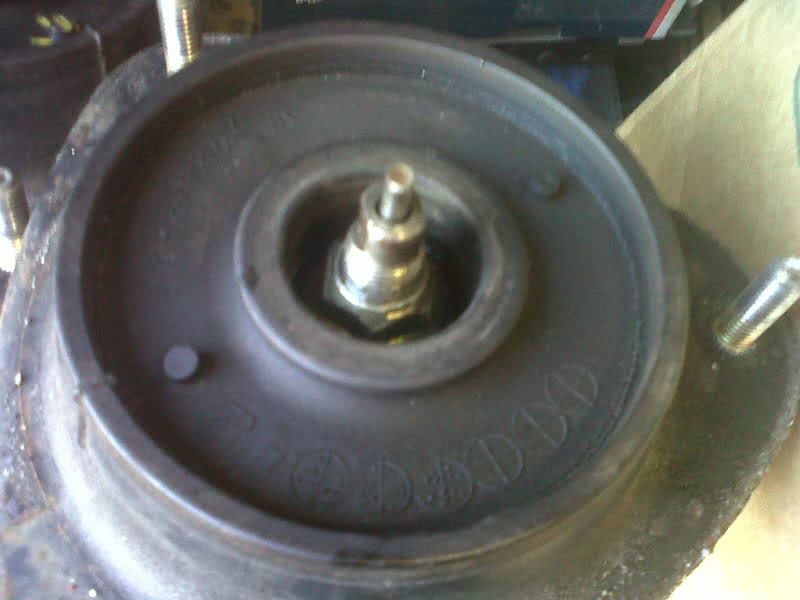
The standard mount gives no clue as it's a central position:
The Tein mounts are marked L & R, but this depends on ou interpretation of L & R IYSWIM.
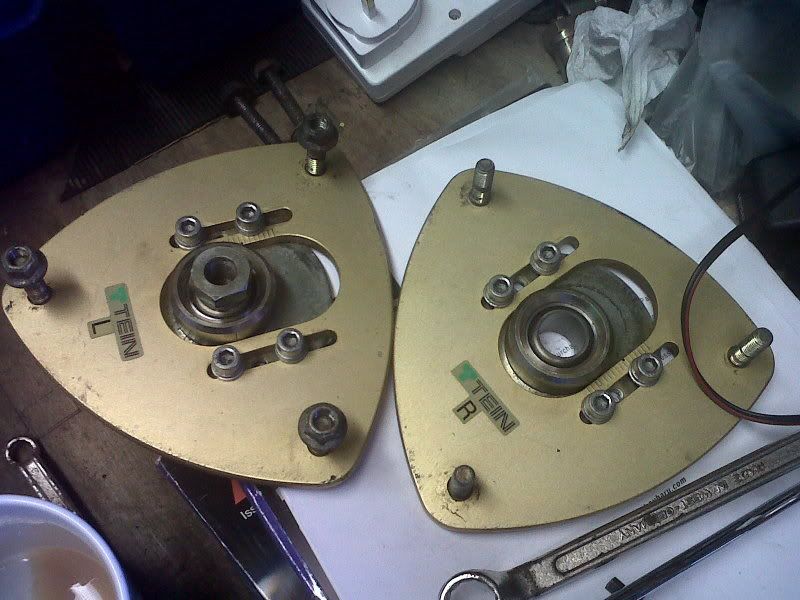
I decided I wanted more camber rather than caster but even so you can get the alignment to change by switching the sides:
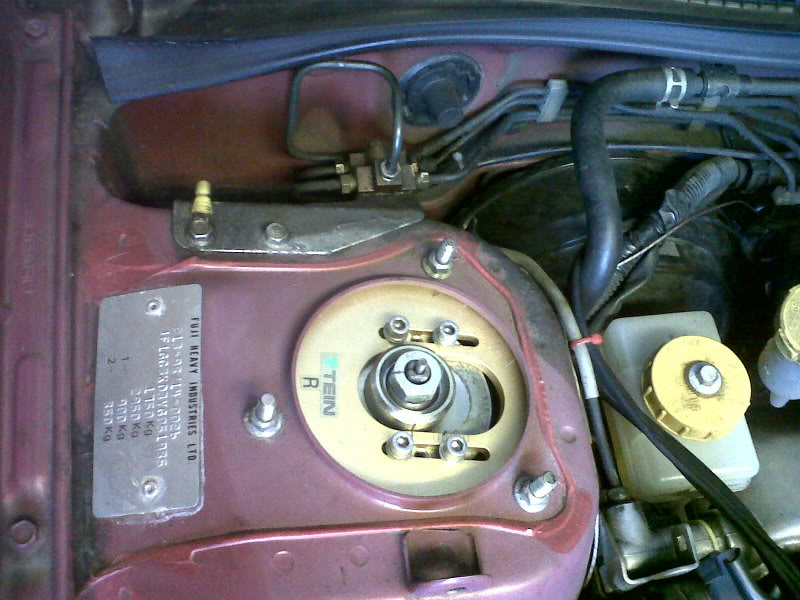
Position 1:
Position 2:
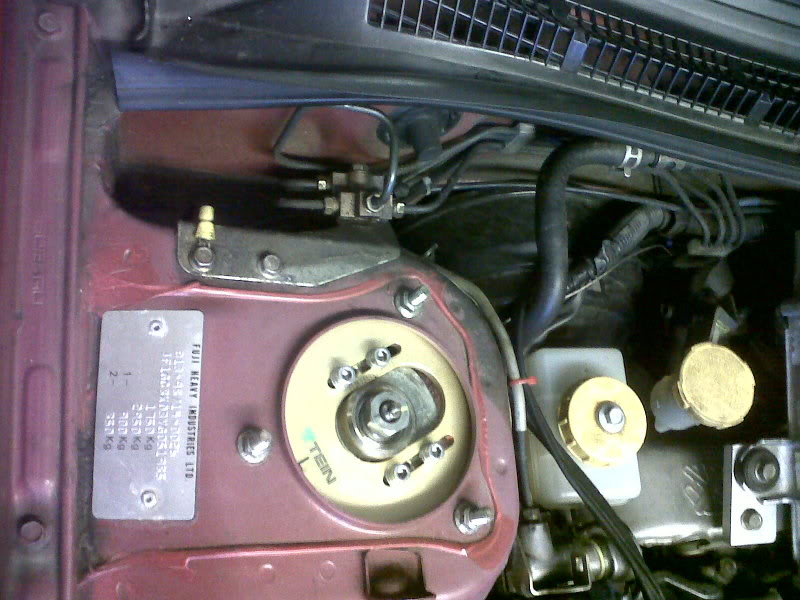
I went for position 2 in the end as this seems to line up with the hub natural angle.
The standard mount gives no clue as it's a central position:
The Tein mounts are marked L & R, but this depends on ou interpretation of L & R IYSWIM.
I decided I wanted more camber rather than caster but even so you can get the alignment to change by switching the sides:
Position 1:
Position 2:
I went for position 2 in the end as this seems to line up with the hub natural angle.
13 February 2012, 01:18 PM
#613
Trying to get the top nut off the old mount was a right PITA!!! I eventually took the strut and mount to a tyre fitters, who wizzed it off with an air gun. I had a deep off set spanner but there are only two small 8mm flats to hold the tube from spinning...
While the strut was off I cleaned them up and reversed the springs to helper on the bottom. I don't think it makes a difference but that's what the AST brochure shows.
I also purchased some covers from Ebay to help keep the crud out. These are made by Kirky so hopefully not rubbish:
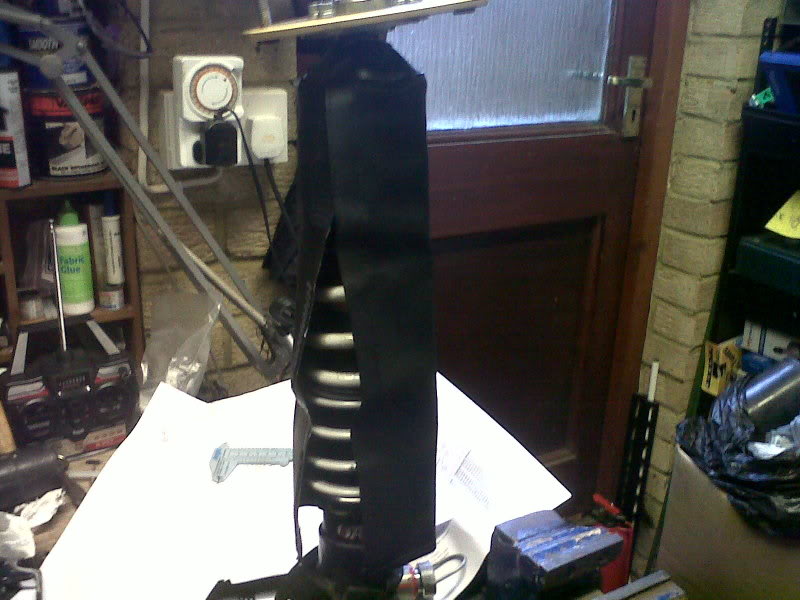
They have velcro and can be adjusted but need to be fitted over the top, so has to be done with the mount removed.
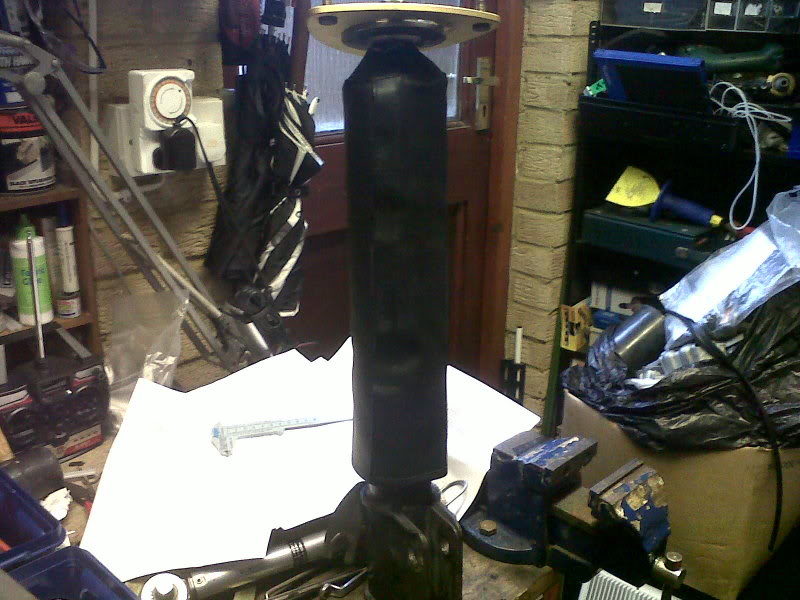
Max camber from hub dialled in, but 0 degrees on top mount until I can get it to a garage for alignment proper but only after rear camber bolts fitted.
While the strut was off I cleaned them up and reversed the springs to helper on the bottom. I don't think it makes a difference but that's what the AST brochure shows.
I also purchased some covers from Ebay to help keep the crud out. These are made by Kirky so hopefully not rubbish:
They have velcro and can be adjusted but need to be fitted over the top, so has to be done with the mount removed.
Max camber from hub dialled in, but 0 degrees on top mount until I can get it to a garage for alignment proper but only after rear camber bolts fitted.
 14 February 2012, 02:31 PM
#616
14N-FR I guessed what L & R meant! The tricky bit is deciding if it means L & R from the drivers seat or looking at the car from the front...
Anyway, Powerstation fit them like position 2 as per Graham's ~(911) project thread page 9:

I think I can get caster and camber in position 2.
Anyway, Powerstation fit them like position 2 as per Graham's ~(911) project thread page 9:
I think I can get caster and camber in position 2.
 14 February 2012, 08:28 PM
#621
Scooby Regular
iTrader: (3)
Join Date: Feb 2009
Location: Glasgow
Posts: 569
Likes: 0
Received 0 Likes
on
0 Posts
With regards to the mounts, picture 1 is the correct fitment. That amount of castor adjustment is not needed as you will end up effecting the self centring nature of your steering as well as upsetting the straight line stability.
You will find you need to mount them as per picture 1 to achieve a decent amount of camber (-2.5 degrees), as I found when fitting my BC coilovers last week.
 15 February 2012, 10:32 AM
#624
I'm thinking 5 degrees caster, -2.5 deg camber front (top mount adj and oe bolts) and -2 deg camber rear with new bolts, slight toe in front and rear 0 toe, front a/r to hardest, rear to middle. Fine tune from there with damping towards hard on AST's. Springs a 50/40 f/r. I would like 55/45 if available.
This is track orientated setting as this is where it mostly lives now.
This is track orientated setting as this is where it mostly lives now.
15 February 2012, 04:31 PM
#625
Scooby Regular
iTrader: (3)
Join Date: Feb 2009
Location: Glasgow
Posts: 569
Likes: 0
Received 0 Likes
on
0 Posts
I found with my BC's which has the exact same markings as your then top mounts, that even adjusting the front camber bolts I could only get a maximum of -0.5degrees when the top mounts were set at 'zero'.
To get more I have to adjust the top mounts.
16 February 2012, 03:24 AM
#627
Scooby Regular
iTrader: (2)
Join Date: Feb 2003
Location: 2.1 Spec-C .......Pimms O'clock!!
Posts: 2,726
Likes: 0
Received 0 Likes
on
0 Posts
Hi Floyd,
Good luck with the suspension, hope it handles well, I've not been on Northloop for ages to update my project thread or join in the fun as everytime I try to load the forum page, it seems to take forever to load, not sure whats going on, it's either my work laptop having a paddy (most likely) or the forum doesnt like me anymore
Will try and get on there with my own laptop soon as I fancy doing a few trackdays with you lot this year and putting names to faces
04 March 2012, 06:37 PM
#629
Finally finished the camber bolt swap on the rear yesterday. Confused that the one's I removed, which I thought had been there since the car was new, looked identical to the new Whiteline one's. I measured them and they are the same!
The Whiteline a/r bars are both 22mm f/r with front at soft and rear currently at middle already.
The Whiteline a/r bars are both 22mm f/r with front at soft and rear currently at middle already.
12 March 2012, 09:00 AM
#630
I fitted my track rubber this w/e and the clearance between the rear tyre and the coil over spring height adjust was very small. I had to resort to some filing of the mount.
The coil over covers had to be removed from the rear too as they rubbed on the tyres. So I have two covers that can be fitted on the front going spare...
The coil over covers had to be removed from the rear too as they rubbed on the tyres. So I have two covers that can be fitted on the front going spare...