
DIY Classic Rally Car Build


Hi Guys
Thought i'd share my rally car build as I've never done a build thread before and I've only just started on this
I got the car from my friend who killed the engine and it looked pretty much like it does now from the outside when I picked it up
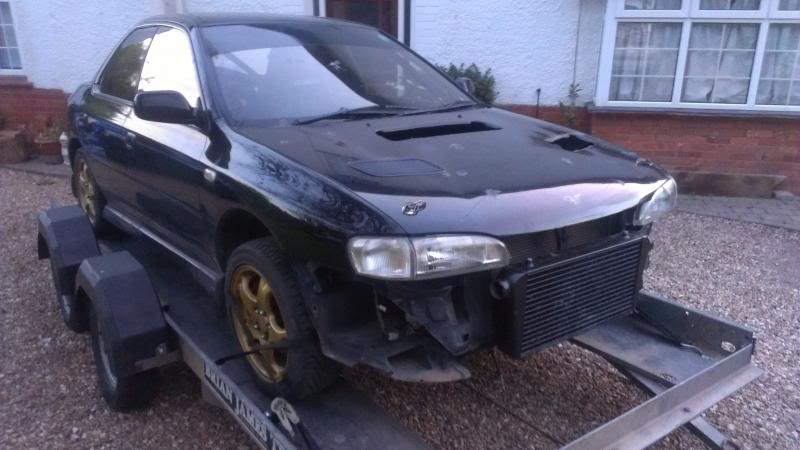
I started by stripping the bits that wont be needed, get in the way or will be replaced, so in the bin went the ABS and standard brake lines along with the majority of the interior apart from door cards and dash
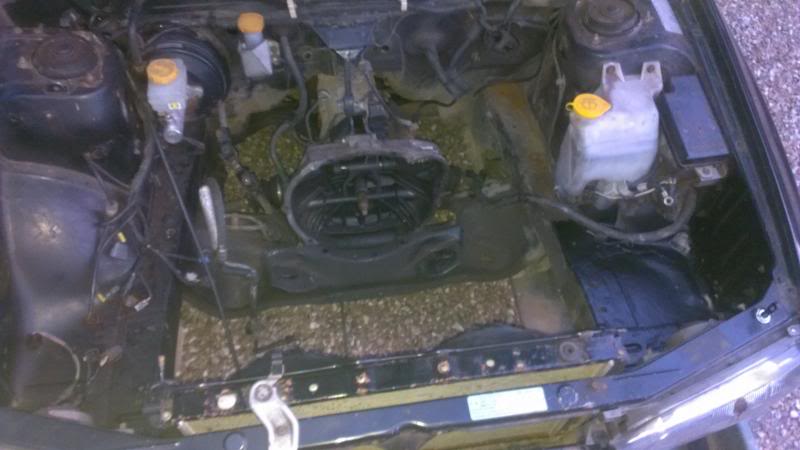
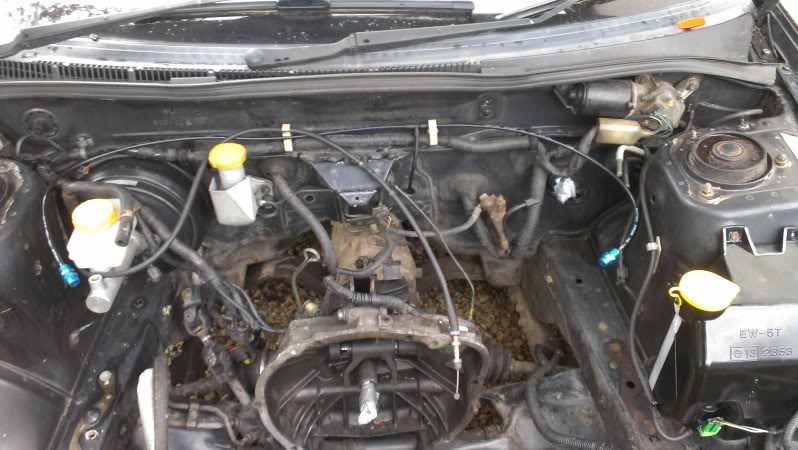
engine bay looks like this with ABS unit removed and battery tray cut out
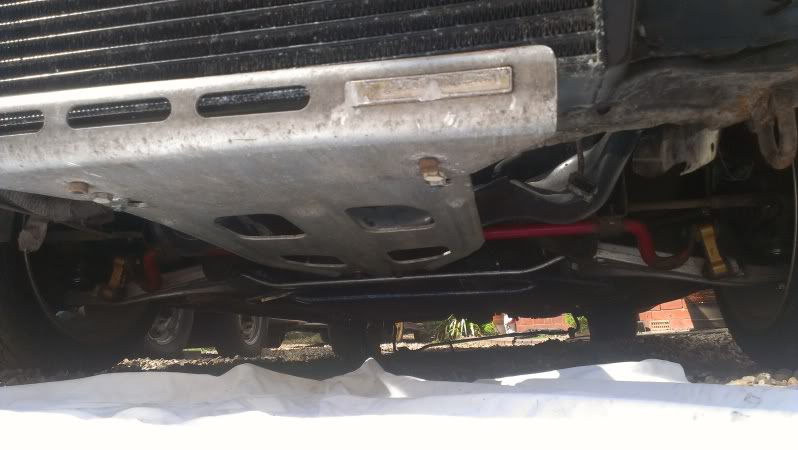
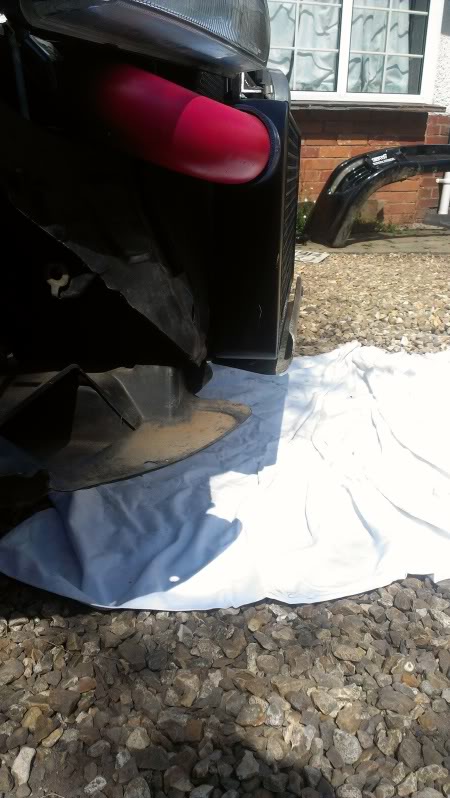
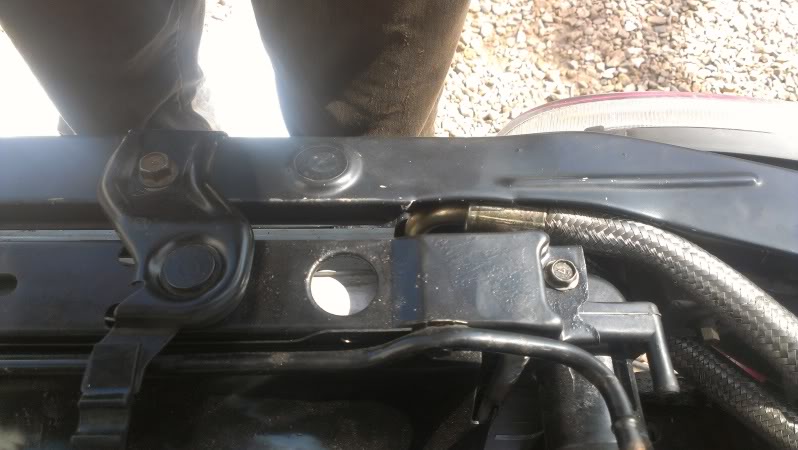
While I was round the front I mounted a front mount intercooler which required abit of cutting and hammering to get it where I wanted (see first pic) and make allowance for the pipework to run under the headlights
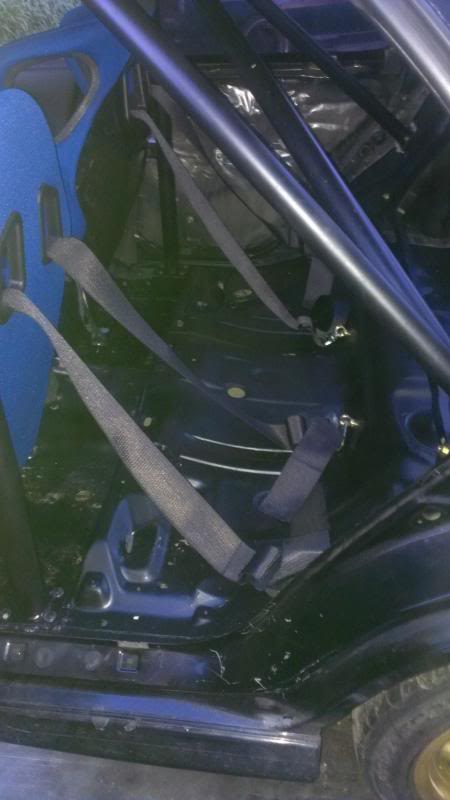
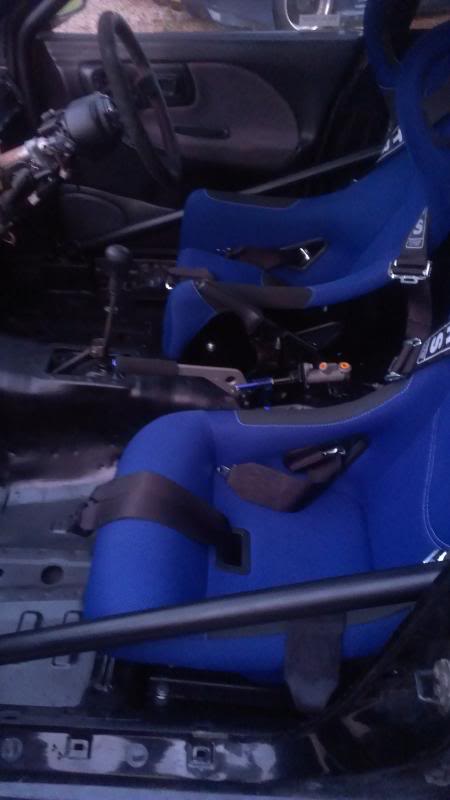
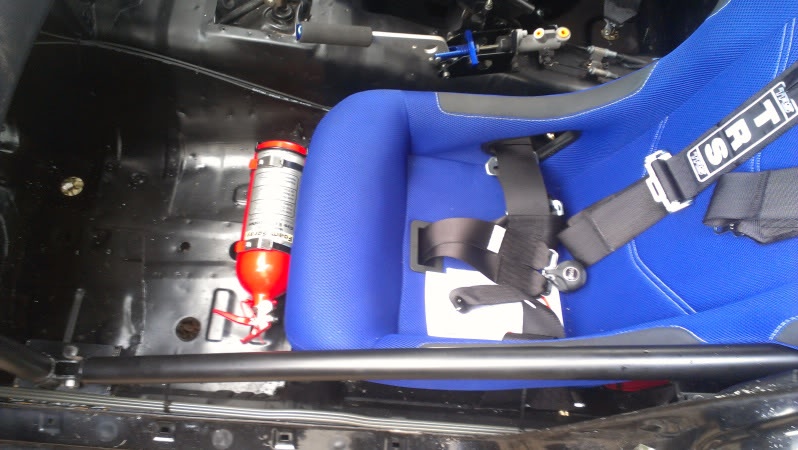
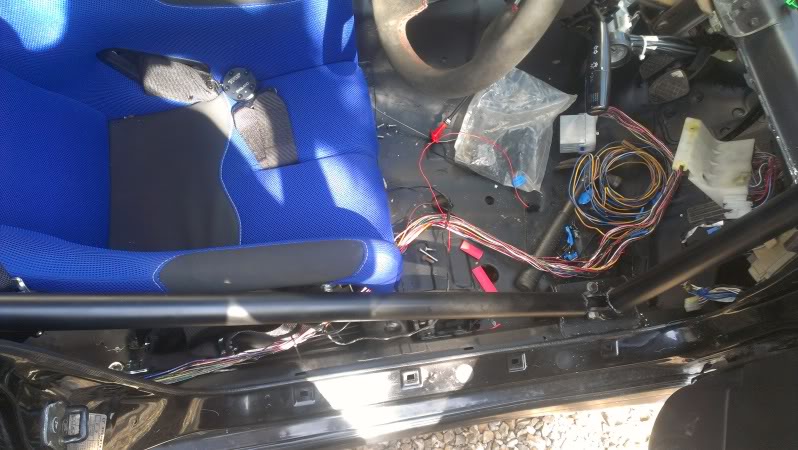
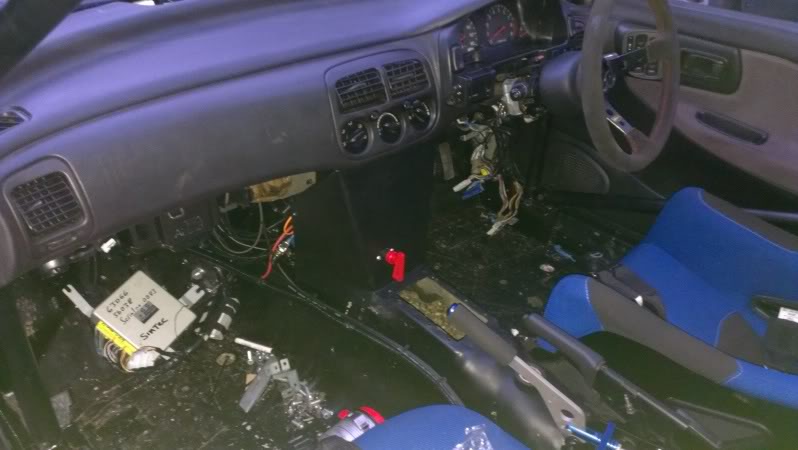
Once the interior was out I trial fitted the cage, seats, steering wheel, belts and hydraulic handbrake
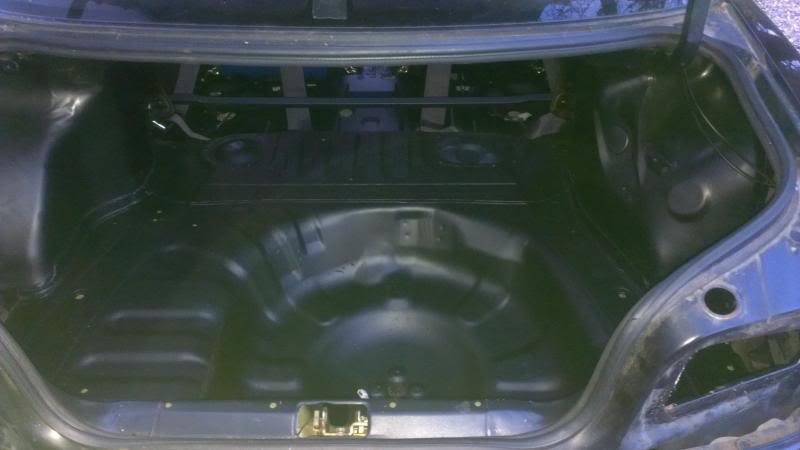
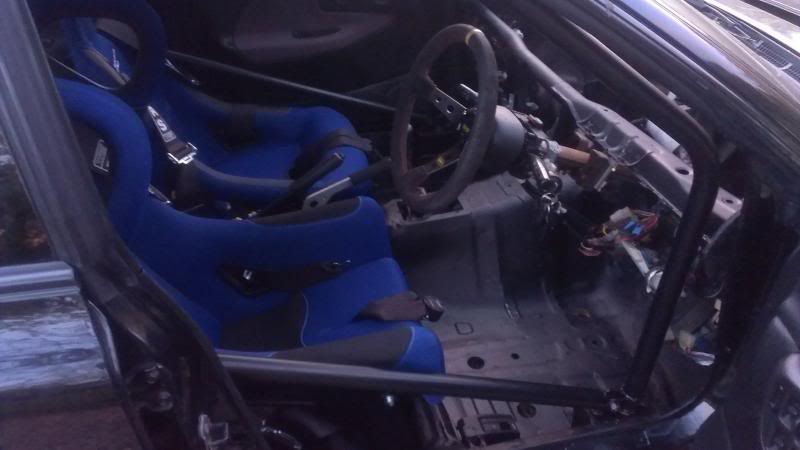
Then I took everything out, welded up the cage mounts and door bars, sprayed the cage and inside of the car and then fitted it all back in along with a set of harnesses. So now looks like this inside
Thought i'd share my rally car build as I've never done a build thread before and I've only just started on this
I got the car from my friend who killed the engine and it looked pretty much like it does now from the outside when I picked it up


I started by stripping the bits that wont be needed, get in the way or will be replaced, so in the bin went the ABS and standard brake lines along with the majority of the interior apart from door cards and dash
engine bay looks like this with ABS unit removed and battery tray cut out

While I was round the front I mounted a front mount intercooler which required abit of cutting and hammering to get it where I wanted (see first pic) and make allowance for the pipework to run under the headlights
Once the interior was out I trial fitted the cage, seats, steering wheel, belts and hydraulic handbrake
Then I took everything out, welded up the cage mounts and door bars, sprayed the cage and inside of the car and then fitted it all back in along with a set of harnesses. So now looks like this inside


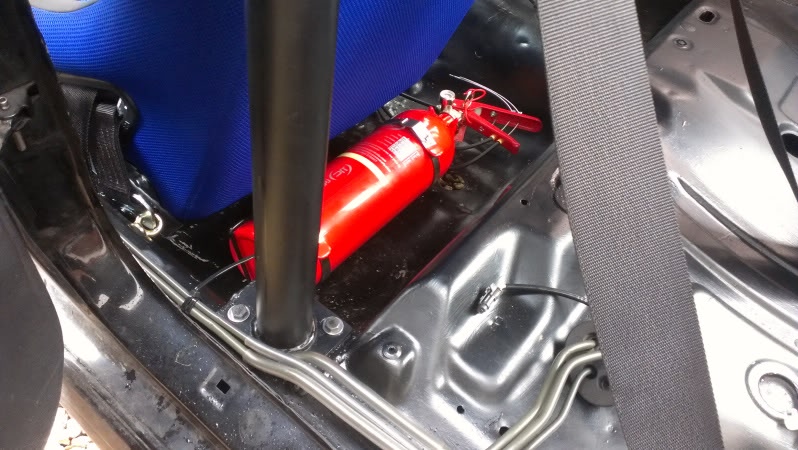
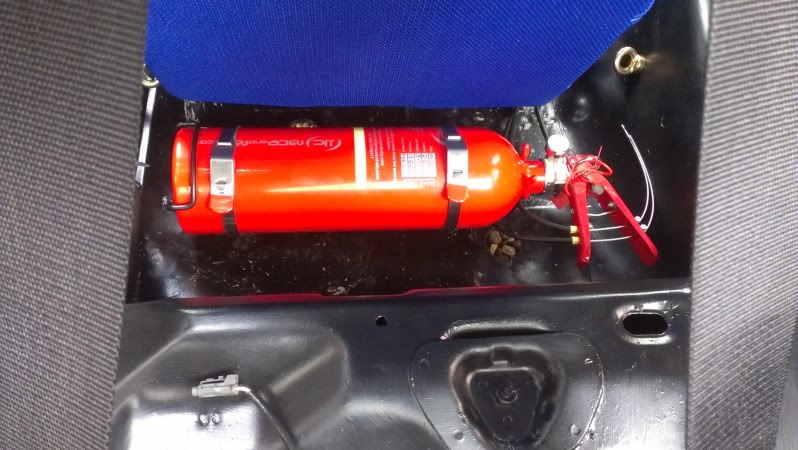
Extinguishers fitted this weekend
Fitted some gauges using the original heater control panel. I like the fit, and the position is ok, but I hate the chrome surround! Chav-tastic! So they will be swapped out for something a little less bling
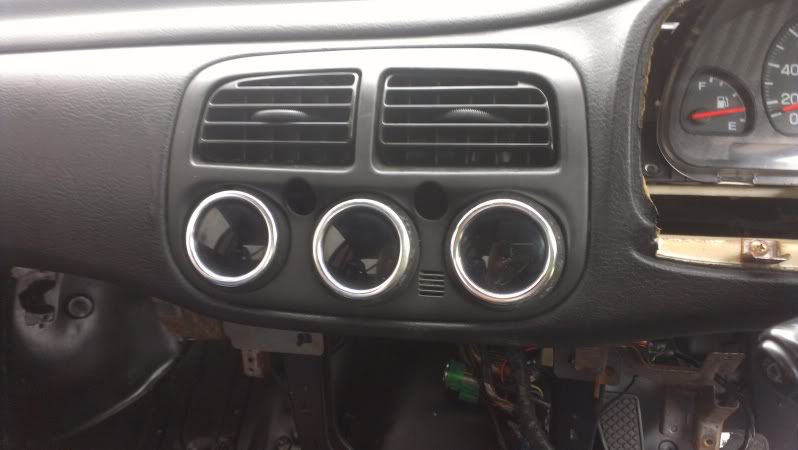
Fitted some gauges using the original heater control panel. I like the fit, and the position is ok, but I hate the chrome surround! Chav-tastic! So they will be swapped out for something a little less bling
Last edited by tom-r33; Jun 17, 2013 at 11:39 AM.
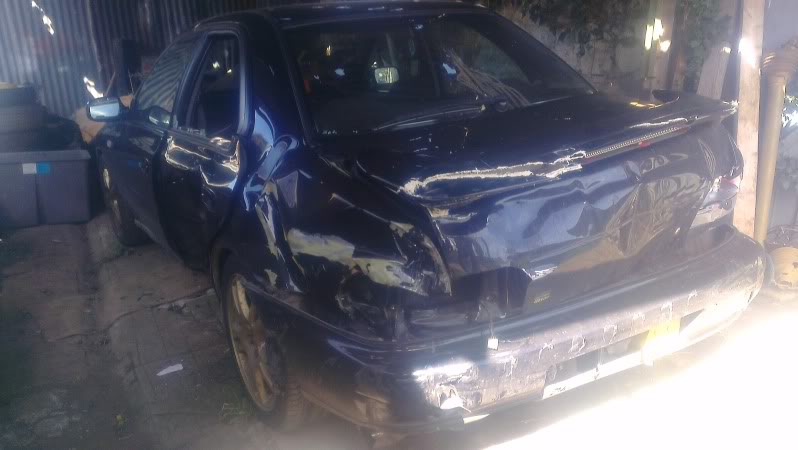
In a bid to keep costs to a minimum and also to end up with a large spares package I bought a couple of complete cars to break, both early sti's. One was running 450hp and had a six speed box, simtec, polybushed, sc42, hks manifold and Godspeed big brakes amongst other things, but ended up like this.....
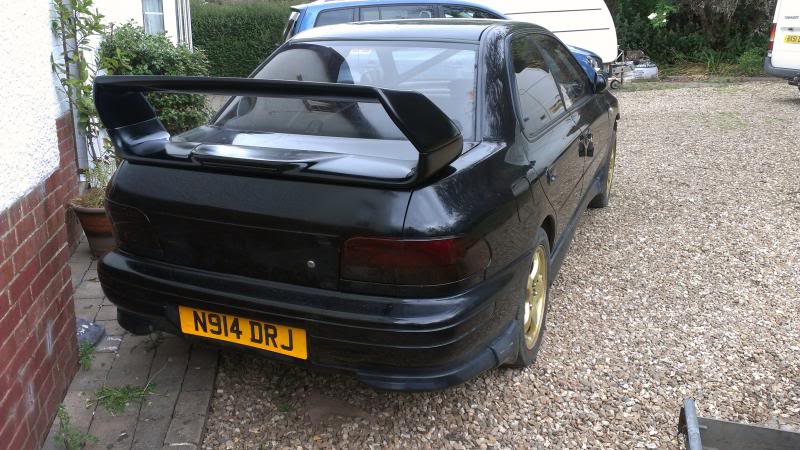
The other had a blown engine but is polybushed, whiteline rear arb, bc coilovers, sump guard, fmic, 17" speedlines, power fc and some other goodies and looks like this......

I've fully broken the crashed car and intend swaping some parts around on the other 2 so I end up with a nice suspension setup on the rally car. And with breaking the crashed car i have ended up with a spares package of polybushed arms, various roll bars, steering rack, sub frames, 3doors, bonnet etc etc.... Also a 450hp setup for my next project and a 6-speed that we just put in my dads RB2.5!
After all the swapping about I will end up with a faily standard sti which I can put an engine in and sell on and a nicely setup rally car with lots of quality spares and a few bits and pieces for my next, more serious*project
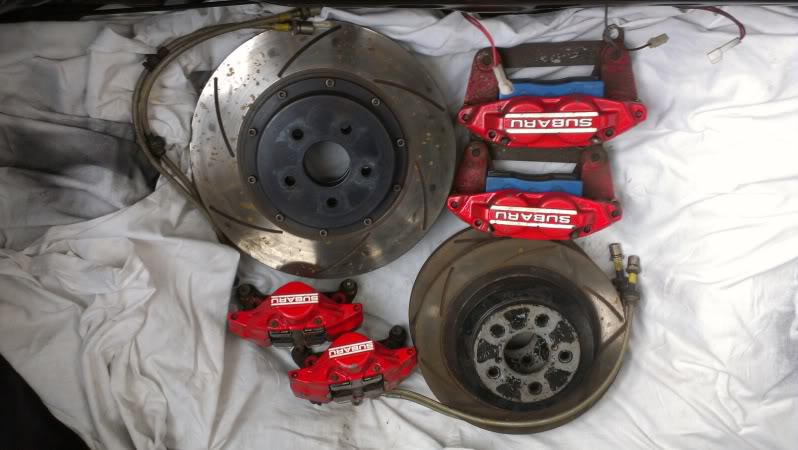
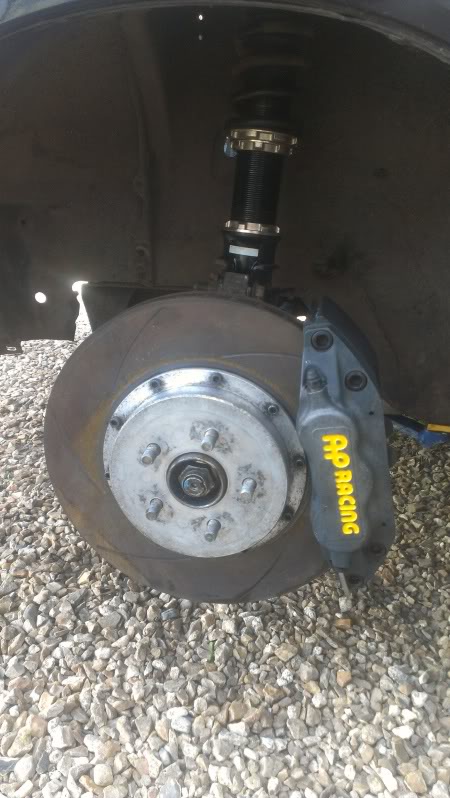
Here's a pic of the brakes...
The other had a blown engine but is polybushed, whiteline rear arb, bc coilovers, sump guard, fmic, 17" speedlines, power fc and some other goodies and looks like this......
I've fully broken the crashed car and intend swaping some parts around on the other 2 so I end up with a nice suspension setup on the rally car. And with breaking the crashed car i have ended up with a spares package of polybushed arms, various roll bars, steering rack, sub frames, 3doors, bonnet etc etc.... Also a 450hp setup for my next project and a 6-speed that we just put in my dads RB2.5!
After all the swapping about I will end up with a faily standard sti which I can put an engine in and sell on and a nicely setup rally car with lots of quality spares
and a few bits and pieces for my next, more serious*project Here's a pic of the brakes...
Last edited by tom-r33; Aug 13, 2013 at 10:01 AM.
Scooby Senior
iTrader: (51)
Joined: Nov 2005
Posts: 20,491
Likes: 2
From: Wherever I park my car, that's my home
Some great work, one comment though - would you not be better mounting the seat belt rear points higher so the harnesses don't crush the seats in the event of an accident
Trending Topics
the harness is designed to keep you in the seat firmly in the event of an accident, so is there to stop you moving upward, which is better achieved with the harness at that angle. there are rules in place within the blue book (race car rules) which say what angle the belts can be at
Also there are some handy point to locate the harness eye bolts already in the shell which are nice and solid, in the form of existing seatbelt mounts

the lap straps also pick up on existing holes which the eye bolts just screw into too. The only thing I had to do was drill through the floor for the centre straps of the 6 point harness, and add a reinforcing plate beneath these as the floor is pretty flimsy underneath the centre of the seats if you pull upward on the harness the floor bows abit!
Scooby Senior
iTrader: (51)
Joined: Nov 2005
Posts: 20,491
Likes: 2
From: Wherever I park my car, that's my home
iirc FIA guidance is between 0 and 45 degrees, but any downward angle equates to a downward force on the back of the seat - it's whatever you're comfortable with at the end of the day I suppose
I might well take you up on that kind offer  where are you based? i'm in the middle of somerset
the cheap scate in me just wants to rattle can the dash matt black
I will more than likely use a few more bits of the old dash to mount switches and gauges and to cover up some wiring etc but i'll post up pics as I go along, will only really know toward the end of the build, which hopefully wont be too long
I'm aiming to be out in it for shake down runs and maybe if everything goes well make it to the regency stages on 12th October.......
where are you based? i'm in the middle of somersetthe cheap scate in me just wants to rattle can the dash matt black
I will more than likely use a few more bits of the old dash to mount switches and gauges and to cover up some wiring etc but i'll post up pics as I go along, will only really know toward the end of the build, which hopefully wont be too long
I'm aiming to be out in it for shake down runs and maybe if everything goes well make it to the regency stages on 12th October.......
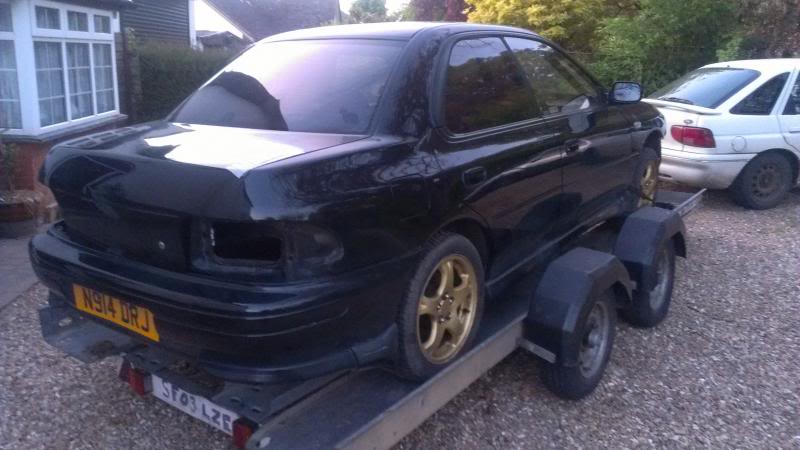
Painted spoiler and tinted rear lights and bolted em on
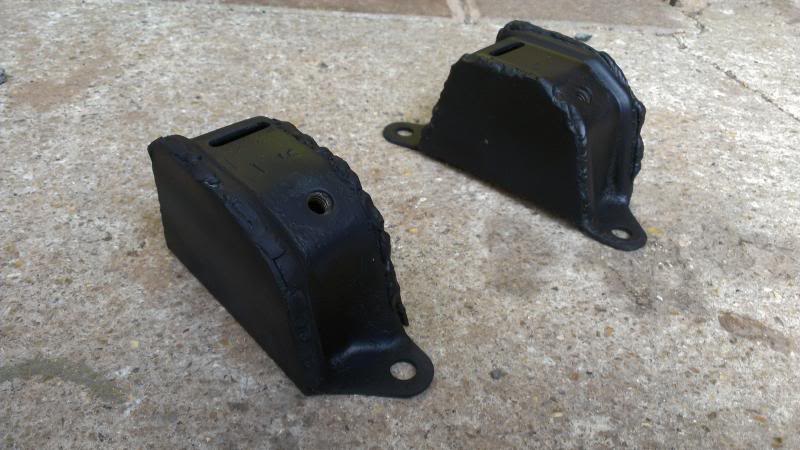
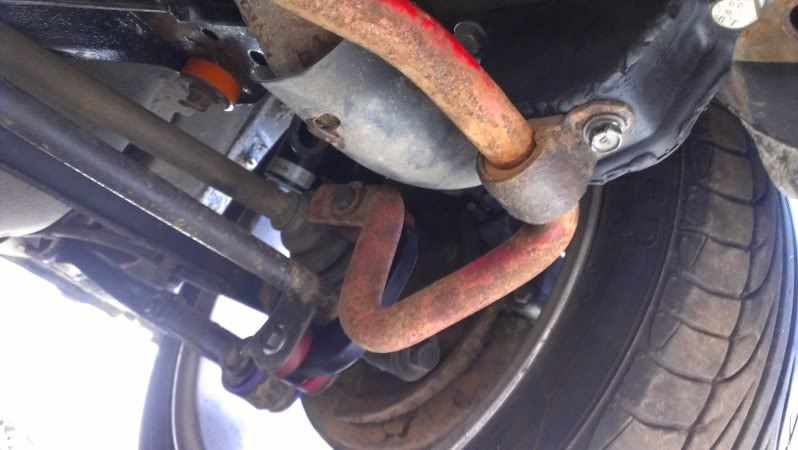
Trying to prep all suspension and beef things up where needed, so took off rear arb brackets and boxed them up
As they came off the car

With mods
Wishing I'd seam welded the shell when it was fully stripped to be honest, I might still do it.....
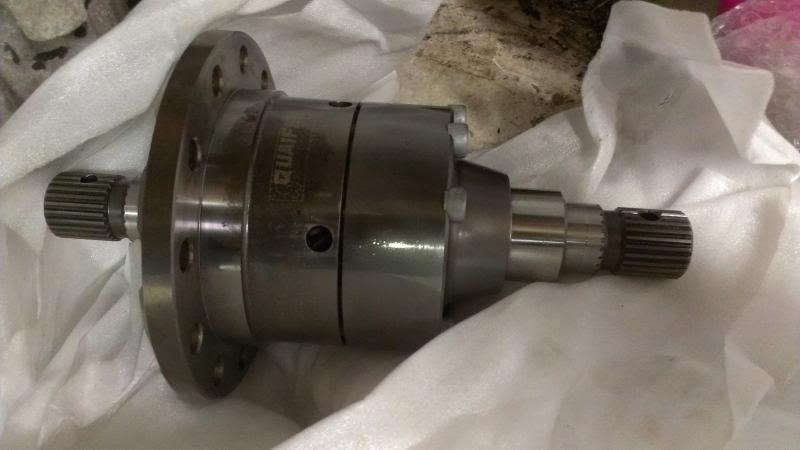
And have this ready to slide in the front of a dccd box
But most of my time this weekend was taken up with picking up this gem and sorting a few things on her...... My VW Transit! :-)
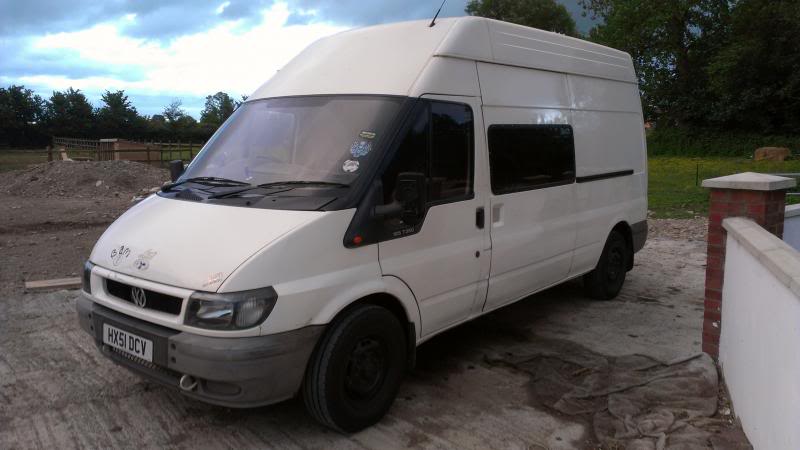
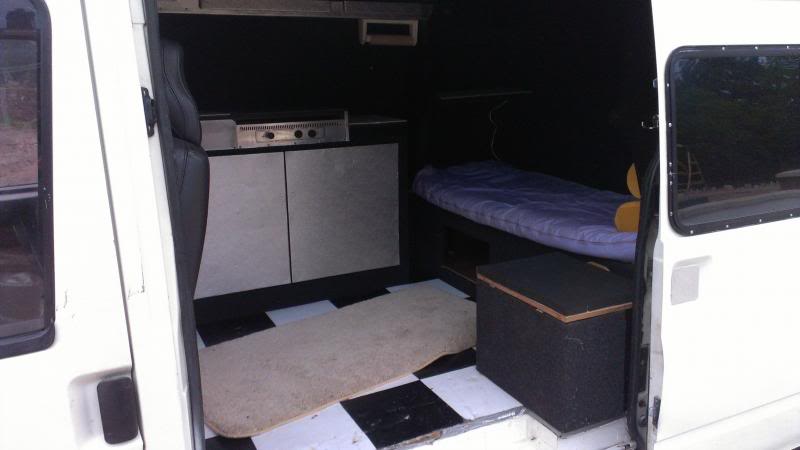
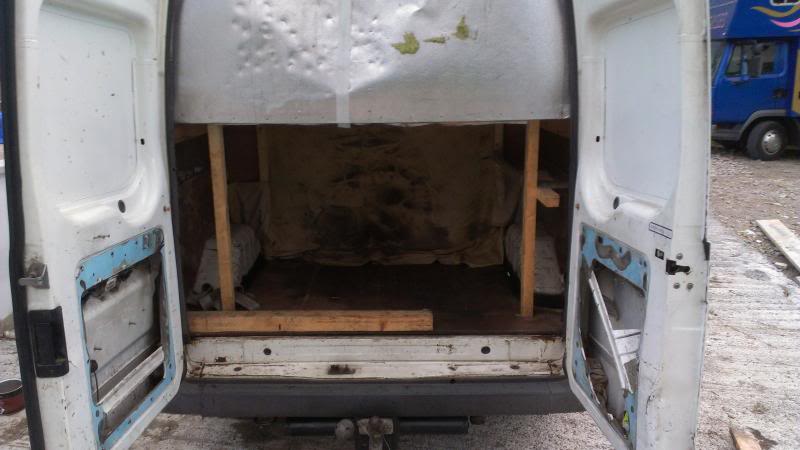
She's a t350 (VW!) transit with 108k on her converted to a camper, front leathers, sink, cooker, leisure battery, bench seat, big double bed that folds down, storage space at the back, tow bar so most of what I need from a rally barge is already there I thought �1140 was a bargain
Trying to prep all suspension and beef things up where needed, so took off rear arb brackets and boxed them up
As they came off the car
With mods
Wishing I'd seam welded the shell when it was fully stripped to be honest, I might still do it.....
And have this ready to slide in the front of a dccd box
But most of my time this weekend was taken up with picking up this gem and sorting a few things on her...... My VW Transit! :-)
She's a t350 (VW!) transit with 108k on her converted to a camper, front leathers, sink, cooker, leisure battery, bench seat, big double bed that folds down, storage space at the back, tow bar so most of what I need from a rally barge is already there
I thought �1140 was a bargain
I can't remember the exact angles, you're probably right though
I'm happy and think that closer to 45deg is prefferable to be honest. I'll go into more detail of you want?!

Scooby Regular
Joined: Aug 2000
Posts: 4,262
Likes: 1
Most shoulder harness manufacturers recommend no more than 15deg from horizontal UNLESS the seat has been designed to take it ( nearly all seats are not designed to take it).
MSA rule book states :
"2.1.10. The anchorage points to the rear should be positioned so that the strap from the shoulder is as near horizontal as possible. It should not be located on the floor directly behind the driver/co-driver".
Thier associated drawings show a range of preferable degrees from horizontal of plus or minus 15deg , they do allow up to 45 deg but there is a clear preference.
so closer to horizontal is actually preferable and safer to the FIA/MSA. Check out any WRC car and see what they do ....
It's your neck at the end of the day.
Last edited by Fat Boy; Jun 24, 2013 at 05:10 PM.
Most shoulder harness manufacturers recommend no more than 15deg from horizontal UNLESS the seat has been designed to take it ( nearly all seats are not designed to take it).
MSA rule book states :
"2.1.10. The anchorage points to the rear should be positioned so that the strap from the shoulder is as near horizontal as possible. It should not be located on the floor directly behind the driver/co-driver".
Thier associated drawings show a range of preferable degrees from horizontal of plus or minus 15deg , they do allow up to 45 deg but there is a clear preference.
so closer to horizontal is actually preferable and safer to the FIA/MSA. Check out any WRC car and see what they do ....
It's your neck at the end of the day.
MSA rule book states :
"2.1.10. The anchorage points to the rear should be positioned so that the strap from the shoulder is as near horizontal as possible. It should not be located on the floor directly behind the driver/co-driver".
Thier associated drawings show a range of preferable degrees from horizontal of plus or minus 15deg , they do allow up to 45 deg but there is a clear preference.
so closer to horizontal is actually preferable and safer to the FIA/MSA. Check out any WRC car and see what they do ....
It's your neck at the end of the day.
And the opinion of harness manufactures but I decided to go off the advice that an MSA scrutineer, and the guy checking out and logbooking my car, recommended. He has campaigned a gc8 in the past and looks after many
I had originally planned to mount them off a harness bar on the rollcage, but then read that modifying the cage in any way voids it and OMP wanted a lot of money for a bolt in one. I then looked at using the existing upper outer seatbelt mounts (in the c pillars) for the outer shoulder straps and attach the inner ones to the front of the 'parcel shelf', which would have needed modifying, so I decided to go off the really solid mounts that were already in the bench area and had been recommended. This area is not classed as the floor
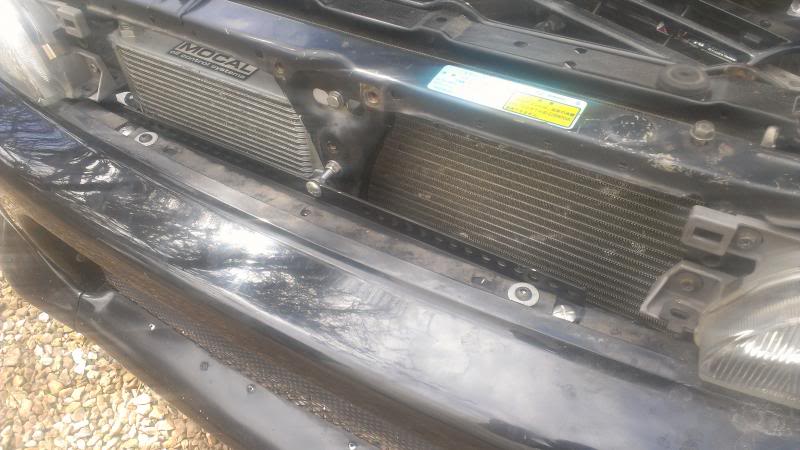
To run the intercooler pipes under the headlights means you cant use the existing bumper mount, so I made up a bracket to attach the bumper and also support the top of the intercooler.
I have some dummy intercooler pipes and had to trim the bumper spotlight recesses to clear
I also mounted the oil cooler in the space between the rad and intercooler
I have some dummy intercooler pipes and had to trim the bumper spotlight recesses to clear
I also mounted the oil cooler in the space between the rad and intercooler

Quick update, not got as much done as I'd have liked but its all being done properly which takes more time in the short term, anyways, I started on the front suspension setup over the weekend. After alot of swapping from one car to another I've ended up fitting these bits to the rally car:
22mm adjustable roll bar with polybushed mounts
Whiteline arb drop links
Whiteline anti lift kit
Polybushed alloy arms
Polybushed steering rack
BC BR series coilovers with unknown spring rates
Alloy strut brace
Alloy lower brace
Sump guard, as it came off the red car, but I'm not happy with how it mounts off the tow eyes so will be modifying it to pick up in better locations
Some of the parts after a clean:
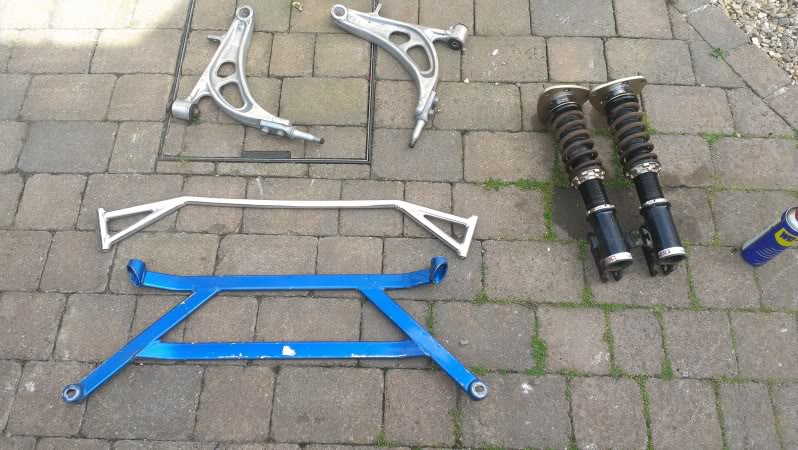
I'm in 2 minds about fitting roll centre correction ball joints and track rod ends at this stage or just go for some new original design stuff
22mm adjustable roll bar with polybushed mounts
Whiteline arb drop links
Whiteline anti lift kit
Polybushed alloy arms
Polybushed steering rack
BC BR series coilovers with unknown spring rates
Alloy strut brace
Alloy lower brace
Sump guard, as it came off the red car, but I'm not happy with how it mounts off the tow eyes so will be modifying it to pick up in better locations
Some of the parts after a clean:
I'm in 2 minds about fitting roll centre correction ball joints and track rod ends at this stage or just go for some new original design stuff
Last edited by tom-r33; Jul 8, 2013 at 11:10 AM.
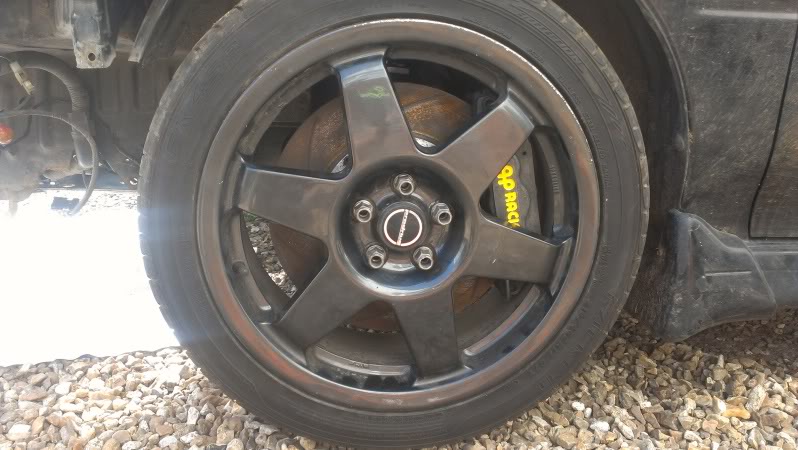
Front end is finished now apart from hard brake lines. I went for some hardrace roll centre adjusters
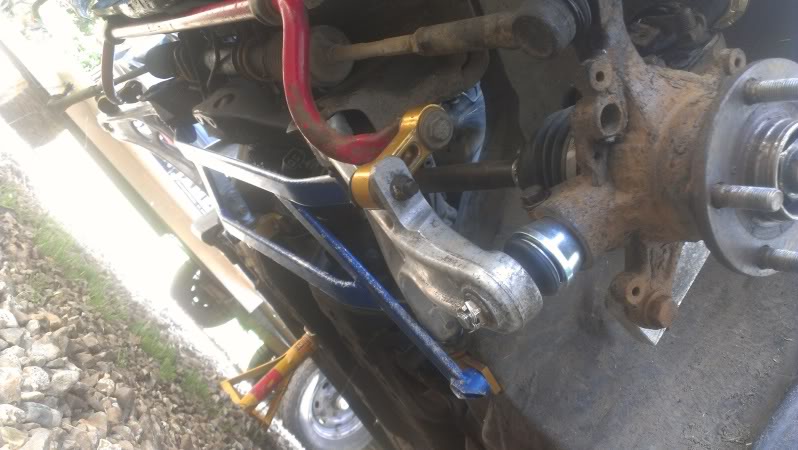
Sorted the sump guard
Changed my mind about the brake setup I'm going to run so robbed these of one of my other cars
Fitted the pipework for the oil cooler, which involved abit of fettling of the front panel
And my old man made a start on the wiring - looks like alot of wires for fuel pump, sender and rear lights?! Plan is to get the car running and then go through the loom and remove uneccessary bits
Last edited by tom-r33; Jul 15, 2013 at 09:15 AM.
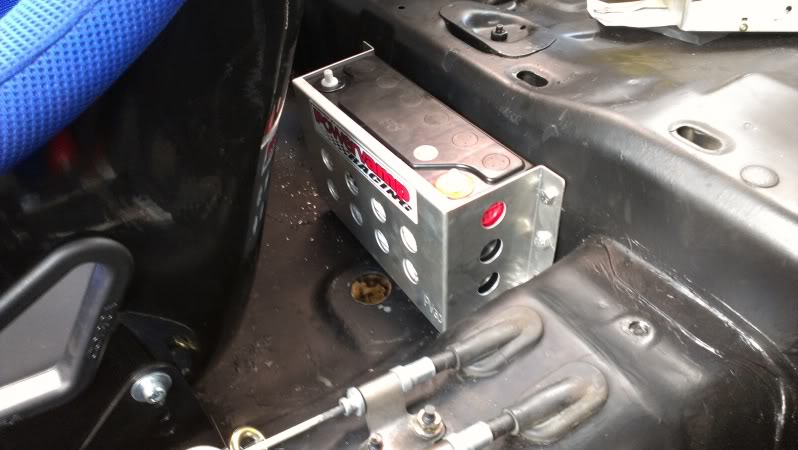
Rear end built up using type r diff, shafts, hubs and brakes. Perrin arb & drop links. Everything polybushed using powerflex apart from subframe which has flowflex and diff mounts which are standard
pvr30 battery mounted behind drivers seat
Hit abit of a snag! Had the dash in place, heaters and controls,clocks etc in and wired up. Was messing around with locations for things like gauges, co driver footrest, ecu etc. When I realised my simtec has 3 plugs and my loom has 4! Damn how did iiss that! Epic fail!
So I ripped the loom out and started trying to figure out what to do....... Well, my dad did! And it looks like I have to swap out pretty much all the wiring in the car! So this has put me back abit and I've lost abit of motivation as it looks like I'll miss the rally day at combe for sure now :-(
Last edited by tom-r33; Aug 20, 2013 at 11:04 AM.

After much head scratching we decided to go this route because the engine/ecu/gauges/loom now all came from the same car which was running 100%, everything worked, mapped etc. So should be a plug in and go job now instead of hacking the existing loom about adding bits and pieces
I did consider selling the simtec ecu and getting another, but with it being locked I was unsure how easy it would be to 'swap' the maps and some pinouts are different, tps reversed etc etc
I did consider selling the simtec ecu and getting another, but with it being locked I was unsure how easy it would be to 'swap' the maps and some pinouts are different, tps reversed etc etc

Looms swapped (every one in the car including dash!) and everything plugged in now
And found time to make a switch panel and mounted the internal kill switch so my old man can sort that side of the wiring out while I'm away this week....
And found time to make a switch panel and mounted the internal kill switch so my old man can sort that side of the wiring out while I'm away this week....
I might well take you up on that kind offer where are you based? i'm in the middle of somerset
the cheap scate in me just wants to rattle can the dash matt black
I will more than likely use a few more bits of the old dash to mount switches and gauges and to cover up some wiring etc but i'll post up pics as I go along, will only really know toward the end of the build, which hopefully wont be too long
I'm aiming to be out in it for shake down runs and maybe if everything goes well make it to the regency stages on 12th October.......
where are you based? i'm in the middle of somersetthe cheap scate in me just wants to rattle can the dash matt black
I will more than likely use a few more bits of the old dash to mount switches and gauges and to cover up some wiring etc but i'll post up pics as I go along, will only really know toward the end of the build, which hopefully wont be too long
I'm aiming to be out in it for shake down runs and maybe if everything goes well make it to the regency stages on 12th October.......
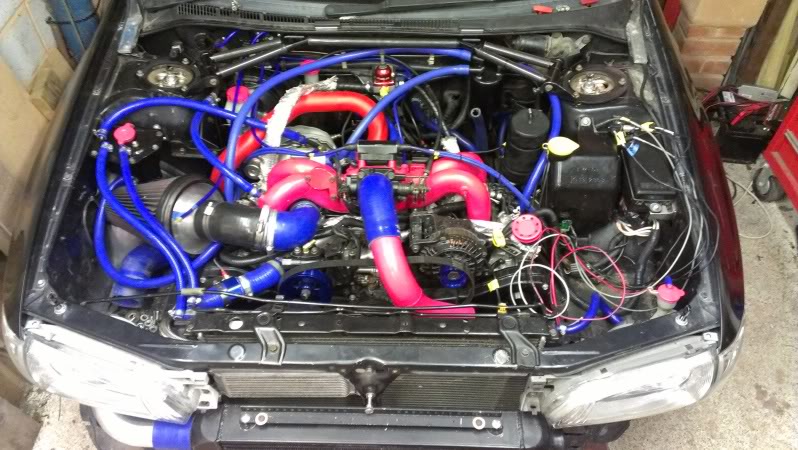
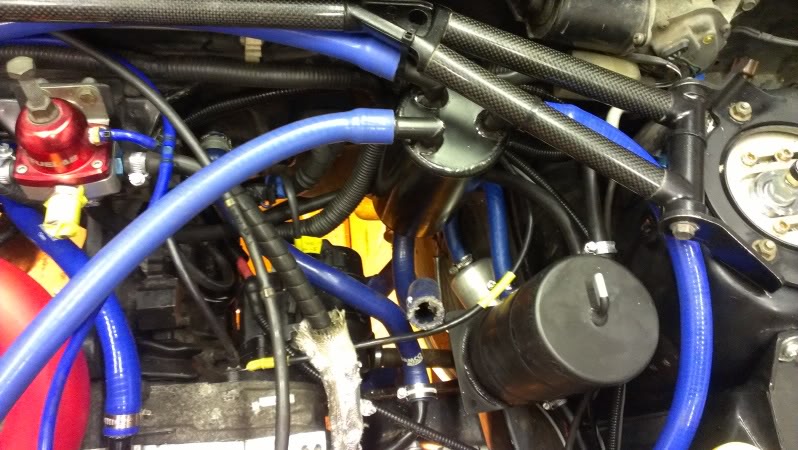
Got a few things sorted over the weekend, interesting bits were relocating the header tank away from the inlet manifold to minimise heat transfer, relocating boost controls onto bulkhead and mounting the external fuel pump and swirl pot in the bay, I hooked it up to the stock pipework that runs through the car and also running parallel fuel rails
Current setup is using sc42 turbo but I will be changing that for a 'rally spec' one which I will be 'clocking' so the pipework is as short as possible and won't run over the top of the hot turbo
Close up of fuel swirl/pump setup
Current setup is using sc42 turbo but I will be changing that for a 'rally spec' one which I will be 'clocking' so the pipework is as short as possible and won't run over the top of the hot turbo
Close up of fuel swirl/pump setup
Last edited by tom-r33; Sep 26, 2013 at 02:06 PM.
