DIY Classic Rally Car Build


 30 September 2013, 09:41 AM
#32
Scooby Regular
Thread Starter
iTrader: (2)

Join Date: Mar 2012
Location: somerset
Posts: 598
Likes: 0
Received 0 Likes
on
0 Posts
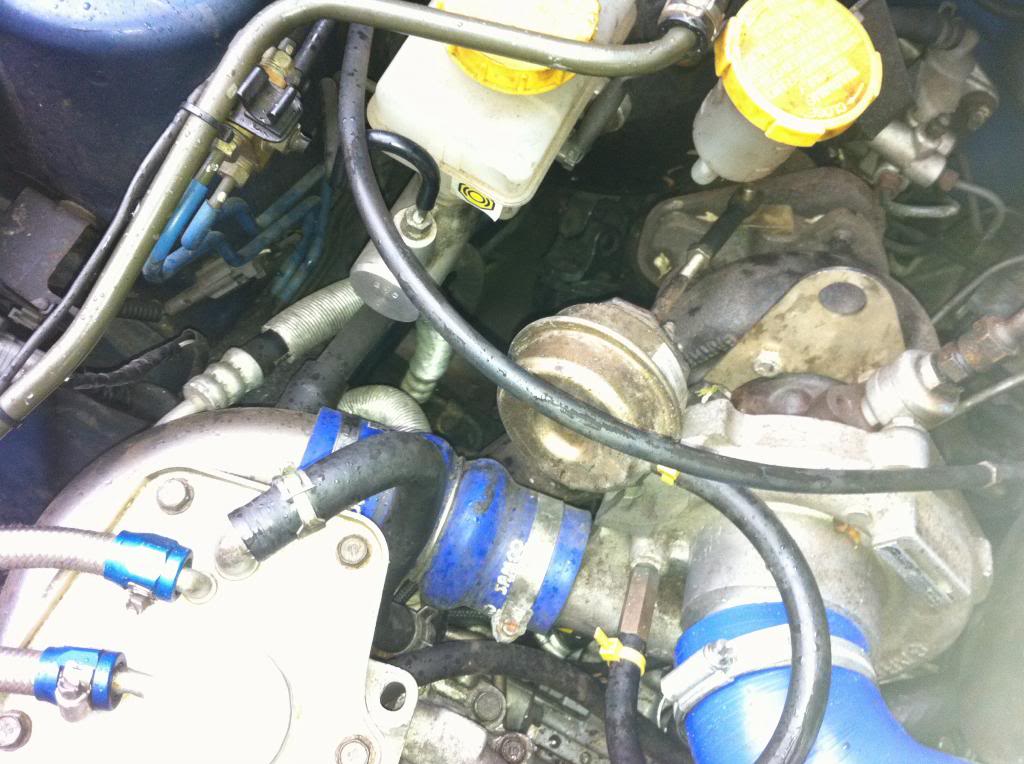
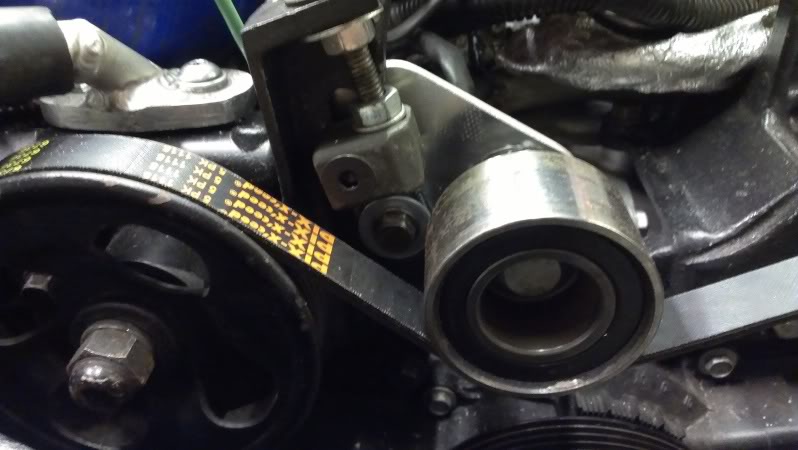
Belt tightened (although ended up abit different to this as the tensioning bolt bent, so replaced with stronger and cap head bolt now countersunk so more clearance to belt) but I'm still not happy with it.
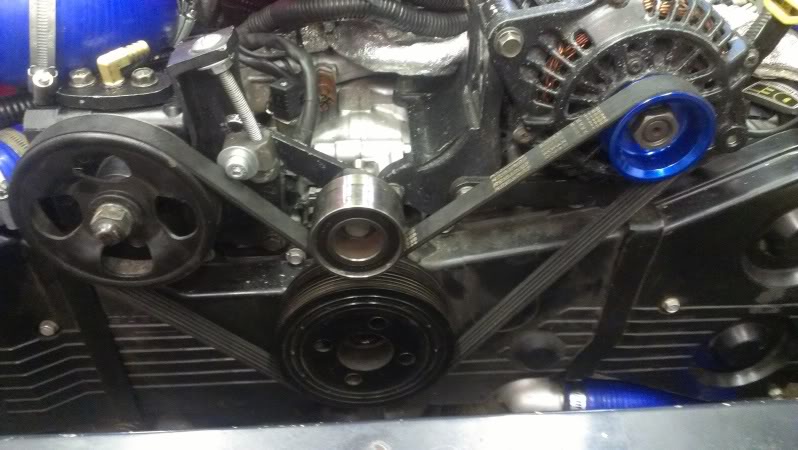
Cooler for p/s added
Cooler for p/s added
Last edited by tom-r33; 30 September 2013 at 09:49 AM.
 10 October 2013, 03:50 PM
#35
Scooby Regular
Thread Starter
iTrader: (2)
Join Date: Mar 2012
Location: somerset
Posts: 598
Likes: 0
Received 0 Likes
on
0 Posts
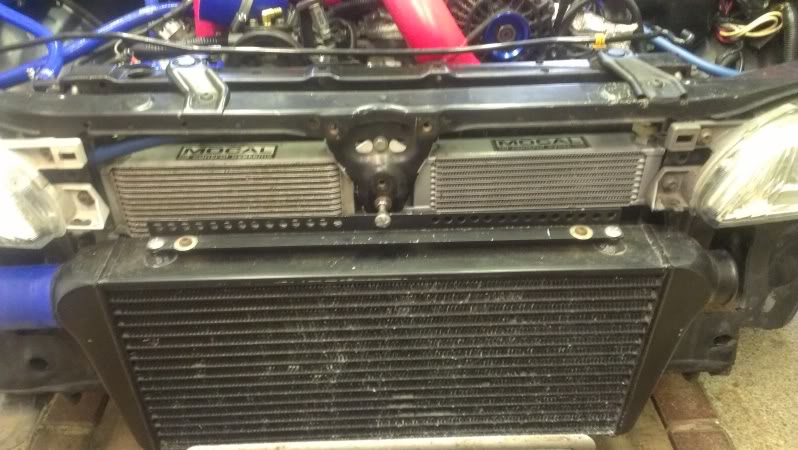
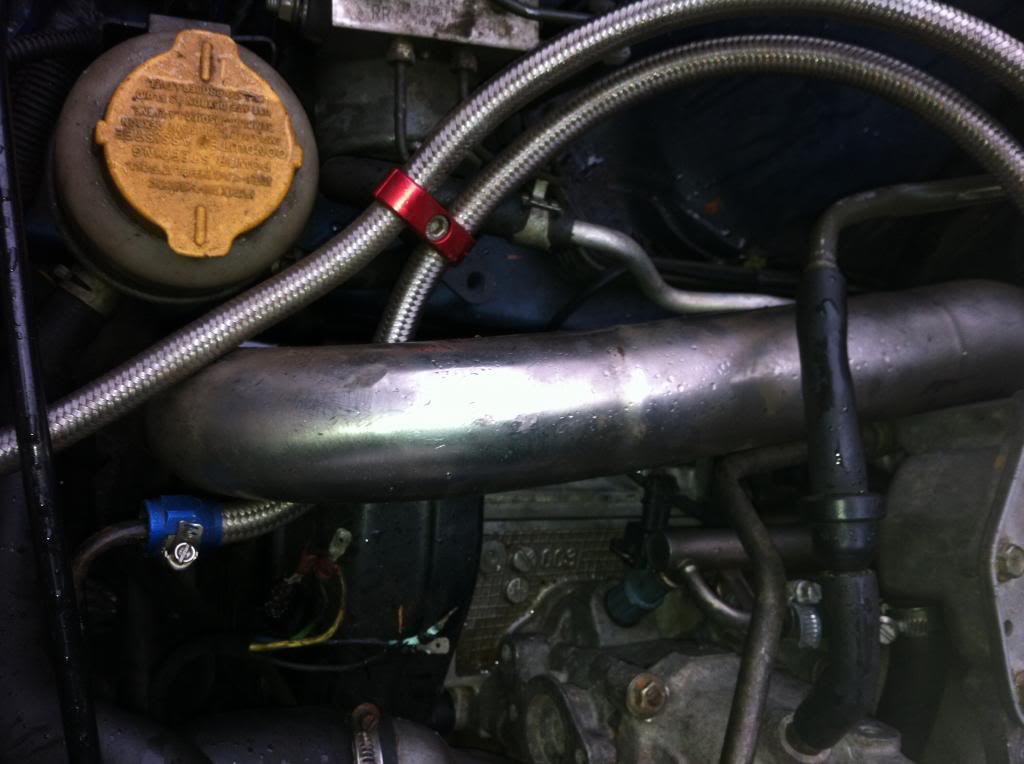
Only a couple pipes left to sort out in the engine bay (I'm toying with the idea of moving the intercooler back so the pipework is even shorter and I will then have a bigger 'crumple zone' directly behind each headlight, so the car will still function if I hit a front corner)
11 October 2013, 08:17 AM
#36
Scooby Regular

On one of daves rally cars he used a smaller Fmic , so he could get it further back and tuck the pipe work away from the corners ,, it seemed to work very well really
Nice build Tom
Nice build Tom
11 October 2013, 11:34 AM
#37
Scooby Regular
Thread Starter
iTrader: (2)
Join Date: Mar 2012
Location: somerset
Posts: 598
Likes: 0
Received 0 Likes
on
0 Posts
Cheers domino
I have 3 or 4 of the common front mounts, so will prob hack the end tanks about on one of those. My main concern is the rad and fan tbh. Had some radical thoughts about boot mounting, ducts in doors, exits in rear quarters etc etc! But I don't want ot in the boot as I need to carry spare wheels and tools there, so I'm on the lookout for a small rad.... Or I may chop up one of the ally ones I have.
I'm at regency stages all day tomoro and raving Sat night, so doubt ill spend much time on it this wknd
11 October 2013, 01:53 PM
#38
Scooby Regular
Sorry I havnt got any better pics but here is what dave dne with his to keep the pipe work away form the corners,,, as iv said the cooler was a very small one but still got good intake temps frm it even with it beng very small
Might give you some ideas though
Might give you some ideas though
 31 October 2013, 07:14 PM
#42
Scooby Regular
Thread Starter
iTrader: (2)
Join Date: Mar 2012
Location: somerset
Posts: 598
Likes: 0
Received 0 Likes
on
0 Posts
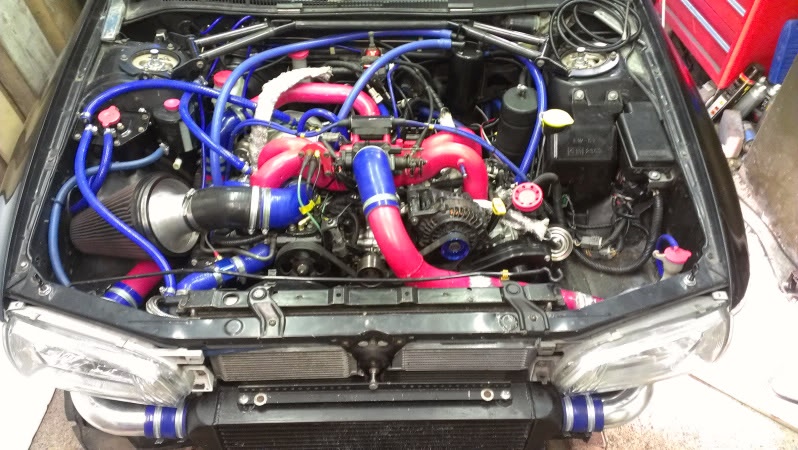
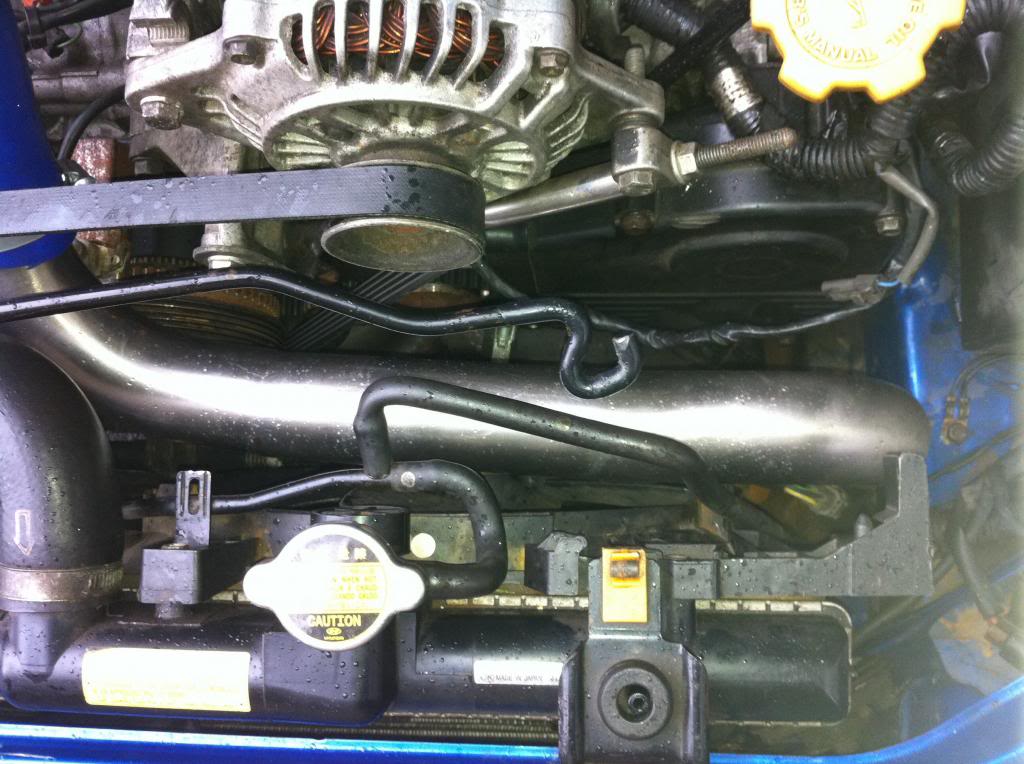
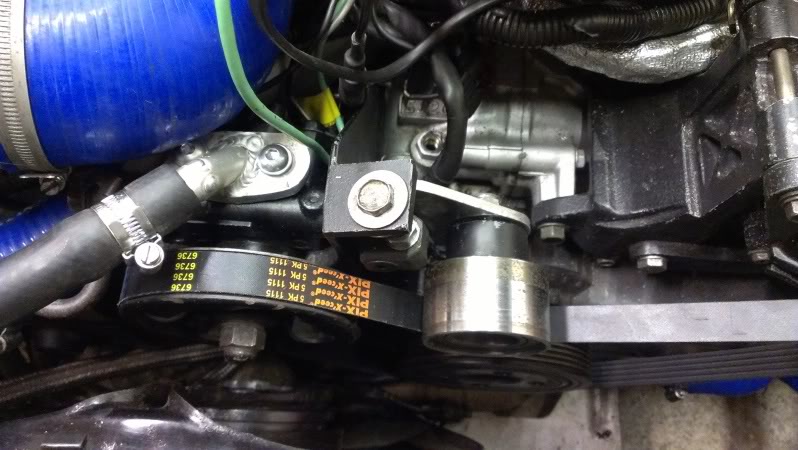
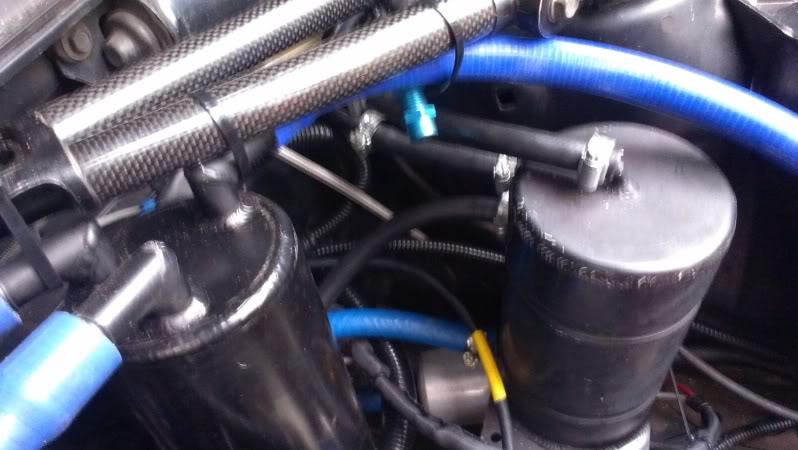
the new belt tensioning bracket, shorter belt and power steering pump fitting
With these fitted I could now fill everything with fluids, bleed systems and fire it up and check everything was ok, no leaks etc.
We found the oil pressure sensor to be reading incorrectly, so that needs to be changed
I was happy that everything was ok, so I changed the oil and plumbed in the oil cooler at the same time
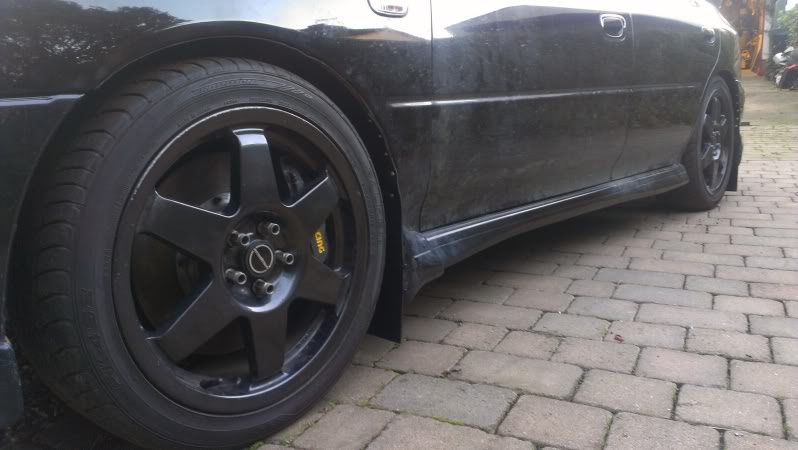
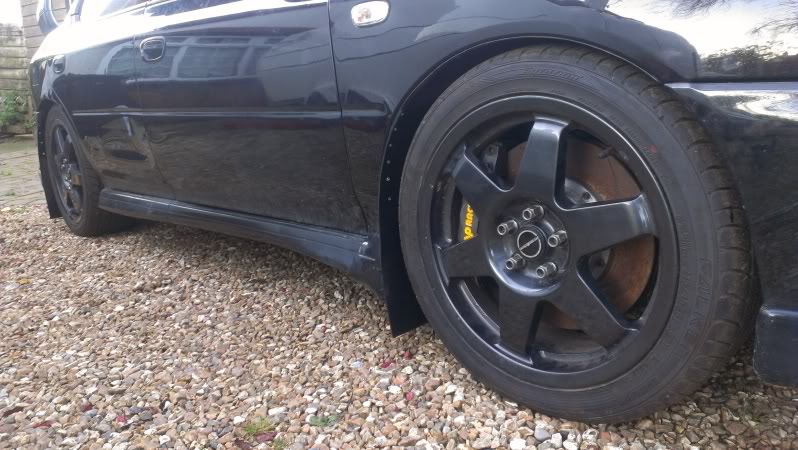
So now I could start it up and move it under its own power I took it outside again and fitted the regulation mud flaps, while there I fitted some longer studs to the front to allow for the spacer I have to run to get the wheels to clear the calipers. I would have fitted longer studs to the rear but being a non ABS setup and the studs being longer than originals which only just squeeze in and out I couldn't see a way of doing this without removing the stub axle and more than likely destroying the rear wheel bearings in the process, so I didn't fit them, i'm hoping to find another way!
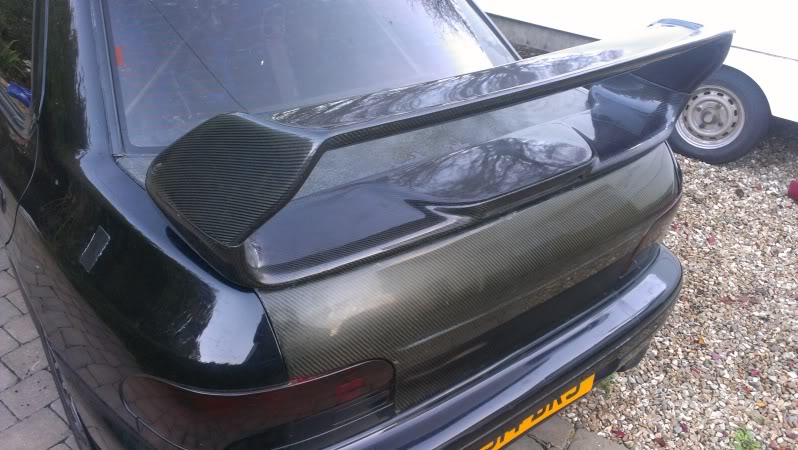
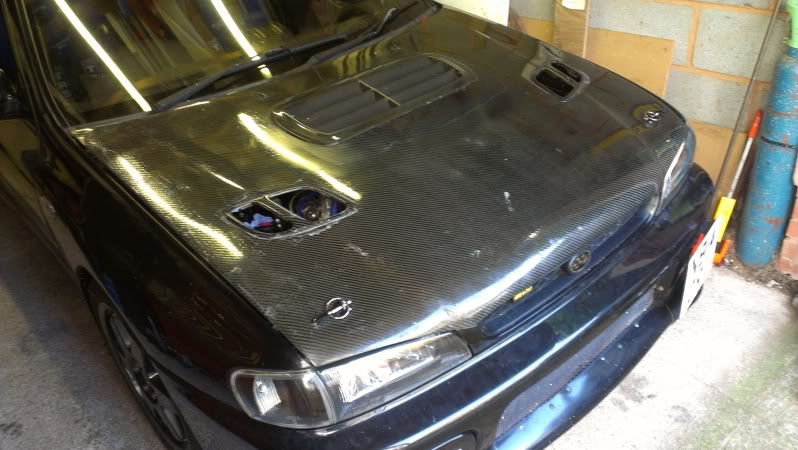
I got hold of a carbon bonnet and bootlid and I already had a carbon spoiler (came on the red car) and bonnet vent so I decided to bolt them on...... the bonnet and top of bootlid are tatty but functional, reflective of the price!
The inside got abit of a tidy up and final few things positioned and fitted, although I think I cut the launch control switch off mistakenly as we cant find it and now we are struggling to identify the wire. This may be a case of getting engine tuner to look at it when down there for maping on the rally spec turbo, which I really need to make my mind up on fast!

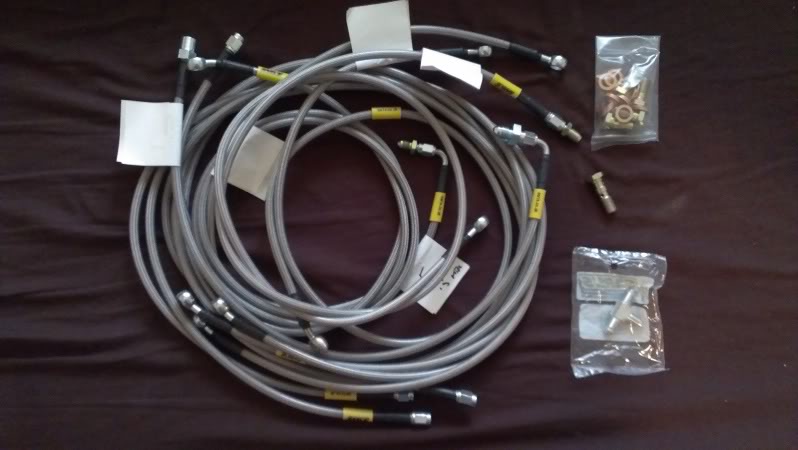
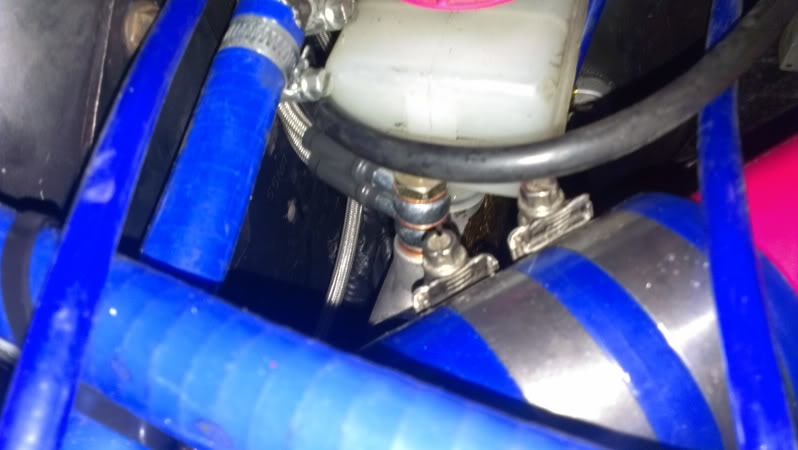
Now I don't know why I hadn't done this way before but the brakes needed bleeding and I was concerned about the joints I had made, having never made copper lines before, so was really hoping I had followed instructions correctly and done a good job. Er, no! Leaked like a sieve in places, lots of joints needed attention, pipework in the engine bay was a nightmare to get at, so I was looking at needing to make up replacement lines and try again. But I had lost confidence in my own abilities, and with the brakes I need to have 100% confidence in them. So I spec'd up some braided lines, minimising the number of joints and therefore chances of failure, which I collected today. All earls so should be good quality, and I also got a spare line which can do any corner
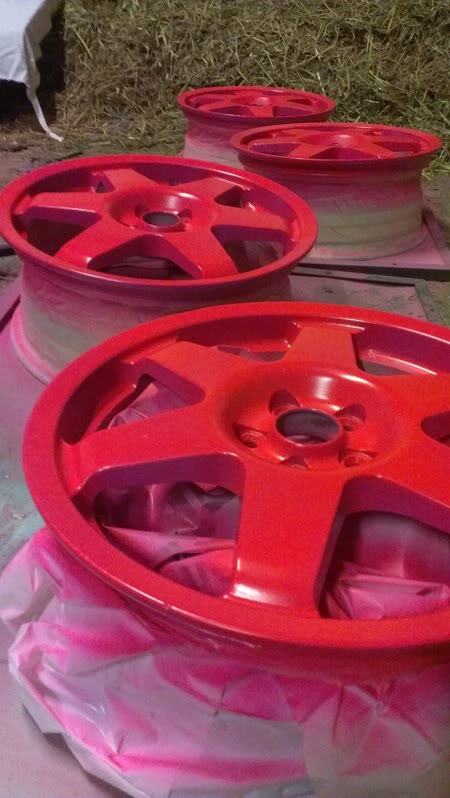
And I sprayed a set of my rally wheels...


With these fitted I could now fill everything with fluids, bleed systems and fire it up and check everything was ok, no leaks etc.
We found the oil pressure sensor to be reading incorrectly, so that needs to be changed
I was happy that everything was ok, so I changed the oil and plumbed in the oil cooler at the same time
So now I could start it up and move it under its own power I took it outside again and fitted the regulation mud flaps, while there I fitted some longer studs to the front to allow for the spacer I have to run to get the wheels to clear the calipers. I would have fitted longer studs to the rear but being a non ABS setup and the studs being longer than originals which only just squeeze in and out I couldn't see a way of doing this without removing the stub axle and more than likely destroying the rear wheel bearings in the process, so I didn't fit them, i'm hoping to find another way!


I got hold of a carbon bonnet and bootlid and I already had a carbon spoiler (came on the red car) and bonnet vent so I decided to bolt them on...... the bonnet and top of bootlid are tatty but functional, reflective of the price!


The inside got abit of a tidy up and final few things positioned and fitted, although I think I cut the launch control switch off mistakenly as we cant find it and now we are struggling to identify the wire. This may be a case of getting engine tuner to look at it when down there for maping on the rally spec turbo, which I really need to make my mind up on fast!

Now I don't know why I hadn't done this way before but the brakes needed bleeding and I was concerned about the joints I had made, having never made copper lines before, so was really hoping I had followed instructions correctly and done a good job. Er, no! Leaked like a sieve in places, lots of joints needed attention, pipework in the engine bay was a nightmare to get at, so I was looking at needing to make up replacement lines and try again. But I had lost confidence in my own abilities, and with the brakes I need to have 100% confidence in them. So I spec'd up some braided lines, minimising the number of joints and therefore chances of failure, which I collected today. All earls so should be good quality, and I also got a spare line which can do any corner

And I sprayed a set of my rally wheels...

 01 November 2013, 09:43 AM
#45
Scooby Regular
Thread Starter
iTrader: (2)
Join Date: Mar 2012
Location: somerset
Posts: 598
Likes: 0
Received 0 Likes
on
0 Posts
Yea Iain hopeing to MOT it next week 
It's non ABS rear hubs, r180 stuff off a type r, so no abs ring or hole for the sensor
The existing studs look like they'll just about come out, but longer ones won't fit back in due to lack of space between stub and hub
It's non ABS rear hubs, r180 stuff off a type r, so no abs ring or hole for the sensor
The existing studs look like they'll just about come out, but longer ones won't fit back in due to lack of space between stub and hub
01 November 2013, 08:02 PM
#48
Scooby Regular
Thread Starter
iTrader: (2)
Join Date: Mar 2012
Location: somerset
Posts: 598
Likes: 0
Received 0 Likes
on
0 Posts
how long were the studs you fitted?
Mine are 20mm longer than standard
The only way I could get one in was to line it up with the hole, stud at an angle (it's longer than the back space) and force the hub round so the stud had no option other than to go through, which it did. however, the thread got damaged, so the nut got stuck, I tried to use the splines to hold the stud while I undid the nut which was very difficult, so I thought that once past the damaged portion of thread the nut would go on fine, so carried on tightening it (thought i'd clean up the threads later, and it was only the very end that was damaged). Through using the slight bit of spline engagement I could get to stop the stud rotating, the splines wore down, to the point where there were none left. so one of the stud holes has no splines, so the stud just turns in the hole. And had a nut stuck on it, so I cut it off after smashing the **** out of it with my hammer, knowing how much work I had just made for myself.
Are all rear stub axles the same on all classics or is the type r specific?
I tried my hardest, now I have even more work to do
 I was really trying to avoid this
On the up side i'm well happy with the brake lines, just need 2 adaptors as I spec'd the threads for the brake bias valve wrong, and it's good to bleed, fingers crossed! Hopefully I can grab them in the morning and get the brake system finished off over the weekend
02 November 2013, 07:31 PM
#53
Scooby Regular
Thread Starter
iTrader: (2)
Join Date: Mar 2012
Location: somerset
Posts: 598
Likes: 0
Received 0 Likes
on
0 Posts
brake lines fitted, i'll take some more pics tomorrow to show the full run to the calipers
I wish i'd got 180deg bends and slightly shorter hoses to and from the hydro, and I should have followed the handbrake cables all the way back with the rear lines, but apart from that i'm fairly happy with the setup

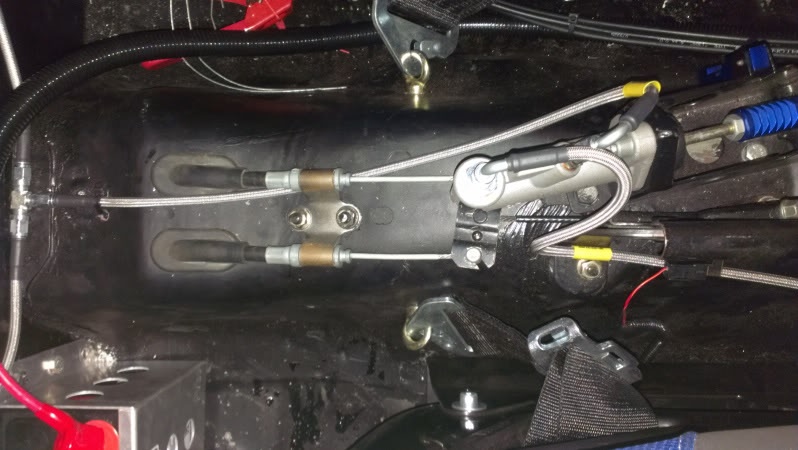
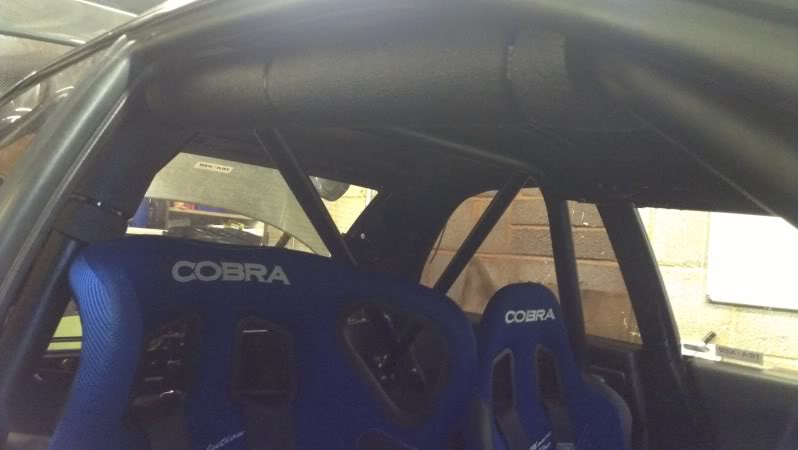
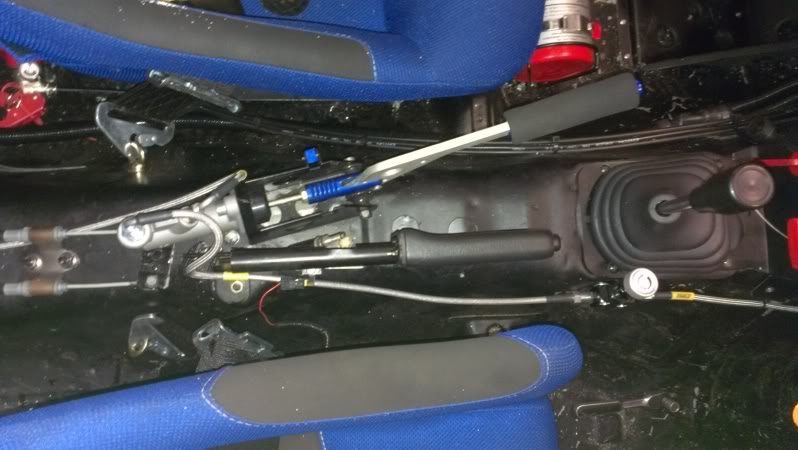
Screwed the centre pod down, driver and co-driver should be able to see these easily
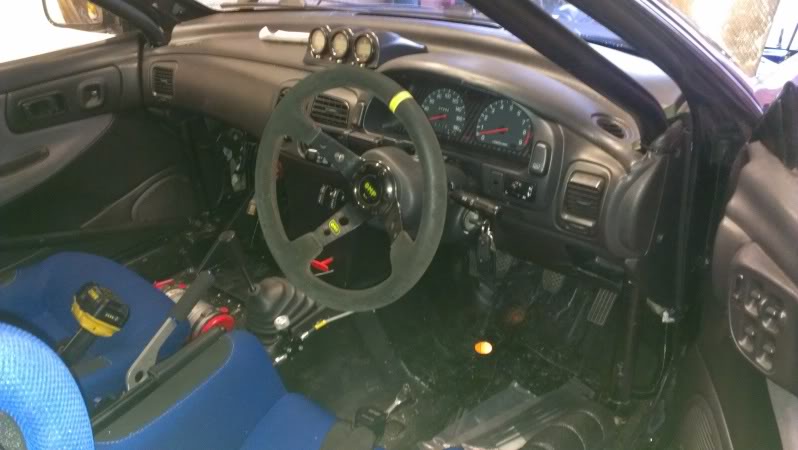
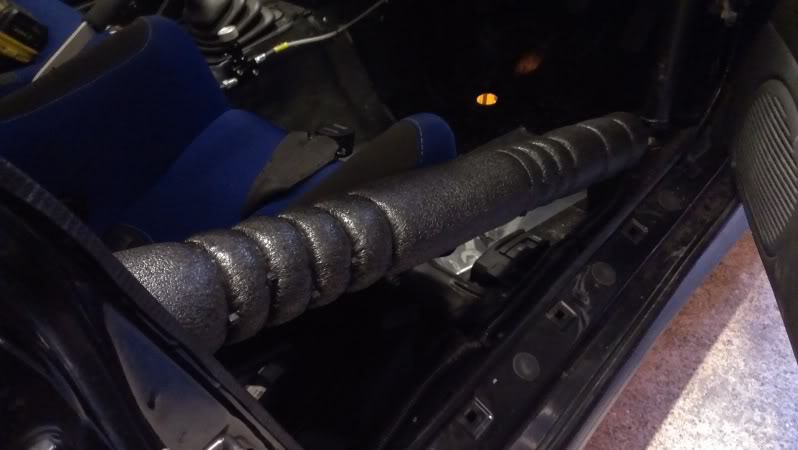
And I put some padding on the rollcage, need to order more! the cable ties are to try and reduce the diameter where the padding hits the doorcards, I might take them off and trim the foam, I think that would be better
I will be attacking the hub/stud issue soon, i'm mulling over exactly what to do. i'm still not sure if the r180 stub axles are the same as the r160 spares I have, does anyone know???
I wish i'd got 180deg bends and slightly shorter hoses to and from the hydro, and I should have followed the handbrake cables all the way back with the rear lines, but apart from that i'm fairly happy with the setup


Screwed the centre pod down, driver and co-driver should be able to see these easily

And I put some padding on the rollcage, need to order more! the cable ties are to try and reduce the diameter where the padding hits the doorcards, I might take them off and trim the foam, I think that would be better


I will be attacking the hub/stud issue soon, i'm mulling over exactly what to do. i'm still not sure if the r180 stub axles are the same as the r160 spares I have, does anyone know???
02 November 2013, 07:39 PM
#54
Scooby Senior
iTrader: (51)
Join Date: Nov 2005
Location: Wherever I park my car, that's my home
Posts: 20,491
Likes: 0
Received 2 Likes
on
2 Posts
I'd be interested to see your brake runs, whilst I'm content with the copper runs since I removed the ABS I can see room for improvement and full braided runs seems a tidier option
 I got another couple sets need sorting, and a few parts. PCL by any chance?
 03 November 2013, 08:18 PM
#59
Scooby Regular
Thread Starter
iTrader: (2)
Join Date: Mar 2012
Location: somerset
Posts: 598
Likes: 0
Received 0 Likes
on
0 Posts
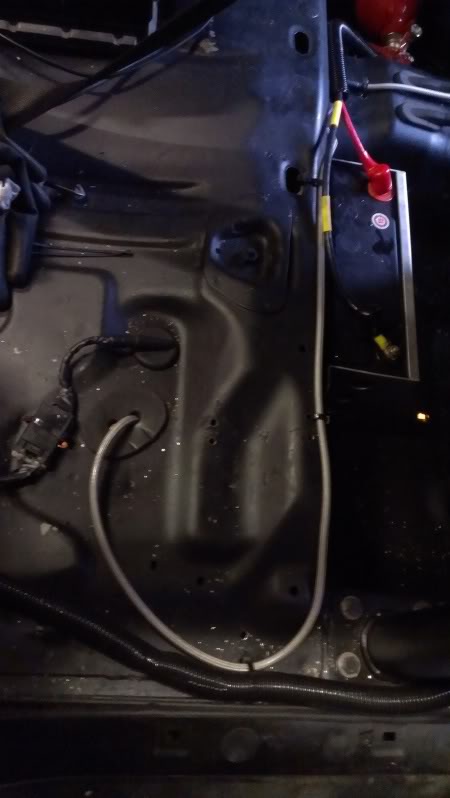
the brake lines...
front drivers side: runs from the master cylinder, out a hole (ABS sensor wiring) in the wing and to the caliper. 1m is plenty, I had to curl it up abit inside the engine bay. 900 would have been perfect. straight 10mm banjo eye to 20deg 10mm banjo eye (caliper end)
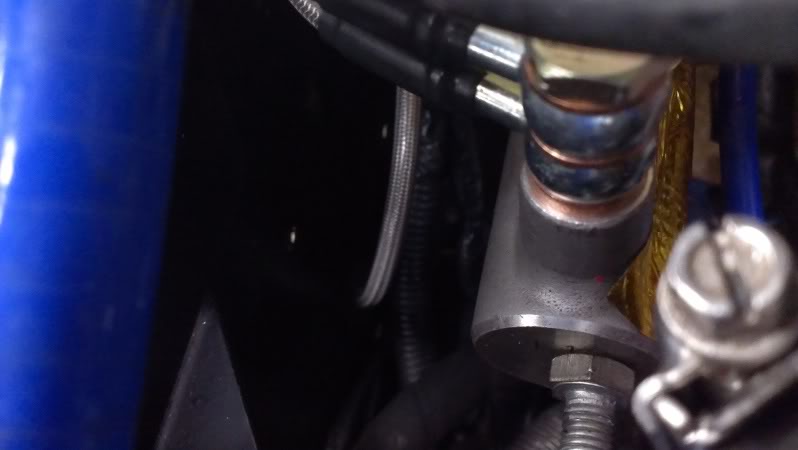
The passenger side runs along the bulkhead (well away from heat sources) and then through a hole I had to drill in the inner arch and then out to the caliper. 2m straight 10mm banjo eye to 20deg 10mm banjo eye, spot on.
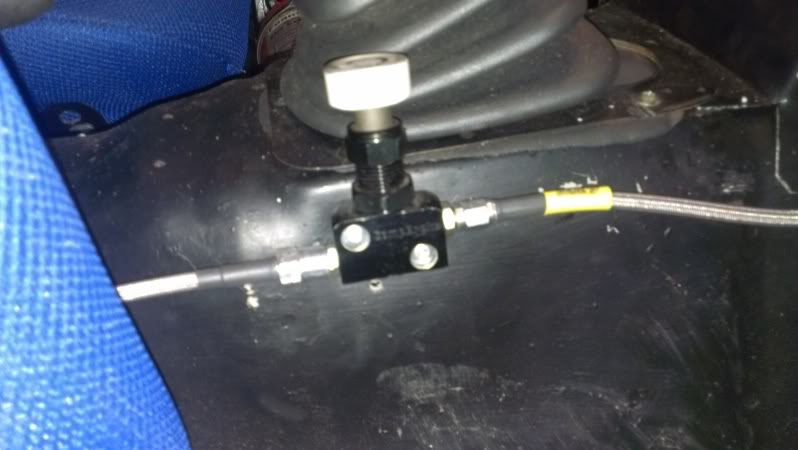
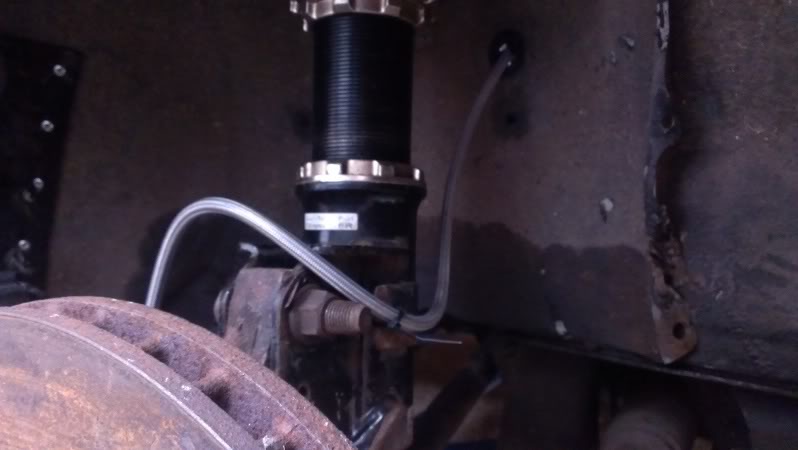
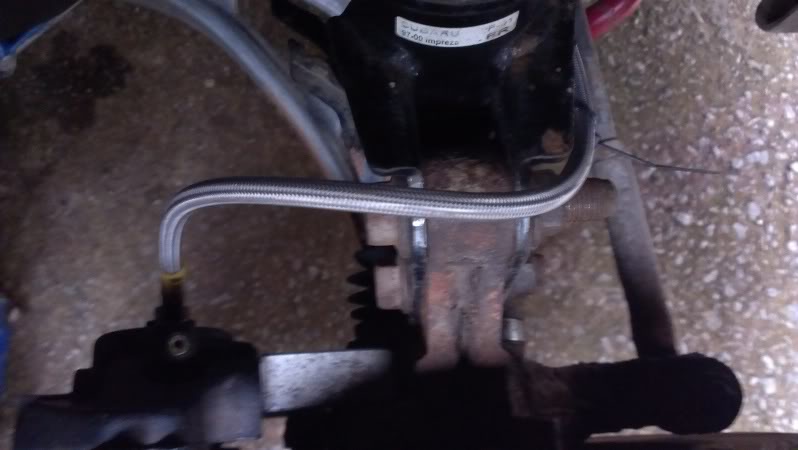
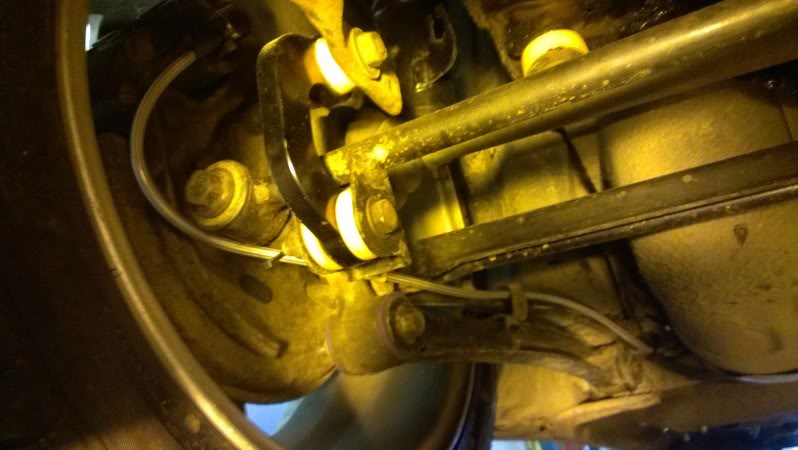
The rear line comes off the master cylinder and back through the bulkhead through an existing hole, behind and above the accelerator pedal, and then to the bias valve. (1.5m straight 10mm banjo eye to straight 3/8UNF male) Then to the hydraulic handbrake (0.6m straight 3/8UNF male to 90deg 7/16 male), then back to a tee (0.5m 90deg 3/8UNF male to straight 3/8UNF male) which is just infront the rear bench. each line (2m straight 3/8UNF to 20deg 10mm banjo eye) then goes out along the bench almost to the doors, then back and through existing holes. From there they follow the handbrake cable along the rear arm and then up to the caliper. I wish I had followed the handbrake cables all the way!


front drivers side: runs from the master cylinder, out a hole (ABS sensor wiring) in the wing and to the caliper. 1m is plenty, I had to curl it up abit inside the engine bay. 900 would have been perfect. straight 10mm banjo eye to 20deg 10mm banjo eye (caliper end)


The passenger side runs along the bulkhead (well away from heat sources) and then through a hole I had to drill in the inner arch and then out to the caliper. 2m straight 10mm banjo eye to 20deg 10mm banjo eye, spot on.

The rear line comes off the master cylinder and back through the bulkhead through an existing hole, behind and above the accelerator pedal, and then to the bias valve. (1.5m straight 10mm banjo eye to straight 3/8UNF male) Then to the hydraulic handbrake (0.6m straight 3/8UNF male to 90deg 7/16 male), then back to a tee (0.5m 90deg 3/8UNF male to straight 3/8UNF male) which is just infront the rear bench. each line (2m straight 3/8UNF to 20deg 10mm banjo eye) then goes out along the bench almost to the doors, then back and through existing holes. From there they follow the handbrake cable along the rear arm and then up to the caliper. I wish I had followed the handbrake cables all the way!


Last edited by tom-r33; 03 November 2013 at 08:26 PM.
03 November 2013, 08:25 PM
#60
