
Widearch classic conversion


Thread Starter
Scooby Regular
Joined: Feb 2003
Posts: 21,611
Likes: 0
From: Zed Ess Won Hay Tee
1st things 1st 
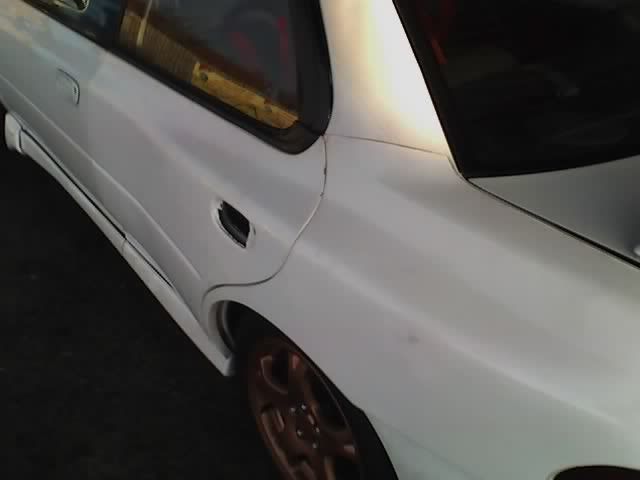
remove rear 1/4 panel Ariel so i can offer up the rear arch and check for fitment.
fits kinda close but will need blended.

a few quick trims and the rear arch is fine
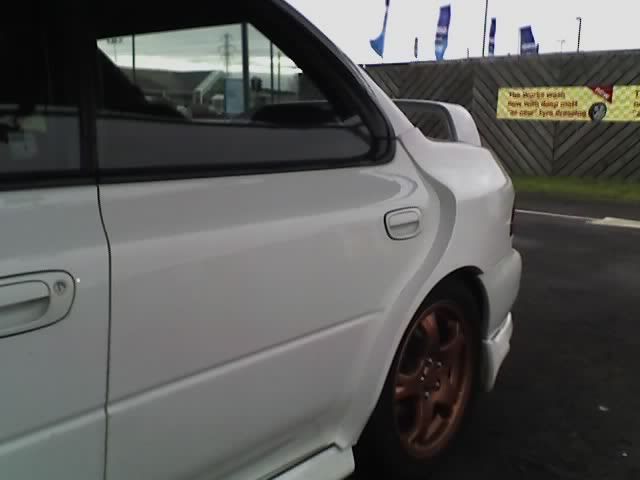
you can see how much wider the 22b is with this shot, the closed rear door is holding the arch on lol
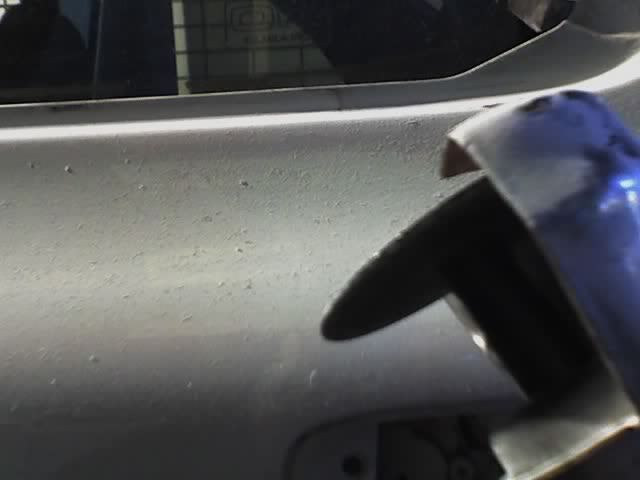
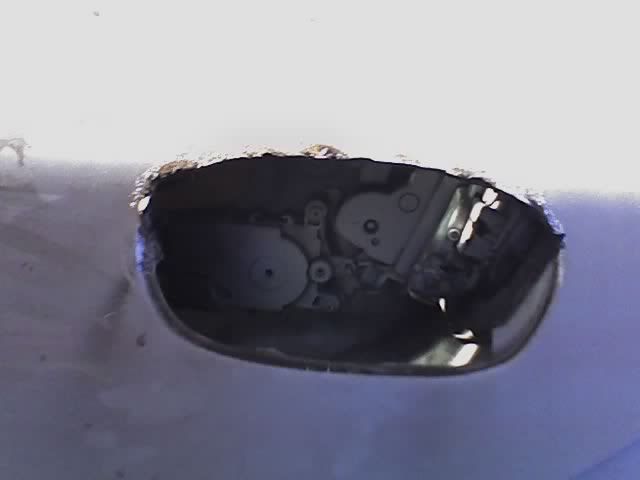
now, the rear door skin needs some prep work, the door handle recess is not cut out, so lets make a start on that with some holes and a hacksaw blade (forgot i had a cutoff tool?!?!)
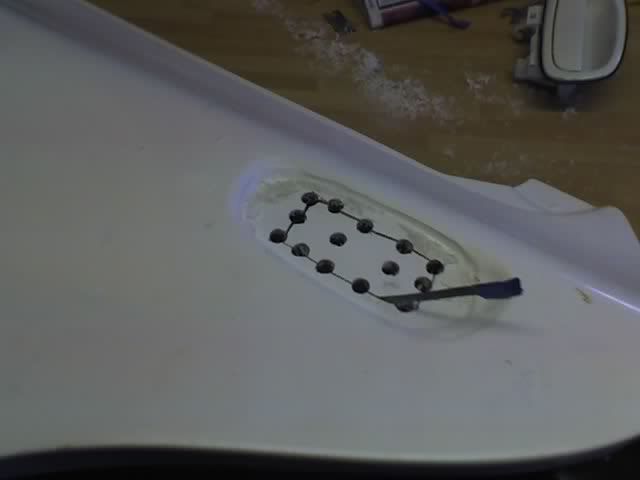
this is time consuming, but eventually you will be able to bolt the rear handle on like this
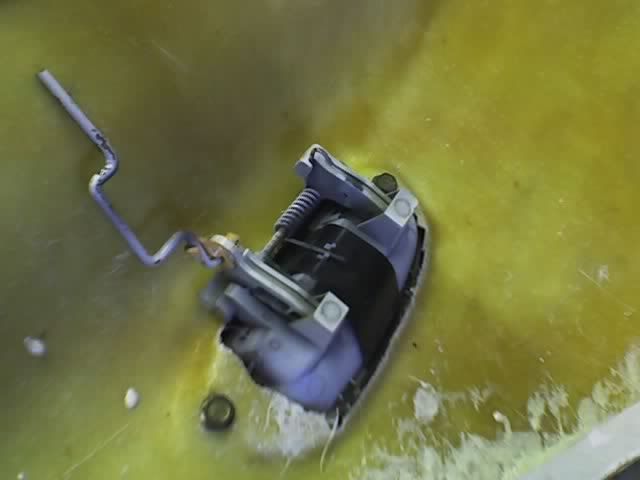
view from the outside
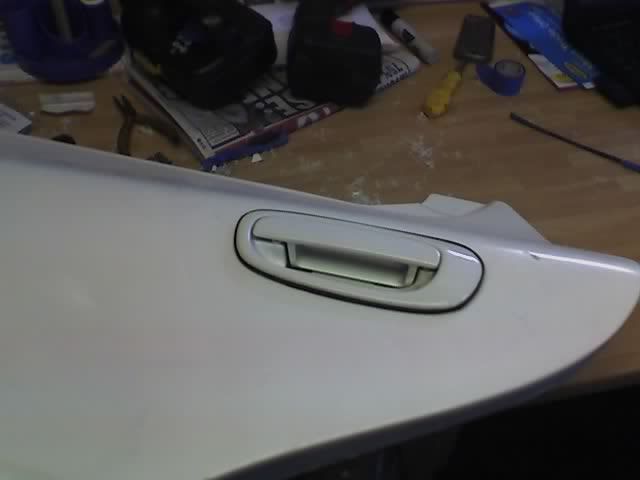
right, whip the handle back off and lets offer up the rear doorskin to the car to check the pannel gaps, its pretty close, but its still a bit off at one part
give it a bit of a file down in places and see if we can improve things
better, but still not perfect, the curve of one of the parts is a little off, hopefully i can jiggle the rear door latch a little to even things out.
now the door handle was tried with the new skin taped onto the car and it interfered a little bit (at least i think it did)
this can only mean one thing, its cutting time right now, this is the point of no return, this bit was a bit of a head stamp, do i? dont i? do i? dont i ?
lets cut the rear door to smithereens
what i was left with :shock:
lets not waste any time, get the adhesive on the go, this stuff i bought from a plastic manufacturing company, they said it will work, we shall see!

get the fettled skin and stick it on, refit the window seal to help clamp the top down and tape up the rest to help it cure in position

now i rushed the next part and forgot to take any pics, basically i worked out where i needed to cut and glue, and set myself away, the cutoff tool disc snapped :roll: so i couldn't cut the metal right off and weld up the gap, but i have enough room under the arch to sort this out tomorrow.

bond it all on and tape it all up so it can set for the next 24 hours, will remove the rear wheel tomorrow, and finish off under the arch with the cutting and welding, then seal all the underside up.
will continue this later just ordered my new 18" wheels with et35 offset
remove rear 1/4 panel Ariel so i can offer up the rear arch and check for fitment.
fits kinda close but will need blended.
a few quick trims and the rear arch is fine
you can see how much wider the 22b is with this shot, the closed rear door is holding the arch on lol
now, the rear door skin needs some prep work, the door handle recess is not cut out, so lets make a start on that with some holes and a hacksaw blade (forgot i had a cutoff tool?!?!)
this is time consuming, but eventually you will be able to bolt the rear handle on like this
view from the outside
right, whip the handle back off and lets offer up the rear doorskin to the car to check the pannel gaps, its pretty close, but its still a bit off at one part
give it a bit of a file down in places and see if we can improve things
better, but still not perfect, the curve of one of the parts is a little off, hopefully i can jiggle the rear door latch a little to even things out.
now the door handle was tried with the new skin taped onto the car and it interfered a little bit (at least i think it did)
this can only mean one thing, its cutting time
right now, this is the point of no return, this bit was a bit of a head stamp, do i? dont i? do i? dont i ?lets cut the rear door to smithereens
what i was left with :shock:
lets not waste any time, get the adhesive on the go, this stuff i bought from a plastic manufacturing company, they said it will work, we shall see!
get the fettled skin and stick it on, refit the window seal to help clamp the top down and tape up the rest to help it cure in position
now i rushed the next part and forgot to take any pics, basically i worked out where i needed to cut and glue, and set myself away, the cutoff tool disc snapped :roll: so i couldn't cut the metal right off and weld up the gap, but i have enough room under the arch to sort this out tomorrow.
bond it all on and tape it all up so it can set for the next 24 hours, will remove the rear wheel tomorrow, and finish off under the arch with the cutting and welding, then seal all the underside up.
will continue this later
just ordered my new 18" wheels with et35 offset
don't think i've got the ***** to do that!!!
good luck tho!!
i see you have wide arches on the front, what make are they, cost etc???
did the car look odd with just the front done???
it's easy to imagine what mine would look like as i have exactly the same!!
good luck tho!!
i see you have wide arches on the front, what make are they, cost etc???
did the car look odd with just the front done???
it's easy to imagine what mine would look like as i have exactly the same!!
Thread Starter
Scooby Regular
Joined: Feb 2003
Posts: 21,611
Likes: 0
From: Zed Ess Won Hay Tee
dont get me wrong, this is the first time i have done this myself LOL
the fronts are "do-luck front blister fenders", pretty similar to 22b but not quite as wide and a slightly different shape. around �330 from the american ebay
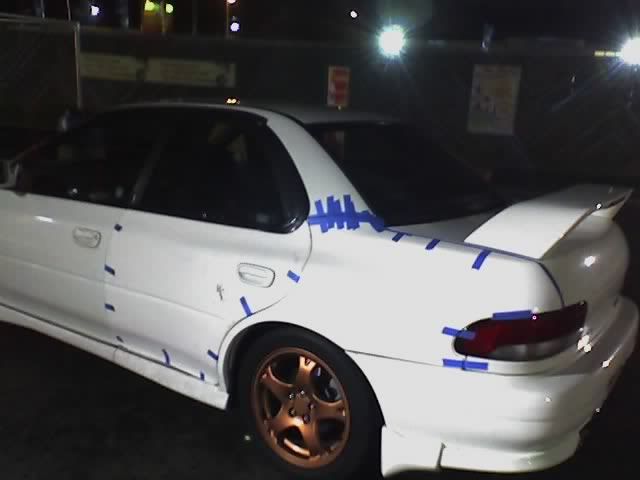
it did look a bit odd at first. but i spaced the standard wheels out 5mm at the front and 6mm at the rear and it all looked lots better.
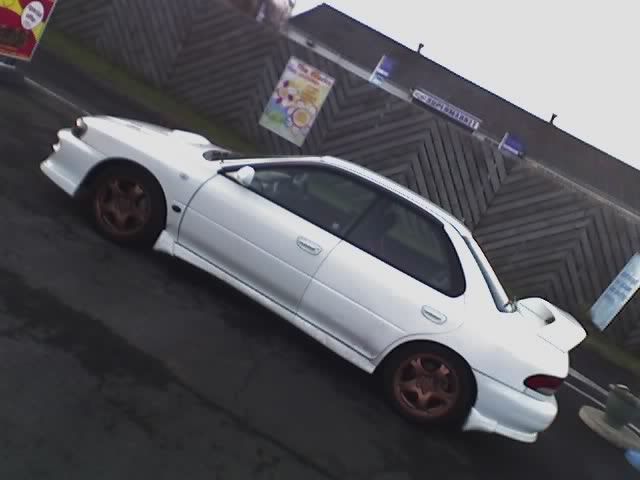
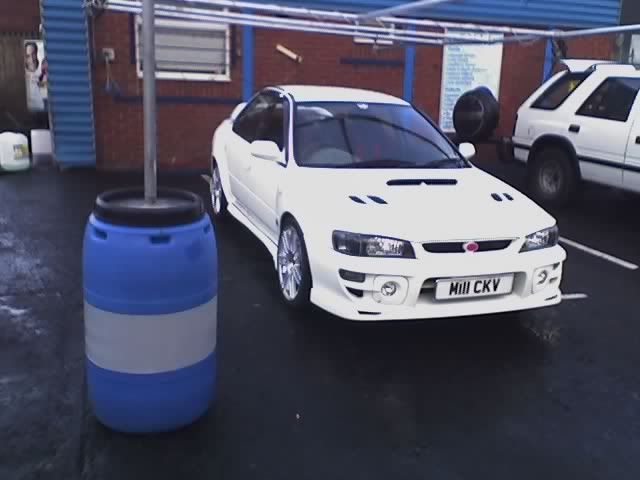
here is the car outside work all taped up on the 16" standard wheels (spaced 6mm at the rear)
the fronts are "do-luck front blister fenders", pretty similar to 22b but not quite as wide and a slightly different shape. around �330 from the american ebay
it did look a bit odd at first. but i spaced the standard wheels out 5mm at the front and 6mm at the rear and it all looked lots better.
here is the car outside work all taped up on the 16" standard wheels (spaced 6mm at the rear)

Thread Starter
Scooby Regular
Joined: Feb 2003
Posts: 21,611
Likes: 0
From: Zed Ess Won Hay Tee
somebody from this forum gave them to me for nothing
sent me a PM saying he knew where i worked and do i want a set of standard wheels for free as they were corroded and he had sold his car.
rubbed them down and painted them "copper"
flogging the 17" legacy wheels if you fancy them>?
sent me a PM saying he knew where i worked and do i want a set of standard wheels for free as they were corroded and he had sold his car.
rubbed them down and painted them "copper"
flogging the 17" legacy wheels if you fancy them>?
Trending Topics


 So you didn't need any primer for the adhesive then??
Thread Starter
Scooby Regular
Joined: Feb 2003
Posts: 21,611
Likes: 0
From: Zed Ess Won Hay Tee
Unfortunately i did not get much done today.
Went into work early, to take of the masking tape

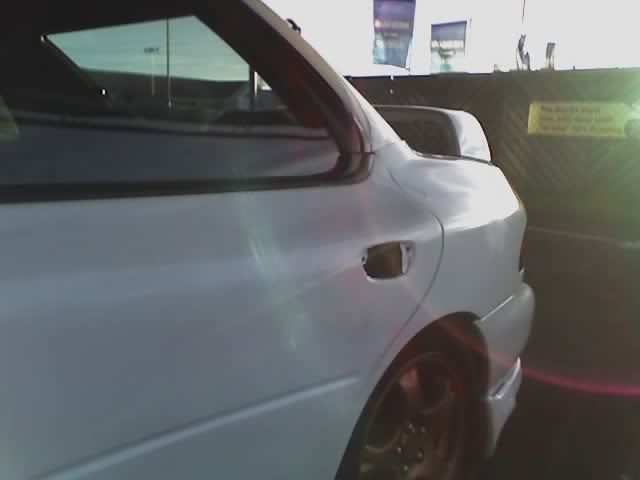
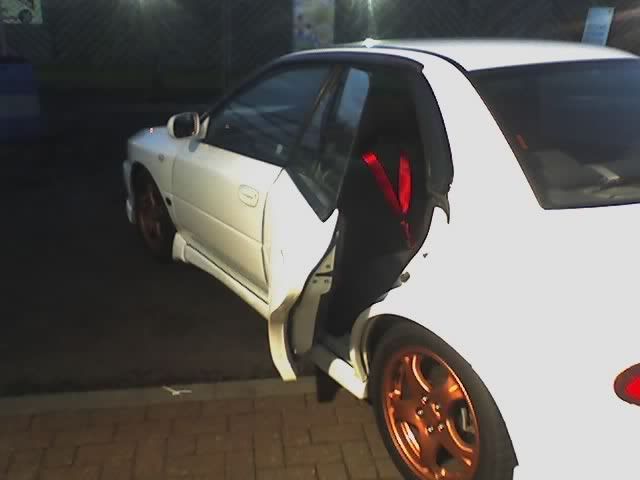
took a photo from the front to show how well the 22b rears match the do-luck fronts

the rear doorskins are not getting blended in on my car, they are simply getting bonded over and then repainted, some of the join needed a little tidy up so i went over the join once again with sealer
now the rear arch will need blended, inside the doorshut i`m not to bothered about and will just seal up/repaint the main points that require work are here
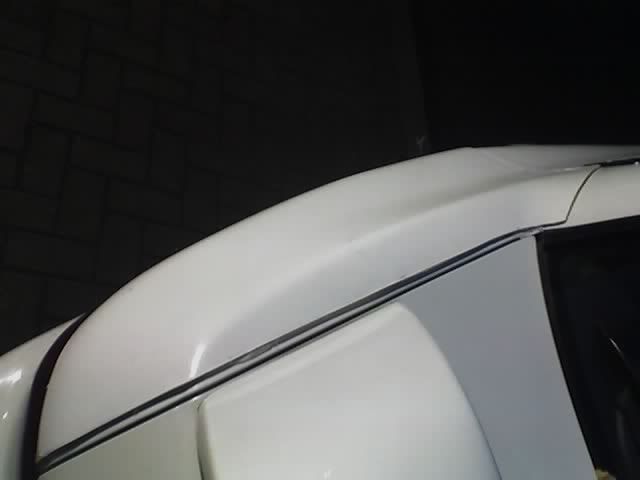
it would have been nicer (and a lot less work!!) if the new arches came up to the actual bootshut instead of stopping short.
this is due to be cleaned up and some 2pack epoxy adhesive added to the join, i dont want to start blending stuff yet, as after i read the initial adhesive instructions again, its claimed that it takes 24hours per 1.5mm worth of product to dry fully, none of mine were anywhere near 1.5mm thick so it might take another few days for this to fully harden :shock:
better safe then sorry
i then took a trip to B&Q for some replacement 3" air cut off tool discs, and couldn't find any
i had ordered some from ebay on sunday (i was not supposed to start fitting the arches until after xmas, not sure what happened lol)
this means i couldn't finish off under the arch with the cutting and welding, hopefully they arrive tomorrow, i did however pick up some araldite rapid epoxy and a large tin of expanding foam
how its sitting at work at the moment, its a shame the white fibreglass gel coat does not match the white paint
New wheels may arrive tomorrow with a bit of luck
Went into work early, to take of the masking tape
took a photo from the front to show how well the 22b rears match the do-luck fronts
the rear doorskins are not getting blended in on my car, they are simply getting bonded over and then repainted, some of the join needed a little tidy up so i went over the join once again with sealer
now the rear arch will need blended, inside the doorshut i`m not to bothered about and will just seal up/repaint the main points that require work are here
it would have been nicer (and a lot less work!!) if the new arches came up to the actual bootshut instead of stopping short.
this is due to be cleaned up and some 2pack epoxy adhesive added to the join, i dont want to start blending stuff yet, as after i read the initial adhesive instructions again, its claimed that it takes 24hours per 1.5mm worth of product to dry fully, none of mine were anywhere near 1.5mm thick so it might take another few days for this to fully harden :shock:
better safe then sorry
i then took a trip to B&Q for some replacement 3" air cut off tool discs, and couldn't find any
i had ordered some from ebay on sunday (i was not supposed to start fitting the arches until after xmas, not sure what happened lol)
this means i couldn't finish off under the arch with the cutting and welding, hopefully they arrive tomorrow, i did however pick up some araldite rapid epoxy and a large tin of expanding foam
how its sitting at work at the moment, its a shame the white fibreglass gel coat does not match the white paint
New wheels may arrive tomorrow with a bit of luck

Scooby Regular
Joined: Dec 2007
Posts: 64
Likes: 0
From: North of Germany
Hello i�m from Germany an my English is not the best but i�ve got some questions about the abw Widearch kit.
Do you have got some more pictures ? do you have a lot of work on the chassis to fit it?
Do you have got some more pictures ? do you have a lot of work on the chassis to fit it?
Thread Starter
Scooby Regular
Joined: Feb 2003
Posts: 21,611
Likes: 0
From: Zed Ess Won Hay Tee

the chassis?
apart from cutting the old rear arches off and around the rear door handles (not fully sure i needed to do that to be honest)
the car pretty much stays the same, you will need wider wheels.
the rest of the chassis stays the same
Thread Starter
Scooby Regular
Joined: Feb 2003
Posts: 21,611
Likes: 0
From: Zed Ess Won Hay Tee
Struggled to do much today due to the crazy rain
actually i am lying, did LOADS today
lets start off
first things first, check out the other rear 1/4 panel and inspect the fuel flap area, some work needed

time to get mr drill out and start punching some holes

then i offered up the fuel flap to see where i should be drilling holes to mount it, i added some masking tape underneath the hinge
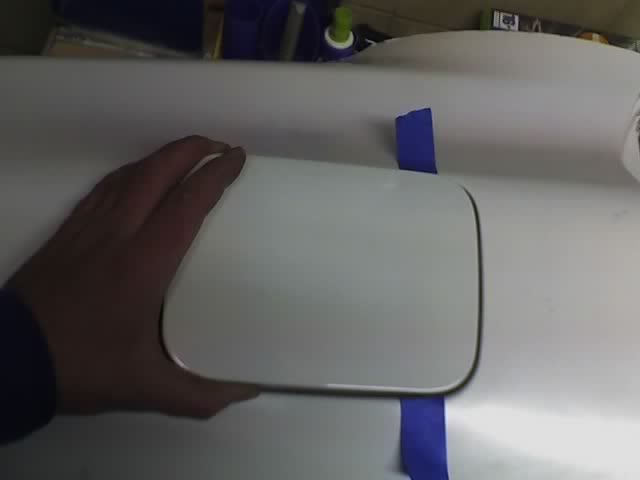
a cunning plan
i then took my cunning plan to the next extreme, level and marked out some tape so i knew how far apart the fuel flap hinge mountings holes are
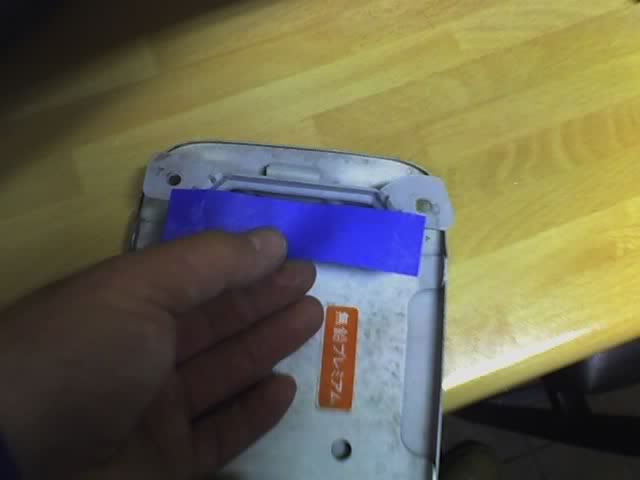
then stuck this down on the tape that shows the hinge point

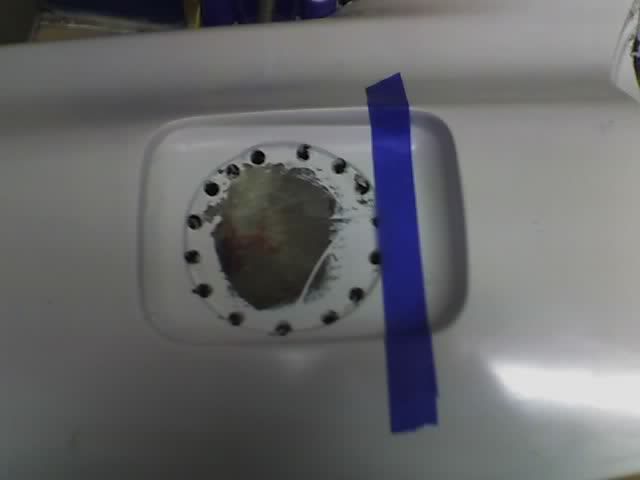
drill 2 quick holes
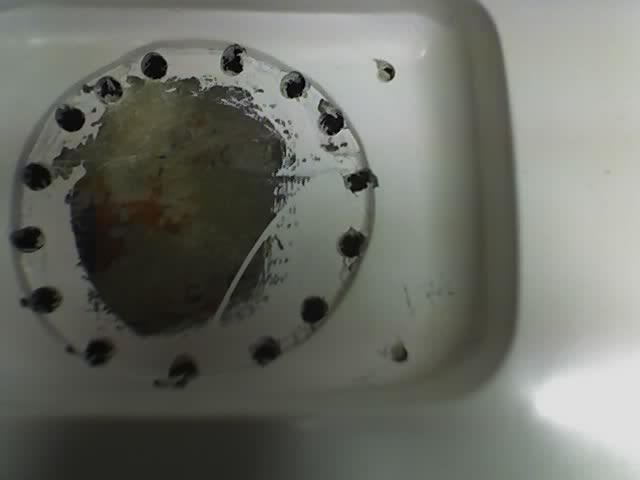
"jobs a goodun" actually that was a lie, the holes were miles off had to re drill them, and punch out the large center hole, soon i was left with this
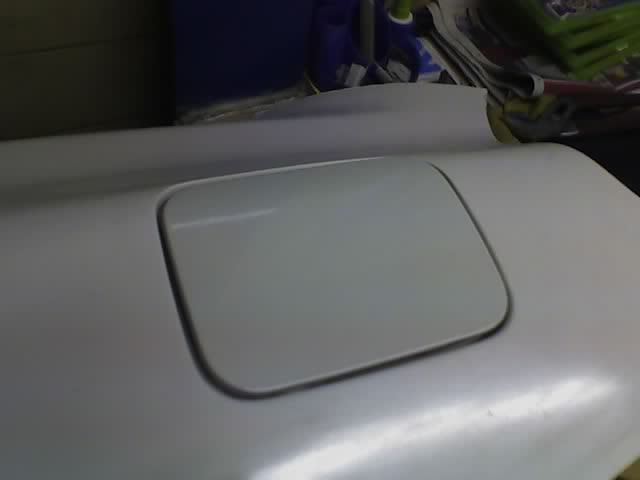
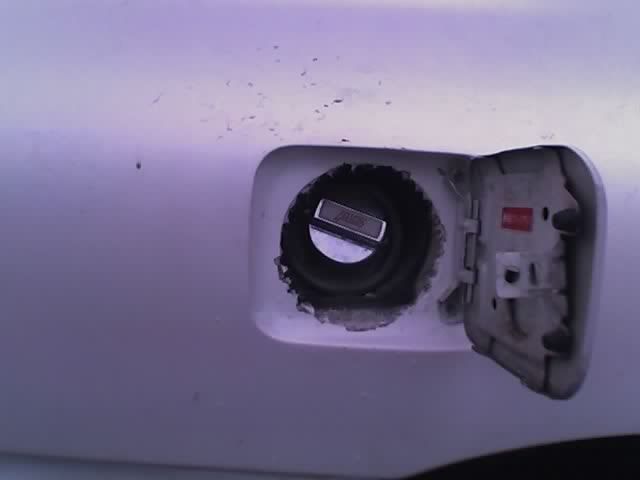
open
now lets take the rear 1/4 outside to check for fitment against the car
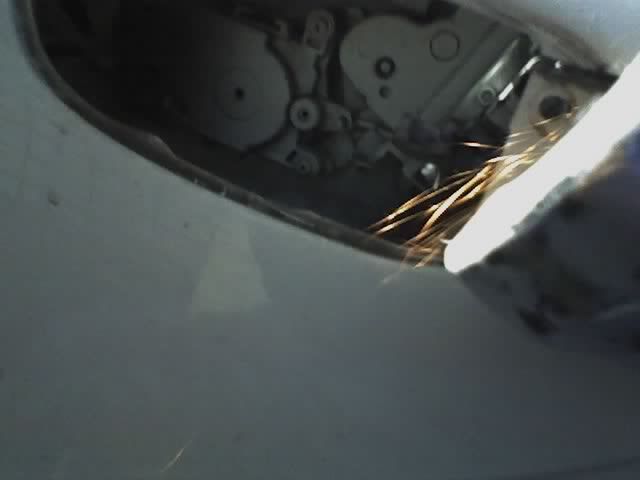
all looks fine so far, at this point the postie arrived with my new 3" cut off tool discs, so i attacked the rear arch like this
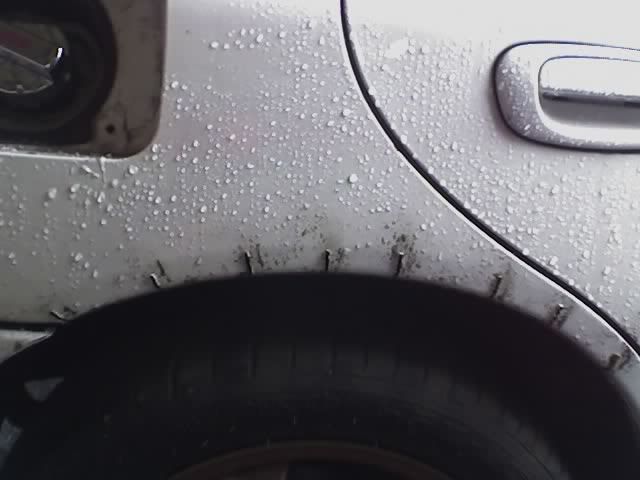
this is another cunning plan, grab a pair of grips and pull them outwards like this, making some cute little "tubs" for the new wheels to sit in

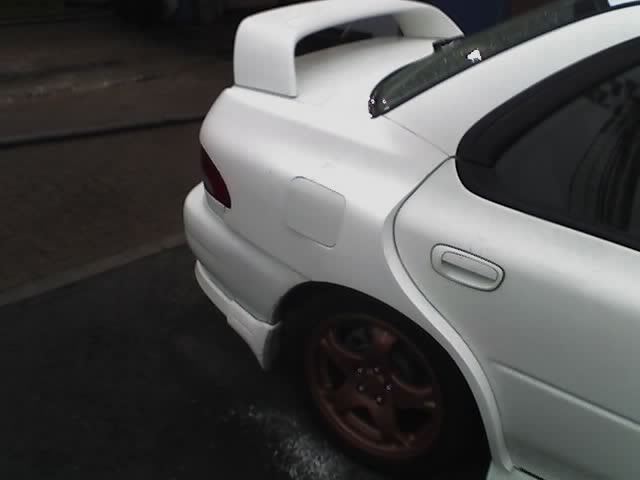
at this point i added the expanding foam to the other side arch (the one i did a few days ago) and as i rolled the car outside and put it into a parking bay, a delivery driver arrived with my new wheels (awesome timing)
so lets what the new Audi RS4 wheels on and see what we have
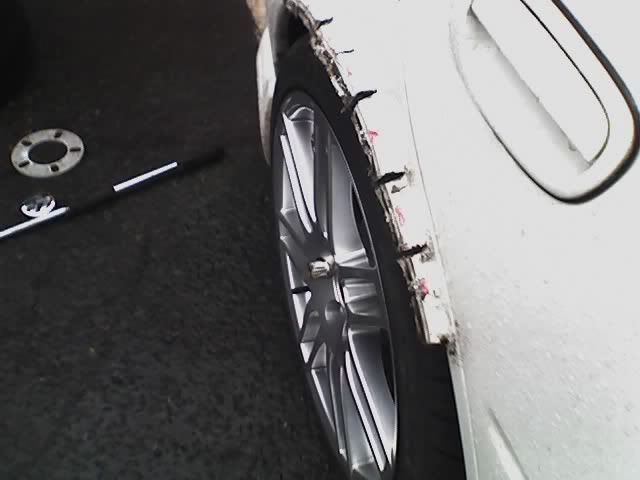
bling bling
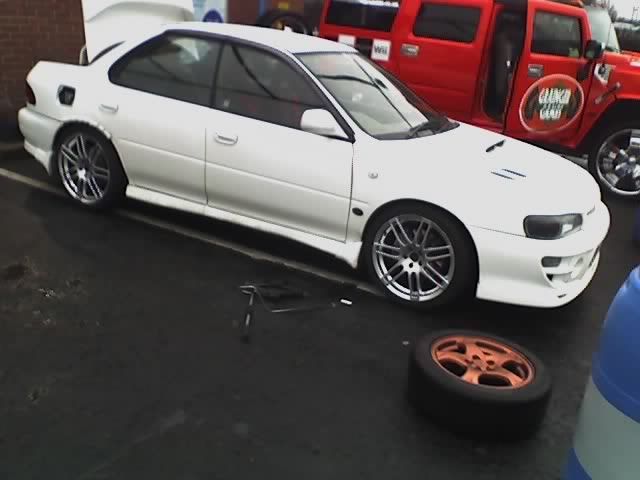
i then bonded the rear arch on and taped it up to set over night, door skin will be bonded on tomorrow
how the car sits on the other side


actually i am lying, did LOADS today
lets start off
first things first, check out the other rear 1/4 panel and inspect the fuel flap area, some work needed
time to get mr drill out and start punching some holes
then i offered up the fuel flap to see where i should be drilling holes to mount it, i added some masking tape underneath the hinge
a cunning plan
i then took my cunning plan to the next extreme, level and marked out some tape so i knew how far apart the fuel flap hinge mountings holes are
then stuck this down on the tape that shows the hinge point
drill 2 quick holes
"jobs a goodun" actually that was a lie, the holes were miles off
had to re drill them, and punch out the large center hole, soon i was left with thisopen
now lets take the rear 1/4 outside to check for fitment against the car
all looks fine so far, at this point the postie arrived with my new 3" cut off tool discs, so i attacked the rear arch like this
this is another cunning plan, grab a pair of grips and pull them outwards like this, making some cute little "tubs" for the new wheels to sit in
at this point i added the expanding foam to the other side arch (the one i did a few days ago) and as i rolled the car outside and put it into a parking bay, a delivery driver arrived with my new wheels
(awesome timing)so lets what the new Audi RS4 wheels on and see what we have
bling bling
i then bonded the rear arch on and taped it up to set over night, door skin will be bonded on tomorrow
how the car sits on the other side

Thread Starter
Scooby Regular
Joined: Feb 2003
Posts: 21,611
Likes: 0
From: Zed Ess Won Hay Tee
5x100
et35
8j
225/4018 tyres *i think*
the spacers i have are 5mm and 6mm although they are not fitted with the new wheels at the moment, the front sits fine, maybe the rear could come out a little, stuff like this does not have to be sorted until much further in, at first i thought the car drove like a bag of hammers and had some tram lining but as the tyres got a few miles on them via the drive home it seamed to sort itself out.
it would be easy enough to fit wider rubber if required, the vw offset is pushing the wheels quite far out anyway.
what i did find, was that i could get far more threads into the wheel nots on these wheels compared with the stock subaru ones+spacers, much safer option
Thread Starter
Scooby Regular
Joined: Feb 2003
Posts: 21,611
Likes: 0
From: Zed Ess Won Hay Tee
pulling out from blind junctions is a bit iffy IMO (need to loosen to lean forward)
still waiting for the flocked dashboard to come back lol
Thread Starter
Scooby Regular
Joined: Feb 2003
Posts: 21,611
Likes: 0
From: Zed Ess Won Hay Tee

Thread Starter
Scooby Regular
Joined: Feb 2003
Posts: 21,611
Likes: 0
From: Zed Ess Won Hay Tee
ok small update.
today i bonded on the other rear door skin and taped it up, i have a small list of things that need "sorted" sometime this weekend/early next week
1.drivers rear door handle rod needs a tweak, sometimes door will not open via handle = easy job, quick bend on the rod
2.both front door latches need moved outwards about 1mm to help the flow of air down the side of the car (panel in front should always overlap the panel at the rear) = going to parents house tomorrow to try and find my hammer drive screwdriver set to sort this out
3.both rear latches probably need a little tweak (not much to be honest) = probably tomorrow at parents house
4.both rear wheels are catching something under hard cornering, i suspect this is the part of the rear 1/4 panel where it meets the rear bumper (loads of room elsewhere) i have put some dabs of paint underneath so i can see which bits get rubbed away
5.fuel flap area needs tidied up and sealed so no water can enter behind the flap and get down the arch causing problems in the future = easy job once the bonding stuff has been set for 48 hours = probably monday while at work
6. fuel flap also needs modified so it still locks! at the moment you can open it by hand and steal my fuel
7. under the rear arches needs resealed back up = scheduled for next tuesday morning as i may need to do a bit more grinding yet.


ok small update.
2.both front door latches need moved outwards about 1mm to help the flow of air down the side of the car (panel in front should always overlap the panel at the rear) = going to parents house tomorrow to try and find my hammer drive screwdriver set to sort this out
4.both rear wheels are catching something under hard cornering, i suspect this is the part of the rear 1/4 panel where it meets the rear bumper (loads of room elsewhere) i have put some dabs of paint underneath so i can see which bits get rubbed away
The bolts are fitted with loctite at the factory, so can be a bit tricky some times..
Also, if you are trying to move the back edge of the front door out to match the new rear door skins, be careful of the door glass not sealing up against the rubber, or elso you will need aer plugs (for the wind noise) and an umberella ( for...well you know
)Good idea re; the paint for finding out where's catching at the back..
Good luck m8, and hats off to you for getting stuck in...
Thread Starter
Scooby Regular
Joined: Feb 2003
Posts: 21,611
Likes: 0
From: Zed Ess Won Hay Tee
Be careful when you 'try' and adjust the door catches m8..
The bolts are fitted with loctite at the factory, so can be a bit tricky some times..
Also, if you are trying to move the back edge of the front door out to match the new rear door skins, be careful of the door glass not sealing up against the rubber, or elso you will need aer plugs (for the wind noise) and an umberella ( for...well you know )
Good idea re; the paint for finding out where's catching at the back..
Good luck m8, and hats off to you for getting stuck in...
The bolts are fitted with loctite at the factory, so can be a bit tricky some times..
Also, if you are trying to move the back edge of the front door out to match the new rear door skins, be careful of the door glass not sealing up against the rubber, or elso you will need aer plugs (for the wind noise) and an umberella ( for...well you know
)Good idea re; the paint for finding out where's catching at the back..
Good luck m8, and hats off to you for getting stuck in...
especially after i smacked it all about with a hammer i agree with the wind noise, i had thought about it all ready, and had already thought of an even more cunning plan by the time i went to bed last night
move the rear door hinges so the door sits a bit further in at the front
should be a bit of adjustment on the mounting points somewhere along the line, usually is on cars to adjust them up to spec at the factory?
ps. if i get mine half as tidy as yours i will be happy
getting jiggy with the expanding foam is a messy job and a half LOL