
MY98 VF35 and supporting mods


(this is my project from about 6 months ago)
Ok I thought I would make a start on a project thread and see how its pans out.
My initial goal was 340/340
THE CAR

In standard form = 208bhp 214 lbft
Mods already carried out:-
3" H&S decat tapering to 2.5" at the back box.
new age WRX TMIC
3 port boost solenoid
Apexi PFC (mapped by Andrew C)
K&N panel filter.
PFR7Bs
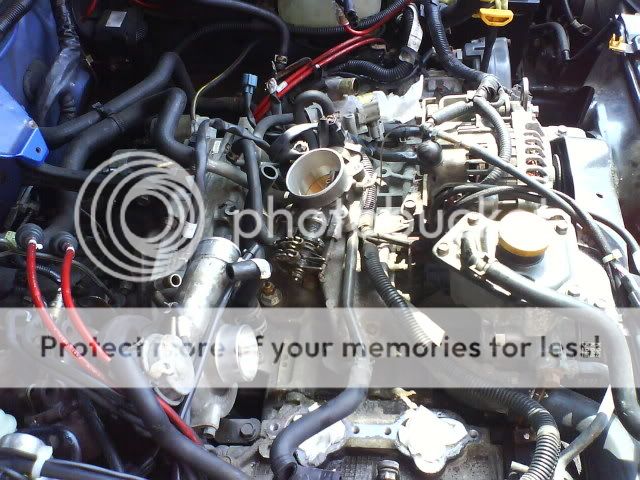
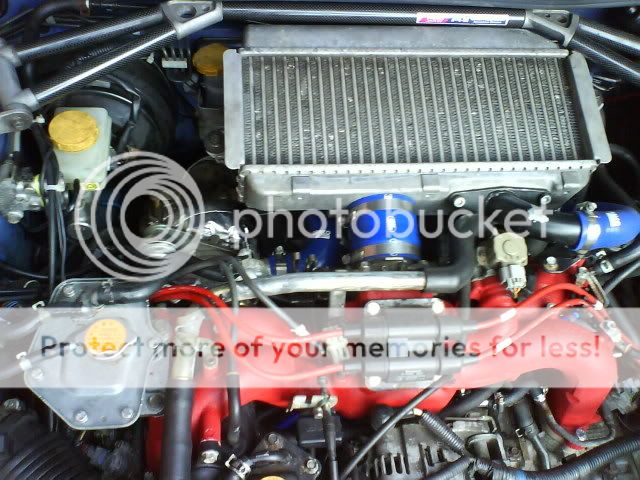
Looks like this.........
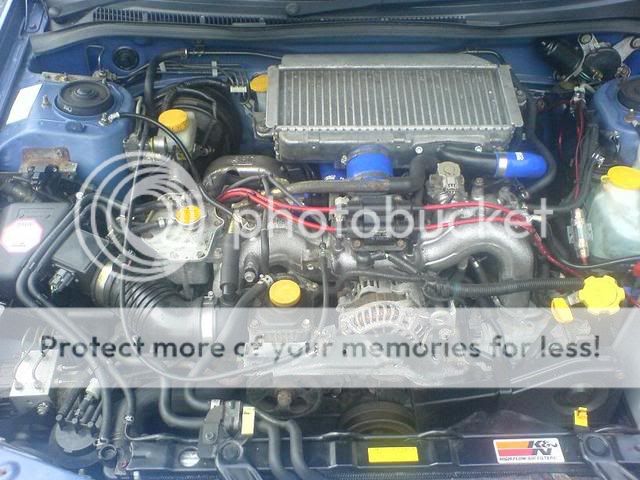
This got me 280bhp/300lbft and a 1/4mile time of 13.32@110
Mike
Ok I thought I would make a start on a project thread and see how its pans out.
My initial goal was 340/340
THE CAR
In standard form = 208bhp 214 lbft
Mods already carried out:-
3" H&S decat tapering to 2.5" at the back box.
new age WRX TMIC
3 port boost solenoid
Apexi PFC (mapped by Andrew C)
K&N panel filter.
PFR7Bs
Looks like this.........
This got me 280bhp/300lbft and a 1/4mile time of 13.32@110
Mike
Last edited by Shmerman; Nov 27, 2007 at 10:51 PM.
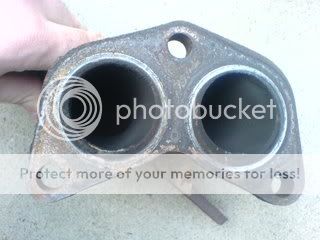
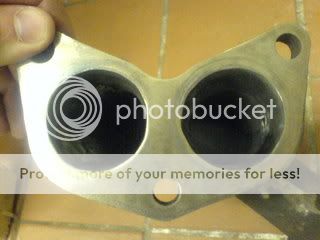
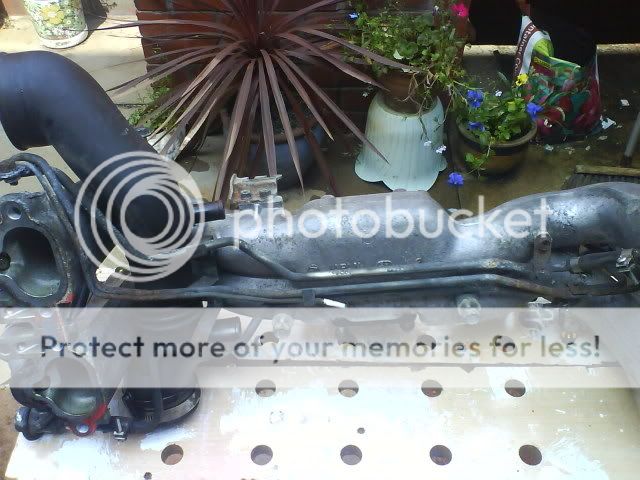
First I made a start on the headers a few weeks ago while the car was at cotcomp (blown gear box) for a ppg kit box rebuild. I had a spare set of headers so had the luxury of porting these while still being
able to use/work on the car.
what i had to work with.
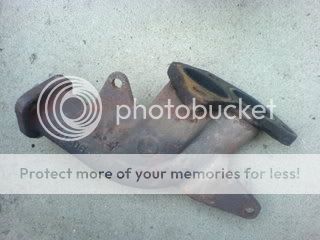
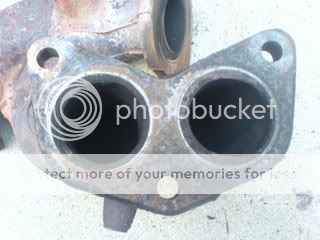
And after a little work
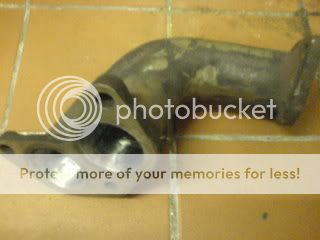
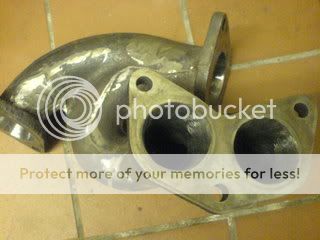
The back yard looked a little worse for ware :shock:

and this was just after the inital grinding of the lugs
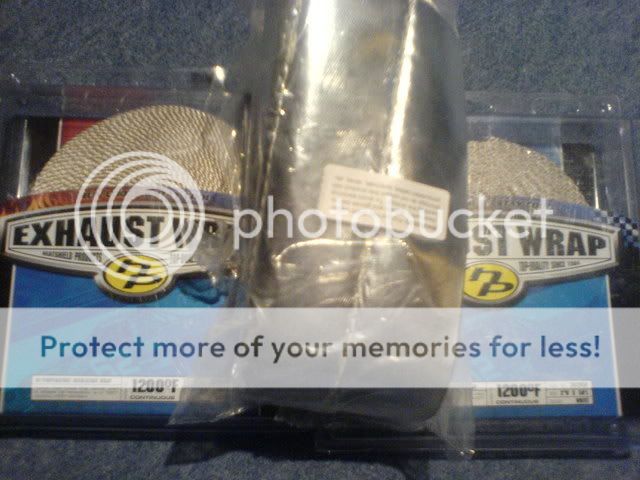
I just need to get all the new gaskets and then I can wrap them.
I ordered 100' of 1" wrap and got 100' of 2" also got myself a blanket for the VF35 which Andrew C has kindly ported for me.
Mike
able to use/work on the car.
what i had to work with.
And after a little work
The back yard looked a little worse for ware :shock:
and this was just after the inital grinding of the lugs
I just need to get all the new gaskets and then I can wrap them.
I ordered 100' of 1" wrap and got 100' of 2"
also got myself a blanket for the VF35 which Andrew C has kindly ported for me.Mike
Well a little bit of progress from the weekend.
To make sure I was getting a good supply of cold air to the filter I plumbed in a couple of pipes to feed from the bumper slats that normally guide the air over the brakes.
I didnt want to delete the beake cooling completely for obvious reasons so I hacked into the plastic right behind the slats and secured 2 slightly squashed pipes and fed them up through the inner wing area to the filter, see pics below.
I have booked the car in for a MOT tomorrow so had to sort a couple of things out. Handbrake needed tightening....again :roll:
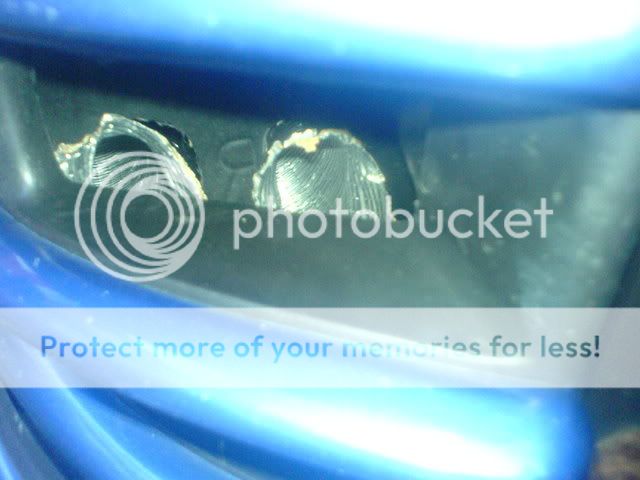
I have STi rear lights. I hate the look of the fog lights hanging off the rear so I have jigged about with the wiring so now the drivers side reverse light illuminates (red bulb) when the fog lamp button is pushed.

I also have a nice size crack in the windscreen from a kamakazi pigeon that I met on the M6 so having a new one fitted in the morning.


The picture doesnt really show how few the crack goes but its about 18" long.
Thats enough for now.
Mike
I have STi rear lights. I hate the look of the fog lights hanging off the rear so I have jigged about with the wiring so now the drivers side reverse light illuminates (red bulb) when the fog lamp button is pushed.
I also have a nice size crack in the windscreen from a kamakazi pigeon that I met on the M6 so having a new one fitted in the morning.
The picture doesnt really show how few the crack goes but its about 18" long.
Thats enough for now.
Mike
UPDATE
Passed the MOT with flying colours, (had a little help with the emmisions).
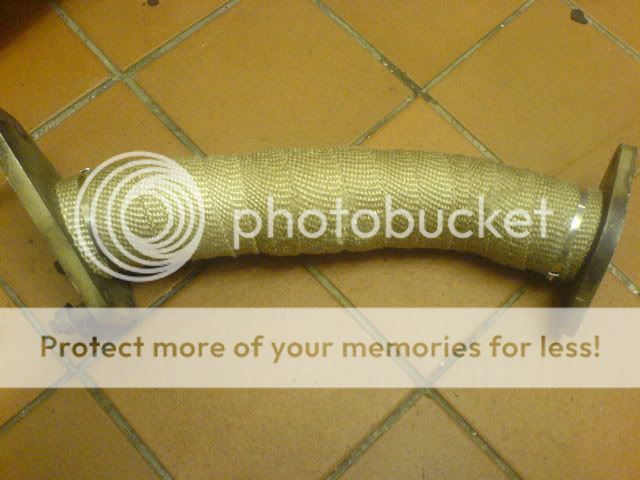
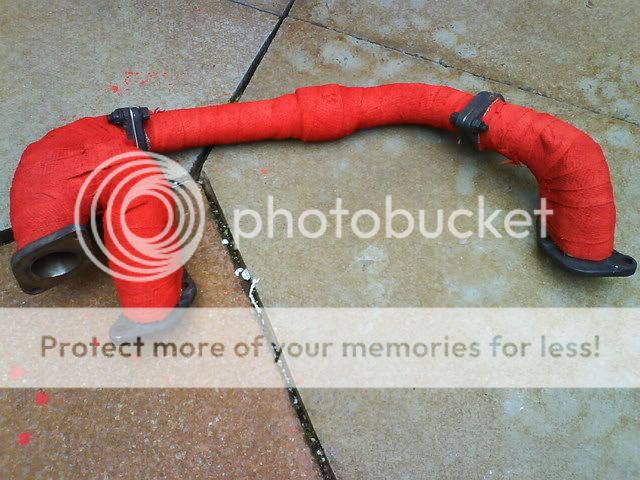
I got round to wrapping the H&S up pipe last night. I also ordered the gasgets I need from Mark @ lateral yesterday afternoon and they were behind the door when I got home from work (and I had told him i was in no rush), great service!
Picked this up for �50 off e-bay
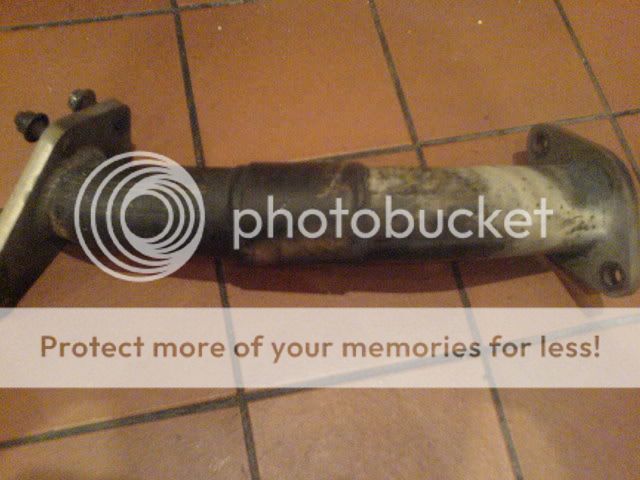
Pressure washed the headered to get all the filings out and letting them dry so should have them wrapped tomorrow and back together.
Mike
Passed the MOT with flying colours, (had a little help with the emmisions).
I got round to wrapping the H&S up pipe last night. I also ordered the gasgets I need from Mark @ lateral yesterday afternoon and they were behind the door when I got home from work (and I had told him i was in no rush), great service!
Picked this up for �50 off e-bay
Pressure washed the headered to get all the filings out and letting them dry so should have them wrapped tomorrow and back together.
Mike
I finished wrapping the headers today and put them together.
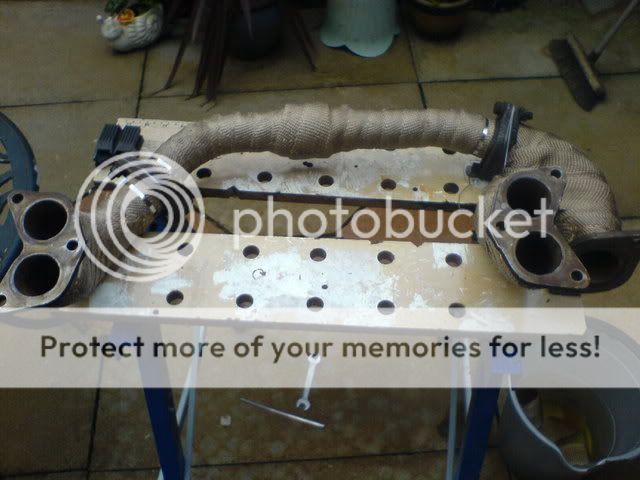
I also decided to do something about the bonnet undertray. I have the larger newage TMIC but its not being used to its full potential because the undertray is still oem directing air over only about 2/3 of the IC.
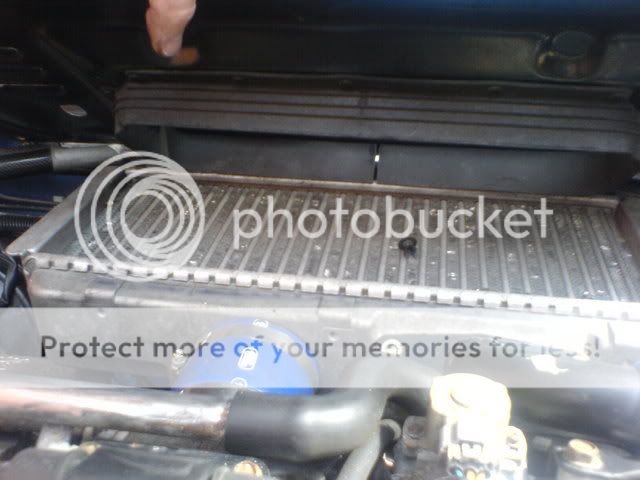
What you can see from the pic is that there is a large area to the left that is not fed any air and a couple or rows on the right.
What you can't see from the pics is the area to the front of the IC that also doesn't get any air directed to it.
To fix this I used the rubber skirt and positioned it new holes I had made.
To make the gap up I used some draft excluder and taped it all up to keep it secured in place.
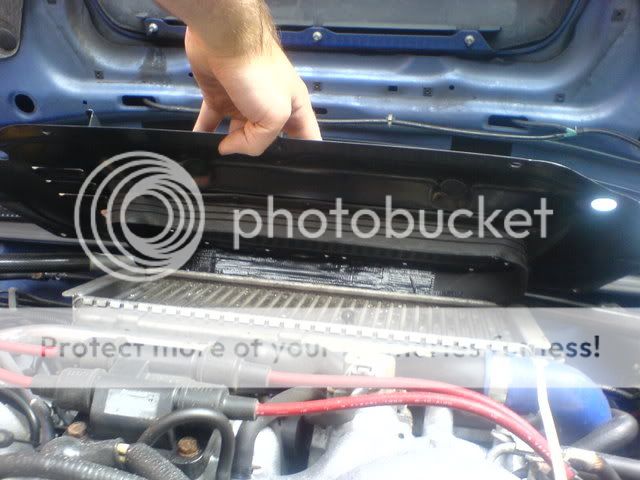
Its fits much better now but is still only an interim measure.
Mike.
I also decided to do something about the bonnet undertray. I have the larger newage TMIC but its not being used to its full potential because the undertray is still oem directing air over only about 2/3 of the IC.
What you can see from the pic is that there is a large area to the left that is not fed any air and a couple or rows on the right.
What you can't see from the pics is the area to the front of the IC that also doesn't get any air directed to it.
To fix this I used the rubber skirt and positioned it new holes I had made.
To make the gap up I used some draft excluder and taped it all up to keep it secured in place.
Its fits much better now but is still only an interim measure.
Mike.
Trending Topics
I have almost all the bits I need now and most of the prep work is complete.
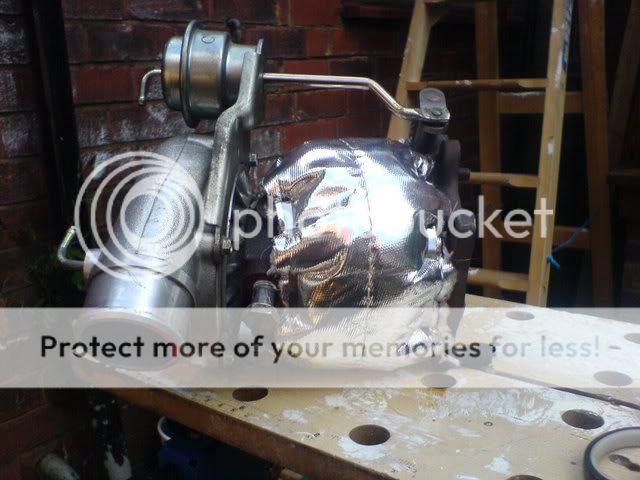
I have painted to heat wrap. I used some high temperature paint I had left lying around hense the colour :shock:

To keep the turbo hot where it should be and everything else cool I put a little jacket on it.
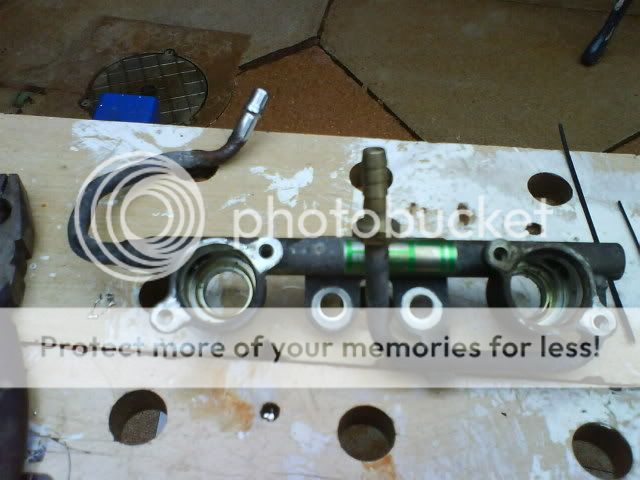
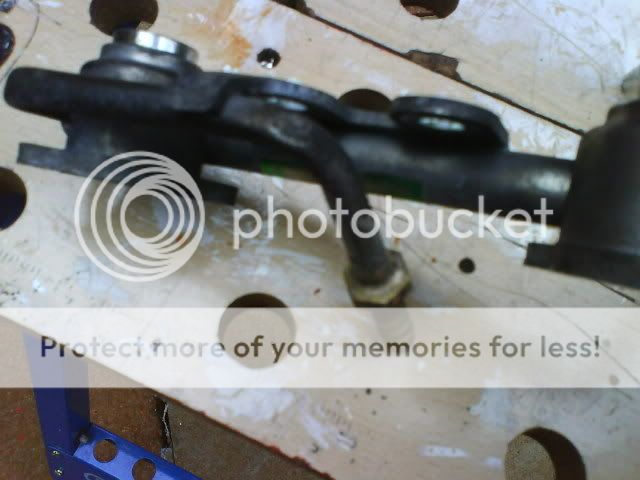
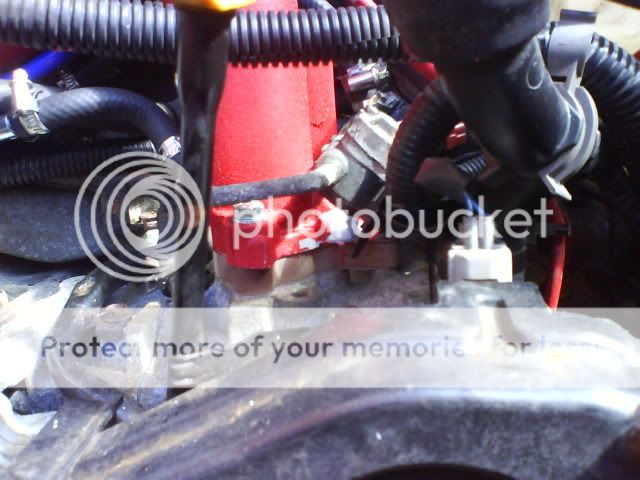
I have started on the inlet manifold (thanks Andrew)
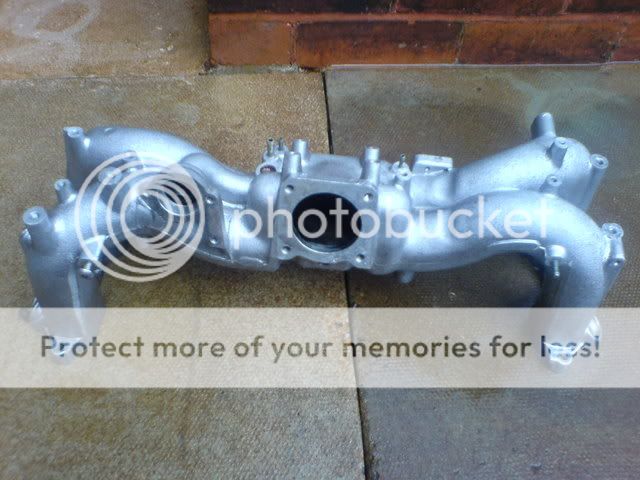
it is all prepped ready for painting. Just waiting on the paint to be delivered as they are out of stock.
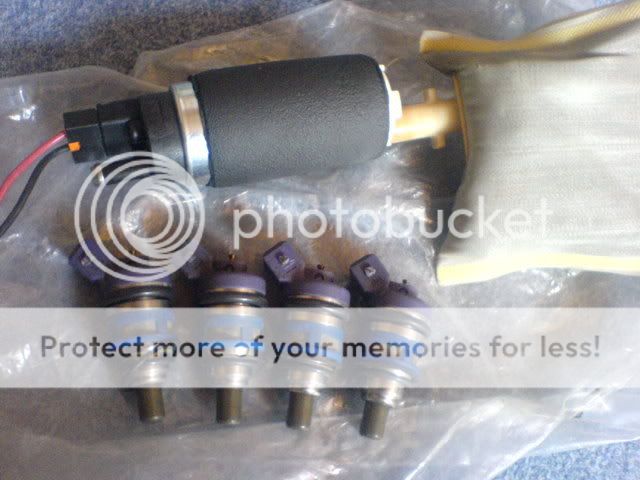
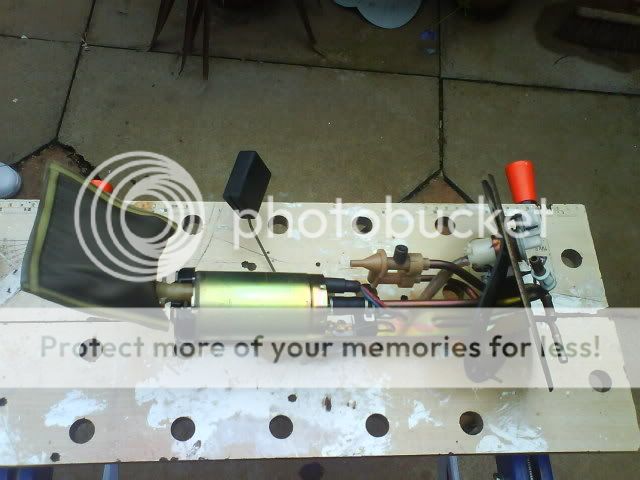
Have fuel pump and 550cc injectors together now.
I am sending the injectors to Mark @ lateral to be ultrasonically cleaned and flow tested.
All I need to do now is work out what diameter fuel pipe I need and what fittings then I can get them ordered. Then its just a case of finding the time to get all this lot bolted on.
Mike
I have painted to heat wrap. I used some high temperature paint I had left lying around hense the colour :shock:
To keep the turbo hot where it should be and everything else cool I put a little jacket on it.
I have started on the inlet manifold (thanks Andrew)
it is all prepped ready for painting. Just waiting on the paint to be delivered as they are out of stock.
Have fuel pump and 550cc injectors together now.
I am sending the injectors to Mark @ lateral to be ultrasonically cleaned and flow tested.
All I need to do now is work out what diameter fuel pipe I need and what fittings then I can get them ordered. Then its just a case of finding the time to get all this lot bolted on.
Mike
Update with some pics.
Making a start removing the IM
It took me a while as I wanted to be sure I didnt break anything in the process. I used a few labels to help when I put it all back together.
Got there in the end!
Off and ready to be stripped.
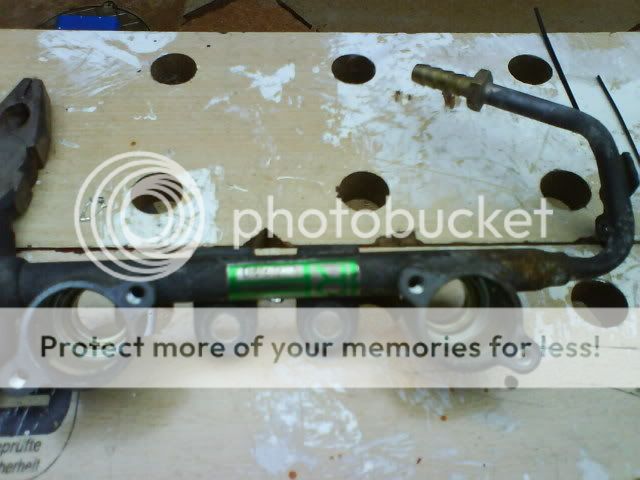
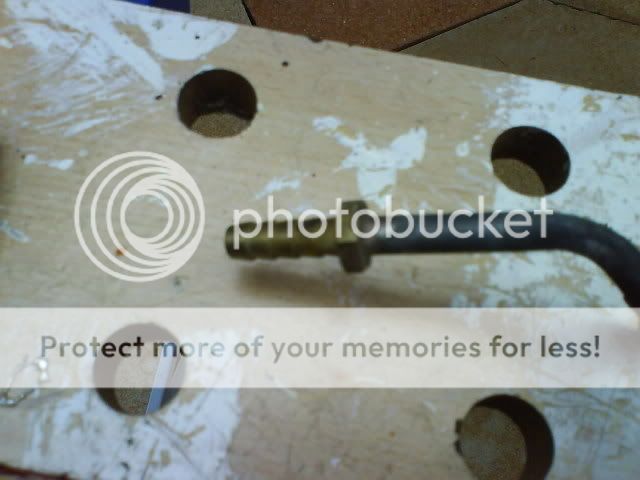
I took the fuel rails to a guy round the corner from me who is going to braize some barbed pieces on the pipes. He said it will only cost about �6....bonus!
I will hopefully get them back tomorrow or wednesday.
Im getting desparate for the IM paint now as it takes 48hrs to dry and I was hoping to have the car finished for Friday.
Making a start removing the IM
It took me a while as I wanted to be sure I didnt break anything in the process. I used a few labels to help when I put it all back together.
Got there in the end!
Off and ready to be stripped.
I took the fuel rails to a guy round the corner from me who is going to braize some barbed pieces on the pipes. He said it will only cost about �6....bonus!
I will hopefully get them back tomorrow or wednesday.
Im getting desparate for the IM paint now as it takes 48hrs to dry and I was hoping to have the car finished for Friday.
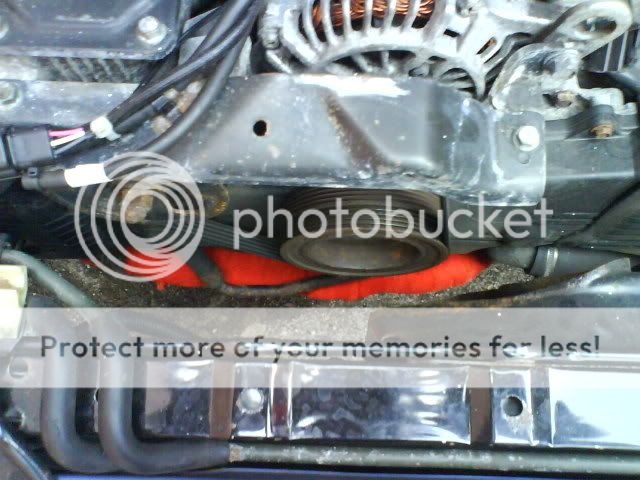
I knew the heat shield on the headers were fairly coroded but was still a little shocked when they came off :-
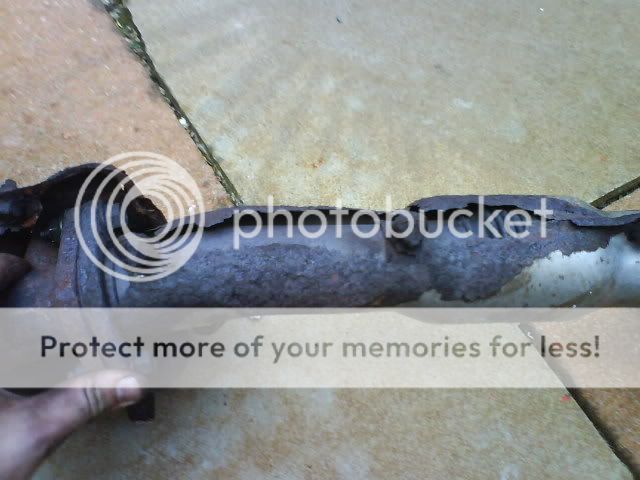
Headers now missing
and replaced with some bright ones :shock:
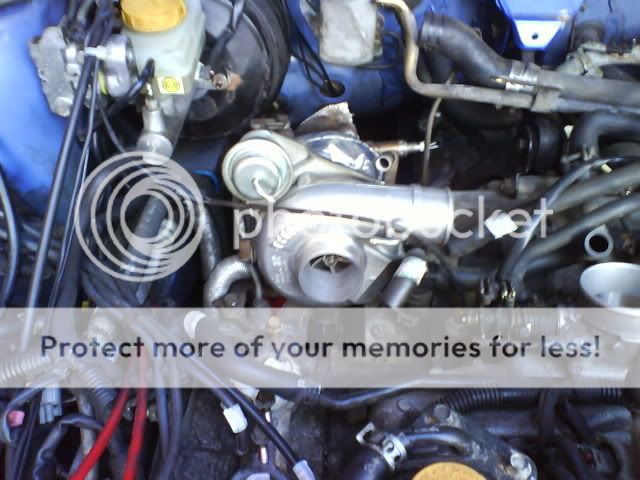
Next it was back to gettin the turbo off. I covered it in WD40 last night and had another go at it today......it wasnt playing but I got mad and it soon gave in!!
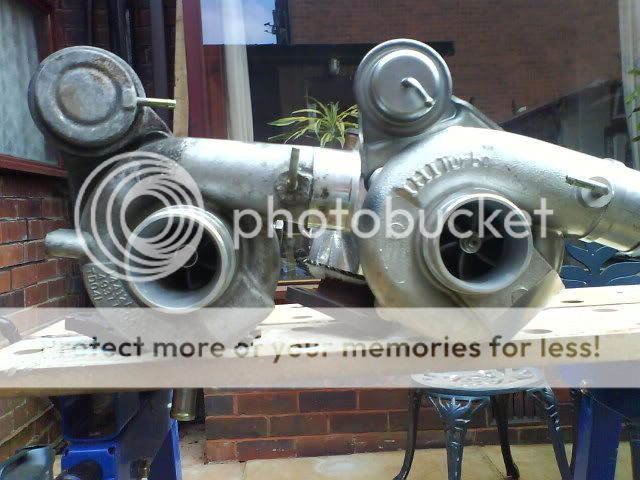
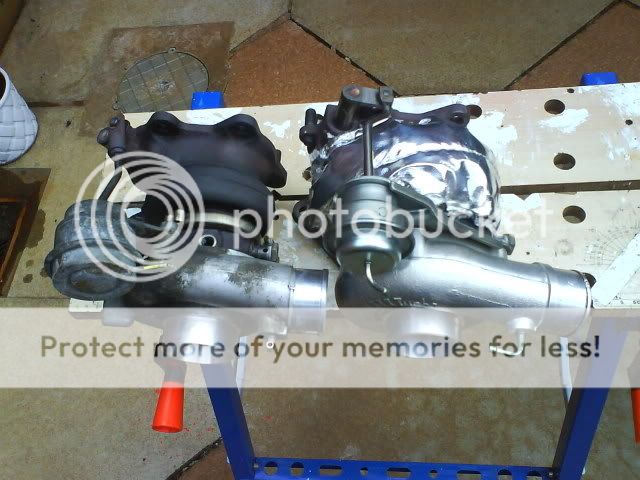
A little comparison
TD04 on the left VF35 on the right
Tomorrow will hopefully get the pump sorted and and would like to have the up pipe and turbo back on but I need to source the oil banjo bolt and oil drain pipe for the new VF first.
Mike
Headers now missing
and replaced with some bright ones :shock:
Next it was back to gettin the turbo off. I covered it in WD40 last night and had another go at it today......it wasnt playing but I got mad and it soon gave in!!
A little comparison
TD04 on the left VF35 on the right
Tomorrow will hopefully get the pump sorted and and would like to have the up pipe and turbo back on but I need to source the oil banjo bolt and oil drain pipe for the new VF first.
Mike
Made a nice bit of progress today.
Removed the old fuel pump which was easier than I thought it would be. The most difficult thing about removing it was getting the fuel pipes off.
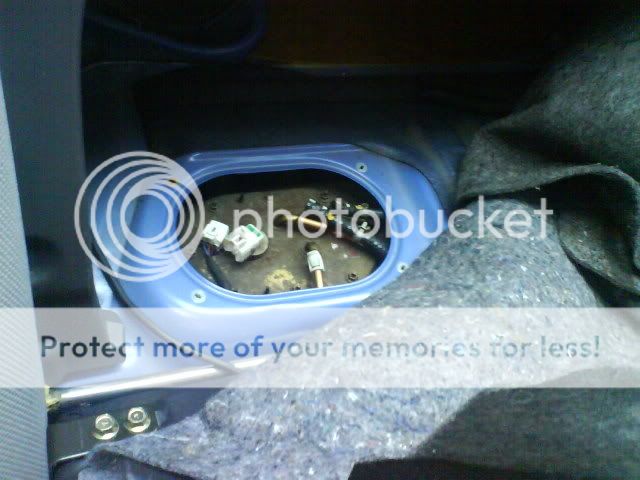
the standard pump in assembly
Due to the walbro power terminals being different the original one have to be cut and soldered together.
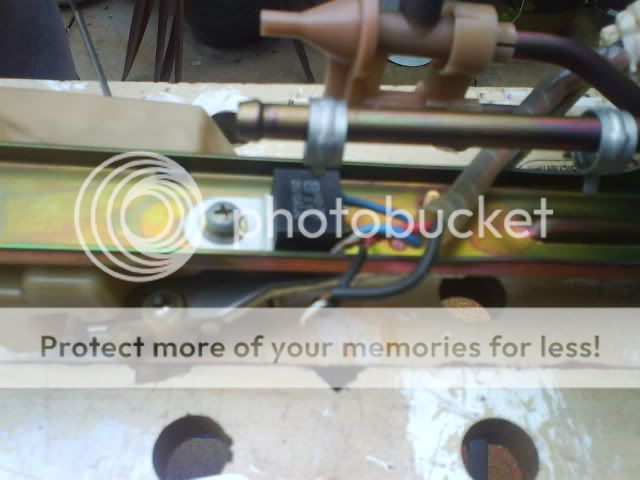
The walbro is a little smaller than original so I have secured it with a couple of cable ties.

Removed the old fuel pump which was easier than I thought it would be. The most difficult thing about removing it was getting the fuel pipes off.
the standard pump in assembly
Due to the walbro power terminals being different the original one have to be cut and soldered together.
The walbro is a little smaller than original so I have secured it with a couple of cable ties.
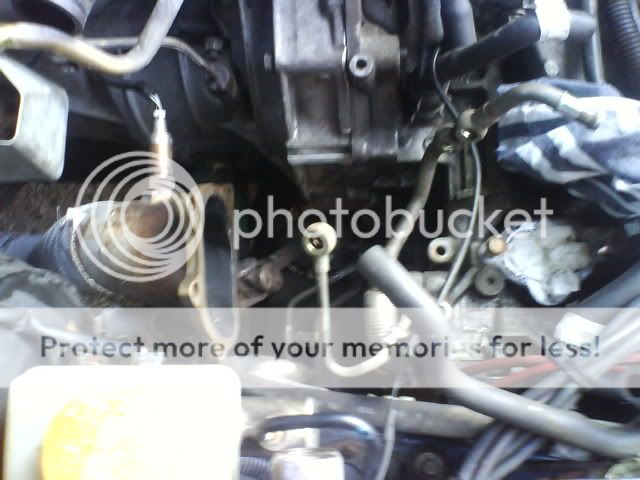
With that side of the fueling sorted I moved on to getting the up pipe and turbo on. I had a bit of conflicting information reguarding the banjos from the TD04. I asked a few people about this and found some info from others that have already done the TD04>VF35 that using the original banjos is fine (VF>TD is not okay).
I put the up pipe in place after a slight panic as it wasn't orientated correctly and about 2 inches to short :shock:
Soon got around this with a bit of force and put the brackets on (left the nut out on the gearbox side as its a swine to get to)
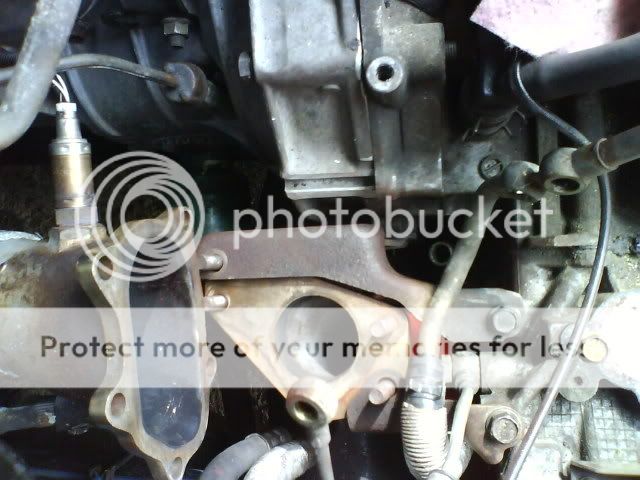
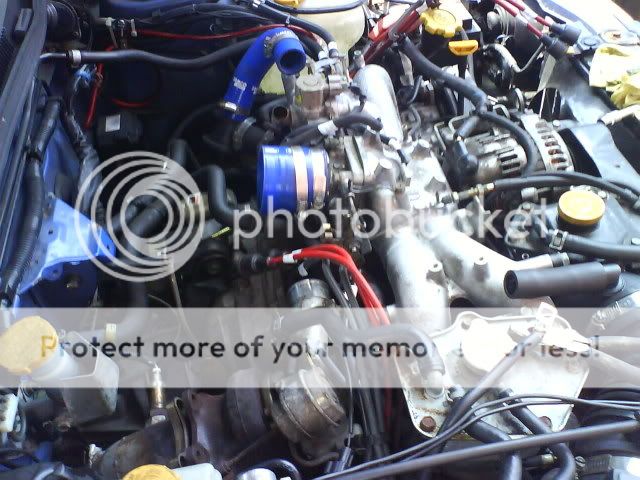
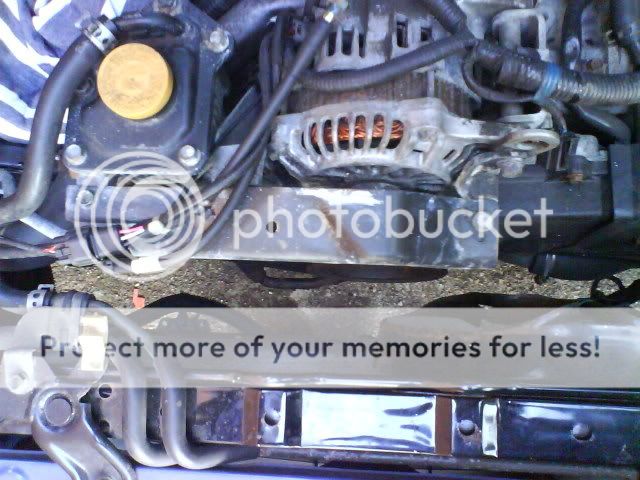
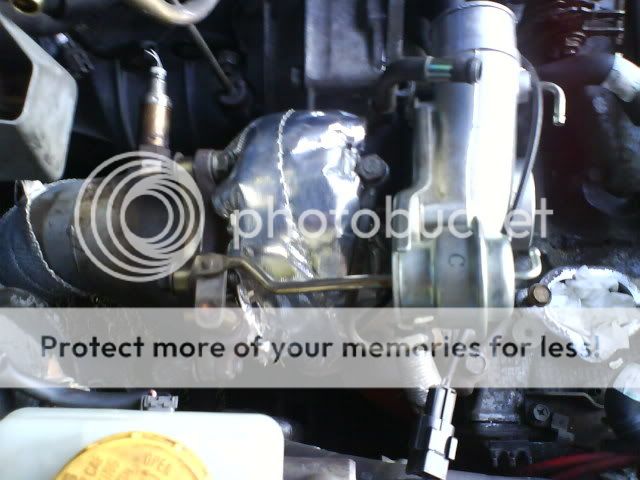
Turbo in place, all water/oil/DP all connected up.
I put the up pipe in place after a slight panic as it wasn't orientated correctly and about 2 inches to short :shock:
Soon got around this with a bit of force and put the brackets on (left the nut out on the gearbox side as its a swine to get to)
Turbo in place, all water/oil/DP all connected up.
And finally for today.....I got a phone call about 10:00 this morning saying the fuel rails are all ready for picking up!!
Taken a couple of pics.
I can supply a link to full res pics if needed (Steve)?

The only set back I have had today is the same set back I have had for the last 2 weeks!!!!! The ******* paint still hasnt turned up!
Mike
Taken a couple of pics.
I can supply a link to full res pics if needed (Steve)?
The only set back I have had today is the same set back I have had for the last 2 weeks!!!!! The ******* paint still hasnt turned up!
Mike
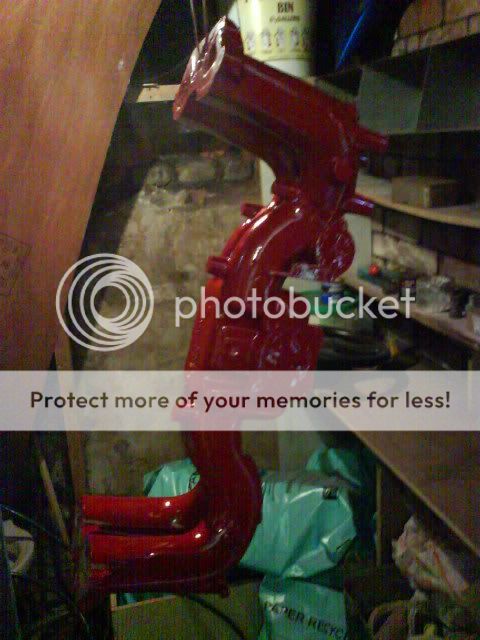
As I was in the neighbourhood of the paint supplier (Frost) I decided to pay them a visit. They told me it would be 2 weeks before the paint is delivered :evil:
I arguged it wasnt good enough as the car is being put back together tomorrow. They managed to find a tin that was damaged and had leaked a little

They gave me this and refunded my card for the cost of the paint.
Got cracking with the primer
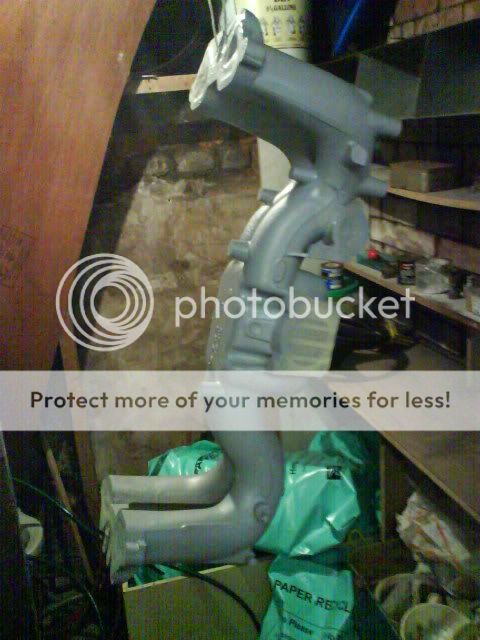
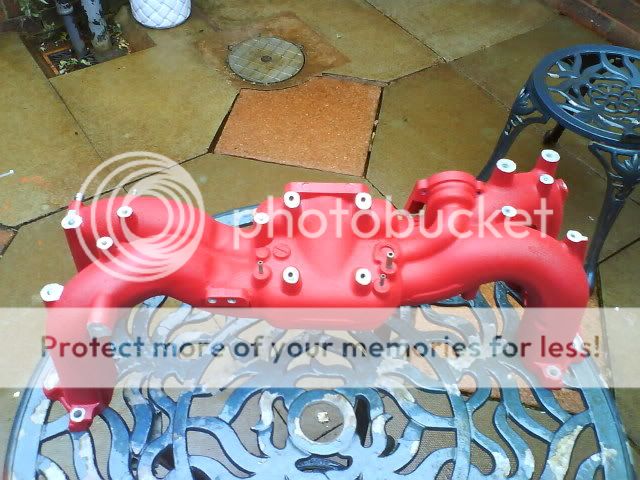
And after waiting 30mins from the last coat of primer I could finally put some colour on the manifold.
Under normal conditions you have to leave the paint to dry for 48 hours.
As I dont have 48hrs (going away for the weekend) I have tried to spead up the process

My injectors are still with Lateral but I have just got an email from Mark saying he will try and catch special delivary. Keeping my fingers crossed!
Mike
I arguged it wasnt good enough as the car is being put back together tomorrow. They managed to find a tin that was damaged and had leaked a little
They gave me this and refunded my card for the cost of the paint.
Got cracking with the primer
And after waiting 30mins from the last coat of primer I could finally put some colour on the manifold.
Under normal conditions you have to leave the paint to dry for 48 hours.
As I dont have 48hrs (going away for the weekend) I have tried to spead up the process
My injectors are still with Lateral but I have just got an email from Mark saying he will try and catch special delivary. Keeping my fingers crossed!
Mike
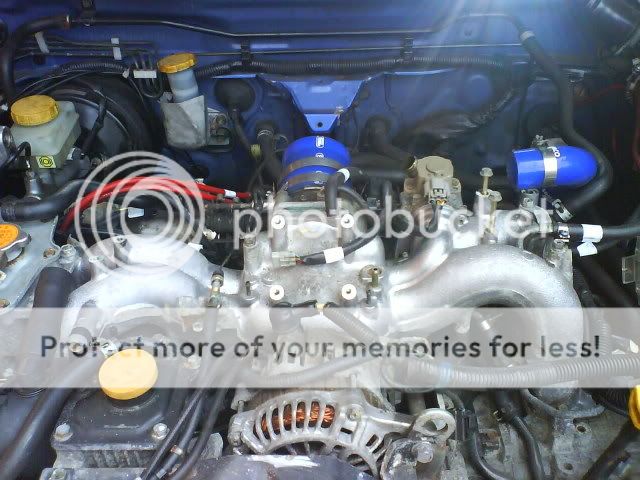
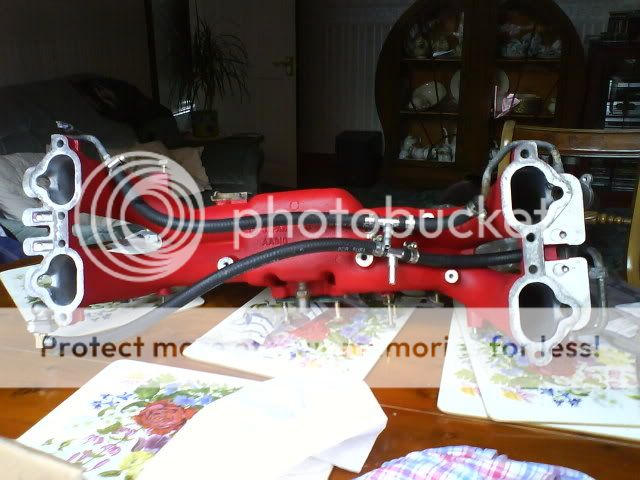
Got everything back together primed the fuel pump set the FPR to 3bar and turned it over. Fired but died straight away.
I had issues with the injectors. They were leaking badly out of the top of the rail. This caused some of the paint on the IM to come away which really annoyed me!
I think I pulled all the injectors and re sat them. Unfortunatly I couldn't cure a leak from the injectors for cylinder 3. It was getting late and I had been working solidly on the car for 13hrs with only a couple of strawberrys to eat.
After a good nights sleep I got back to work on the injectors. I changed a few O-rings on all the injectors which cured the leak.
The car still wouldn't run! After many calls to Andrew C he got me to run a few checks.I pulled the plugs and gave them a clean. The car fired nicely but instantly died. More phone calls and more checks.
The problem was the MAF.......what i mean is the problem was ME not plugging the MAF in propperly, whoops
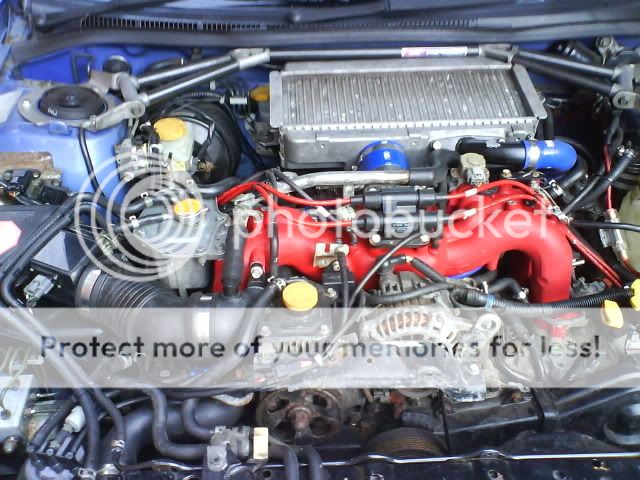
Turned the key and fired up straight away!
I had issues with the injectors. They were leaking badly out of the top of the rail. This caused some of the paint on the IM to come away which really annoyed me!
I think I pulled all the injectors and re sat them. Unfortunatly I couldn't cure a leak from the injectors for cylinder 3. It was getting late and I had been working solidly on the car for 13hrs with only a couple of strawberrys to eat.
After a good nights sleep I got back to work on the injectors. I changed a few O-rings on all the injectors which cured the leak.
The car still wouldn't run! After many calls to Andrew C he got me to run a few checks.I pulled the plugs and gave them a clean. The car fired nicely but instantly died. More phone calls and more checks.
The problem was the MAF.......what i mean is the problem was ME not plugging the MAF in propperly, whoops
Turned the key and fired up straight away!

Made me laugh about not plugging the MAF back in. I changed the plugs and fuel pump on mine.
Then went to start it and couldnt. I assumed it was a faulty pump so put the old one back in. Then realised the reason it was dying was because I too forgot to replug the MAF in!!
Glad to hear someone else made the same mistake!!!
Then went to start it and couldnt. I assumed it was a faulty pump so put the old one back in. Then realised the reason it was dying was because I too forgot to replug the MAF in!!
Glad to hear someone else made the same mistake!!!
Was relieved but rather pi$$ed off at the same time. I had checked all the connections and it appeared to plugged in correctly. It was seated ok put not pushed in far enough......lesson learned.


When having the car mapped its was struggling to reach target boost of 1.45bar. In fact I was only reaching around 1.25. Its was a miserable night - very dark and raining so investigating the problem was difficult.
check the plumbing of the 3 port - fine
checked for exhaust leak - fine
air leak after the compressor - fine
came to the conclusion that it may be
a, soft actuator
b, leaky dump valve (oem)
c, turbo has been ported too well (prevent boost creep)
check the plumbing of the 3 port - fine
checked for exhaust leak - fine
air leak after the compressor - fine
came to the conclusion that it may be
a, soft actuator
b, leaky dump valve (oem)
c, turbo has been ported too well (prevent boost creep)
Last edited by Shmerman; Nov 29, 2007 at 02:31 PM.


My mapper (Andrew Carr) wasn't happy with the fact he knew the car could make more power and asked me to come back so we could investigate the problem some more.
We ran at WG pressure to see if it was cracking before target boost. I set my defi's to alarm at 1.45 bar so I knew when to lift and not cause any damage by overboosting. At the first sign on alarm and warning light I lifted. We then assumed the actuator was ok.
We did many other checks, ran without dumpvalve......move boost gauge to induction to make sure there wasnt a vacume. moved to compressor to compair with IM boost. Tried a manual boost controller. Put small restrictor pill in the wategate pipe.
Everything checkout as working correctly.
Still not happy that the actuator was working correctly Andrew suggested we did another run at WG pressure but was a little 'braver'. The WG cracked around 1.35 bar with my foot planted.
We wanted something to help keep the WG shut and see if we get any higher boost through the solenoid. A clutch spring came to the resue. Went out for a test run, fantastic 1.4bar achieved.
Obviously I wasnt going to drive round with a clutch spring holding the actuator but at least I knew what the problem was and could easily fix it.
I had the car on the RR in this guise. It got 300/290 @ 1.19bar
I looked in to gettin an uprated actuator. I found somewhere that would put an uprated spring any tension request.
I was planning on getting a 1bar actuator but it was gonna cost around �170. I felt this was a little bit much considering the turbo is only worth around �300.
I decided I would try and get my hands on another standard actuator.
I gave Teg sport a ring and they had a box full of vf34 acts (same as the vf35) 2days later and �15 lighter (bargain) it was on my door step.
I fitted it and took it for a quick spin round the block. It pulled harder and made boost of around 1.3 bar. Still not reaching target but was much better.


Joined: Nov 2003
Posts: 13,356
Likes: 58
From: in the woods...........555 Wagon Sqn
great thread, scarily similar to mine early this year on 22B...looking forward to seeing how you have done 
22B Bulletin Board: bolt on stage II mods...
Ian
22B Bulletin Board: bolt on stage II mods...
Ian
great thread, scarily similar to mine early this year on 22B...looking forward to seeing how you have done
22B Bulletin Board: bolt on stage II mods...
Ian
22B Bulletin Board: bolt on stage II mods...
Ian
Hi Ian.....yeah I was following your on 22b at the time. Funny we were basically doing exactly the same thing at the same time.
Mike