
new project 05 sti mickyjeff


Thread Starter
Scooby Regular
iTrader: (2)
Joined: Mar 2005
Posts: 858
Likes: 0
From: sunny stockton in a 300bhp scooby
i have finally decided to get off my backside and do the work if been wanting to do for ages
work im doing myself in the garage at home
hyperflow monster FMIC AET great company (andy taylor MD real quick service)
hyper flow TM oil cooler AET great service/and very helpful. i will be using andy knowledge on the turbo etc later on in the project.
hyperflow induction kit AET great service
hyperflow catchcan on battery bracket AET great service fitted by me
aim MXL strada digital dash AET turbos
E Boost 2 boost controller AET turbos
TEIN mono flex coilover suspension TSL good company fast service fitted by me
EDFC control system for suspension TSL fitted by me
TEIN front strut brace TSL/me
TEIN rear strut brace TSL/me
tar-ox brake grande 12 pot front/ 10 pot rear/ stainless lines new discs etc revolution
front and rear sway bars TSL/me
S.E.C.S Data monitor with VFD
carbon wing mirrors scooby parts
stainless rad cooling plate badass
stainless fuse box badass
stainless brake and clutch covers bad ***
carbon b pillar covers scooby parts
front splitter E.M.B neil cracking bloke fitted by me raffle prize NBO cheers neil
carbon bonnet revolution
chargespeed carbon fibre air intake replacing foglight covers revolution
nitrous wizards of oz streetfighter 150 thor racing
morette rear light cluster revolution
morrette front light cluster revolution
fantastic wiring performed by myself
fully flocked wrc style dashboard with a litte bit difference to others i have seen ( more on that later) CBC banbury
door cards and b pillar flocked cbc banbury
carpets changed dying them black with valeters dye
new front seats, corbeau boss seats revolution
full four point seat belts revolution sabelt
two fire suppression systems 1 interior 2 engine bay demon tweeks and
custom made panel to mount rear subwoofers, fire extingishers seatbelts etc will be flocked when i have designed it
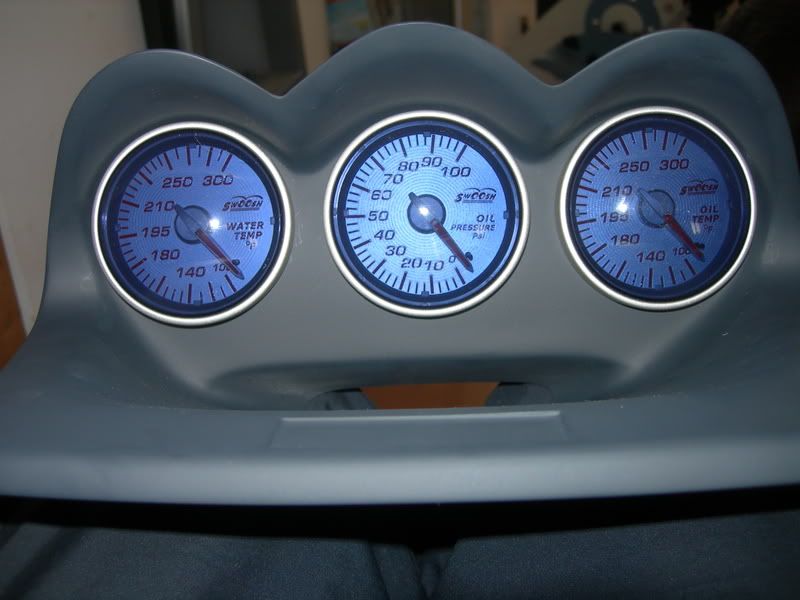
swoosh gauges 7 of them, sorry like the look of them, defis also but going to be different and fit the swoosh fitted by me
zero sports triple pod japan parts done by me
perrin drop links front and rear TSL done by me
perrin anti lift kit TSL done by me
move the clock into the front grill done
buddy club condenser revolution
underseal all exposed areas whilst wings etc are off/done
roof vent
new tubular headers ceramic coated fitting me
fit EDFC controller in ashstray custom build me/ done
work im not doing is ( TSL motorsport ) are
upgrade to 353 bhp
upgraded exhaust system
alloy hand polishing by R+S in manchester
wheel laser alingnment for the suspension
thanks to glen and keith and the rest of the crew at revolution
remap jolly green monster thanks simon
and anything else that i can think off mick
1st pic headlights out
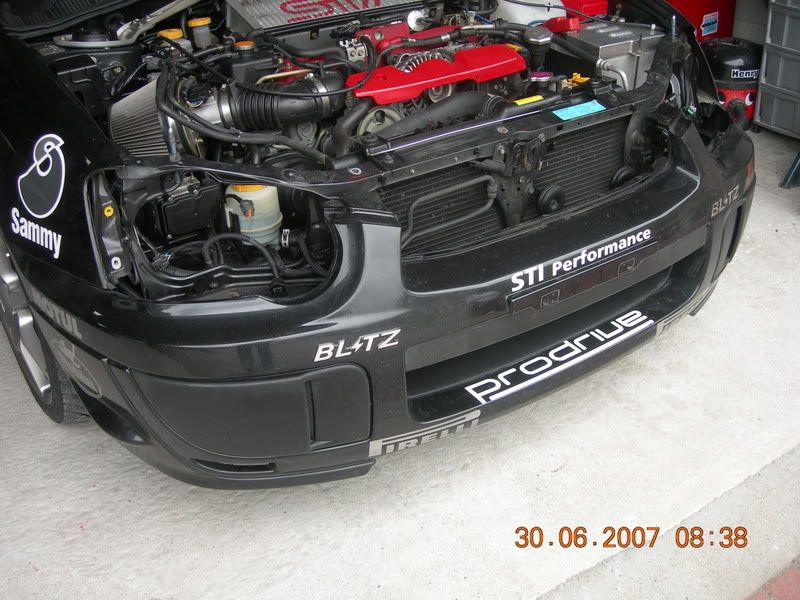
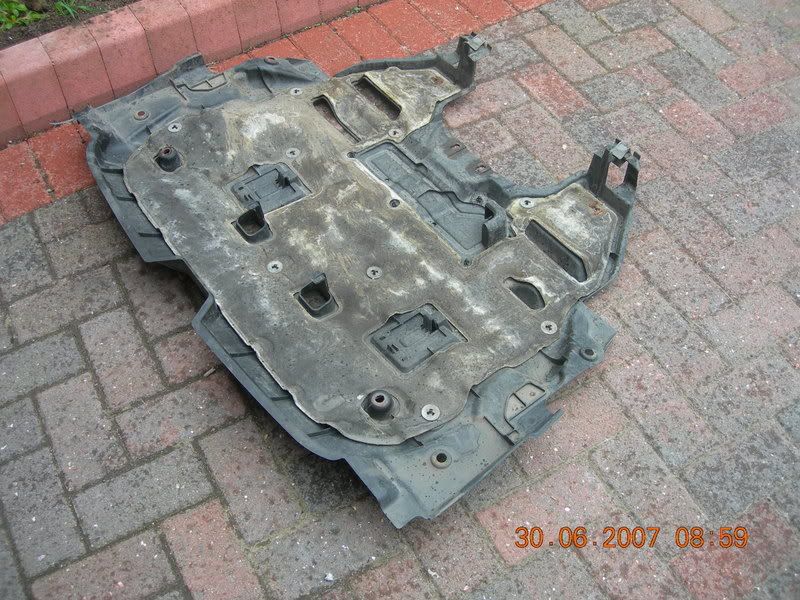
2nd pic sump plate removed to give me totall access allready removed the bonnet as well
3rd pic front wheels off and most of the little plastic bolts that hold the front bumper on
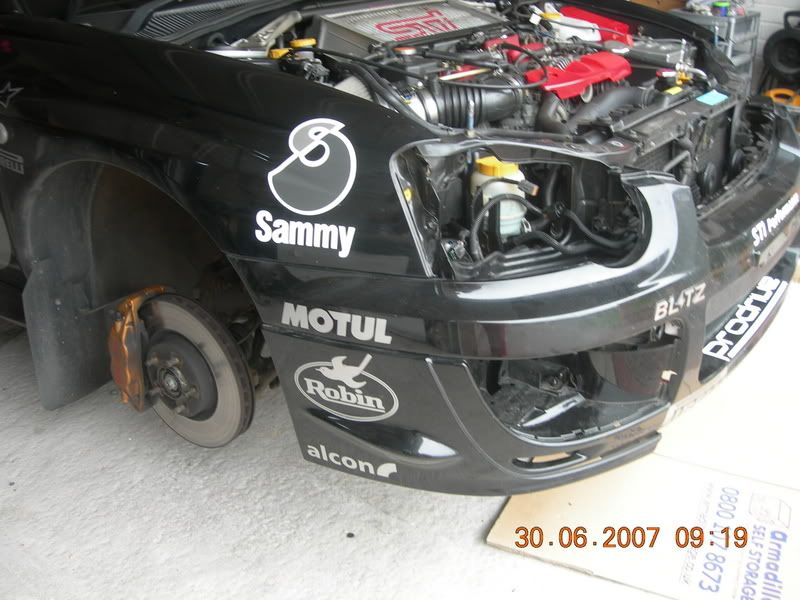
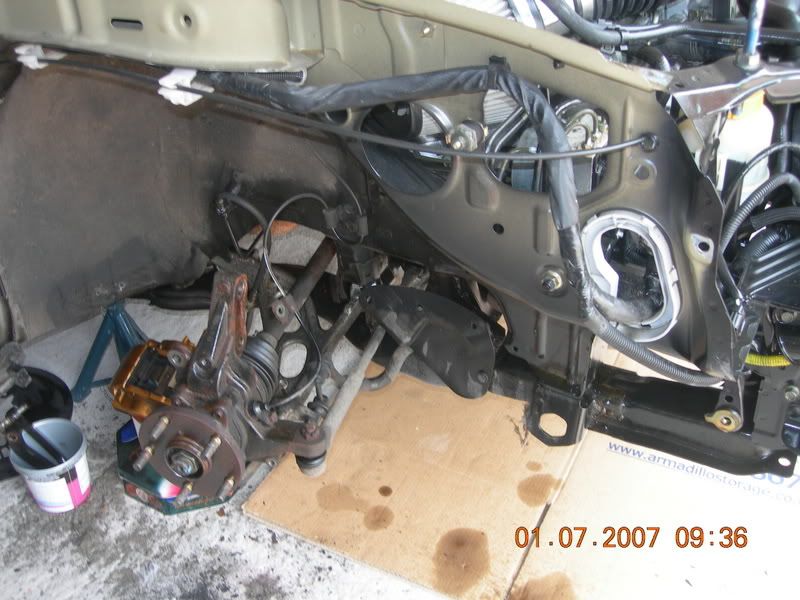
4th inner wing removed as i am removing the front wings
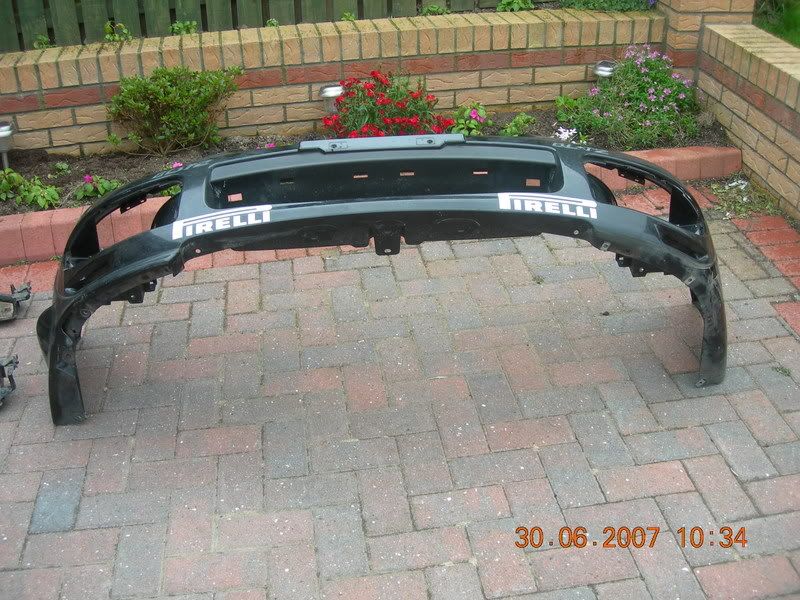
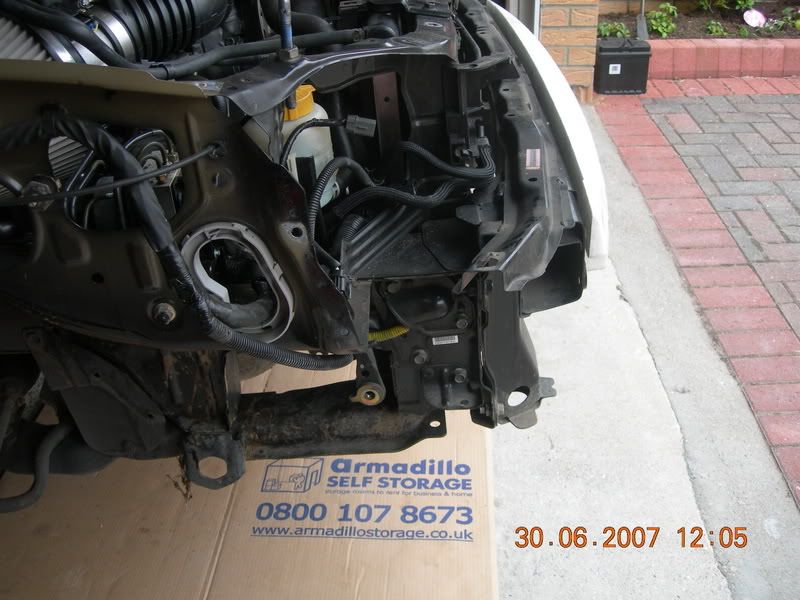
front bumper is off
pic of the front of the car
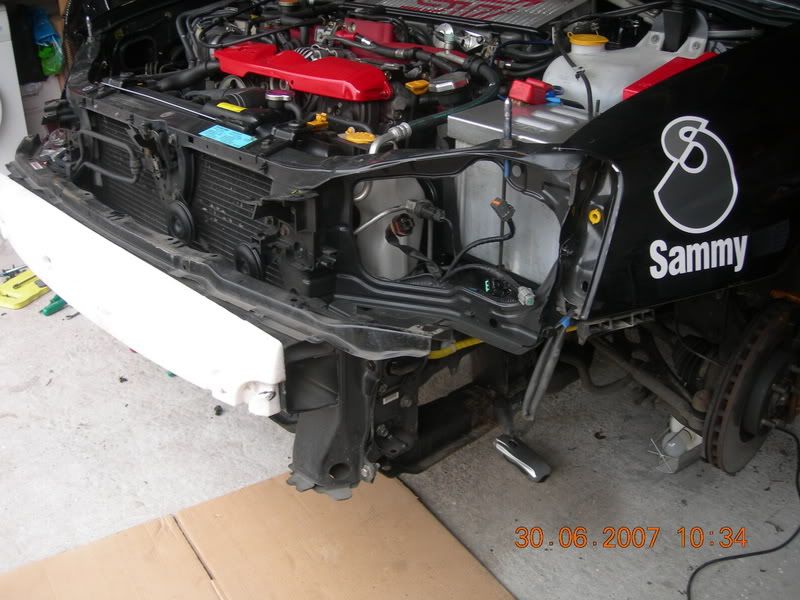
airduct system on the inner wing can be seen this will be removed not needed
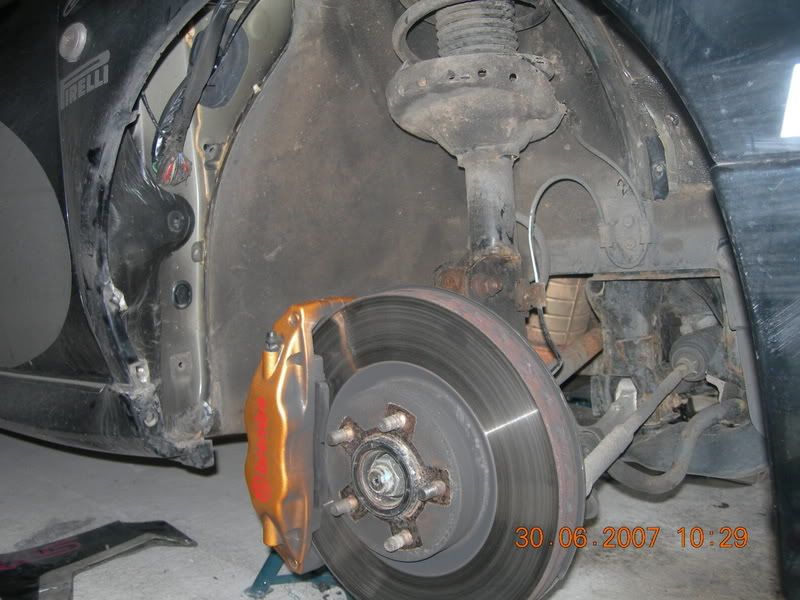
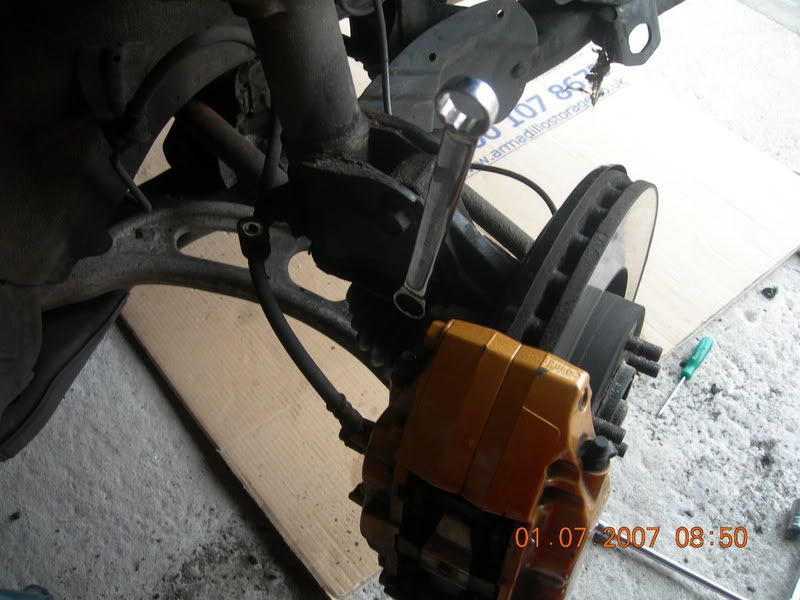
wings off starting to dismantle the suspension
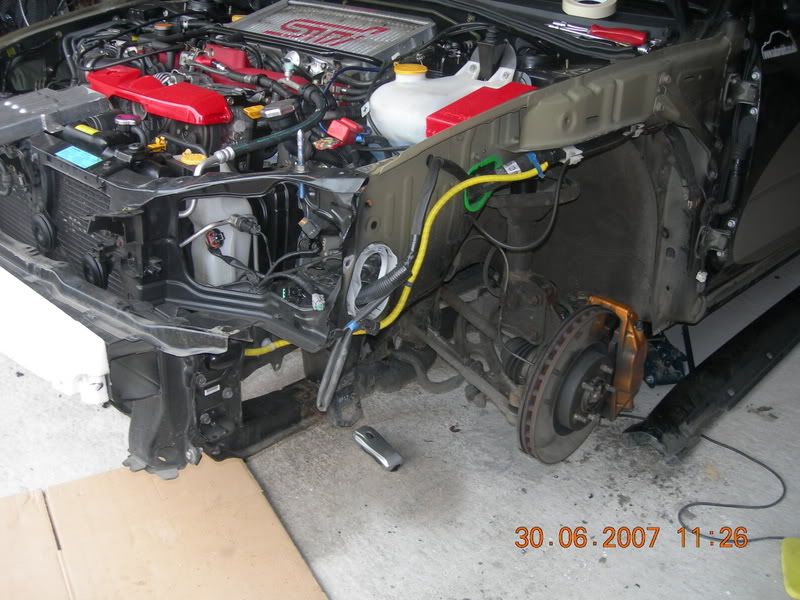
remove the calipers remember to hang them up on cable ties ive put mine on supports it protects the pipes
brakes removed suspension next
suspension being removed
passeger side removed
inner air box removed
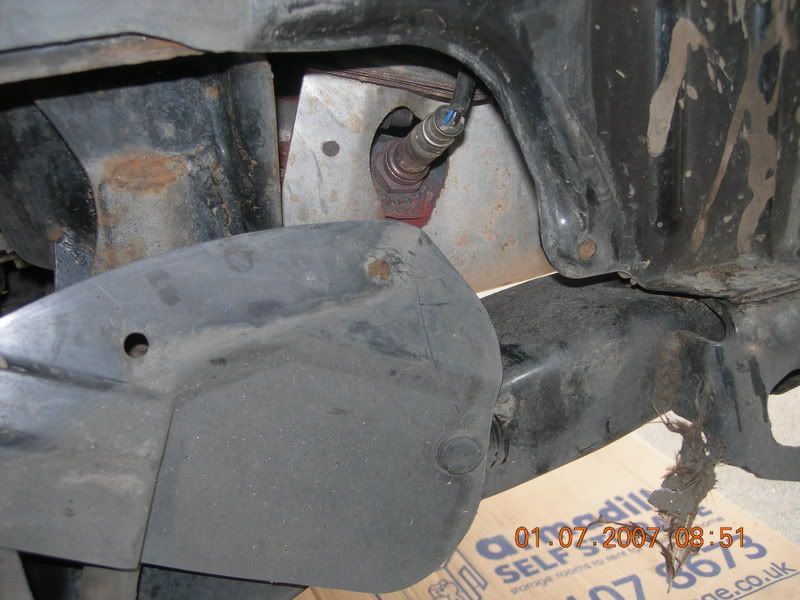
start on drivers side brakes
senser hidden away under drivers side inner wing
brakes and suspesion off
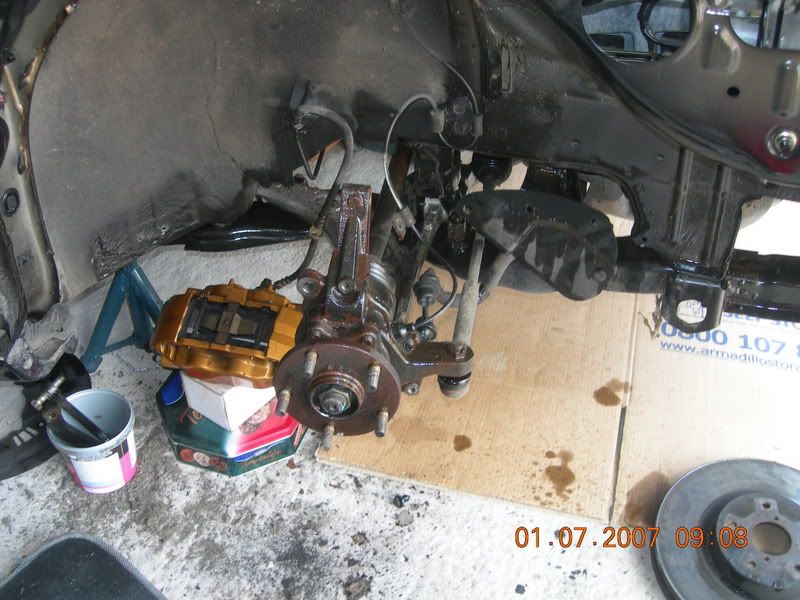
stub axle soaking in gunk ready for painting

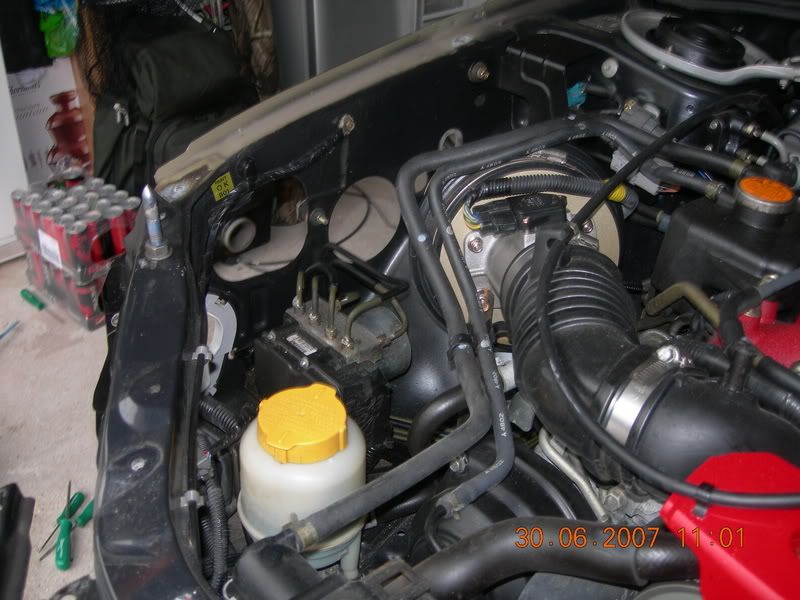
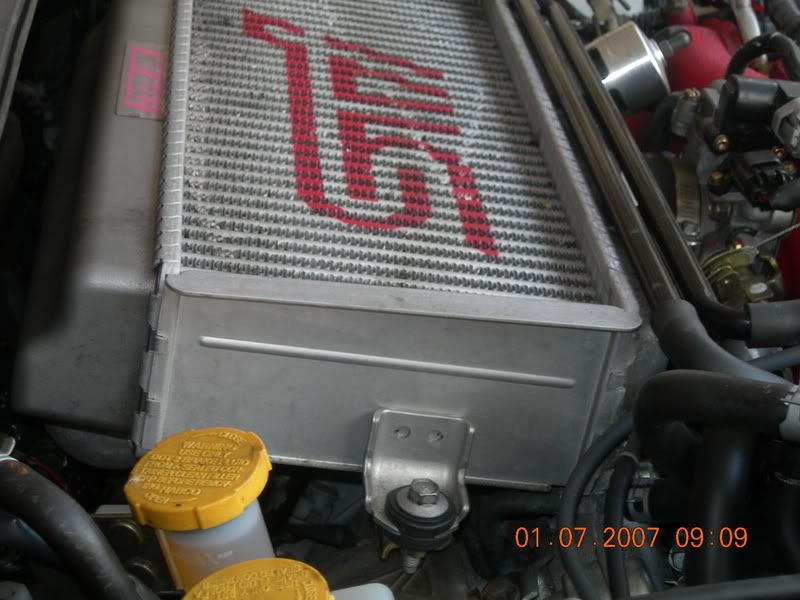
starting on TMIC
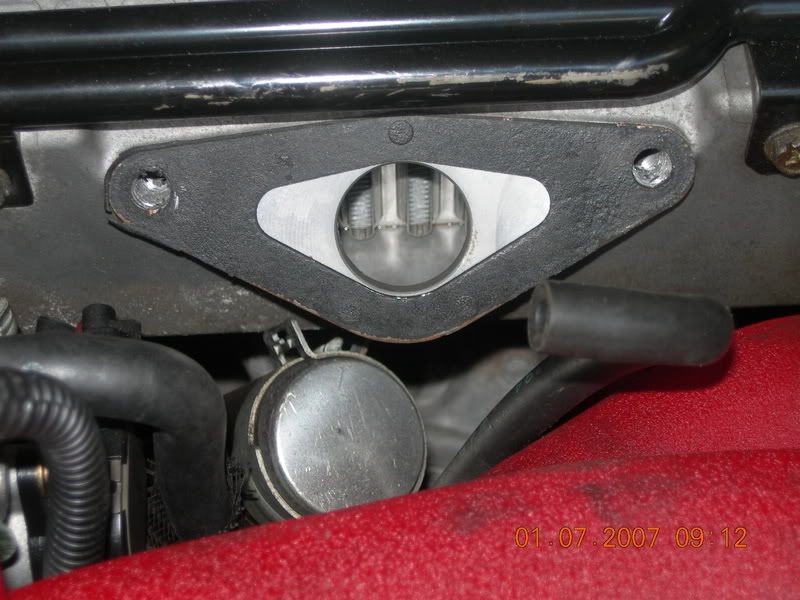
dump valve removed
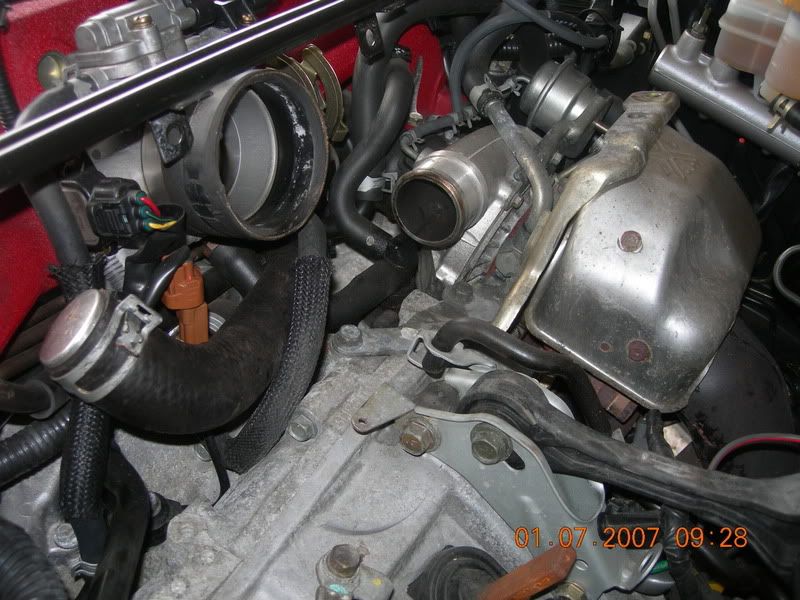
all off quite easy
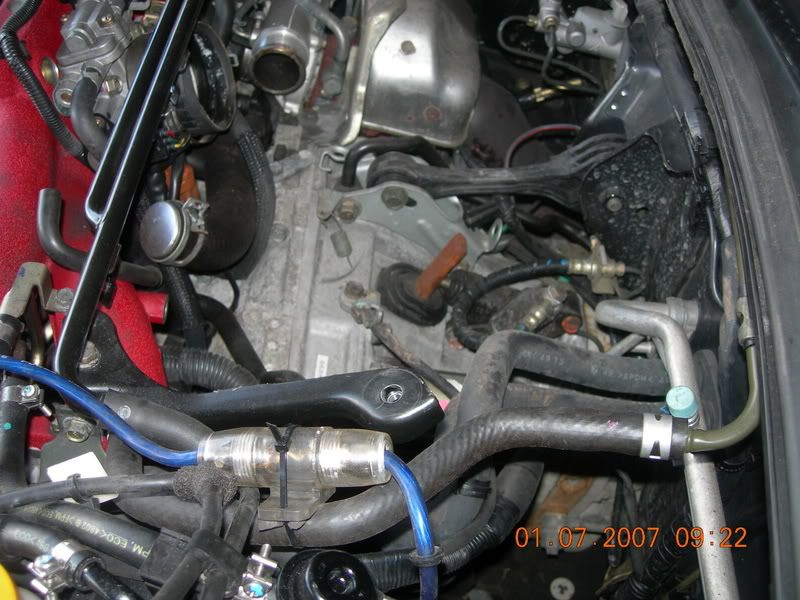
another shot off where the intercooler was
pic of the strut mounting
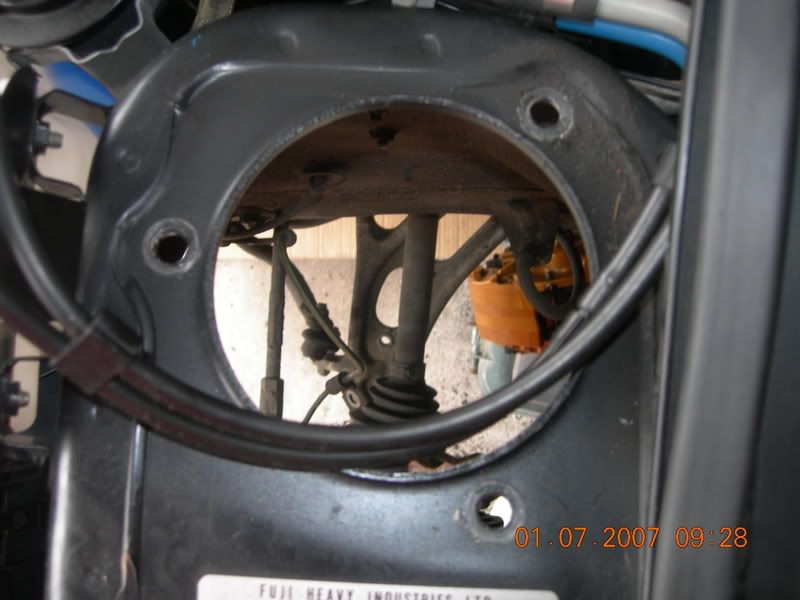
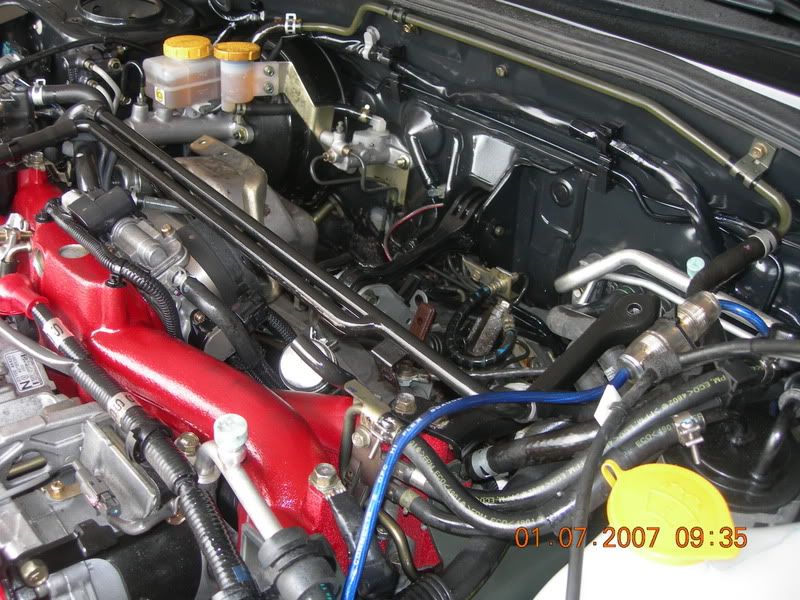
engine bay
drivers side removed
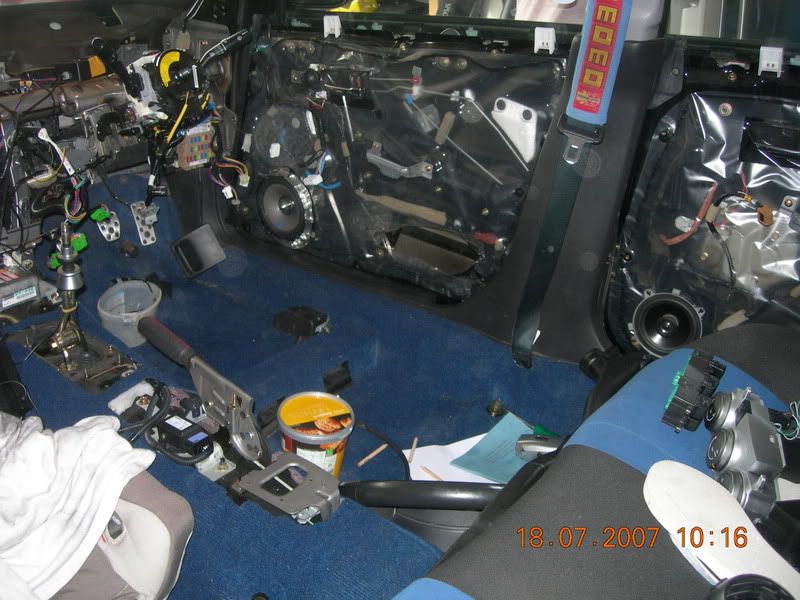
right thats the mechnicals stripped down front anyway, so whist i was doing this i decided to do the complete interior off the car starting with seat removal and the dash.
that will be the next installment cheers mick
work im doing myself in the garage at home
hyperflow monster FMIC AET great company (andy taylor MD real quick service)
hyper flow TM oil cooler AET great service/and very helpful. i will be using andy knowledge on the turbo etc later on in the project.
hyperflow induction kit AET great service
hyperflow catchcan on battery bracket AET great service fitted by me
aim MXL strada digital dash AET turbos
E Boost 2 boost controller AET turbos
TEIN mono flex coilover suspension TSL good company fast service fitted by me
EDFC control system for suspension TSL fitted by me
TEIN front strut brace TSL/me
TEIN rear strut brace TSL/me
tar-ox brake grande 12 pot front/ 10 pot rear/ stainless lines new discs etc revolution
front and rear sway bars TSL/me
S.E.C.S Data monitor with VFD
carbon wing mirrors scooby parts
stainless rad cooling plate badass
stainless fuse box badass
stainless brake and clutch covers bad ***
carbon b pillar covers scooby parts
front splitter E.M.B neil cracking bloke fitted by me raffle prize NBO cheers neil
carbon bonnet revolution
chargespeed carbon fibre air intake replacing foglight covers revolution
nitrous wizards of oz streetfighter 150 thor racing
morette rear light cluster revolution
morrette front light cluster revolution
fantastic wiring performed by myself
fully flocked wrc style dashboard with a litte bit difference to others i have seen ( more on that later) CBC banbury
door cards and b pillar flocked cbc banbury
carpets changed dying them black with valeters dye
new front seats, corbeau boss seats revolution
full four point seat belts revolution sabelt
two fire suppression systems 1 interior 2 engine bay demon tweeks and
custom made panel to mount rear subwoofers, fire extingishers seatbelts etc will be flocked when i have designed it
swoosh gauges 7 of them, sorry like the look of them, defis also but going to be different and fit the swoosh fitted by me
zero sports triple pod japan parts done by me
perrin drop links front and rear TSL done by me
perrin anti lift kit TSL done by me
move the clock into the front grill done
buddy club condenser revolution
underseal all exposed areas whilst wings etc are off/done
roof vent
new tubular headers ceramic coated fitting me
fit EDFC controller in ashstray custom build me/ done
work im not doing is ( TSL motorsport ) are
upgrade to 353 bhp
upgraded exhaust system
alloy hand polishing by R+S in manchester
wheel laser alingnment for the suspension
thanks to glen and keith and the rest of the crew at revolution
remap jolly green monster thanks simon
and anything else that i can think off mick
1st pic headlights out
2nd pic sump plate removed to give me totall access allready removed the bonnet as well
3rd pic front wheels off and most of the little plastic bolts that hold the front bumper on
4th inner wing removed as i am removing the front wings
front bumper is off
pic of the front of the car
airduct system on the inner wing can be seen this will be removed not needed
wings off starting to dismantle the suspension
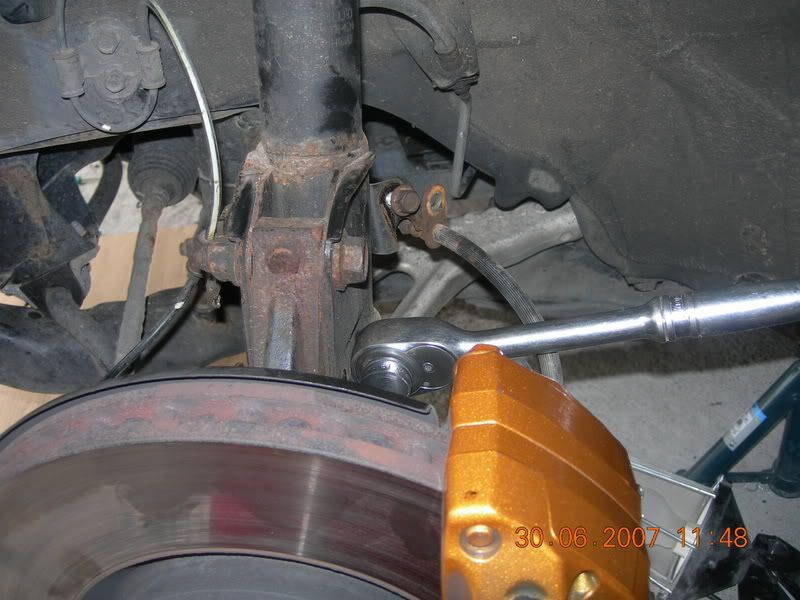
remove the calipers remember to hang them up on cable ties ive put mine on supports it protects the pipes
brakes removed suspension next
suspension being removed
passeger side removed
inner air box removed
start on drivers side brakes
senser hidden away under drivers side inner wing
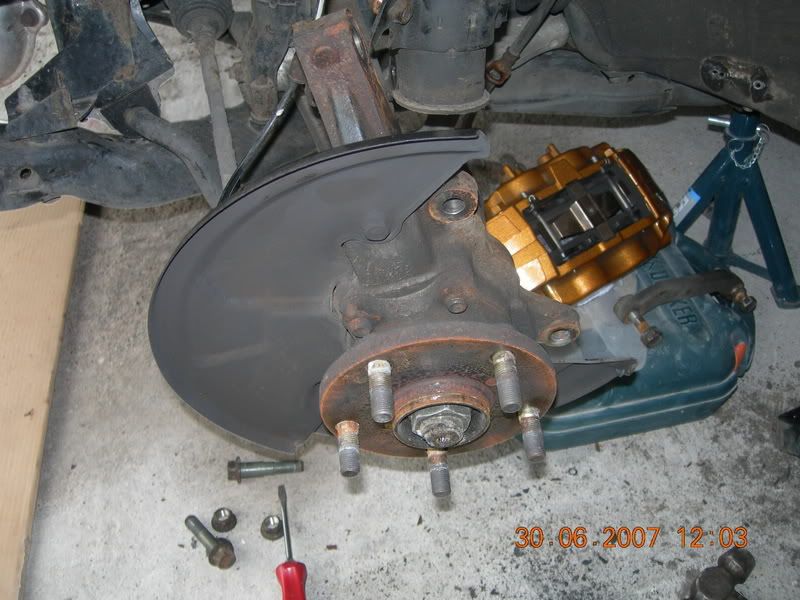
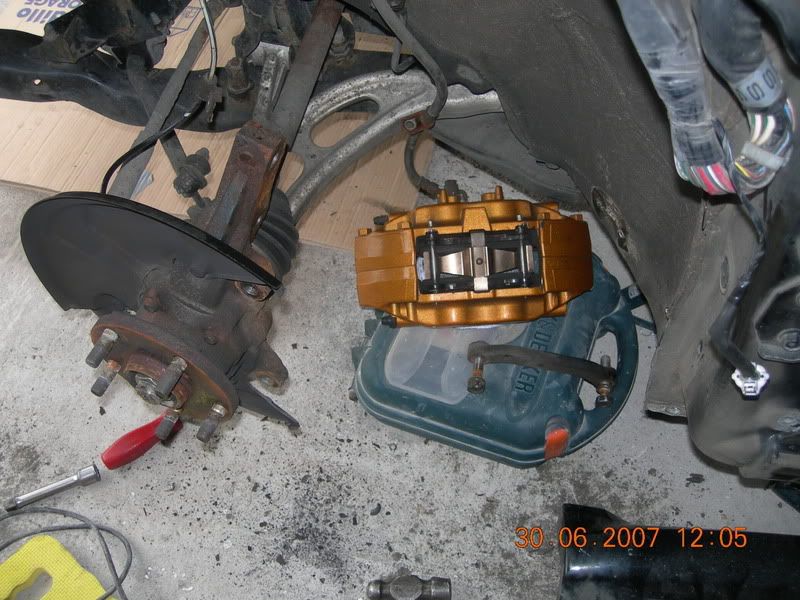
brakes and suspesion off
stub axle soaking in gunk ready for painting
starting on TMIC
dump valve removed
all off quite easy
another shot off where the intercooler was
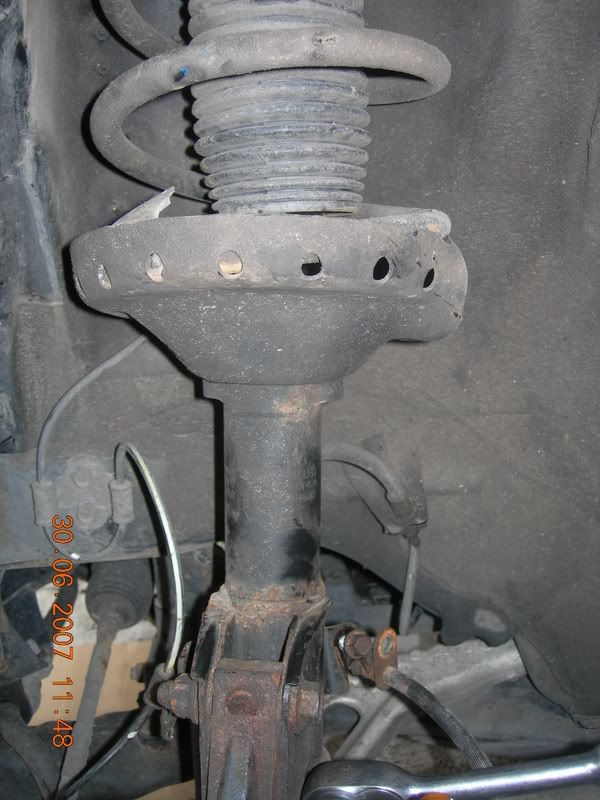
pic of the strut mounting
engine bay
drivers side removed
right thats the mechnicals stripped down front anyway, so whist i was doing this i decided to do the complete interior off the car starting with seat removal and the dash.
that will be the next installment cheers mick
Last edited by mickyjeff; Jan 30, 2008 at 12:48 PM. Reason: more mods

Thread Starter
Scooby Regular
iTrader: (2)
Joined: Mar 2005
Posts: 858
Likes: 0
From: sunny stockton in a 300bhp scooby
right dash in fact the whole interior of the car is getting a make over, one tip if you are just doing the dash leave the seats in. comfort is a wonderful thing
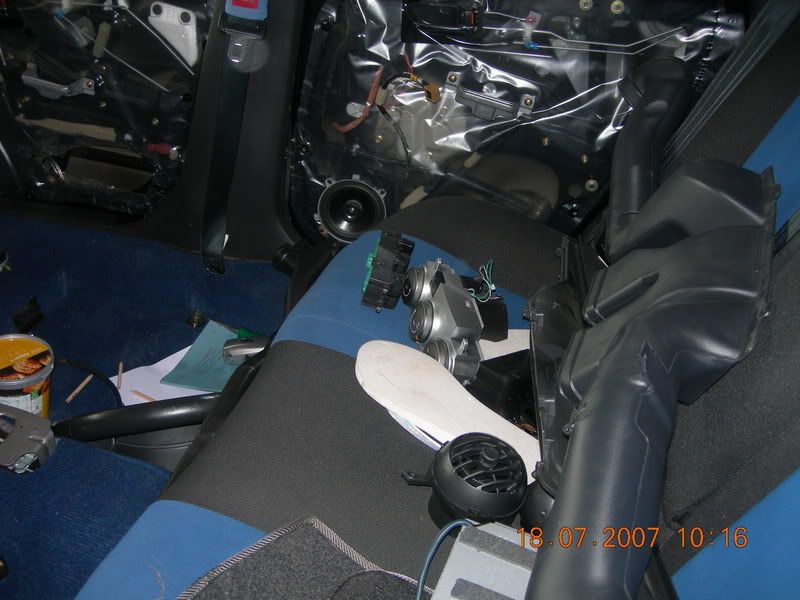
right first pics seats out
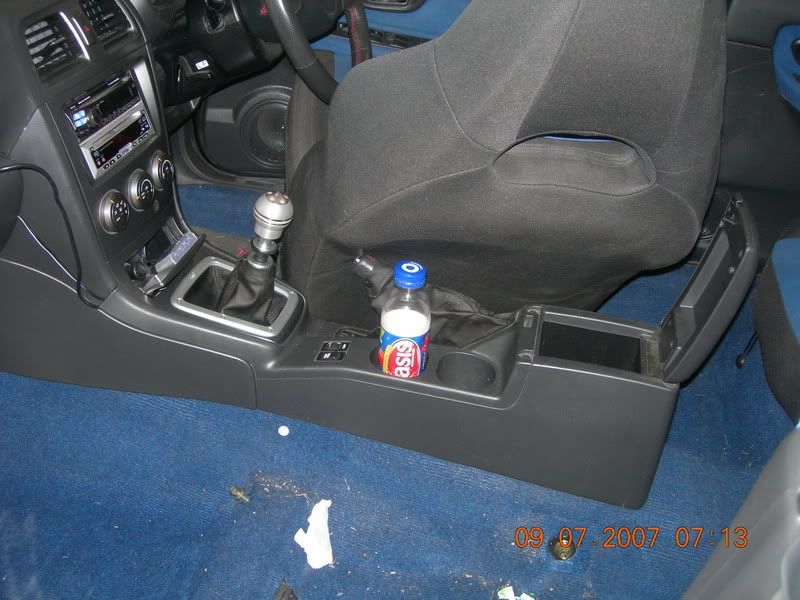
right seats out now centre console
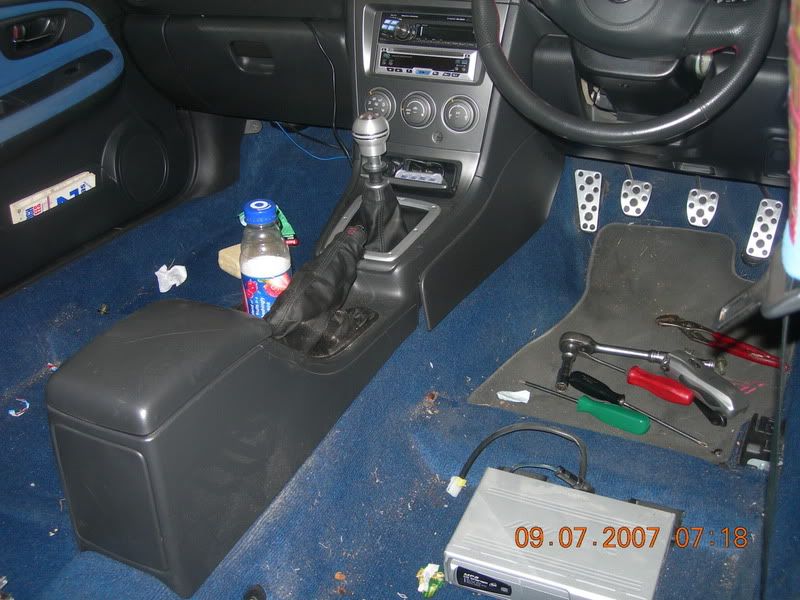
start on the console screws inside the cubby hole
never realised how dirty me bloody car was anyway gear **** and remove the console with the gaiter on it
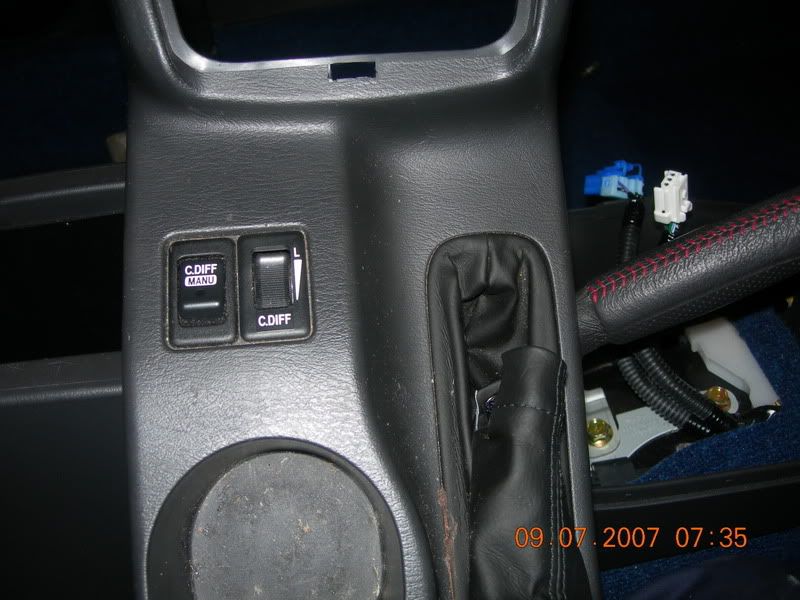
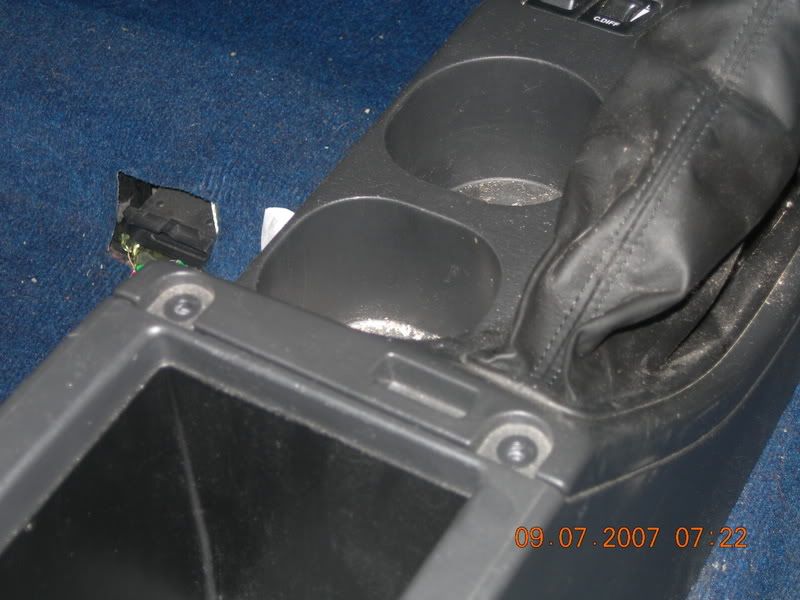
DCCD wiring is just snap connections little screwdriver saves the fingers
removal exposes the next screws
leaves everything exposed
next glovebox screws inside snap connecters for lights
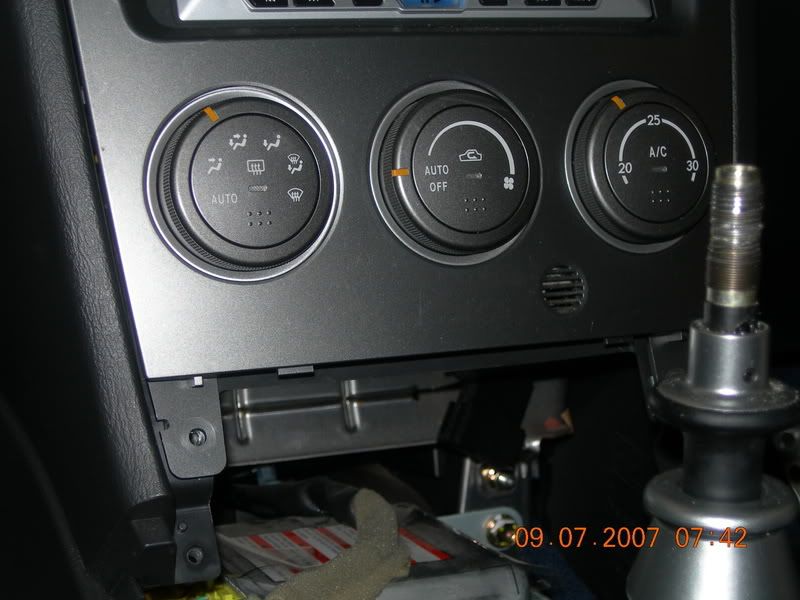
removal of air con control panel is easy couple of screws and snap connecters reveals the audio system
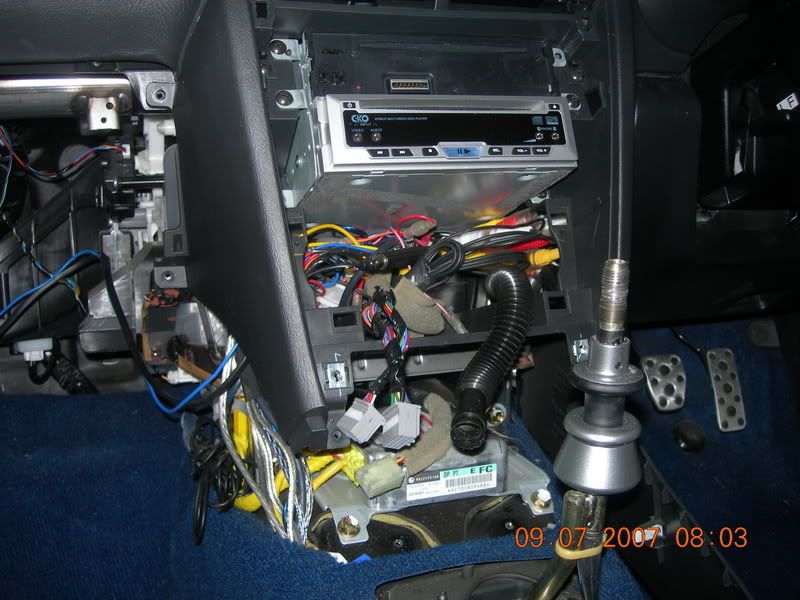
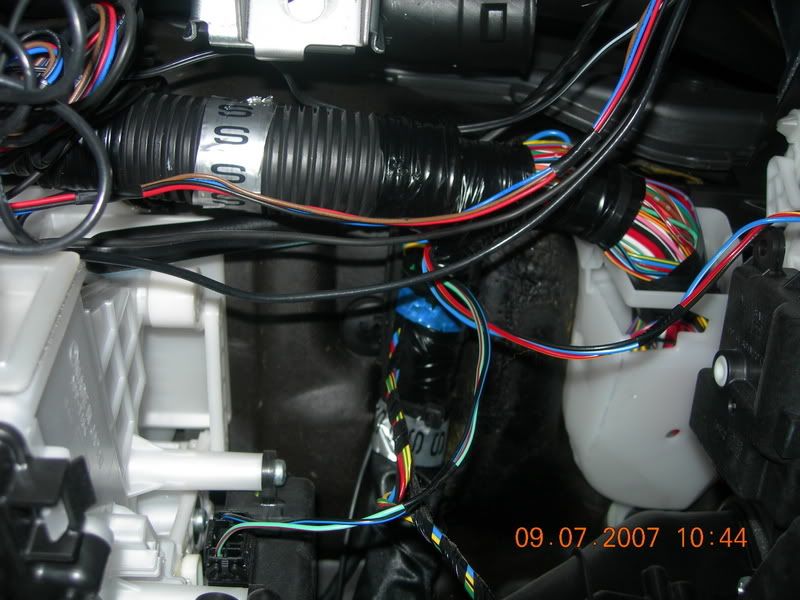
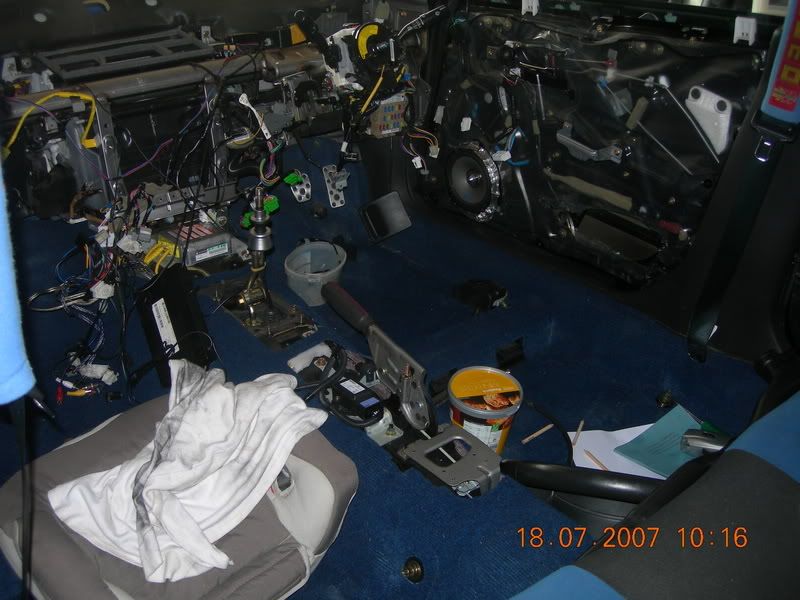
lots of wiring
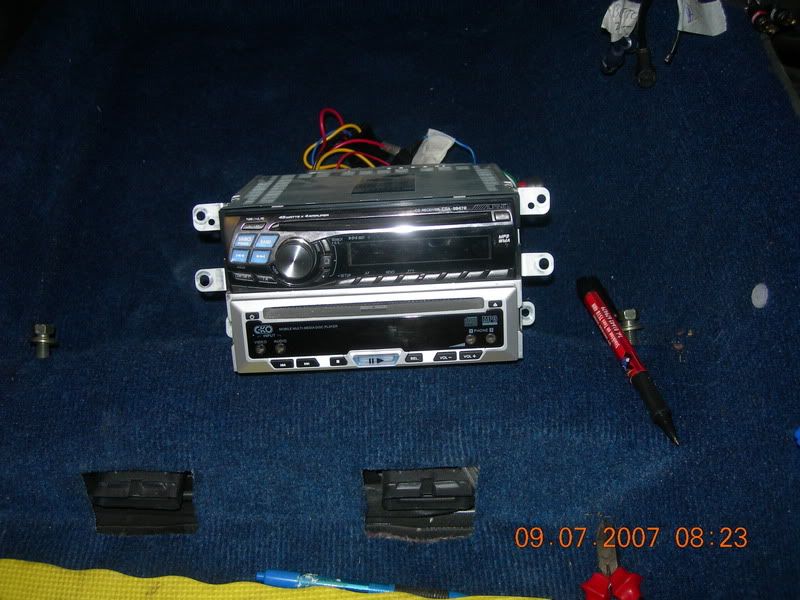
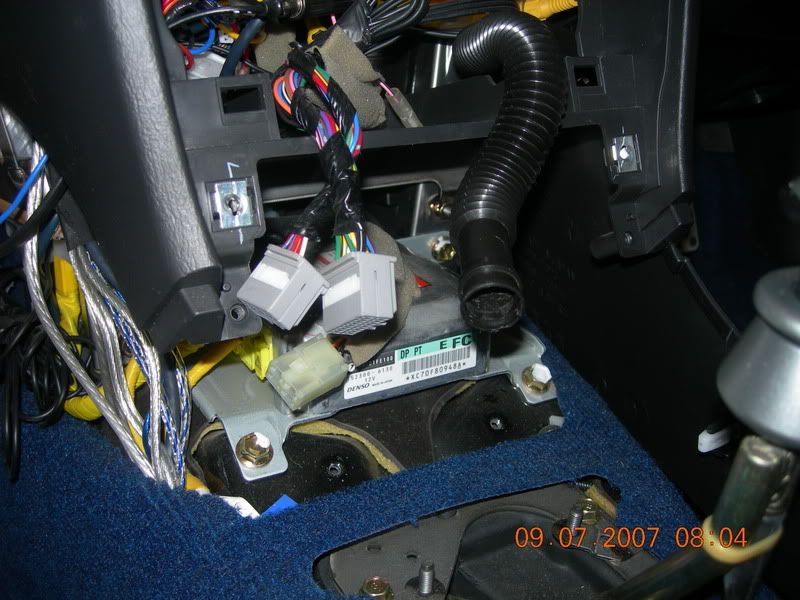 go audio system is not standard. dvd will have to go. ill have to find something to fit in the single din
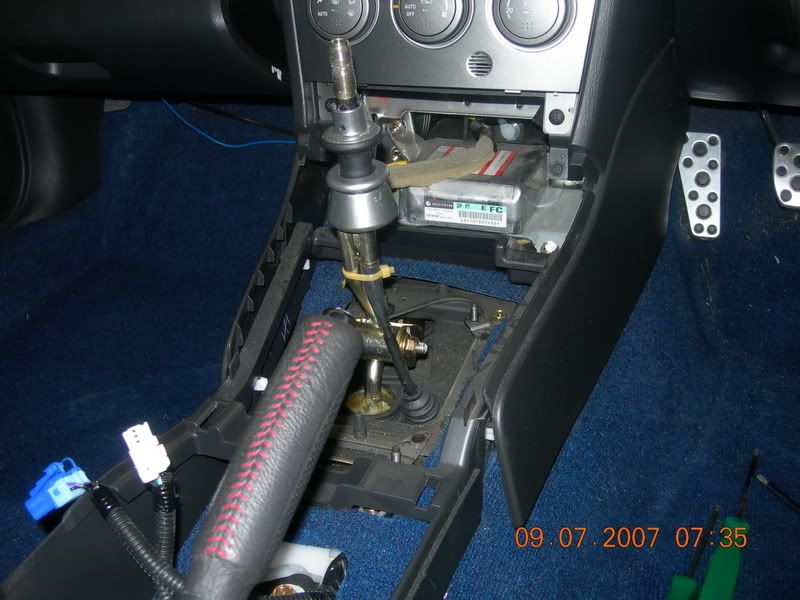
exposes the screws for the little panel with the two air vents and four way flashers
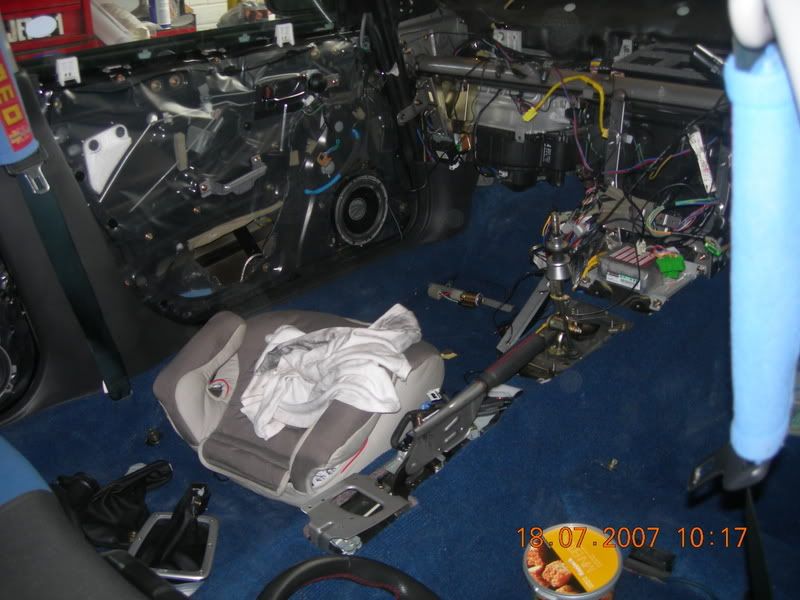
remove the centre console

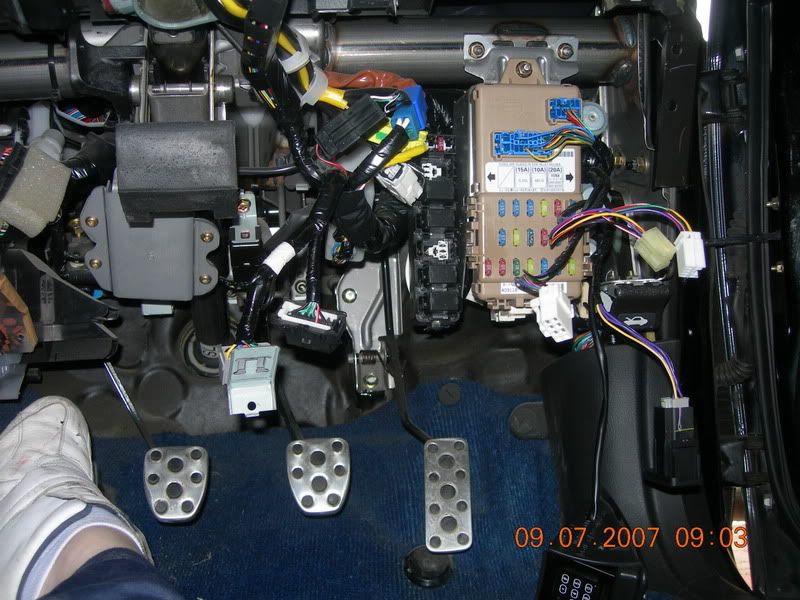
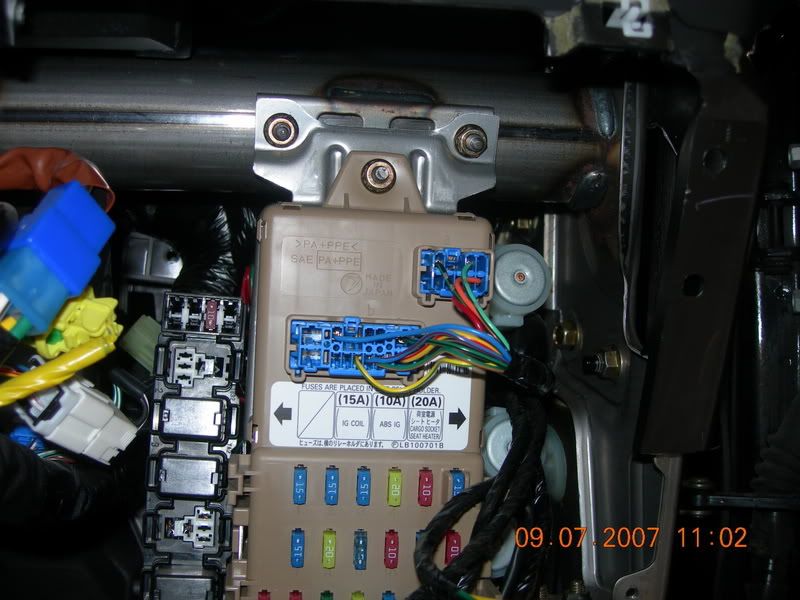
remove panel drivers side exposes fuse box
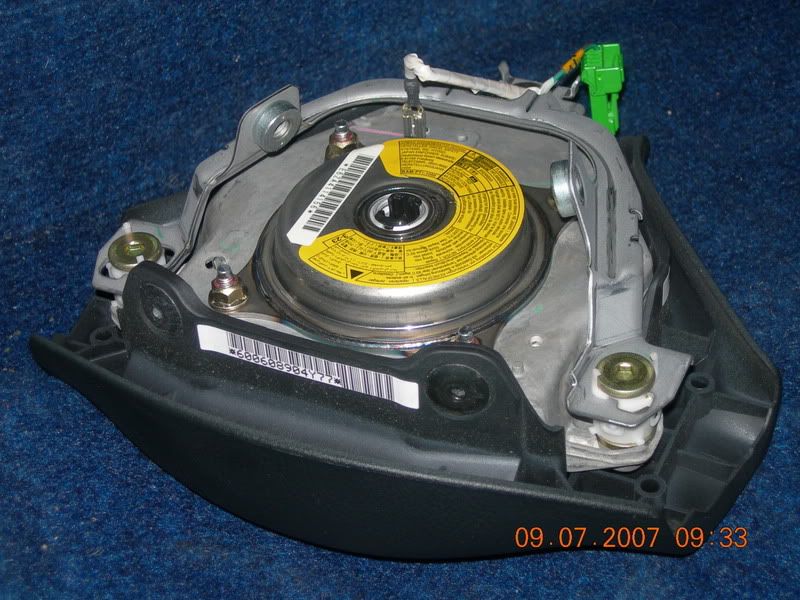
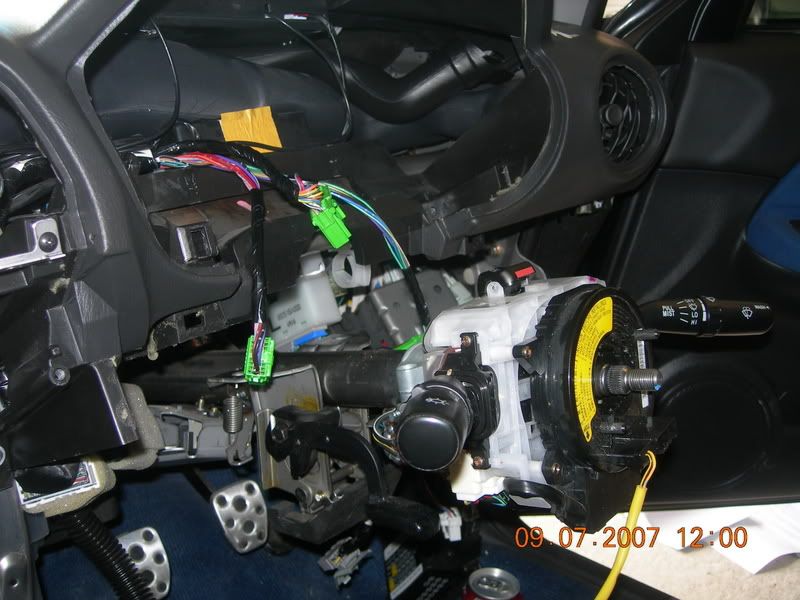
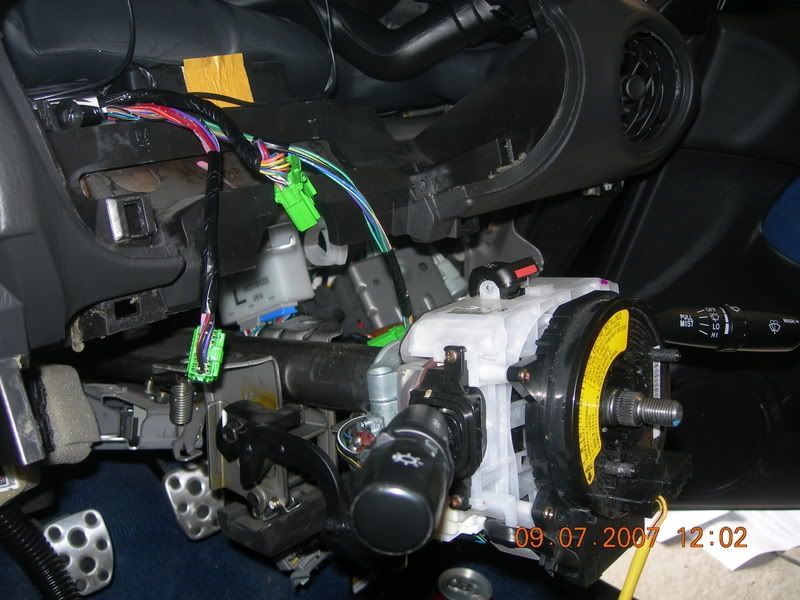
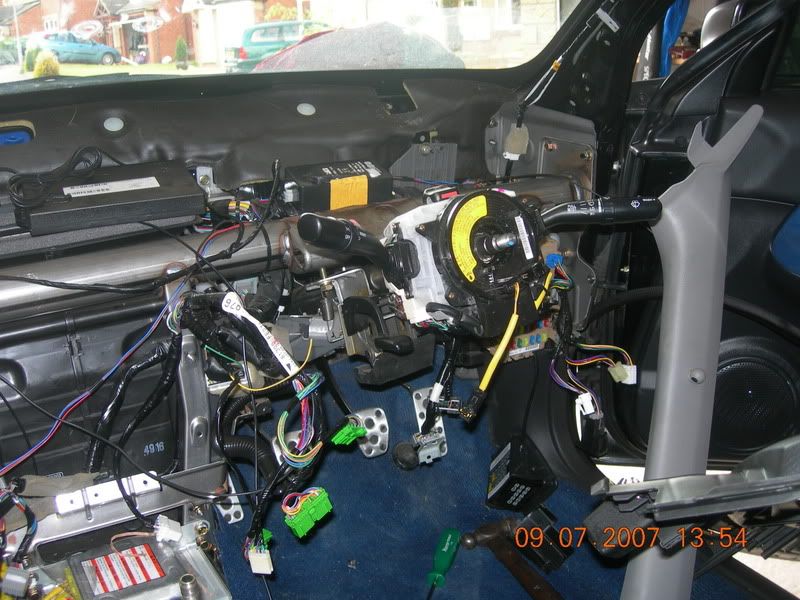
next airbag. battery off the vehicle think they recommend 20 mins but i left it ages. two screws in back of centre cap about 5mm multi screw, not sure what the term is but i will photo it and put it on
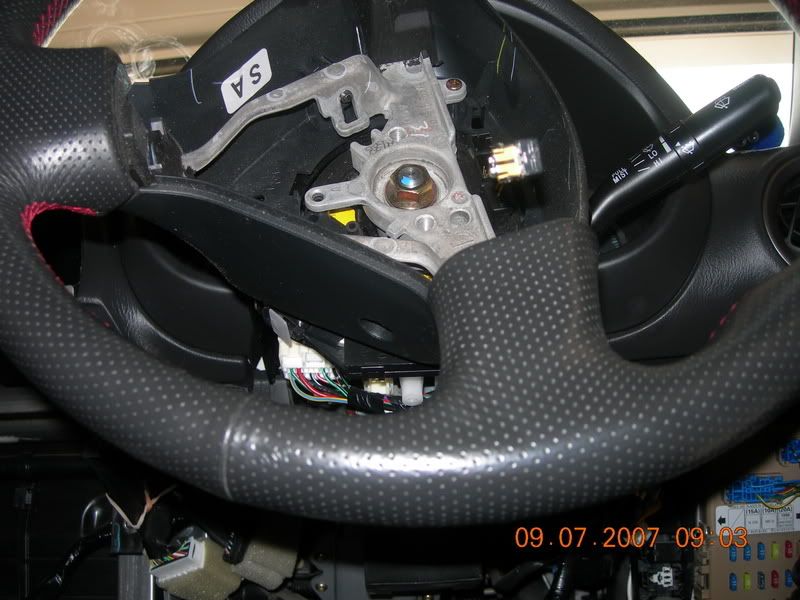
airbag store in a cool dry place
top of steering column
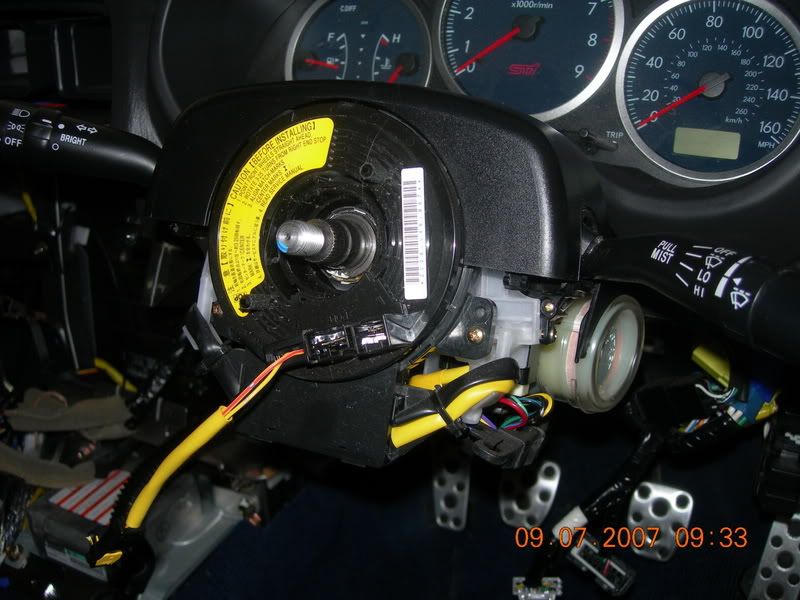
rght removal of the top cover on the steering column is fixed with a snap fit on the back and 2 hard to see screws underneath
this lets you take the cover on the dash panel two screws and two push fit snap fittings it exposes lots of wiring, but most is not involved so should not put you off
fuse box close up
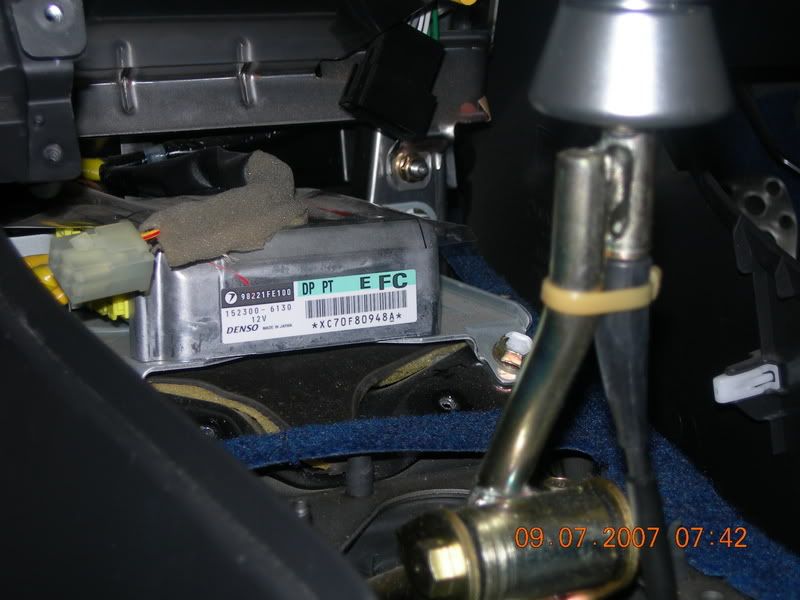
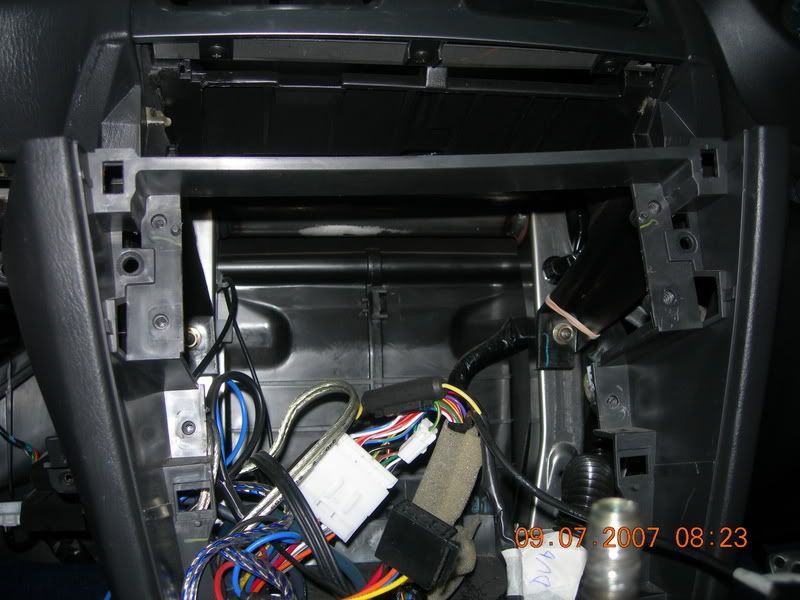
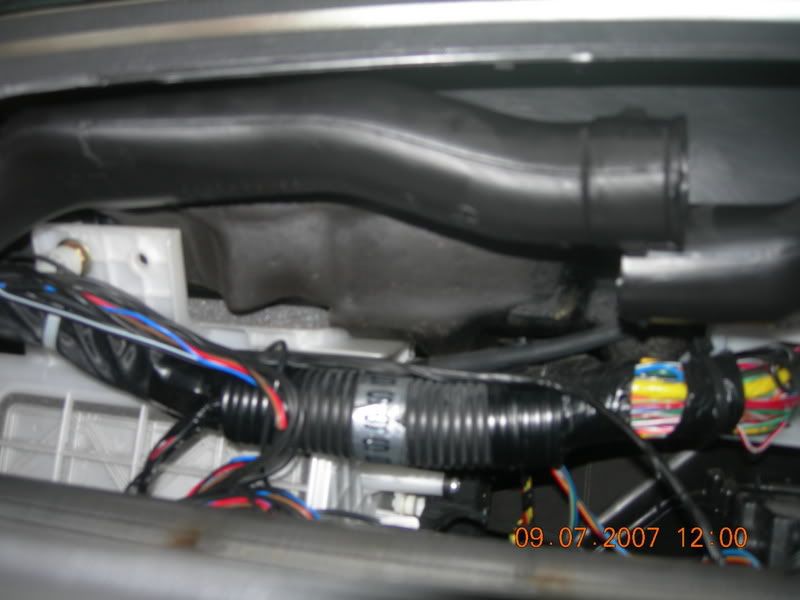
messed about quite a bit trying to figure next move mainly with the air ducting no probs here it all comes off with dash
had a big problem witrh a couple of modules till i realised they were the tracker, aerial, receiver, sender etc but this will differ car to car
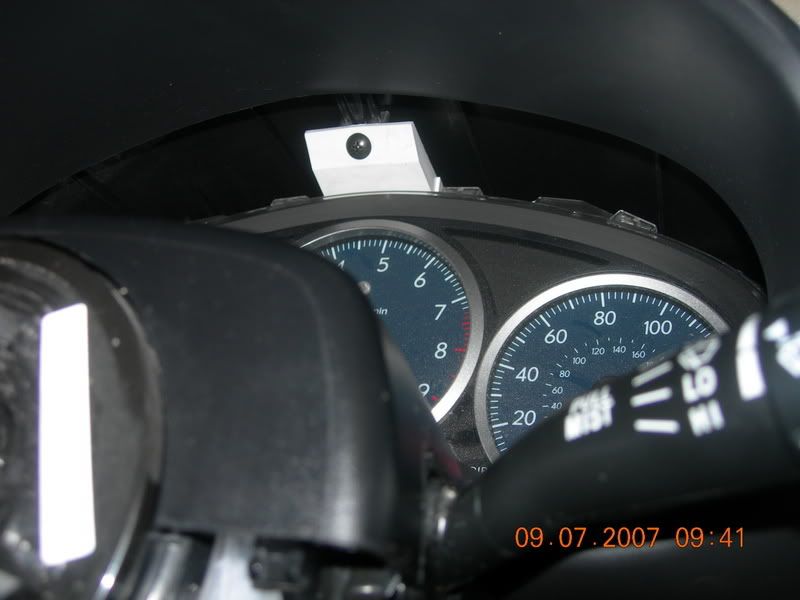
the air vents at the front are a snapfit and give you access to everything
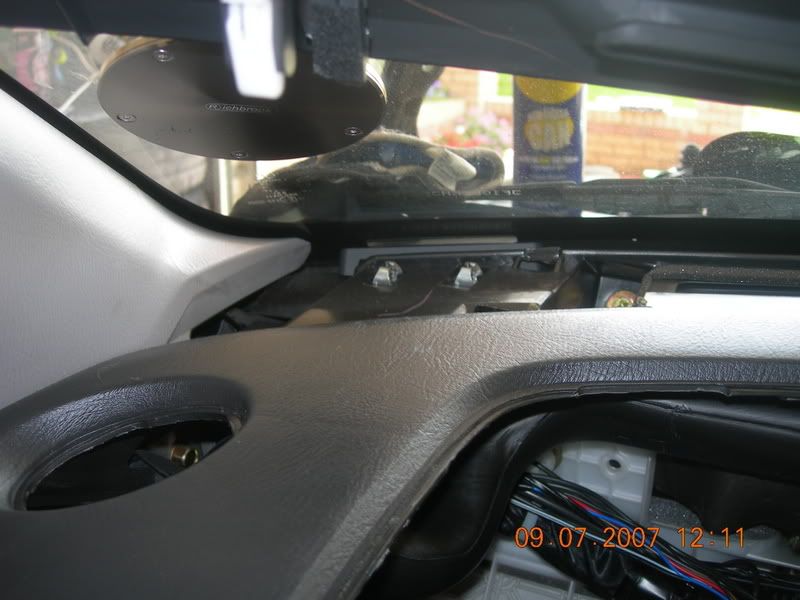
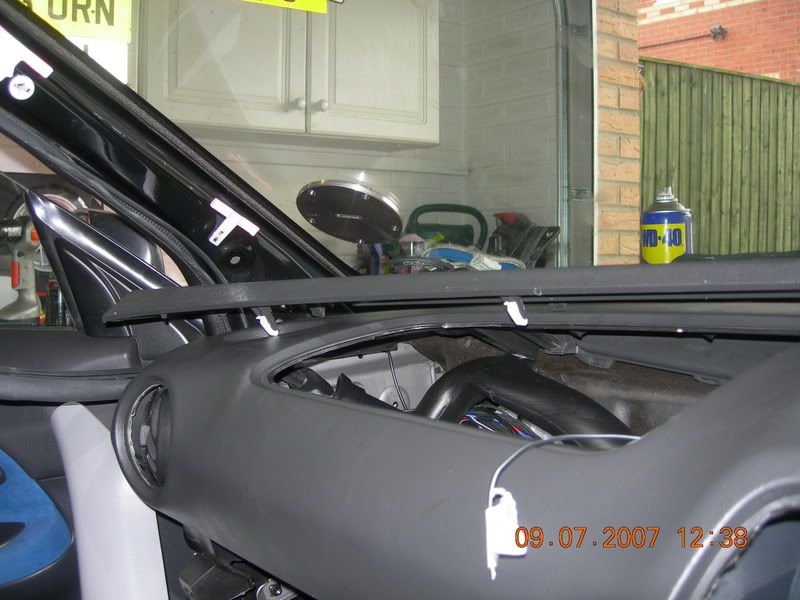
as you can see from the picture above the air bag has been removed i will post pics when i refit it
one of two hidden screws holding the dash underneath the air vent panel

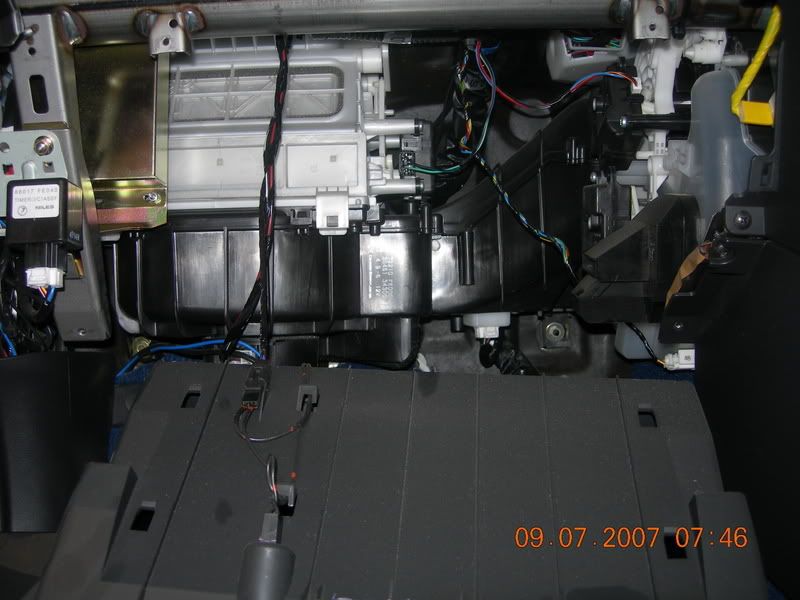
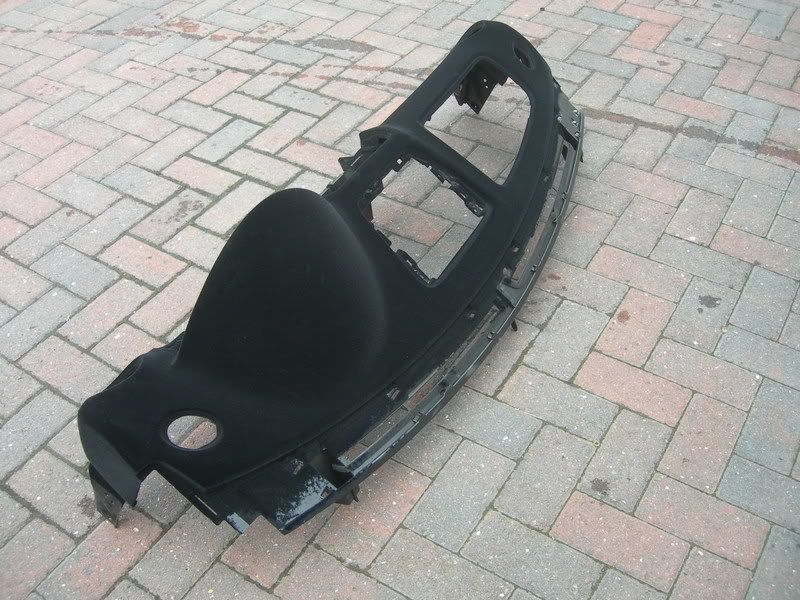
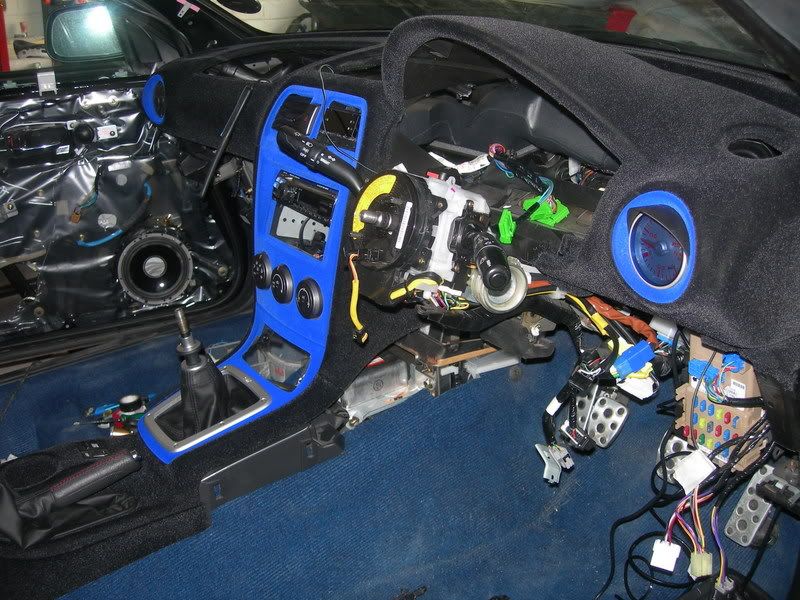
dash is removed and all is revealed
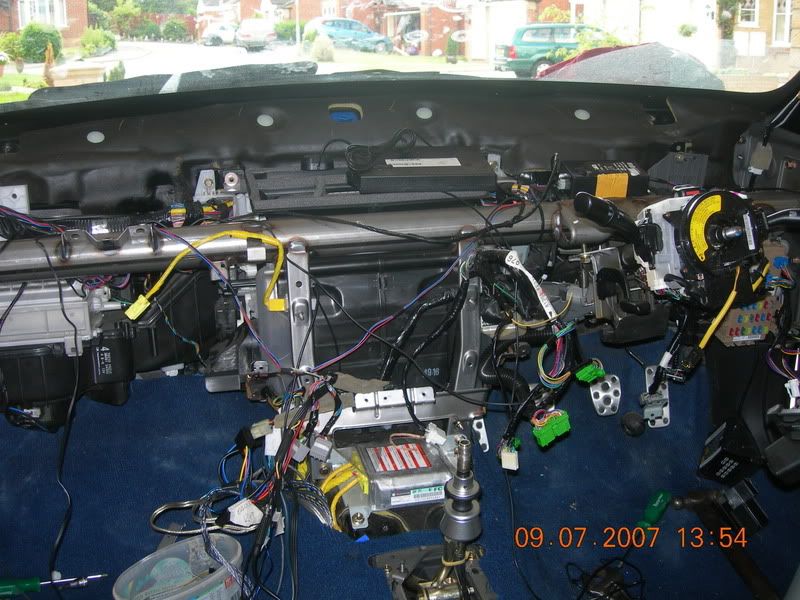
some of the parts for flocking
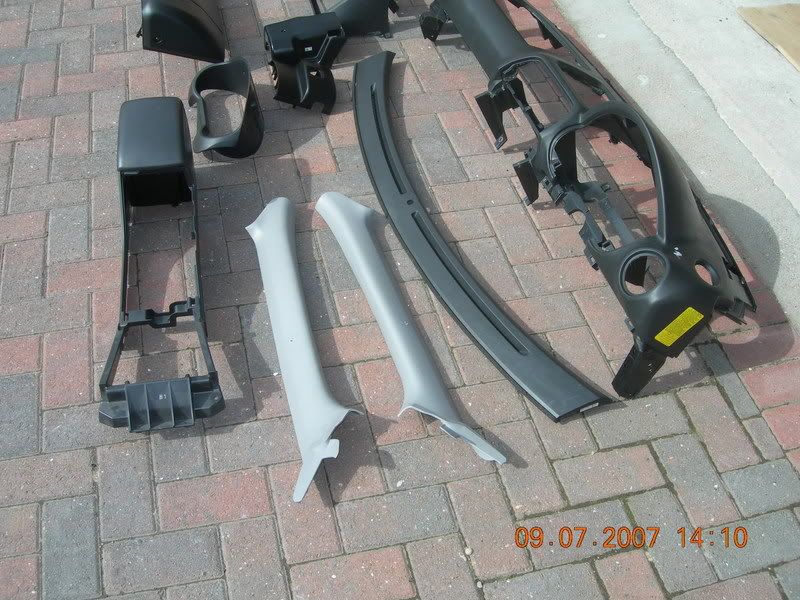
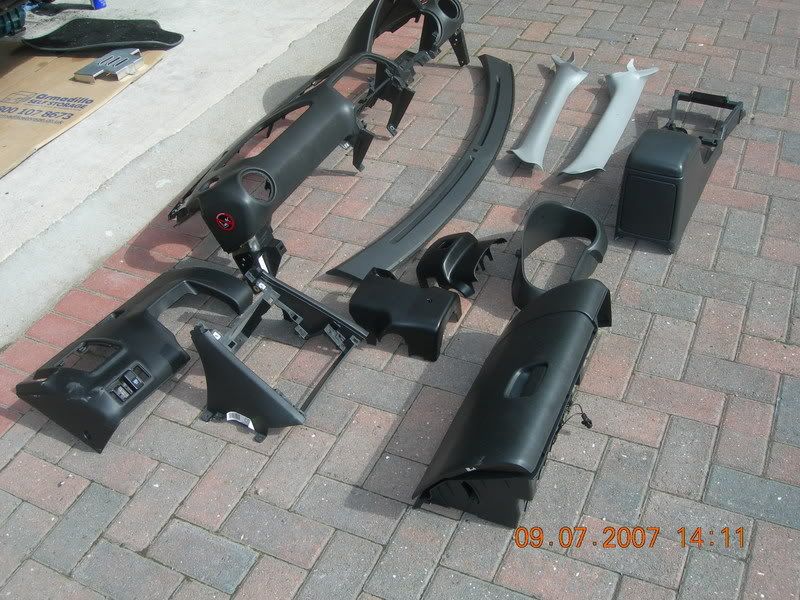
as i said full interior is getting a face lift some will like it some wont
right most of my stuff has been flocked but will not be revealed just yet. cbc services in banbury are doing it mick nikki and chris have been great. we picked up the flocking on friday when the rain from hell fell on that area it took nine hours to get home and consider ourselves very lucky. best wishes to all those people exposed to that downpour and we hope you get your houses sorted soon. no doubt some on scoobynet will be involed
i will start putting the car back together inside first mick
right first pics seats out
right seats out now centre console
start on the console screws inside the cubby hole
never realised how dirty me bloody car was anyway gear **** and remove the console with the gaiter on it
DCCD wiring is just snap connections little screwdriver saves the fingers
removal exposes the next screws
leaves everything exposed
next glovebox screws inside snap connecters for lights
removal of air con control panel is easy couple of screws and snap connecters reveals the audio system
lots of wiring
go audio system is not standard. dvd will have to go. ill have to find something to fit in the single din exposes the screws for the little panel with the two air vents and four way flashers
remove the centre console
remove panel drivers side exposes fuse box
next airbag. battery off the vehicle think they recommend 20 mins but i left it ages. two screws in back of centre cap about 5mm multi screw, not sure what the term is but i will photo it and put it on
airbag store in a cool dry place
top of steering column
rght removal of the top cover on the steering column is fixed with a snap fit on the back and 2 hard to see screws underneath
this lets you take the cover on the dash panel two screws and two push fit snap fittings it exposes lots of wiring, but most is not involved so should not put you off
fuse box close up
messed about quite a bit trying to figure next move mainly with the air ducting no probs here it all comes off with dash
had a big problem witrh a couple of modules till i realised they were the tracker, aerial, receiver, sender etc but this will differ car to car
the air vents at the front are a snapfit and give you access to everything
as you can see from the picture above the air bag has been removed i will post pics when i refit it
one of two hidden screws holding the dash underneath the air vent panel
dash is removed and all is revealed
some of the parts for flocking
as i said full interior is getting a face lift some will like it some wont
right most of my stuff has been flocked but will not be revealed just yet. cbc services in banbury are doing it mick nikki and chris have been great. we picked up the flocking on friday when the rain from hell fell on that area it took nine hours to get home and consider ourselves very lucky. best wishes to all those people exposed to that downpour and we hope you get your houses sorted soon. no doubt some on scoobynet will be involed
i will start putting the car back together inside first mick
Last edited by mickyjeff; Aug 14, 2007 at 06:58 PM.
Thread Starter
Scooby Regular
iTrader: (2)
Joined: Mar 2005
Posts: 858
Likes: 0
From: sunny stockton in a 300bhp scooby


Trending Topics
Thread Starter
Scooby Regular
iTrader: (2)
Joined: Mar 2005
Posts: 858
Likes: 0
From: sunny stockton in a 300bhp scooby
Thread Starter
Scooby Regular
iTrader: (2)
Joined: Mar 2005
Posts: 858
Likes: 0
From: sunny stockton in a 300bhp scooby

Thread Starter
Scooby Regular
iTrader: (2)
Joined: Mar 2005
Posts: 858
Likes: 0
From: sunny stockton in a 300bhp scooby
updates will be regular thing out in the garage today, couple wiring issues to sort out. also want something single din maybe a ecutek unit or something like i want it all to be useable but to look the dogs
cheers mick.
Thread Starter
Scooby Regular
iTrader: (2)
Joined: Mar 2005
Posts: 858
Likes: 0
From: sunny stockton in a 300bhp scooby
Thread Starter
Scooby Regular
iTrader: (2)
Joined: Mar 2005
Posts: 858
Likes: 0
From: sunny stockton in a 300bhp scooby
Thread Starter
Scooby Regular
iTrader: (2)
Joined: Mar 2005
Posts: 858
Likes: 0
From: sunny stockton in a 300bhp scooby
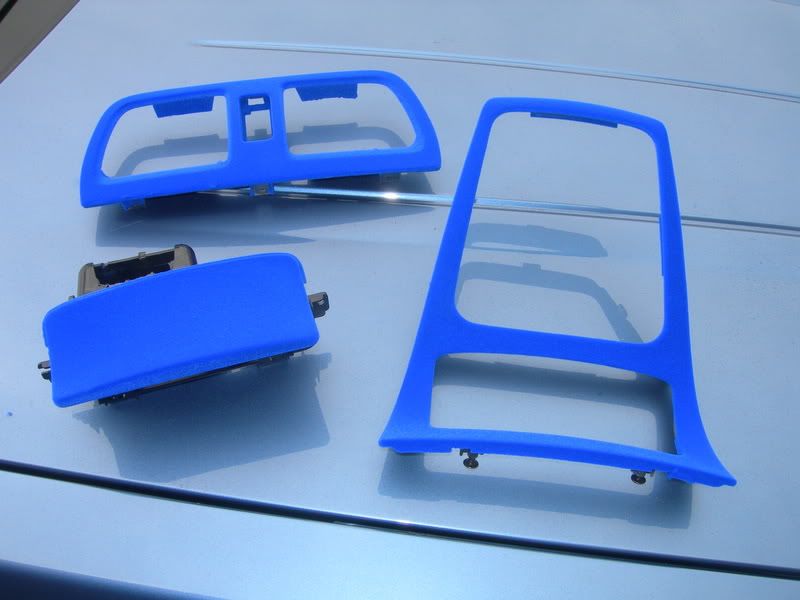
first pic is the dash second glove box and airbag cover

they are the dogs boll-cks
i will keep the updates coming
cheers mick
they are the dogs boll-cks
i will keep the updates coming
cheers mick

Thread Starter
Scooby Regular
iTrader: (2)
Joined: Mar 2005
Posts: 858
Likes: 0
From: sunny stockton in a 300bhp scooby
dont quote me but here goes
1 wrc teams use it for its anti glare propeties it totally stops the reflection of the dash in the windscreen
2 the process is a glue put on the panel and a electrically charged nylon particals fired at it. any porous surface can be done
3 the second pic of the glove box, dont do it justice, it is jet black very hard wearing and looks the dogs nuts, remember best of show winner at the NBO had a flocked dash
hope that helps someone will come on and give better details
cheers mick

Thread Starter
Scooby Regular
iTrader: (2)
Joined: Mar 2005
Posts: 858
Likes: 0
From: sunny stockton in a 300bhp scooby

Thread Starter
Scooby Regular
iTrader: (2)
Joined: Mar 2005
Posts: 858
Likes: 0
From: sunny stockton in a 300bhp scooby
hi neil
the feelings mutual i will update the post at the end the week, a lot of stuff is at CBC, which you know suffered badly in the floods but i think i can c do enough work this week to warrent a post.
thanks for the splitter m8 i know you went to great lengths to get me it and it is appreciated. i hope that we me getting involved in the modifier/showcar scene i think i will be using your services sometime in the near future
mick
ah good good, keep us posted dude.
Thread Starter
Scooby Regular
iTrader: (2)
Joined: Mar 2005
Posts: 858
Likes: 0
From: sunny stockton in a 300bhp scooby
cheers mick
Thread Starter
Scooby Regular
iTrader: (2)
Joined: Mar 2005
Posts: 858
Likes: 0
From: sunny stockton in a 300bhp scooby
cheers mick
hoping to have it all done by next NBO


 i cant beleive your ripped out all the dash, you brave daft crazy person lol
Thread Starter
Scooby Regular
iTrader: (2)
Joined: Mar 2005
Posts: 858
Likes: 0
From: sunny stockton in a 300bhp scooby
i have not got time to do a full update so here is a couple of pics for those who like and those that dont i dont mind.
door card not yet finished
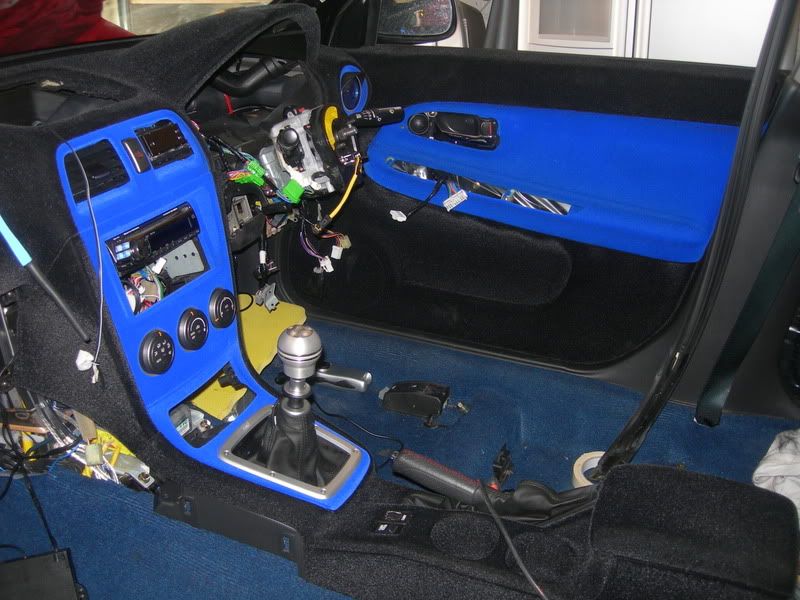
i knew i could get that dash back in lol
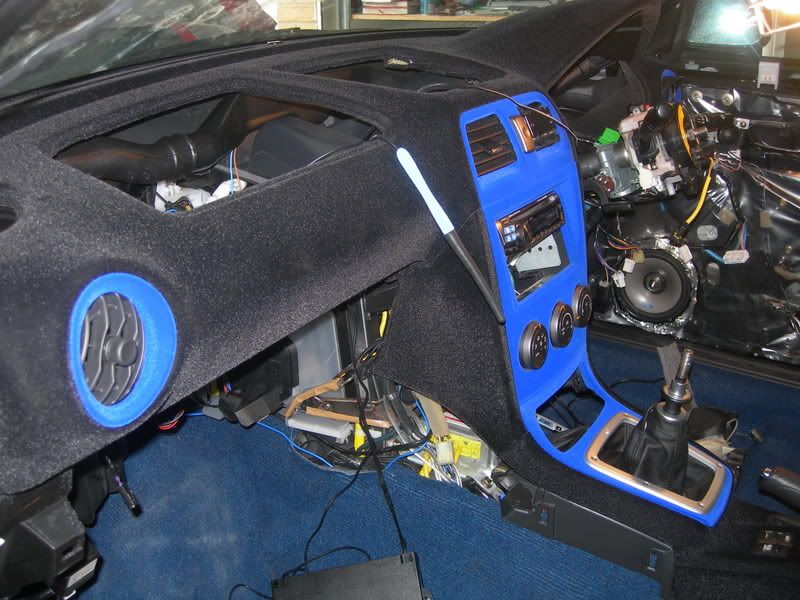
full update will follow soon some flocked parts below
zero sports triple pod to be flocked yet
cheers mick
door card not yet finished
i knew i could get that dash back in lol
full update will follow soon some flocked parts below
zero sports triple pod to be flocked yet
cheers mick
Last edited by mickyjeff; Aug 14, 2007 at 06:57 PM.

 great project!