
DIY - JDM RA Rally Roof Vent Install


Thread Starter
Scooby Newbie
Joined: Dec 2006
Posts: 12
Likes: 0
From: Flagstaff, Arizona USA
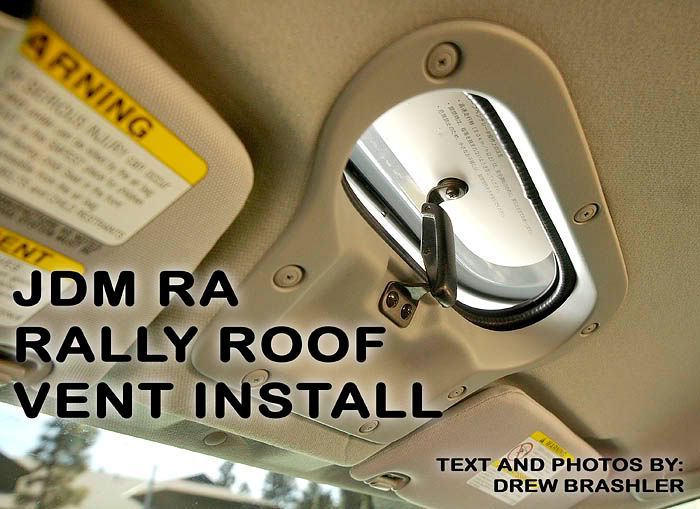
The JDM RA Rally Roof Vent Install
Photos and Text by: Drew Brashler (yesitsdrew5310)
Disclaimer: Modification of your car involves risks and may void your warranty. I can not be held responsible for the modifications you consciously decide to undertake nor for the results of doing so.
Note: This modification was made to a USDM 05� Subaru Impreza 2.5 RS Wagon, other models installations may differ slightly.
Alright, with that part out of the way. I purchased this vent a while ago in a Group Buy, I think I paid around $380. New its around $500, I know you can get it at Boxer4racing.com. It comes in JDM colors, so I purchased the Black, and took it to a body shop to get it sanded and painted PSM. (I spent around $30-35 to get it painted) Anyway it has been sitting in my closet ever since I got it painted. Spring break rolled around for me, so I decided to go ahead and install this thing. I got help from Jamesrt from NASIOC.com (thank you very much). We used his garage and his tools.
Tools Needed:
- JDM RA Rally Roof Vent Kit
- 14mm Wrench or Socket
- Phillips Screwdriver
- Flathead Screwdriver
- A Good Drill with Sharp Bits
- Dremel with Reinforced Cutting Bit
- X-Acto Kinfe
- Thin Tip Sharpie
- Thick Paper to Make Template
- Scissors
- Duct Tape or Gaffers Tape
- Plastic Trash Bag
- Safety Glasses
Here is a photo of what comes in the JDM RA Rally Roof Vent Kit:

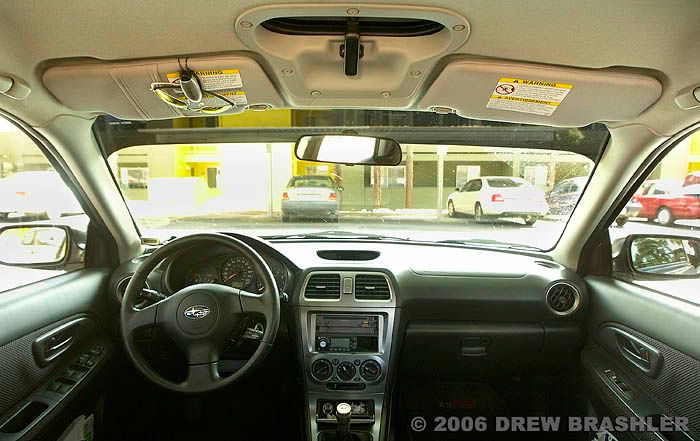
Part 1 � Removal of the Headliner
You can really remove the headliner any way you want, but this is the way I did it.
Step 1 � Removing the Sunvisors:
Break out your Philips Screwdriver and remove the 3 screws holding each visor on.

Step 2 � Removing the Side Handles:
Unsnap the covers from the sides of the handles and use your Philips Screwdriver to remove the 2 screws holding each handle on.

Step 3 � Removing the Dome Light:
Use a flathead screwdriver to pop the clear cover off the light. Then use a flathead screwdriver to remove the 2 screws. The dome light should be loose now, pull it down. Take your flathead screwdriver and lift the piece of plastic holding the power connector on, and detach the power connector.

Step 4 � Removing the Top Seat Belt Point:
Pop the covers off, and use your 14mm wrench or socket to remove the bolts. Let the seatbelt point just dangle.

Step 5 � Removing the Side Trim Molding on the A and B Pillars:
This is really easy, you just pull on them, and they come off. Fully remove the A pillar side molding. Pull the B pillar side molding down out of the way, but don�t fully remove it.


Thread Starter
Scooby Newbie
Joined: Dec 2006
Posts: 12
Likes: 0
From: Flagstaff, Arizona USA
Step 6 – Removing the Clips Holding the Headliner:
Use a flathead screwdriver and pull the clips off. Try to not put too much pressure on the headliner if prying them out.

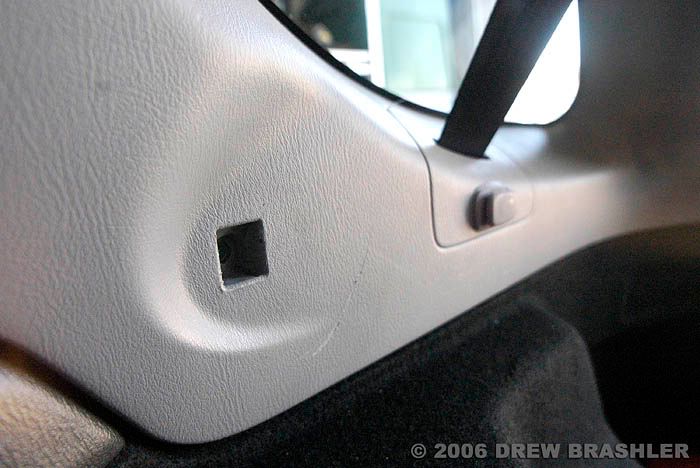
Step 7 – Removing the C Pillar Side Trim Molding:
Grab a Philips screwdriver and unscrew the 2 screws on the C pillar trim. As showed in the 2nd photo the rear storage cover holder pops right off. Then pull off the c pillar trim and run the middle seatbelt thought the opening by popping off the plastic. (you will see what I mean when you get to this part).

Step 8 – Removing the Headliner:
Now carefully remove the headliner through the back of your wagon. Sedan owners, I’m sorry, you get to let the headliner rest on your driver seats. I would recommend removing your headrests on your seats as well. The headliner is fairly sturdy, and is hard to bend, but don’t get over confidante.
Part 2 – Installing the JDM Roof Vent
Here is the fun part, where you get to drill and cut into your cars roof! You ready??? Good, here we go.
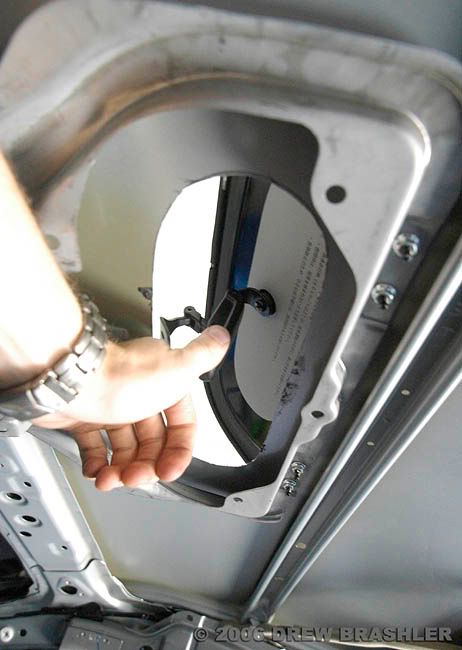
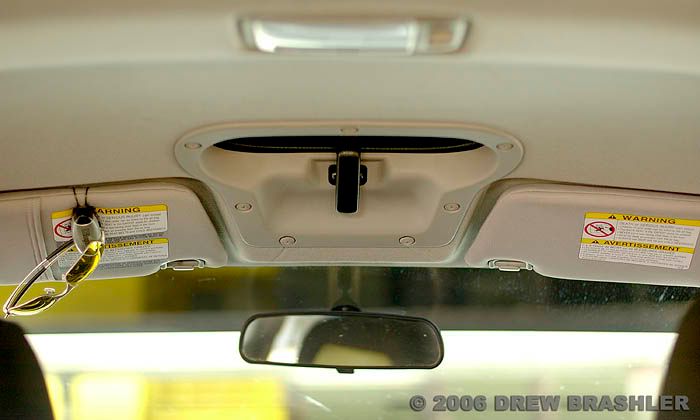
Step 1 – Removing the Map Light Bracket:
Behold… the map light bracket:
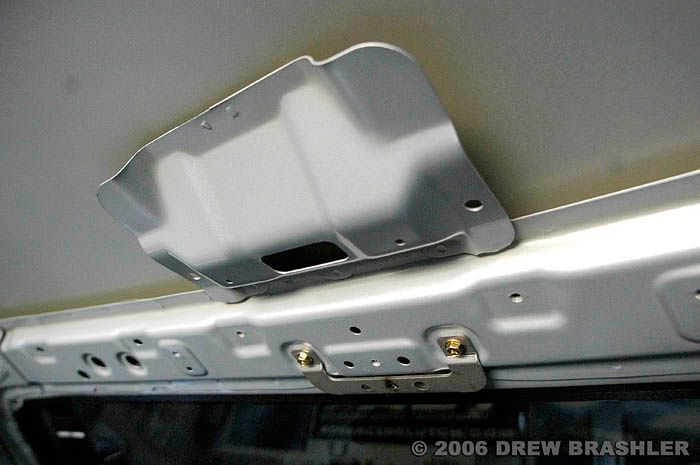
Even if you don’t have the map light, sadly you still have the bracket. So you get to remove this. The easiest way is to grab a drill and drill out the spot welds. There is amble room between the spot welds and the roof, just make sure you don’t start going into the roof.


Step 2 – Mount the vent bracket:
Use the supplied black screws to mount up. This is going to show you where to drill the holes.
Step 3 (the big step) – Drill the holes:
After this big step, there IS no going back. Once you drill these holes you would have to replace your roof to go back. Mark with a sharpie where the holes will be, remove the bracket, and drill them out.

Use a flathead screwdriver and pull the clips off. Try to not put too much pressure on the headliner if prying them out.
Step 7 – Removing the C Pillar Side Trim Molding:
Grab a Philips screwdriver and unscrew the 2 screws on the C pillar trim. As showed in the 2nd photo the rear storage cover holder pops right off. Then pull off the c pillar trim and run the middle seatbelt thought the opening by popping off the plastic. (you will see what I mean when you get to this part).
Step 8 – Removing the Headliner:
Now carefully remove the headliner through the back of your wagon. Sedan owners, I’m sorry, you get to let the headliner rest on your driver seats. I would recommend removing your headrests on your seats as well. The headliner is fairly sturdy, and is hard to bend, but don’t get over confidante.
Part 2 – Installing the JDM Roof Vent
Here is the fun part, where you get to drill and cut into your cars roof! You ready??? Good, here we go.
Step 1 – Removing the Map Light Bracket:
Behold… the map light bracket:
Even if you don’t have the map light, sadly you still have the bracket. So you get to remove this. The easiest way is to grab a drill and drill out the spot welds. There is amble room between the spot welds and the roof, just make sure you don’t start going into the roof.
Step 2 – Mount the vent bracket:
Use the supplied black screws to mount up. This is going to show you where to drill the holes.
Step 3 (the big step) – Drill the holes:
After this big step, there IS no going back. Once you drill these holes you would have to replace your roof to go back. Mark with a sharpie where the holes will be, remove the bracket, and drill them out.
Thread Starter
Scooby Newbie
Joined: Dec 2006
Posts: 12
Likes: 0
From: Flagstaff, Arizona USA
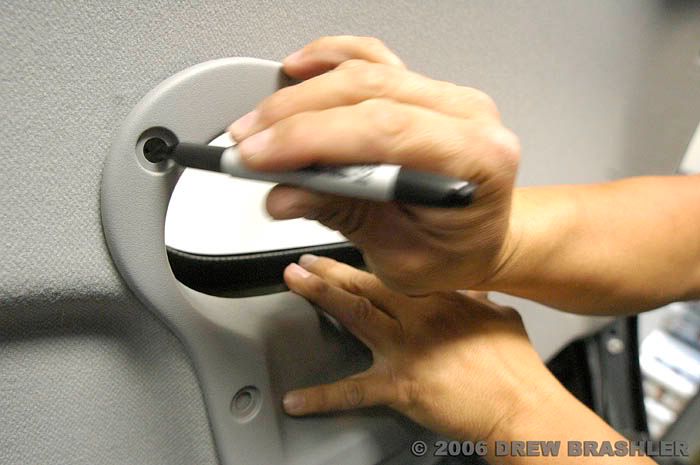
Step 4 – Mark Where the Cutout Will be on the Inside:
Bolt up the vent bracket and the vent trim. Line up the bracket to the holes you just drilled, and tighten down. Attach the vent trim by using the 2 black screws that will attach the handle for opening and closing the vent. Press the back of the bracket up so it is touching the roof. Grab your sharpie and trace on the roof where the hole will be cut.

Step 5 – Make a Template for the Top:
Unbolt the bracket and unscrew the vent trim. Now take the vent trim and make a template on thick paper just like you did with the roof. Cut out the template. Mark which is pointed toward the front because the curves are not the same front to back.

Step 6 – Drill Pilot Holes for Placement of the Template on the Roof:
Grab a drill with a small bit and drill pilot holes in the roof to show you where to place the template.
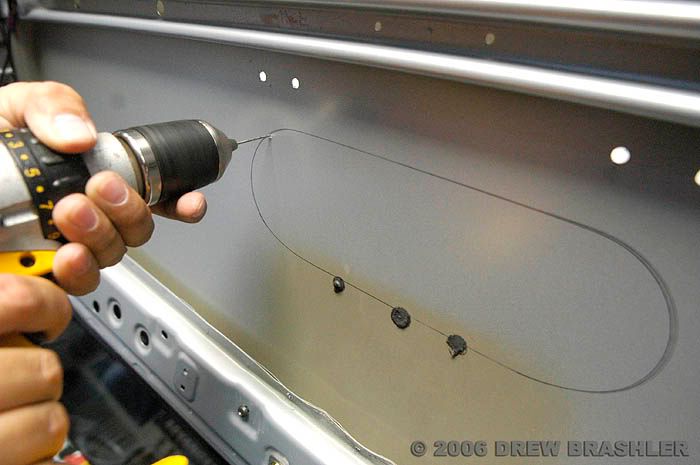
Step 7 – Draw the Line for Cutting on the Roof:
Use the template and a sharpie and draw where you will cut.

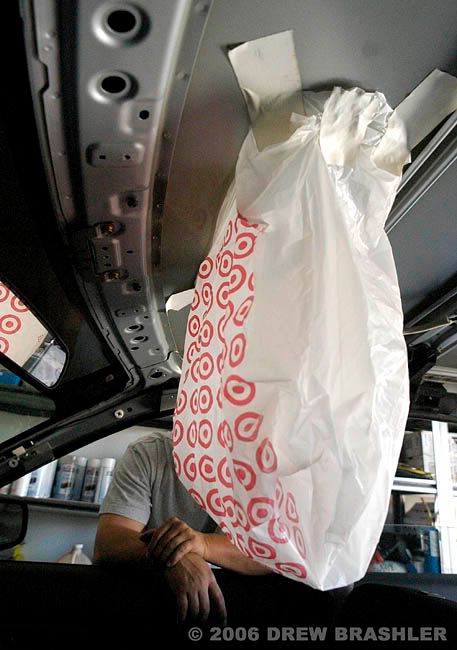
Step 8 – Tape a Plastic Bag to the Roof:
Use Duct Tape and tape a plastic bag under where the hole will be. Trust me, if you don’t do this you will spend a lot of time cleaning the interior.
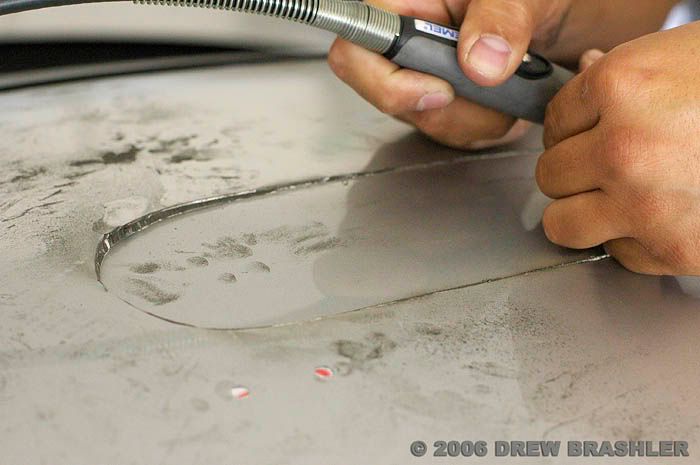
Step 9 – Cut the Hole:
It's recommended to put tape around where the hole would be cut to protect from scratches. Grab a Dremel and use a reinforced cutting bit. Set it at the highest speed the Dremel will go to, and SLOWLY cut out the hole. If you have a friend, you can have them hold a vacuum next to the bit and catch all the dust.
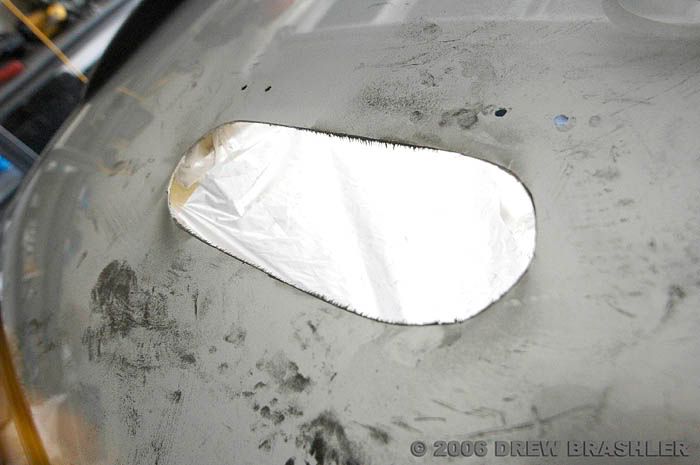
Step 10 – Clean the Hole and the Roof:
Use a vacuum and vacuum the roof off. Remember those are metal shavings and metal dust, so it will easily scratch your roof, so be careful!
Bolt up the vent bracket and the vent trim. Line up the bracket to the holes you just drilled, and tighten down. Attach the vent trim by using the 2 black screws that will attach the handle for opening and closing the vent. Press the back of the bracket up so it is touching the roof. Grab your sharpie and trace on the roof where the hole will be cut.
Step 5 – Make a Template for the Top:
Unbolt the bracket and unscrew the vent trim. Now take the vent trim and make a template on thick paper just like you did with the roof. Cut out the template. Mark which is pointed toward the front because the curves are not the same front to back.
Step 6 – Drill Pilot Holes for Placement of the Template on the Roof:
Grab a drill with a small bit and drill pilot holes in the roof to show you where to place the template.
Step 7 – Draw the Line for Cutting on the Roof:
Use the template and a sharpie and draw where you will cut.
Step 8 – Tape a Plastic Bag to the Roof:
Use Duct Tape and tape a plastic bag under where the hole will be. Trust me, if you don’t do this you will spend a lot of time cleaning the interior.
Step 9 – Cut the Hole:
It's recommended to put tape around where the hole would be cut to protect from scratches. Grab a Dremel and use a reinforced cutting bit. Set it at the highest speed the Dremel will go to, and SLOWLY cut out the hole. If you have a friend, you can have them hold a vacuum next to the bit and catch all the dust.
Step 10 – Clean the Hole and the Roof:
Use a vacuum and vacuum the roof off. Remember those are metal shavings and metal dust, so it will easily scratch your roof, so be careful!
Thread Starter
Scooby Newbie
Joined: Dec 2006
Posts: 12
Likes: 0
From: Flagstaff, Arizona USA
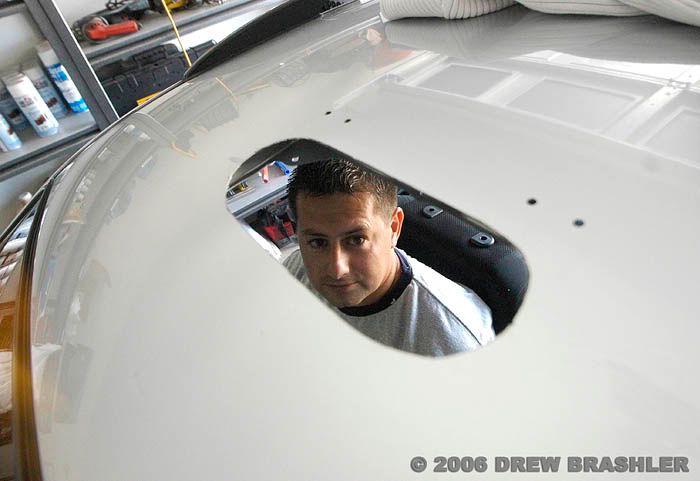
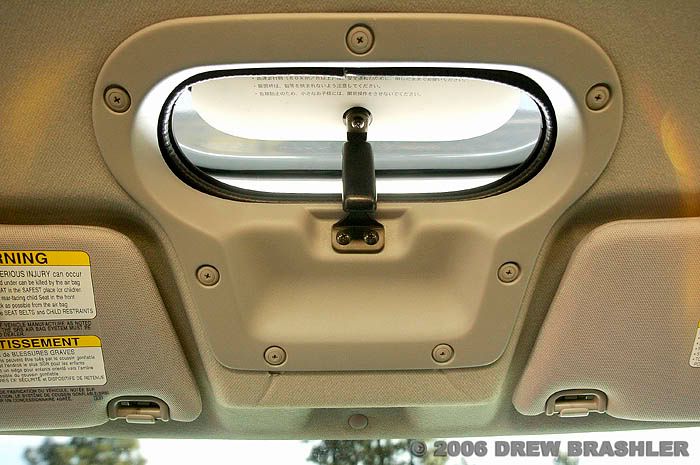
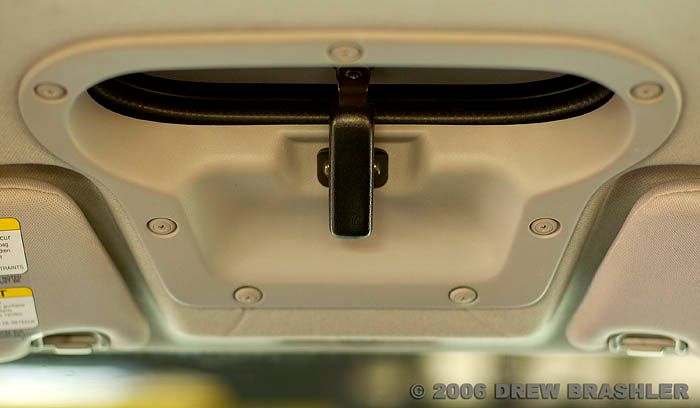
Step 11 – Observe Your New Skylight/Mini Sunroof in Your Car:
YAY the hole is cut!!!
Step 12 – Bolt on the Vent Flap:
First you need to bolt up the vent bracket on the inside of the car. Line up the holes and bolt it down. Then slip the 4 bolts that are attached to the vent and slide them through the holes. Use the 4 nuts included in the kit and tighten them down.
Step 13 – Install the Rubber Seal:
Now grab the gasket that was included with the vent. This has a type of glue inside it where the rubber attaches to the metal. You need to twist the gasket out and slip it over the metal. On my gasket there was a white dot where the center was. My hole was smaller than the gasket so we cut the gasket in the center and then cut it to the correct size using metal sheers.
Note: Make sure there is a rubber lip sticking up. This is what makes the seal between the roof and the vent flap. Some other DIY’s have this upside down.
Step 14 – Cutting the headliner:
Now grab the vent trim, the headliner and an X-Acto Knife and start cutting away at it. We ended up putting ours a bit to forward than where it was spoce to be, but it all worked out in the end. We drilled though the headliner for where the plastic clips would be. These plastic clips will attach the trim, through the headliner and then attach to the vent bracket. Good Luck!


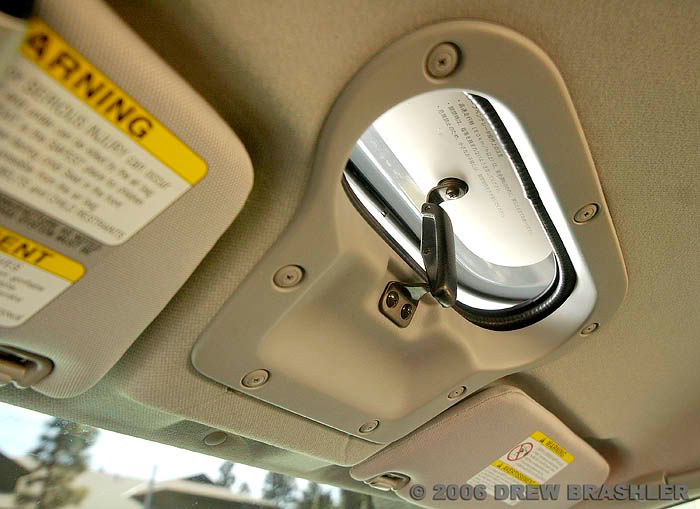
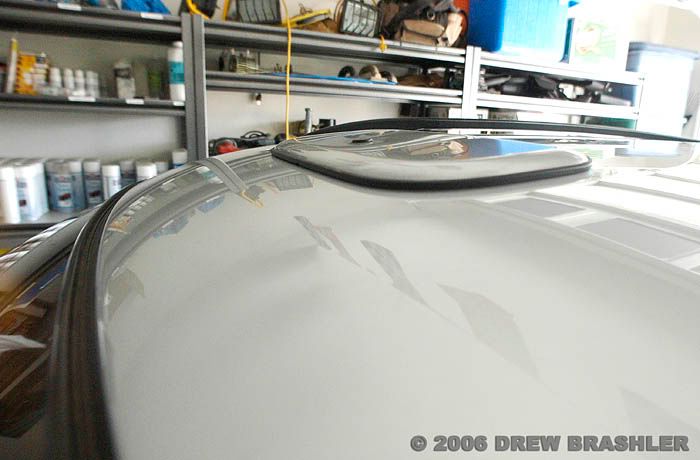
Step 15 – Finishing Up the Vent:
Use the supplied clips to attach the trim through the headliner to the bracket. Then use the 2 supplied black screws to attach the latch from the vent to the trim and bracket.
Step 16 – Replace Headliner and Other Things:
Replace everything back to how it was.
The headliner did crease a little from the trim, it may be that we installed it a bit too low on the headliner. But I think its from the headliner not being made for the vent.
YAY the hole is cut!!!
Step 12 – Bolt on the Vent Flap:
First you need to bolt up the vent bracket on the inside of the car. Line up the holes and bolt it down. Then slip the 4 bolts that are attached to the vent and slide them through the holes. Use the 4 nuts included in the kit and tighten them down.
Step 13 – Install the Rubber Seal:
Now grab the gasket that was included with the vent. This has a type of glue inside it where the rubber attaches to the metal. You need to twist the gasket out and slip it over the metal. On my gasket there was a white dot where the center was. My hole was smaller than the gasket so we cut the gasket in the center and then cut it to the correct size using metal sheers.
Note: Make sure there is a rubber lip sticking up. This is what makes the seal between the roof and the vent flap. Some other DIY’s have this upside down.
Step 14 – Cutting the headliner:
Now grab the vent trim, the headliner and an X-Acto Knife and start cutting away at it. We ended up putting ours a bit to forward than where it was spoce to be, but it all worked out in the end. We drilled though the headliner for where the plastic clips would be. These plastic clips will attach the trim, through the headliner and then attach to the vent bracket. Good Luck!
Step 15 – Finishing Up the Vent:
Use the supplied clips to attach the trim through the headliner to the bracket. Then use the 2 supplied black screws to attach the latch from the vent to the trim and bracket.
Step 16 – Replace Headliner and Other Things:
Replace everything back to how it was.
The headliner did crease a little from the trim, it may be that we installed it a bit too low on the headliner. But I think its from the headliner not being made for the vent.
Thread Starter
Scooby Newbie
Joined: Dec 2006
Posts: 12
Likes: 0
From: Flagstaff, Arizona USA
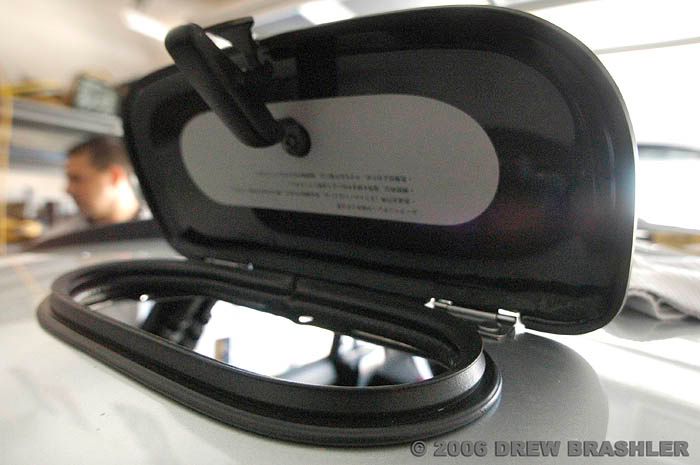
Step 17– Open and Close the Flap and Enjoy Your New Mod:
Your done! Give yourself a pat on the back, and go drive to get something to eat. And enjoy the cool air.
(Vent Closed)
(Vent Open)

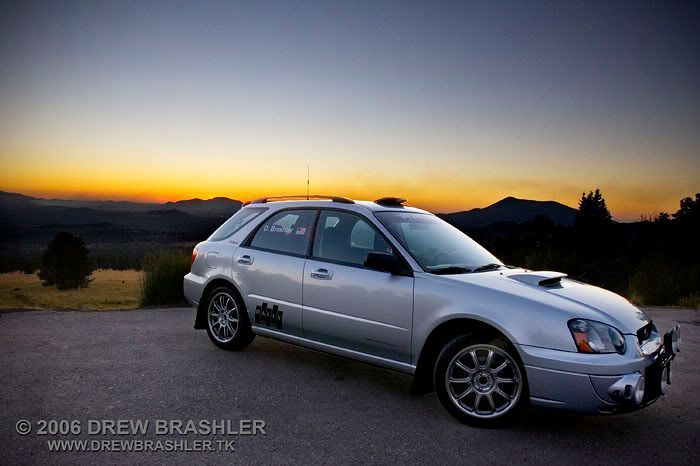
Step 18 – Go take photos of your car:
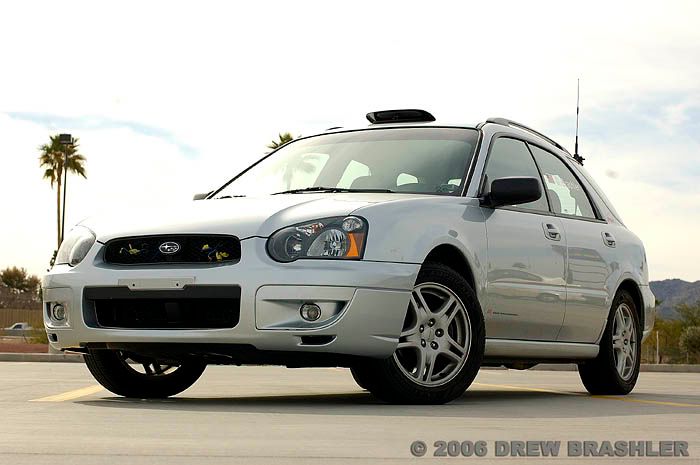
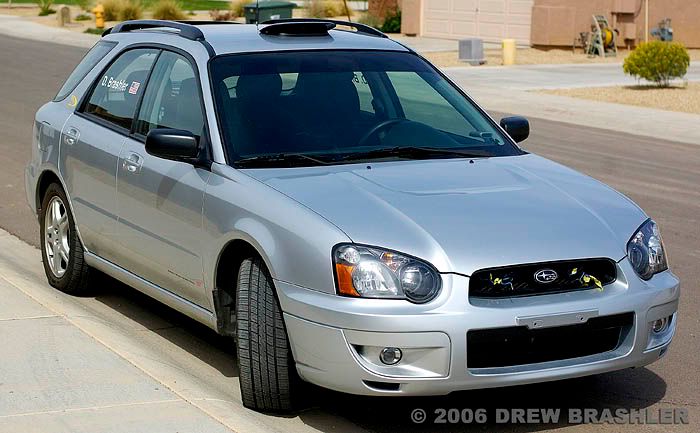

(Note on photos, my light bar was removed because I am getting a Rally Innovations Light Bar.)

Total time was around 3 hours, and was a lot easier than I thought it would be. The vent is awesome; it pulls in a good amount of air. The noise at 80 MPH is quieter than having one window open. If you really want to move air through your car, crack the back windows about 3 inches and it’s awesome. When the vent is shut, there is no noise noticeable. The waterproof part has not been tested yet, I think I might try to go through a brushless carwash and see if it leaks at all (when closed). Just make sure you don’t wash your windshield with the vent open, unless you want to have a shower inside your car. The vent is either open or closed, there is no in between. There are a lot of questions regarding the text on the flap and what it means. The text on the flap reads something like “Do not try to open or close if going 40 MPH or faster.” It IS ok to have the vent open going faster than 40 MPH, just don’t try to open or close it after going 40 MPH.
This concludes the DIY Installation for the JDM RA Rally Roof Vent. I hope this will help you or a friend of yours install their roof vent. I would strongly recommend getting one, because they are sweet! If you have any questions, feel free to PM me.
Thanks for reading, and have a great day.
Drew Brashler
Your done! Give yourself a pat on the back, and go drive to get something to eat. And enjoy the cool air.
(Vent Closed)
(Vent Open)
Step 18 – Go take photos of your car:
(Note on photos, my light bar was removed because I am getting a Rally Innovations Light Bar.)
Total time was around 3 hours, and was a lot easier than I thought it would be. The vent is awesome; it pulls in a good amount of air. The noise at 80 MPH is quieter than having one window open. If you really want to move air through your car, crack the back windows about 3 inches and it’s awesome. When the vent is shut, there is no noise noticeable. The waterproof part has not been tested yet, I think I might try to go through a brushless carwash and see if it leaks at all (when closed). Just make sure you don’t wash your windshield with the vent open, unless you want to have a shower inside your car. The vent is either open or closed, there is no in between. There are a lot of questions regarding the text on the flap and what it means. The text on the flap reads something like “Do not try to open or close if going 40 MPH or faster.” It IS ok to have the vent open going faster than 40 MPH, just don’t try to open or close it after going 40 MPH.
This concludes the DIY Installation for the JDM RA Rally Roof Vent. I hope this will help you or a friend of yours install their roof vent. I would strongly recommend getting one, because they are sweet! If you have any questions, feel free to PM me.
Thanks for reading, and have a great day.
Drew Brashler


Scooby Regular
Joined: Nov 2006
Posts: 602
Likes: 0
From: AKA: GARIYARALLY, on the way to the next stage
Looks very good !
Saw pics in the gallery, almost thought it was original.
Really good pictures too!
Thinking of doing this to a ltd 555 edition 5 door classic, the search is on for the vent + fittings.
Saw pics in the gallery, almost thought it was original.
Really good pictures too!
Thinking of doing this to a ltd 555 edition 5 door classic, the search is on for the vent + fittings.
Trending Topics


Scooby Regular
Joined: May 2003
Posts: 734
Likes: 0
From: kent
I did the one on our rally car....no problem at all...although we do not have an internal roof lining..
It only took an hour or so to do...
Make sure you do PLENTY of measuring first though...
there is one for sale here... if anyone wants one... Jap Performance Parts
speak to sajid... and tell him jon with the rally car recommended him
jon
It only took an hour or so to do...
Make sure you do PLENTY of measuring first though...
there is one for sale here... if anyone wants one... Jap Performance Parts
speak to sajid... and tell him jon with the rally car recommended him
jon

Thread
Thread Starter
Forum
Replies
Last Post
Mattybr5@MB Developments
Full Cars Breaking For Spares
12
Nov 18, 2015 07:03 AM