When you click on links to various merchants on this site and make a purchase, this can result in this site earning a commission. Affiliate programs and affiliations include, but are not limited to, the eBay Partner Network.
Thought it was about time I stuck up a project thread, now that I finally have a little bit more time to play with cars (still not a lot, mind). I've lost a lot of the early photos, but I'm hoping that my friend might send me some.
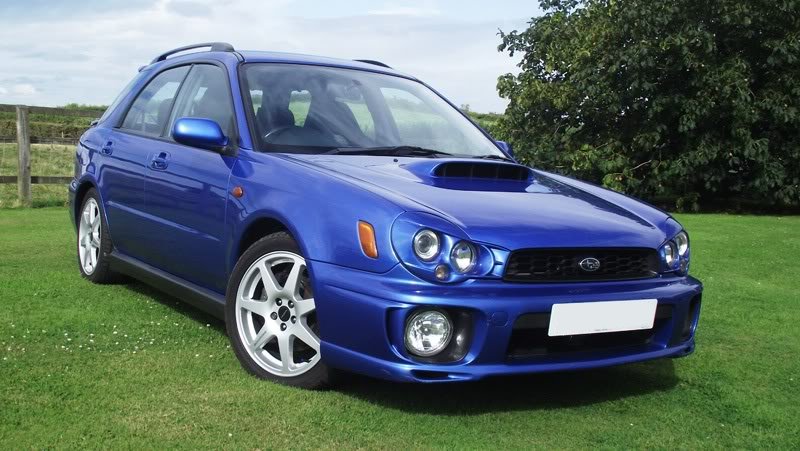
It all started off back in July 2003, when my brand new WRX was delivered by Adams in Aylesbury. It stayed standard for about two months before I fitted an obnoxiously loud backbox. It's so long that I can't even remember the name of it, but it was something from TSL anyway (anyone remember them still? ). In hindsight, I should have gone for a classic STI, but there was no way I could have afforded the insurance as a 23 year old, and my Mrs didn't want to get a used car.
In the early years the car was a second car and only came out in the weekends and once we moved to Camden in London, it just sat in the parking bay, because there was nowhere to really drive it. I'm pretty sure we didn't do more than 20k miles in the first four years.
Once the warranty had run out, and I'd saved some money after nearly wiping myself out on the bubble payment (8k, ouch), I bought myself:
- Andy Forrest td05-20g
- Lateral Performance headers
- STI PPP sports cat, decat rear cat, ppp backbox
- Apexi Power Intake
- Autobahn88 FMIC
- STI pink injectors
- Walbro 255 pump
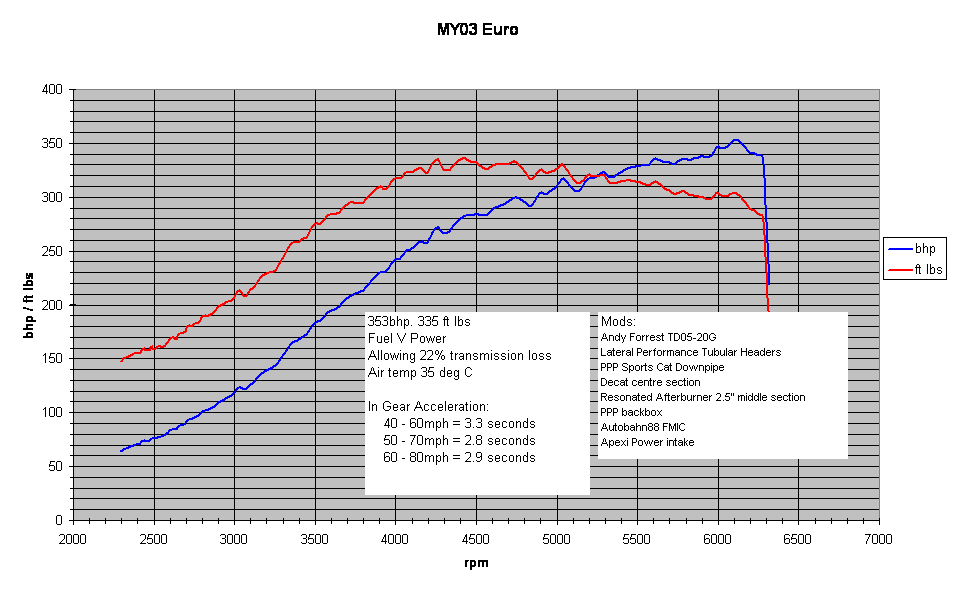
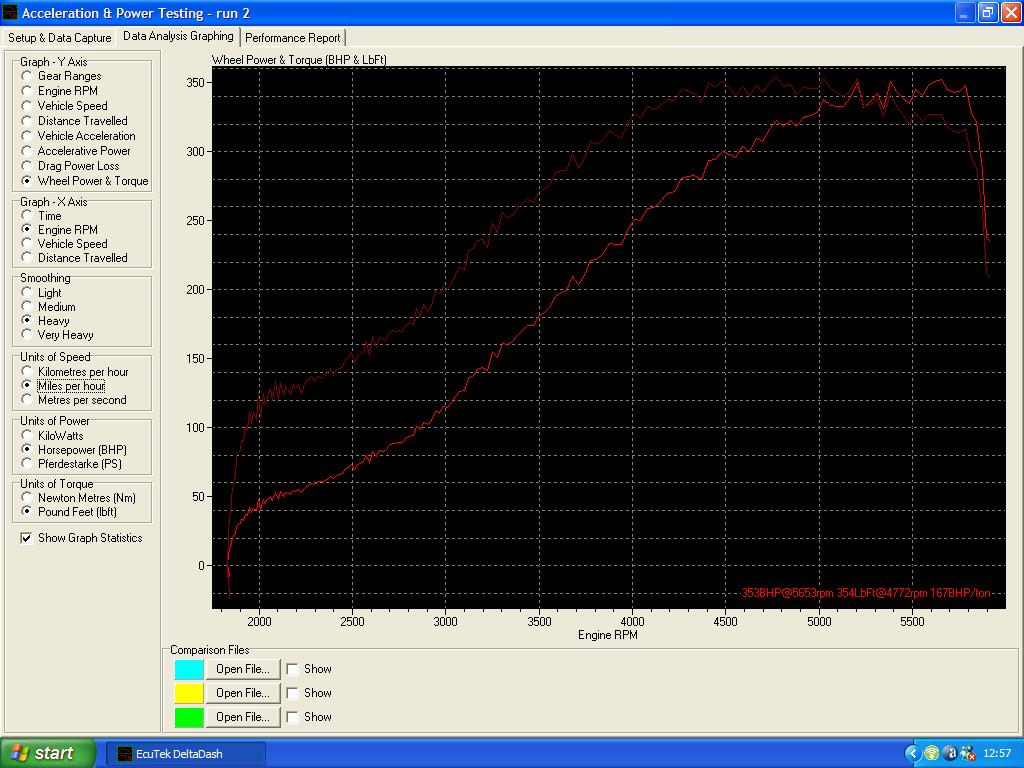
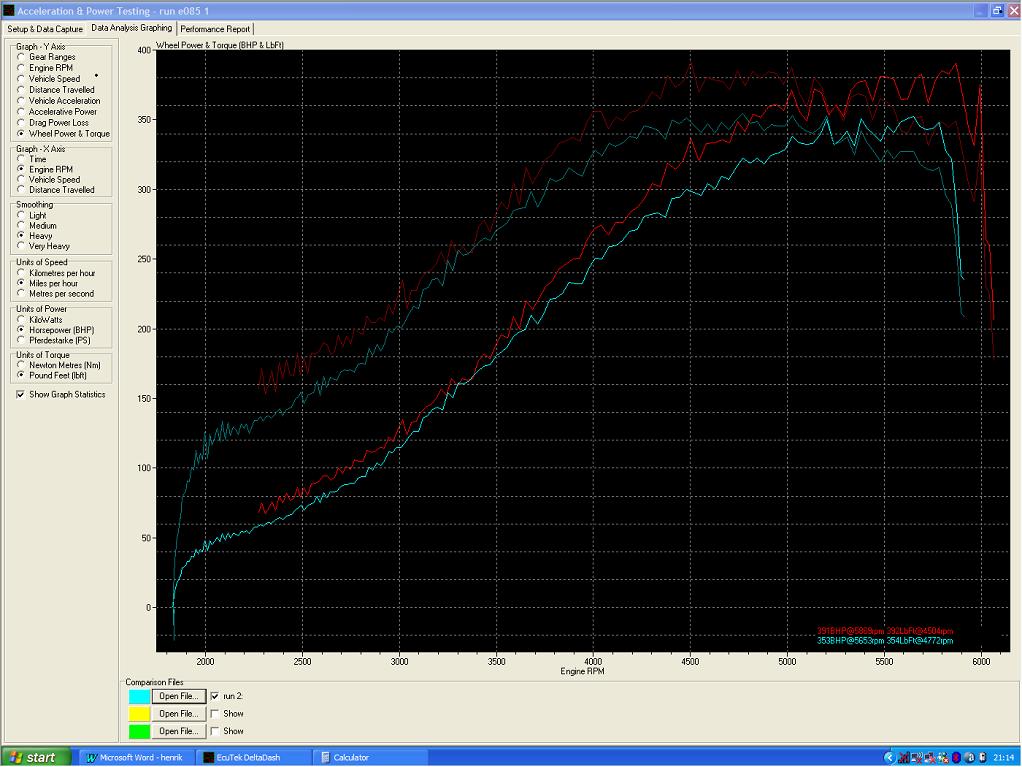
After the mods were fitted, I slowly drove the car to Bob Rawle in Swindon on the 11th of August 2007. Bob put an Ecutek map on it, and the results were OK, considering it was held back a bit for safety.
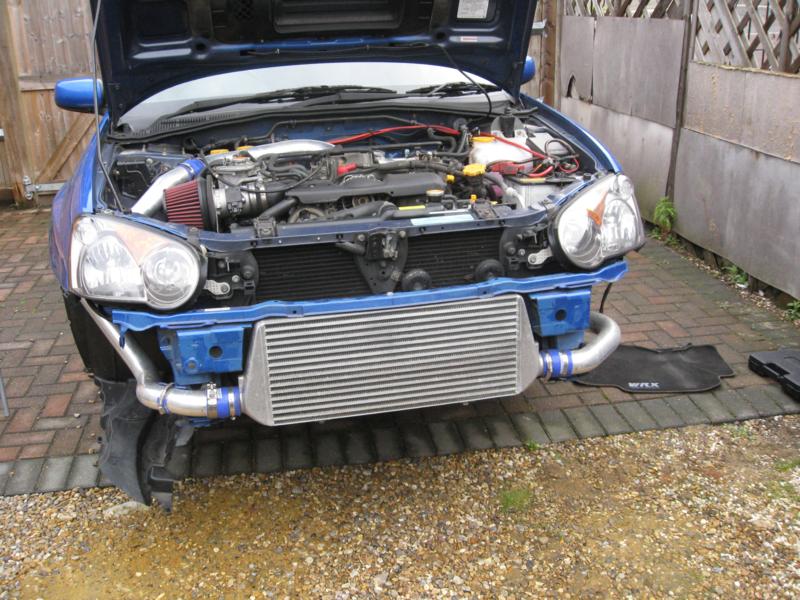
A lot of people at the time were slating the AB88 FMIC kit, but I thought it worked really quite well. It fitted well, and even on track the "outlet" side from the FMIC was cold to the touch after a session (and the turbo side hot).
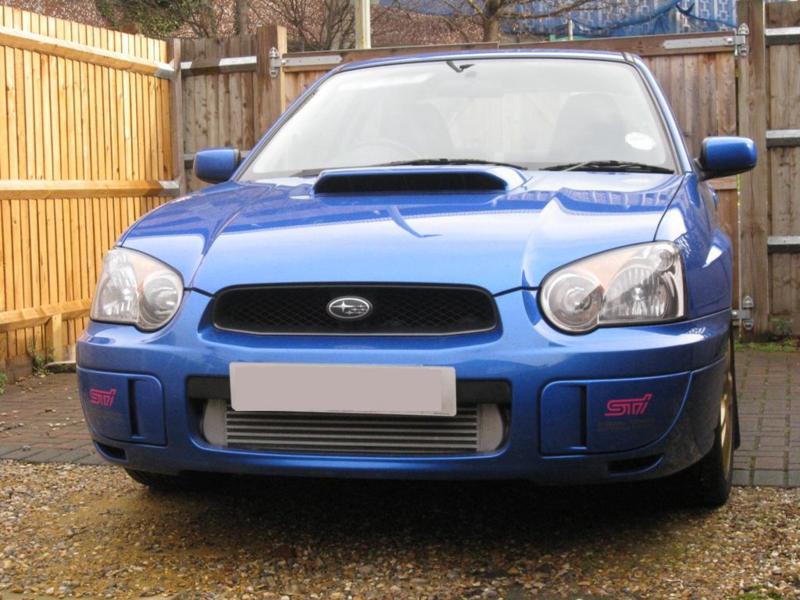
It also looked quite nice:
I particularly liked the look with some cheap mesh I bought from B&Q, ahem (already a cheap-skate )
Shortly after this, the clutch slipped a little bit, so I booked it in with API engines to have a lightened flywheel and Exedy Pink box clutch fitted. This IMO was a fantastic mod. It transformed the way it drove, and it felt much more "racey" afterwards. I had no extra vibration, and no judder etc.
In May 2008, I had another map performed by Simon Roe (JGM), and I really liked the way he worked, and also he was much more local than Bob, so I stayed with him for a number of remaps, until his untimely passing.
First map was exactly the same spec as before, with the exception of a FuelLap FPR, and also a whole bottle of NF octane booster per tank:
I never thought the car felt happy with the fuel - it was as if it didn't burn cleanly, so even though it made more torque and power than before, there was something amiss.
Around this time, Morrisons in the UK were selling E85 fuel, so I started using a mix of five litres of E85, to a brimmed tank, and the car felt _much_ nicer after a remap. In fact, this is the best it's ever driven:
I was doing quite a bit of miles around this time, and the faff of E85 mixing got too annoying in the end, particularly as it's such a pain to get hold of at a sensible price in the UK now that Morrisons have stopped doing it. As a result, I went back to Simon to have just a pure V-power map, and also on an STI TMIC (otherwise identical spec), with a still reasonable result of around 370hp (still on 2.5" exhaust).
I also upgraded the brakes and fitted coil-overs at around this time. I had been running the ian@Godspeed 335mm kit that uses the original WRX calipers, which were great, however the extra mass made the wheels more skittish in my opinion. Once a group-buy for 8 pot k-sports came around, I jumped on that instead, and the car drives much nicer on the road with the k-sport kit (due to the lighter weight). Braking-wise, I don't think there's anything in it between the two kits - both are better at braking than I am
The coil-overs I'm currently using are a bit of a weirdo-brand.. They're called Wangan Monoceros, and are some japanese brand coil overs. They are/were marketed for street use in Japan (at 3000 GBP for a set, eek), but I _really_ like the way they behave on track. They are not so stiff that they skip around, but also not so soft that the car wallows around in the corners. I picked them up used from the Japanese car breakers in Crawley, expecting them to be totally rubbish, but actually I ended up with a really good set of coil-overs for 500 pounds (this is back in 2009, so there are no cheap coil-overs around like there would be today). I had an unfortunate incident at Druids at Brands Hatch, where I stuck the car into the kitty-litter and blew one of the valves on the front shock, but luckily Curtis@AST changed the seals and refreshed the coil overs, and after that they felt better than ever. I highly suspect they use the same parts as AST coil overs, because AST offered to change the springs and revalve them etc for me.
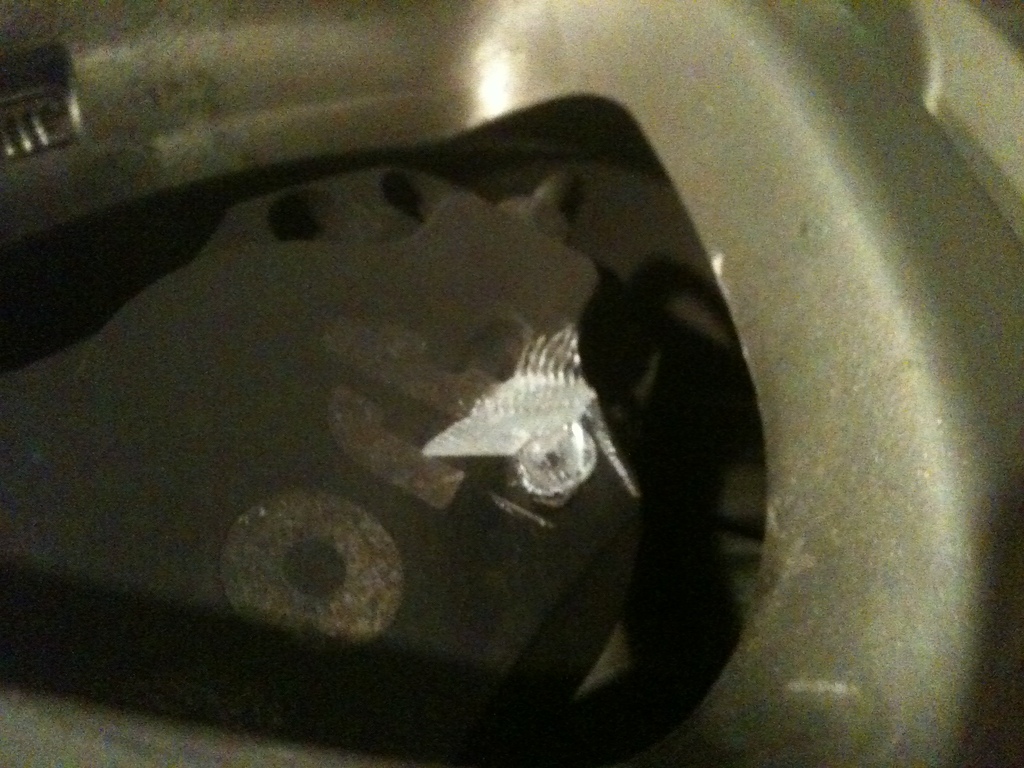
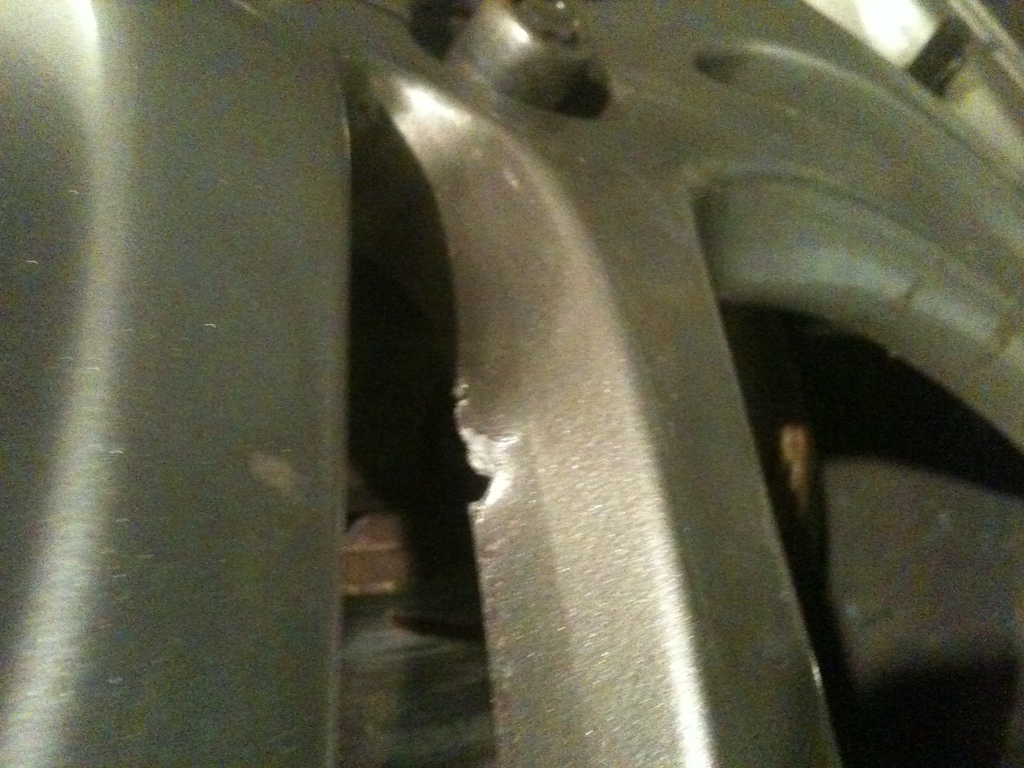
I did a bunch of track days without any other incidents (and switching back to FMIC again), and also drove the car to work every so often. The only real incident (if you can call it that) on track was when we ran over some debris next to the pit wall at brands, which destroyed a wheel spoke and scuffed the brake caliper:
I see now that I've forgotten a bit of stuff in the middle.
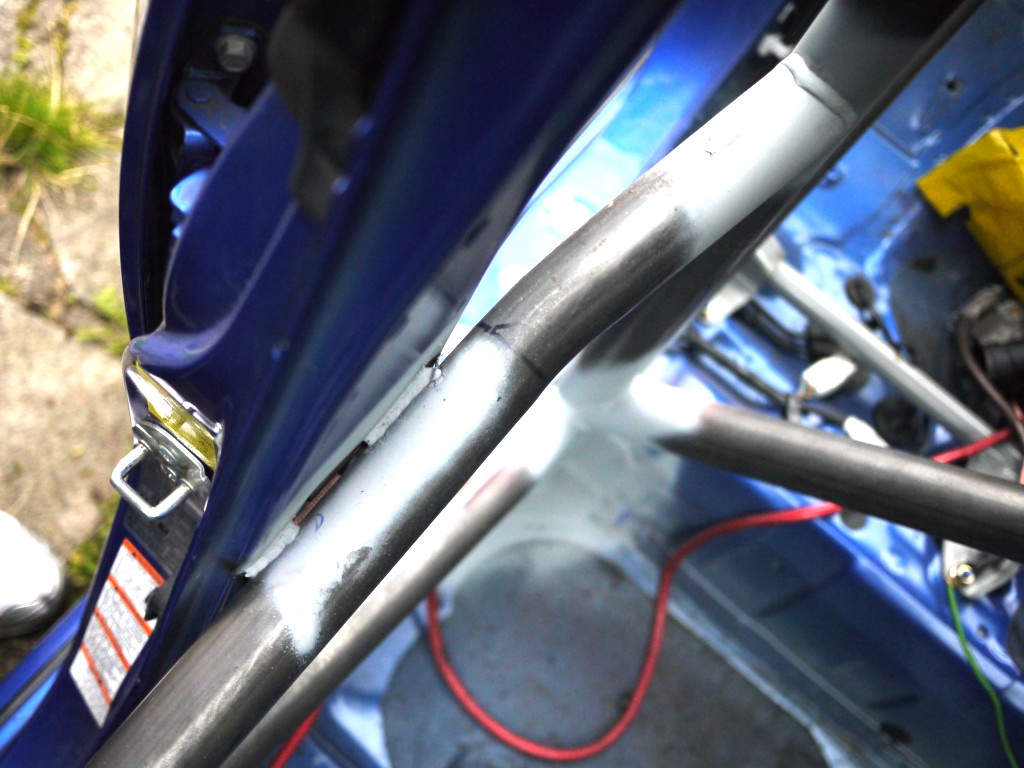
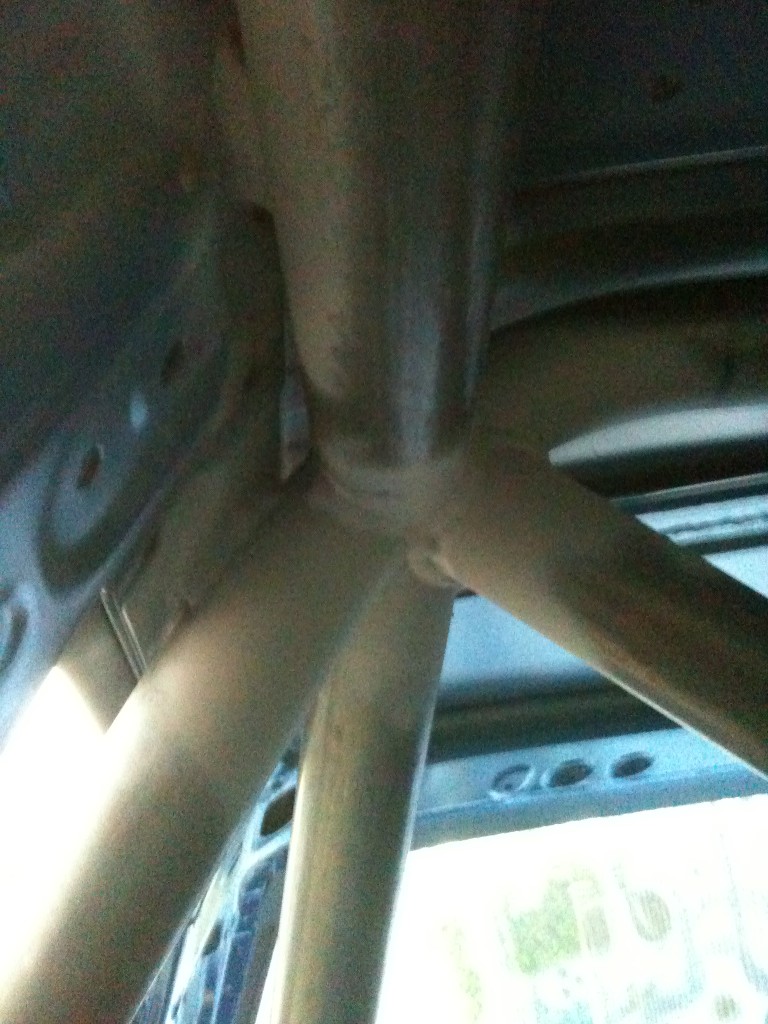
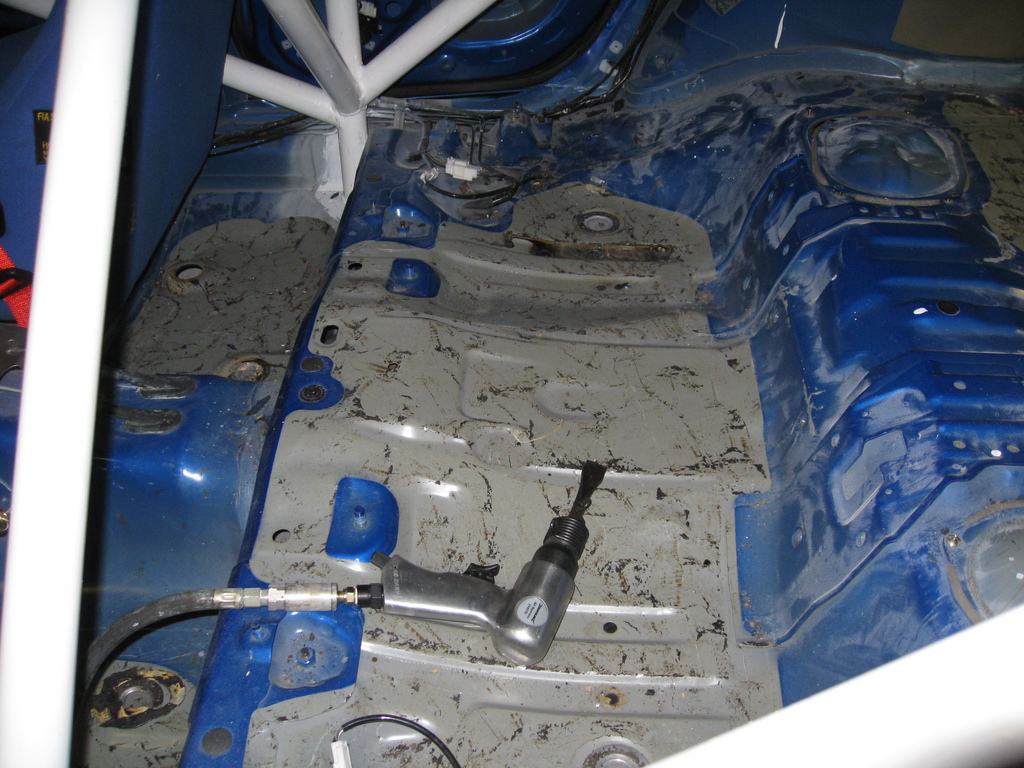
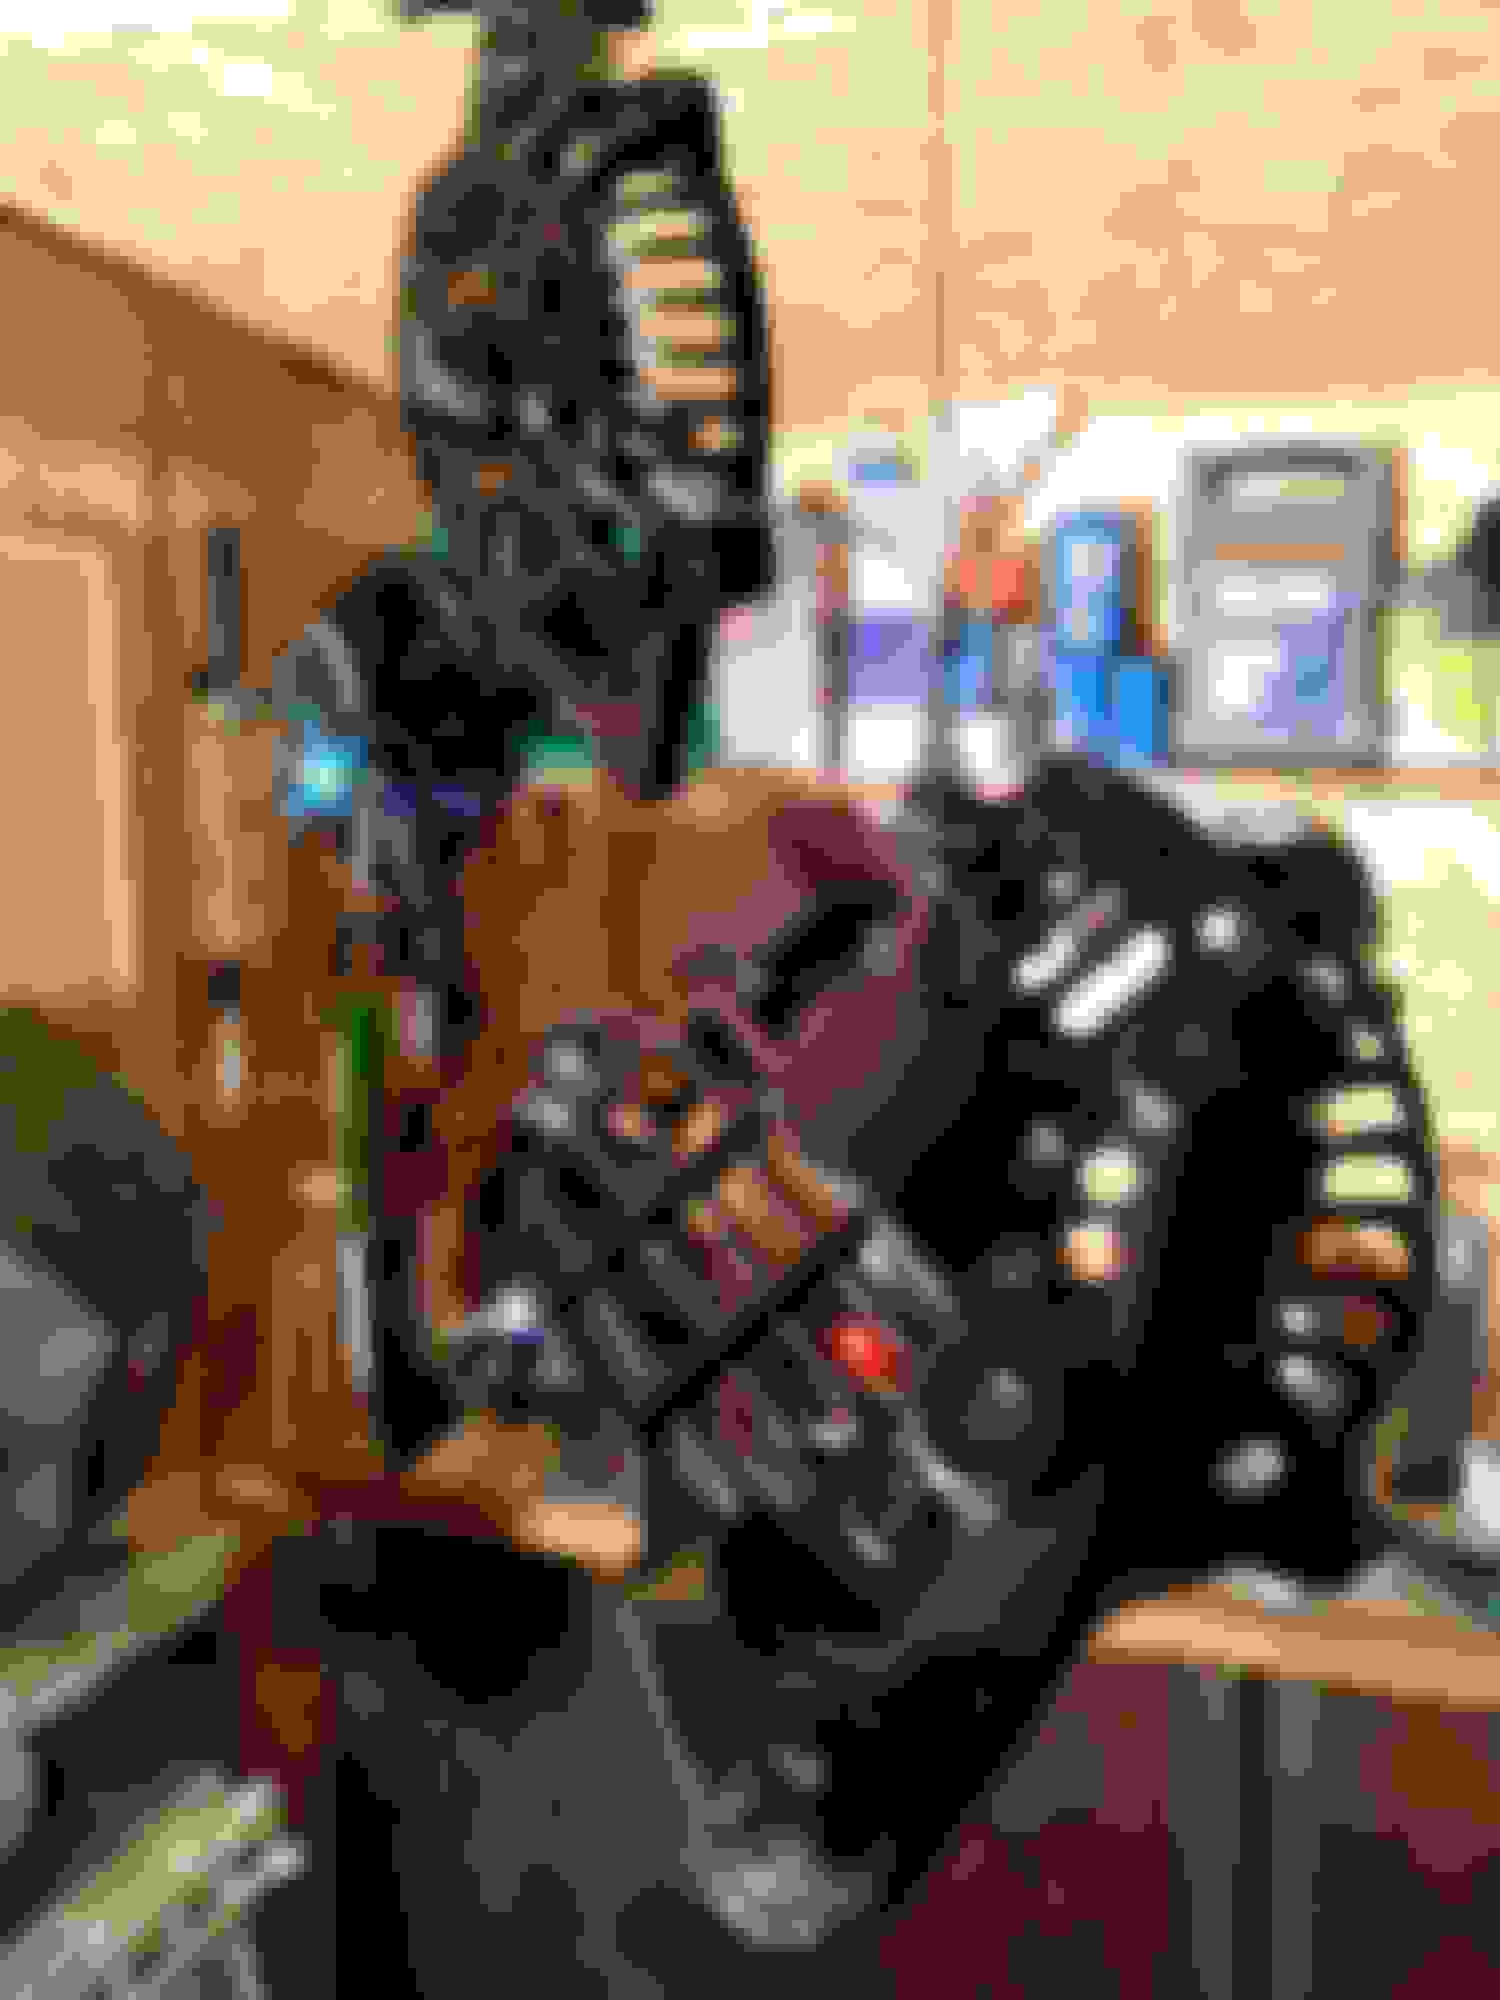
I also had Nickson Motorsport build me a weld-in cage. The workmanship is amazing, and you can see from the photos how close to the car body the cage is:
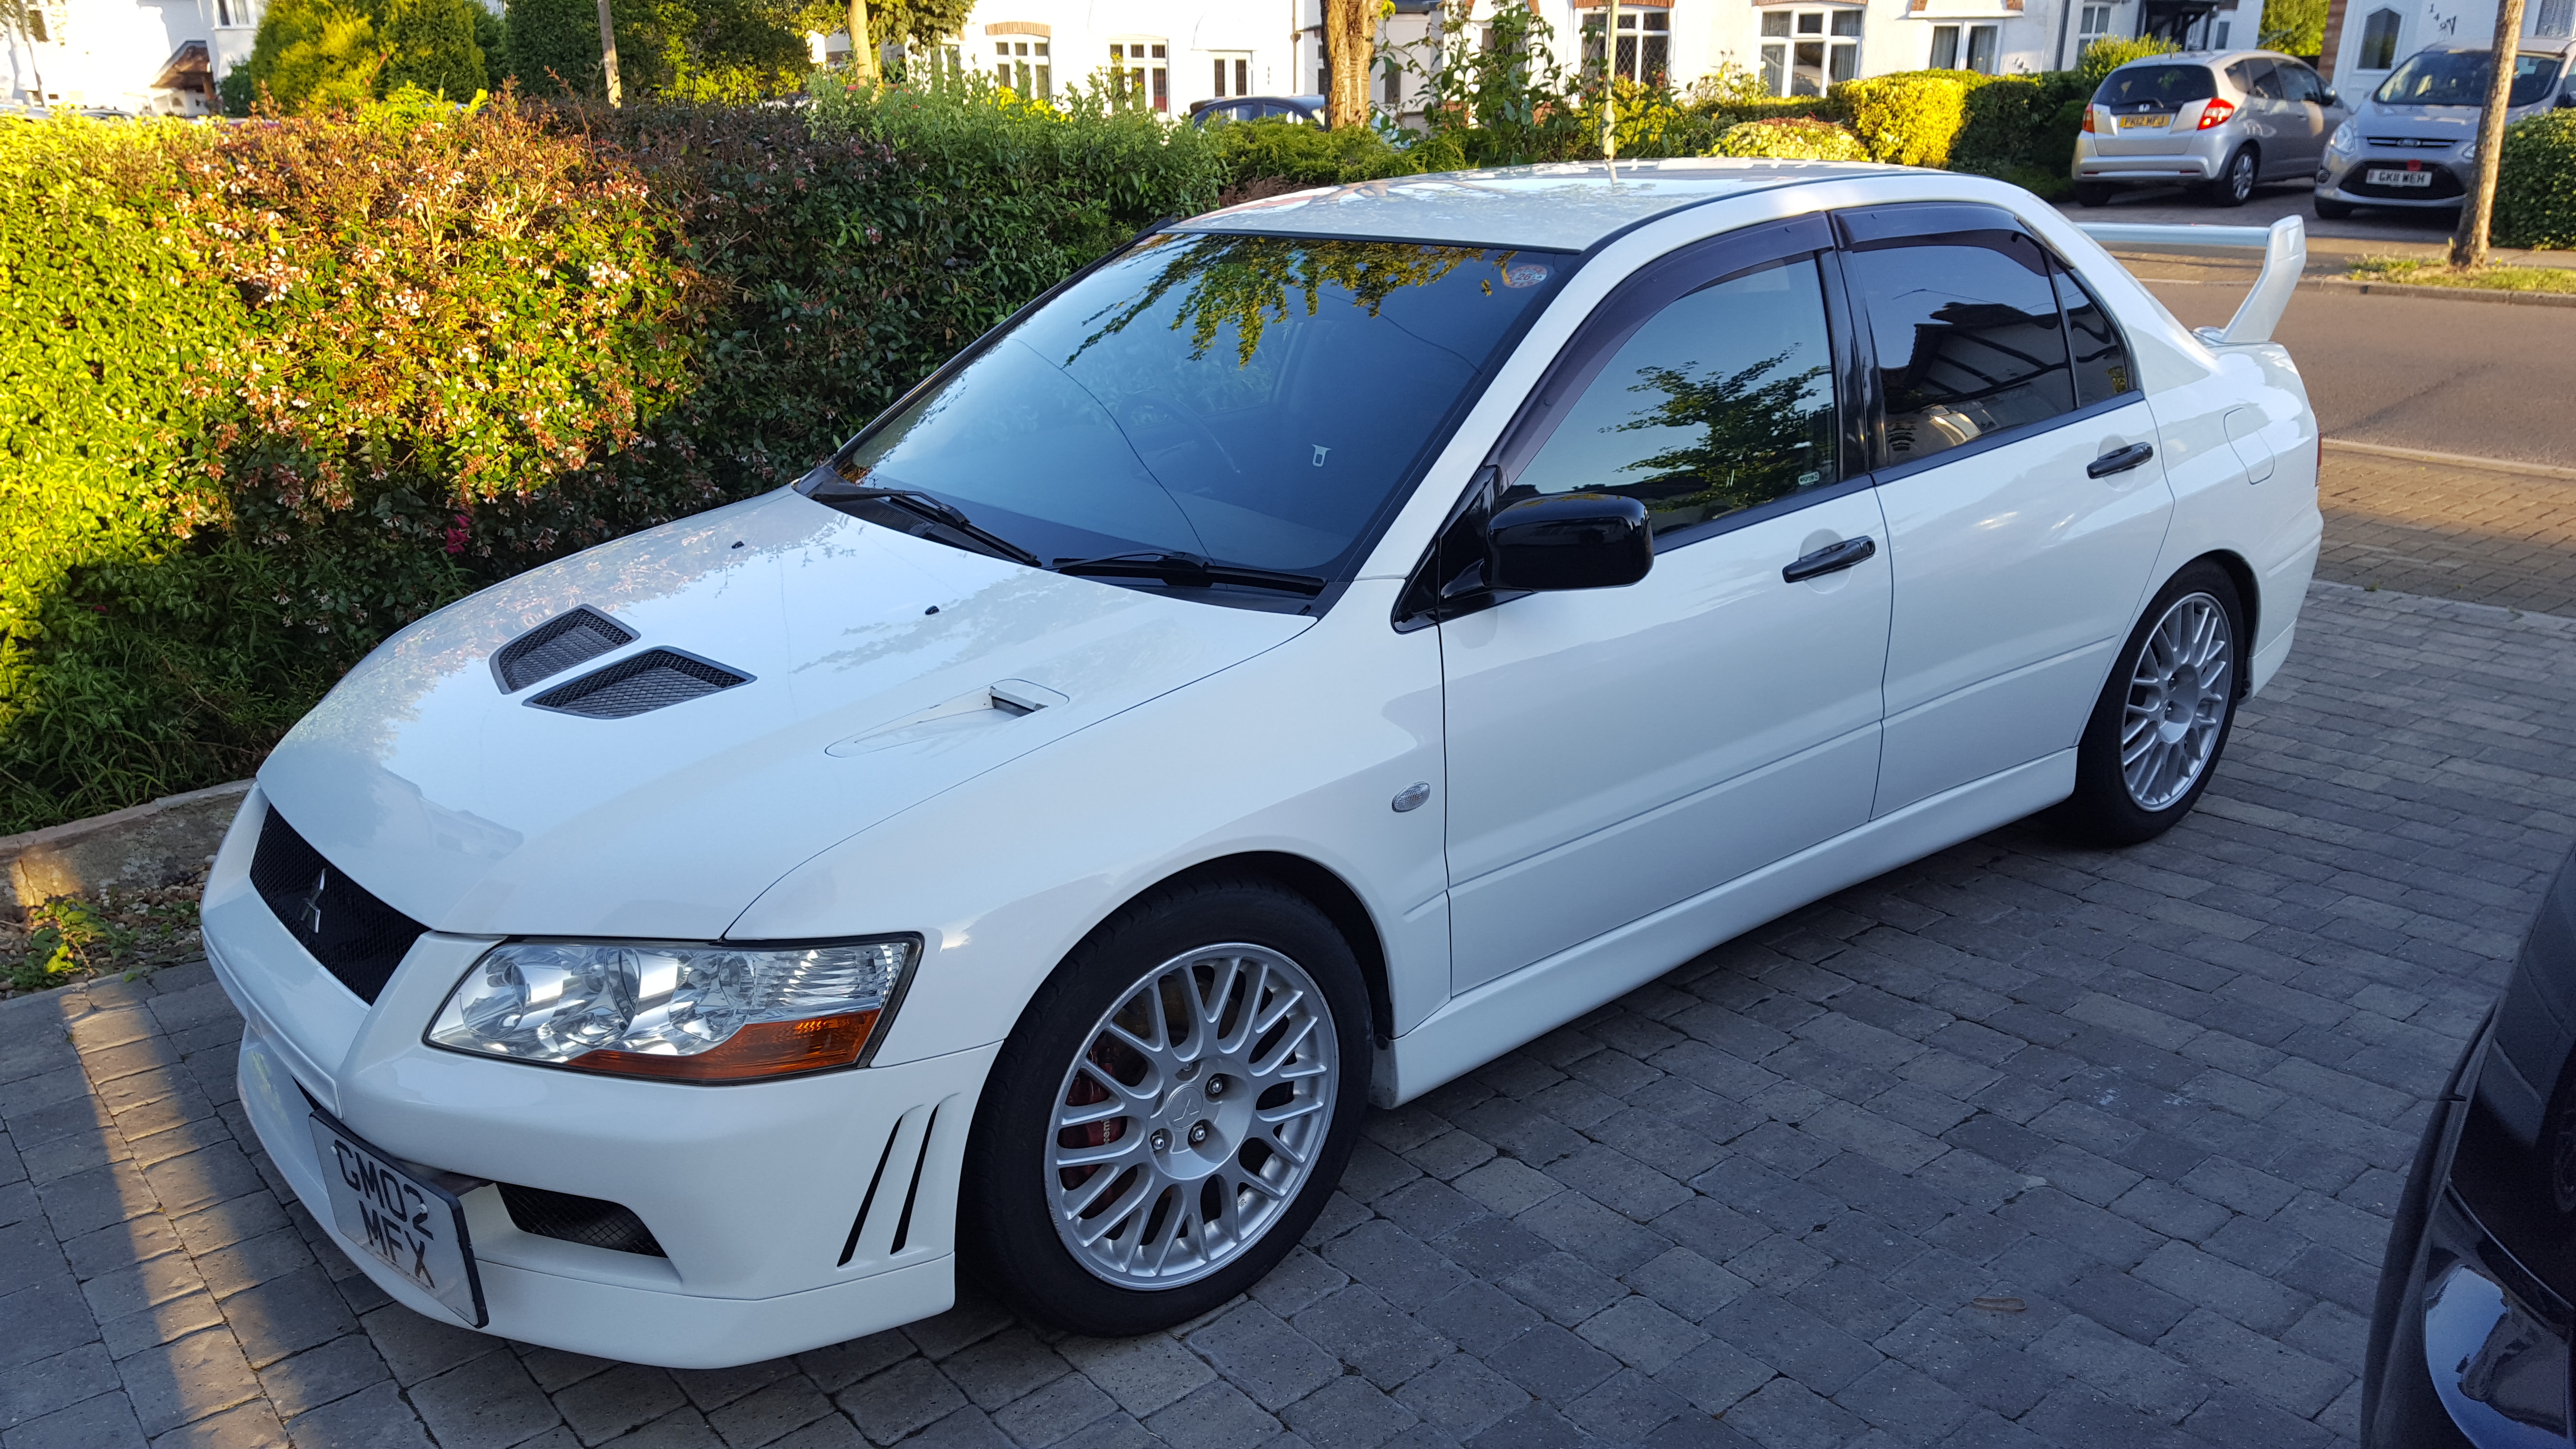
In 2012, just before our daughter was born, I also bought myself a WRX estate (because why not...). It had an engine tuner built 2.1 with an SC36 turbo, which would have been perfect for a daily, but I had other plans.
The plan was to transplant the engines between the cars, so I changed the engine from the saloon into the estate, and instead of sticking to the original plan I went off-piste (because, in all my years, I have never finished anything the way I planned originally). Original plan was to drop the engine into the estate, fit a td04 and make it standard but with a cheeky map. Instead what happened was that I chucked all my "spare rubbish" that I had accumulated on the shelf into it, so it ended up with a front entry converted td05-16g, STI tmic, PPP downpipe etc etc. It was mapped by JGM on the worst fuel I could find locally (because I was now wise from the pain of having to chase out v-power all over the UK), and it made 317bhp. Not great, but a respectable figure for a family estate.
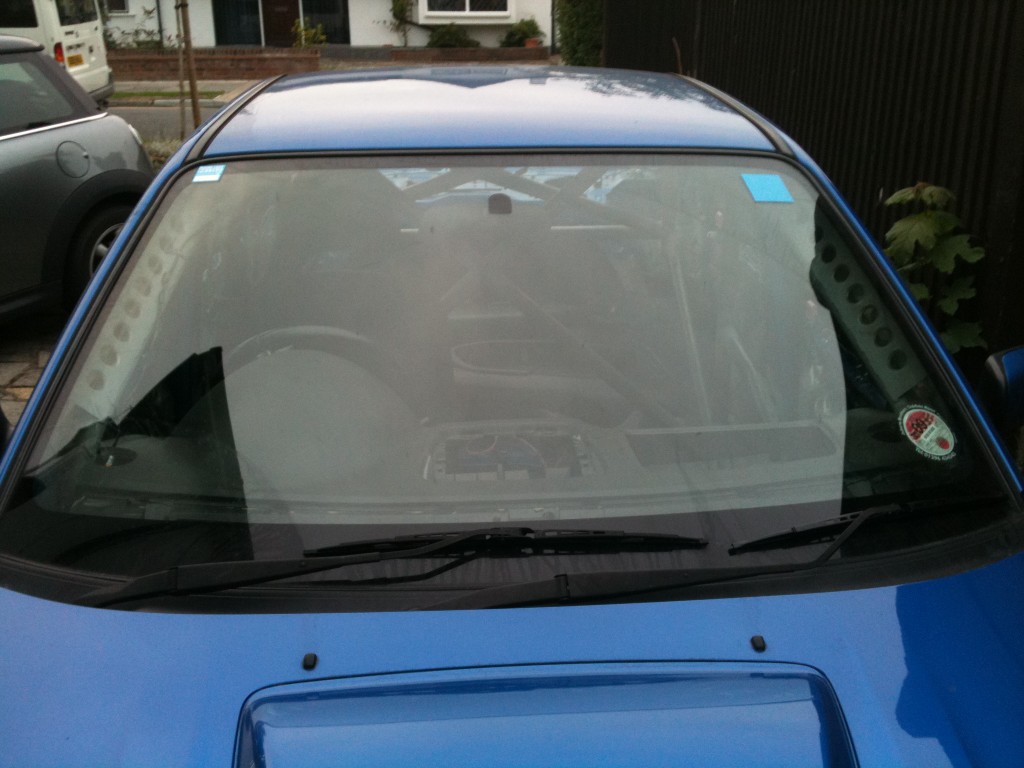
Long story short, my Mrs didn't like the car in the end, so I sold it to a chap in Wales, and the saloon finally came back into the garage in April 2013. By this time it had been without an engine for a whole year, sitting on the drive with a sad face:
Not a lot happened for many years, but in the end I started working on it slowly again.
I bought myself a used twin plate clutch, as I had used the pink exedy in the wagon. This clutch turned out to be a real poisoned chalice. I never got it to disconnect cleanly, even after buying new plates for it, and having Alyn @ ASP machine the surfaces flat etc. In the end, I spent about 1000 on just bits for the clutch, for a clutch that wasn't even required at my power level... Insanity of the highest order! My only defence here is that I dailied an Evo 7rs for a bit, and it had a carbon twin plate clutch, which was amazing to drive. All in all, I think I've taken the engine out in excess of 5 times JUST to mess around with the clutch.
As an aside, the evo was lovely (completely rust free, fresh JDM import), but it just lacked something that the subaru has:
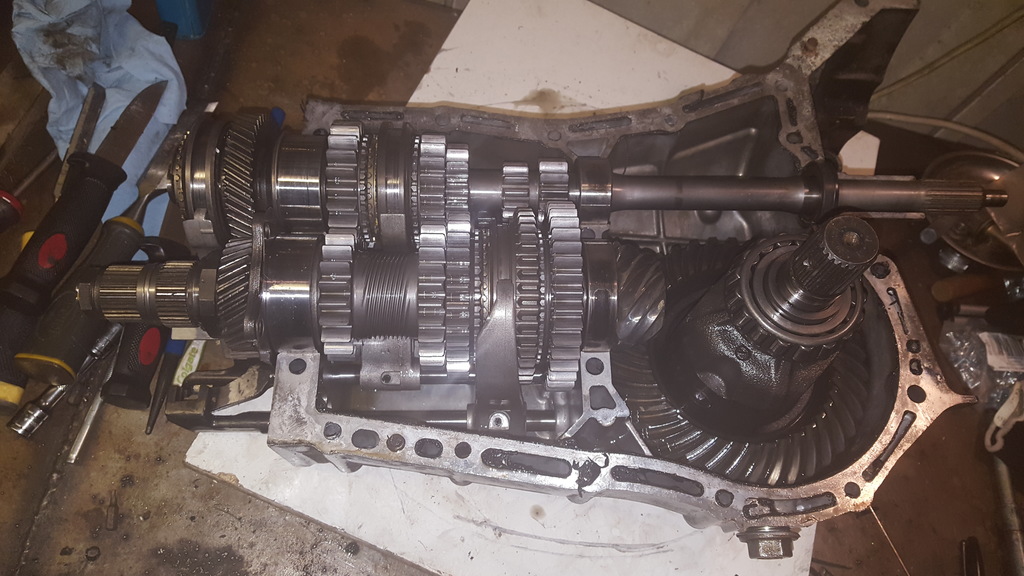
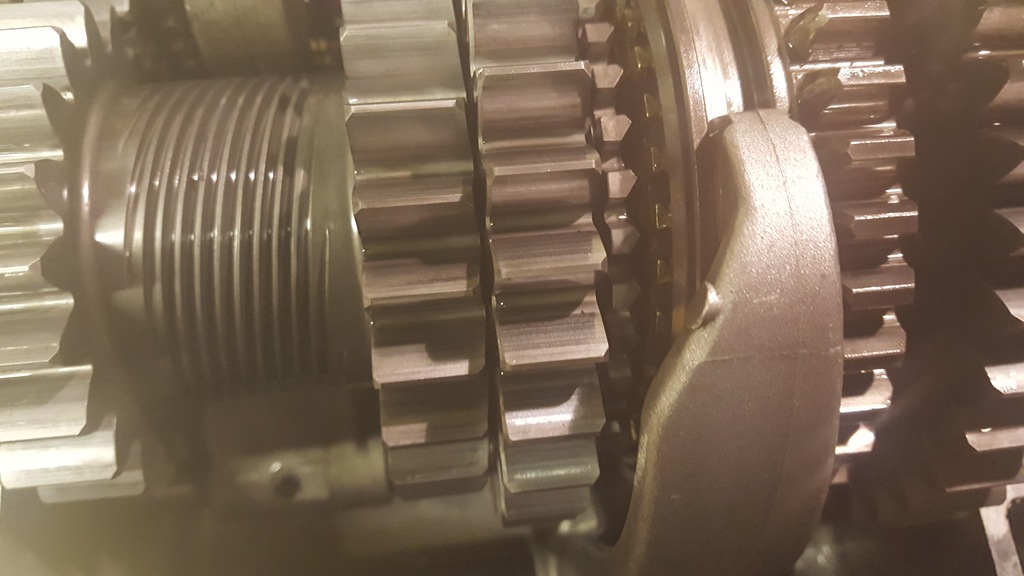
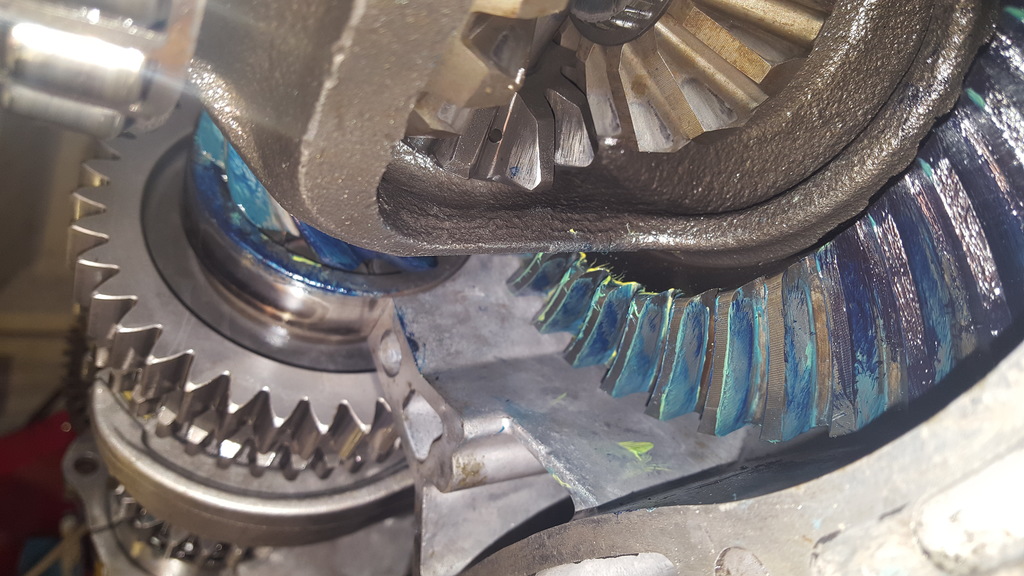
I also purchased a used PPG gearbox from Braveheart Racing. It didn't want to go into reverse, so I had to take it apart and fix it. Turned out that the locking out ring had broken and it was jamming the reverse mechanism. I moved the 5th gear synchro and associated bits from my WRX gearbox across, and now it works perfectly. As the box was apart anyway, all the rubber seals in the box were replaced, and the bearings were inspected and clearances checked.
Some tasty shots of teeth
mmm - shiny
Reasonable meshing pattern:
The PPG box may be my favourite piece of the whole car
Did I mention that the twin plate was a poisoned chalice?
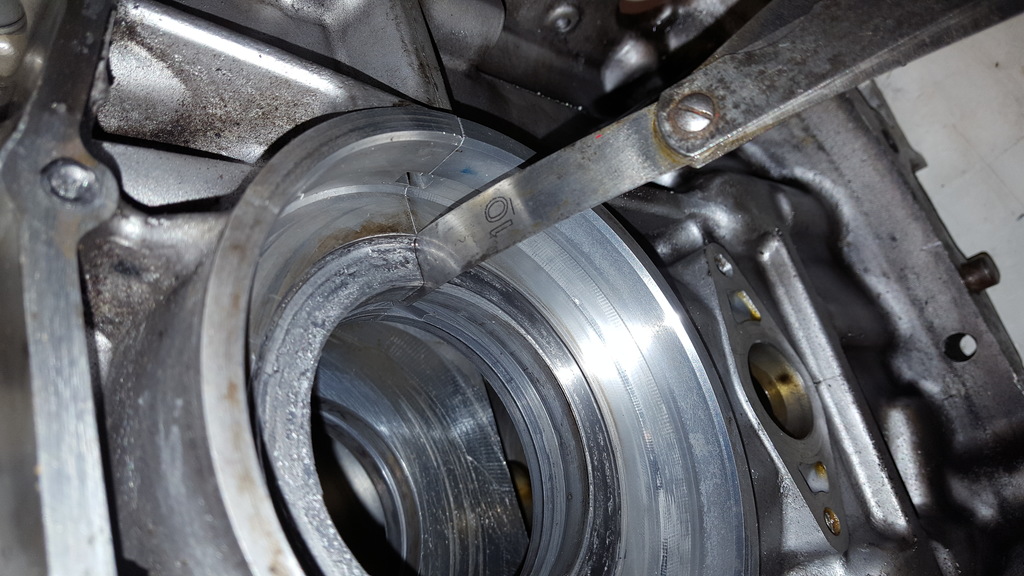
At some point, I was out late at night working on the car, tired etc etc, and I was in the process of dropping the engine back into the car. Anyway, the engine hung on some of the dowels that align the gearbox and engine. Or well, that's what I thought, at least. What actually happened was that the inner clutch plate wasn't aligned with the outer, and the gearbox input shaft was pressing on the inner clutch plate. I kept doing the bolts up (in a criss-cross pattern, because you don't want to break anything, don't you know?), and all of a sudden the engine / gearbox slammed together - great, I thought and filled it up with oil and water.
Except, it wasn't great... after about 1m30 the engine seized, and it was also leaking oil really badly from the rear... FFS..
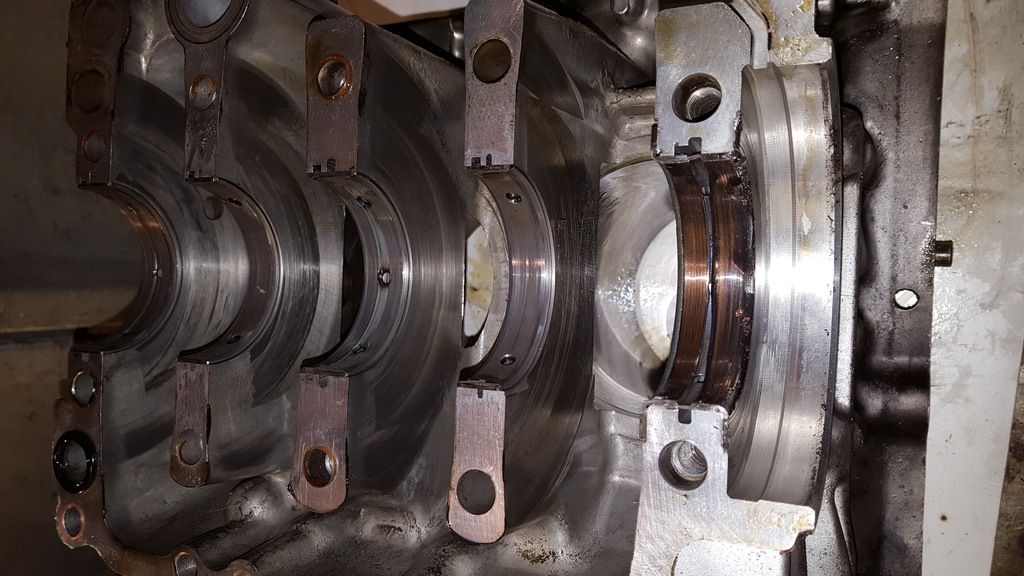
I actually managed to *BEND* the block halves apart, and what should be flush now allowed me to insert a feeler gauge:
My lovely ET 2.1 engine was totally broken, and I could insert a 0.010 (~0.25mm) feeler gauge between the block halves:
Also, note the melted thrust bearing
I contemplated building an engine myself, but thankfully Paul Finch came to my rescue and re-used all the bits (pistons, rods, heads) that could be used from the old engine. It's also now running an ej25 sump for some better oil control.
The (expensive) moral of the story here is: Do not under any circumstances buy a cheap looking used twin plate on ebay, and if things do not mate up properly, ffs do not assume it will go back together
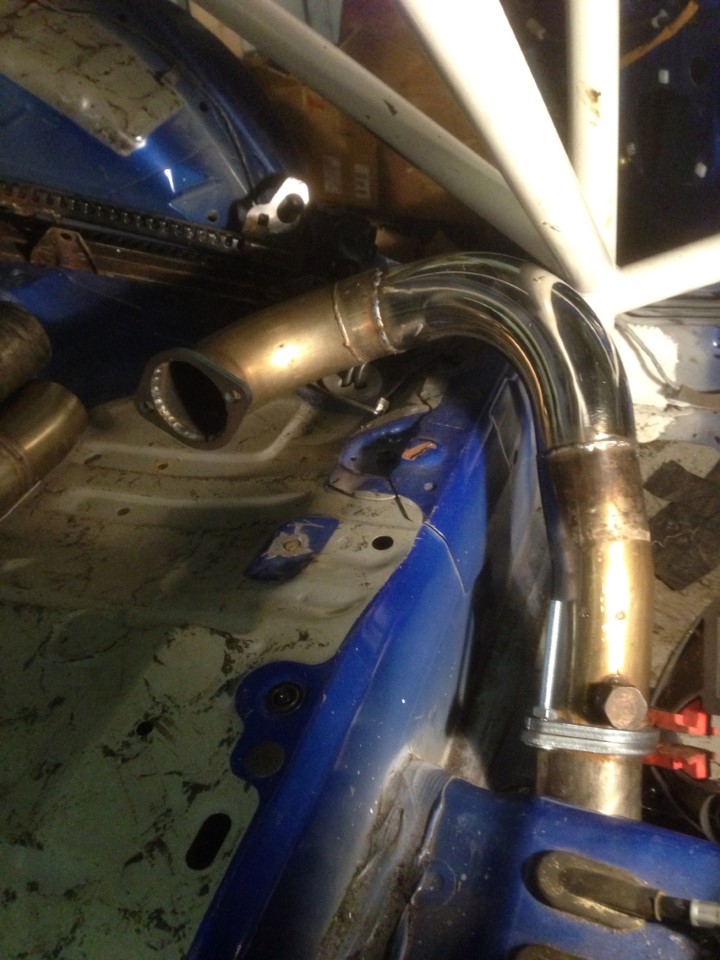
I finally got the car back into one piece (now running a TD06-20g blouch turbo, because why not?) last year in September.
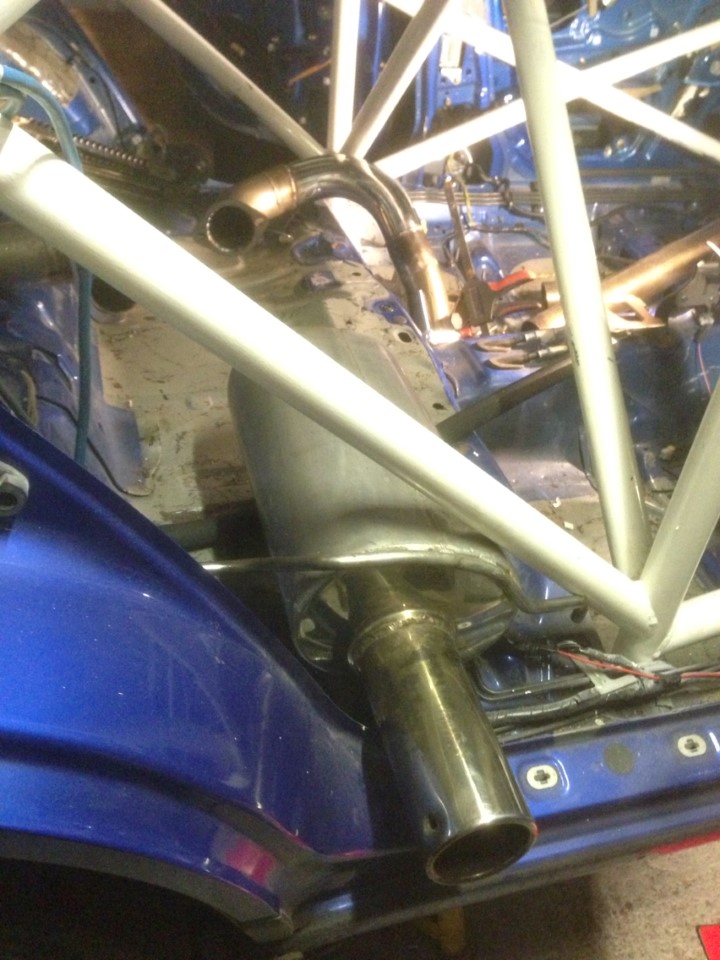
It originally ran a side exhaust (which I've removed, as I figured it wasn't actually safe in the end):
A couple of work-in-progress pics:
I decided to ditch the above exhaust, and it's now running a scoobyworld catted DP with a miltek centre + rear.
Another interesting thing that's happened is that I took it to slowboy for a running in map, and on the way there one of the oil hoses for my oil cooler came loose. *Incredibly* luckily I was idling at a set of traffic lights when it happened, and my audible gauges beeped at me, so I immediately turned the engine off and had the AA recover me to Slowboy. Its done a couple of hundred miles without incident since, so I think I might have gotten away with it.
Shortly after the slowboy running in map, I decided that whilst the td06-20g was entertaining, it was also a bit too laggy for track, so I tore it down again for some changes.
Thanks hedgecutter, it's been a long, long journey
As per the previous post, the new plan is to use a different turbo, namely one that is smaller than the td06.
I have a couple of broken td05-16Gs sitting around, but also a very interesting smaller turbo, namely a td04HL-15t (OEM on new age WRX in japan). My friend in Sweden gave me this turbo, and I carried it home on the airplane. The TD04HL turbine housing is bigger than the TD04L that is OEM fit for UK/EU WRXs, and other cars that have the HL housing make upwards of 340hp (with a different compressor side).
The turbo had to be stripped down for a clean and bearing change, as it had sat around with water in it. The exhaust wheel had some funny looking corrosion on it, so I bought a new one from turborebuild.co.uk, and also changed the compressor wheel (like for like), as it was only 30 pounds. There's also an uprated thrust bearing kit for the td04 family on turborebuild, so I got one of them too. The individual components are balanced, so in theory it should not need dynamic balancing (certainly people on the internets seem to get away without balancing).
This is what the turbo looked like when I took it apart. The compressor wheel actually cleaned up nicely, but unfortunately it has had a couple of fins bent, so got a new one.
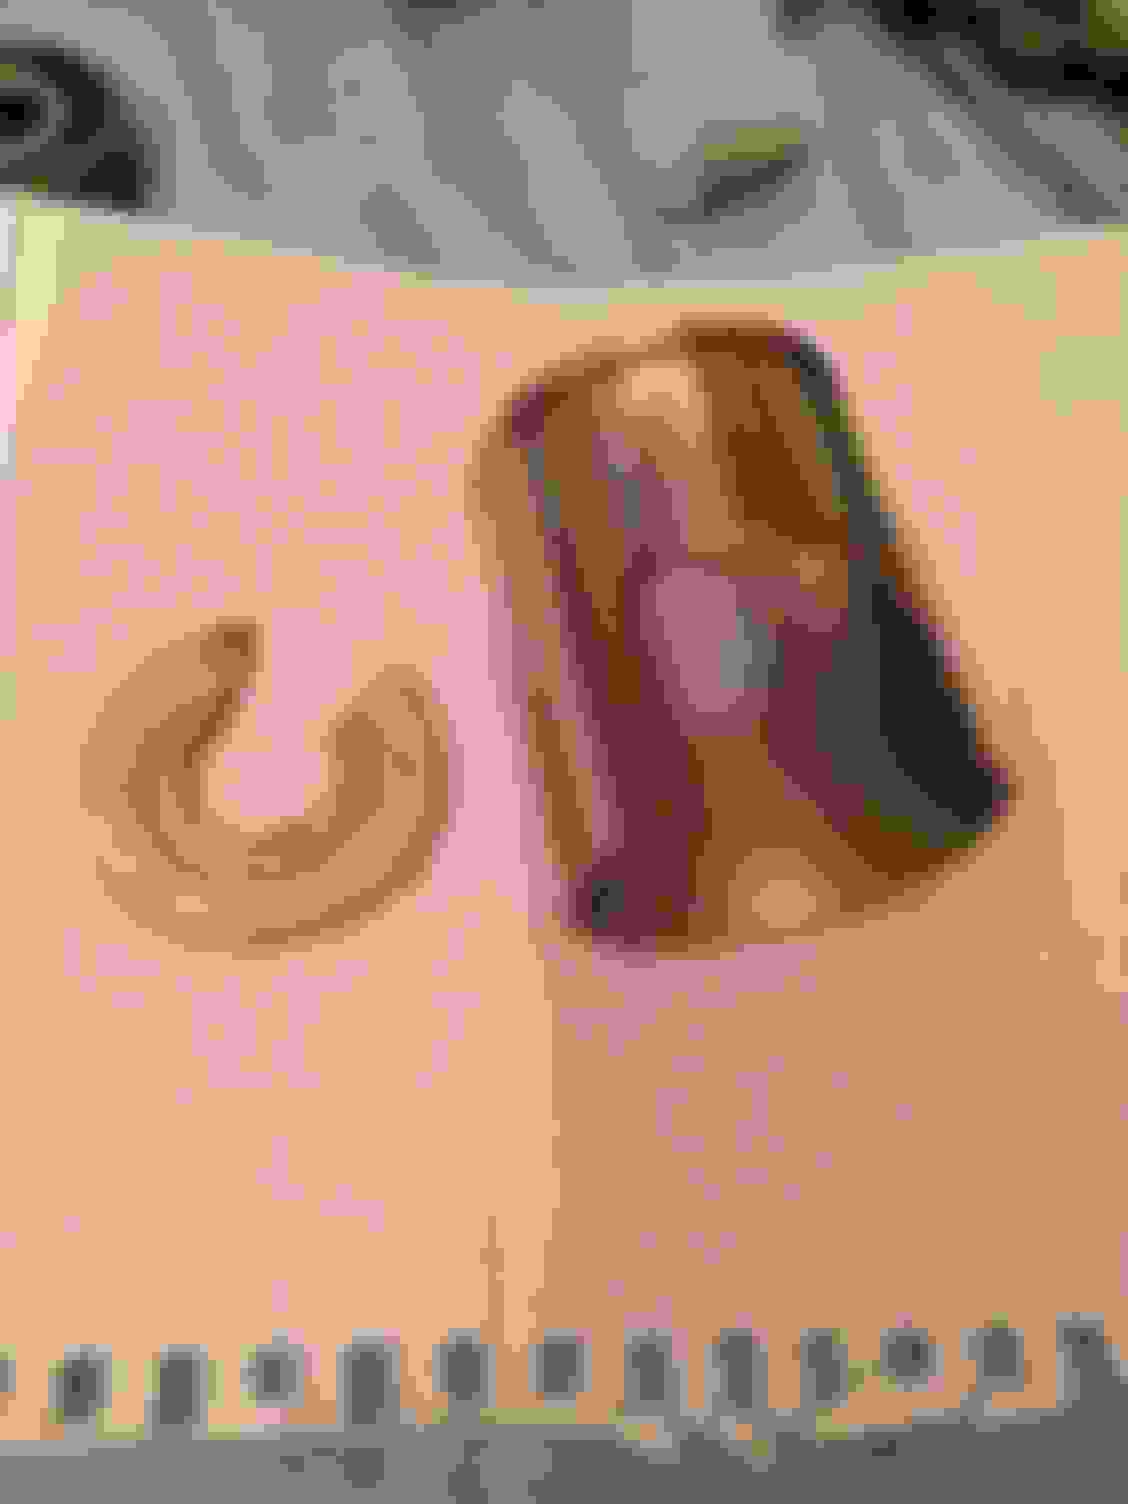
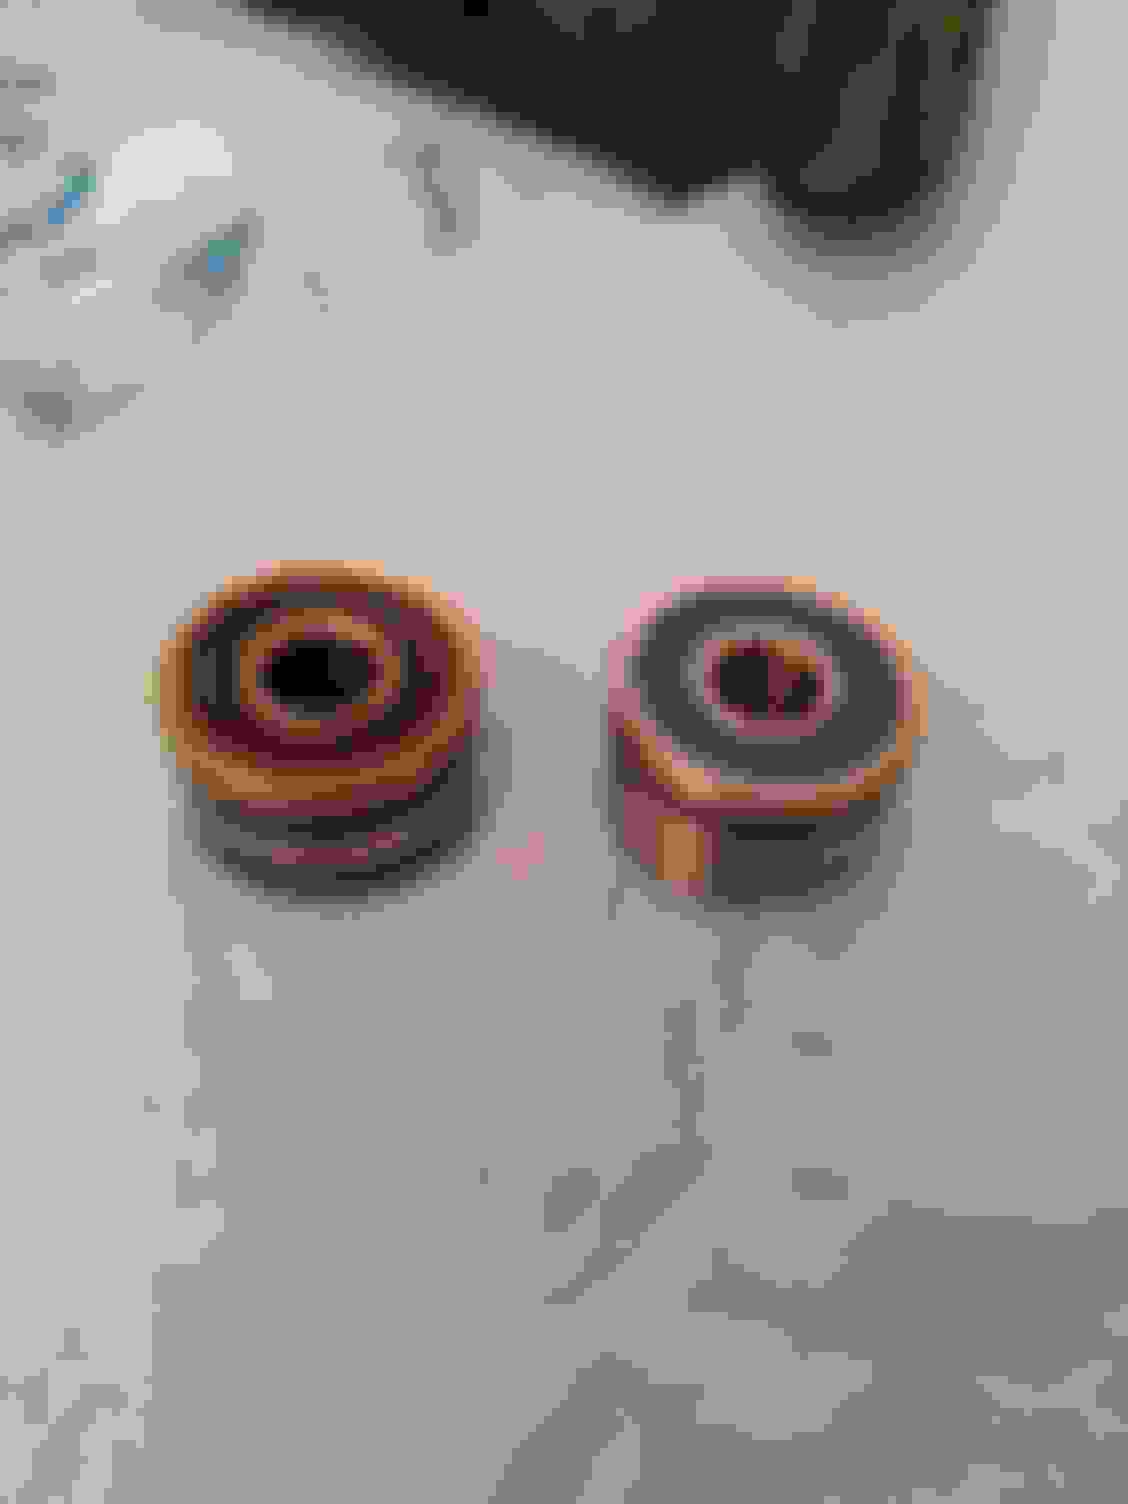
Old and new thrust plate
Weird corrosion on the back of the turbine wheel. I wasn't happy using this, because who knows what would happen to the balancing if one of those flakes would fall off, for example. The other side of the wheel looked perfect, so it was a bit sad to find this..
Full rebuild kit. Only the actual housings are re-used.
shiny compressor wheel
and the exhaust wheel. The quality of the Mellet gear is fantastic IMO - it's all UK made, even.
All assembled. The weird colour on the comp wheel is oil from assembly.
Brand new core. I ended up spending about 120 for the rebuild bits, which to some people might sound expensive, but the idea is to run the car in properly with this turbo (and see if the engine is OK after the oil hose issue), and if it is, then the compressor wheel and housing will be swapped for a td04-19t or td04-20t, which should get me to about 330hp or there-abouts, but still retain great spool characteristics (without going twin scroll).
I've also decided to ditch the RCM 3-bolt headers I got as part of the bug-eye. Although they are still in perfect condition (having only done 18k miles...), there's no way they are required for something like a td04, or even a smaller td05 variant. I've also ran the lateral headers for many years without problems, but I miss the burble (this is one area where form comes before function for me ).
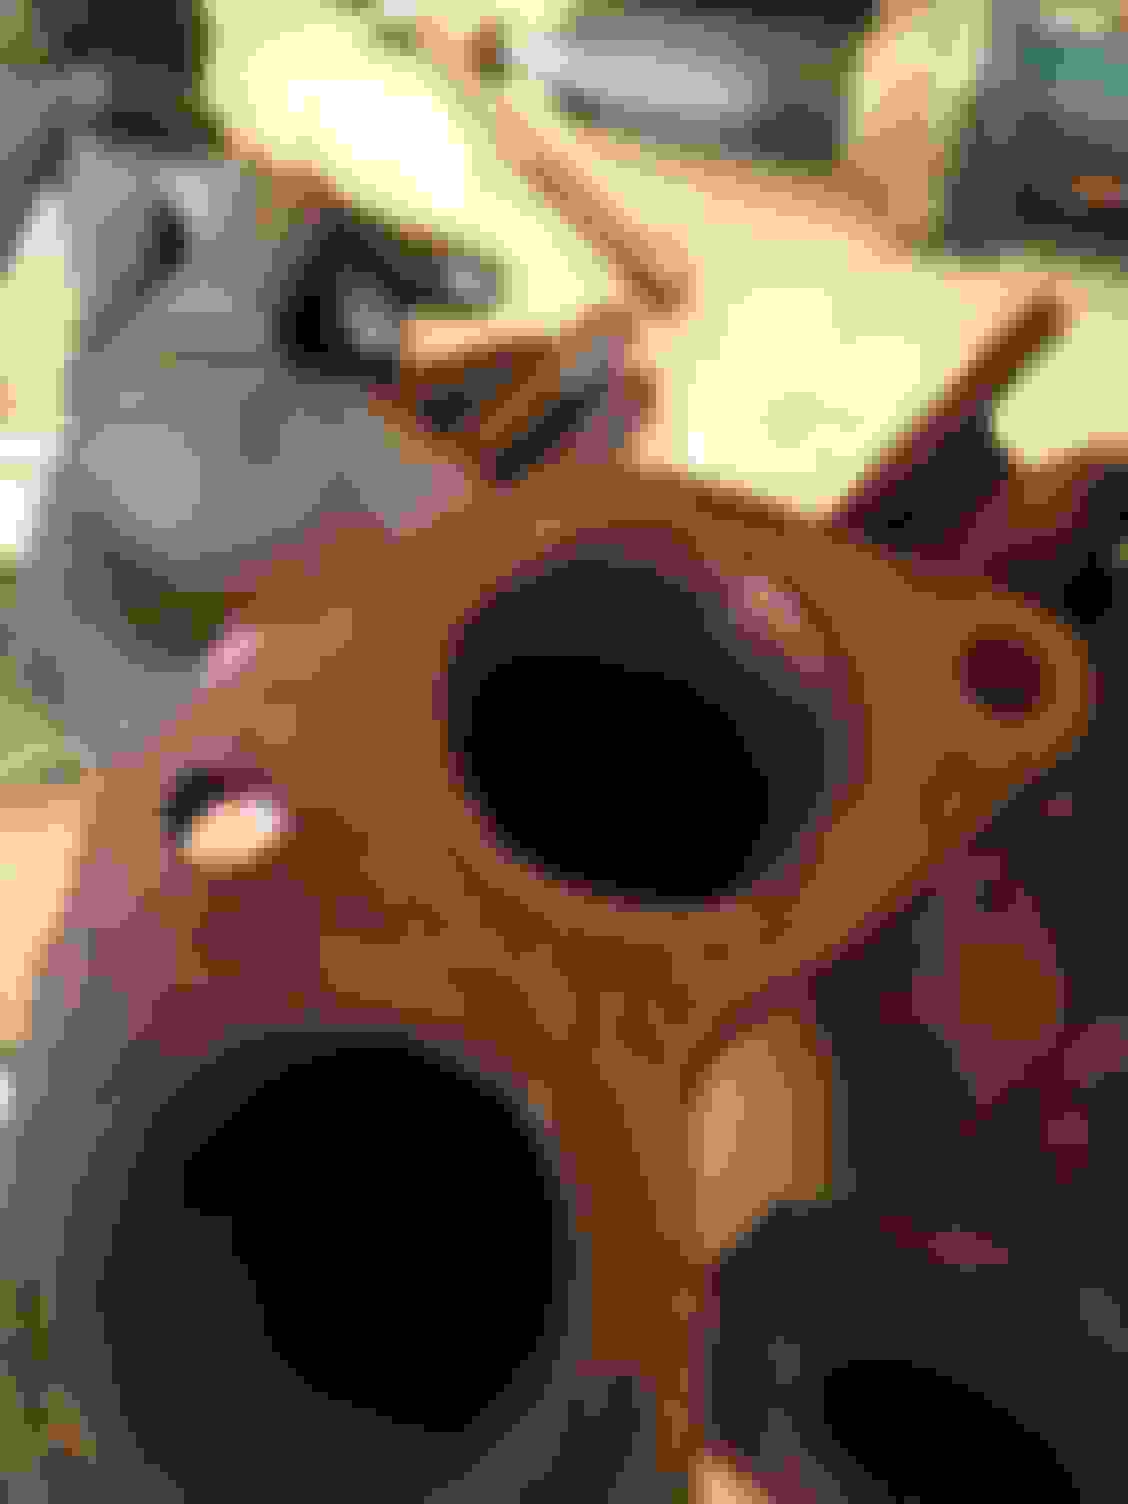
Anyway, I bought a cheap OEM exhaust manifold on eBay, and took it all apart. The shields were completely rusted, but that suited me just fine, as nobody else wanted them due to the rotten shields, and I didn't want the shields anyway
The tool of choice (about 25 quid on amazon + a decent burr):
Not a whole lot to see, really, but all the bumps (particularly on the passenger side one of the ports was very odd looking) have been cleaned up and been more or less port matched. Also the drivers side has some very odd looking bumps in the join that merges the "two" pipes. I was careful not to go too big on the head side, as e.g. using an exhaust gasket as an outline would make the holes enormous. There is however quite a lot of material that has to be removed to make the change ports 'fluid'. Tbh the effectiveness is all very hard to prove one way or another without a flow bench, but I don't think I've made it worse at the very least. Particularly in the joins, there are some very definite areas where the "downstream" pipe (towards the exhaust) is smaller than the up-stream side, and surely smoothing out these joins is beneficial.
Centre pipe was quite shonky (the OEM port match here is very poor IMO).
In order to wrap the manifolds, the old mounting lugs have to be ground off... For some reason the photo makes this look super bumpy, but it's more or less smooth to the touch.
All wrapped up and ready to go. You'll note that I wrapped the pipes in sections rather than as one big piece. The thinking behind this is that if the gasket between the sections blow, it would be difficult to fix without wrecking the wrap, where-as if they're separate sections it's a simple unbolt/bolt back in type job.
I also needed to get myself a decat up-pipe somehow. When I last looked for up-pipes, they could be had for 30-35 pounds used, but now they all seem to be crazy prices. I did win one an STI up-pipe on ebay, but the seller refused to sell it to me.
Instead of spending lots of money on a new up-pipe (now something like 120 quid from scoobyworld), I decided to decat the one I had received with the OEM headers.
Upon removing the heat shields, I discovered that the flex-joint had blown completely all around, but it was fresh enough that I could piece it together into the right location and weld it back up.
I used another old up-pipe I had to build a simple wooden weld jig to ensure alignment, and then I tacked the up-pipe back together:
I then cut out the cat:
Then cut off a piece of pipe from an old set of headers Harvey Smith sent me for a project that never got off the ground. Quite fitting that the headers eventually had parts used for an up-pipe
All welded up. You'll note that the pipe in the middle looks as if it's a smaller diameter than the other sections, however the internal diameter is the same - goes to show how thin the metal on aftermarket headers is sometimes (and also the fact that the OEM up-pipe is very thick-walled).
Also welded on a fitting for an EGT probe, as I want to start monitoring this at some point.
And all wrapped up:
I'm happy to report that the up-pipe fits as well as the un-modified, un-broken OEM pipe I have as well, so the weld-fixture did its job beautifully, despite looking a bit... insane
Injector-wise I'm not quite sure what to run at the moment.. I have a set of Sard injectors (650cc), a number of decapped OEM WRX injectors (flow matched), 6x blue STI injectors. I ended up with 6 blue, as the set I originally bought had one broken injector, and then I bought another 3 on ebay (for cheap...), but I need to make one good (tested) set up if I'm going to be using them.
The Sards probably work OK, but I've heard they're a bit of a pig to tune, and actually so far I have been super impressed with the decapped ones. However, with the power level I'm aiming for (with td04 max of 330, and potentially with a td05-18g billet about 380), the blues might make more sense, especially as they're OEM quality and unmodified.
One thing I am almost certainly going to do, though, is to remove my FuelLab FPR in favour of an OEM reg in the OEM rails. This might mean that the blues can't flow enough at say 380.
I had a pair of spare TGVs, so I set about porting them out (deleting the flaps).
The standard TGV with just the flaps removed. Note the little lip to the left hand side.
Lip ground off. I contemplated leaving it like this, so that the ECU wouldn't throw a CEL.
However in the end I went to town on them. The holes left by removing the guide were tapped for an M8 bolt, as I didn't have an aluminium welder back then. Should be air tight etc.
What it looks like down into the head. The head could do with having that lip visible at the bottom matched to the TGVs, but that requires taking the heads off, of course.
As the manifold is currently off anyway, I might take these off and polish them + weld the holes up, but I'm not sure what kind of benefits that would yield over what I have at the moment.
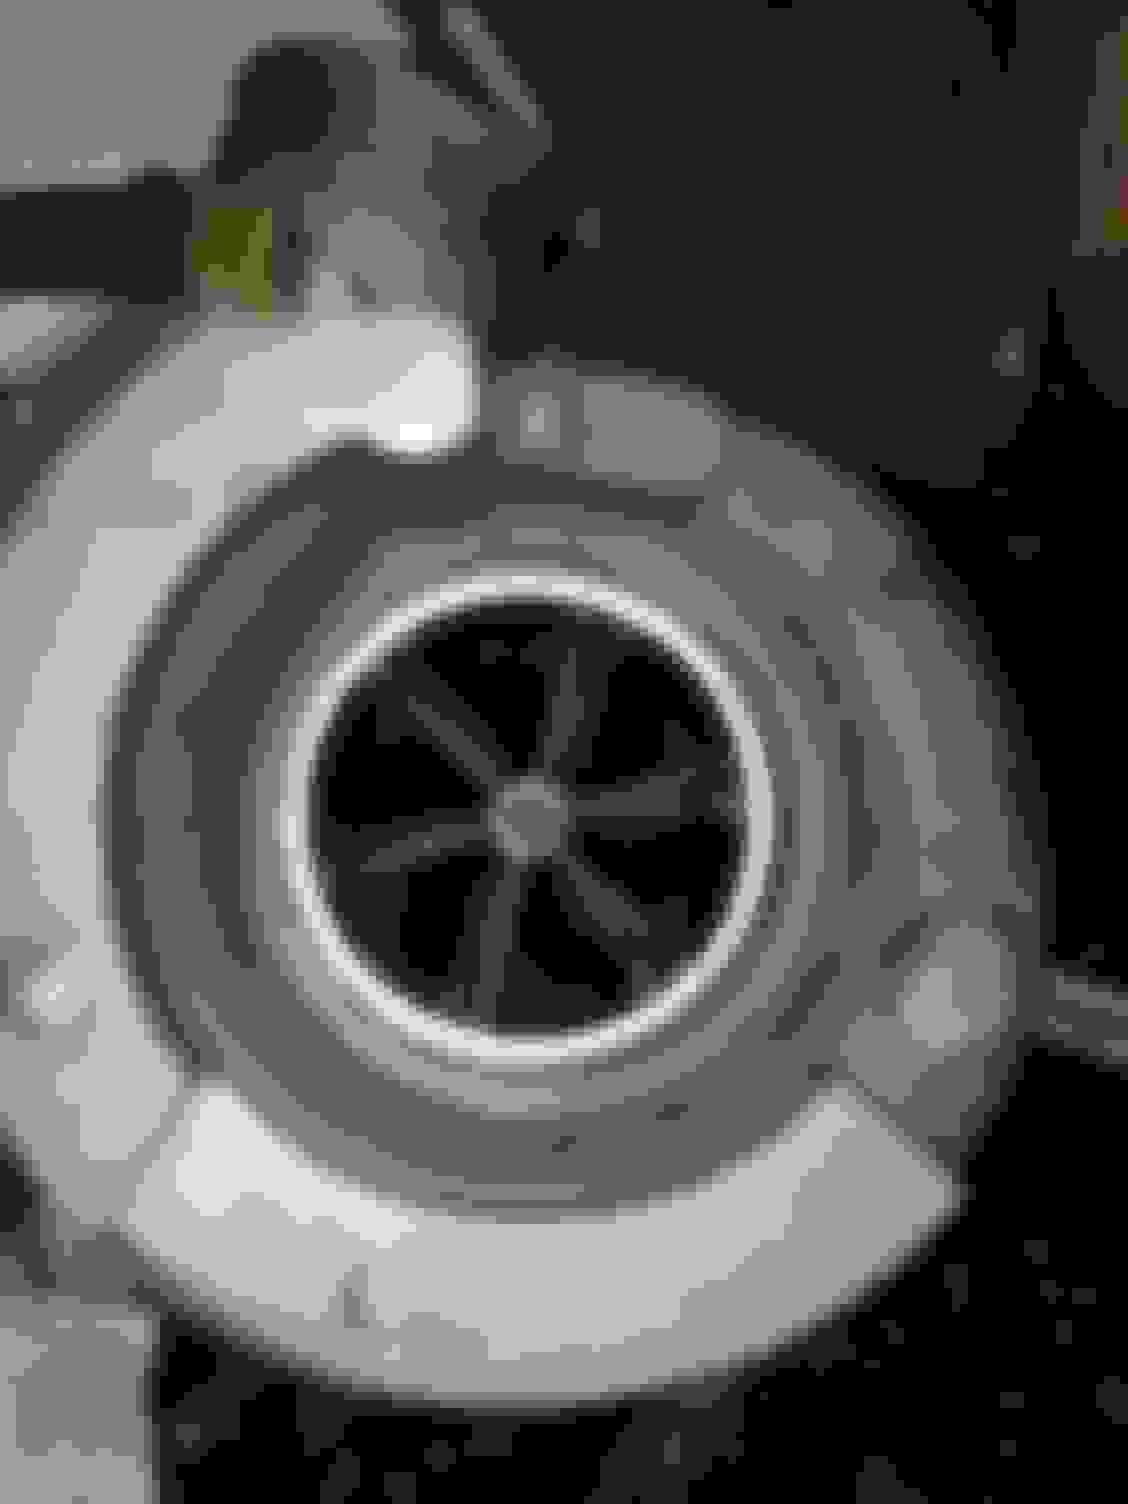
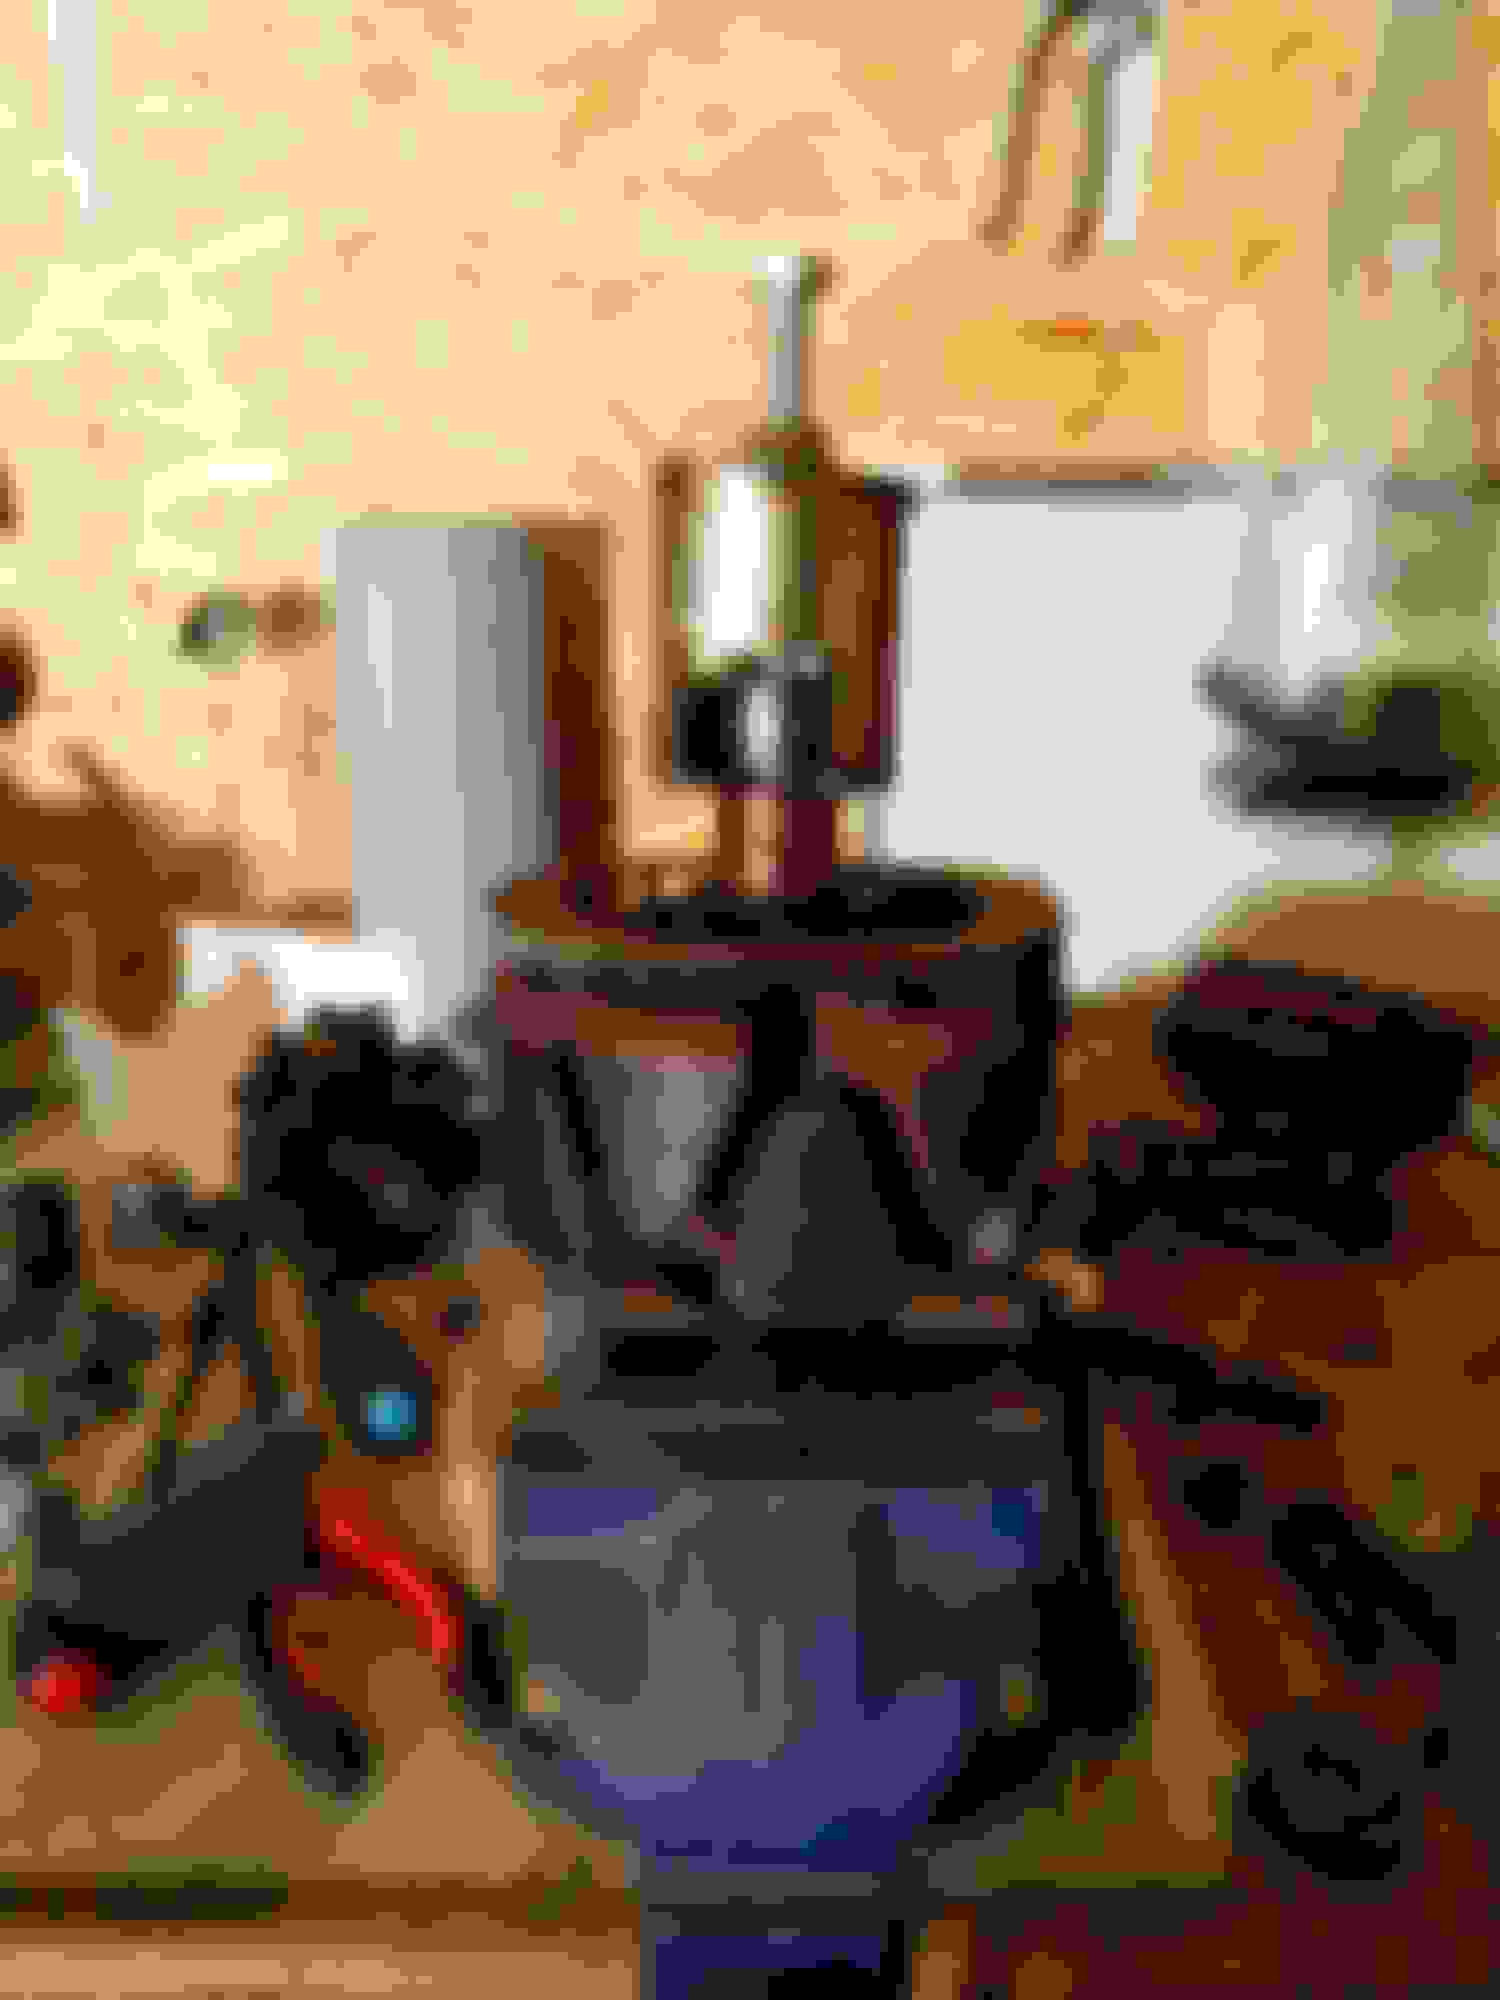
This is what the giant turbo looks like.. It makes 1 bar by about 3600 RPM on my 2.1 with WRX heads - fun on the road, but too laggy.
The specs are:
td06 housing (smaller 7cm for quicker spool)
td05-20g billet wheel, with a genuine mitsubishi compressor cover.
Not sure what I'll do with it yet. Should make about 400hp, but not sure I want to run it, as I need better response out of corners on track (well, want, not need. I don't compete with anyone but myself )
One possibility if I can't sell it is to rob it off its compressor wheel and cover, as they will fit directly onto one of my td05 cores. This should make it a billet td05-20g, but I would honestly rather have a billet td05-18g.
I also accidentally broke one of the redundant hose connectors off of the inlet pipe - second time I've done it, and I couldn't find any on ebay, so I thought I'd fix it.
Turns out the hole the hose connectors leave behind are 8mm, which is the right size for the interior clips.
After cutting the litlte ridges off, I fitted the interior clip with an o-ring, and it's not going anywhere, and probably isn't leaking either.
The clip was then covered with a bike tyre repair patch, and then re-covered again so it's actually double layered. Interestingly, the tyre vulc solution works on the inlet too - probably because it's quite rubbery.
I'm pretty confident this will work, but I will definitely spray some start gas around the area once I get the car up and running again to make sure there's no leaks.
I'm not really someone who is interested in looks - rather have something that works than looks shiny, however the inlet manifold looked really quite dirty and sad. My brother in law sprays a lot of car components (in fact, now he works as a sprayer), so I asked him to spray my manifold in "some interesting colour, not red or black", and this is what he came back with. I absolutely adore the colour - in the daylight it looks fantastic, and makes a change from the usual red or dirty aluminium ones.
First coat, with no clear coat:
With clear coat:
With the "fixed" inlet pipe added - looks pretty nice, except now the throttle body looks really sad
Also gave the air box and inlet a coat of black (from a rattle can...):
I've also been toying with the idea of having a rotated turbo, with v-band connections everywhere for ease of change. The idea would be to have quick connections on oil and water, and v-bands on the exhaust side.
The way I've been toying with is to have an extension that sits on top of the OEM manifold, which lets the turbo be mounted in a different direction. Unfortunately, with it the turbo ends up quite close to the brake cylinder, so I've stopped working on this for the time being. Another issue is that the compressor cover would have to be clocked, in order to avoid hitting a TMIC.
Some little snaps from this (failed for now) experiment can be seen below.
There's lots of room in there, until a wastegate is fitted (well, there still is even with the wastegate, but it's within about 1.5cm of the brake cylinder, and even though the engine and turbo will rotate around the centre of gravity here, I think it's a bit too close for comfort for the time being). An external wastegate would solve the issue, so maybe for the next up-pipe I build An EWG would also allow the turbo to sit a little bit further down, which would allow it to move a bit to the left, which would potentially negate the need for clocking.
Here's the adapter I made up. It's basically two up-pipe flanges, with a piece of tube with v-band inbetween. Unfortunately I'm not great at tig-welding (yet), but it should be gas tight at least
For the time being, I've removed all these bits and fitted the td04 in the standard location. If I swap to FMIC again, I'm going back to rotated, but then with a different up-pipe to move the turbo slightly.
I think I am now more-or-less up to date with the thread.
The next steps are to re-assemble the injector rig, so that I can do some final testing (flow and latency testing), and then make an informed decision about which ones to use.
I quite fancy the idea of the blues, but if I go to the 18g eventually they will be too small.
I could of course swap injectors etc when swapping the turbos, but the eventual goal would be to have "one" setup, where all I have to do to run a different turbo is to whip the turbo off (with v-bands), and then upload a new map. That way I could have different turbos for different tracks, for example, but it's a bit of a pipe dream at the moment. Especially as I'm not willing to go back to a FMIC for the time being.
Data-logging is something that is quite lacking in my car, but I have most of the sensors, but need to hook them up into the arduino somehow. That would be a project and a half on its own
Number 1:
Built my V2 fuel injector tester. This time pressure is from a fuel pump with a real FPR (using my expensive Fuelab until my cheapo one arrives).
It's also quicker and easier to change our injectors, and I also developed a user interface for the Arduino. Currently four modes are supported:
- leak test (run pump and don't fire injectors for X seconds to see if they dribble fuel)
- static flow test (100% open injectors for X seconds)
- rpm simulation (open injectors at a certain duty at a certain rpm for X seconds)
- pwm mode (open injectors for x.yy milliseconds n times)
The last mode I implemented to be able to determine injector latencies.
Some photos:
Using STD fuel rail to hold injectors against a bracket/holder.
Pressure is easy to set and read. Using 3 bar for testing.
Current setup. The power supply is 30a@12v.
Close up of UI:
Flow chart at 50% duty at 1000 rpm for 10s (middle), and 6000rpm (right).
Injector number in left column. 101-102 are standard blob WRX injectors, and 1-7 are dark blue STI injectors. 1-4 were cleaned with the previous tester and 5-7 are uncleaned (as received by seller on eBay).
Interestingly it seems that my simple cleaning does help.
Also note that the fluid used is white spirit, so petrol flow numbers might be different, but this should give a good indication of relative fuel even with petrol.
The engine bay is almost done for the mapping session. I want to hide the oil pressure sensor elsewhere, under the manifold, and also give the engine bay a good clean up around the strut towers, but neither are imperative for mapping.
Unfortunately I've scratched the slam panel during the endless engine removal / refits, so I need to address that at some point.
Also, the intercooler is clearly in need of some love. The fins are mostly straight (after I sat at the kitchen table straightening them for hours...), but it looks very sad in photos. I'm thinking of using a roller with some silver paint to paint the core itself (so that it gets a nice finish on the outside, without wrecking the efficiency), and then respraying the STI logo using a stencil.
I also fixed a poor fitting exhaust flange under the car, by cutting off the miltek exhaust and re-welding it. I'm almost embarrassed to show this pic, due to the massively ugly welding on the flange, but here it is anyway. In my defence, a lot of it was done underneath the car, upside down with about 25cm of room
At least the join further back looks nice
I also started the car for the first time in a year, after fixing a busted o-ring on the fuel injectors (why is it always the one that is the most pain to get to?). Unfortunately i forgot to put the EGT probe into the exhaust, so it leaks badly, but hopefully that's the only leak.
The metallic sound is from dry or worn bearings in the alternator (verified first with a screw driver as a stethoscope, and later by removing it and running the engine without alternator).
Why does it never stop??
Also noticed that the car runs very very lean with the STI blues, so will do a couple of things:
- refit adjustable fuel pressure regulator
- check for vacuum leaks using a smoke machine (DIY, obviously...)
- if still scarily lean, refit the decapped injectors for the 10 mile drive to brands hatch, and then refit them at mapper's.
Turns out the reason it ran lean was that I had forgotten to plug a giant vacuum hose back in (the one behind the alternator), which meant that even with throttle closed, it was sucking in masses of air. Easy fix, but took me setting up a smoke pot to find. I suppose another good thing I learnt from this is that there were no other immediate vacuum leaks (all the way between the MAF and the heads).
I also took it for a remap with Slowboy Saturday just gone. I really like the way Neil works - seems like a no BS kind of guy, and gives sensible sounding answers to my esoteric queries The scoobyworld sports cat even passed the MOT emissions, which was nice. At first, it was a complete fail, but once I had taken it out for a spirited drive, it passed with flying colours - turns out they have to be really, really hot. I did in 151 miles between this years MOT and last years
After the map, the car drives fantastically. The turbo is a little bit larger than a normal UK TD04 (td04HL with a 15T wheel), and I get 1 bar at about 2700 RPM in fourth, and 1.2 (which is what the max boost is set to) at about 3000 RPM. The turbo starts surging at low RPM if the boost is raised further, but even at 1.2 bar it feels absolutely fantastic. I am so much happier with the way it drives like this than I was with the td05-20g. Obviously not as fast in a straight line, but being able to floor it out of a corner and have a lot of torque is great.
In the new year I'm going to put it on the rolling road at SRR to get some baseline figures, and then order a 19t wheel for the td04 and have it remapped again.
Another quick update. A (long) while back I bought a 2006 alternator off ebay - unfortunately the bearings in it turned out to be shot, and instead of getting another used alternator off ebay I decided to rebuild the current one instead. This gives an opportunity to clean up the paint etc on the covers.
As an aside, I don't want to pay relatively lots of money for a refurbed alternator either, because I've had one of them fail within 20k miles (the voltage regulator), so I'd rather stick to the subaru voltage reg etc, which I've never had any issues with.
If you are going to attempt this yourself, you *WILL* need an impact wrench, as the nut on the alternator is very, very tight indeed, and the shaft obviously keeps spinning if you use a normal non-impact wrench. The nut is 24mm, so you will need an impact socket of that size too.
Step 1:
Remove front pulley with the impact wrench. Don't be tempted to strap the pulley into a vice and using a breaker bar, as the vice will muller the pulley (ask me how I know).
Step 2:
Remove the 10mm (or maybe 8) bolts that hold the front cover to the rear cover
Step 3:
Separate the front cover from the alternator by using a normal bearing puller.
Step 4:
Remove the inside "spool" (not sure what the actual term is). The rear bearing can be stuck in the rear cover, so I used some gentle persuasion with a hammer on the rear cover (tapping alternating sides) and it soon came off.
You should now have this bit free:
Step 5 (optional):
If you are painting the covers, you also have to remove the brown bit in the middle of the alternator (the bit with all the copper wires). On the two I took apart, this bit was very corroded onto the rear housing, and also note that coil itself is screwed into the rear housing too, AND it is soldered to the voltage regulator.
To remove, I:
5.1 undid all the accessible screws from the actual back cover
5.2 Mixed up some penetrating fluid using 50% acetone and 50% light oil, and smeared the join between rear housing and coil liberally a couple of times with it.
5.3 gently tapped the rear housing with a hammer whilst holding onto the coil with my hands.
5.4 Eventually it was loose enough that i could wiggle it about. Wiggling about gives access to the final screw that holds the voltage reg in place.
5.5 Once the final screw was out, there's still a stud that goes from the inside of the alternator to the outside rear (where the battery cable attaches). To remove this, remove the cover, undo the 10mm bolt, and tap the stud from the outside, until it is free in the housing.
5.6 the coil should now be removable
Step 6:
The front bearing is held on with a plate (as well as being a tight fit into the housing). You need to remove the four screws on the front cover around the bearing. Both my alts had very corroded screws, and I had to drill out 4 out of a total of 8 screws.
Step 7:
With the plate removed, you can now drift the bearing out. Note that you need to support the rear of the housing around the bearing. I used the pulley to do this, and then tapped the bearing out with an impact socket and a hammer.
The front bearing is a 6203DD
Step 8 (optional):
Prep and paint. I accidentally painted the wrong set of covers the first time around, which added loads of time, but eventually I ended up with this:
Step 9:
Drift in a new front bearing into the front housing, and attach the cover again.
Note, when you're doing this, don't hit the center bit, but rather use a socket that distributes the impact to the outside race only!
I don't have any pics of this step, but it's pretty self explanatory.
Note, if you buy replacement front bearings, do test fit them first. The bearing I got was too tight to fit onto the shaft, so I ended up re-using my front bearing again (luckily the front bearing was fine anyway).
Step 10:
Remove rear bearing from "spool". You can probably buy a bearing puller for not a lot of money, but I made my own out of scrap
This is what you're removing:
I made this tool:
old vs new:
Step 12:
Drift the new bearing onto the shaft using a socket (or press, if you have one).
Step 12:
Put it back together. I removed the little metal ring thing on the rear bearing. You will also need to tap the spool back into the rear housing.
The pulley needs to be done up with an impact wrench.
Finished product:
I'll update with the part numbers of the bearings in a sec.


 ). In hindsight, I should have gone for a classic STI, but there was no way I could have afforded the insurance as a 23 year old, and my Mrs didn't want to get a used car.