
My version 6 type r toy

Hi guys, been back on here since Christmas now when I got my hands on a very nice clean version 6 type r. I love the car to bits but now there are a few bits and bobs that I am planning to do with the car so I thought id start a build thread for anyone interested. Here is a picture of the car when I first got it.
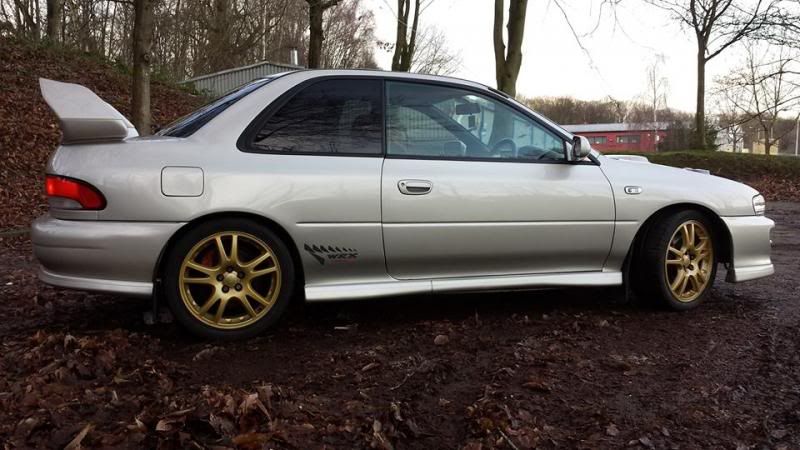

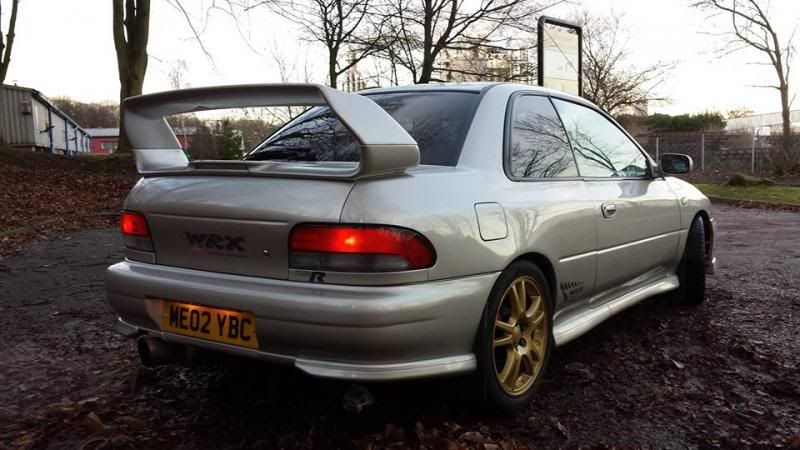
even when I went to view the car I knew the wheels had to go, personally im not keen on the colour of the wheels with the colour of the car and I wanted something a little more after market.
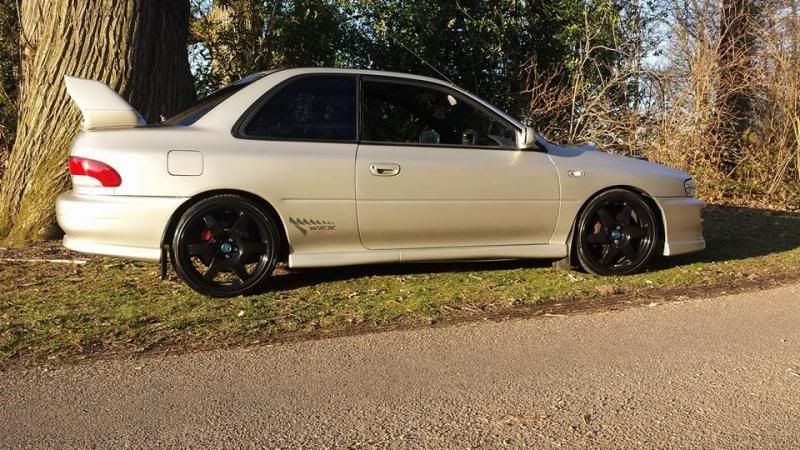
Lucky I got a deal done on some nice compomotive alloys so took a long drive from north wales down to luton to do a deal on my sti rims for the compos.
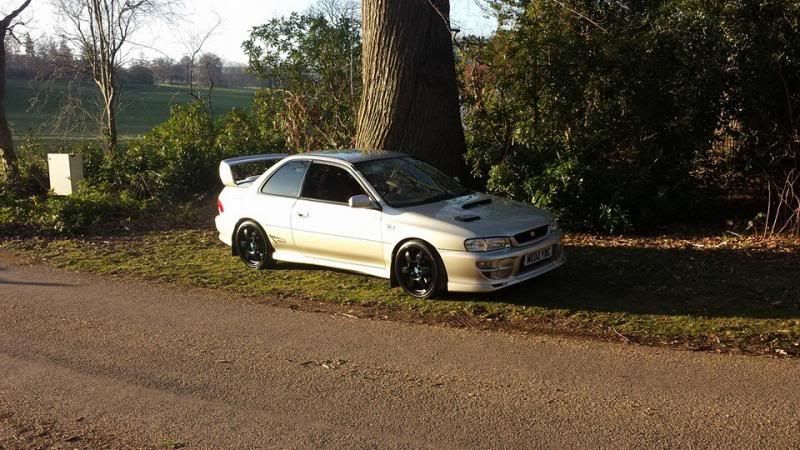
The result I was very happy with, much more my cup of tea
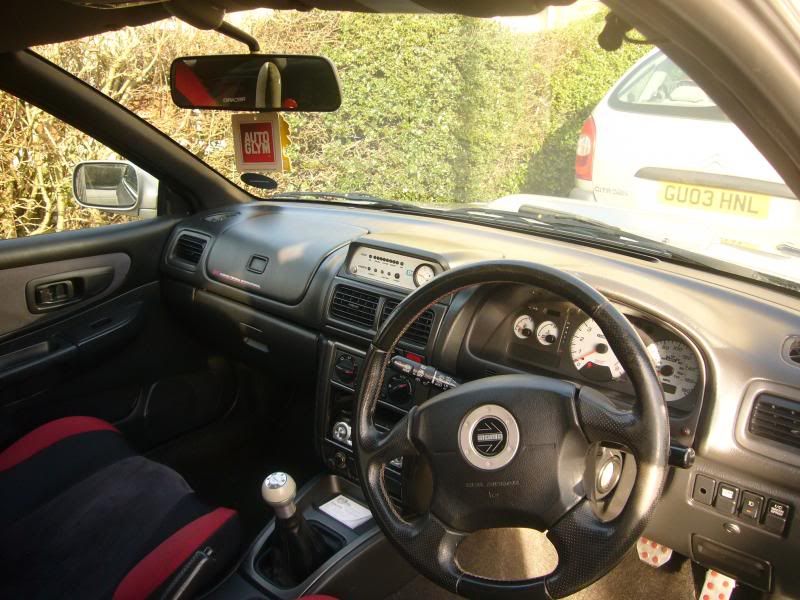
A little pic of the inside of the car aswel
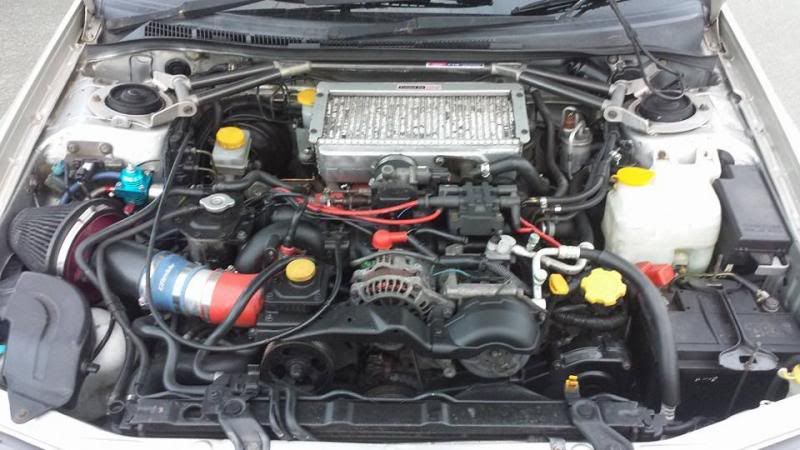
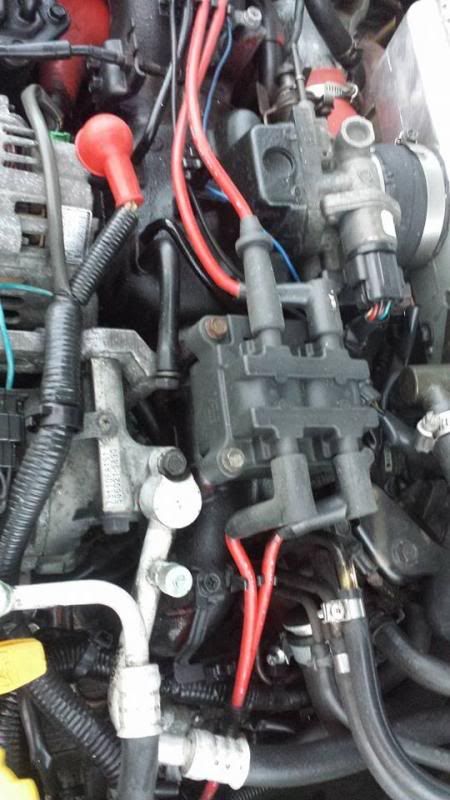
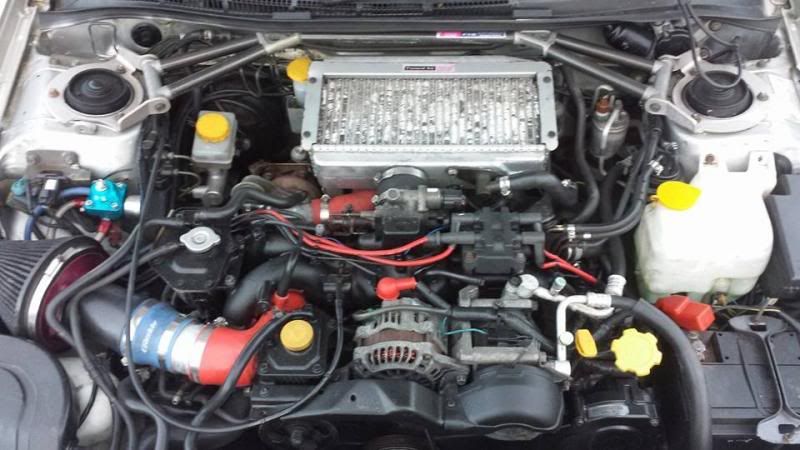
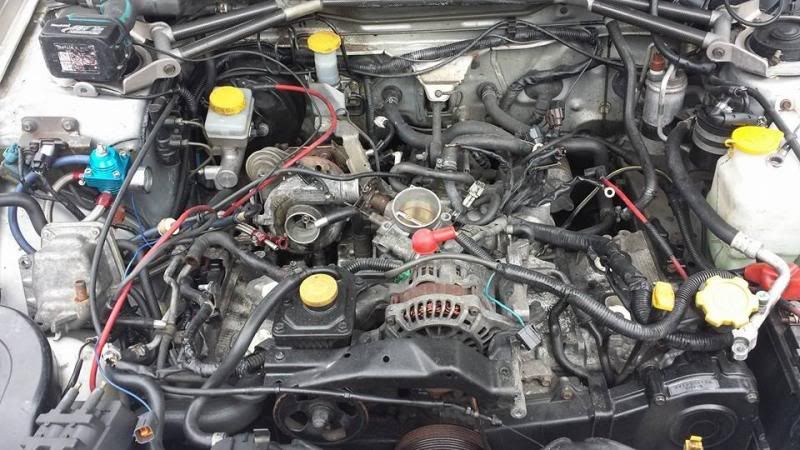
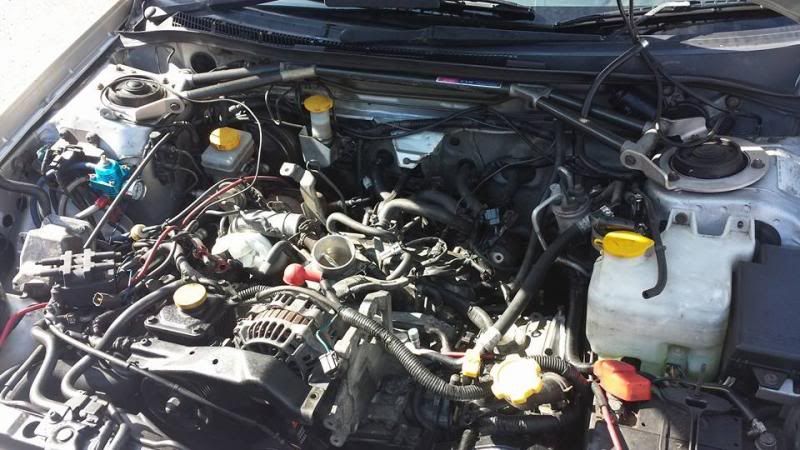
Im going to be starting with a bit of a tidy up under the bonnet. Don't get me wrong its far from a mess but someone has masked up the inlet mani and painted it black which im not keen on, one because it should be red and secondly there is overspray all over other parts of the engine so I will be cleaning all that up. I also plan to make a nice hardpipe as the car is running mafless but the maf is still sat in place so this needs to go. here is a few engine pics as it stands now
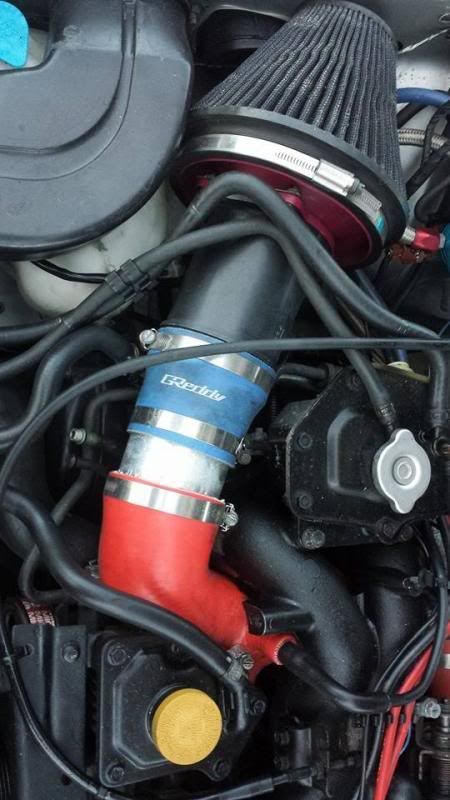
I also plan to remove the air con as it isn't connected and I have no plans to use it so im going to take it off.
I also picked up these the other day so this is also on my list of things to do
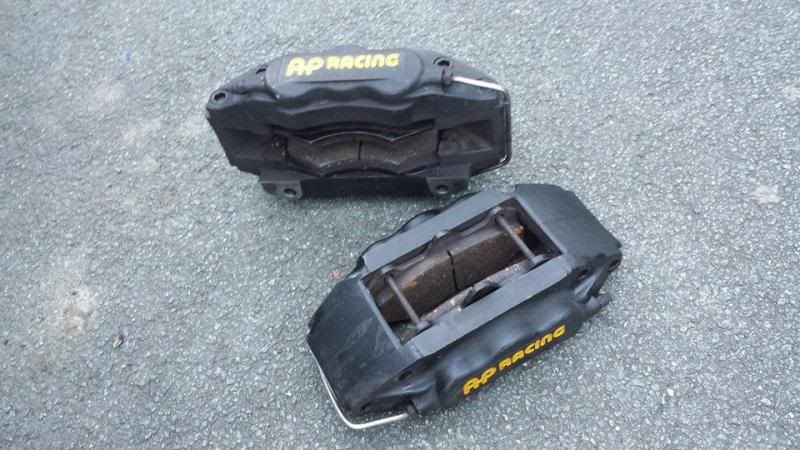

Im quite excited to get these on , they should help stop her a bit quicker and they will look posh im a big tart I know.
I have a spare inlet mani which im going to prep and spray up ready to swap over.
As you will see over my project im a big fan of a bit of fabrication work, I have my own little business making custom parts so I will be using my skills to create so nice one off parts. Here is my posh daily works van I use
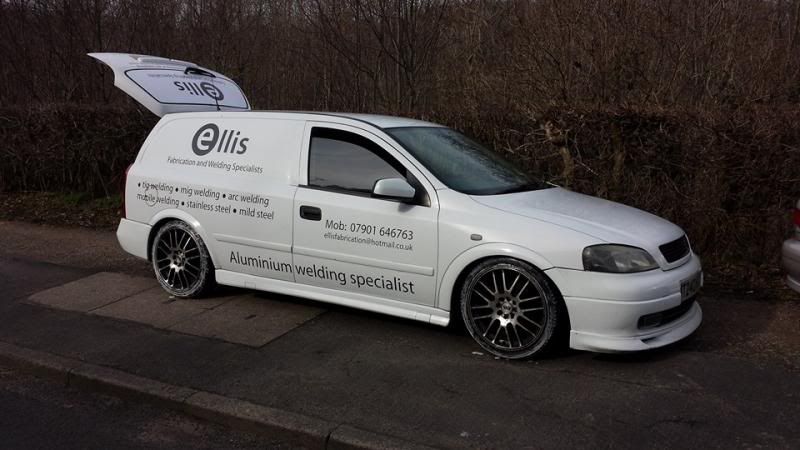
Shes a good old workhorse and does me well as a daily.
Anyway I will keep updating as I go along for anyone interested in my progress. cheers, rich


even when I went to view the car I knew the wheels had to go, personally im not keen on the colour of the wheels with the colour of the car and I wanted something a little more after market.
Lucky I got a deal done on some nice compomotive alloys so took a long drive from north wales down to luton to do a deal on my sti rims for the compos.
The result I was very happy with, much more my cup of tea


A little pic of the inside of the car aswel

Im going to be starting with a bit of a tidy up under the bonnet. Don't get me wrong its far from a mess but someone has masked up the inlet mani and painted it black which im not keen on, one because it should be red and secondly there is overspray all over other parts of the engine so I will be cleaning all that up. I also plan to make a nice hardpipe as the car is running mafless but the maf is still sat in place so this needs to go. here is a few engine pics as it stands now


I also plan to remove the air con as it isn't connected and I have no plans to use it so im going to take it off.
I also picked up these the other day so this is also on my list of things to do


Im quite excited to get these on , they should help stop her a bit quicker and they will look posh
im a big tart I know.I have a spare inlet mani which im going to prep and spray up ready to swap over.
As you will see over my project im a big fan of a bit of fabrication work, I have my own little business making custom parts so I will be using my skills to create so nice one off parts. Here is my posh daily works van I use

Shes a good old workhorse and does me well as a daily.
Anyway I will keep updating as I go along for anyone interested in my progress. cheers, rich

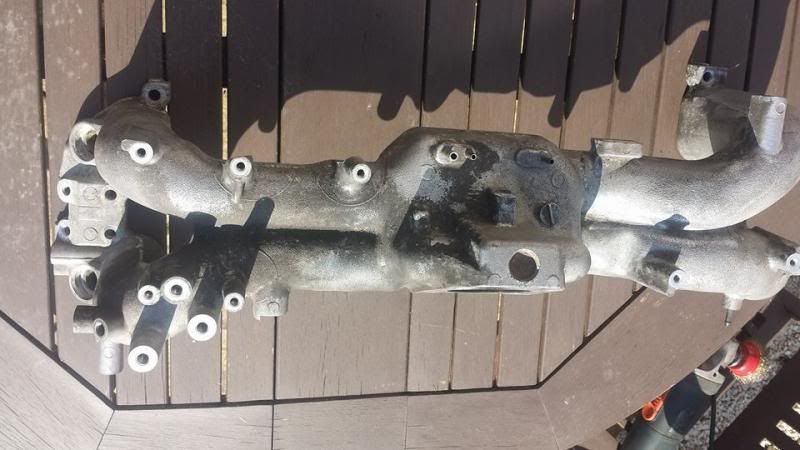
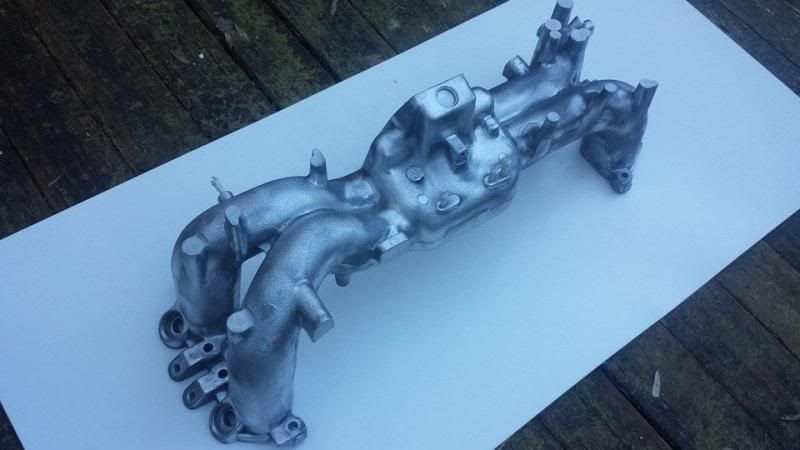
Hi guys, small update , made a start on my new inlet manifold refurb today so took a few pics as I went along.
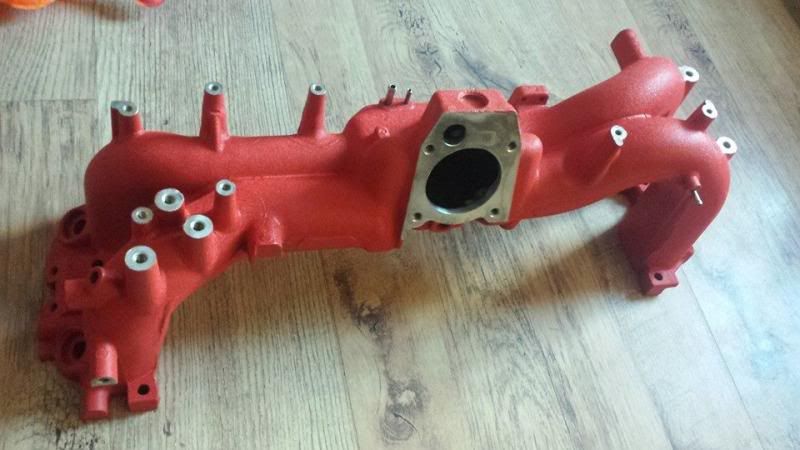
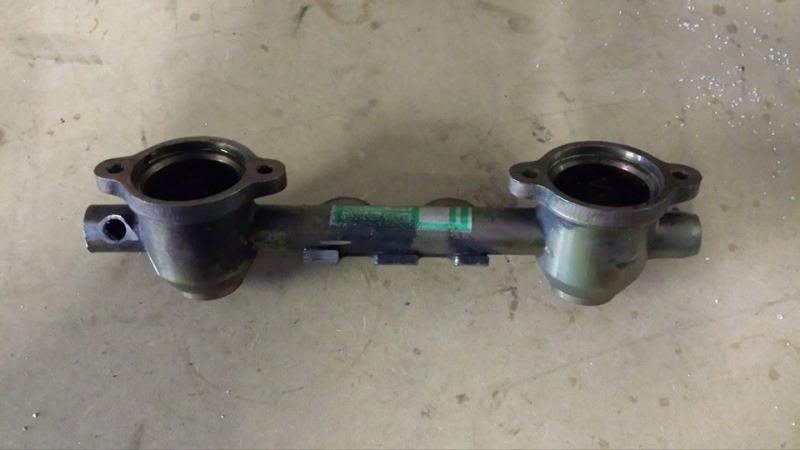
The new dirty inlet manifold
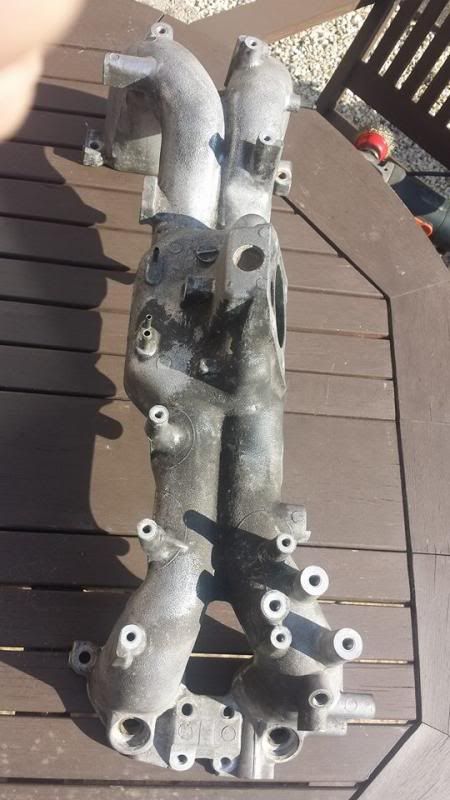
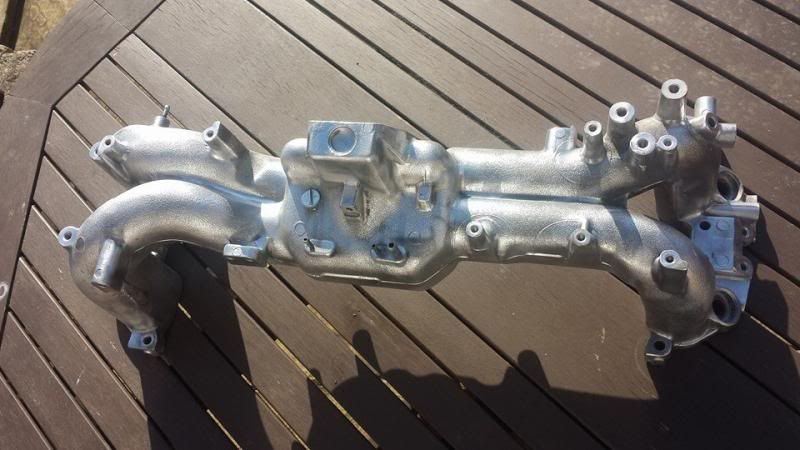
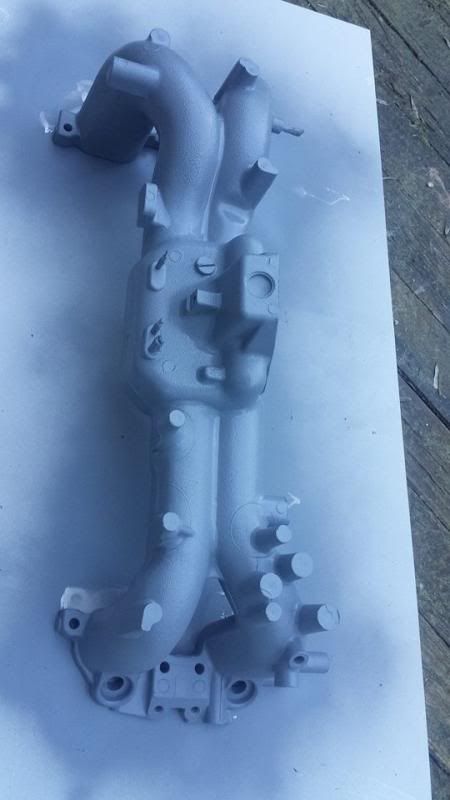
Gave it a bit of a clean up before any primer was applied
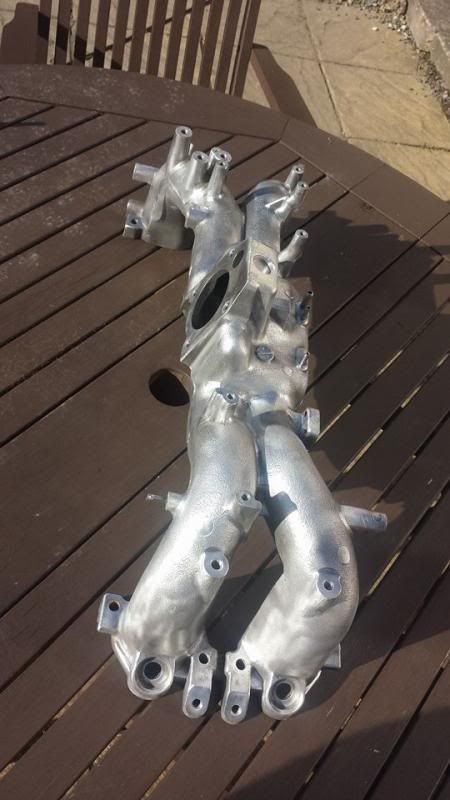
Then masked up the parts I didn't want to paint
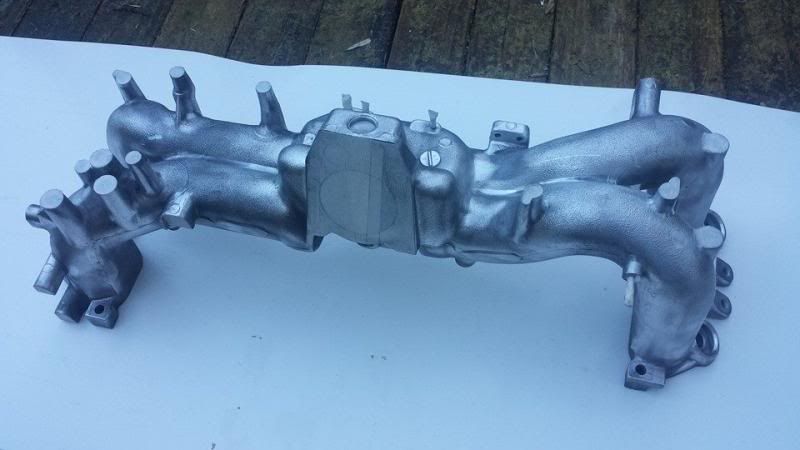
Next was a few coats of high build primer
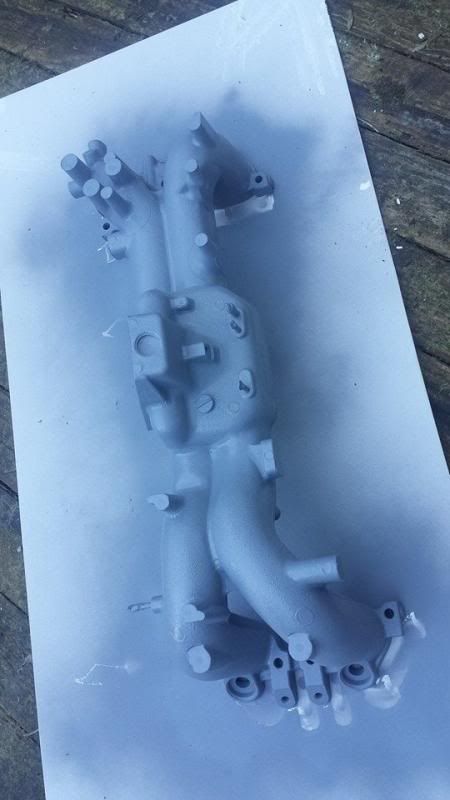
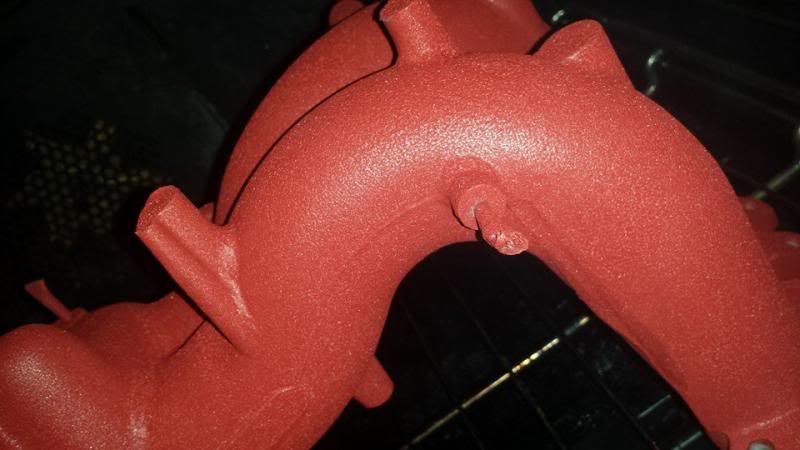
Next was for the high temp wrinkle paint, I love this paint because it always looks very oem , the key to getting a nice even wrinkle with this paint is to keep it nice and warm as its drying. I knew there was a good reason we brought such a big oven
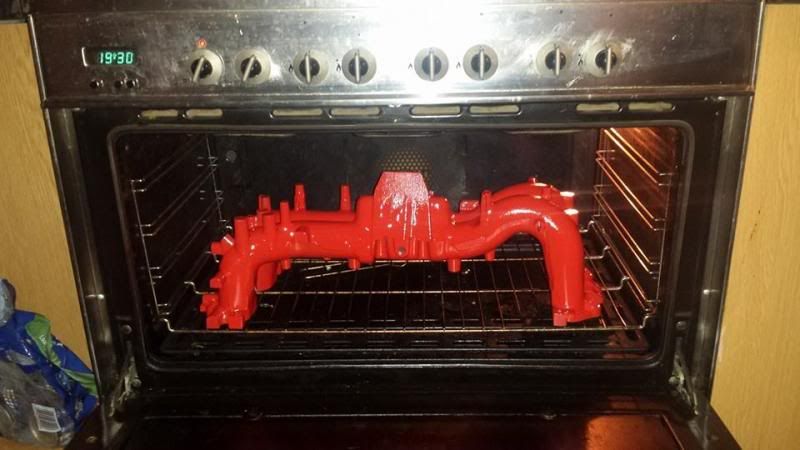
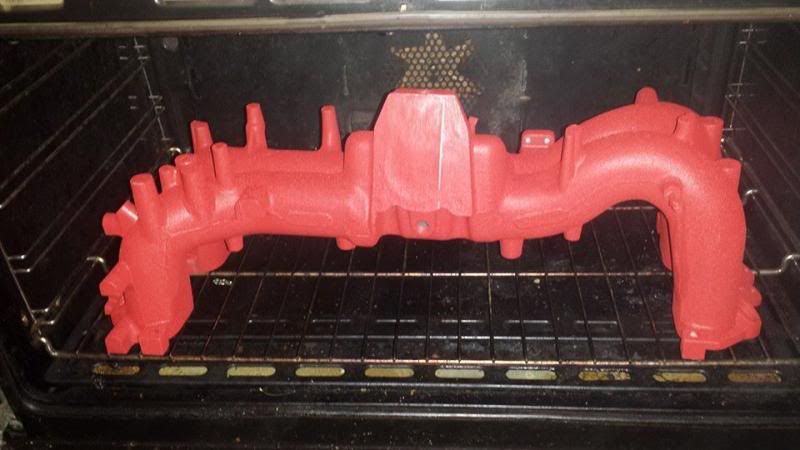
As you can see the oven gives it a very nice even wrinkle finish, be warned tho it also stinks the house out and my wife has just said wtf is that in my oven  I put fish fingers in for tea and that's what came out, honest
The new dirty inlet manifold


Gave it a bit of a clean up before any primer was applied


Then masked up the parts I didn't want to paint


Next was a few coats of high build primer


Next was for the high temp wrinkle paint, I love this paint because it always looks very oem , the key to getting a nice even wrinkle with this paint is to keep it nice and warm as its drying. I knew there was a good reason we brought such a big oven


As you can see the oven gives it a very nice even wrinkle finish, be warned tho it also stinks the house out
and my wife has just said wtf is that in my oven I put fish fingers in for tea and that's what came out, honest
Trending Topics
Martin
Sunday update,
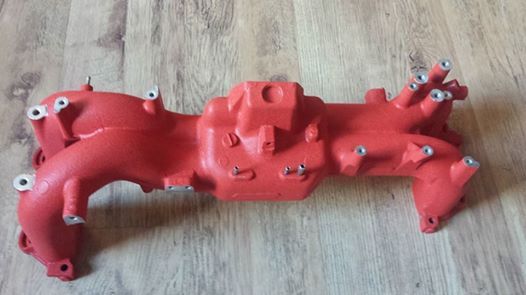
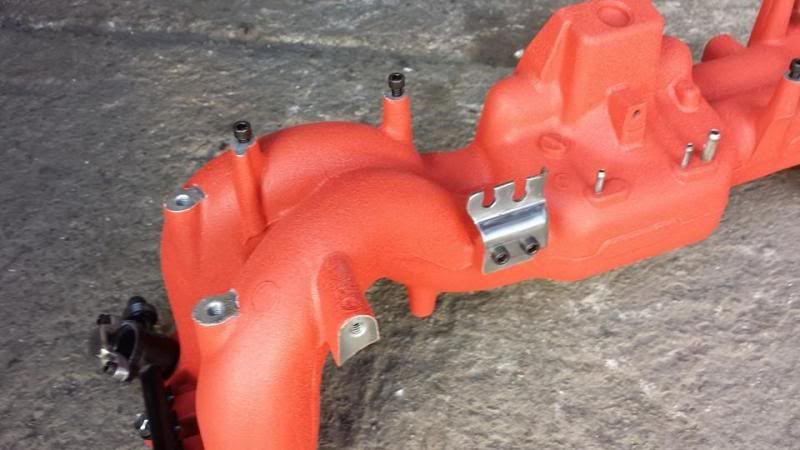
Got the inlet manifold finished and looking good
Then I started to strip off the old inlet manifold. Was quite supprised how much was involved in taking this off, pipes running everywhere , but got it off, now its off tho im going to be doing a few extra bits and bobs that id not planned to do right at this time but since the manifold is off I may aswel do them. Starting with parrellel fuel mod, ive ordered some an6 fittings so as soon as they get here I will crack on with modding my fuel rails.
Im also going to change the rad for an alloy one, make a new alloy header tank, a new alloy washer bottle and a catch can setup so I don't have to connect back up all the standard pipes that I removed
Got the inlet manifold finished and looking good


Then I started to strip off the old inlet manifold. Was quite supprised how much was involved in taking this off, pipes running everywhere , but got it off, now its off tho im going to be doing a few extra bits and bobs that id not planned to do right at this time but since the manifold is off I may aswel do them. Starting with parrellel fuel mod, ive ordered some an6 fittings so as soon as they get here I will crack on with modding my fuel rails.


Im also going to change the rad for an alloy one, make a new alloy header tank, a new alloy washer bottle and a catch can setup so I don't have to connect back up all the standard pipes that I removed
Another little update , done a bit more today, as you can see its taking a bit of time due to work commitments, im trying to work on a customers car so dont get much time on my own
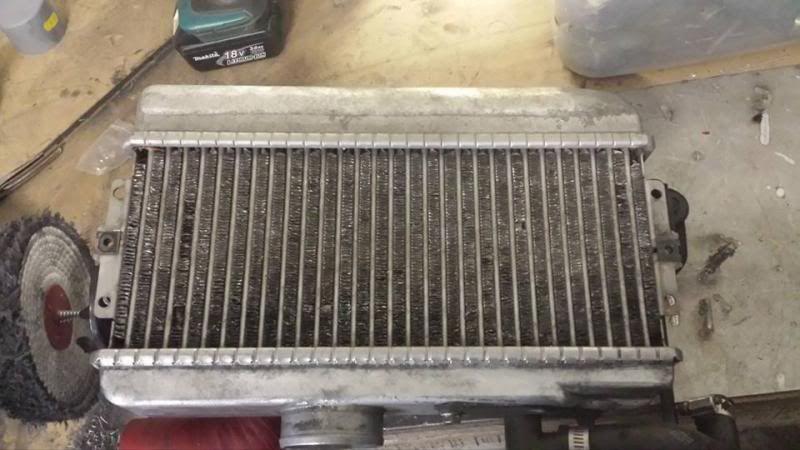
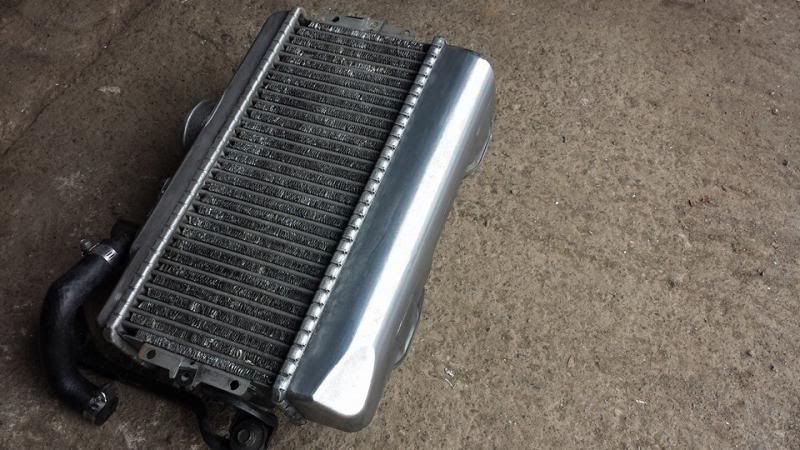
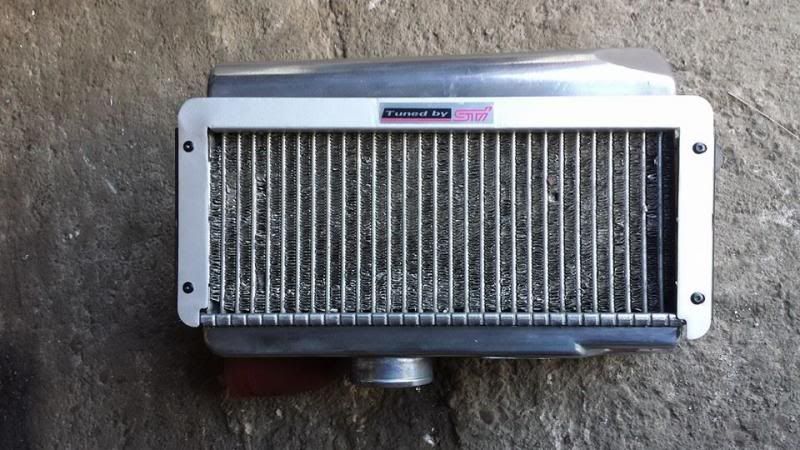
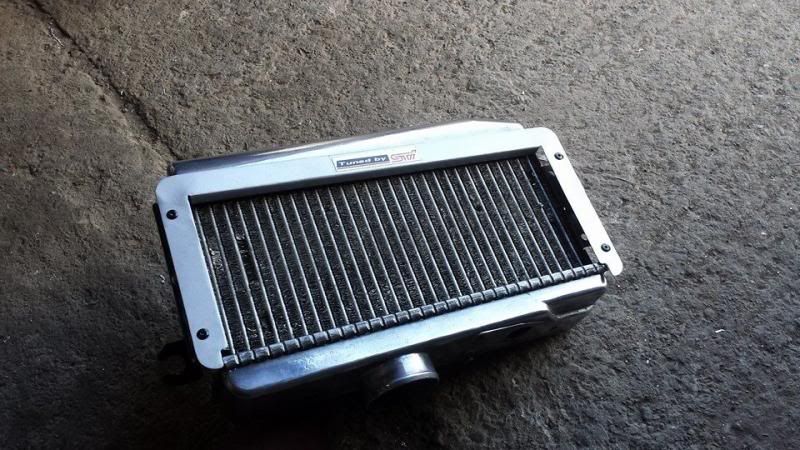
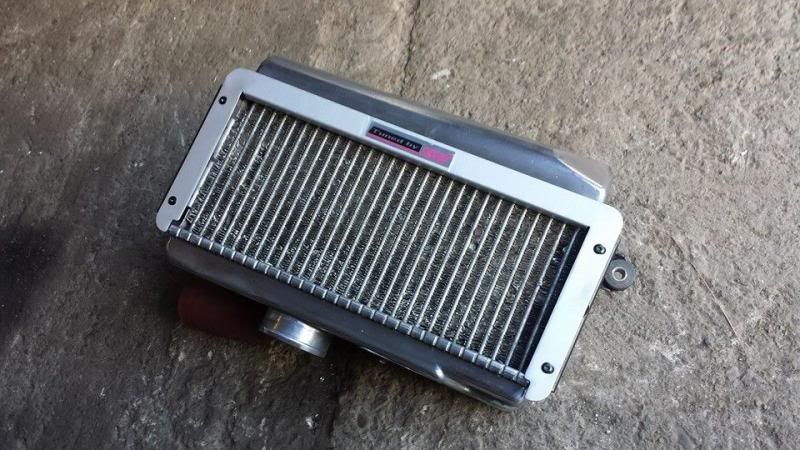
Started with my intercooler that was looking a bit tatty so got to work with a nail file and straightened some fins
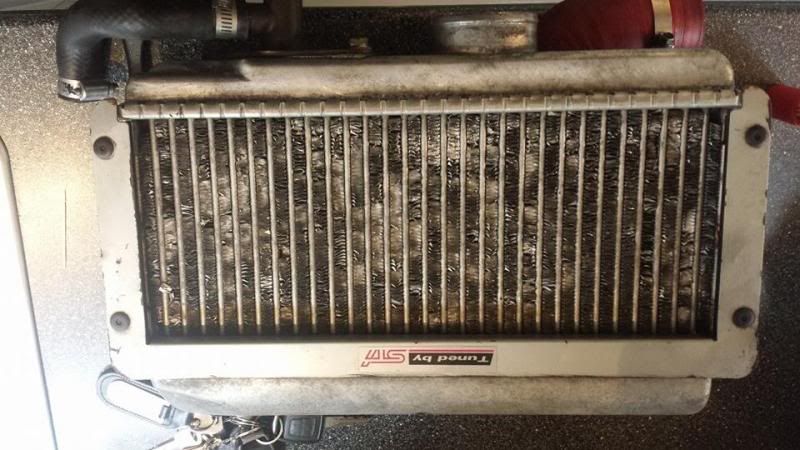
A very boring job but needed doing, looks much better and should work better now too. Then I started making the rest of the cooler look a little fresher
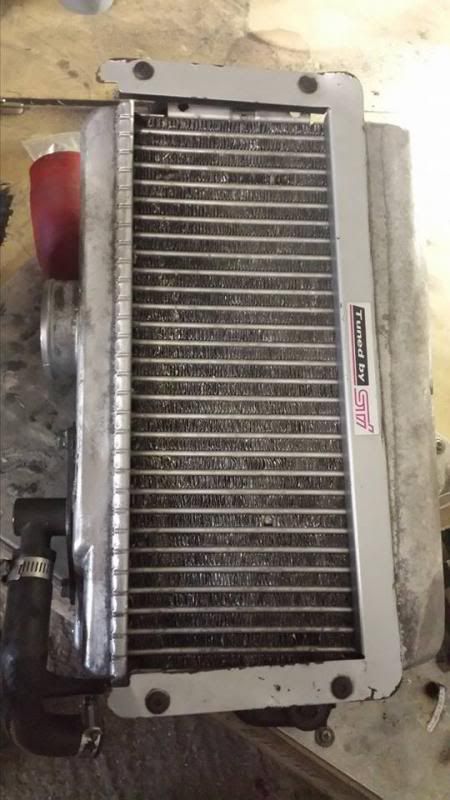
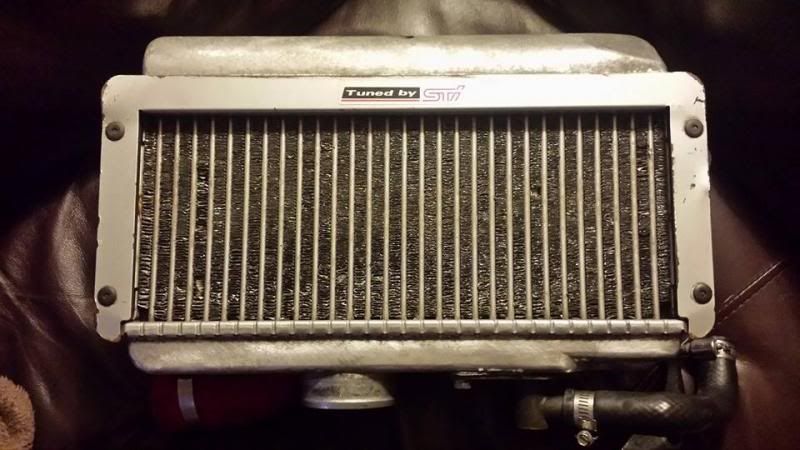
Removed the outer plate that was looking a little tatty and rubbed it down, got all the old paint off and rust
Masked up the sti badge and gave it a quick coat of etch primer and silver paint
Then I thought id see what the cooler would polish up like so I did the top of it as a trial, came out quite well so im going to do the whole thing
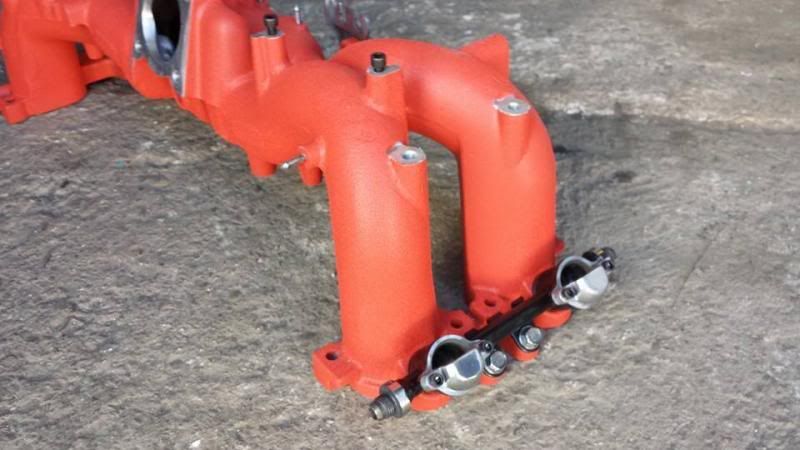
I also made a start on my fuel rail conversion, im converting them to an6 for a parallel rail setup

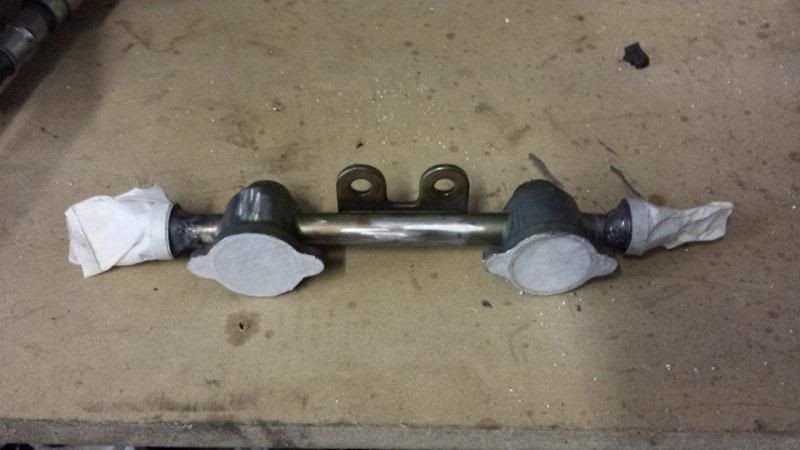
An6 fittings all welded on, masked it up and will be ready for primer and paint once ive done the other side over the weekend
Should hopfuly have another update over the weekend
Started with my intercooler that was looking a bit tatty so got to work with a nail file and straightened some fins


A very boring job but needed doing, looks much better and should work better now too. Then I started making the rest of the cooler look a little fresher

Removed the outer plate that was looking a little tatty and rubbed it down, got all the old paint off and rust


Masked up the sti badge and gave it a quick coat of etch primer and silver paint

Then I thought id see what the cooler would polish up like so I did the top of it as a trial, came out quite well so im going to do the whole thing

I also made a start on my fuel rail conversion, im converting them to an6 for a parallel rail setup


An6 fittings all welded on, masked it up and will be ready for primer and paint once ive done the other side over the weekend
Should hopfuly have another update over the weekend
Last edited by type-ellis; Apr 25, 2014 at 10:39 PM.
Few pics from a couple of bits I got done today.
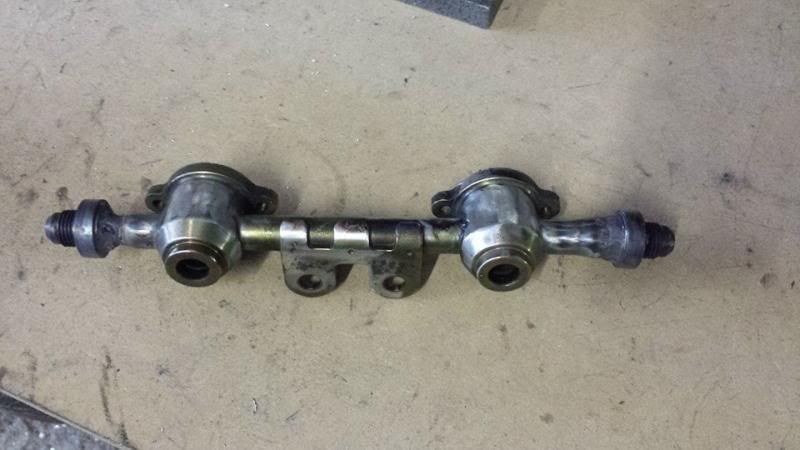
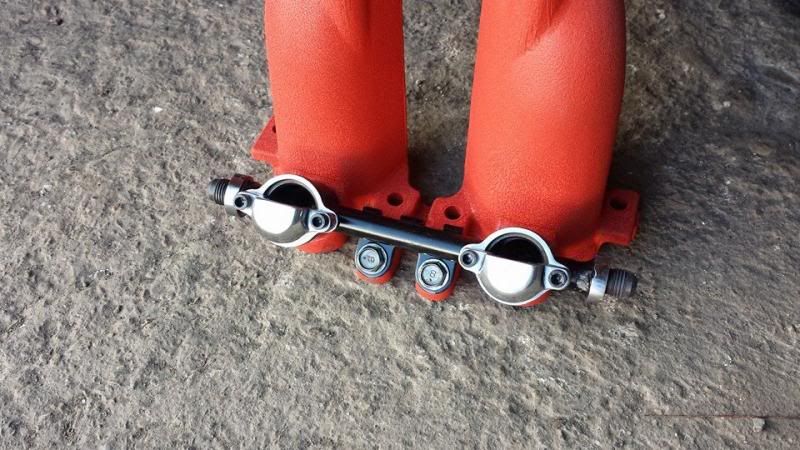
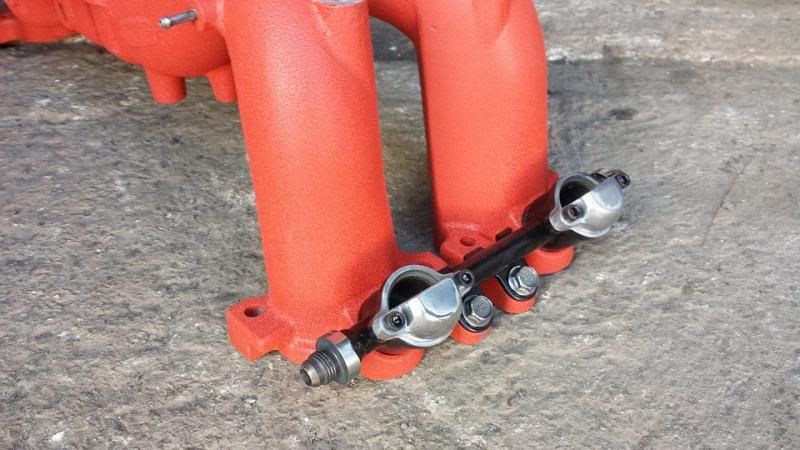
I finished converting the other fuel rail to an6 and gave it a lick of paint.
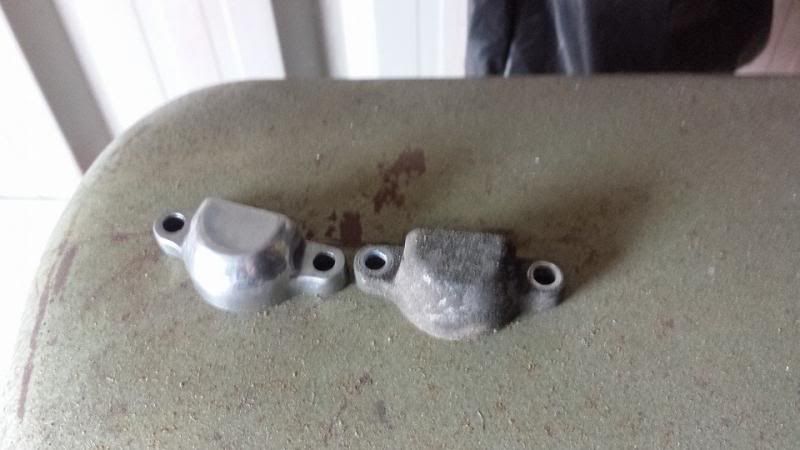
I also gave the injector caps a polish, as you can see they were pretty dirty
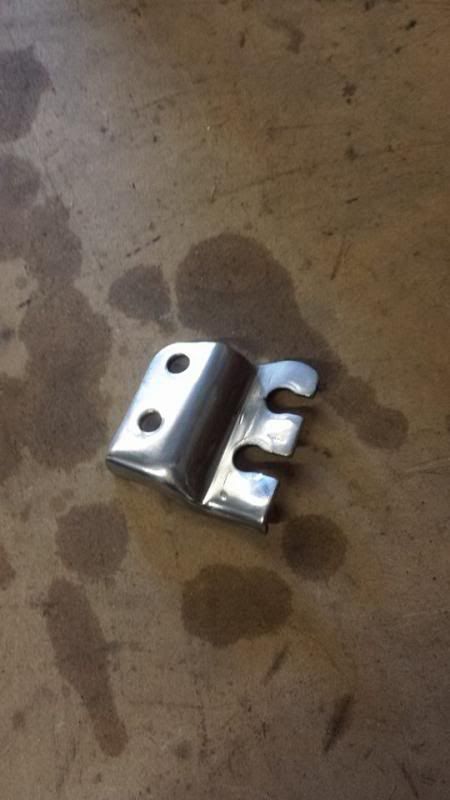
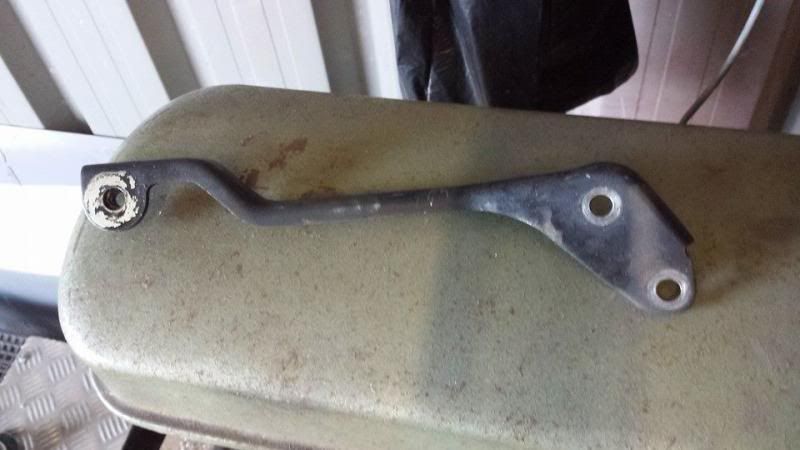
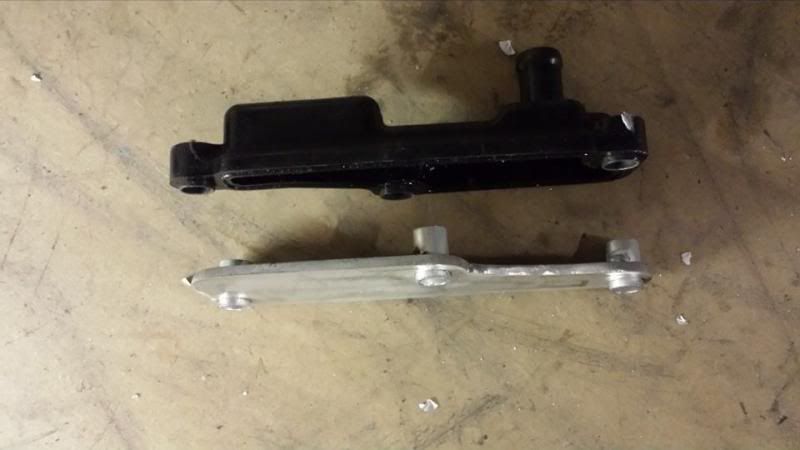
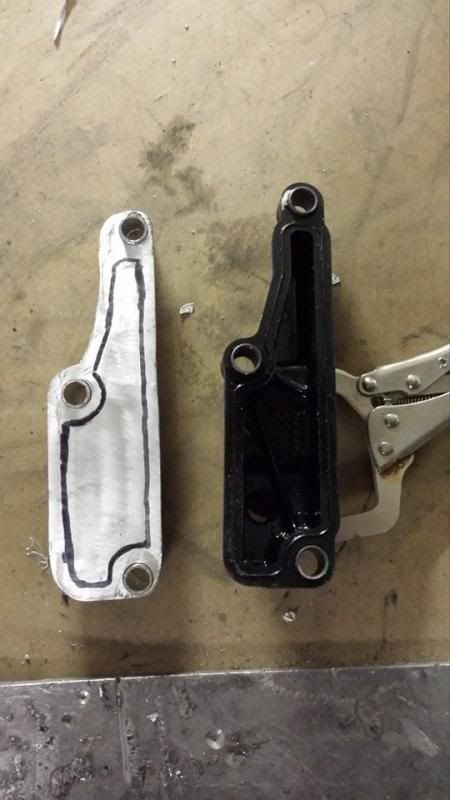
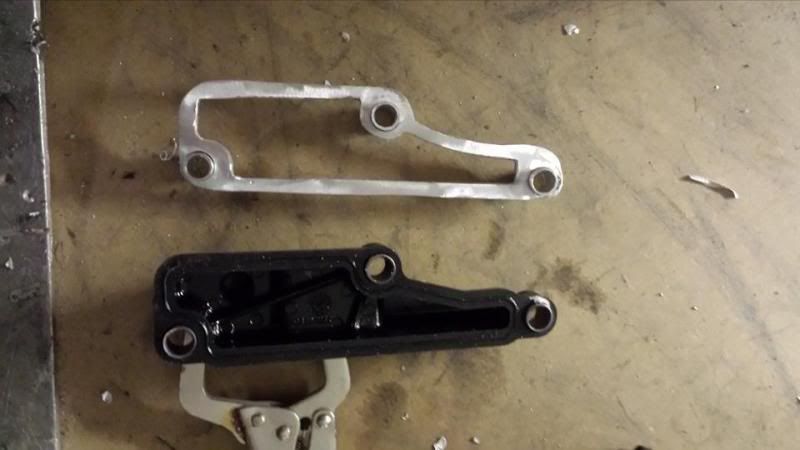
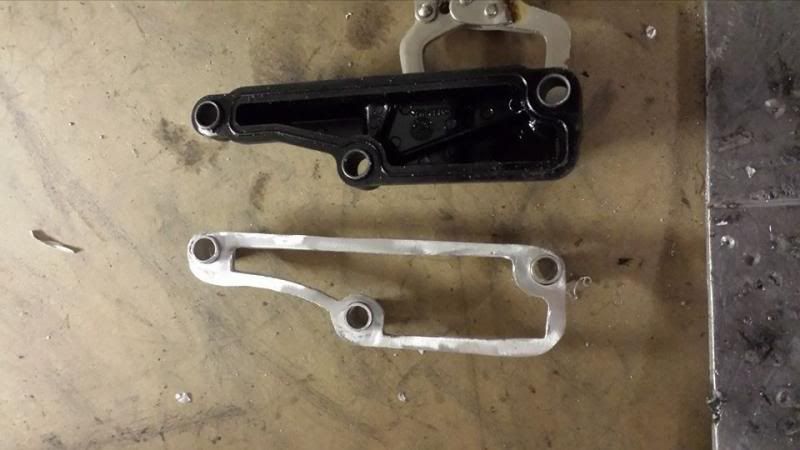
And the same with the throttle cable bracket
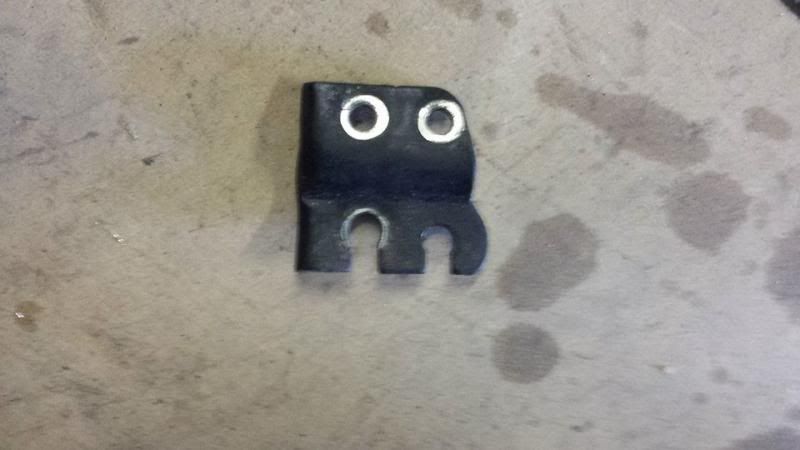
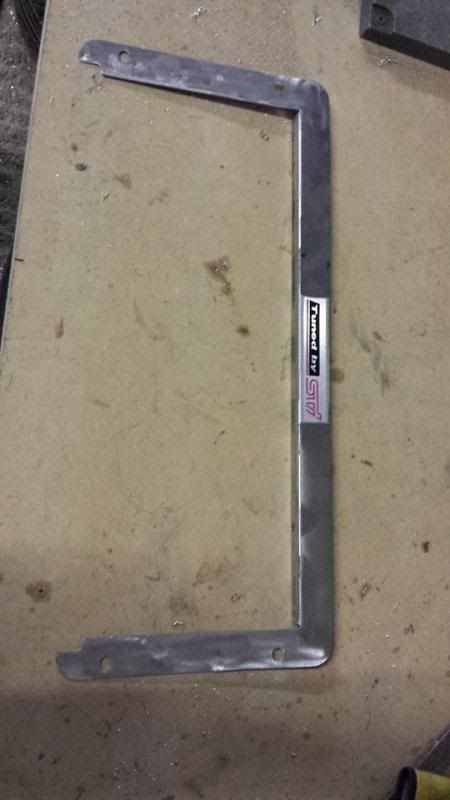
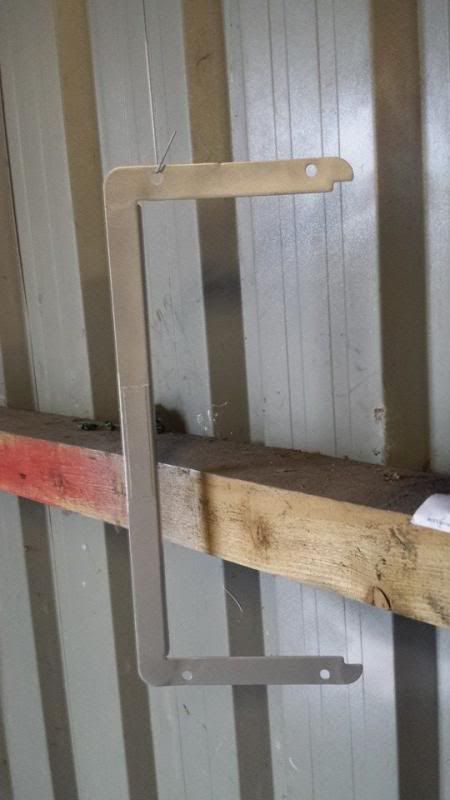
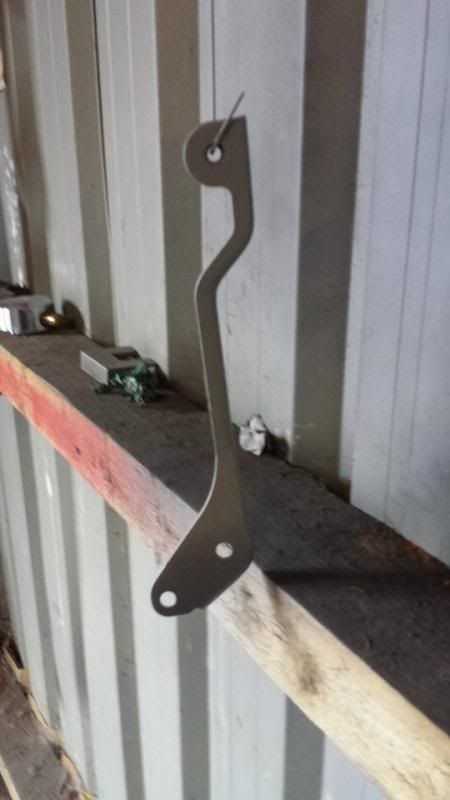
Also gave this intercooler bracket a clean and a lick of primer ready to paint
I then re assembled my intercooler with new black rivets after painting the surround and polishing it up a bit, quite happy with how it came out
I then polished up the bolts that hold the fuel rail on and fitted new bolts in the injector caps then put it all back together with my modified rails to see what it looked like.
And also fitted the polished throttle cable bracket back on
That's all I got done today, quite happy with how its coming along, cant wait to get it all in the engine bay tho
I finished converting the other fuel rail to an6 and gave it a lick of paint.


I also gave the injector caps a polish, as you can see they were pretty dirty

And the same with the throttle cable bracket


Also gave this intercooler bracket a clean and a lick of primer ready to paint


I then re assembled my intercooler with new black rivets after painting the surround and polishing it up a bit, quite happy with how it came out


I then polished up the bolts that hold the fuel rail on and fitted new bolts in the injector caps then put it all back together with my modified rails to see what it looked like.


And also fitted the polished throttle cable bracket back on

That's all I got done today, quite happy with how its coming along, cant wait to get it all in the engine bay tho
Thanks very much sj, im taking my time with it, if im going to do it might aswell do it right. Ive just ordered all my fittings for the parallel fuel lines so will just plod along with other jobs until they arrive. Next job it to tidy up the tb ready to bolt onto the inlet.
Looks really good work there. Intercooler looks lot better as well. Tried to do mine but just got bored.
Done some similar stuff to my scoob as your doing to your's. Keep up the good work mate
https://www.scoobynet.com/959279-sti...arrival-2.html
Done some similar stuff to my scoob as your doing to your's. Keep up the good work mate
https://www.scoobynet.com/959279-sti...arrival-2.html
cheers fella will have a look over your build thread in a second
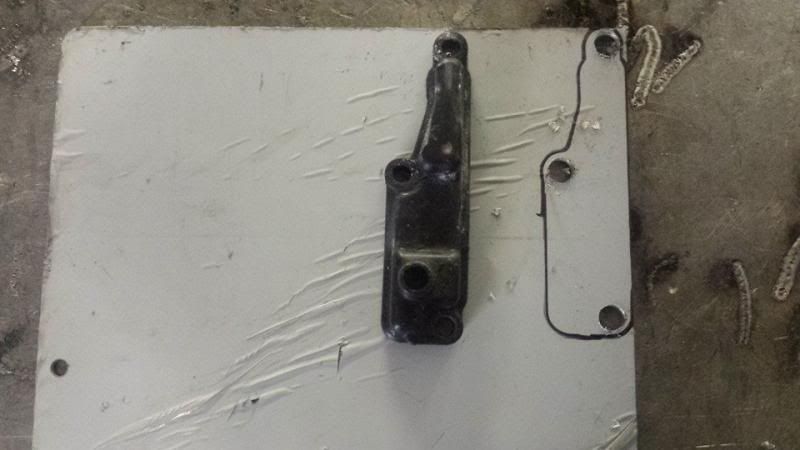
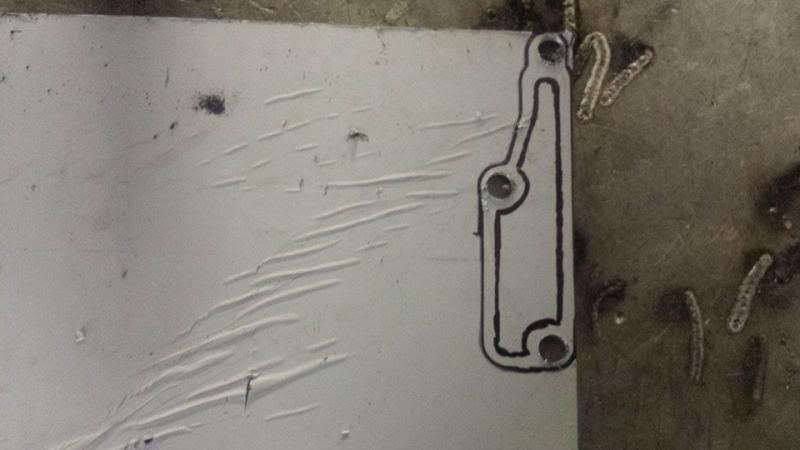
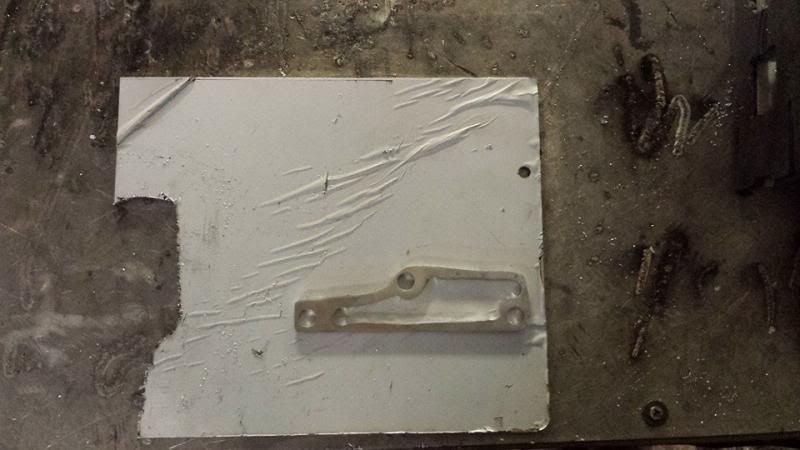
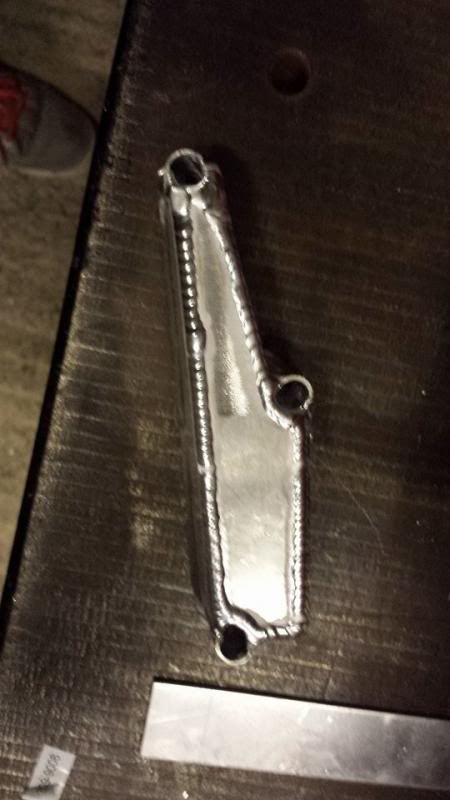
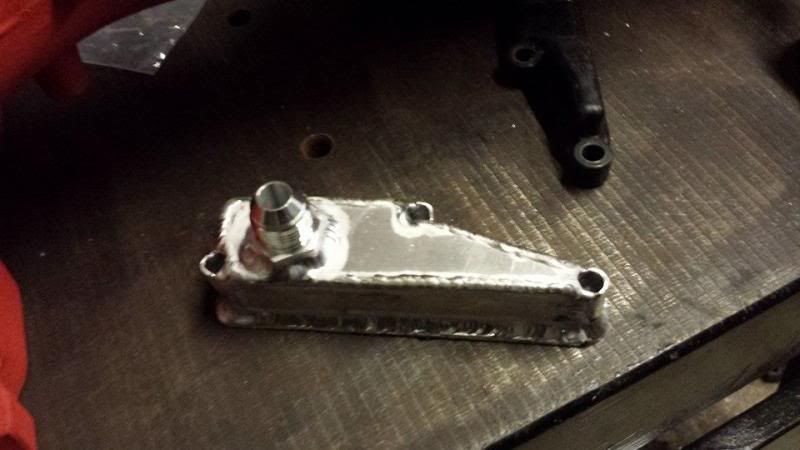
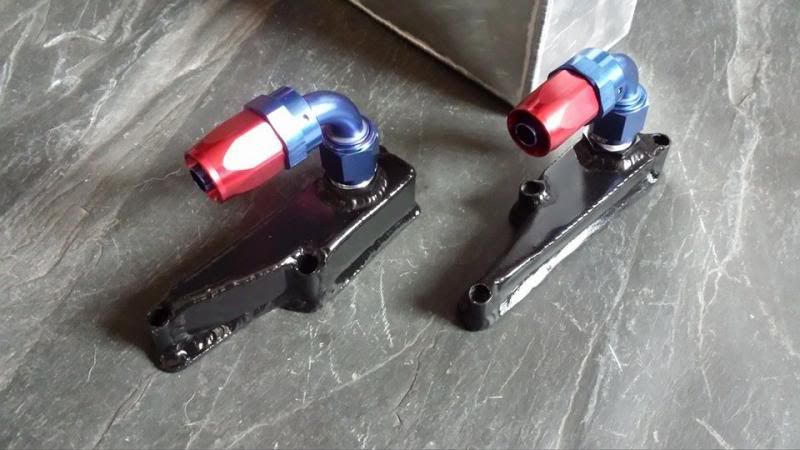
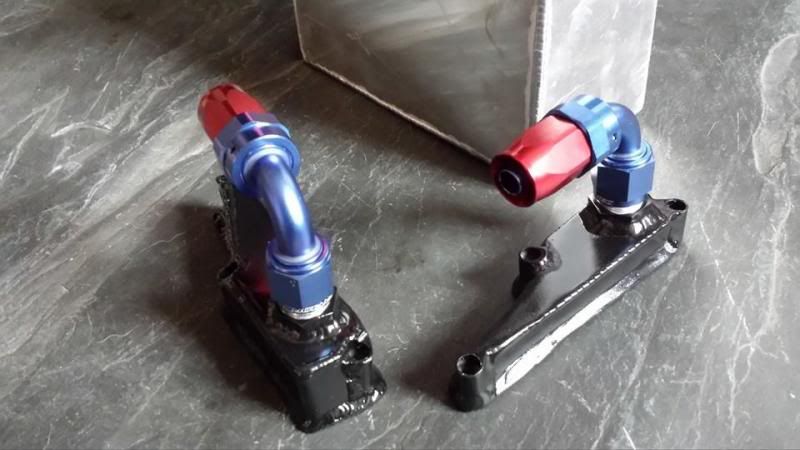
Ive done a bit more today. This mod is more about me being a big tart, many of you may think its a bit extreme to just get a posh alloy shiny fitting but hey I like to be different
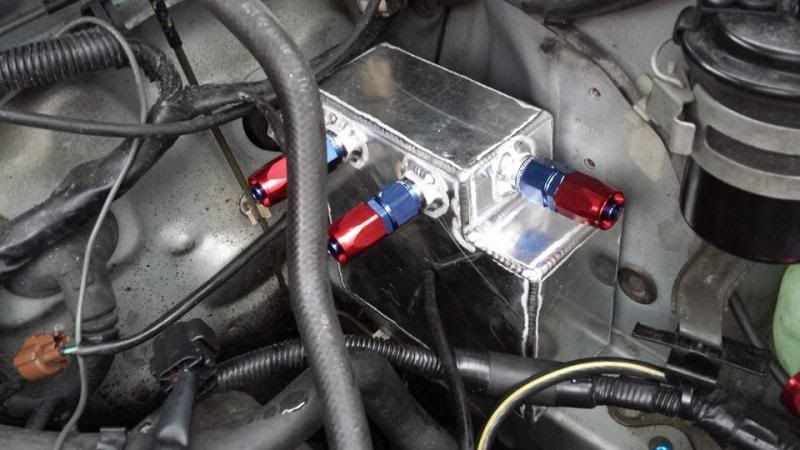
This is the start of my new breather catch tank setup
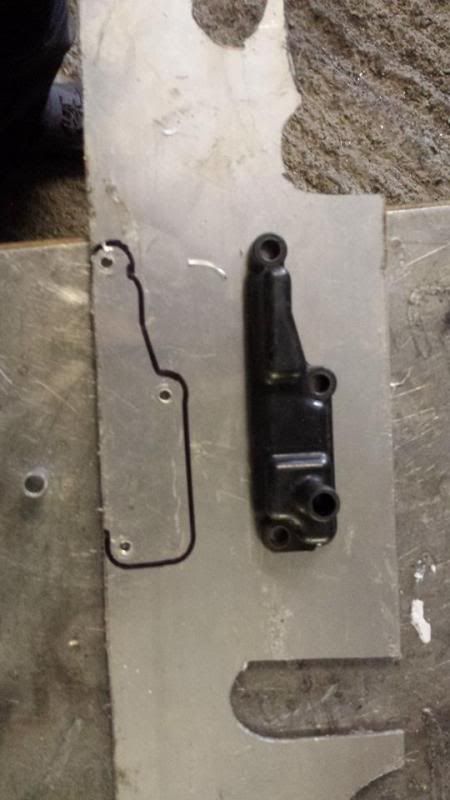
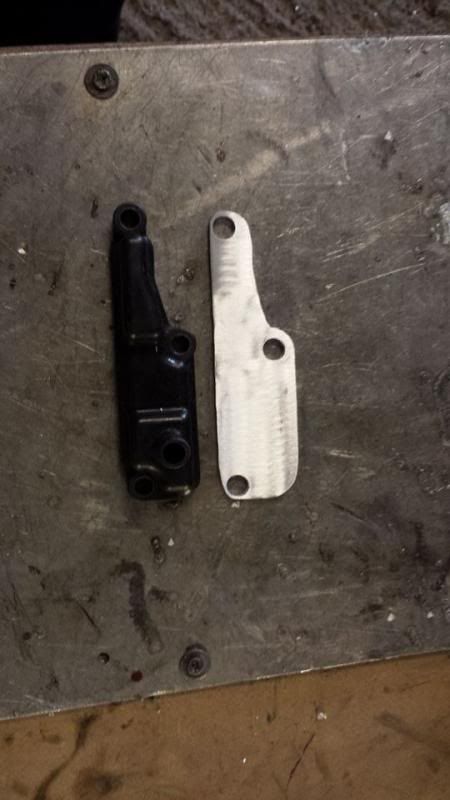
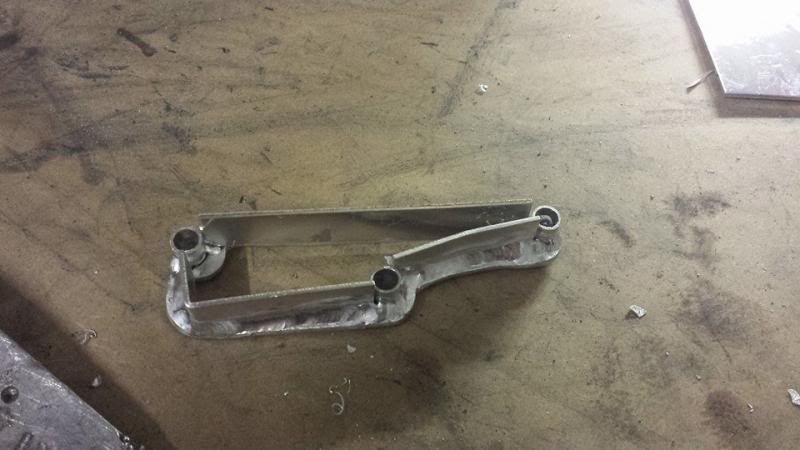
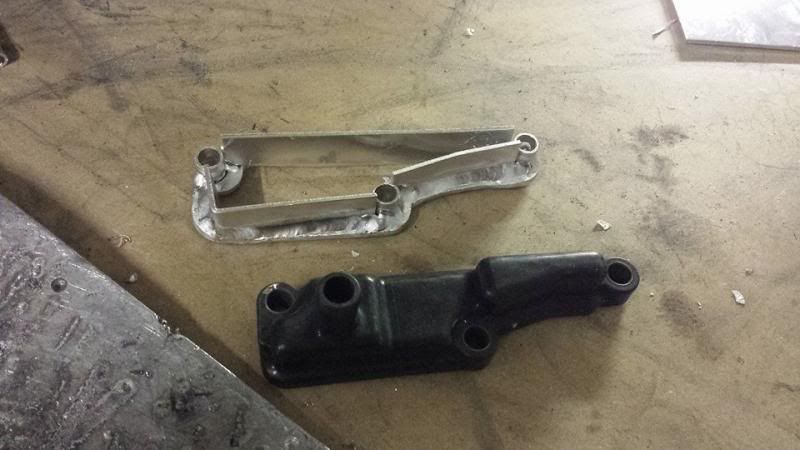
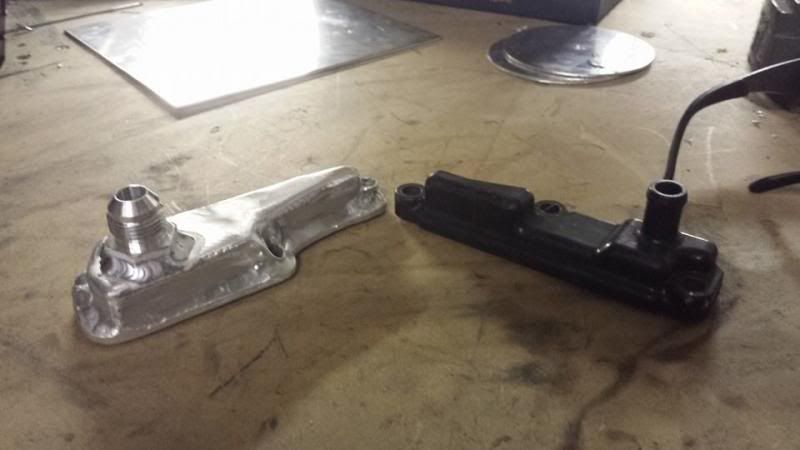
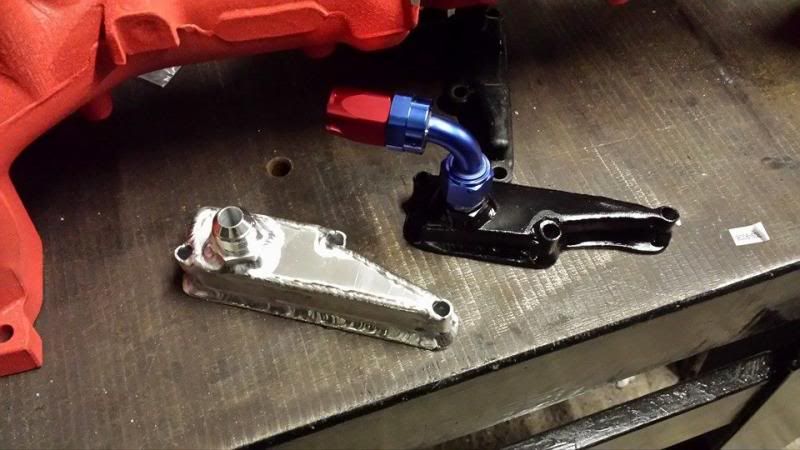
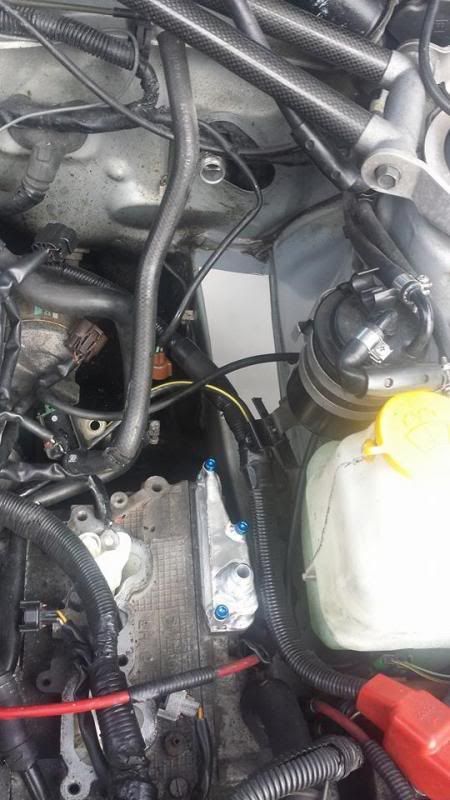
So now I can bolt a nice posh an fitting onto my rocker cover and fit the same fittings onto a catch can, end result should look quite nice under the bonnet
Ive done a bit more today. This mod is more about me being a big tart, many of you may think its a bit extreme to just get a posh alloy shiny fitting but hey I like to be different
This is the start of my new breather catch tank setup


So now I can bolt a nice posh an fitting onto my rocker cover and fit the same fittings onto a catch can, end result should look quite nice under the bonnet
cheers guys, im going to get these ones finished for my car and then if people like the setup then I will see how much interest there is in me putting some kits together with a catch tank.
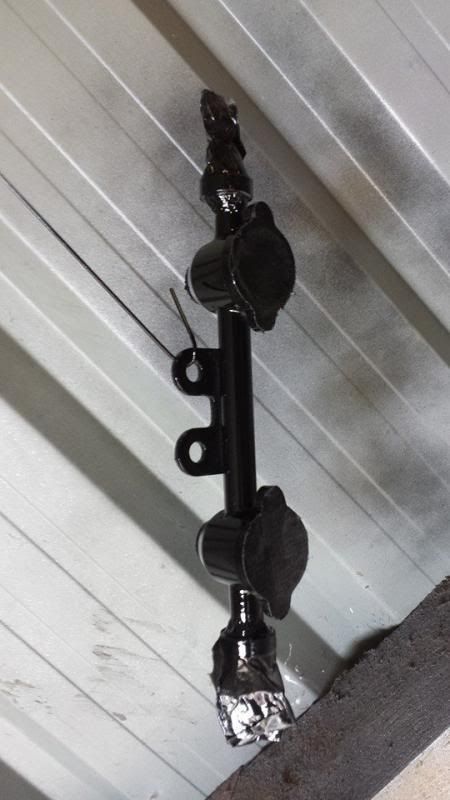
Ok guys the car has been off the road a few weeks now, been hard juggling work and getting the car back on the road. anyway here is a few more pics of what ive been upto.
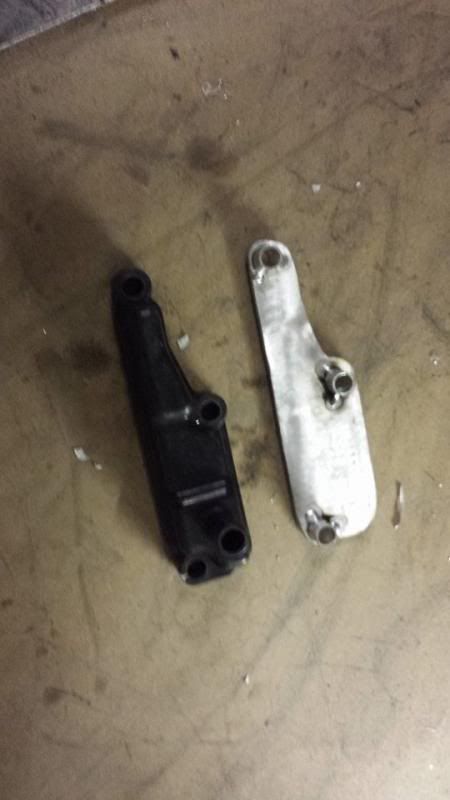
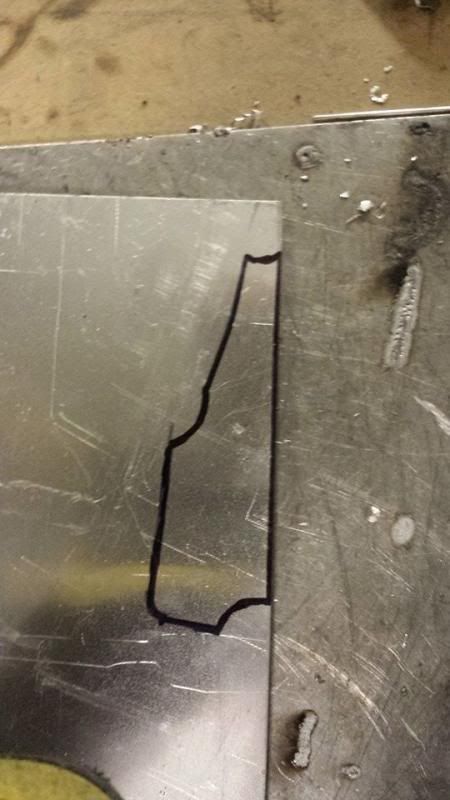
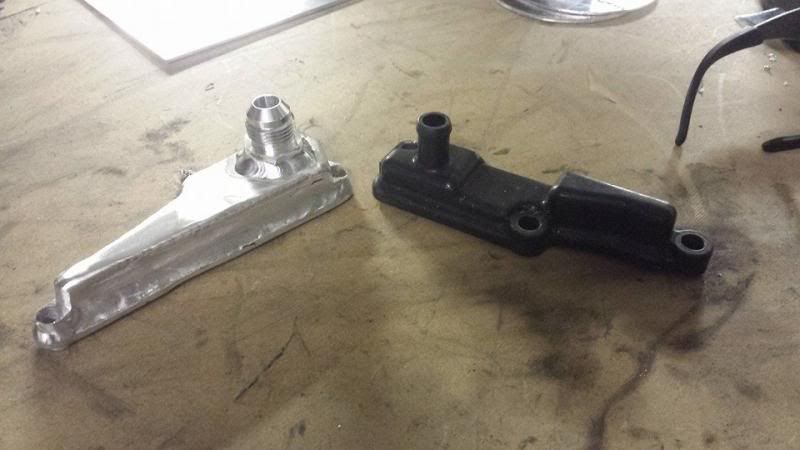
Had to make the breather for the other side of the engine

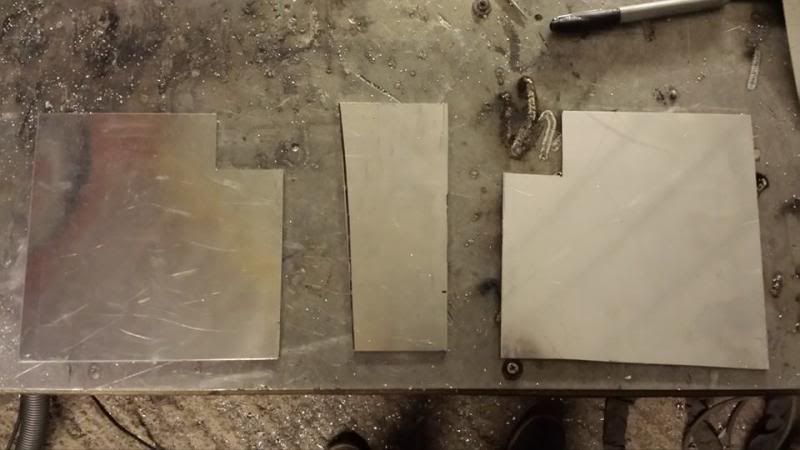
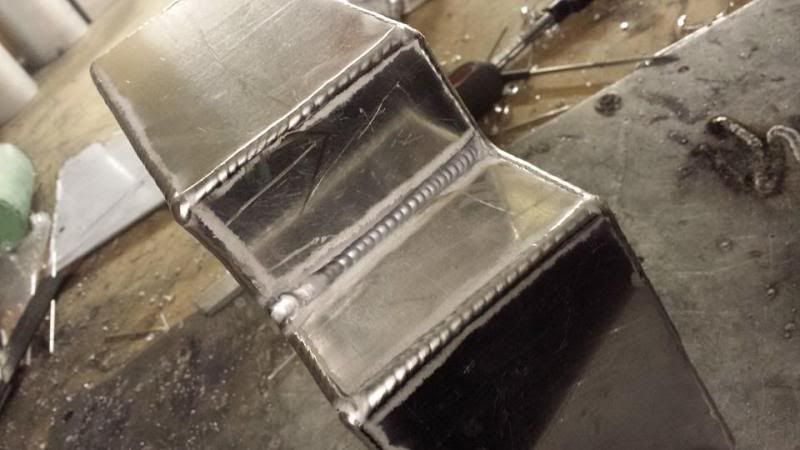
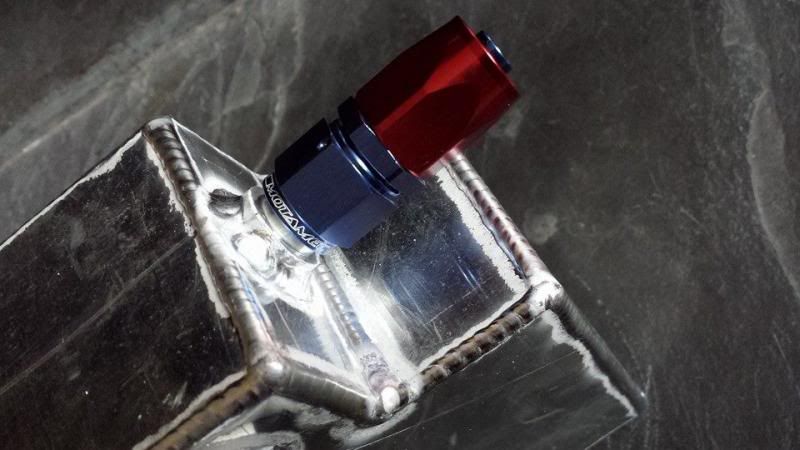
Then it was time to make a tank to go with my new breathers

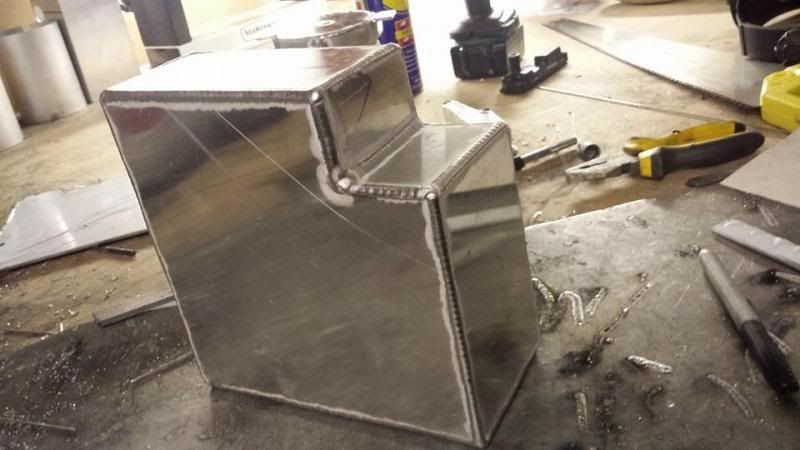
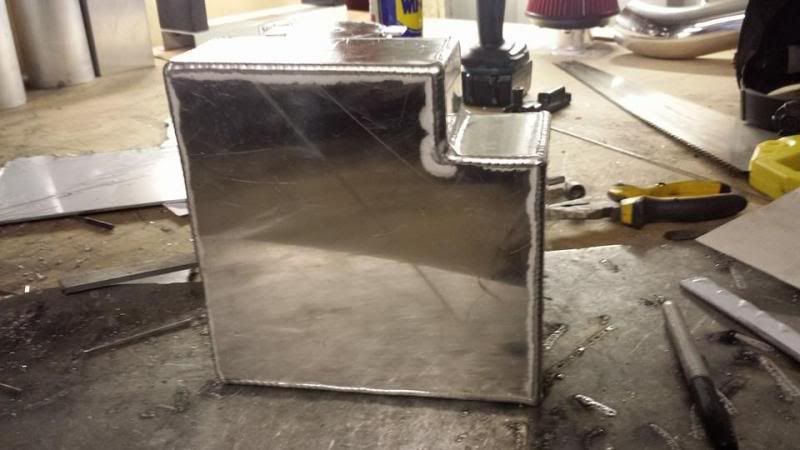
Then with the basic tank made I added some fittings to match my rockers
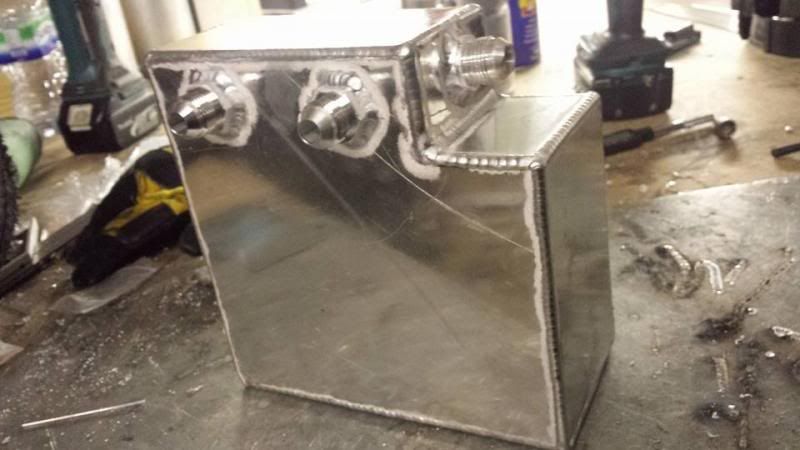
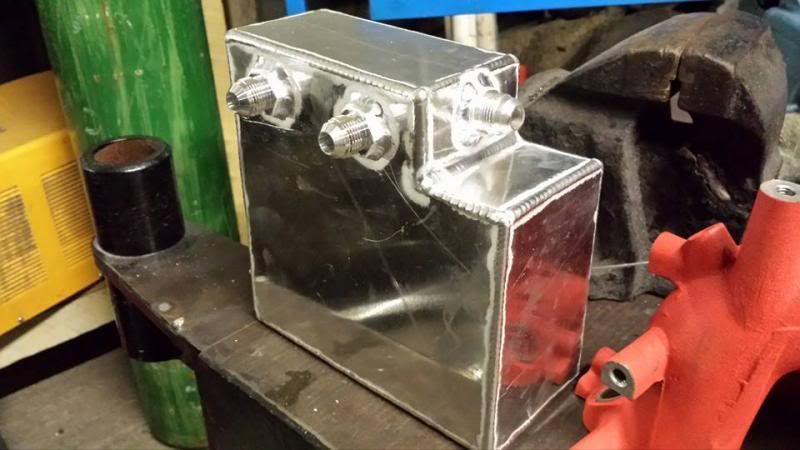
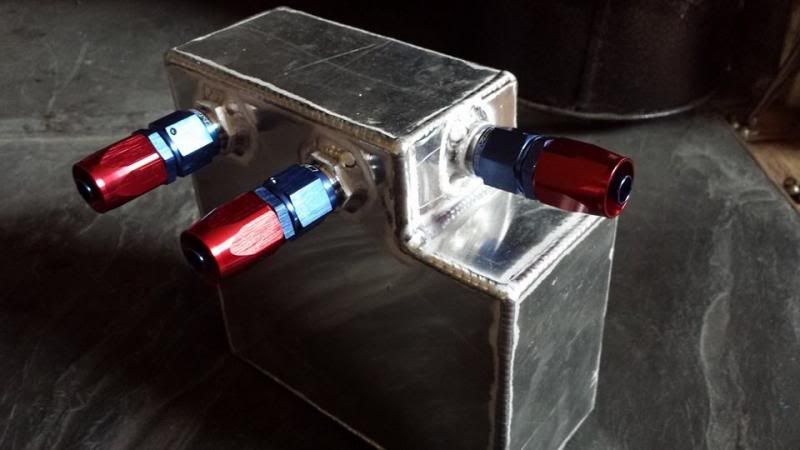
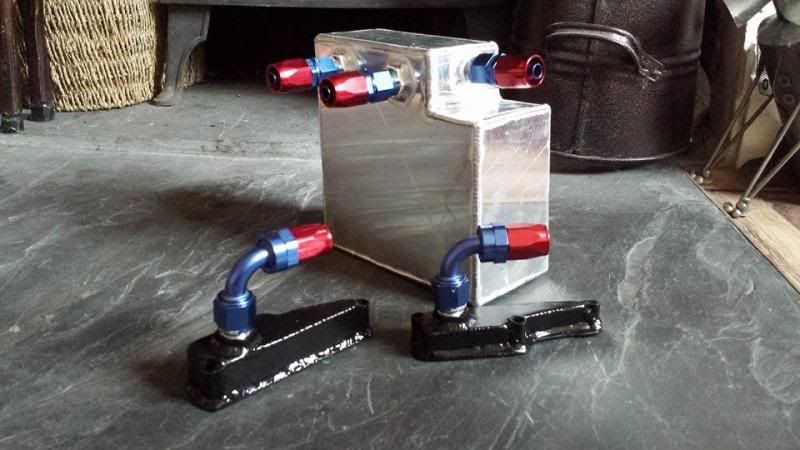
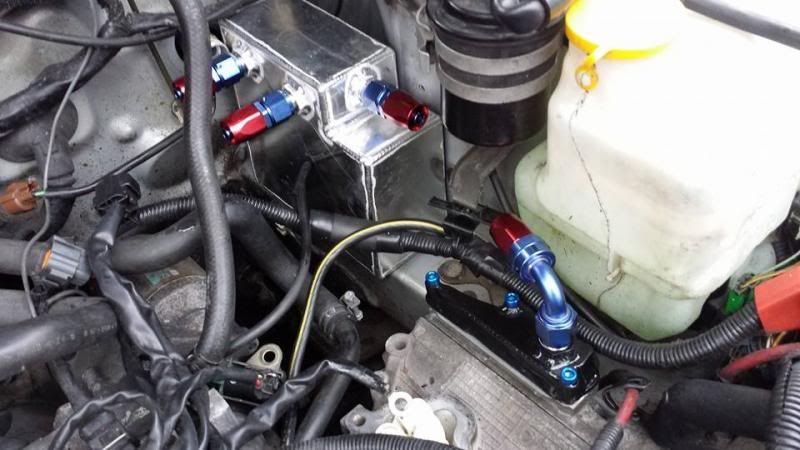

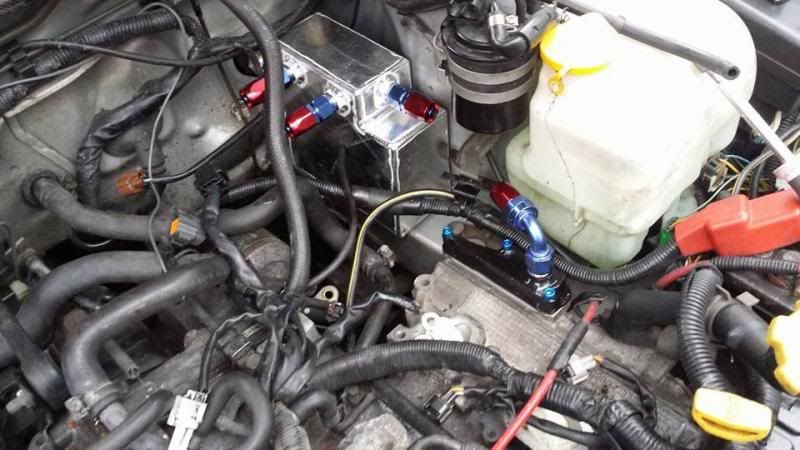
So that's where im at right now. Tommrow I will add a fixing bracket to the catch tank and a vent ontop. Hopefuly all my braided hose will arrive tommrow too so I can get it all plumbed up. Lots of pics I know so sorry if ive gone ott but I know some people love pics
Another update tommrow.
cheers
Had to make the breather for the other side of the engine


Then it was time to make a tank to go with my new breathers


Then with the basic tank made I added some fittings to match my rockers


So that's where im at right now. Tommrow I will add a fixing bracket to the catch tank and a vent ontop. Hopefuly all my braided hose will arrive tommrow too so I can get it all plumbed up. Lots of pics I know so sorry if ive gone ott but I know some people love pics
Another update tommrow.
cheers
Thanks mate, I just wish I had a bit more time to put into it to get it done faster.
Whats your plans mate?
I want to do a tidy job of the breather setup as im hoping to put some kits together to see if they sell.
Whats your plans mate?
I want to do a tidy job of the breather setup as im hoping to put some kits together to see if they sell.
Scooby Senior
iTrader: (51)
Joined: Nov 2005
Posts: 20,491
Likes: 2
From: Wherever I park my car, that's my home
I know what you mean about time - there's never enough of it
Mine is oing to be a lain and simple silicon hose and jubilee clip job for the breather system...

Mine is oing to be a lain and simple silicon hose and jubilee clip job for the breather system...


