plucked up the nerve to start drilling into my car!
 26 June 2011, 03:45 PM
#1
Scooby Newbie
Thread Starter
iTrader: (1)

Join Date: Aug 2009
Posts: 20
Likes: 0
Received 0 Likes
on
0 Posts
well i just had to get this fitted, as it just come back from prodriverules who has done a fantastic job of painting it  its something i've really wanted on the car to finish its looks, to me the car looks unfinished without it
  so got a roll of masking tape and some paper, made a template plucked up a bit of courage and started drilling into my car
  and amazingly all the holes lined up!! wasn't quite sure what to do with the big electrical connection from the spoiler as i really didn't want to drill such a big hole!! but the it occurred to me take the little one from the car to the spoiler and not the other way round
so here it is, i think it looks great!!! along with my recently tinted window, done by prestige wrap, so what you all think


its something i've really wanted on the car to finish its looks, to me the car looks unfinished without it so got a roll of masking tape and some paper, made a template plucked up a bit of courage and started drilling into my car and amazingly all the holes lined up!! wasn't quite sure what to do with the big electrical connection from the spoiler as i really didn't want to drill such a big hole!! but the it occurred to me take the little one from the car to the spoiler and not the other way round so here it is, i think it looks great!!! along with my recently tinted window, done by prestige wrap, so what you all think


Trending Topics
 26 June 2011, 07:31 PM
#9
Scooby Regular
As said on UKL Andy FOOKIN lovely!
You gotta colour code ya LPG cap to disguise it a bit!
It's strange but a lil rear spoiler really changes the look of the Leggy!
Russ!
You gotta colour code ya LPG cap to disguise it a bit!
It's strange but a lil rear spoiler really changes the look of the Leggy!
Russ!
27 June 2011, 08:35 AM
#10
Scooby Newbie
Thread Starter
iTrader: (1)
Join Date: Aug 2009
Posts: 20
Likes: 0
Received 0 Likes
on
0 Posts
dates!!!! for the pix let me know so i can get it in the diary
 03 July 2011, 10:33 PM
#12
Scooby Regular
Join Date: Feb 2009
Posts: 197
Likes: 0
Received 0 Likes
on
0 Posts
Yeah, the RFRB rear spoiler does really finish it off well, took me ages to find one, I never did put the Tommy Kaira (whale tail) one I had on it (luckily) it was just too 'in yer face' for me.
Paint looks great, and the windows set it off a treat, well done.
Paint looks great, and the windows set it off a treat, well done.

 30 December 2012, 07:32 PM
#15
Scooby Regular
Join Date: Dec 2012
Location: cambridgeshire
Posts: 106
Likes: 0
Received 0 Likes
on
0 Posts
any advice on cutting holes in my bonnet for some vents? not too sure how to as never attempted it before. or is there anywhere that anyone knows of around cambridgeshire that can do it for me? (sorry if posted in wrong forum im still new on here)
30 December 2012, 08:08 PM
#16
Scooby Regular
iTrader: (4)

Join Date: Jul 2001
Location: MSOC..........middlesex subaru owners club
Posts: 10,429
Likes: 0
Received 0 Likes
on
0 Posts
We have done it on our MLR500 lancers with a plasma cutter and it went very well. Also JonMc and Frayz have done roof vent installs so it can be done. I think Frayz used a dremmel and lots of masking tape.
30 December 2012, 08:18 PM
#17
Scooby Senior
iTrader: (51)
Join Date: Nov 2005
Location: Wherever I park my car, that's my home
Posts: 20,491
Likes: 0
Received 2 Likes
on
2 Posts
Rotary cutters are the way forward. Make sure you've got spare cutting discs( I use a diamond cutter). Don't use a jigsaw, it'll just buckle the metal. If you can get a plasma cutter great, but it'll be overkill (and requires practice) if you have an alloy bonnet
 01 January 2013, 03:24 AM
#20
Scooby Regular
Join Date: Dec 2012
Location: cambridgeshire
Posts: 106
Likes: 0
Received 0 Likes
on
0 Posts
hi sorry to bother again anyone know where i can get the rotary cutter online for fairly cheap i had a look on fleabay but cant seem to really find anyone, only ones which do come up are manual ones for sewing :S lol... also i am planning to fit a bonnet vent for induction kit... (stupid question) when it rains is the going to affect the air filter or performance as rain could get into filter??
05 January 2013, 08:57 AM
#23
Scooby Regular
Join Date: Dec 2012
Location: cambridgeshire
Posts: 106
Likes: 0
Received 0 Likes
on
0 Posts
hi all just another quick couple of questions regarding cutting holes in bonnet i have the vents and the cutter with diamond discs... someone mentioned masking tape? what exactly do i need to do to prep the area for cutting do i mask the entire area including the area which is to be cut out and then cut through the tape? and how much do i use (layers)? also would anyone advise removing the bonnet from the car to cut holes or leave on and be careful? any info on this would be a great help as i have never cut any metal FULL STOP! so when it comes to this i am a complete noob i also welcome any criticism 
i also welcome any criticism
05 January 2013, 09:54 AM
#24
Mask up where you will be cutting and the surrounding areas. 1 layer of good quality masking tape will be fine.
Leave the bonnet in place as its secure when bolted to the car. Just prop it open and put a dust sheet over your engine an area under wherever you may cut.
Cut through your tape. Hope that helps.
Leave the bonnet in place as its secure when bolted to the car. Just prop it open and put a dust sheet over your engine an area under wherever you may cut.
Cut through your tape. Hope that helps.
05 January 2013, 10:00 AM
#25
Scooby Senior
iTrader: (51)
Join Date: Nov 2005
Location: Wherever I park my car, that's my home
Posts: 20,491
Likes: 0
Received 2 Likes
on
2 Posts
The masking tape is to protect the paintwork so I would mask the full width of the bonnet and as far back as the scoop, a single layer albeit with overlaps should be enough. It may seem overkill but the swarfe can do a lot of damage. It also gives you something you can draw on to mark out the bonnet
Leave the bonnet on as it will be a more stable platform to work with, but wedge it open (a small piece of wood on the slam panel will prevent it closing and keep it firm) and place some plastic sheeting over the engine bay, again to keep the swarfe from filling the nooks and crannies around the engine bay.
Try with the dremel set slow at first, it may take longer but you'll have more control until you develop your hand with it.
05 January 2013, 01:08 PM
#26
Scooby Regular
Join Date: Dec 2012
Location: cambridgeshire
Posts: 106
Likes: 0
Received 0 Likes
on
0 Posts
hi thanks for all the advice you have given to me its all alot clearer now will attemp to fit them next weekend when i have resprayed the vents... once fitted will post a pic to this thread see what you all think p.s jonmc i havent got a scoop its a non turbo  lol
lol
will attemp to fit them next weekend when i have resprayed the vents... once fitted will post a pic to this thread see what you all think p.s jonmc i havent got a scoop its a non turbo lol
11 January 2013, 12:03 AM
#29
Scooby Regular
Join Date: Dec 2012
Location: cambridgeshire
Posts: 106
Likes: 0
Received 0 Likes
on
0 Posts
got a couple of pics so far... not fitted yet but sanded, primed and sprayed no primer pics forgot before i sprayed

<< Left has been sanded (keyed) ready for primer and right is before i done anything to it>>
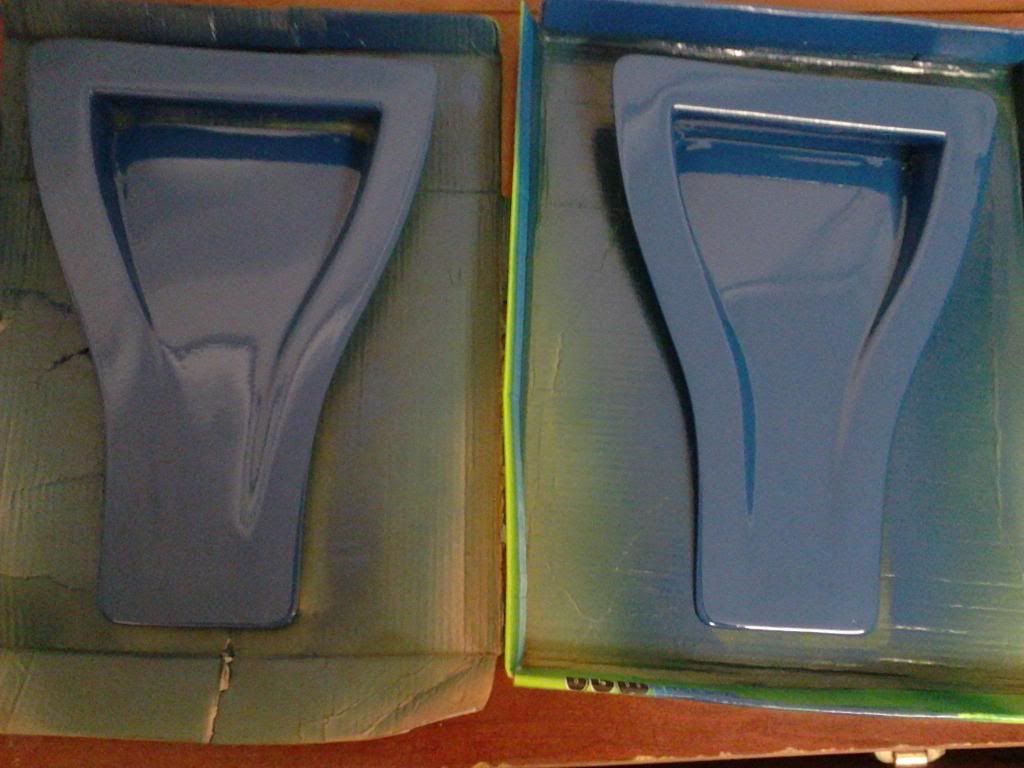
Sprayed and ready to for fitting hopefully sunday
sorry no pics of primer stage completely forgot to take pics... will post more pics of some stages when cutting etc and 1 of final fitting... only dilema i have is what way to have the vent forward or backward facing not too sure any suggestions?
just noticed the sprayed pic looks abit chrap on 1 its just the shadow or something dont look like that in person lol
<< Left has been sanded (keyed) ready for primer and right is before i done anything to it>>
Sprayed and ready to for fitting hopefully sunday
sorry no pics of primer stage completely forgot to take pics... will post more pics of some stages when cutting etc and 1 of final fitting... only dilema i have is what way to have the vent forward or backward facing not too sure any suggestions?
just noticed the sprayed pic looks abit chrap on 1 its just the shadow or something dont look like that in person lol
Last edited by SCOTTIEDOO1990; 11 January 2013 at 12:04 AM.

Thread
Thread Starter
Forum
Replies
Last Post
ossett2k2
Engine Management and ECU Remapping
15
23 September 2015 09:11 AM
Bazil_SW
Engine Management and ECU Remapping
24
21 September 2015 11:55 PM