
Prodrive Grp.N. chassis street build


Thread Starter
Scooby Regular
Joined: Dec 2002
Posts: 458
Likes: 0
It has been a while since i posted on Scoobynet, so here's an update  .
.
Here are some words&pics to show u guys what i have got, loosely translated from my dutch members gallery thread :
:
My first Impreza i bought a few years ago when i sold my Renault 5 GT Turbo (small turbo'd version, don't know if this car is known over here)
It was a so calles MY96 MCRea version, it was a special edition with a different color and some options as standard, it had the TD05 turbo as standard.
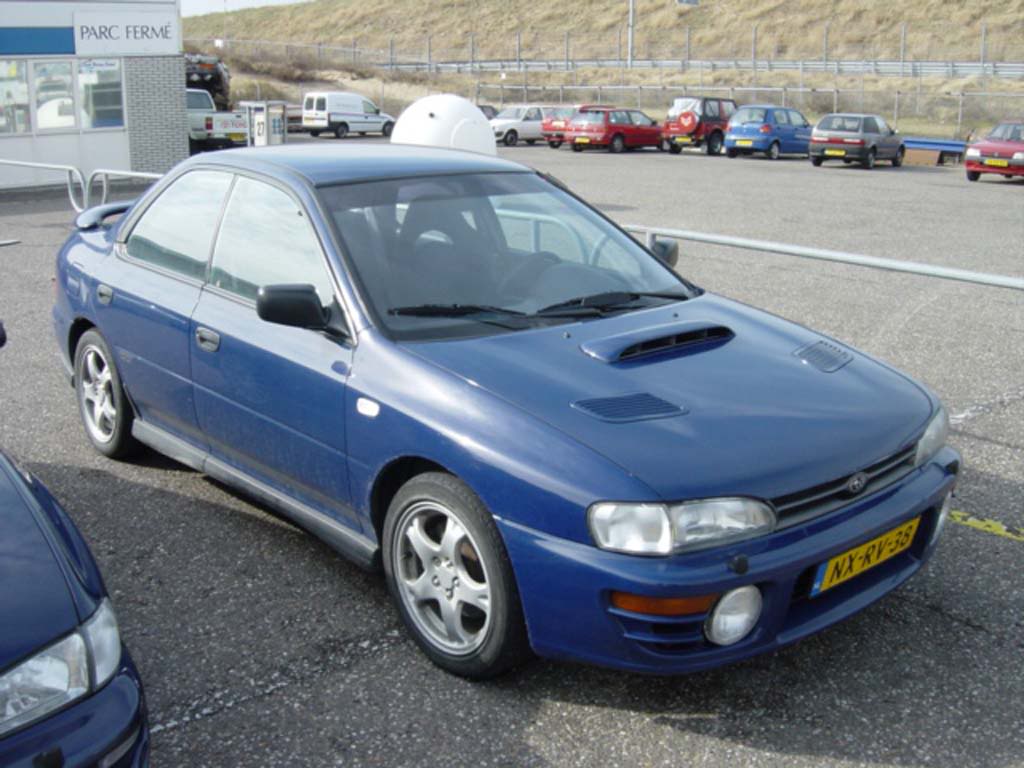
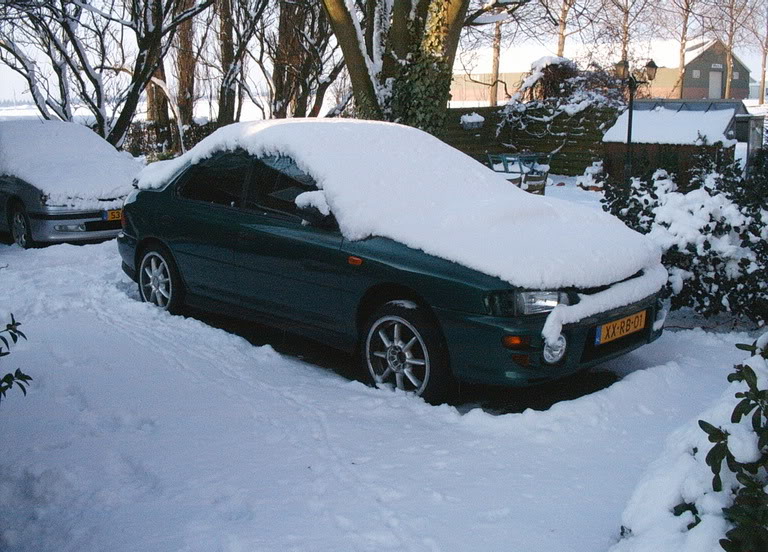
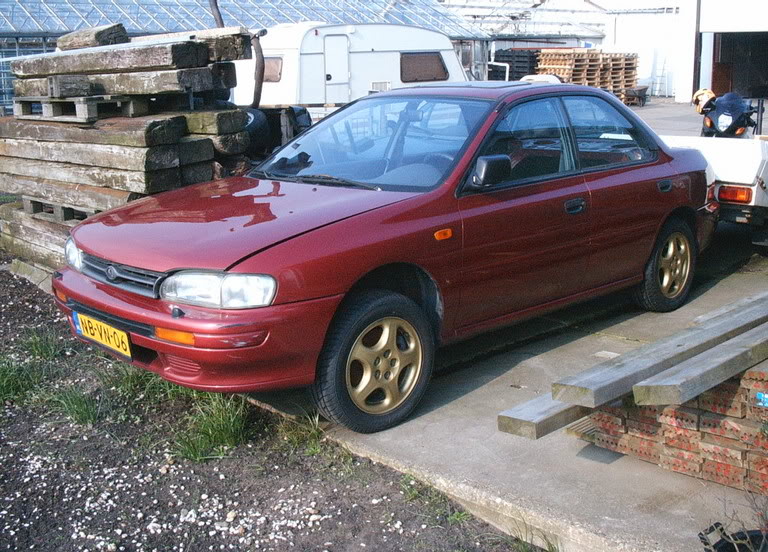
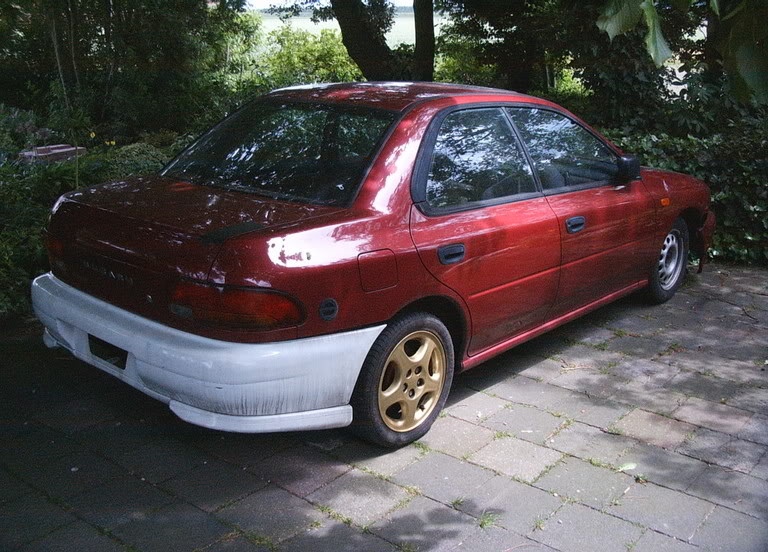
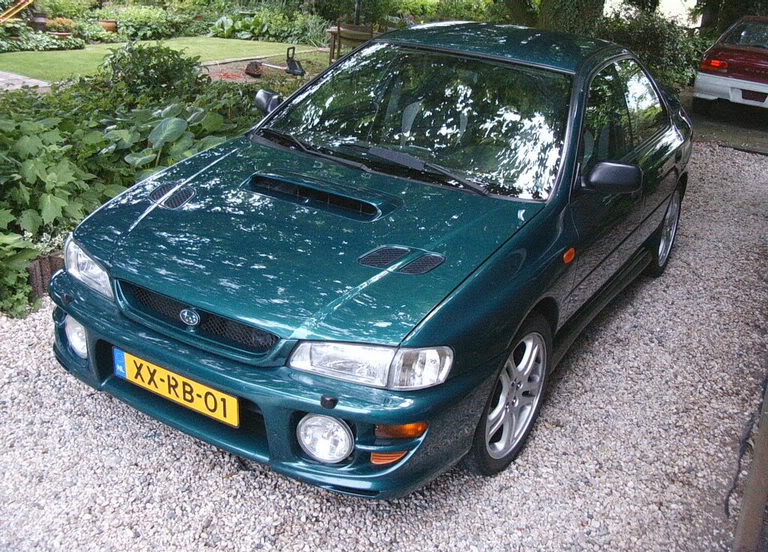
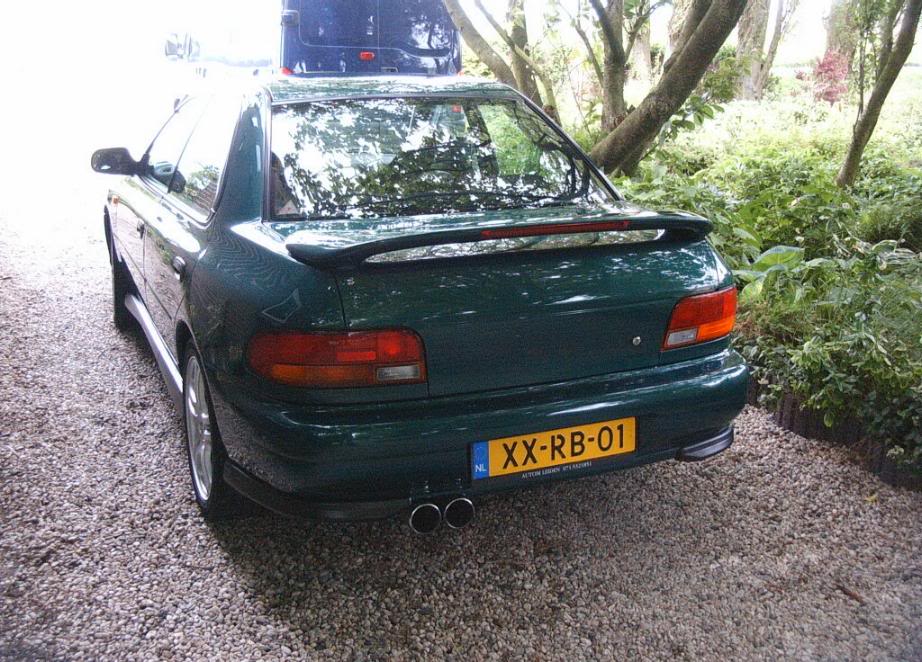
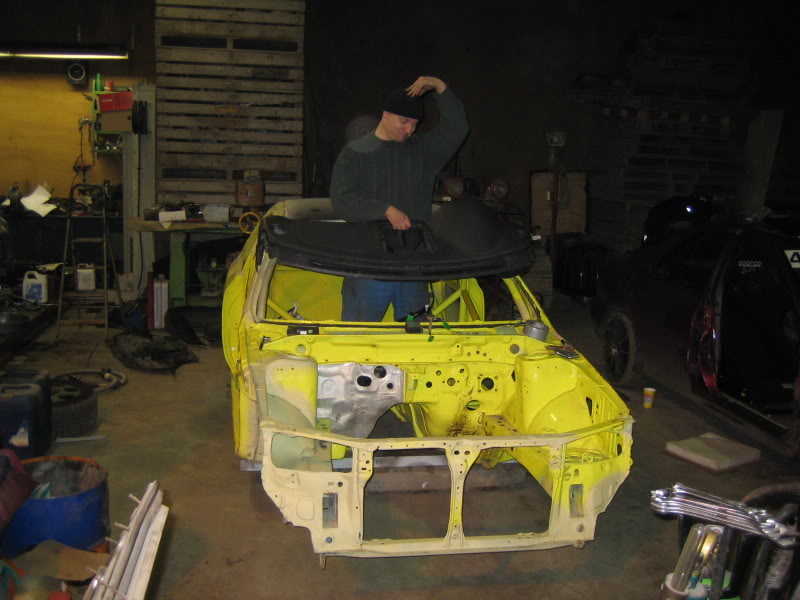
After this i bought an MY99 which has seen all kinds of faces as you can see by the photo's

 ]
]
 Then in December last year i got the oppertunity to buy 2 Impreza's pretty cheap.
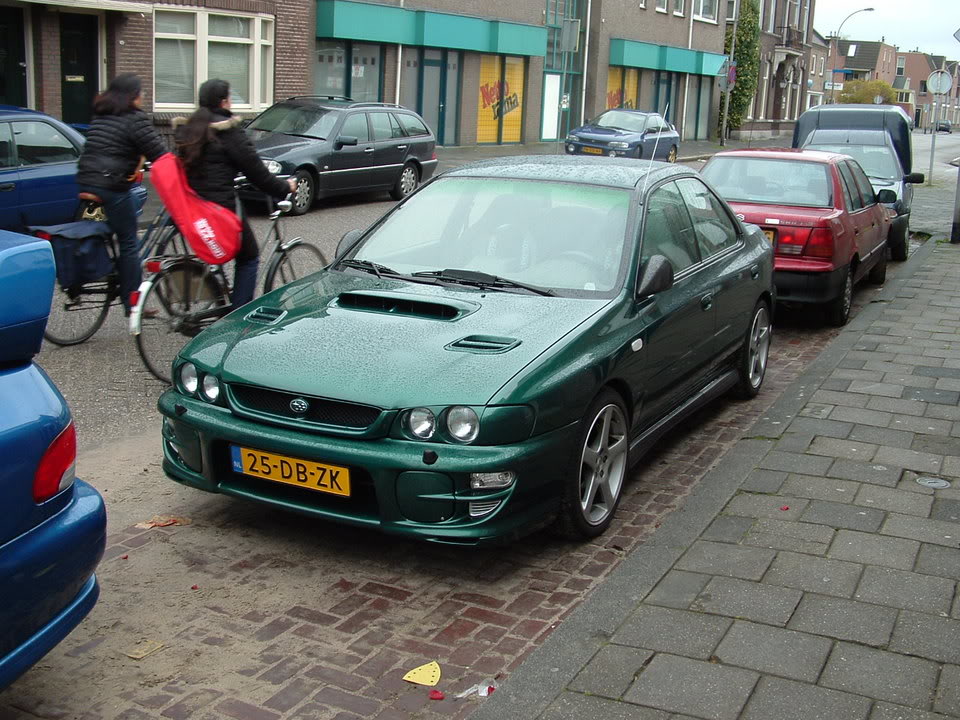
A green MY99 (yeah another one ) which had no engine, interior parts and some other stuff.
It did have the heads, in- and exhaust manifolds, various other engine parts and alot of parts for a non turbo car which, off course, were pretty useless.
The missing interior parts were used to convert a RHD 2-door type-R to LHD.
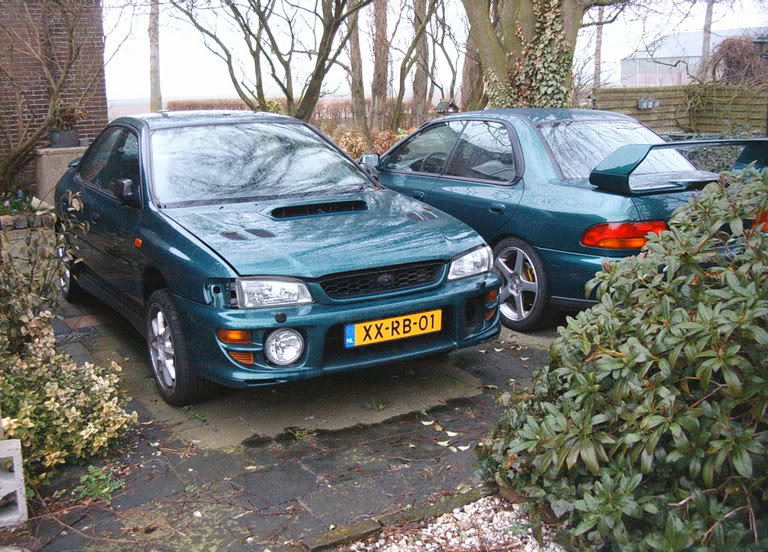
The other car was a MY95 non-turbo Impreza but with AWD which was going to be my hobby car.
The plan:
Make it an as good as possible road/circuit car.
- Make it as light as possibble
- Get a safe 400-450 HP engine.
In my opinion more power will get in the way more than it will help when driving fast.
Making a car lighter could be as expensive as making more HP so i will be doing this pretty simple ---> no interior, alu hood, alu wishbones and things like this.
.Here are some words&pics to show u guys what i have got, loosely translated from my dutch members gallery thread
:My first Impreza i bought a few years ago when i sold my Renault 5 GT Turbo (small turbo'd version, don't know if this car is known over here)
It was a so calles MY96 MCRea version, it was a special edition with a different color and some options as standard, it had the TD05 turbo as standard.
After this i bought an MY99 which has seen all kinds of faces as you can see by the photo's
A green MY99 (yeah another one
) which had no engine, interior parts and some other stuff.It did have the heads, in- and exhaust manifolds, various other engine parts and alot of parts for a non turbo car which, off course, were pretty useless.
The missing interior parts were used to convert a RHD 2-door type-R to LHD.
The other car was a MY95 non-turbo Impreza but with AWD which was going to be my hobby car.
The plan:
Make it an as good as possible road/circuit car.
- Make it as light as possibble
- Get a safe 400-450 HP engine.
In my opinion more power will get in the way more than it will help when driving fast.
Making a car lighter could be as expensive as making more HP so i will be doing this pretty simple ---> no interior, alu hood, alu wishbones and things like this.
Last edited by Aram; Dec 29, 2007 at 11:31 PM.
Thread Starter
Scooby Regular
Joined: Dec 2002
Posts: 458
Likes: 0
Parts i have uptill now:
- A MY04 2.5l Forester STI engine inc. turbo, ecu, loom, subframe etc.
- Forester 5 speed gearbox with oilcooling.
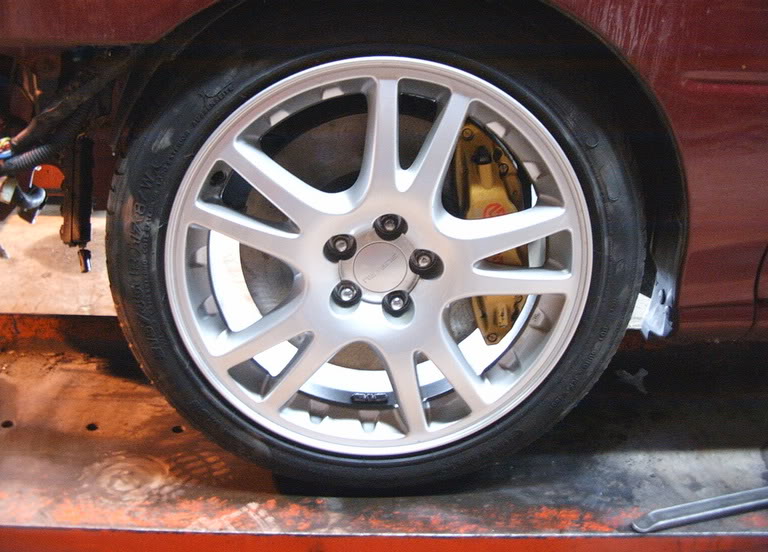
- STI Brembo's
- 22B grille
- HKS blow-off valve
- STI 17" wheels in silver
- Walbro 255 feulpump
- AVC-R
- FMIC APS
- STI clutch set
- 4.111 reardiff with LSD
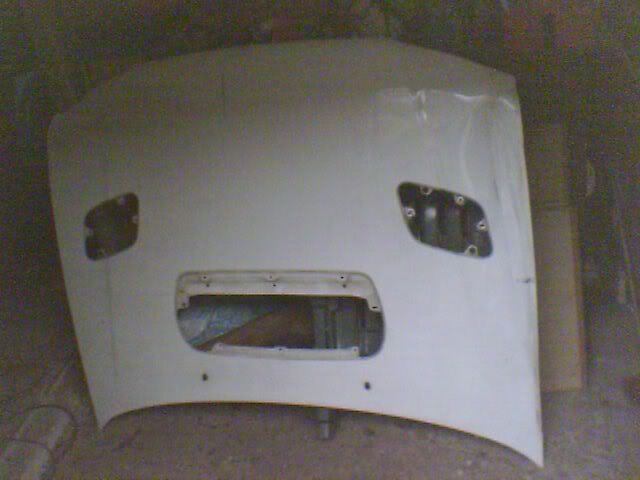
- STI alu hood
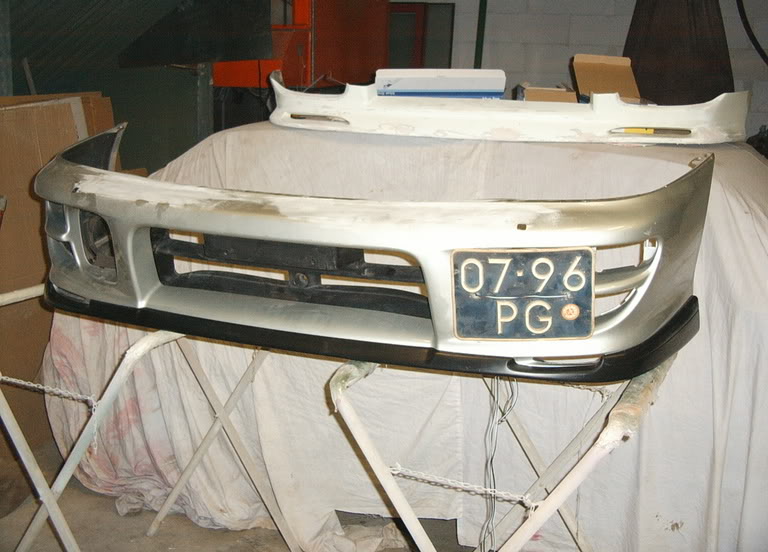
- MY99 bumper with integrated STI6 lip (they are welded together now making it one big bumper)
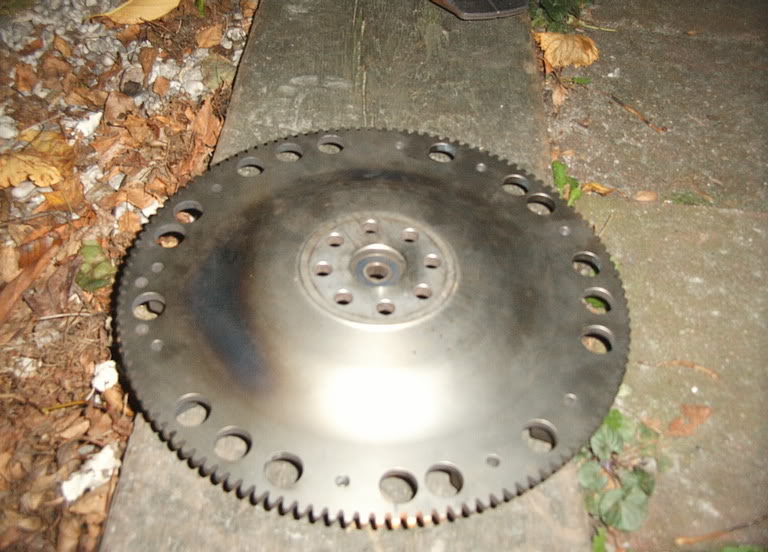
STI Flywheel
wannahaves:
- STI 6 speed
- Cage and additional body welding.
- Different color
- retractable mirrors (just for the fun of it)
This is the car from which the engine comes from, this is factory grounds.

- A MY04 2.5l Forester STI engine inc. turbo, ecu, loom, subframe etc.
- Forester 5 speed gearbox with oilcooling.
- STI Brembo's
- 22B grille
- HKS blow-off valve
- STI 17" wheels in silver
- Walbro 255 feulpump
- AVC-R
- FMIC APS
- STI clutch set
- 4.111 reardiff with LSD
- STI alu hood
- MY99 bumper with integrated STI6 lip (they are welded together now making it one big bumper
)STI Flywheel
wannahaves:
- STI 6 speed
- Cage and additional body welding.
- Different color
- retractable mirrors (just for the fun of it
)This is the car from which the engine comes from, this is factory grounds.
Last edited by Aram; Nov 16, 2005 at 07:35 PM.
Thread Starter
Scooby Regular
Joined: Dec 2002
Posts: 458
Likes: 0
This is the latest update i have on the two cars i have left, already my apologies for the lousy pic qualities .
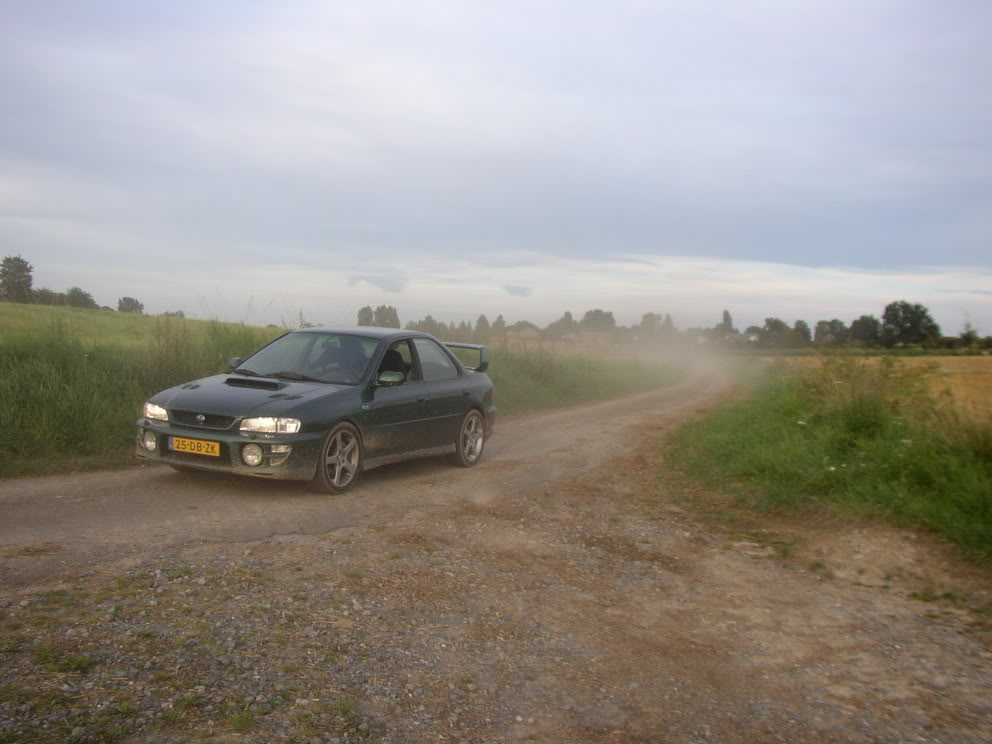
The green car is finished apart from some minor details, and is up for sale now.
Engine wise it had some probs, but the engine has been totally rebuild and is purring away real horrorshow
After standing still for almost a year i finaly got round to starting on my hobbycar 3weeks ago!
First thing i did was changing the rear-suspension, because the original was rusted and worn out.
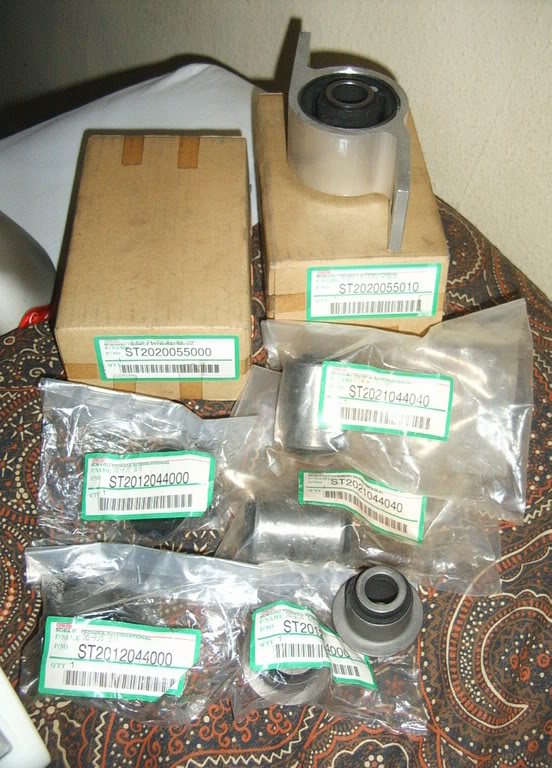
Luckily i managed to get my greedy pawns on a STI 5 suspension, which included rear subframe and arms, hubs, handbrake wires, MY99 brakes and some new group N rally bushes.
So on a friday afternoon i pulled out the old STI bushes and pushed in the new Group N's, that night all was fitted back under the car again.
New suspension:
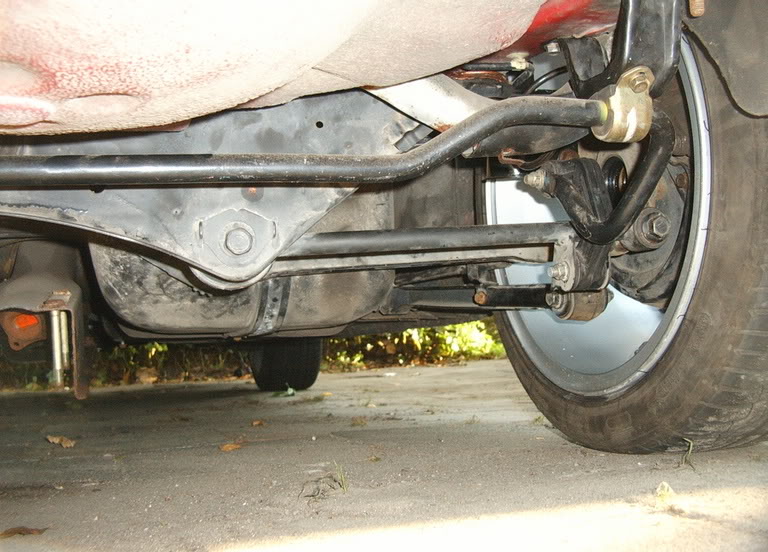
STI group N rally bushes, 4x for the rear subframe, rest is for the front suspension:
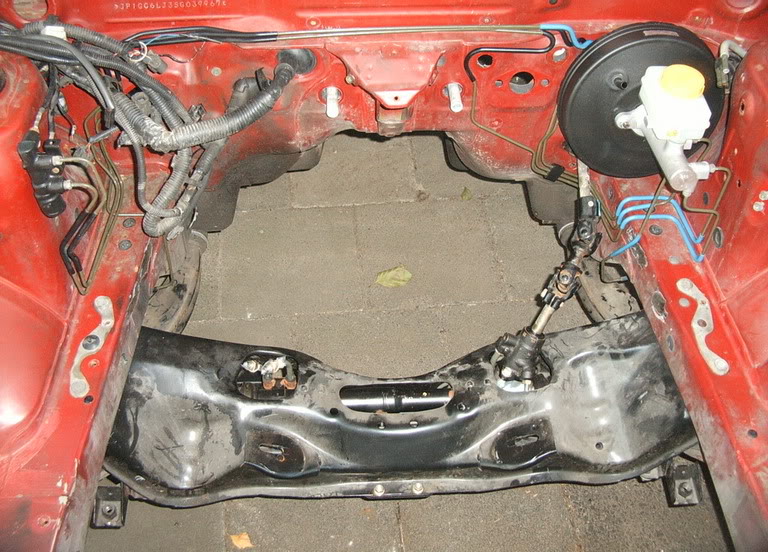
That Saturday i spent putting the MY04 front suspension under the car.
I changed the RHD steering collumn and fitted the good old MY95 LHD one back, 9 years difference and it fits one on one, gotta love those Japs
I kept the original MY95 brake booster, it is said it has more feel than the later twin membran versions.
Saturday evening the front suspension wasfinished!! yay !!
That Sunday i fitted the steeringwheel (try that one on your own ) and also put the brakebooster back into the engine bay.
I'm going to repaint the car later, i havent got the cash for it atm plus i'll need to do some plumbing when fitting the FMIC and such.
And yeah, i'm to lazy to clean the car up, it's a rallycar, it's supposed to be dirty .
.
.The green car is finished apart from some minor details, and is up for sale now.
Engine wise it had some probs, but the engine has been totally rebuild and is purring away real horrorshow
After standing still for almost a year i finaly got round to starting on my hobbycar 3weeks ago!
First thing i did was changing the rear-suspension, because the original was rusted and worn out.
Luckily i managed to get my greedy pawns on a STI 5 suspension, which included rear subframe and arms, hubs, handbrake wires, MY99 brakes and some new group N rally bushes.
So on a friday afternoon i pulled out the old STI bushes and pushed in the new Group N's, that night all was fitted back under the car again
.New suspension:
STI group N rally bushes, 4x for the rear subframe, rest is for the front suspension:
That Saturday i spent putting the MY04 front suspension under the car.
I changed the RHD steering collumn and fitted the good old MY95 LHD one back, 9 years difference and it fits one on one, gotta love those Japs
I kept the original MY95 brake booster, it is said it has more feel than the later twin membran versions.
Saturday evening the front suspension wasfinished!! yay !!
That Sunday i fitted the steeringwheel (try that one on your own
) and also put the brakebooster back into the engine bay.I'm going to repaint the car later, i havent got the cash for it atm plus i'll need to do some plumbing when fitting the FMIC and such.
And yeah, i'm to lazy to clean the car up, it's a rallycar, it's supposed to be dirty
.
Last edited by Aram; Nov 16, 2005 at 07:37 PM.
Thread Starter
Scooby Regular
Joined: Dec 2002
Posts: 458
Likes: 0
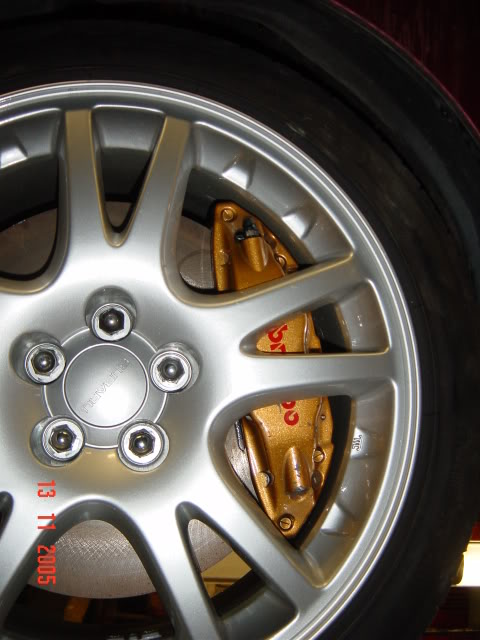
I did not get the attachment bolts with my Brembo's, but i thought i could use the ones from the 2-pots---not!!
So i had to order 4 new ones because those japs don't use regular thread.
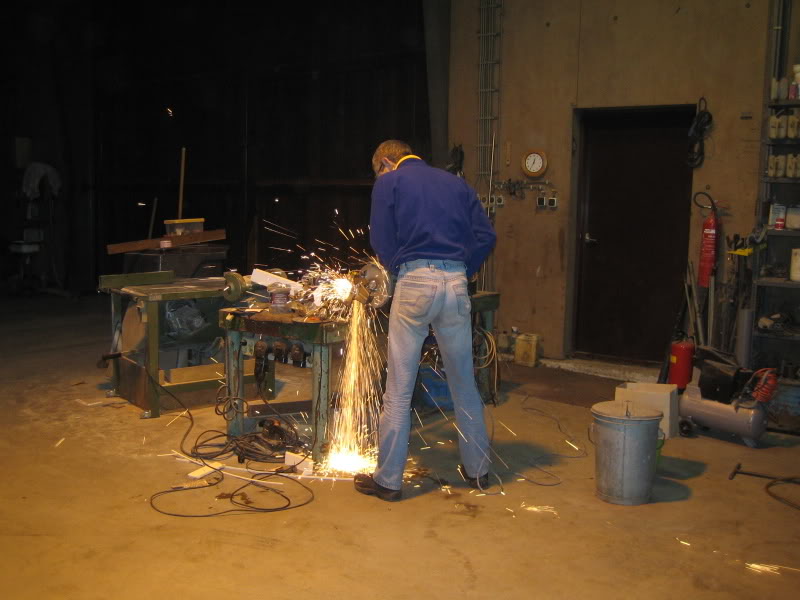
Anyway the week after ihad some very expensive bolts and fitted Brembo's.
Fat *******!! hehehe:
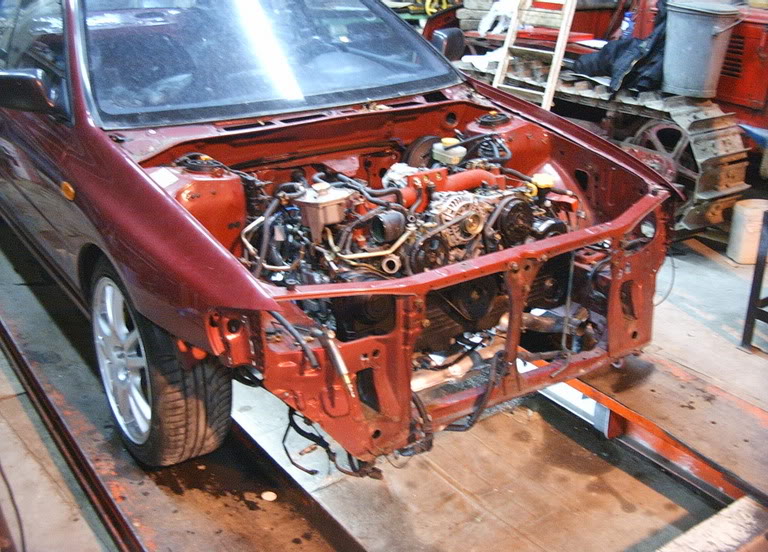
Meanwhile on a lazy Sunday afternoon i fitted the engine with gearbox attached to it, also very nice to do on your own
So using strings attached to the forklift handles i finaly got that job done with fitting the driveshafts as "highlight"
Costing me some cuts and a bleu nail, but hey anything goes for the hobby right .

I needed an 4.111 reardiff to go with the gearbox, but they are very hard to find.
I got one in the end without a LSD diff, but the rear driveshaft didnt fit.
So today i fitted that LSD, and tommorow i will be fitting it to my car.
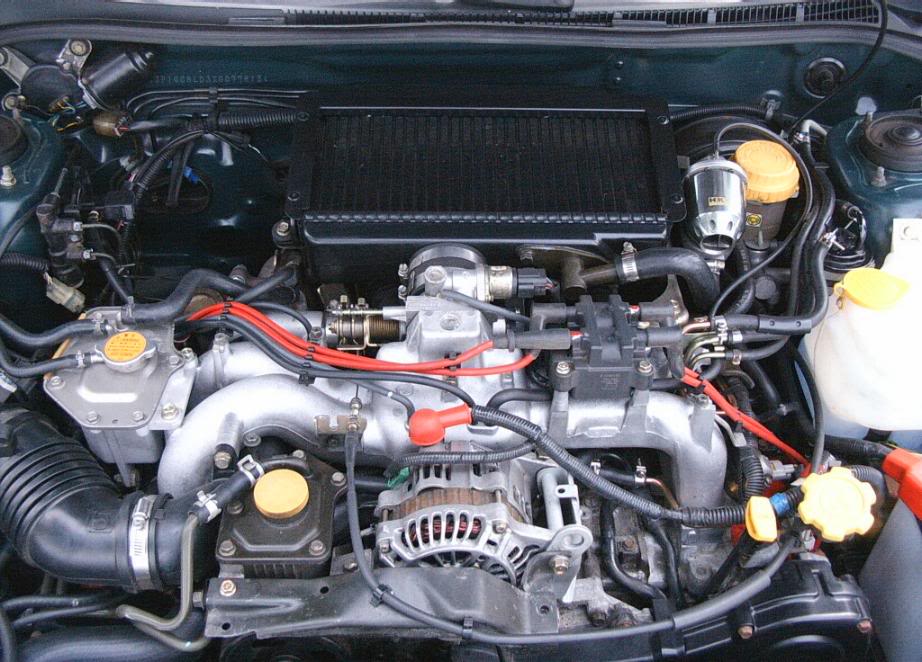
I sold the VF39 turbo and now I'm looking for a suitable GT30.
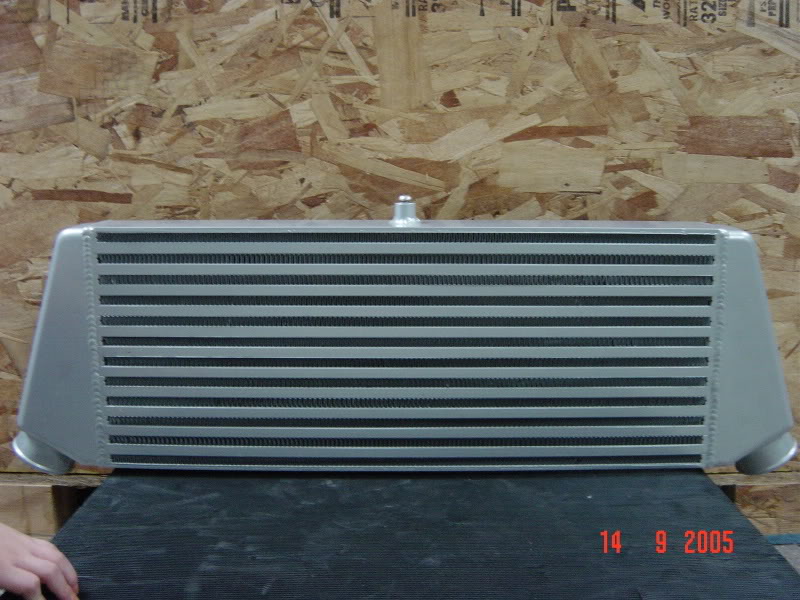
Here's a pic of my APS FMIC
Looks like it is going to standard non-turbo looks for a while, real sleeper style
So i had to order 4 new ones because those japs don't use regular thread.
Anyway the week after ihad some very expensive bolts and fitted Brembo's
.Fat *******!! hehehe:
Meanwhile on a lazy Sunday afternoon i fitted the engine with gearbox attached to it, also very nice to do on your own
So using strings attached to the forklift handles i finaly got that job done with fitting the driveshafts as "highlight"
Costing me some cuts and a bleu nail, but hey anything goes for the hobby right
.I needed an 4.111 reardiff to go with the gearbox, but they are very hard to find.
I got one in the end without a LSD diff, but the rear driveshaft didnt fit.
So today i fitted that LSD, and tommorow i will be fitting it to my car.
I sold the VF39 turbo and now I'm looking for a suitable GT30.
Here's a pic of my APS FMIC
Looks like it is going to standard non-turbo looks for a while, real sleeper style
Last edited by Aram; Nov 16, 2005 at 07:37 PM.


Trending Topics


Thread Starter
Scooby Regular
Joined: Dec 2002
Posts: 458
Likes: 0
Just got an email from fotopic, they just lamed my account because i was taking too much bandwith away from other users  .
.
Hopefully to be restored later.
Does anyone know a site that doesn't mind this?
.Hopefully to be restored later.
Does anyone know a site that doesn't mind this?

Thread Starter
Scooby Regular
Joined: Dec 2002
Posts: 458
Likes: 0
Well, let me dig up an old thread here.
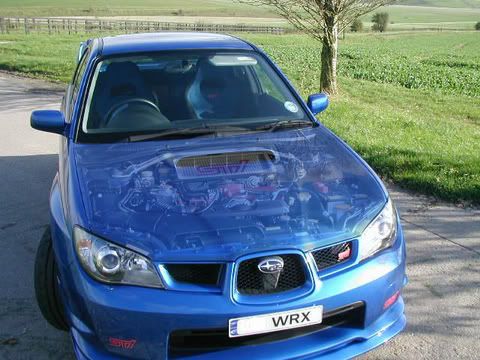
After driving my GL for 1.5 years I got an offer I couldn't refuse!
I was offered a genuine Group-N chassis that someone reserved for himself to build up but had to sell because he had bought a real WRC S5 instead.
So I took it off his hands.
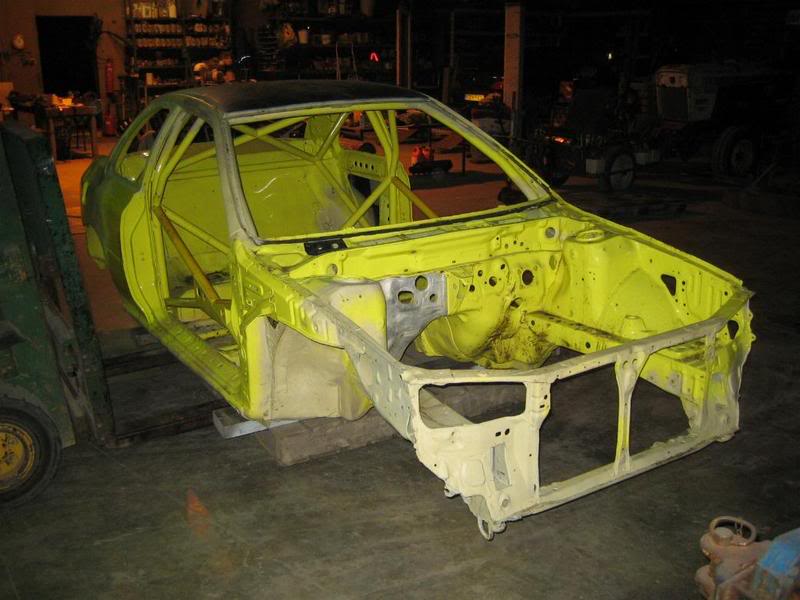
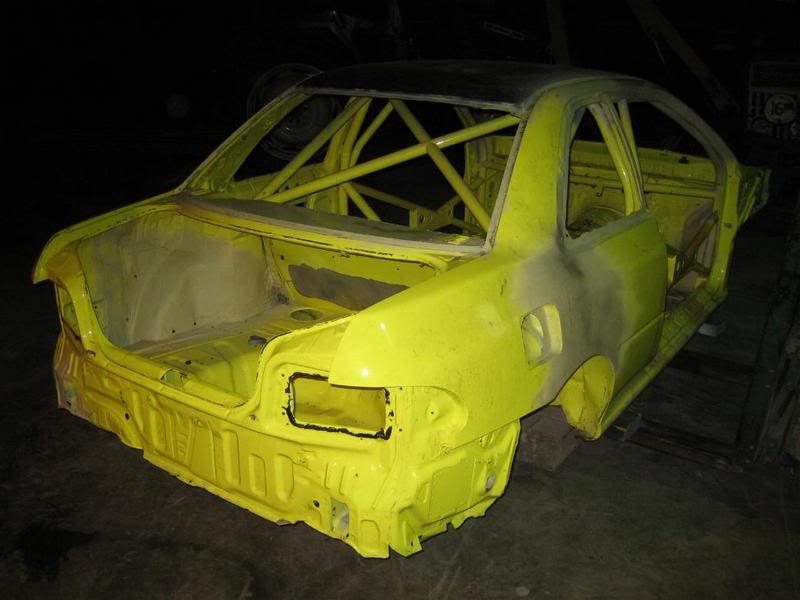
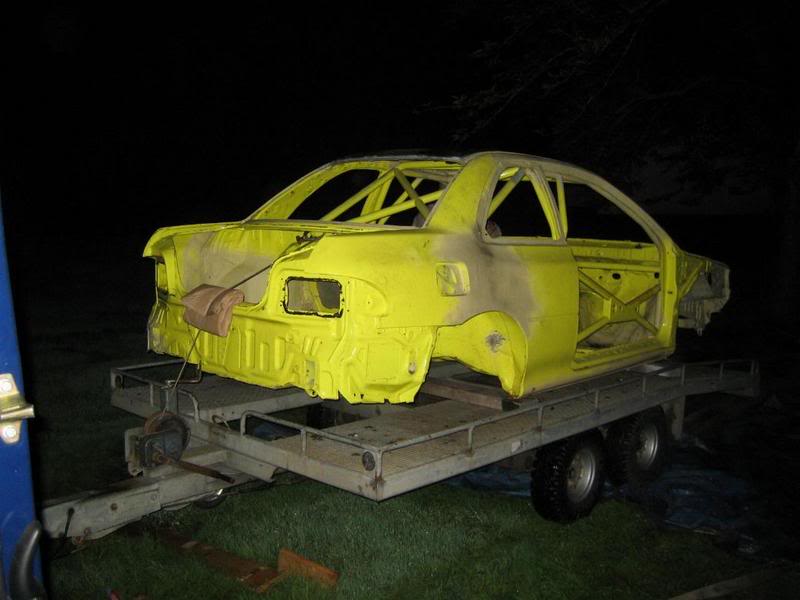
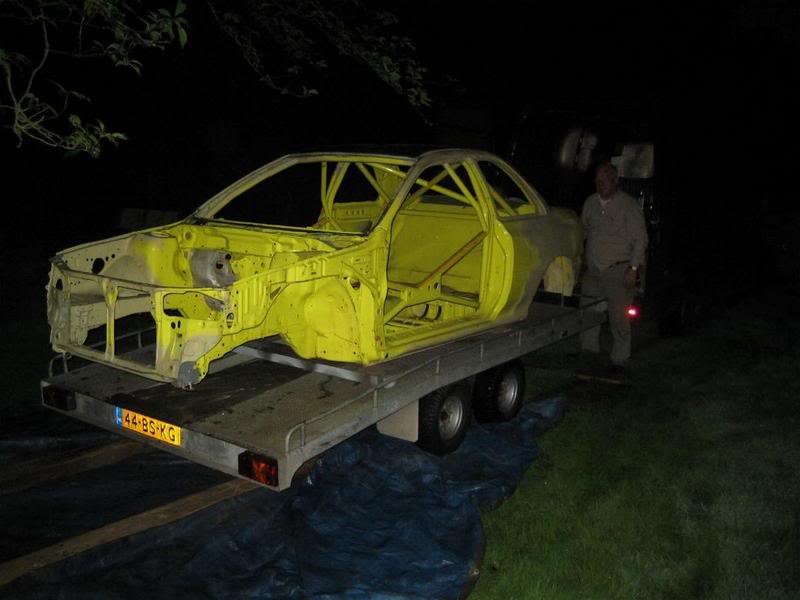
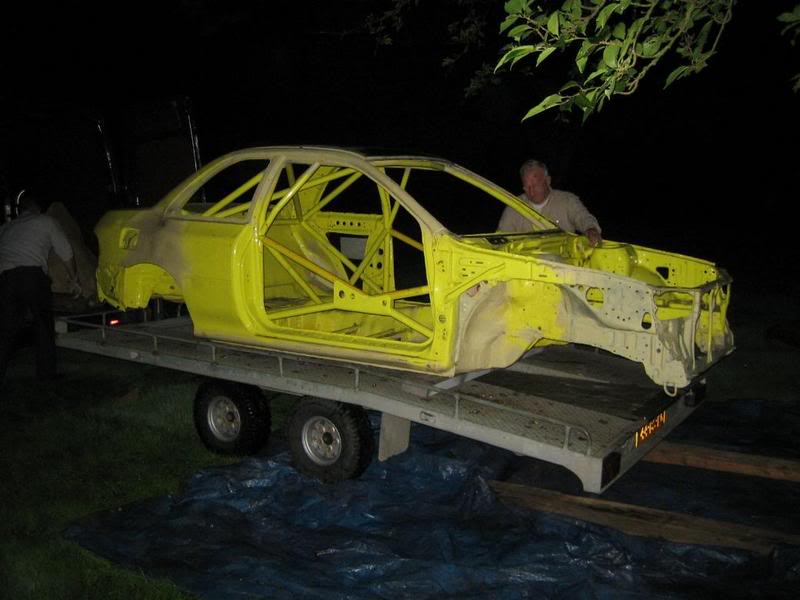
It's a genuine Prodrive bodyshell, LHD, seam welded, full cage.
Everything from the GL will be put into this chassis so i will have litlle free time left this year .
I have n o history on this shell, but I know it comes from the UK, if anyone has any info on in PLEASE let me know.
It has a tag on the cage saying: S2 PRO 97
So it's probably from 1997.
After driving my GL for 1.5 years I got an offer I couldn't refuse!
I was offered a genuine Group-N chassis that someone reserved for himself to build up but had to sell because he had bought a real WRC S5 instead.
So I took it off his hands.
It's a genuine Prodrive bodyshell, LHD, seam welded, full cage.
Everything from the GL will be put into this chassis so i will have litlle free time left this year
.I have n o history on this shell, but I know it comes from the UK, if anyone has any info on in PLEASE let me know.
It has a tag on the cage saying: S2 PRO 97
So it's probably from 1997.
Thread Starter
Scooby Regular
Joined: Dec 2002
Posts: 458
Likes: 0
I got new goodies for it also.
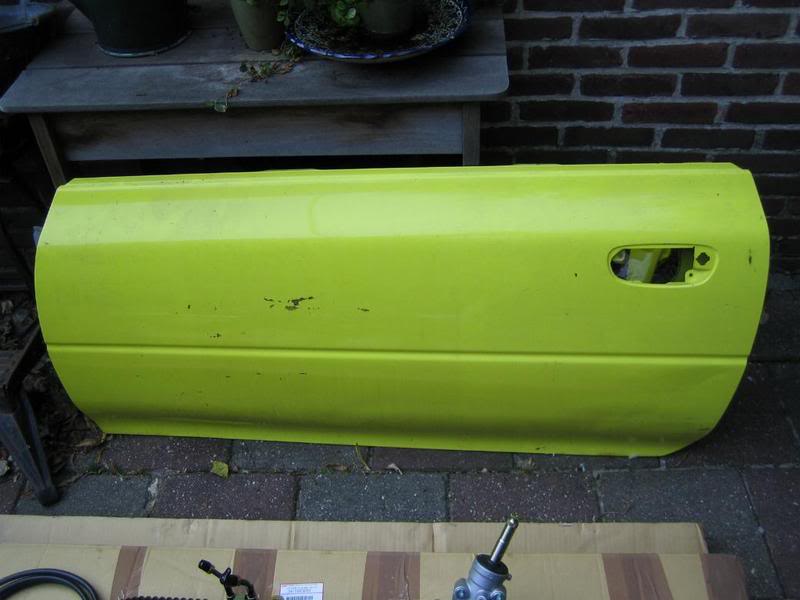
First up half the doors arrived!
Small dents but they wil be dealt with in a later stage.
The windows and mechanisms are still in the UK.
But what i'm really proud of is this:

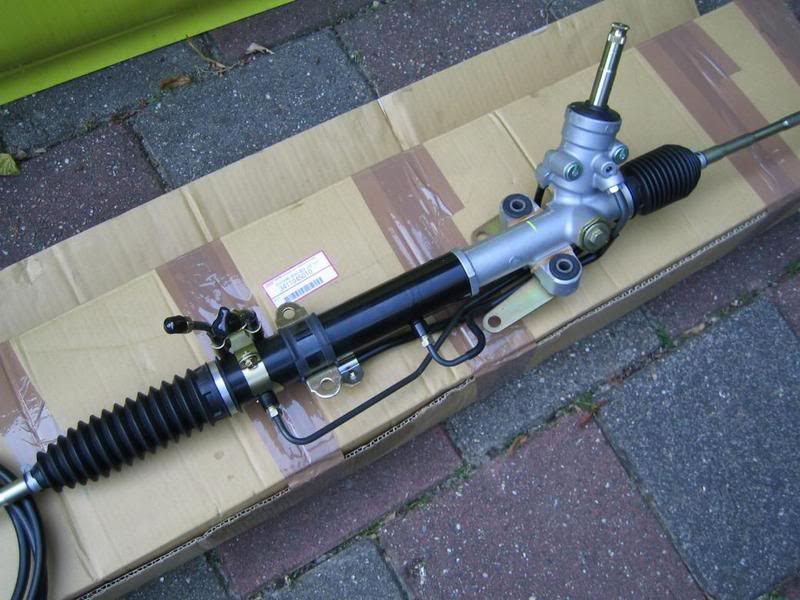
A genuine Prodrive quick rack group-n steering rack.
It's 13:1 or 2 turns lock to lock.
Very expensive but i had some luck by having the right connections.
This will definatly improve the driving experience!
First up half the doors arrived!
Small dents but they wil be dealt with in a later stage.
The windows and mechanisms are still in the UK.
But what i'm really proud of is this:
A genuine Prodrive quick rack group-n steering rack.
It's 13:1 or 2 turns lock to lock.
Very expensive but i had some luck by having the right connections.
This will definatly improve the driving experience!
Thread Starter
Scooby Regular
Joined: Dec 2002
Posts: 458
Likes: 0
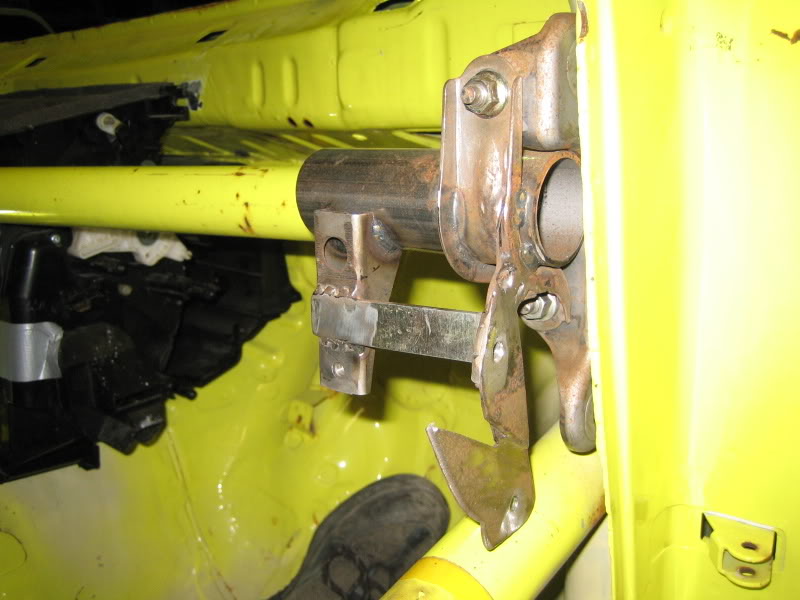
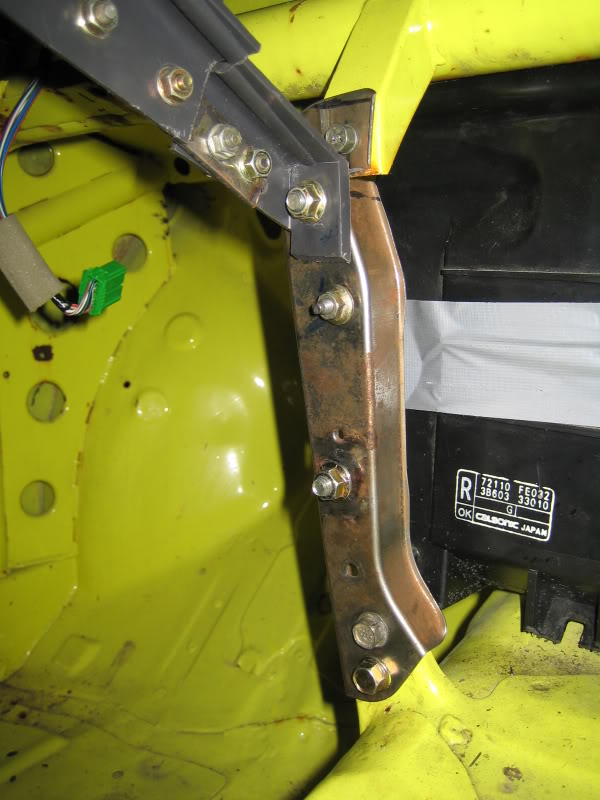
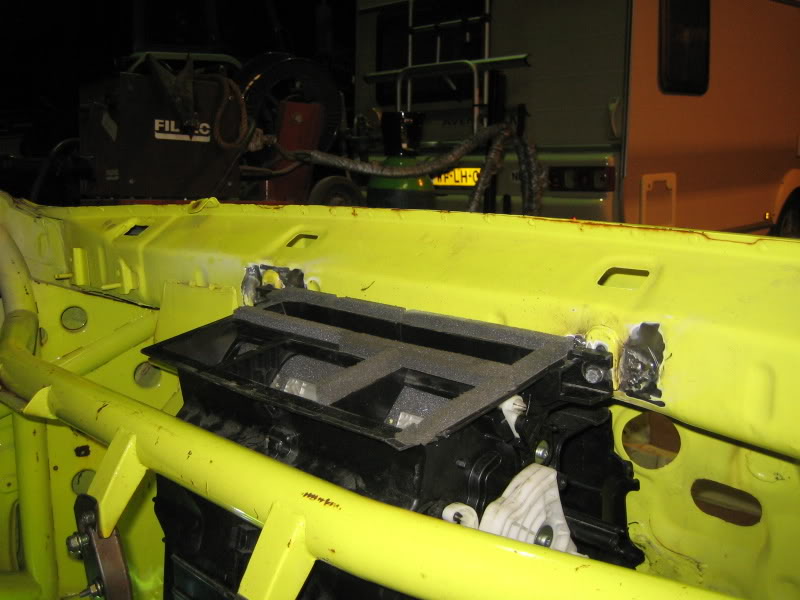
Did the first small step on the chassis.
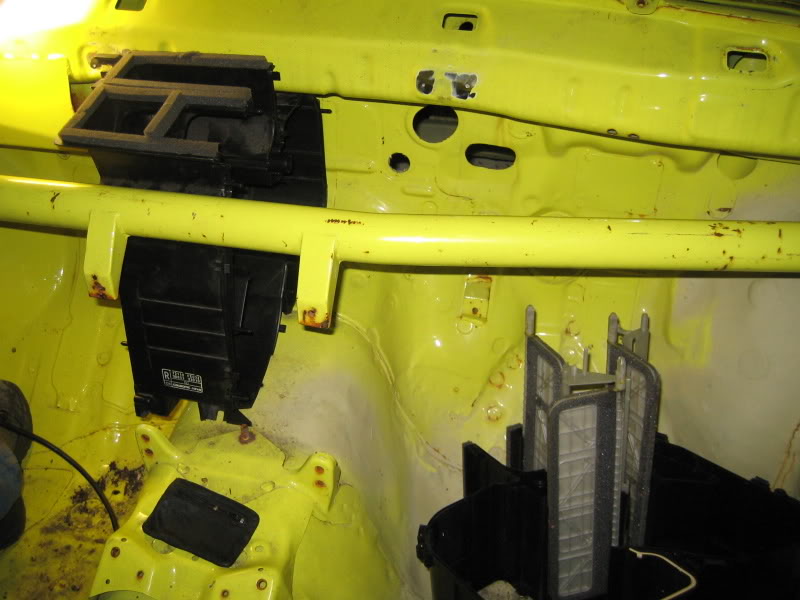
I'll begin with the dash, and the first thing to begin with is the heater unit.
First problem, there is a beam from the cage that runs through the dash.
That wouldn't be a prob as it runs there on a standard car also, but only then it's removeable.
Now there is no way to mount the unit behind the beam in one piece.
The beam:

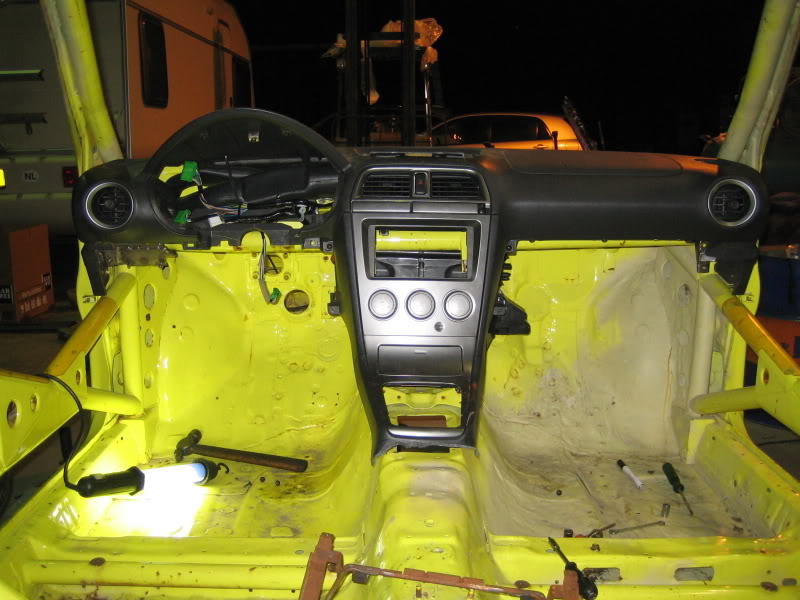
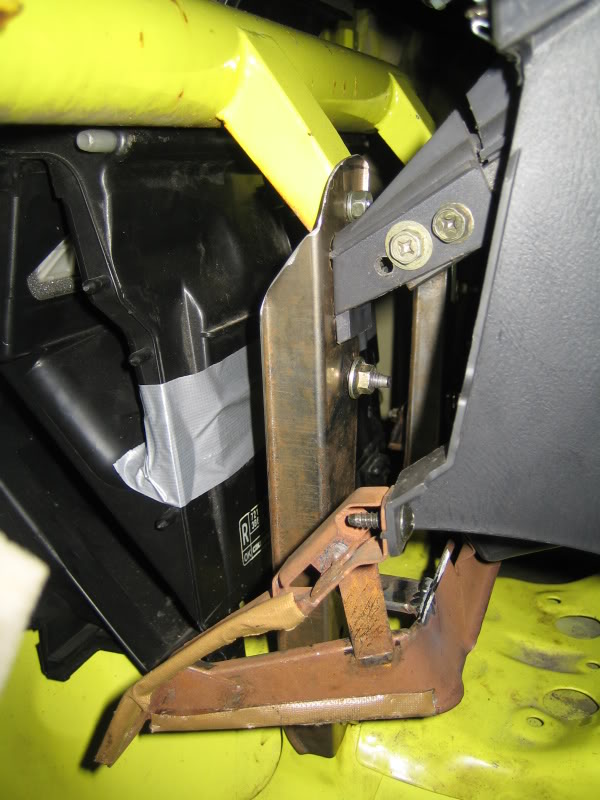
I've got a heater unit to use as a dummy, the one that I'm going to use is still in the other car.
I had to separate this unit because it would not fit in one piece behind the beam.
2 mounting points were also removed, which is no problem as these would not be useable anyway.
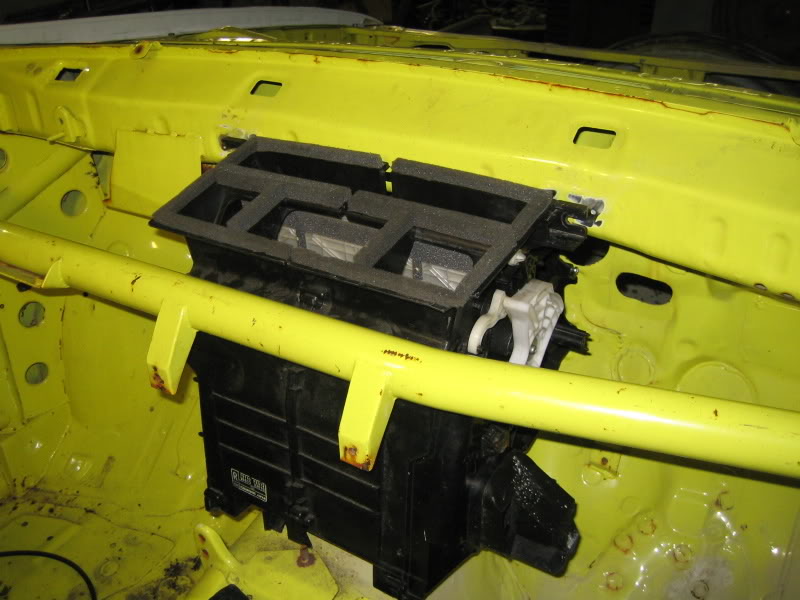
The 2 unit parts:
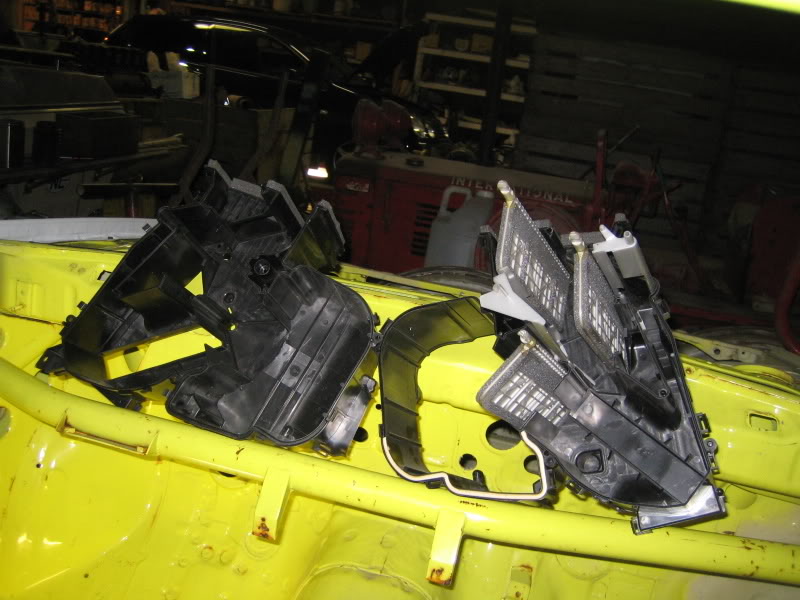
One part fitted:
Et viola, a heater unit in place:
I'm not sure if I will leave it like this, I'll contact my friend in the rally team if cutting out the beam brings down the strength, if it's not significant I will cut it out and use the original.
I'll begin with the dash, and the first thing to begin with is the heater unit.
First problem, there is a beam from the cage that runs through the dash.
That wouldn't be a prob as it runs there on a standard car also, but only then it's removeable.
Now there is no way to mount the unit behind the beam in one piece.
The beam:
I've got a heater unit to use as a dummy, the one that I'm going to use is still in the other car.
I had to separate this unit because it would not fit in one piece behind the beam.
2 mounting points were also removed, which is no problem as these would not be useable anyway.
The 2 unit parts:
One part fitted:
Et viola, a heater unit in place:
I'm not sure if I will leave it like this, I'll contact my friend in the rally team if cutting out the beam brings down the strength, if it's not significant I will cut it out and use the original.
Thread Starter
Scooby Regular
Joined: Dec 2002
Posts: 458
Likes: 0
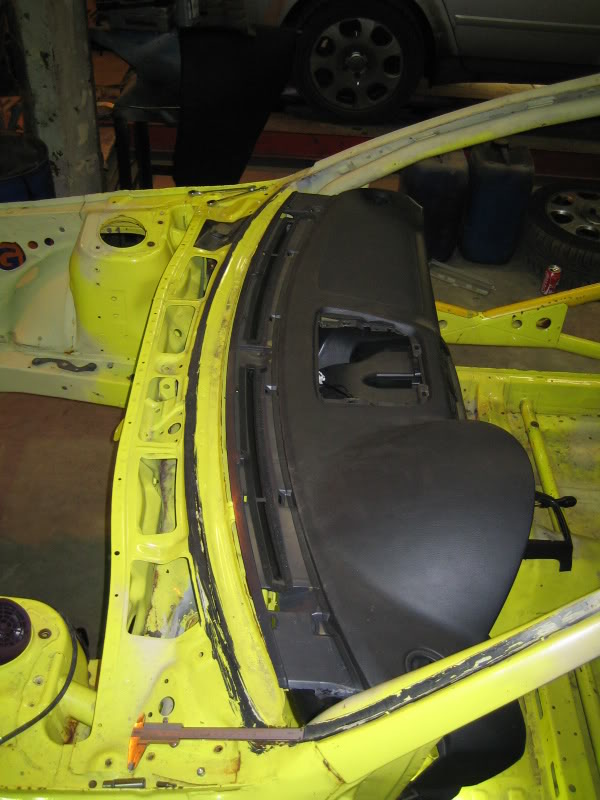
So, the first day of the new project has ended.
This morning my friends Alex and Dick were at my door.
So we started right away with tearing out the dashbord, the last hour of my GL had begun...*snif*
Pics:
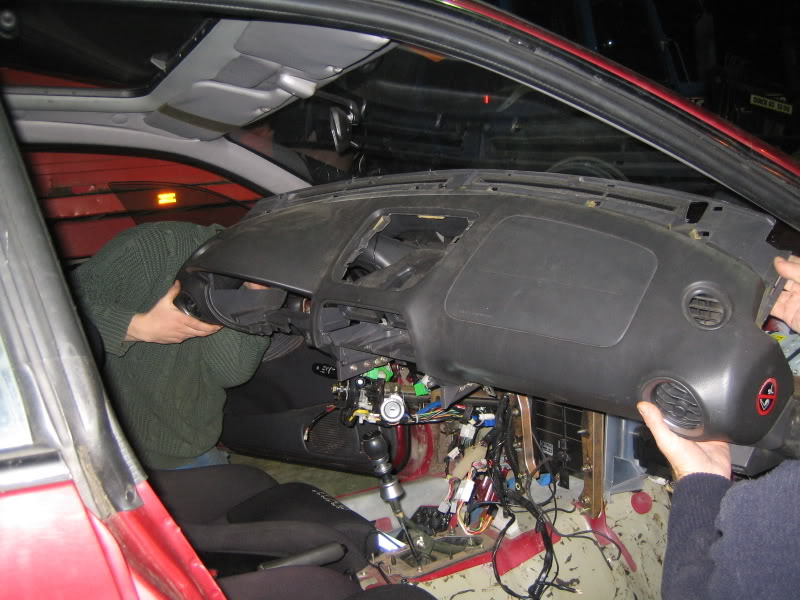
Dash out of the GL:
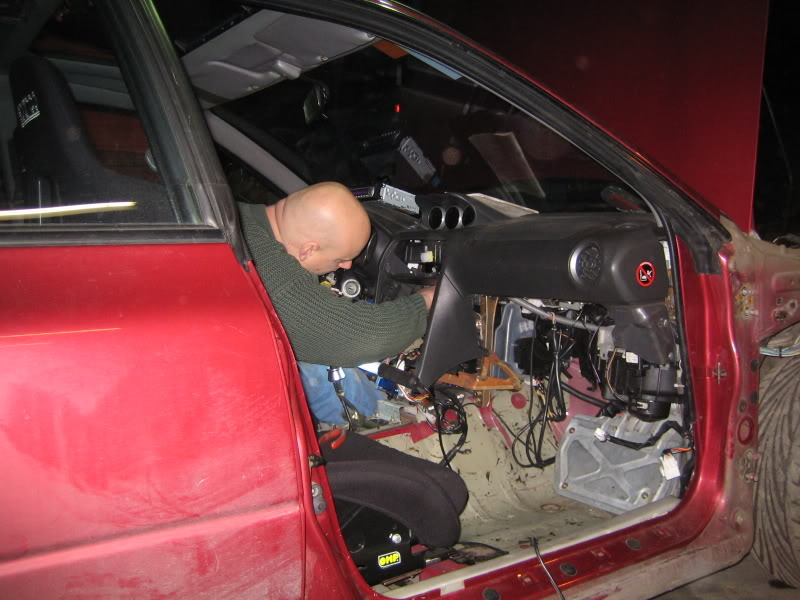
Dick doing his thing:
Ehh....
R.I.P. GL 24-12-2007
Dick happy:
Alex is a bit confused:

This morning my friends Alex and Dick were at my door.
So we started right away with tearing out the dashbord, the last hour of my GL had begun...*snif*
Pics:
Dash out of the GL:
Dick doing his thing:
Ehh....
R.I.P. GL 24-12-2007
Dick happy:
Alex is a bit confused:
Thread Starter
Scooby Regular
Joined: Dec 2002
Posts: 458
Likes: 0
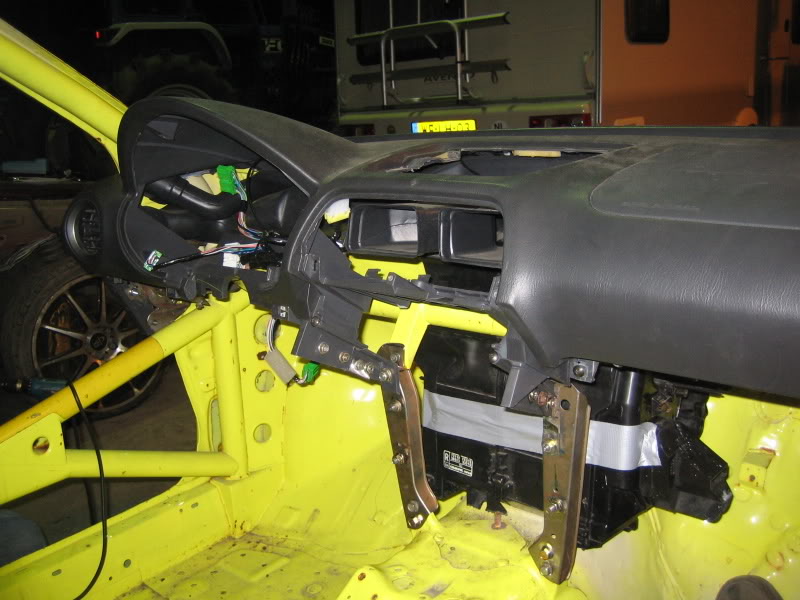
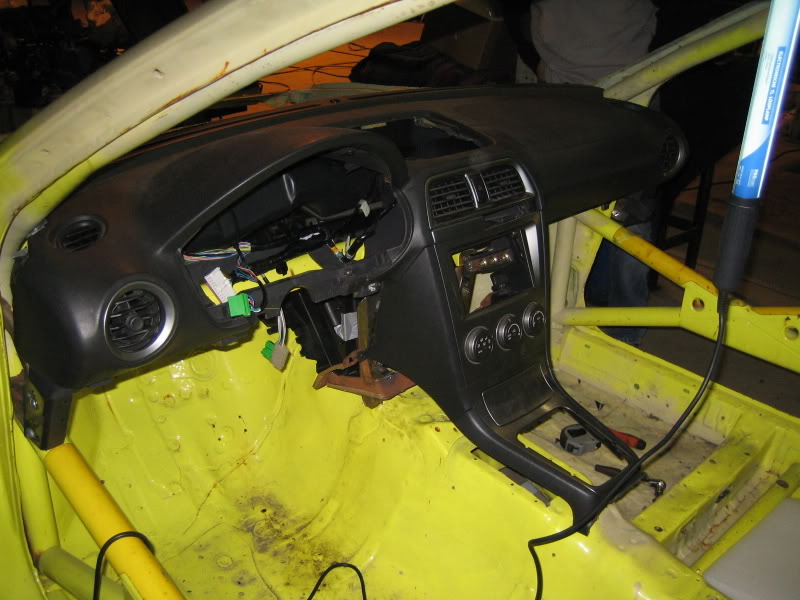
Fortunatly we could use the brackets we made for the GL, we spent alot of time fabricating those.
But the dash was a bit crooked when it was in the GL and this time around I wanted it perfect, so a bit of modification was required.

It's not finished of course but I couldn't resist putting in the centre console, also to see if it was in straight:
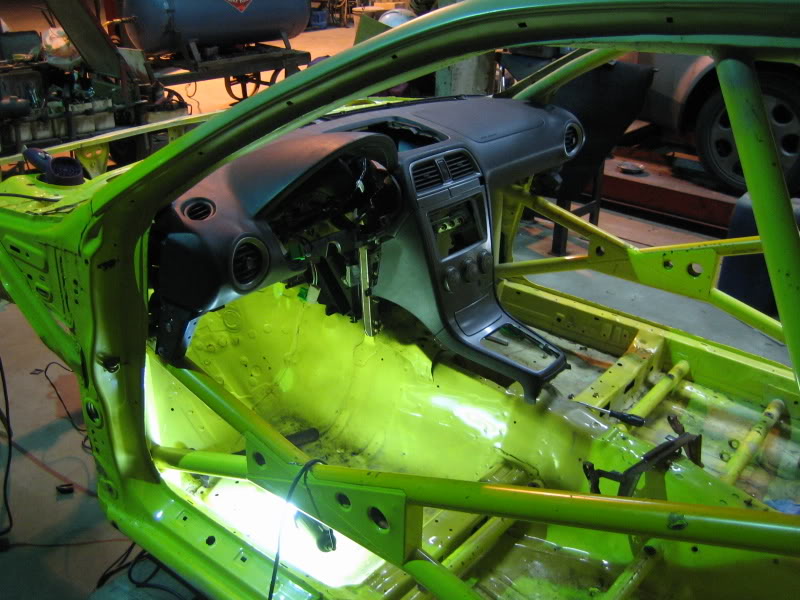
Thursday we continue, hopefully we can get as much done as today.
But the dash was a bit crooked when it was in the GL and this time around I wanted it perfect, so a bit of modification was required.
It's not finished of course but I couldn't resist putting in the centre console, also to see if it was in straight:
Thursday we continue, hopefully we can get as much done as today.
Cooking on Calor
iTrader: (23)
Joined: Oct 2001
Posts: 23,346
Likes: 7
From: in a house full of girls!
wow! you ought to put this in projects! cant wait to see this car come along, maybe you could contact mike wood at prodrive, he comes on here a fair bit. ile mail him a link to here
james
james
Thread Starter
Scooby Regular
Joined: Dec 2002
Posts: 458
Likes: 0
I also have posted this in Projects, I'm not sure if everyone from this forum looks there also and vice verse.
If you could mail Mike that would be great, any info would be welcome.
I do know this chassis has had damage.
If you could mail Mike that would be great, any info would be welcome.
I do know this chassis has had damage.
I'm impressed with the interior upgrade plus the fact it's all the drivetrain as well there, plus the engine ecu etc etc  you certainly don't do things by half, I know it's been a work in progress for a long while now but it looks as if this will be the final direction with the group n chassis... maybe
I was pointed in this direction earlier it may be of interest to you also
ECS Performance
I'll drop the link on your project thread as well for reference for the guys that will be reading that one.
Simon
you certainly don't do things by half, I know it's been a work in progress for a long while now but it looks as if this will be the final direction with the group n chassis... maybe I was pointed in this direction earlier it may be of interest to you also
ECS Performance
I'll drop the link on your project thread as well for reference for the guys that will be reading that one.
Simon

Scooby Regular
Joined: Aug 2004
Posts: 926
Likes: 0

Thread Starter
Scooby Regular
Joined: Dec 2002
Posts: 458
Likes: 0
Done a bit today.
Monday we already fixed the dashboard console for the looks. Today we fixed it up.

After that it was the heaters turn. I have to measure the whole thing out, so it fits perfectly to the tubes inside the top of the dashboard.
Back together solid as a rock:
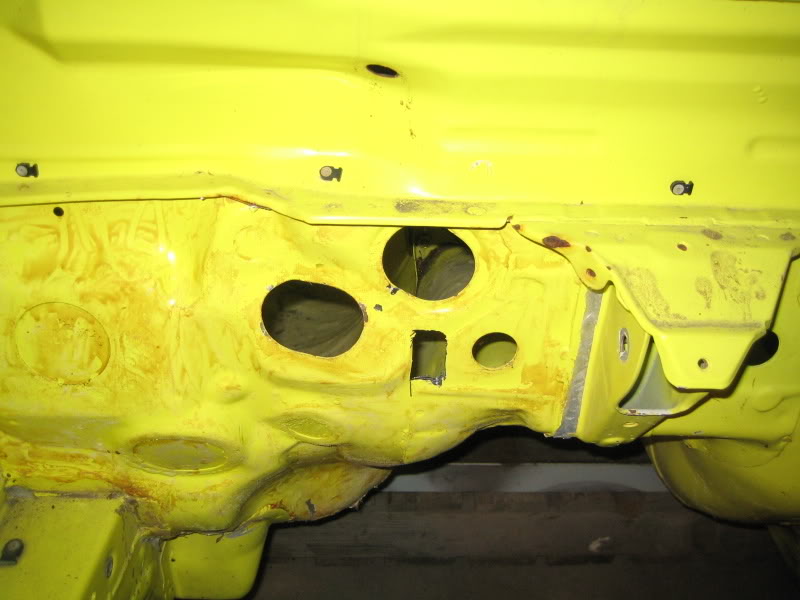
Then it was time to rearrange the firewall, I have to cut holes for the airco, heater and engine loom. Halfway the hole the saw went dull, so I have to pick up new ones tommorow:
Monday we already fixed the dashboard console for the looks. Today we fixed it up.
After that it was the heaters turn. I have to measure the whole thing out, so it fits perfectly to the tubes inside the top of the dashboard.
Back together solid as a rock:
Then it was time to rearrange the firewall, I have to cut holes for the airco, heater and engine loom. Halfway the hole the saw went dull, so I have to pick up new ones tommorow: